STEP-BY-STEP TUTORIAL
#SAKennieWovenShirt
Tutorial varies slightly from Style Arc construction sheet by @becsewsthings

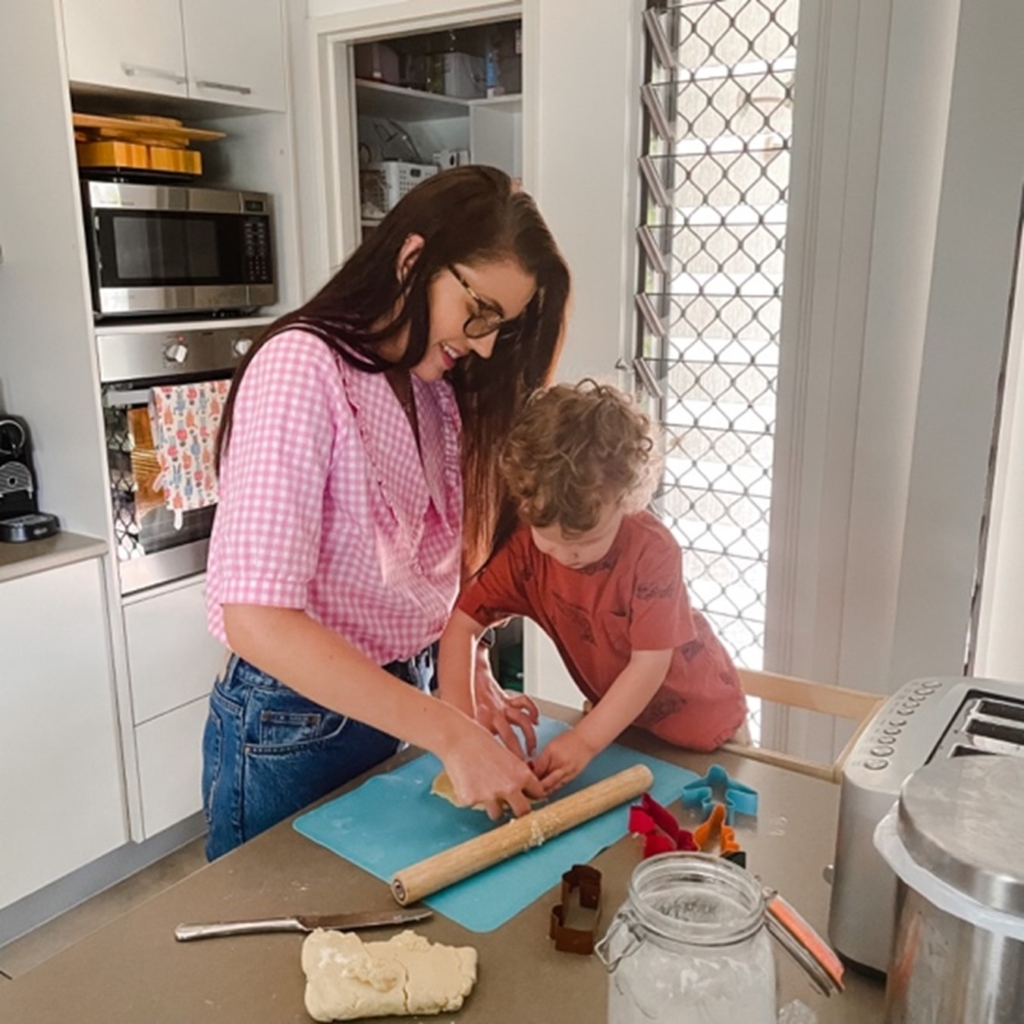
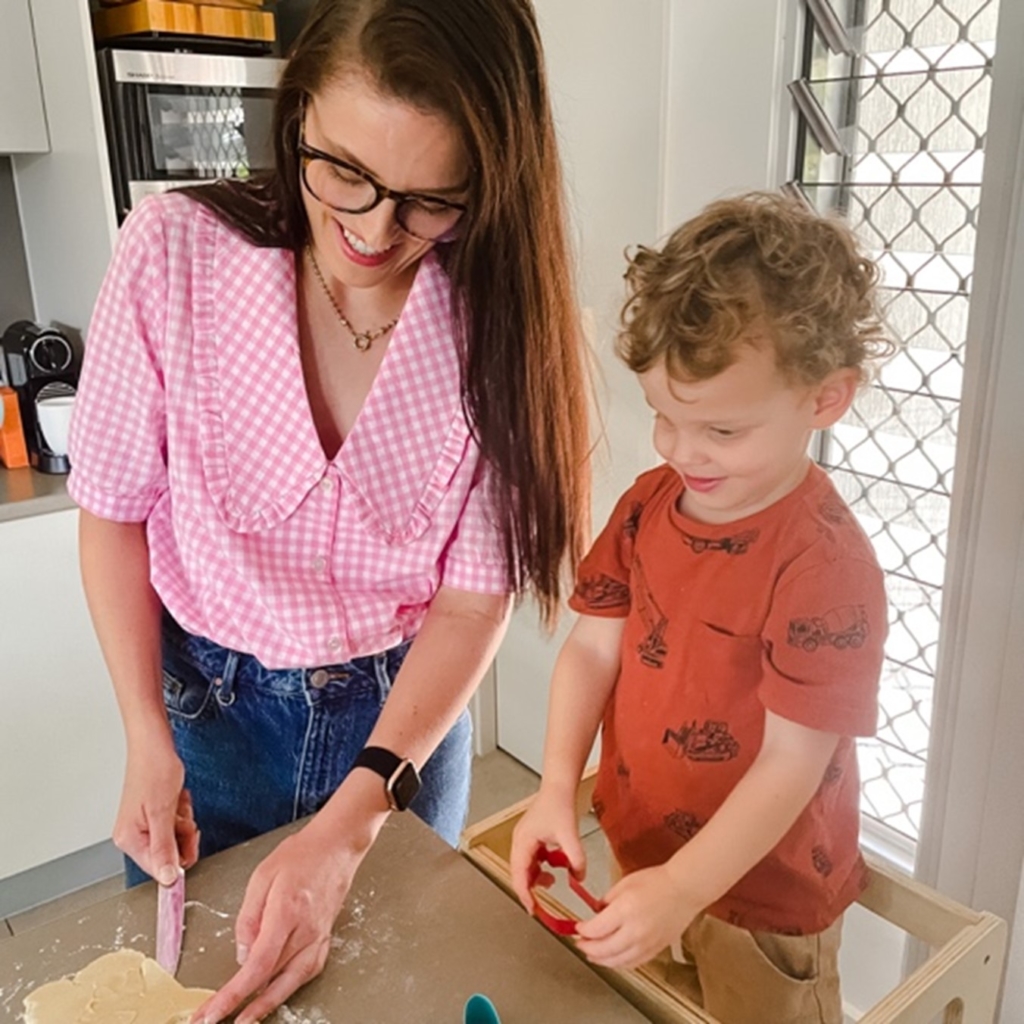
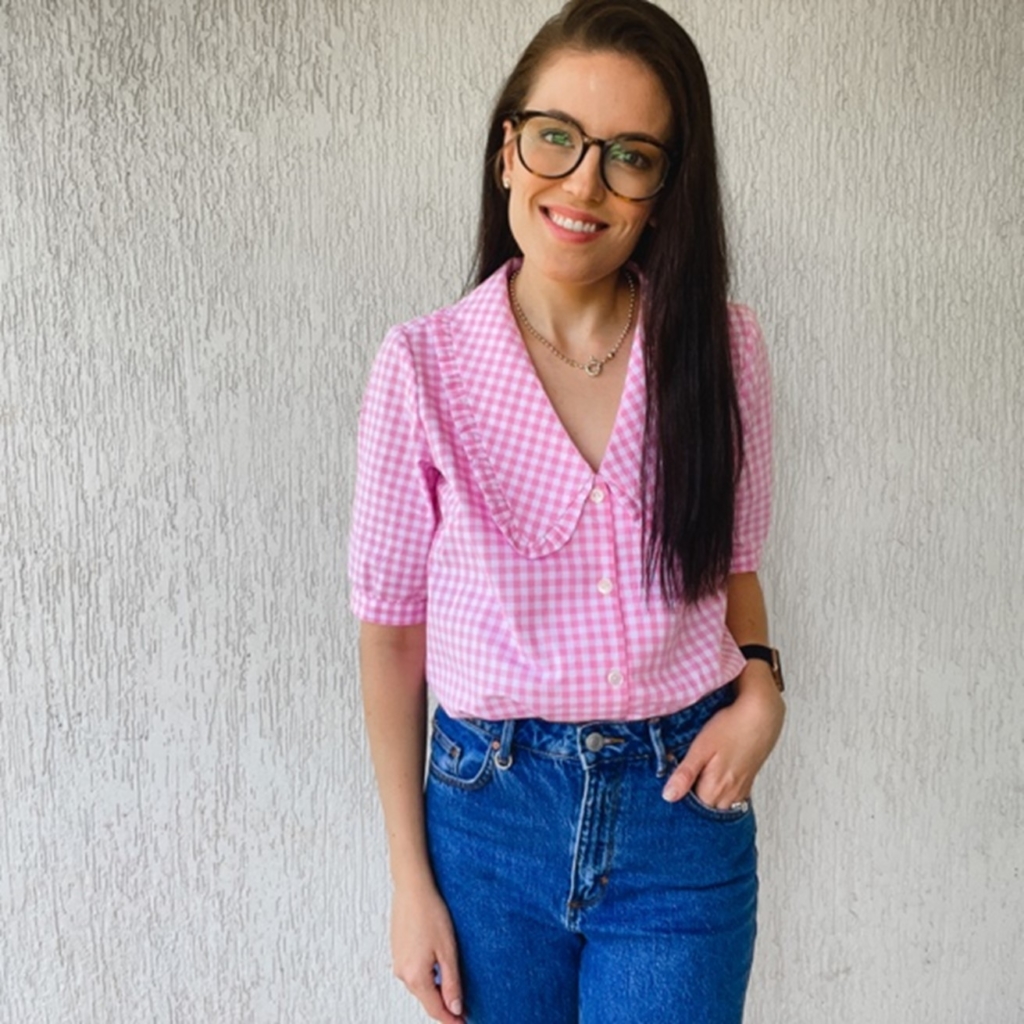
As part of the Queen’s Platinum Jubilee celebrations, the Duke and Duchess of Cambridge shared some photographs of the Duchess baking with her children. In these pictures the Duchess is pictured wearing a pink and white gingham shirt with a ruffled collar, tucked in to jeans. I knew as soon as I saw it that I could easily recreate the look using the Style Arc Kennie Woven Shirt pattern and some fabric I already had in my stash! See my inspiration images below, and let me know how you think I went recreating HRH’s look!
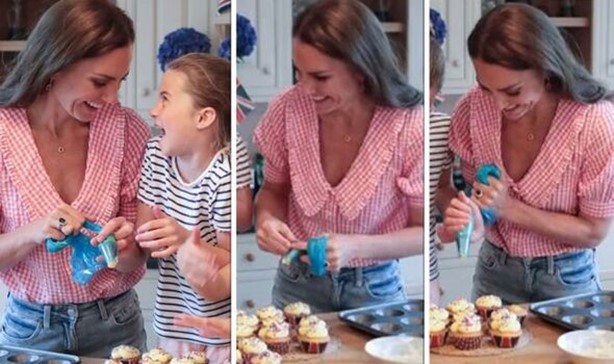
Credit: @dukeandduchessofcambridge via express.co.uk
Preparation:
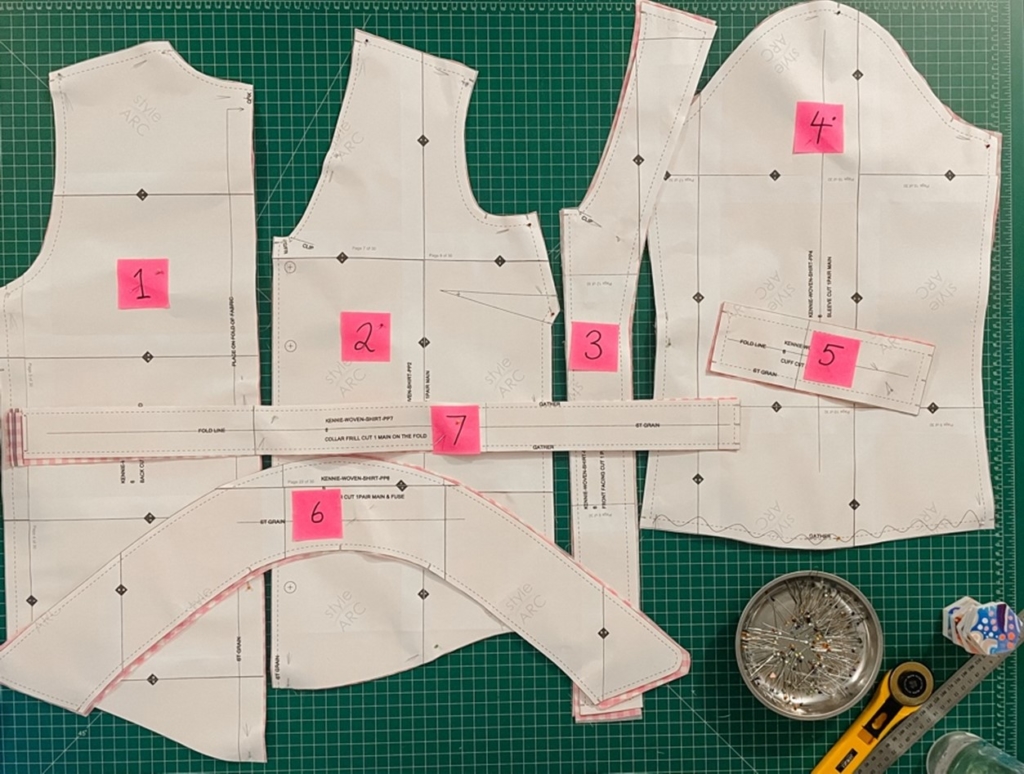
- Cut pattern pieces from fabric, marking notches as you go.
- Cut and fuse interfacing for pieces 3, 6 and 5 if required.
- I interfaced the top of my collar (but not the under-collar) (piece 6), and both placket pieces (piece 3).
Collar:
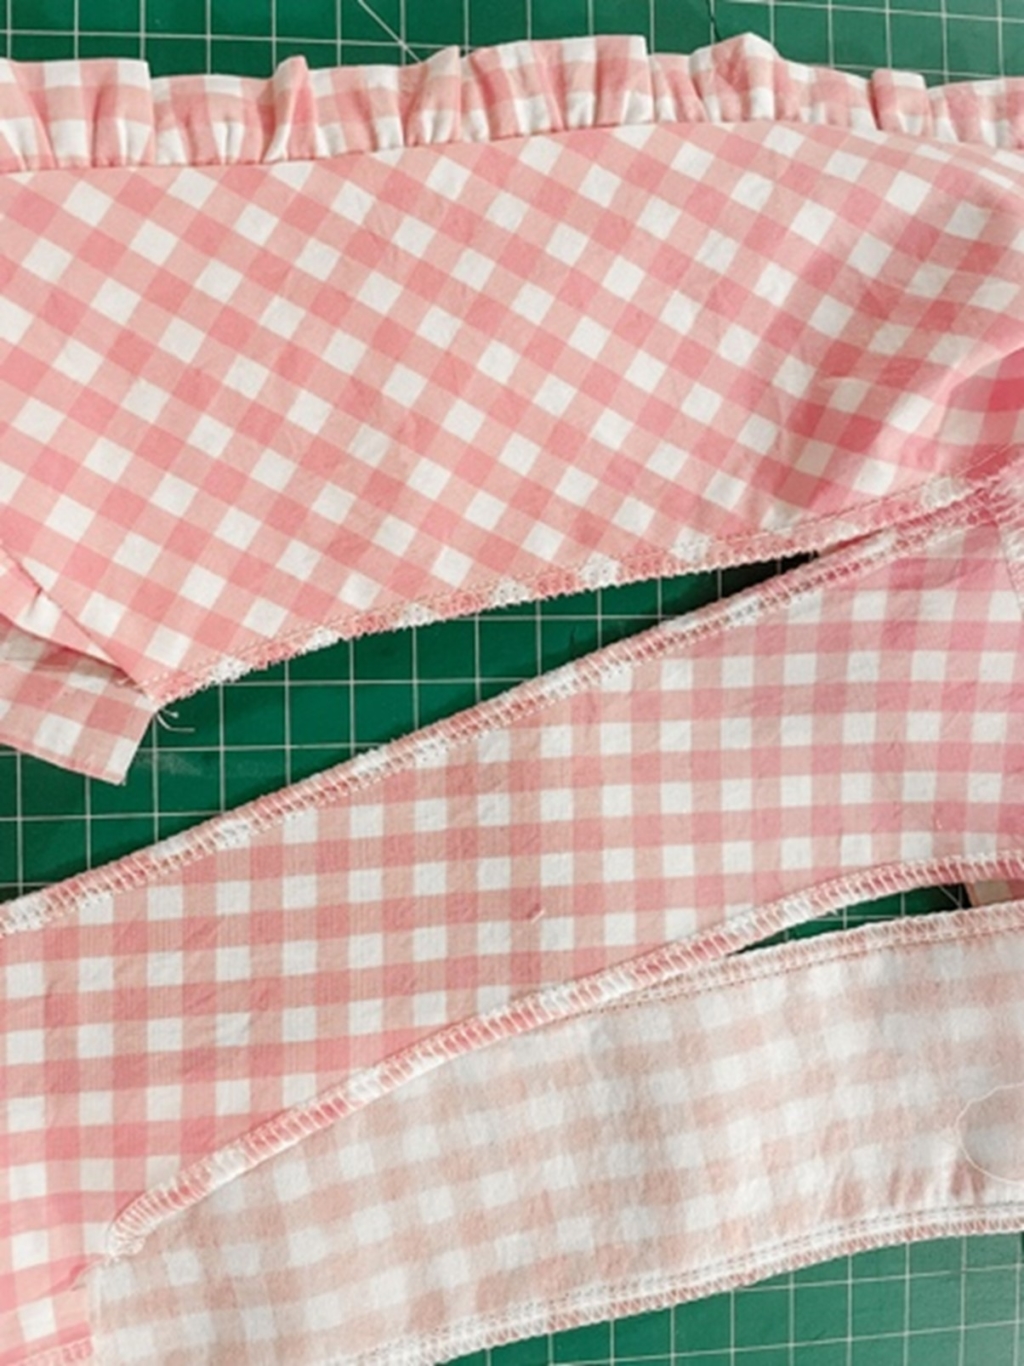
- Take piece 7 and fold in half lengthways, wrong sides together, and press lightly
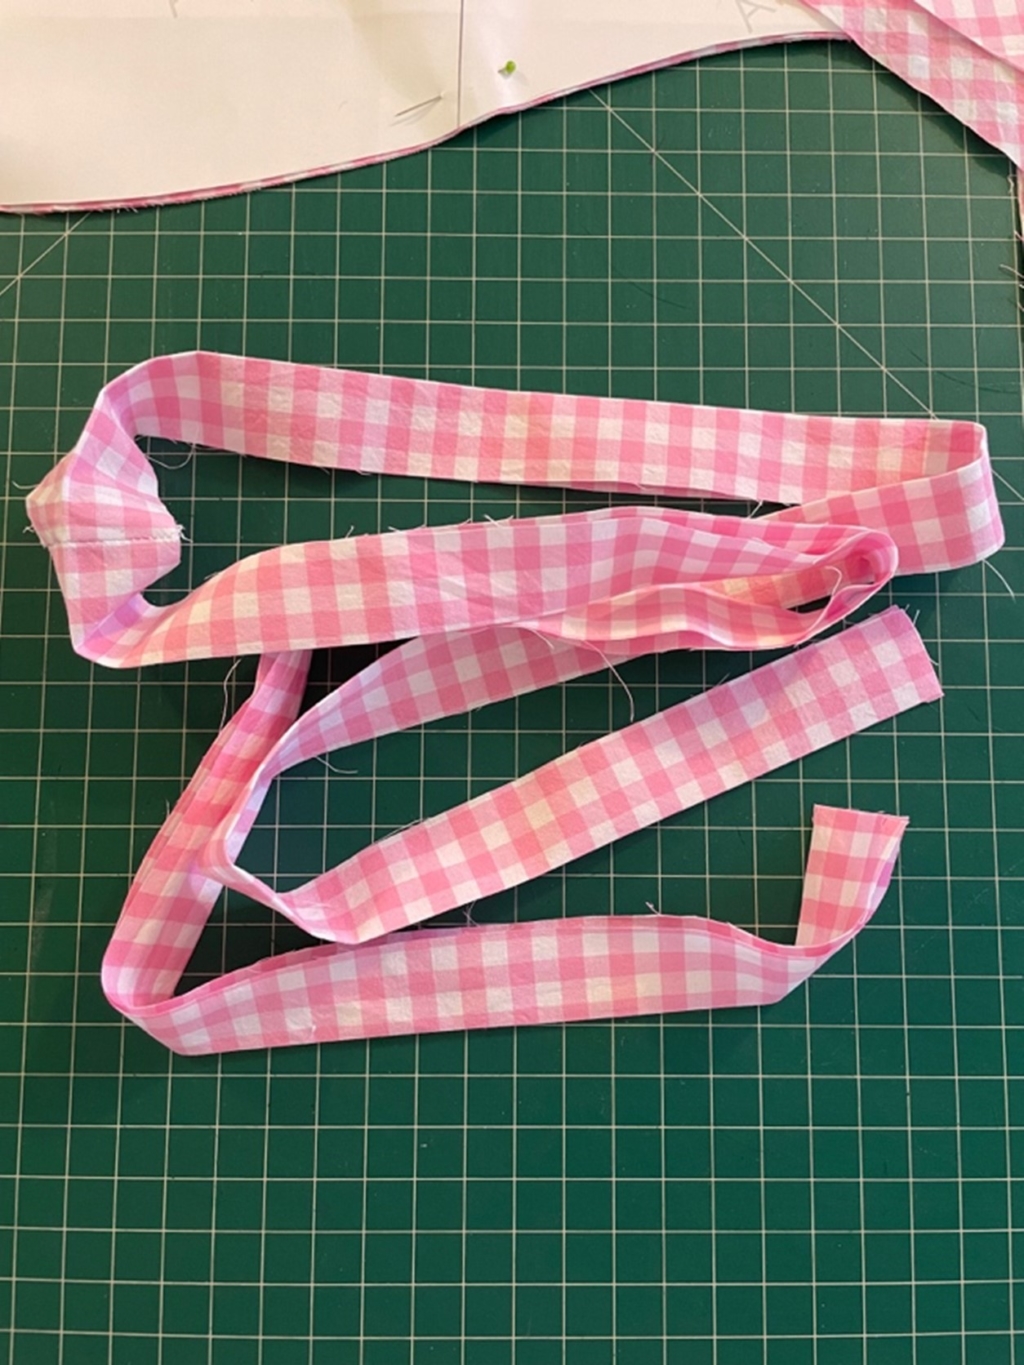 2. Sew a gathering stitch a scant ¼” from the raw edge
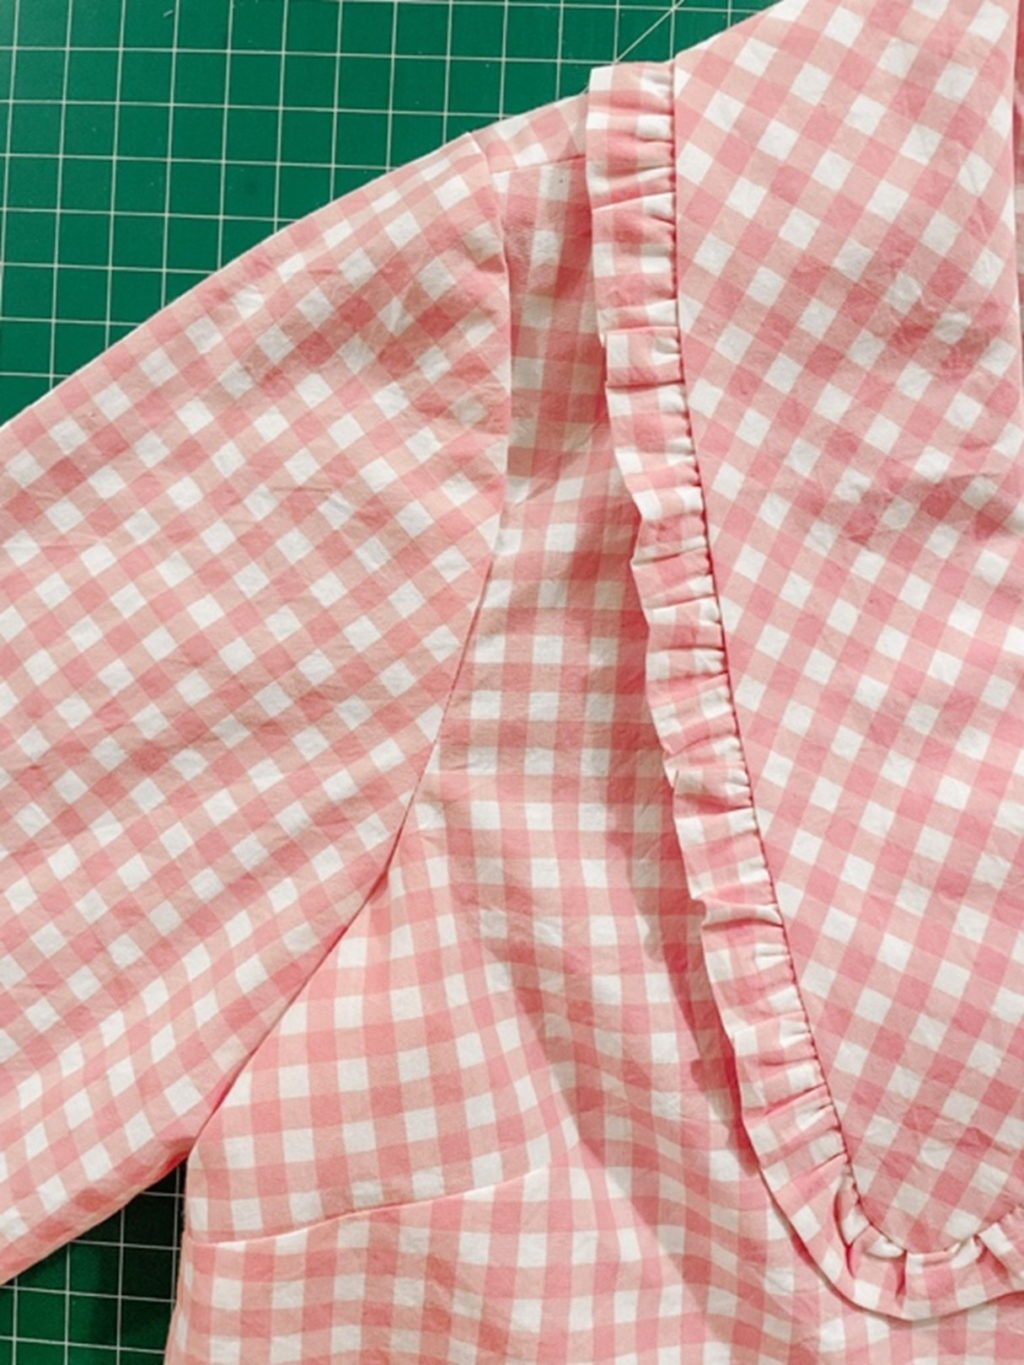
3. Draw up the gathering threads until the ruffle is the same length as the outside of collar piece 6, and distribute the gathers evenly. TIP: Before pulling up the gathering threads, mark the centre of the ruffle piece to make it easier to match it to the centre of your collar.
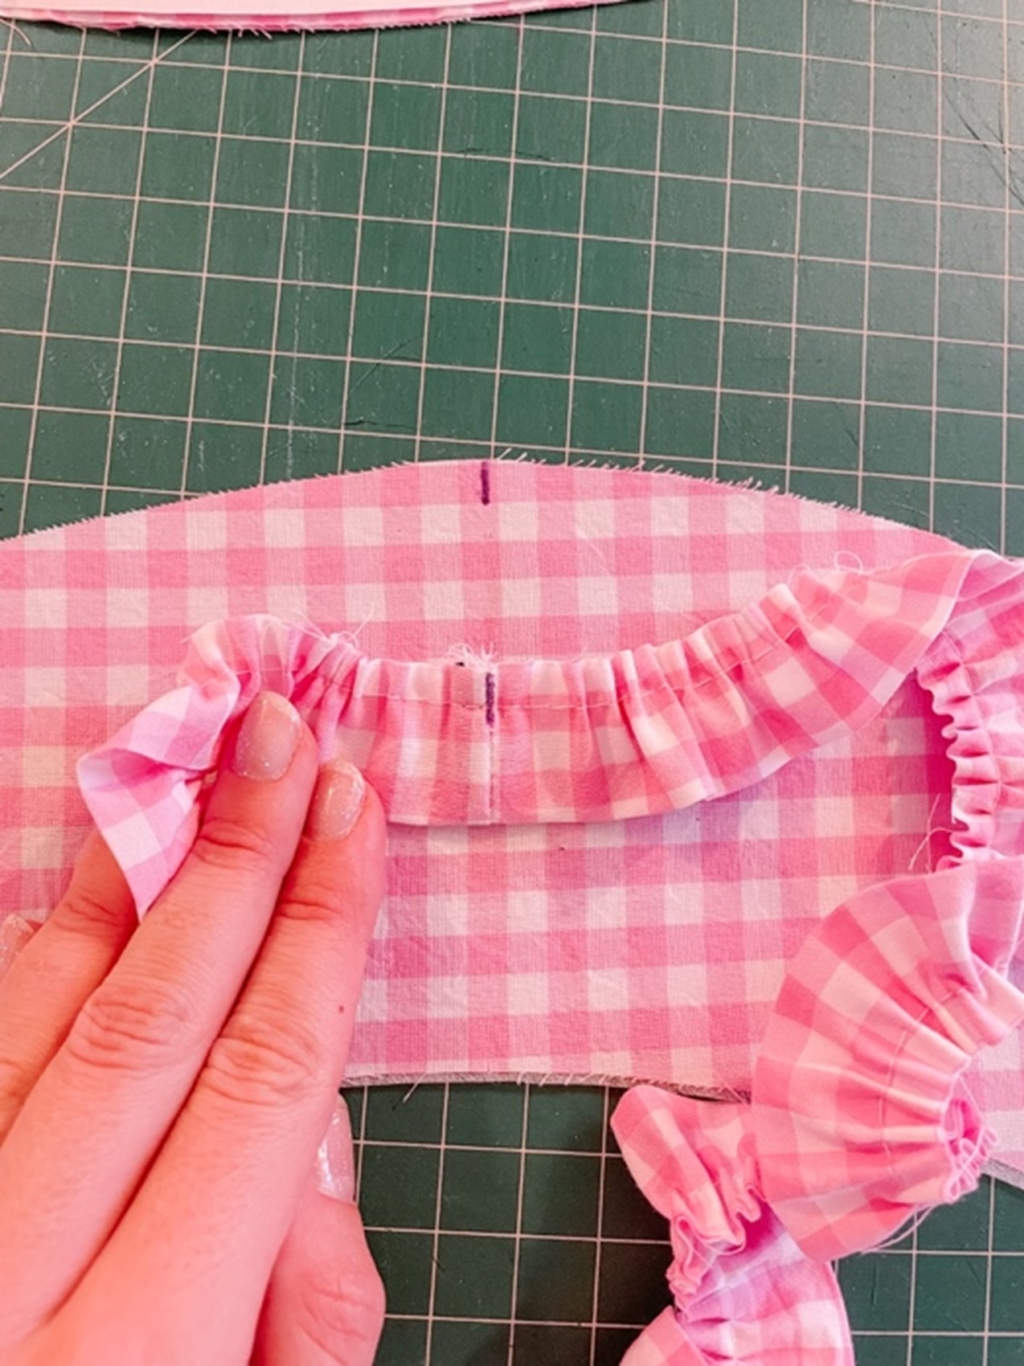 4. Aligning raw edges, pin the ruffle to one of your collar pieces. Run/taper the ruffle off to nothing by the end of the collar. Baste in to place at a scant ¼” . Trim away excess ruffle where it was tapered off.
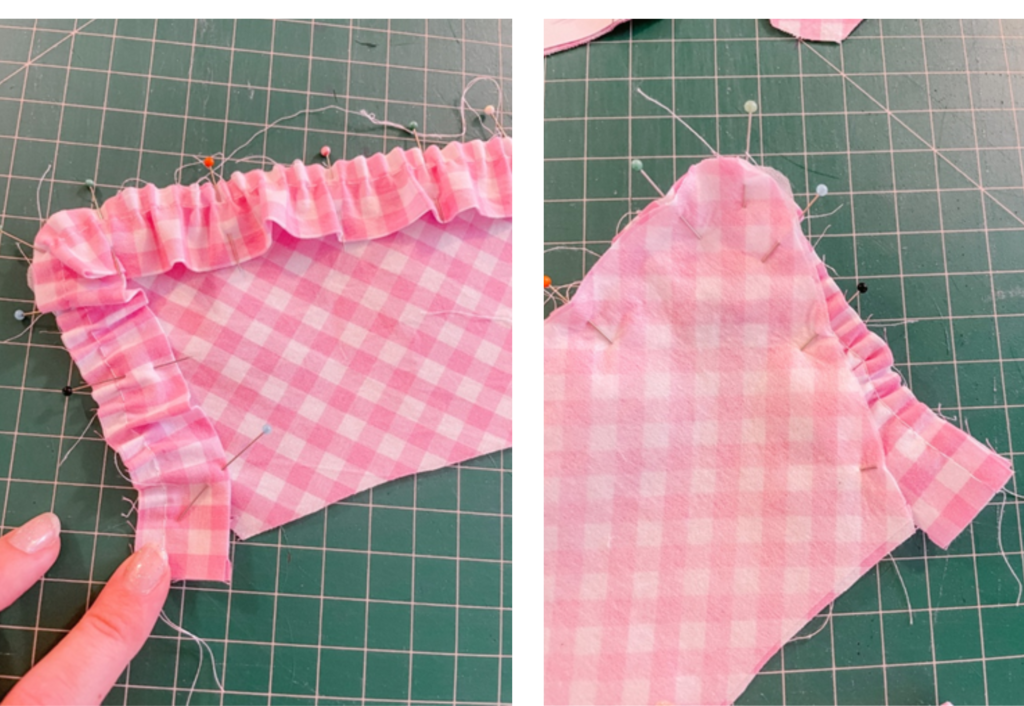 5. Right sides together, place the second collar piece over the first, sandwiching the ruffle in-between, and stitch in place with a ¼” seam allowance.
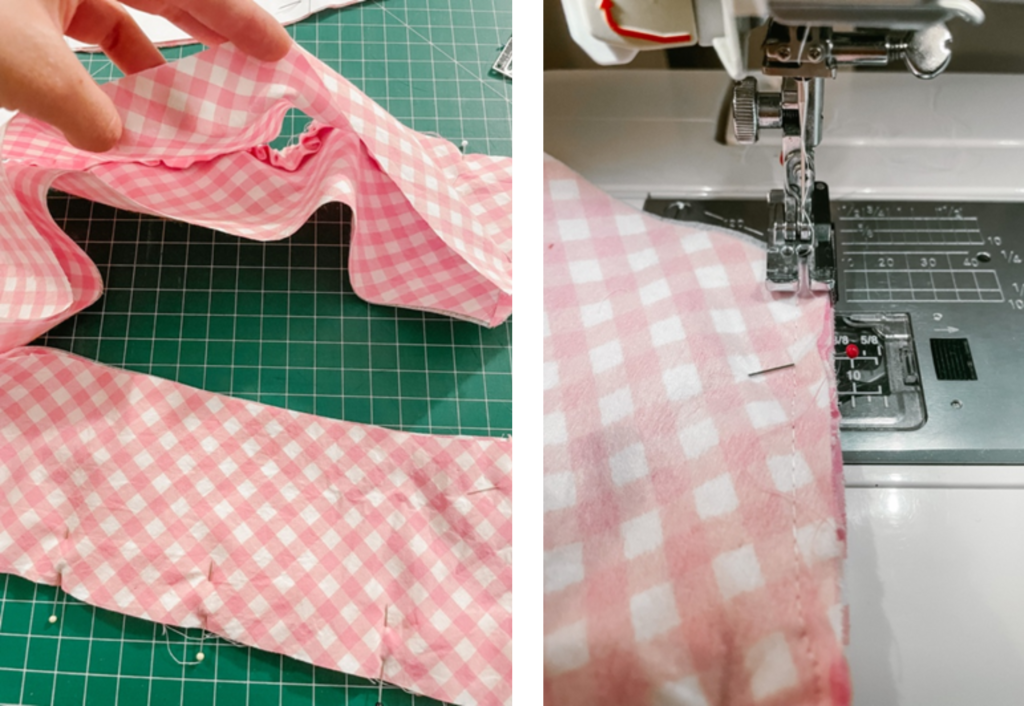 6. Grade seam allowance at the corners, and turn right sides out. Understitch the under collar to the seam allowance as much as possible (you can see in the image below that I wasn’t able to understitch through the corner of the collar). Press.
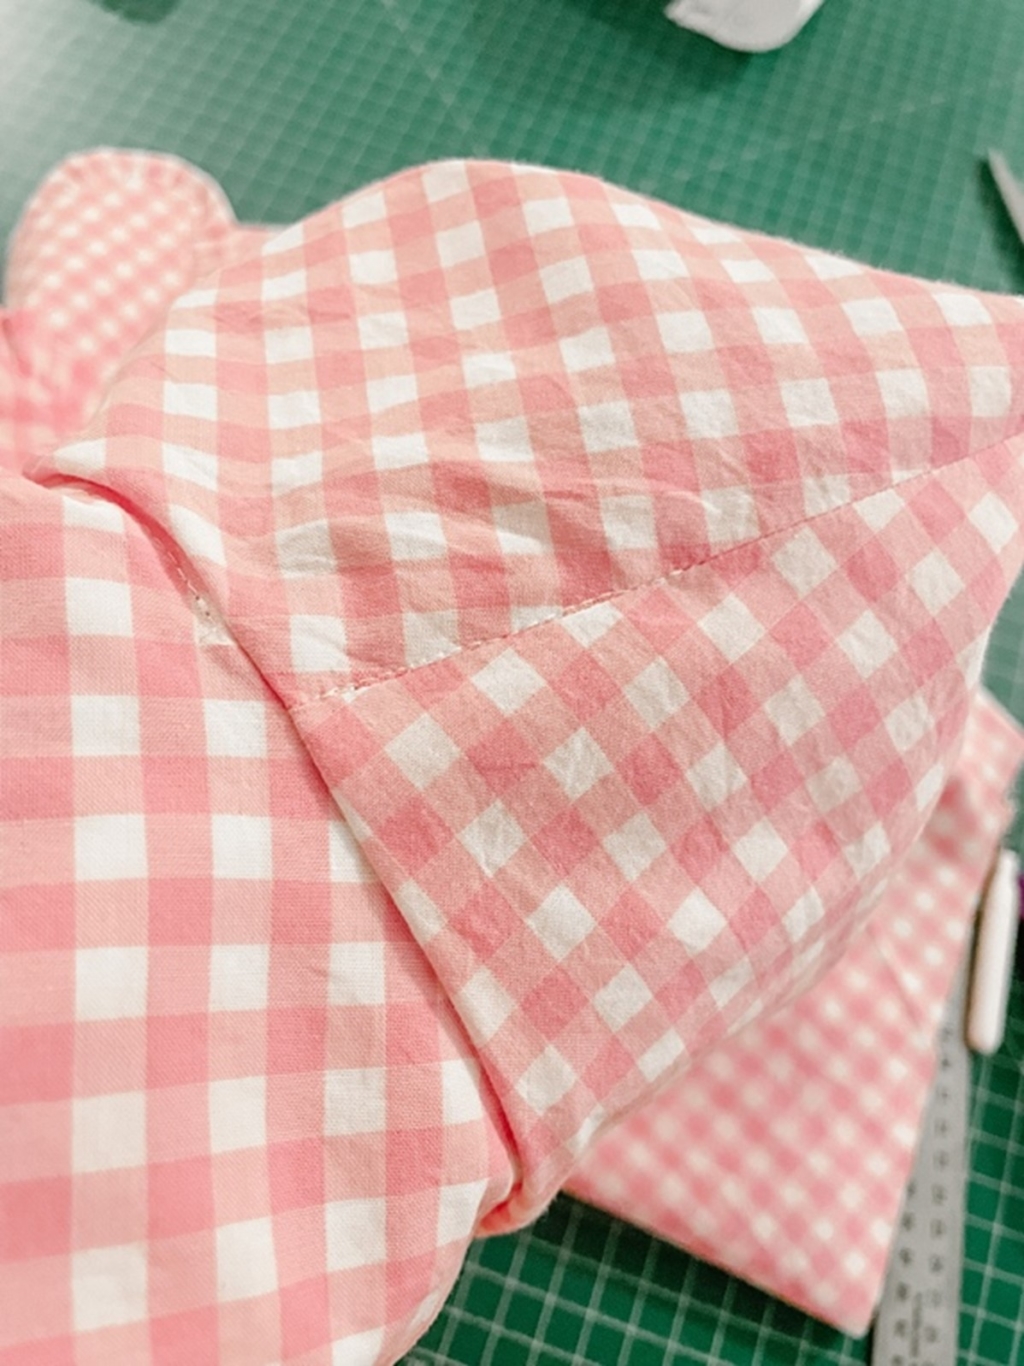
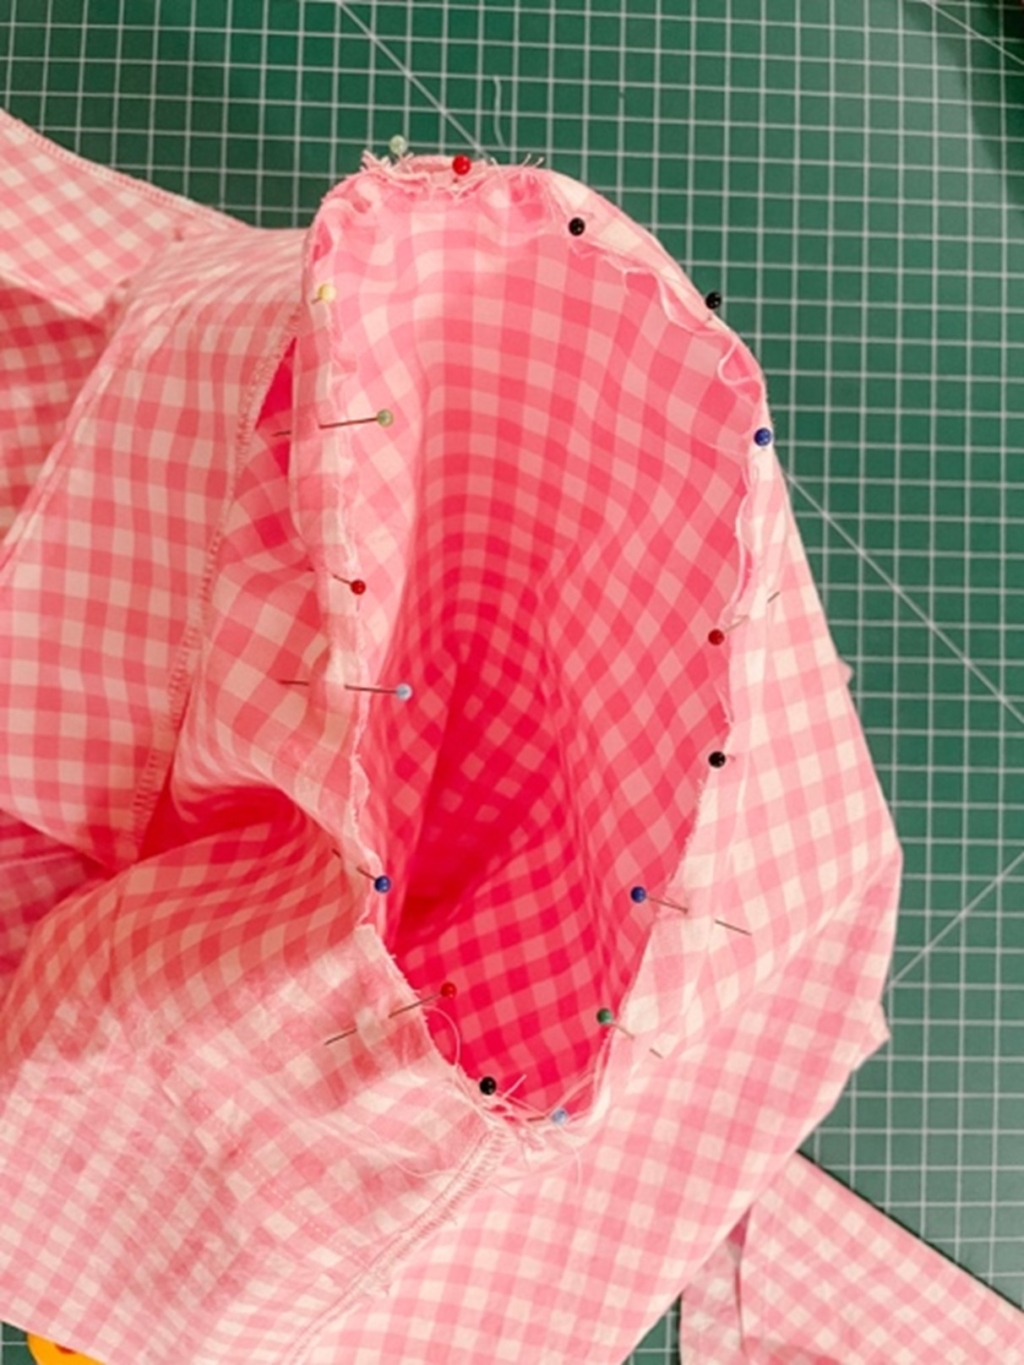
 7. Baste both collar pieces together along the neck edge from the ends to the shoulder notches, leaving the space between the two notches open.
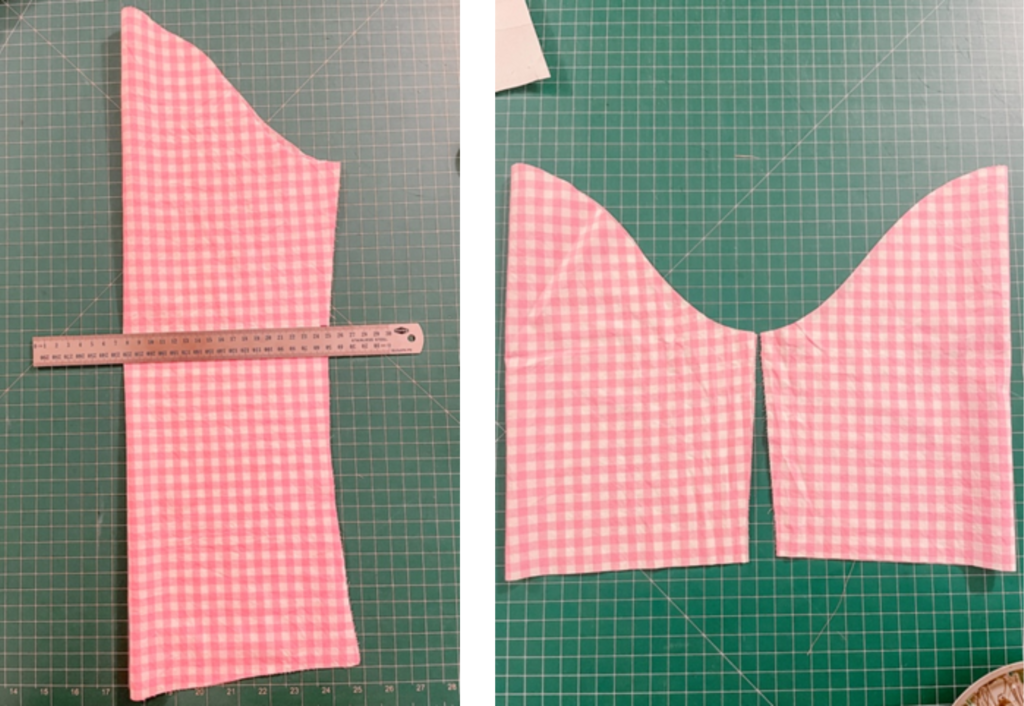
Bodice – Darts
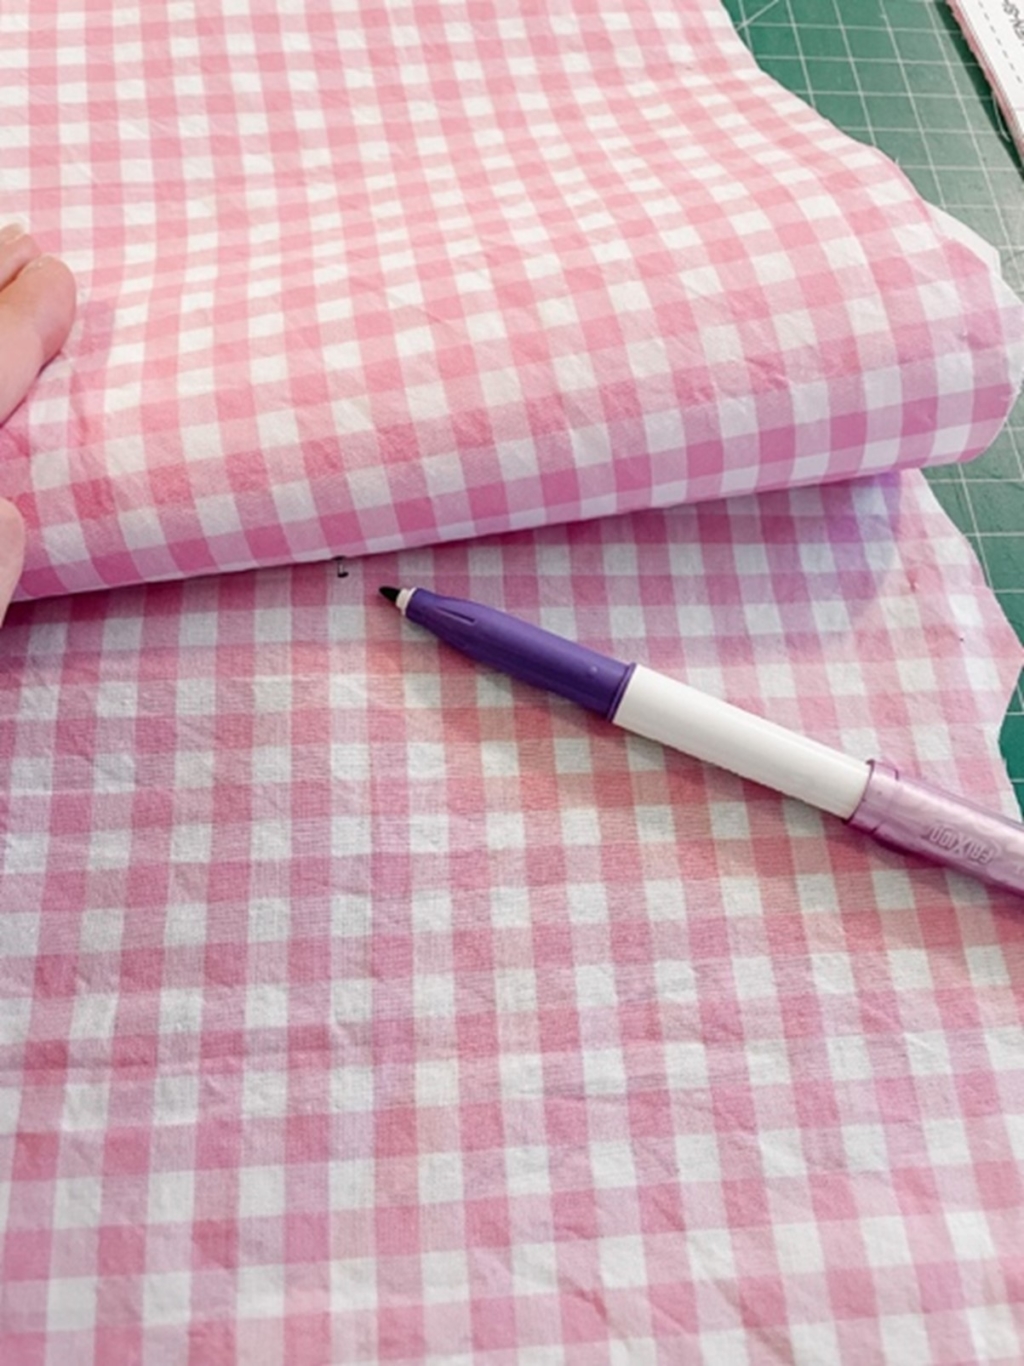
- To mark the finishing point of the bust darts, while the fabric is still pinned to the pattern piece, push a pin through that point and all layers of fabric.
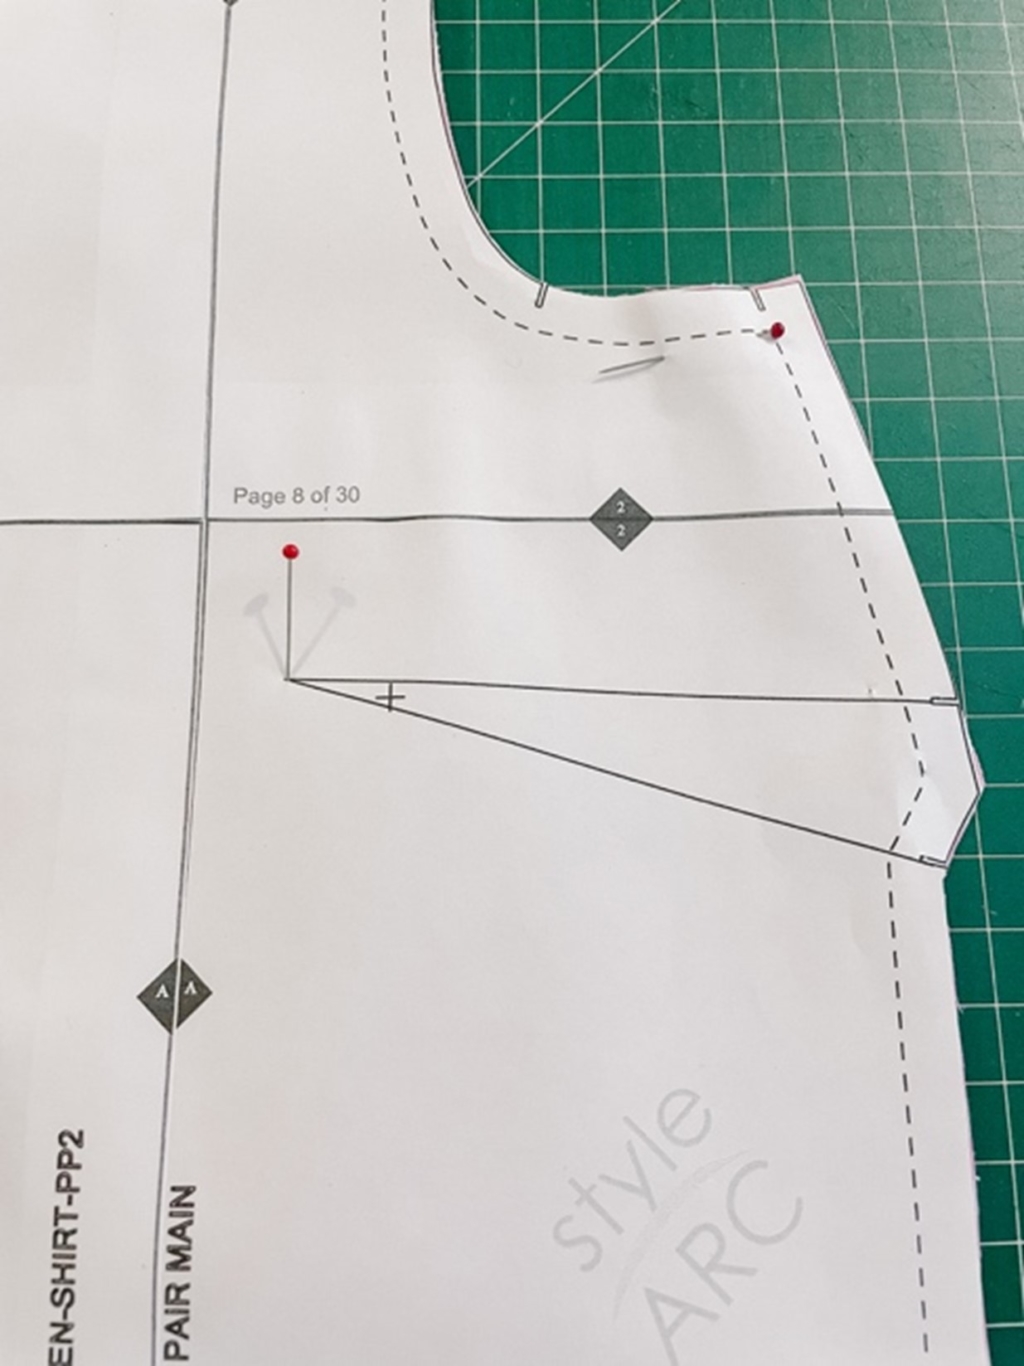 2. Carefully peel back the pattern piece and the top layer of fabric only, leaving the pin through all layers. Now you can easily mark with a removable pen the stopping point for your sewing.
 3. Separate the fabric from the pattern piece and with right sides together, pin the darts. Using a ruler, you may wish to mark the “legs” of the darts for easier sewing.
4. Starting at the outside edge of the fabric, sew the dart. Backstitch to secure at the beginning but NOT the end. Instead run the stitching off the fabric at the point of the dart and leave the thread tails long.
 5. Separate the thread tails and tie a secure knot. Trim the tail ends short. This creates a smoother finish at the point of the dart and avoids bulk or puckering in this area.
 6. Press the darts downwards. You can use a tailor’s ham, sleeve roll, or rolled up towel to get a sharp press and to create shape in this area.

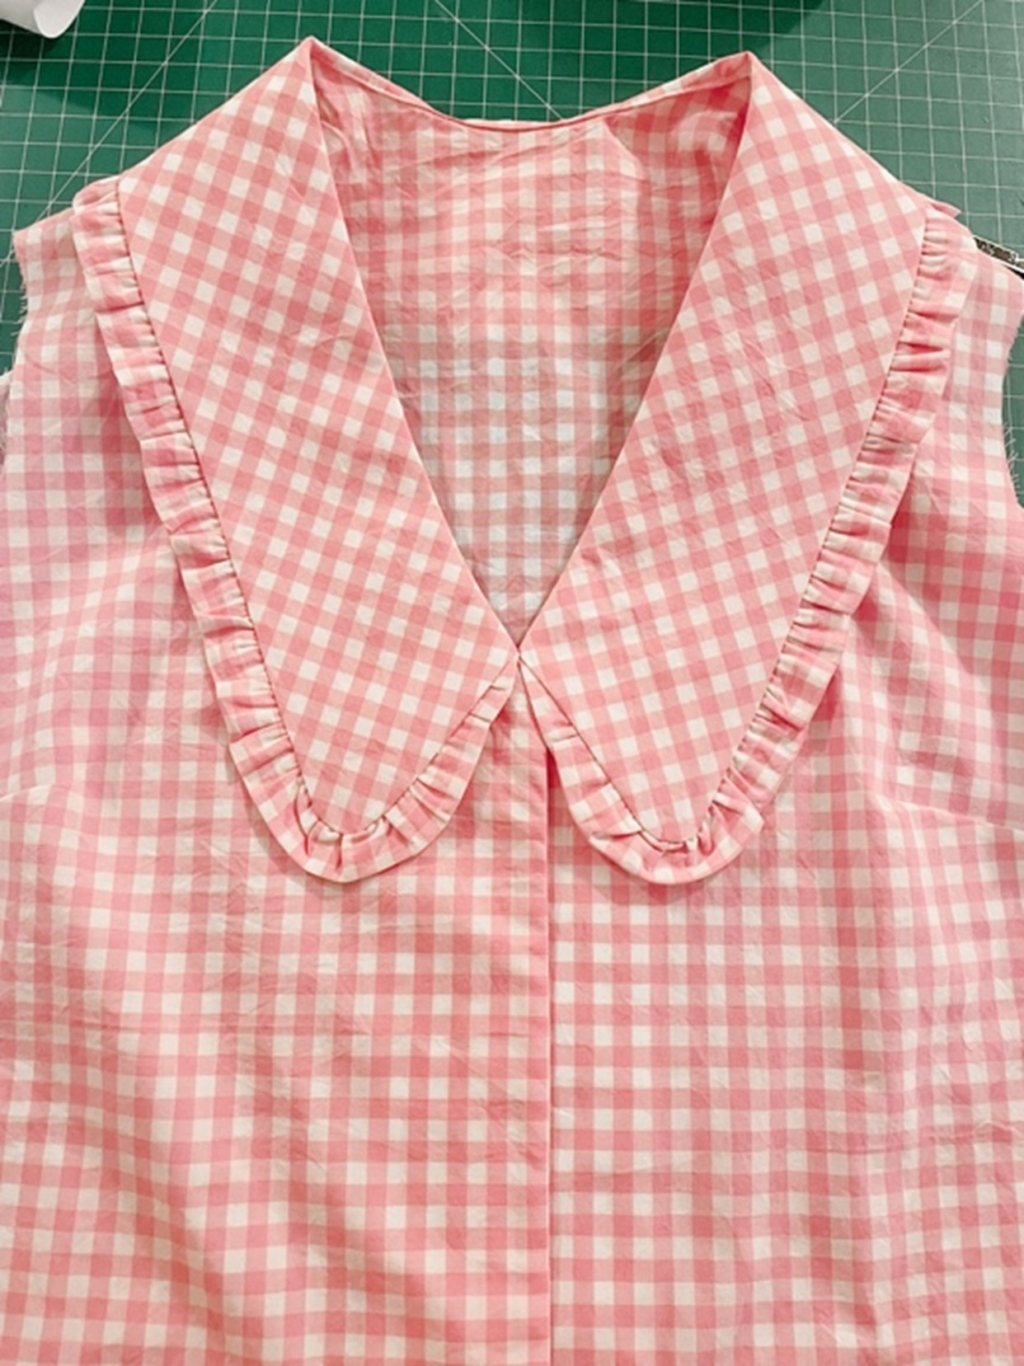
Attaching the collar
- Finish the raw edges at the shoulders of the front and back bodice (pieces 1 and 2).
- Right sides together, sew the shoulder seams and press open.
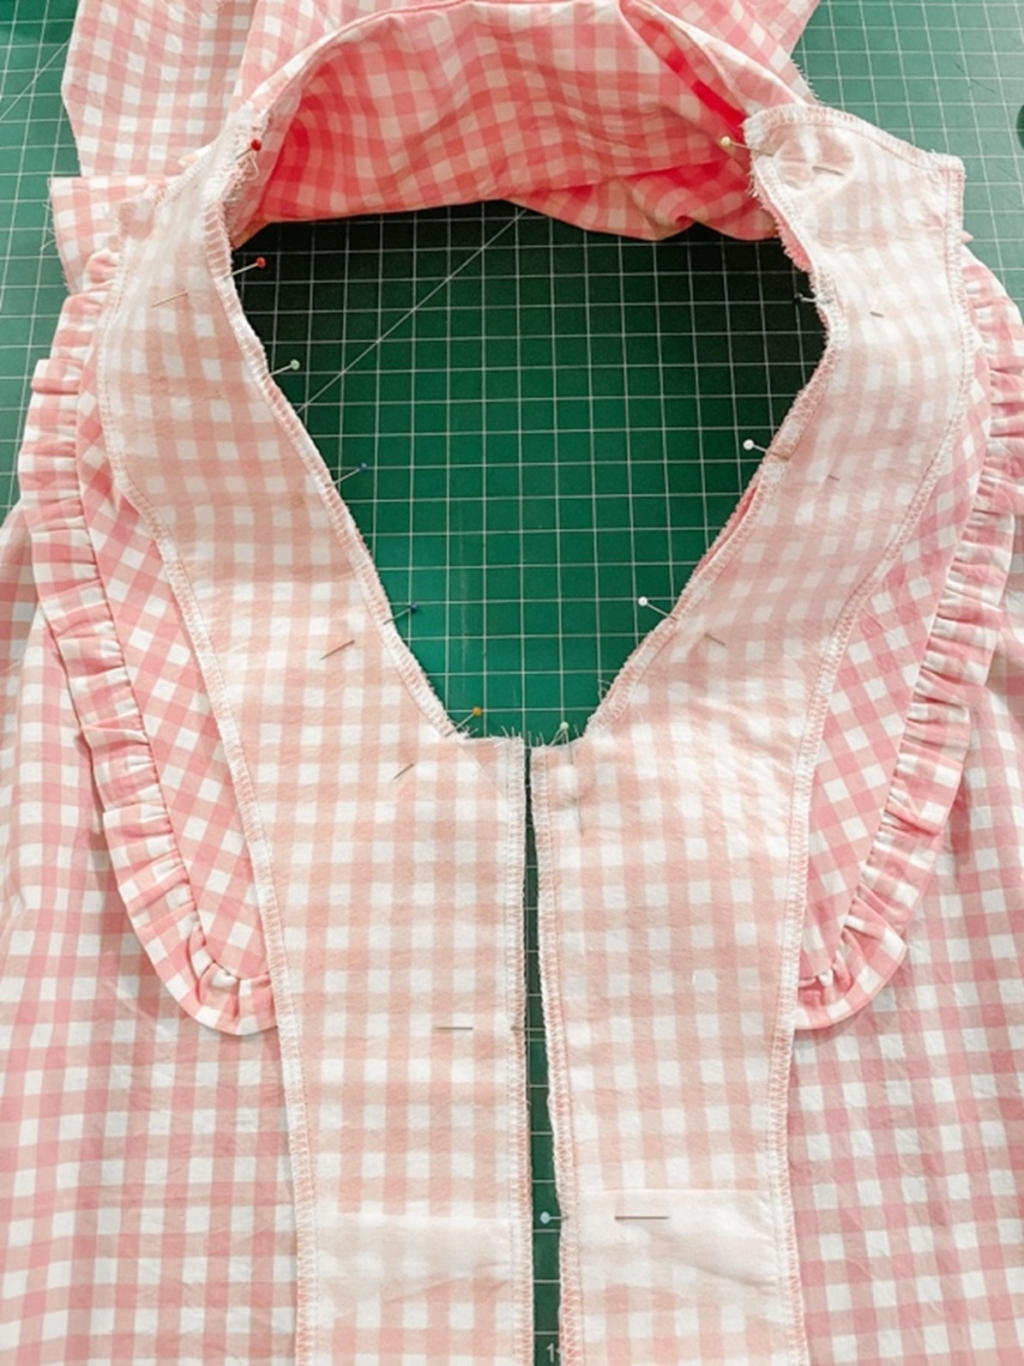
 Stay-stitch the neckline edge of the bodice to help prevent stretching in this area. To do this, sew a line of lengthened or basting stitches a scant ¼” from the neckline edge, taking care not to pull or stretch this area while doing so (it’s okay if this stitching is a little wonky!).
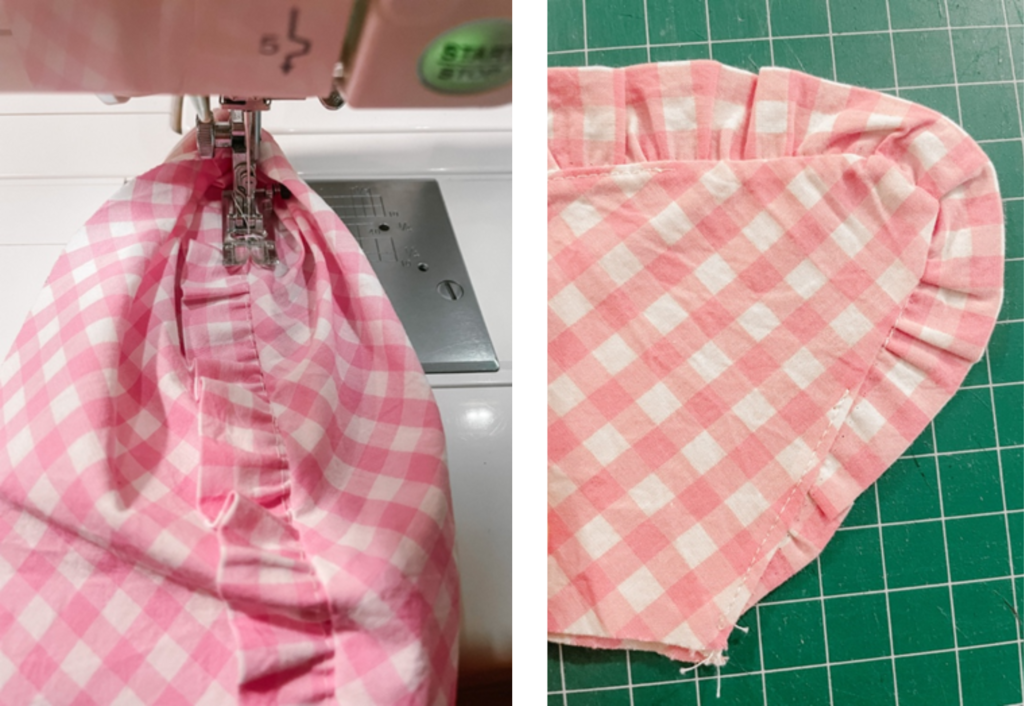
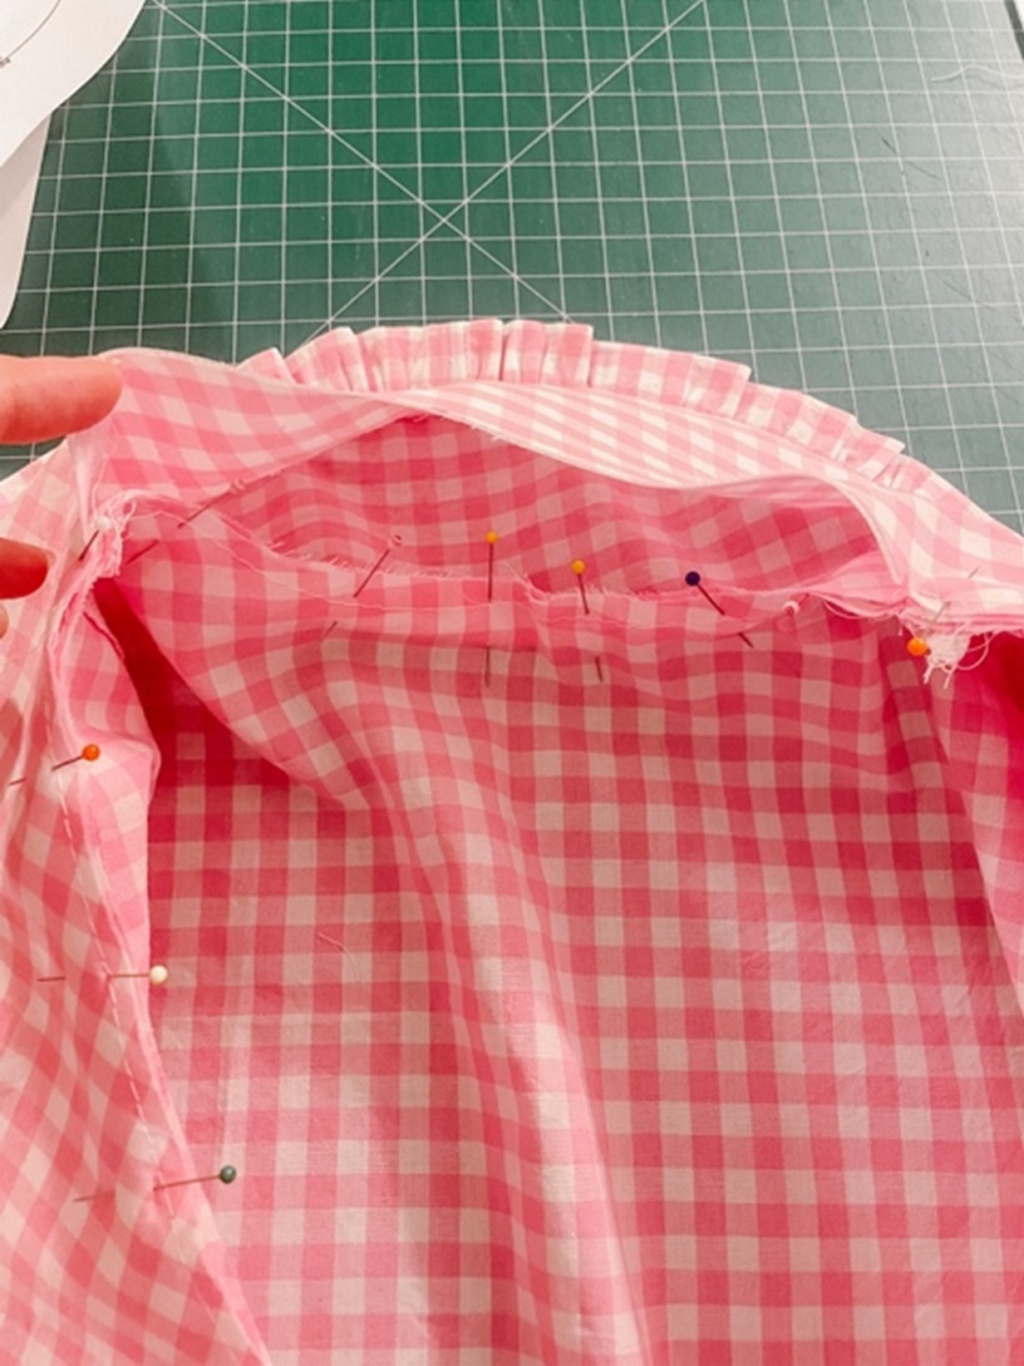
- With the shirt right side out, pin the collar to the neckline, aligning raw edges and matching the shoulder notches on the collar with the shoulder seam lines. The ends of the collar should match up with the angled notch of each front bodice piece.
- When pinning the back, unbasted portion of the collar to the shirt, pin only the under-collar – leaving the top collar loose. This will be folded under and edgestitched in to place for a clean finish.
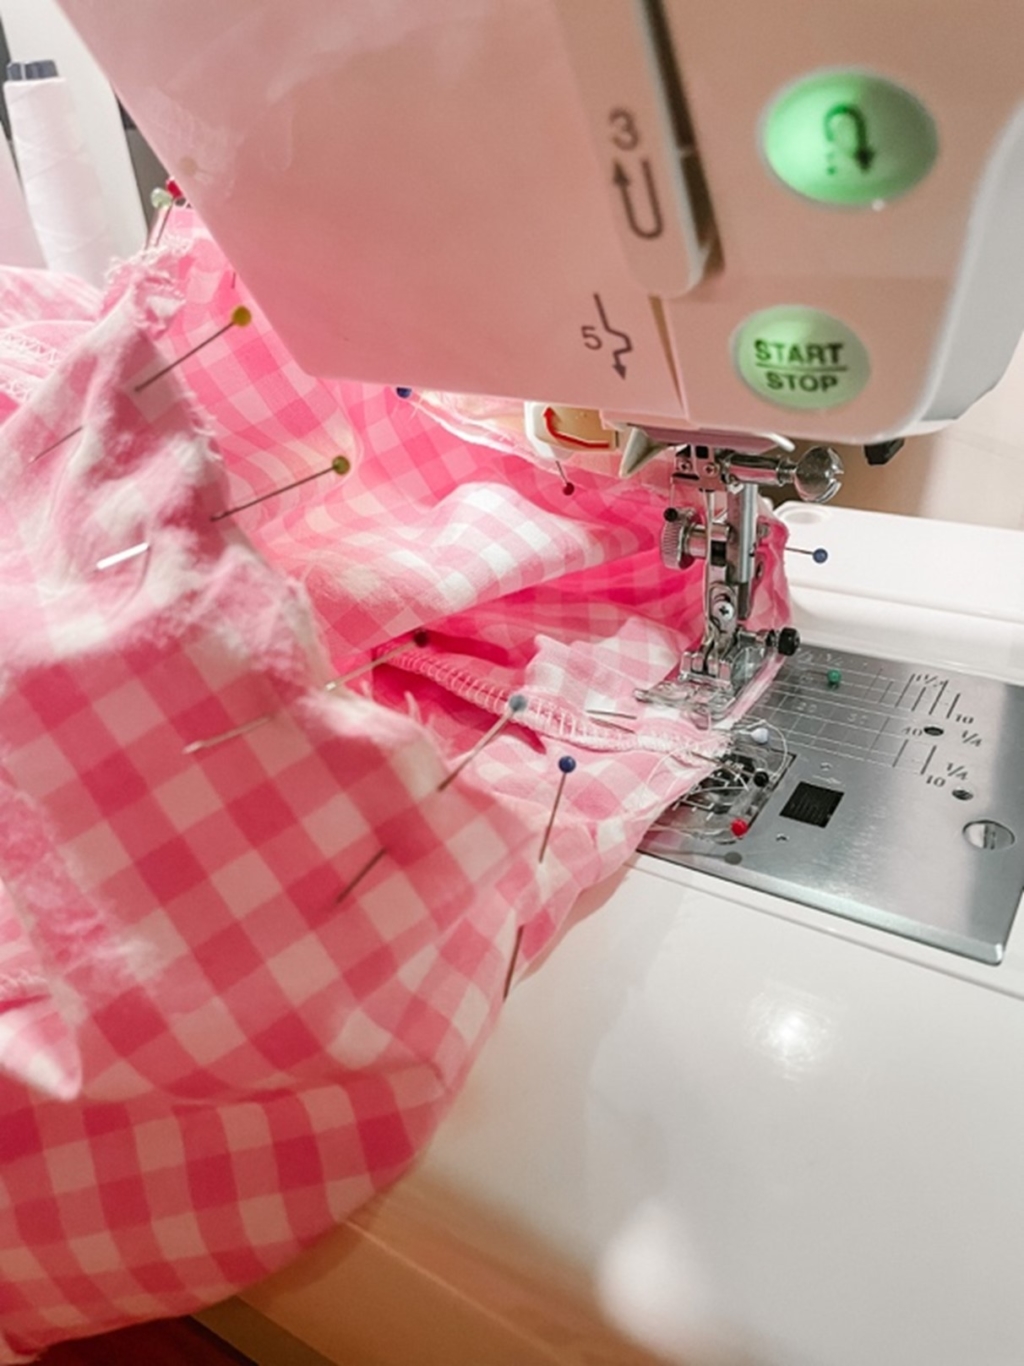
- Sew the collar to the shirt, remembering to leave the top collar free between the shoulders.
- At this point I finished the raw edges of the collar and front bodice together with a narrow zig-zag stitch as this area was too narrow for my overlocker to finish neatly.
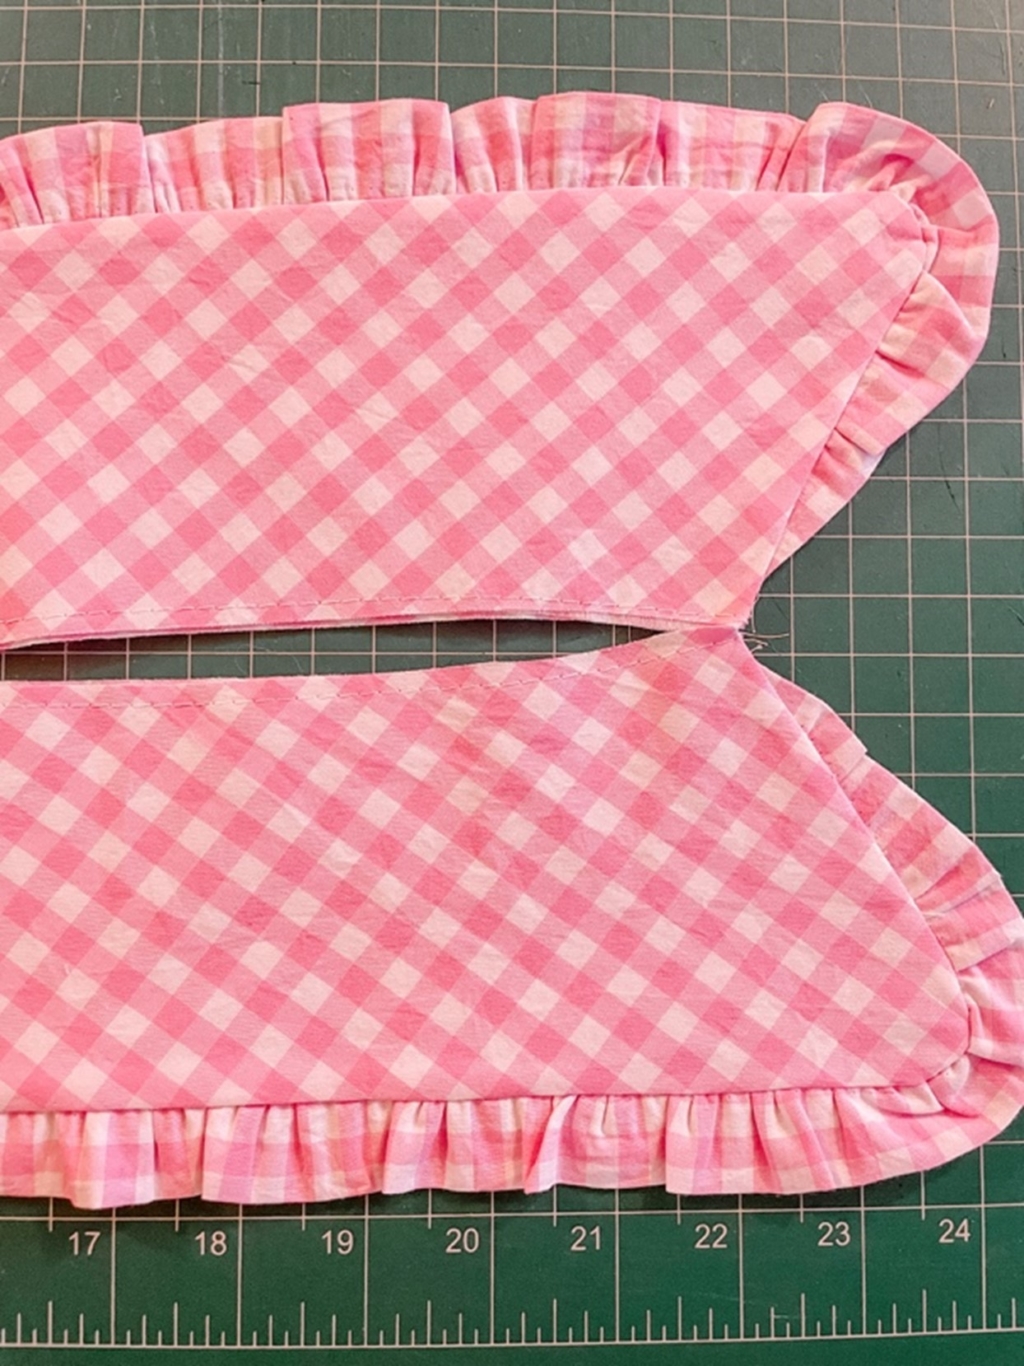
- Carefully fold under the seam allowance of the rear top collar piece and pin in to place so that all raw edges are concealed. Now is the time to insert a label or a tag if desired.
- Edgestitch using a scant 1/8” seam.
 Stay-stitch the neckline edge of the bodice to help prevent stretching in this area. To do this, sew a line of lengthened or basting stitches a scant ¼” from the neckline edge, taking care not to pull or stretch this area while doing so (it’s okay if this stitching is a little wonky!).
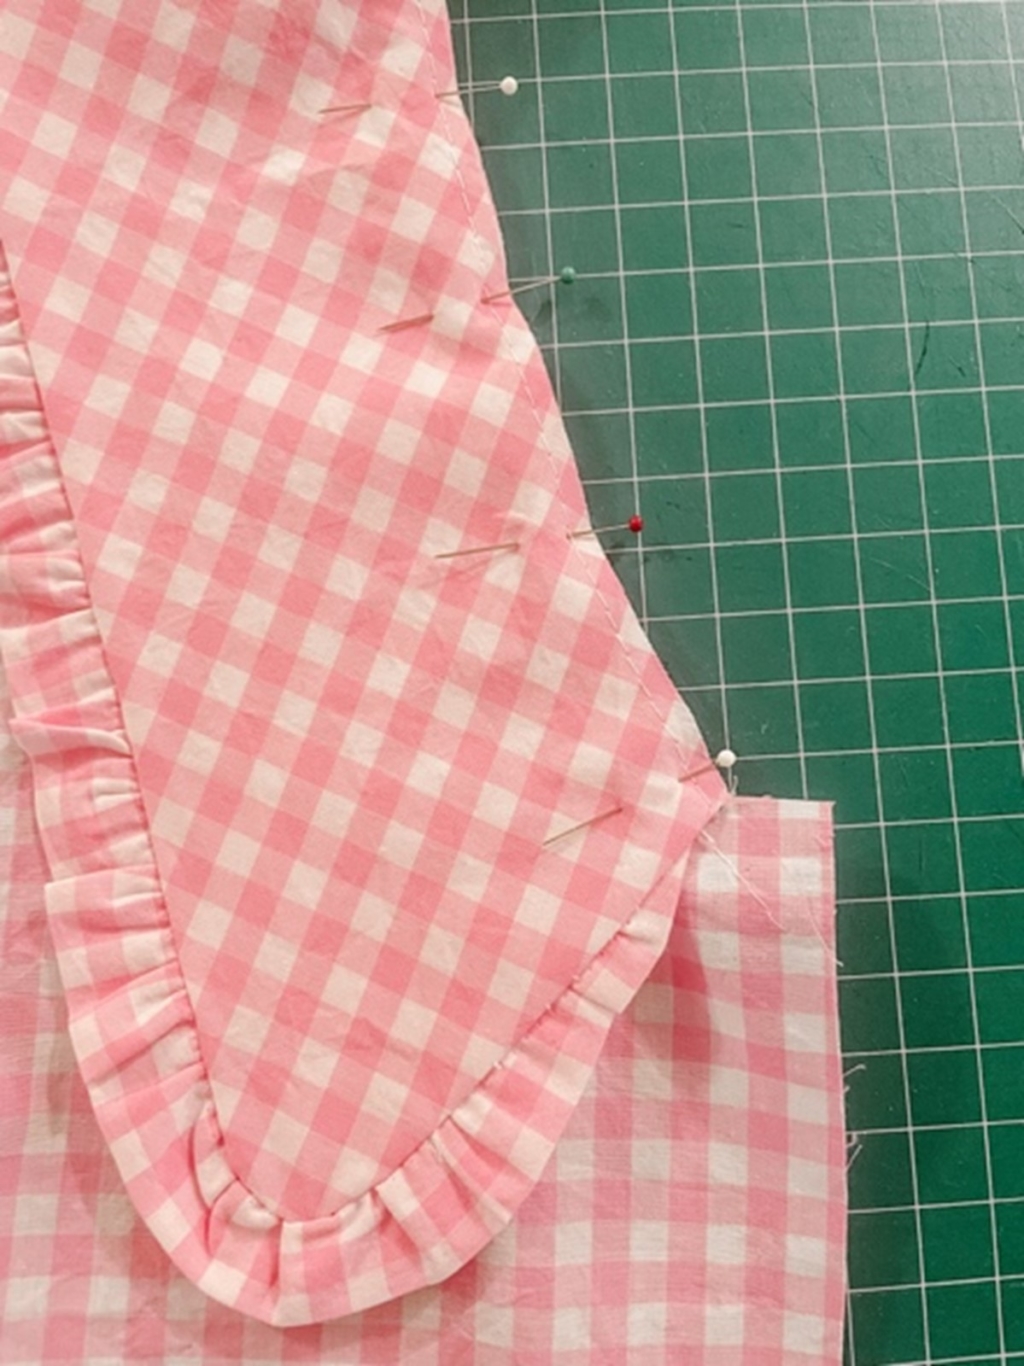
Attaching the facing
- Finish the raw edges of your facing (piece 3) in your desired manner.
- Right sides together, pin a facing to each side of your front bodice, sandwiching the collar in between the facing and bodice.
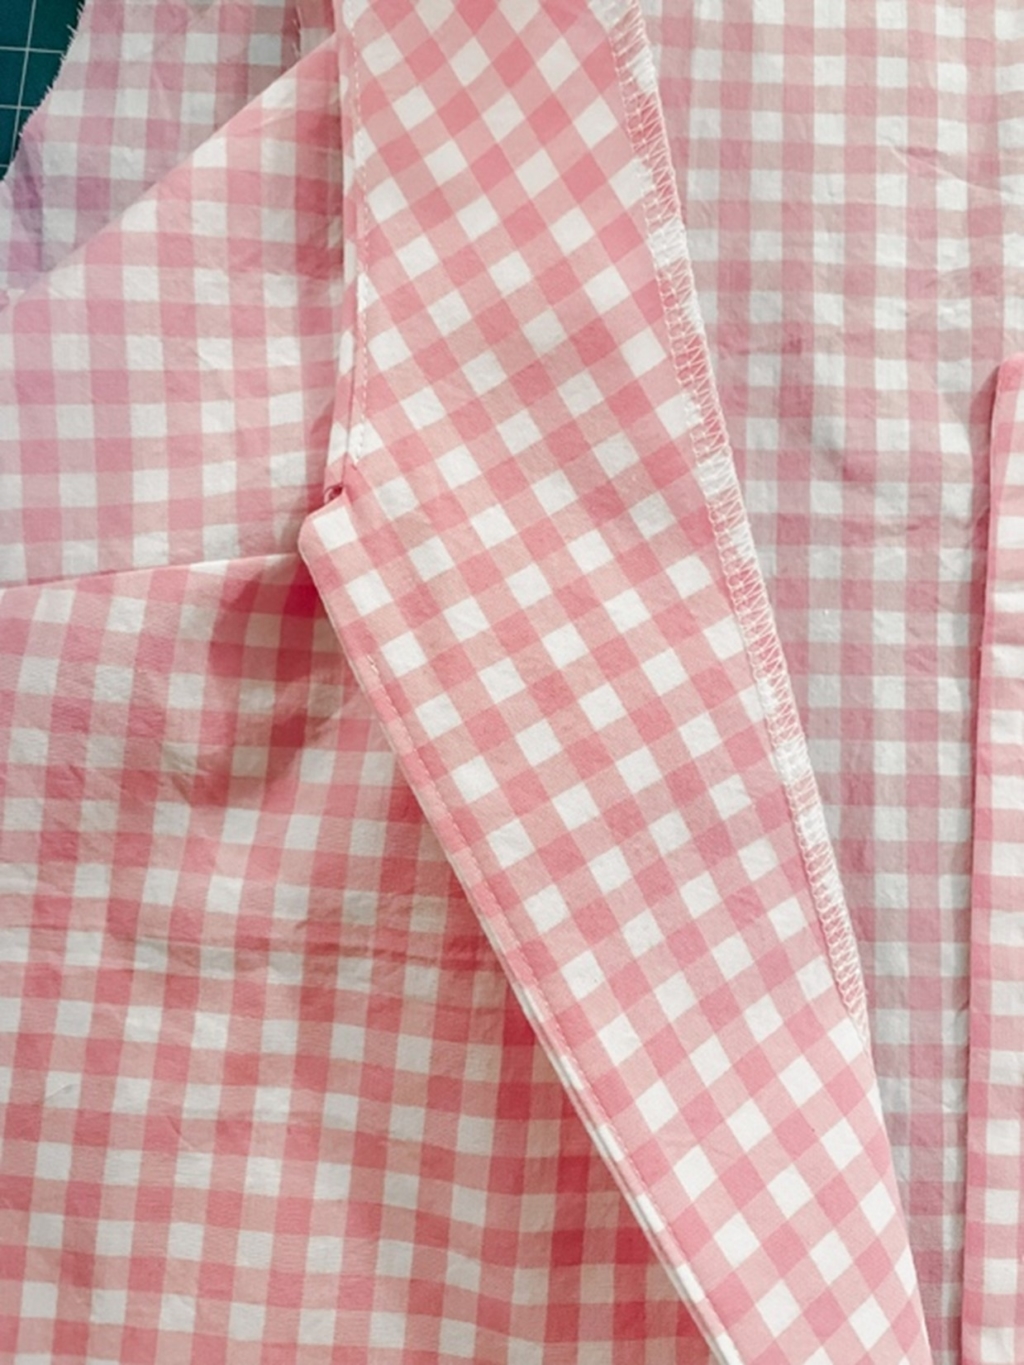
- Sew in place, pivoting at the corners with the needle down.
- Clip in to the corner at the top of each placket (if not already done), and trim the corner.
- Turn the facing to the inside, using a point turner or a blunt pencil to get a sharper edge on the corner.
- Understitch the facing to the seam allowance as far as possible. Again I was not able to get right in to the corner but that’s okay. Press.
- Secure the shoulder edge of the facing by stitching in the ditch from the right side of the bodice through the facing (underneath the collar).
Bodice – finishing
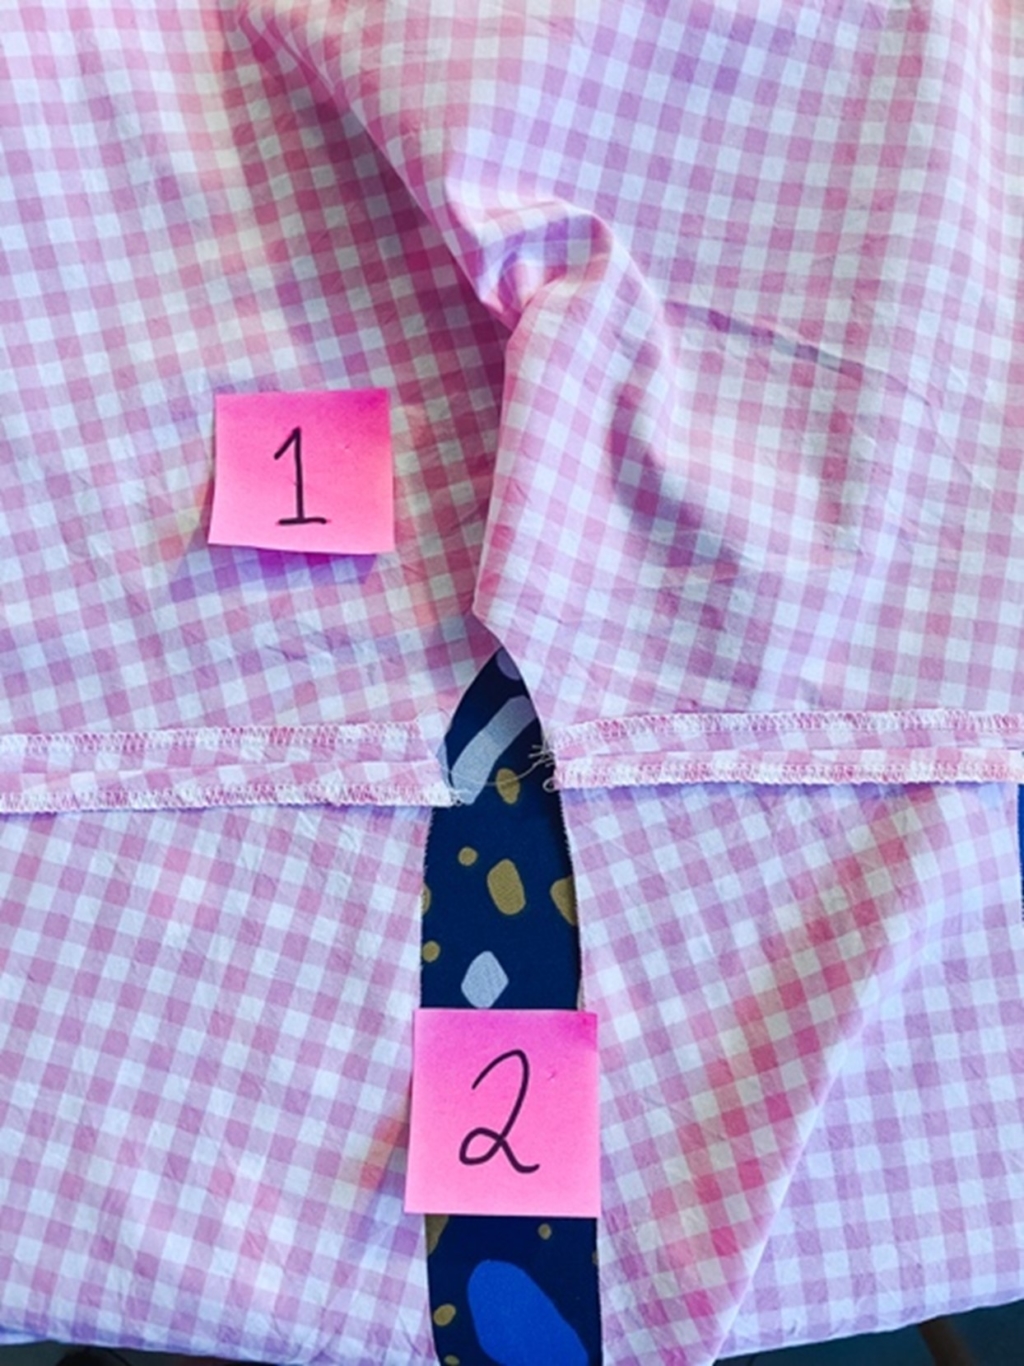
- If you wish to add side seam labels, now is the time.
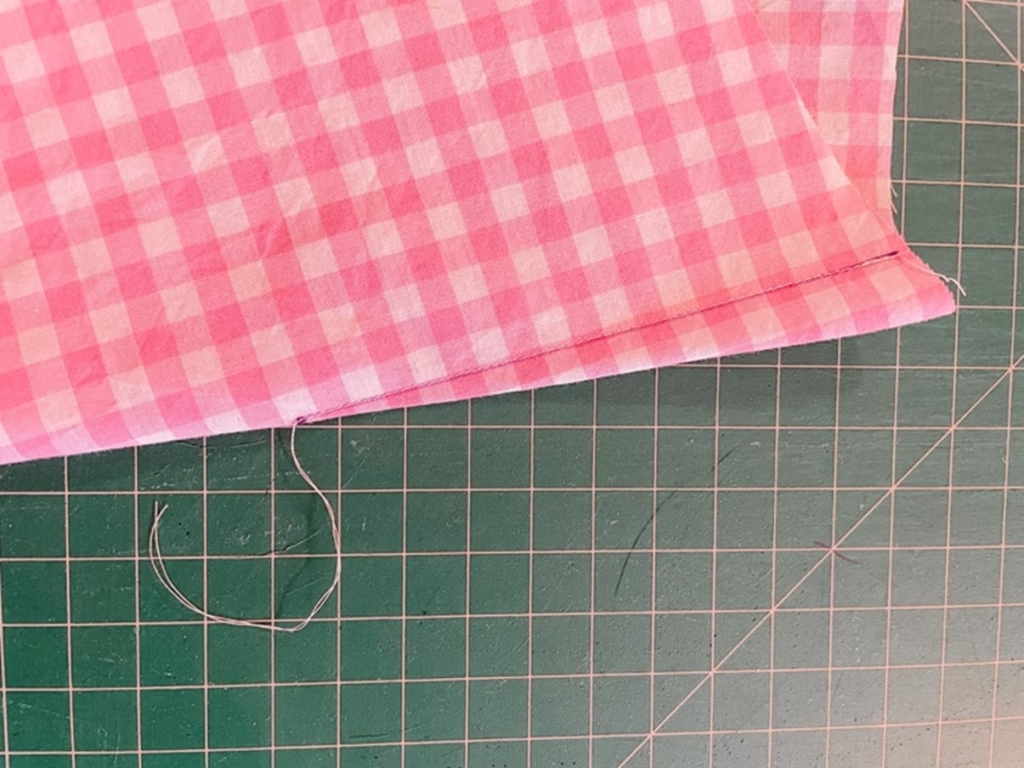
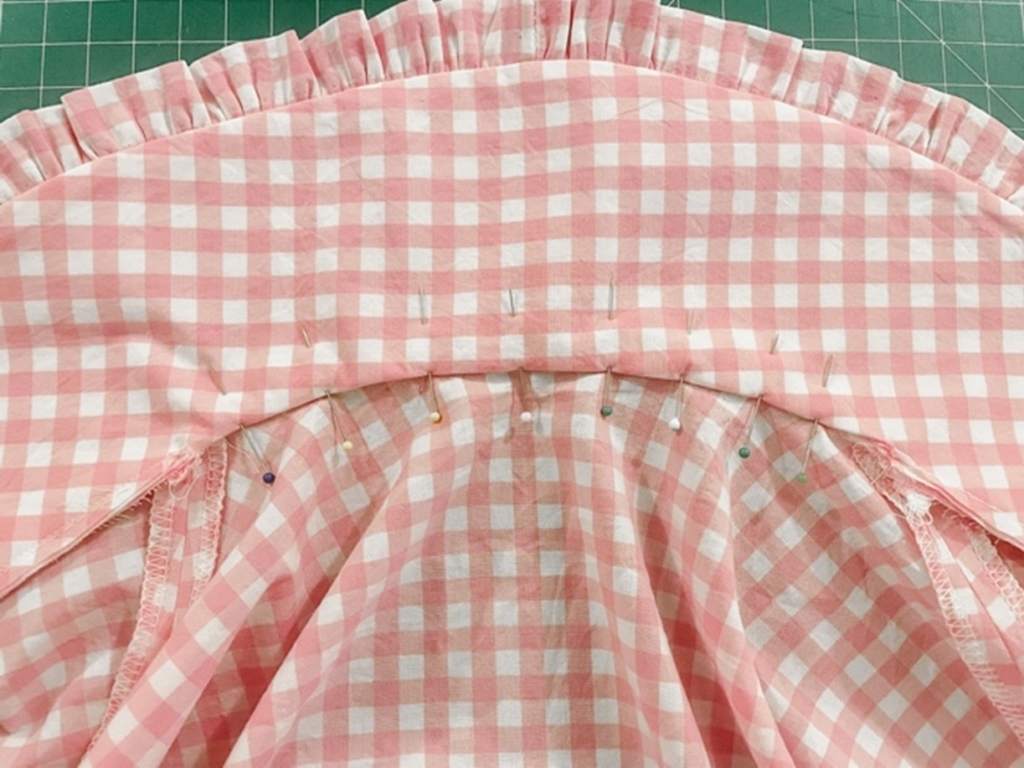
- Right sides together, sew the side seams ensuring that the bust darts remain pointing downward. Finish the seam allowance and press toward the back.
- Turn the front facing back to the outside along the hem and pin.
- Sew in to place using a 1cm/ 3/8” seam allowance, trim the corner, and turn the facing back inside, pushing out the corner.
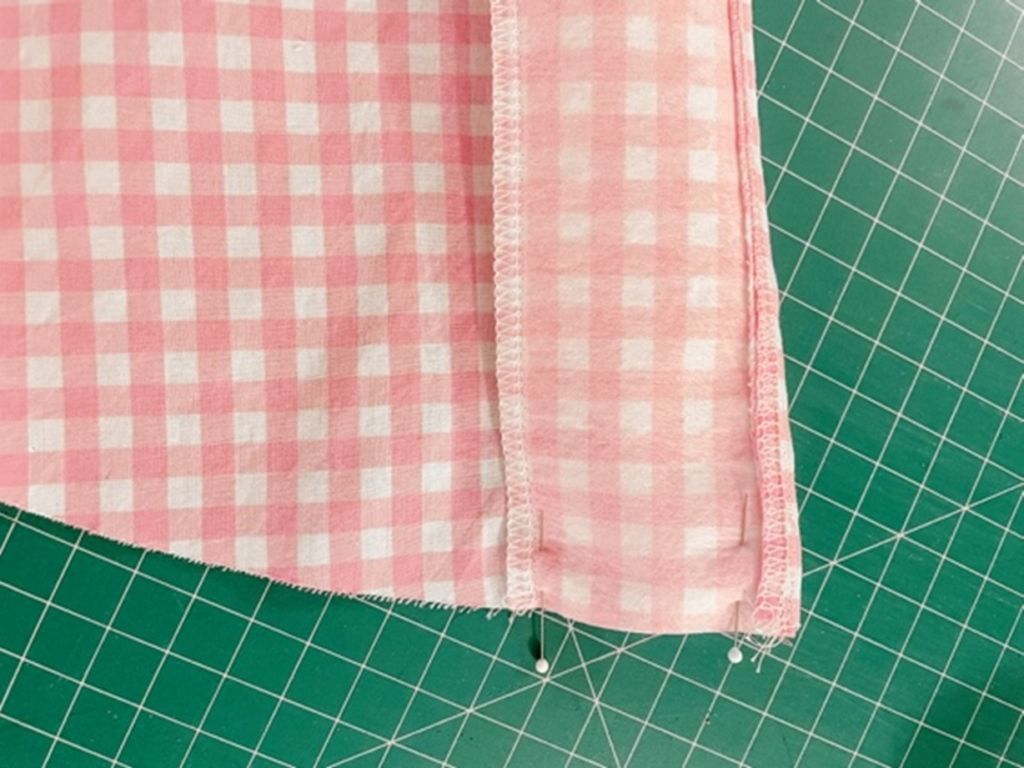
- Continue to hem the garment by either folding under 0.5cm / 1/4” twice and stitching in to place, or finishing the raw edge in your desired manner, and folding under 1cm / 3/8” and stitching in to place. Be careful not to twist or rope the hem as you go and take care with the curves.
Sleeves
- At this point I modified the original pattern sleeves to look more like those in the picture of HRH. I measured where I wanted the sleeves to finish on my arm, taking in to account the cuff, and shortened each sleeve so that it had an underarm length of 29cm.
- Right sides together, sew the underarm seam on each sleeve. Finish the seam allowance and press.
- Sew a gathering stitch along the lower edge of each sleeve, as well as a line of gathering/easestitching along each sleeve head.
- Turn the bodice inside out, and the sleeve right side out.
- Put the sleeve inside the shirt and align the raw edge of the sleeve with the armhole on the bodice.
- Match the underarm and side seams, as well as the notch just past the apex of the sleeve head with the shoulder seam. Note that the notch allows for much more ease in the rear of the sleeve so ensure you have the correct sleeve for each side of the bodice.
- Drawing up the ease stitching along the sleeve head slightly to ease the sleeve in, pin the sleeve head to the armscye. Remember that the sleeve and the bodice need to fit together at the seam line, not the raw edge, so do not worry if there are puckers or gathered fabric right at the edge of the sleeve.
- Sew in to place. TIP: place the presser foot inside the sleeve and sew in the round this way.
- Before finishing the seam allowance, turn the sleeve out to check that there are no puckers in the sleeve or bodice. If there are, just unpick that section plus a little either side, and re-ease that section together. Remove the easestitching thread and finish the seam allowance.
- Repeat for the other sleeve.
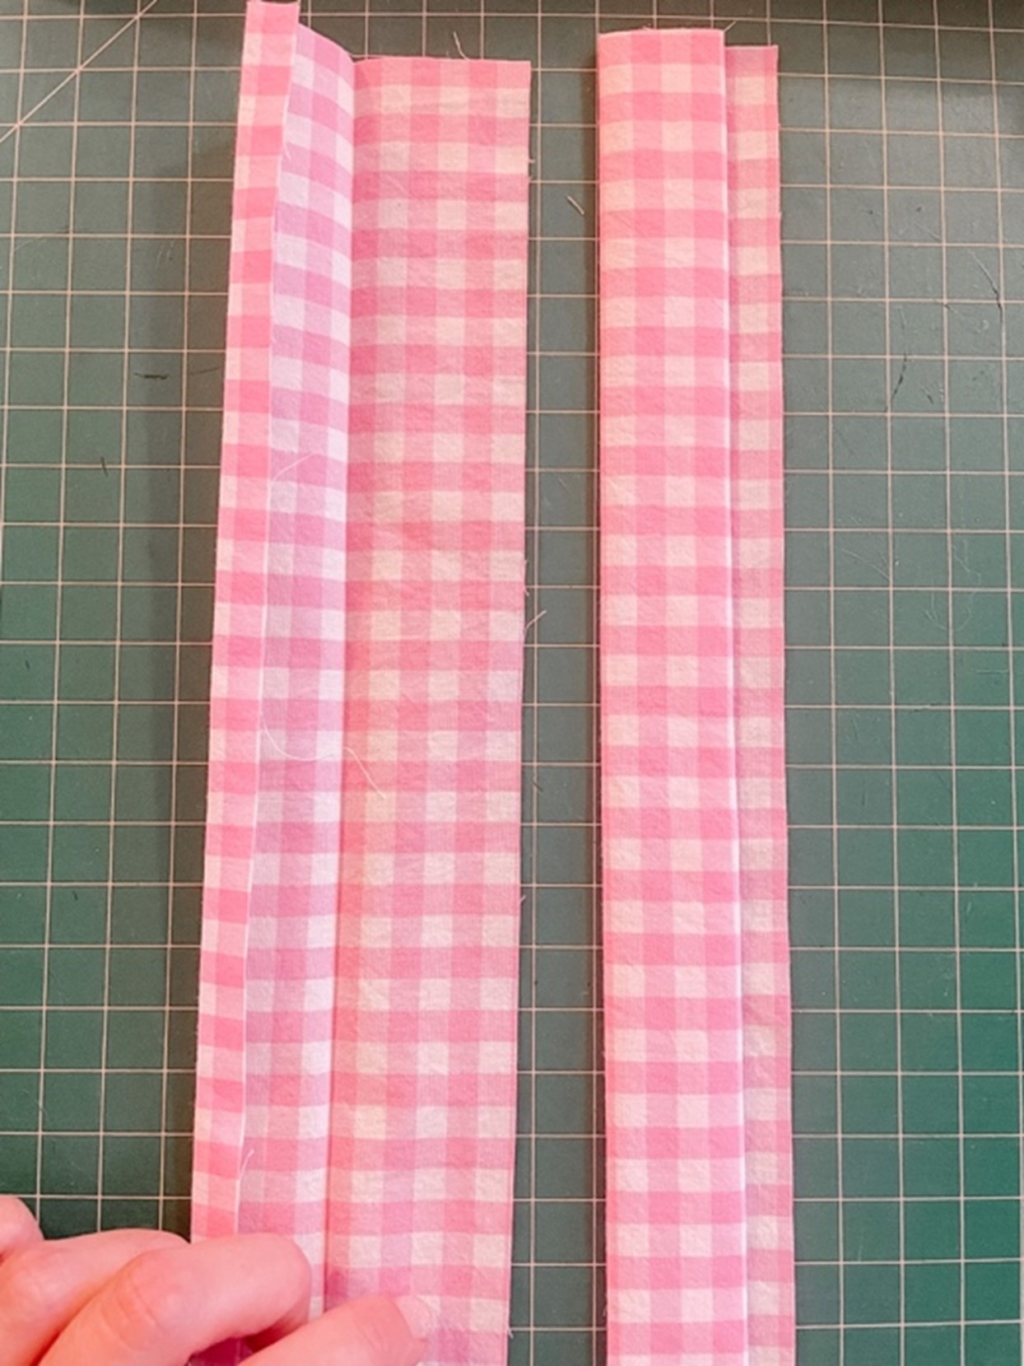
Sleeves – Attaching the cuff
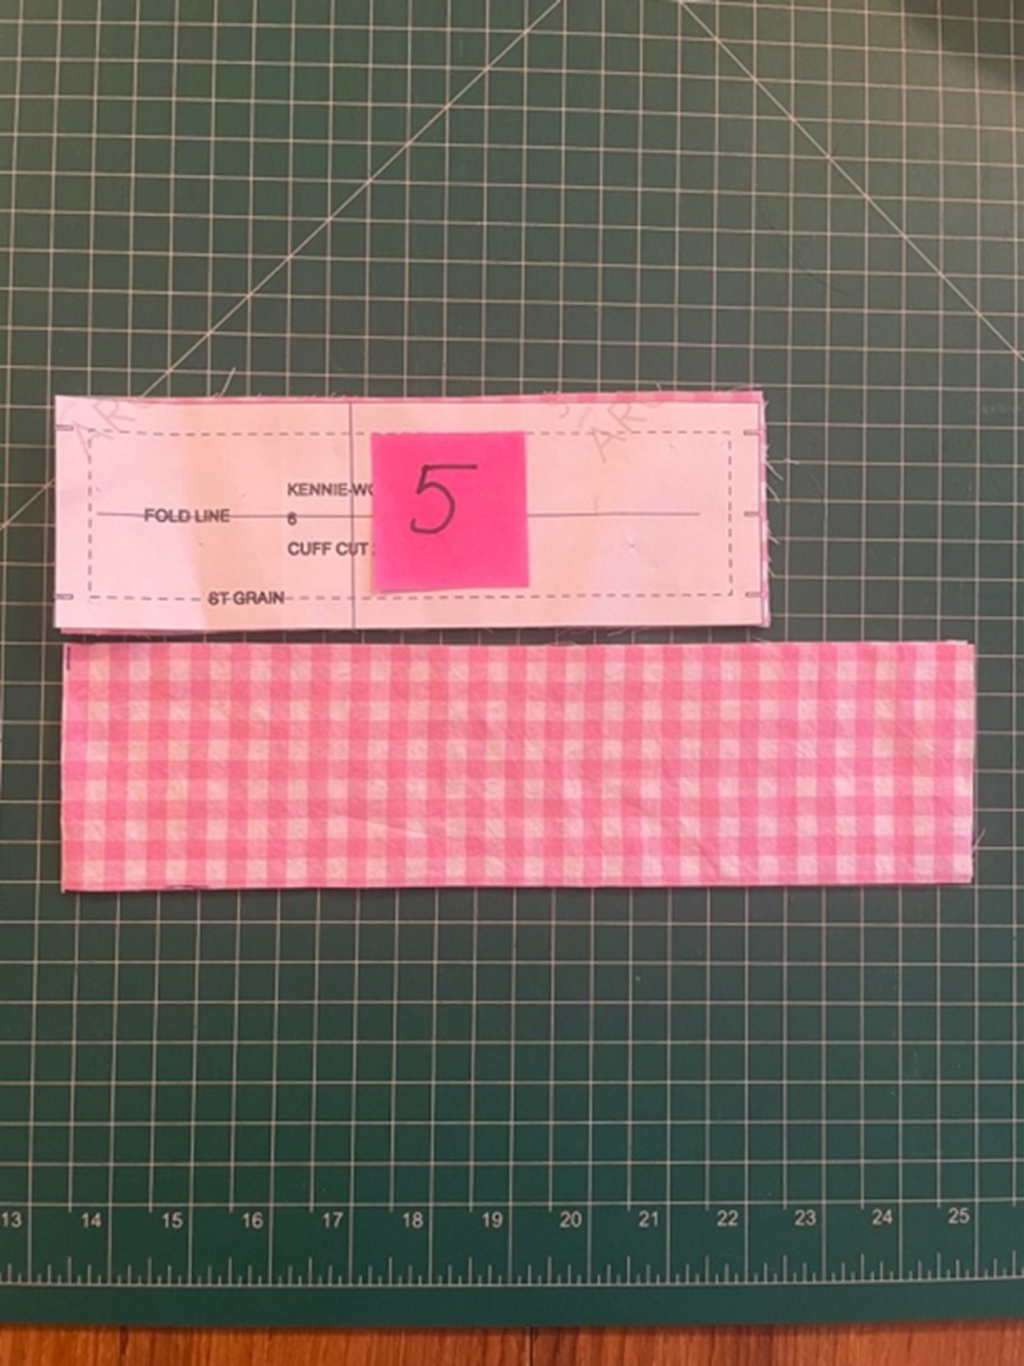
- Due to shortening the sleeves, I also had to increase the length of the cuffs (piece 5) by approx. 6cm.
- I then folded them in half lengthways, right sides together and pressed.
- Then I folded one of the long edges under a further 1cm and pressed.
- Right sides together, I sewed the short ends of each cuff together, forming two loops. Press the seam allowance open.
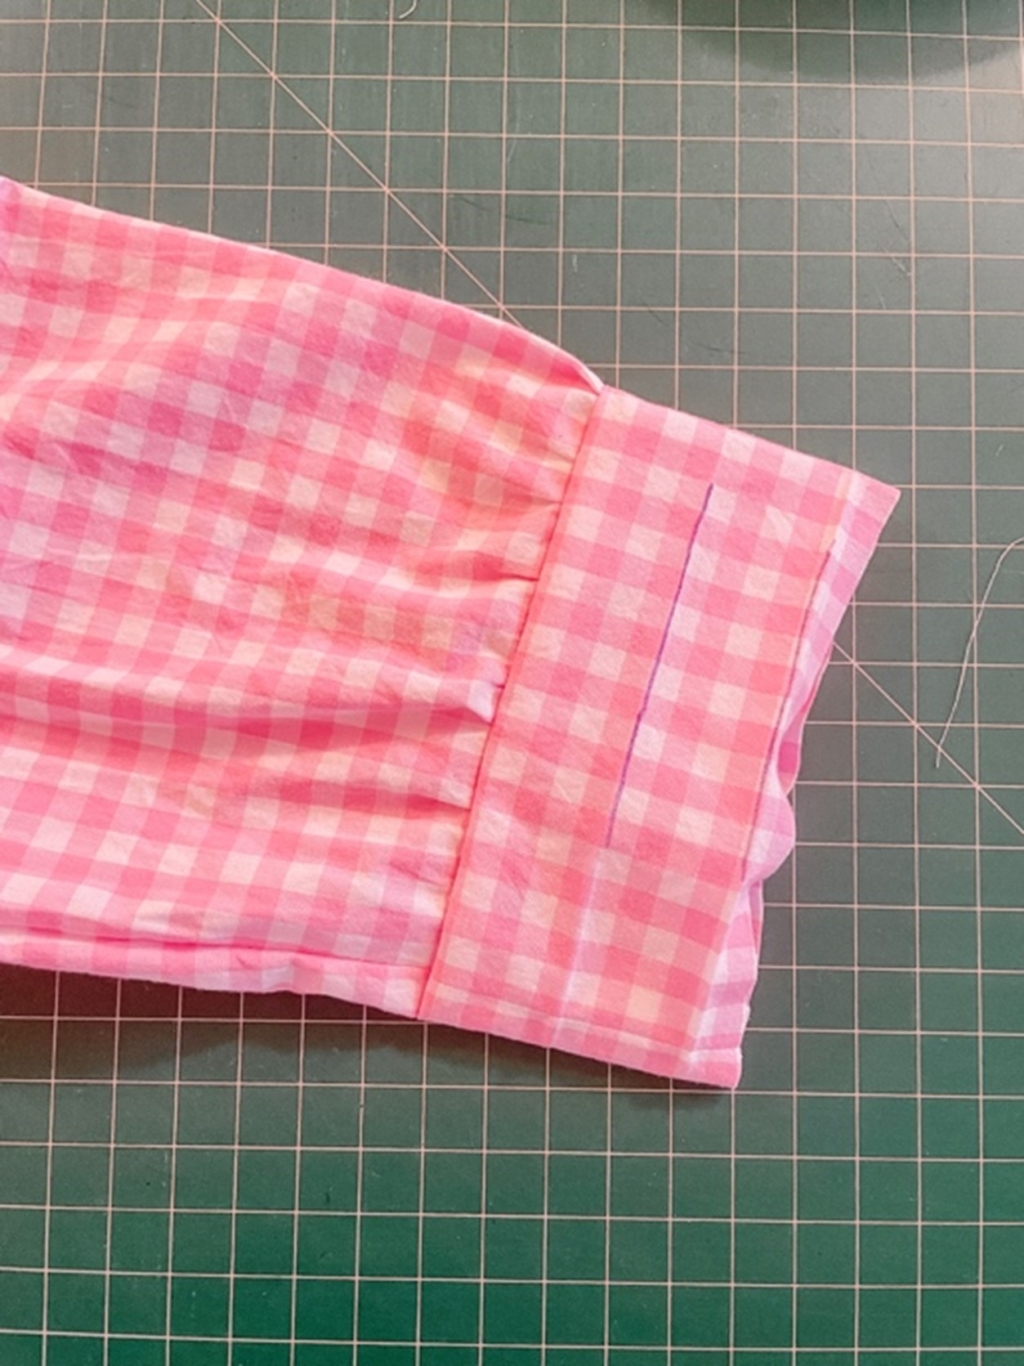
- Right sides together, slide each cuff over the end of each sleeve. Aligning raw edges and the underarm seams, draw up the gathering thread at the end of the sleeve so that the sleeve matches the cuff (it will only be lightly gathered). Distribute the gathers evenly and pin in to place. Stitch using a 1cm / 3/8” seam allowance.
- Pull the cuffs away from sleeve and finger press. The seam allowance of the sleeve and the remaining raw edge of the cuff should be pointing in the same direction.
- Fold the cuffs to the inside of the sleeves following the lines pressed earlier (marked above in purple for clarity).
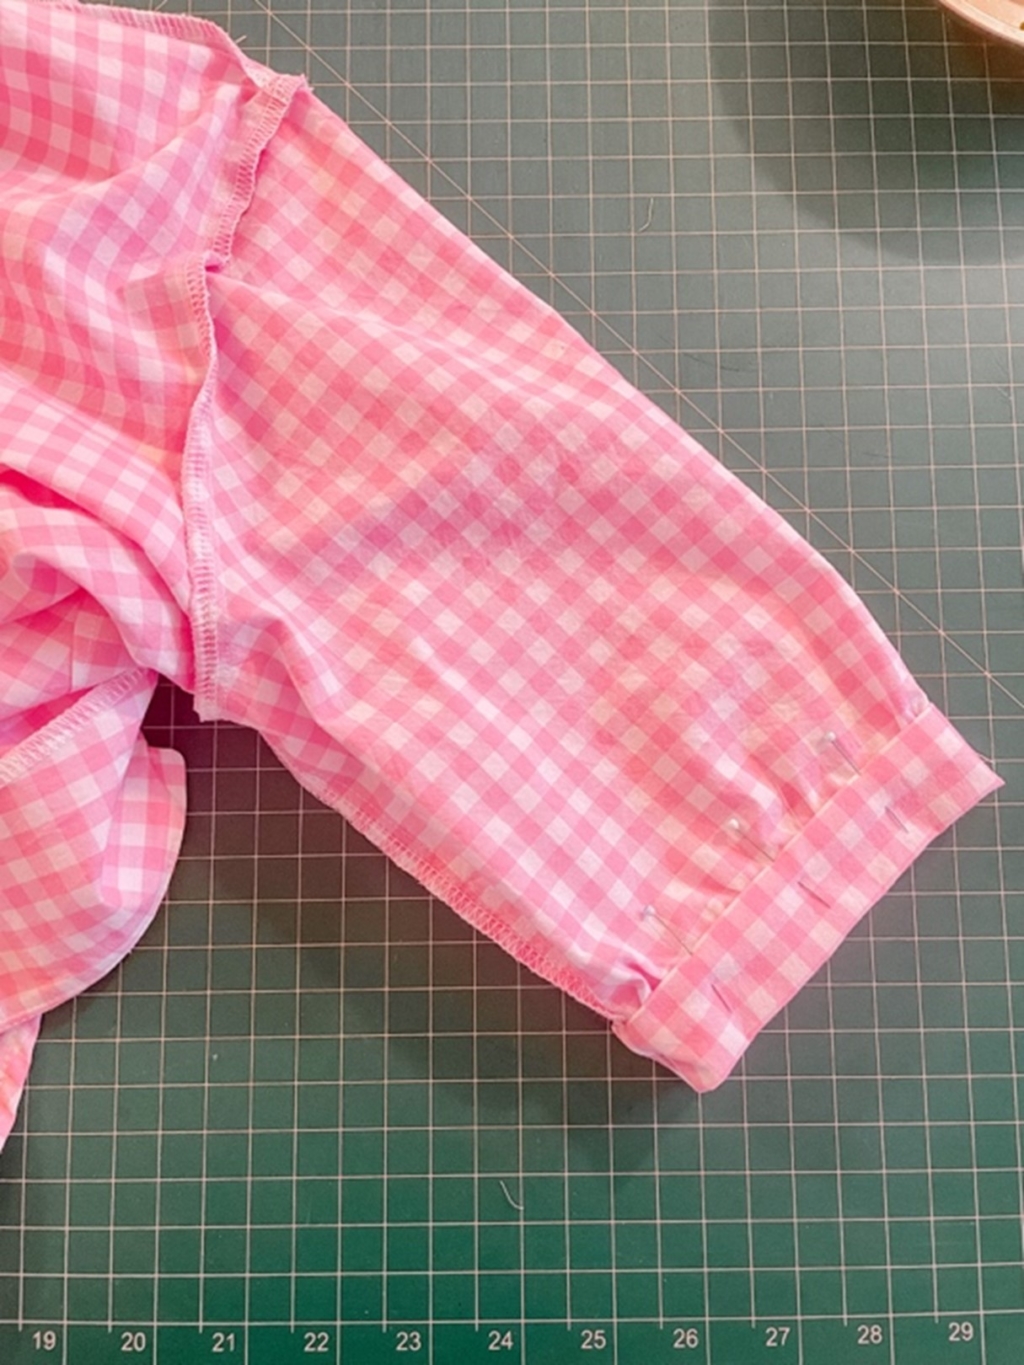
- Pin in to place so that the inside folded edge just covers the seam line when first attaching the cuffs to the sleeves. This is easier to do with the wrong side of the sleeve and bodice facing outward.
- Again, placing the presser foot inside the sleeve so that it is resting on the right side of the fabric, stitch in the ditch, ensuring that you catch the edge of the cuff inside the shirt.
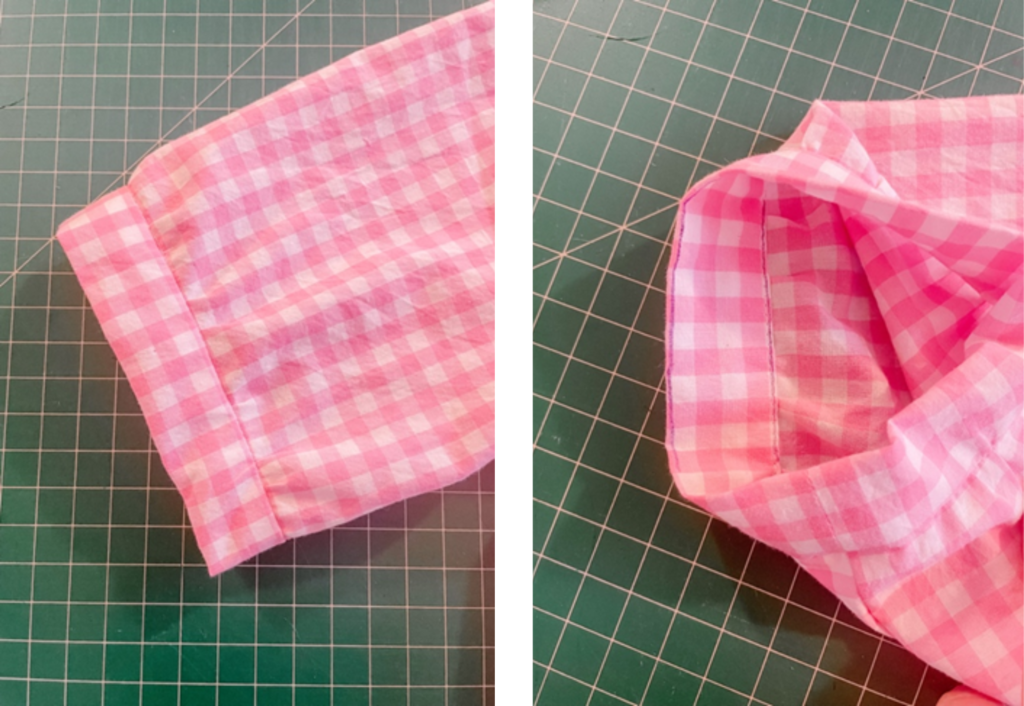
- This gives a much cleaner/more professional, and less itchy finish to the inside of the cuff. You can see in the second picture below the two purple lines ruled on the folds earlier in this section.
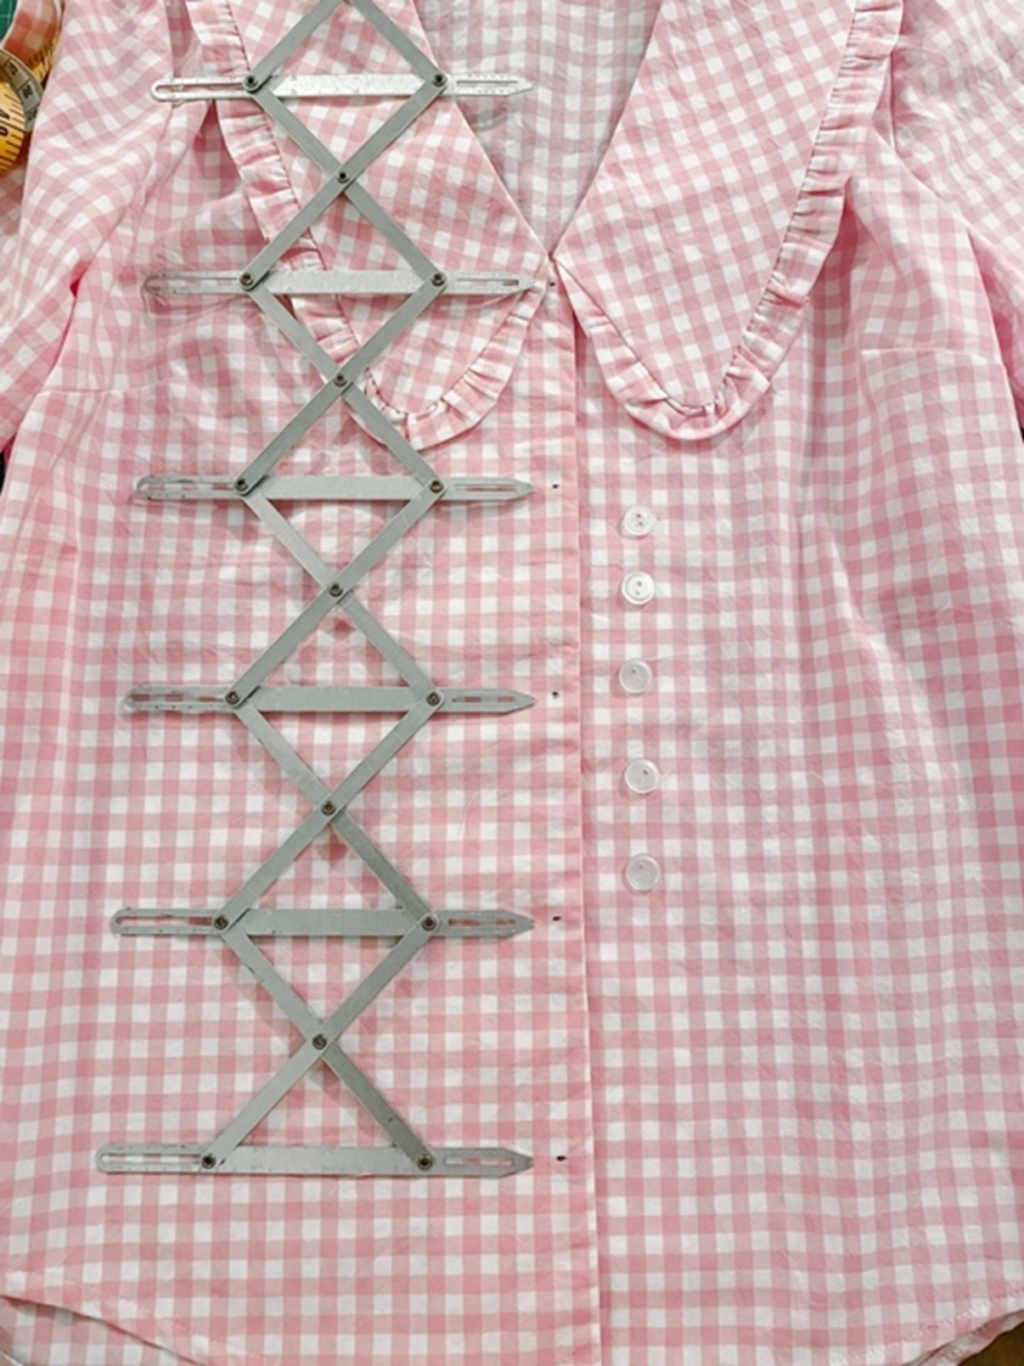
Buttons
- Using the placement on the pattern pieces or a tool of your choice (here I’m using my simflex gauge) evenly mark where your buttons will be placed.
- Using your machine or by hand, sew your buttonholes.
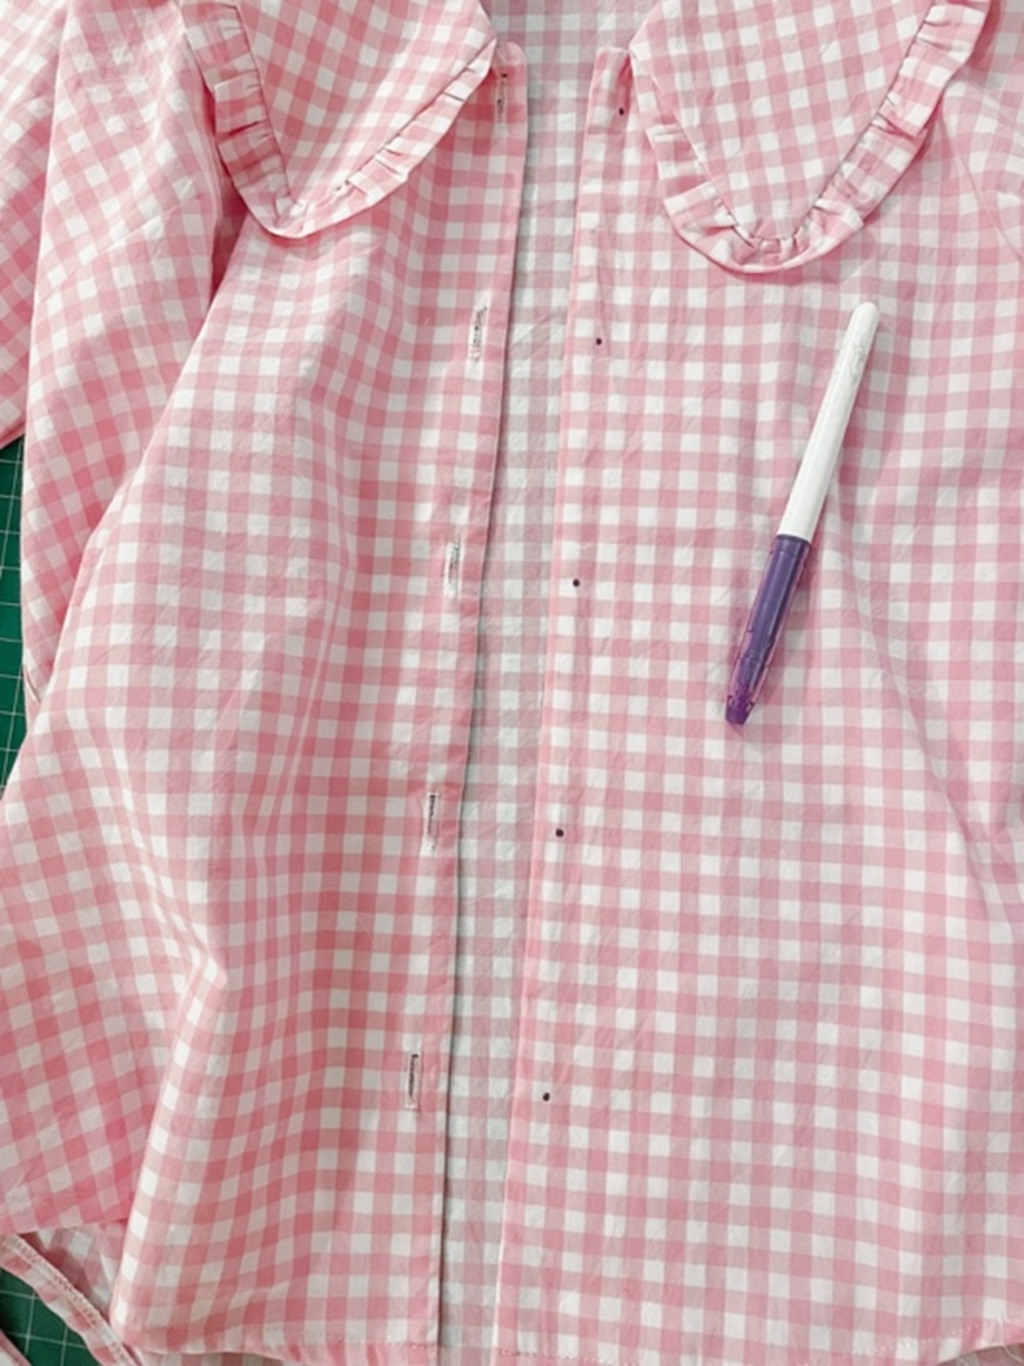
- Aligning your bodice fronts, use a disappearing fabric marker to mark through each buttonhole to get your button placement spot-on.
- Attach your buttons and voila! You are done!

@becsewsthings