Lena Shift Dress Tutorial by Lou Sheffer from Sew Much to Design
@sewmuchtodesign
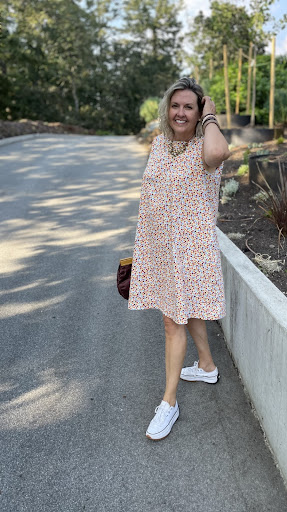
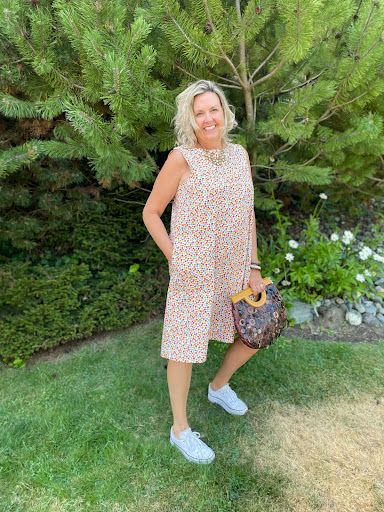
Introducing the Lena Dress a wonderful sheath A-line dress that will bring a chic versatile look to your wardrobe. Lena is a mid-length sleeveless dress that features a boat neck with large inseam pockets and hem facing that both feature twin needle topstitching.

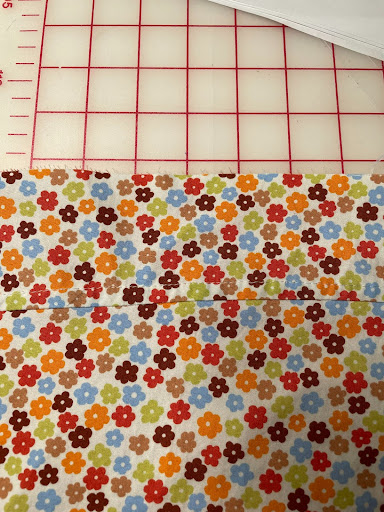
Seen here in a summer version using a printed cotton poplin; Lena can be made in a variety of woven fabric options. Linens, cottons or crepe will all look wonderful as they will help the design to hold its shape and celebrate the structure of A-Line pattern as well as giving the boat neck a crisp clean finish.
Helpful Hints before you sew:
- Cut out the pattern taking note of the grains and instructions written on the pattern pieces
- The neck facings have fusible interfacing. One short cut is to fuse interfacing to a larger piece of fabric, then cut out your fused pattern pieces
- Adding the inseam pockets is optional depending on your fabric choice and the look you wish to attain
- If you want to line the dress, eliminate the facings and cut out a front and back body in your lining fabric. Cut the lining 2” shorter than the finished length of the dress


POCKETS
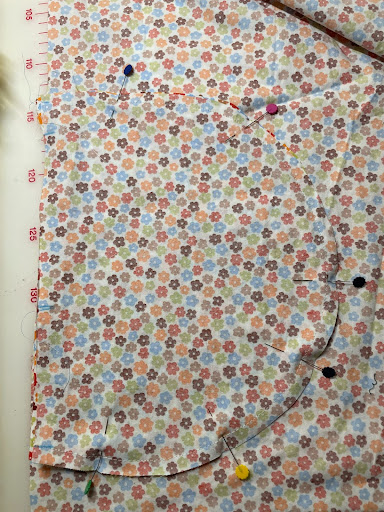
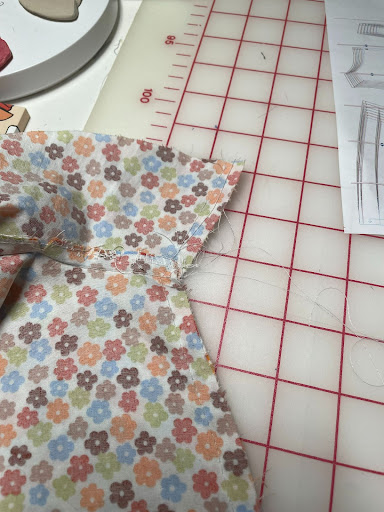
Sew one set of the pockets to the front side seam, where marked on the pattern (A to A).
Stitch where the pins are in the picture.
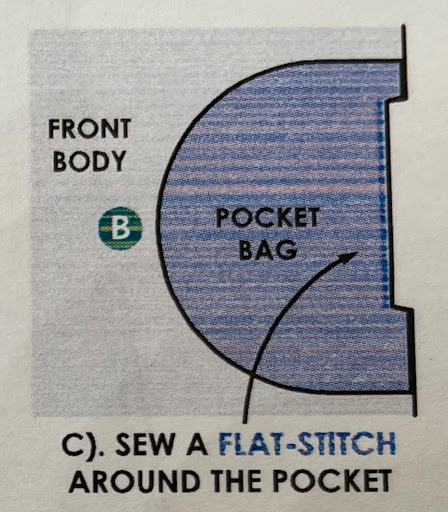

Flip pocket to the wrong side and clip at the notches and sew a flat stitch close to the seam on the side of the pocket bag.
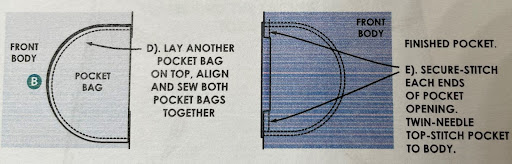
Sew the second set of pockets to the pockets already sewn to the front side seam. Stitch the two pocket bags together to create a complete pocket. (B to B) The straight edge of the pocket is left unstitched to sew to the back body’s side seam.
Overlock the edge of the pocket bag then pin it to the front body making sure it lays flat. Sew a stay stitch above and below the pocket opening to attach it to the side seam.
Once in place you can sew a twin needle topstitch around the edges of the pocket; this will be done from the right side of the fabric.
If you do not have a twin needle, or would prefer to make sure you have secured the pocket to the front bodice by working from the wrong side of the fabric, stitch the pocket bag to the bodice then flip to the right side and stitch a second row of equidistant from the first to attain a twin needle stitched look.
BODY
Overlock the long edges of the back bodice
Using an open seam, sew the centre back seams of the body together and press open.
With right sides facing, sew the back and front shoulder seams together and press open.
Sew the shoulder seams of the front and back facings together and press open or press to the back if overlocking.

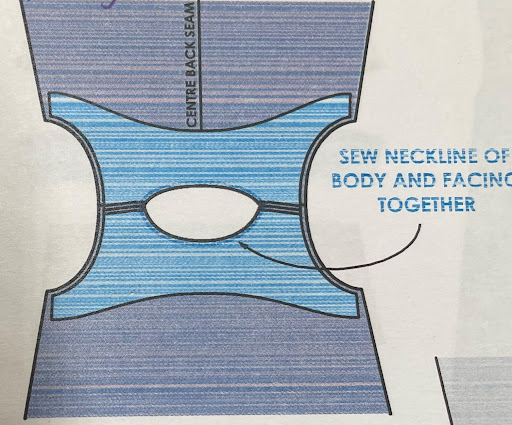
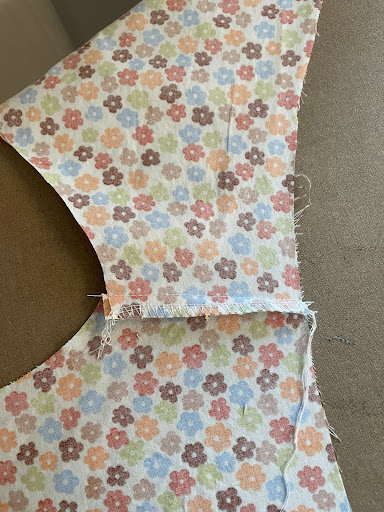
With the right sides together sew the neck facing to the neck of the body.
Turn to the right side and sew a flat stitch close to the seam of the side facing.
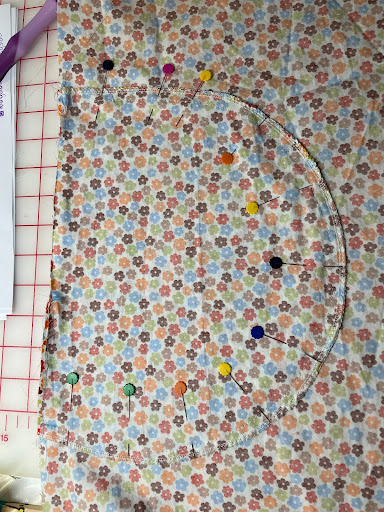
Quick Tip: This is a great time to remember to use fractions to ensure even pinning that keep fabric flat. Pin the centre and sides, then work the fabric along the curve of the neckline pinning each half then quarters etc. Taking the time to pin this way avoids having to repin because the facing and body aren’t matching equally.
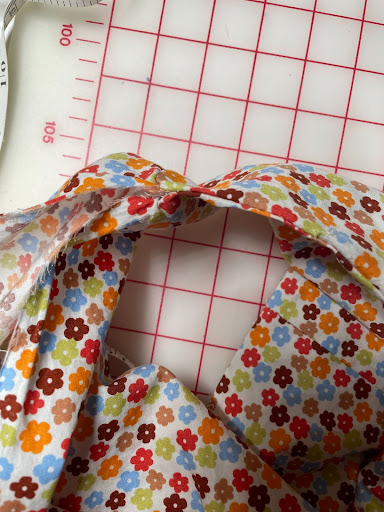
Turn your fabric so that you have the right sides facing out.
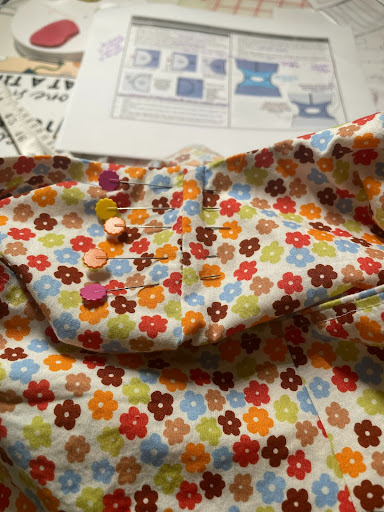
You may want to over lock the facing armhole and the armhole separately before pinning them together.
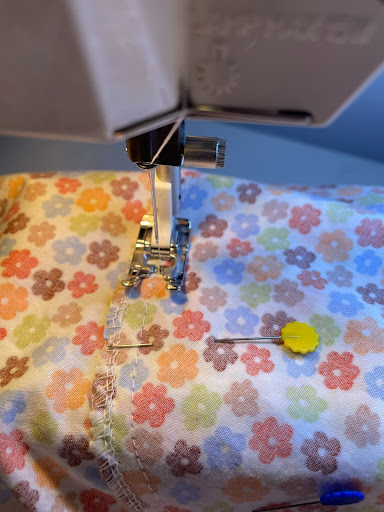
You will be “pinching” the seams of the front armhole and the armhole facing together, pinning them in place. Sew from the front under arm up to the shoulder seam.
If you are doing this correctly you will need to sew the armhole in two sections like this because it is not possible to sew the entire armhole to the facing all in one go. If you can sew it all at once, this is a very good indicator that you are not sewing them together correctly.
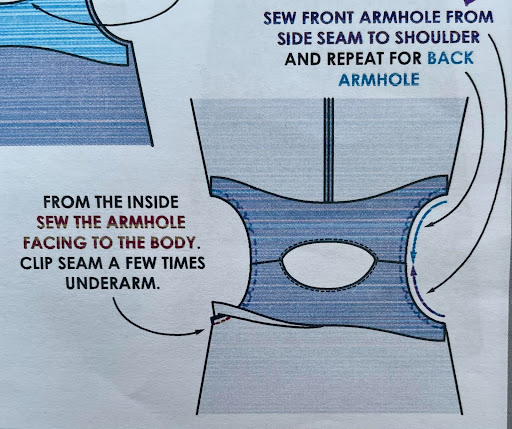
This picture shows half of the armhole sewn to the shoulder seam, with the other side still left to “pinch together” to sew.
Turn to the right side and sew a flat stitch to the facing on the side seam as far as you can up towards the shoulder seam.

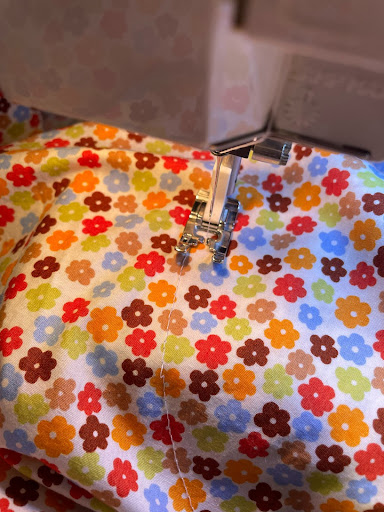
With right sides together, sew the front and back side seams together. Start at the hemline and continue sewing the side seam of the facing as well.
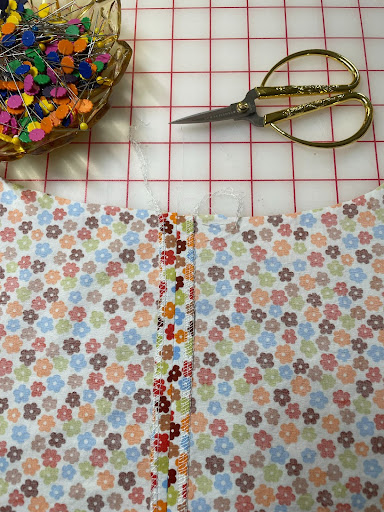
Turn the facing to the inside of the dress and catch the facing by stitching in the ditch along the right-side side seam.
HEM FACING AND COMPLETION
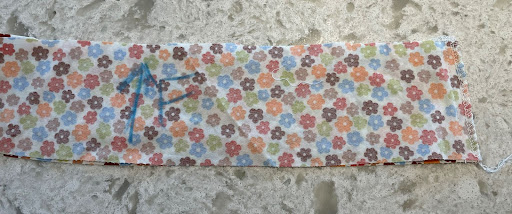
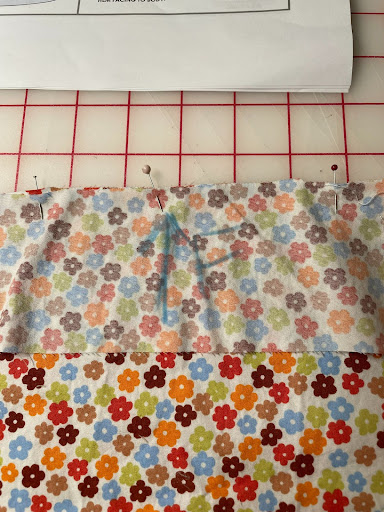
With right sides together sew the front and back side seams of the hem facing together. Mark the top of the front hem facing with an arrow to help you easily see which side gets pinned to the dress.
With right sides facing sew- the hem facing to the hemline of the body.
Once this is sewn, from the right side, sew a flat stitch close to the seam of the facing.
Press.
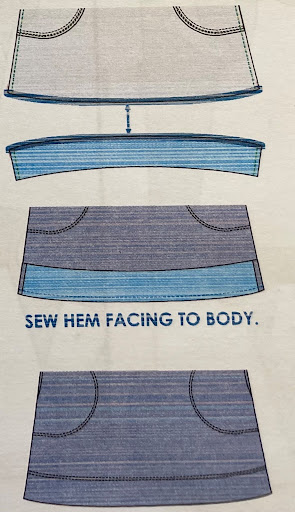
Overlock the remaining edge of the hem facing and pin it to the body of the dress.
Sew the facing down with a twin needle top stitch, or if preferred, use the single needle method outlined above for the pocket.
Depending on the grain and stretch of the fabric you are using you may find that you will need to form very small pleats in the hem facing in order for it to lie flat to the bodice of the dress.
Press your new dress. You are finished!!

The Lena Dress is a fun dress to sew and to style. You can easily dress it up with a pair of cute sandals and a necklace, or slip on a pair of sneakers and wear it to run errands on a summer’s day…. Or both! You will find that the Lena Dress will become a go-to pattern that you use creatively with a variety of woven fabrics. Enjoy!