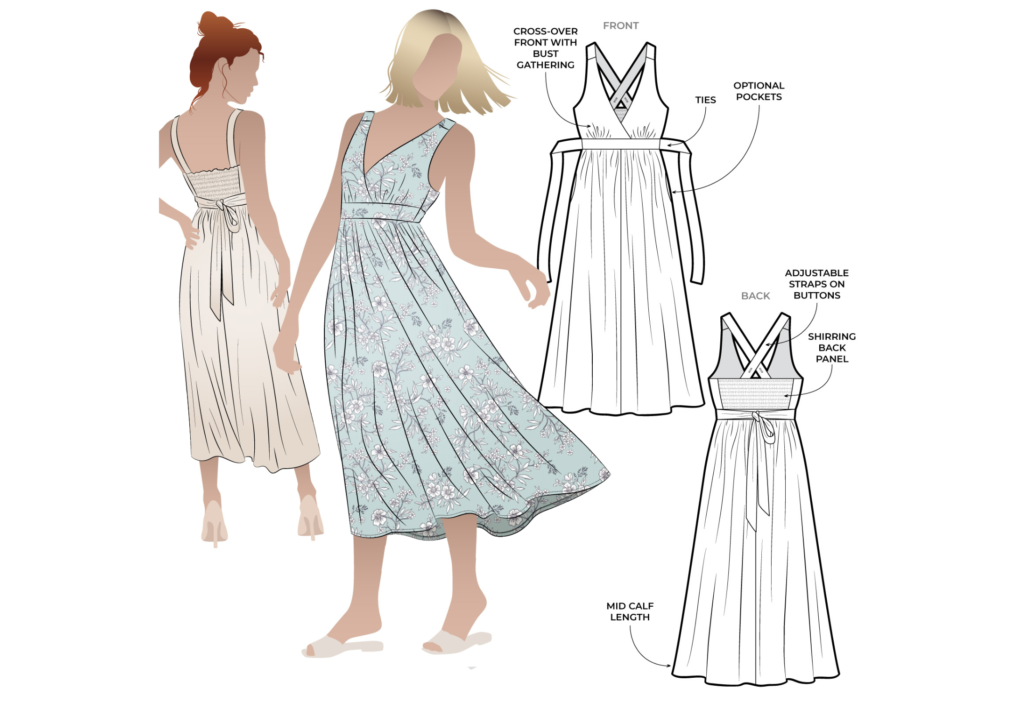
CONSTRUCTION:
BACK BODICE: Click here to head to the Shirring tutorial if you need assistance shirring
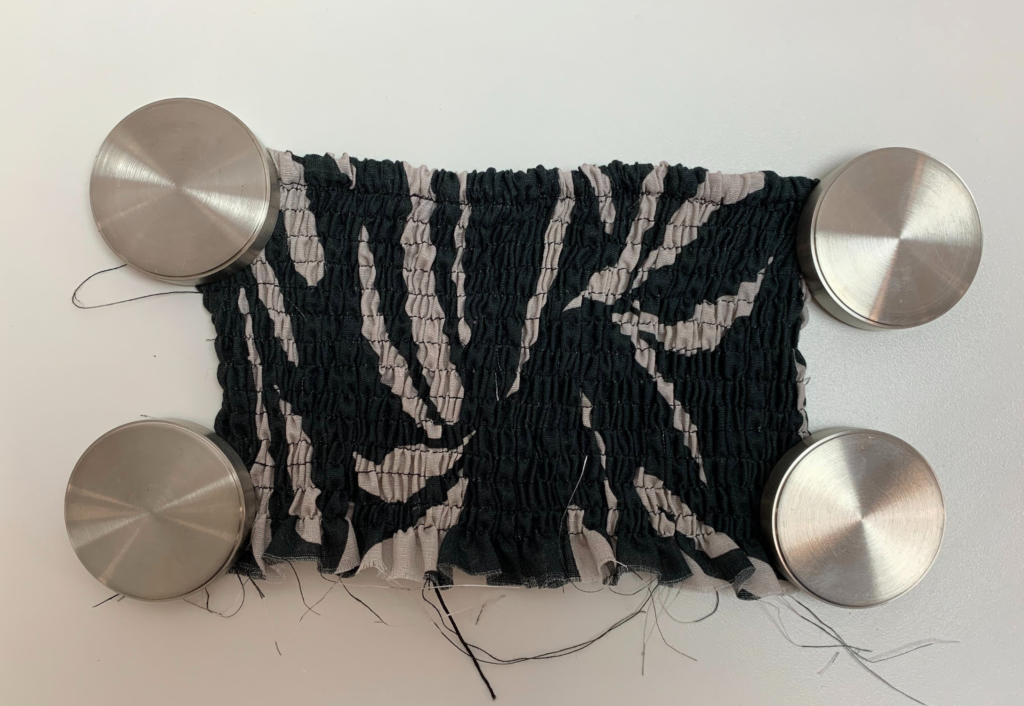
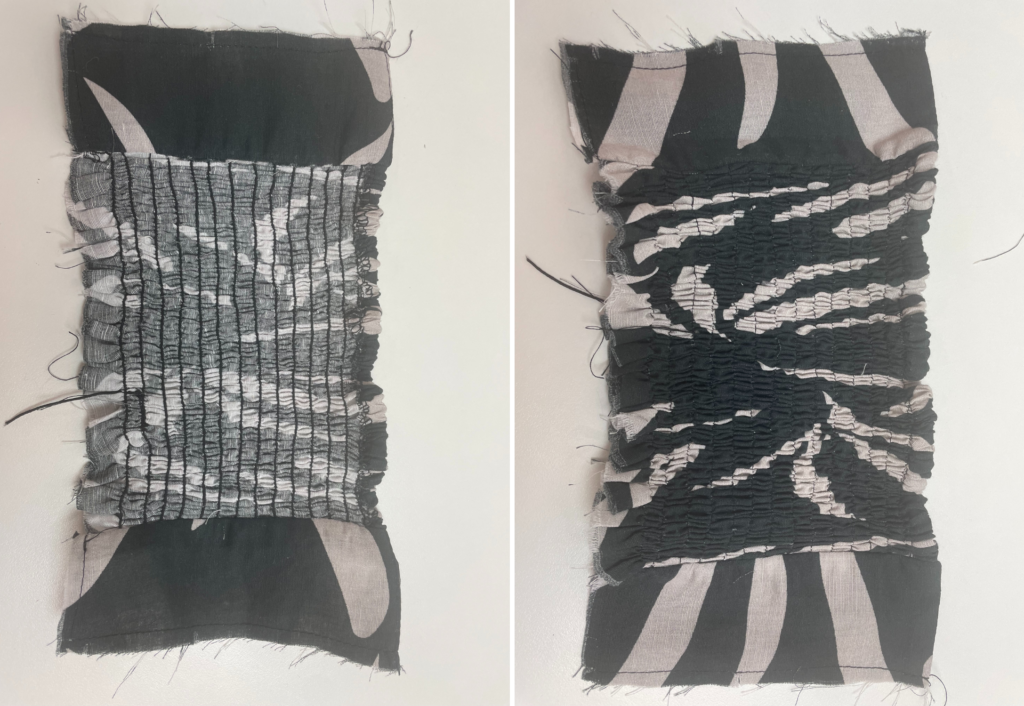
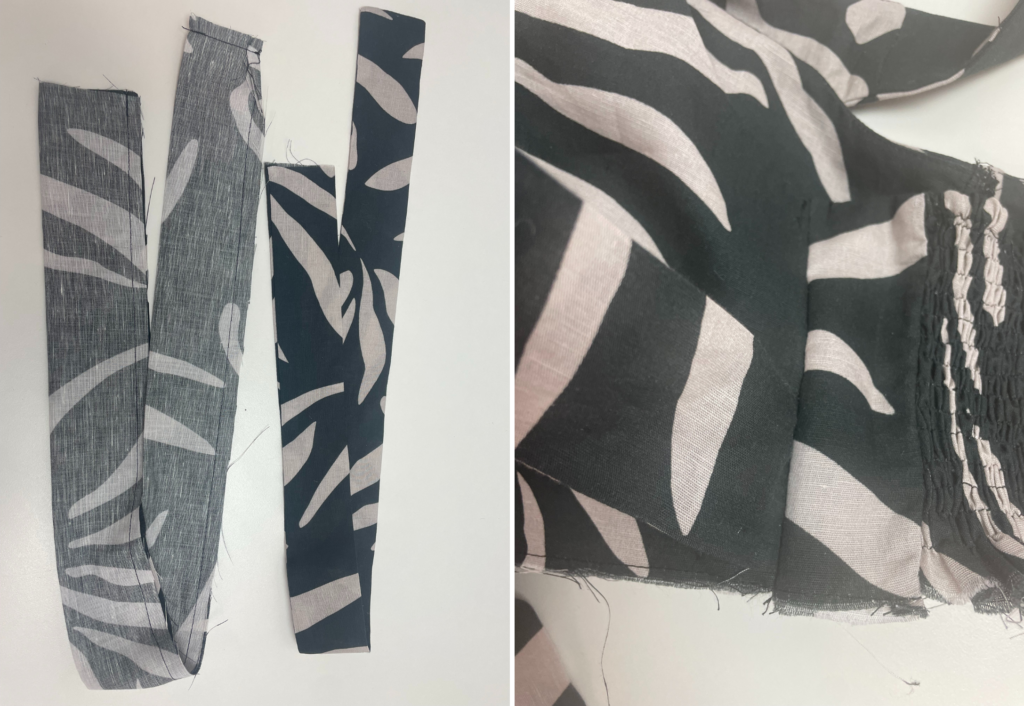
Neaten the top edge of the Centre Back Shirring Panel with an overlocker/serger.
Set your machine up with shirring elastic on the spool and test the shirring on a scrap piece. When you have the tension correct sew the 14 x shirring rows with the shirring elastic on the wrong side of the fabric. Steam/press the finished shirring to flatten the panel. You can now remove the shirring elastic from your spool.
Fold over the top edge of the back shirring panel and stitch to create an elastic casing. Insert the 6mm (1/4”) elastic through the casing and secure at both ends.
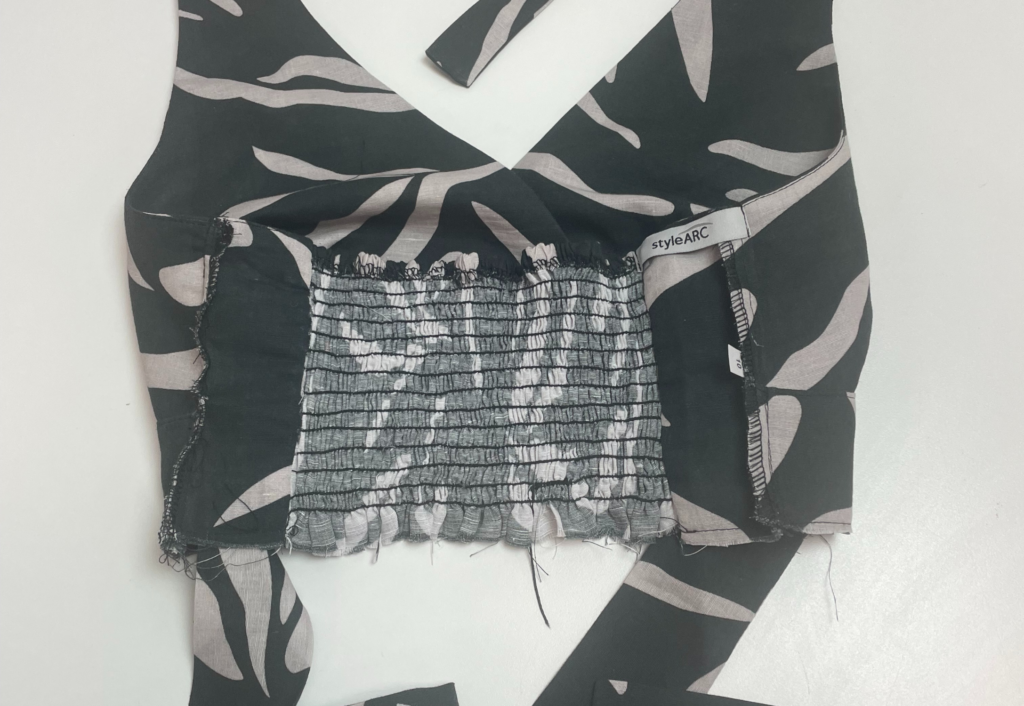
With right sides facing sew the top edges of the side back pieces together, turn out and sew an understitch on top of the seam on the inner side back.
Sandwich the back bodice shirred side seams between the side back seams, once in place sew the side seams of the back bodice to the side back panel. Turn out to the right side, press and sew a stay stitch down the cut edges of the side back panels and around the waist to hold the bodice in place ready to sew to the front side seam.
FRONT BODICE:
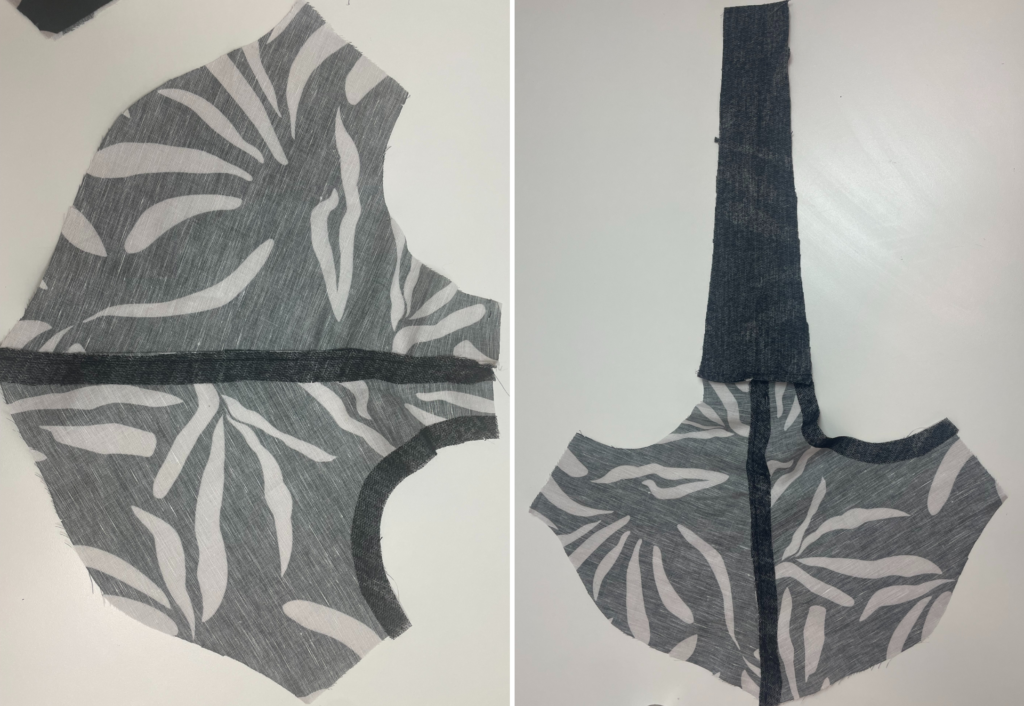
Take 1 pair of the front bodice pieces and with right sides together sew the neck edge. Press and understitch on the inside.
With right sides facing sew the wide end of the open straps to the opened top edge of the front necks. Press the seam open.
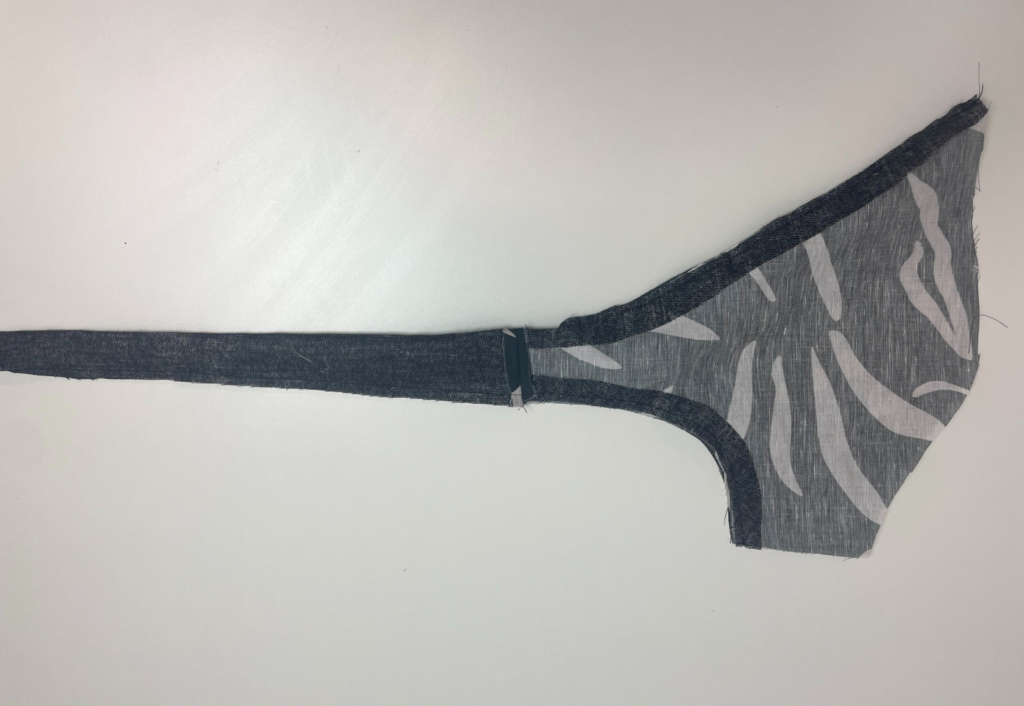
With right sides facing sew the bodice armhole and the outer edges of the straps together, commence at the underarm and sew up the armhole continuing through the strap, with the needle down turn the corner and sew across the end of the strap.
Pull the bodice and strap out to the right side and understitch as far as possible close to the seam on the side of the inner armhole.

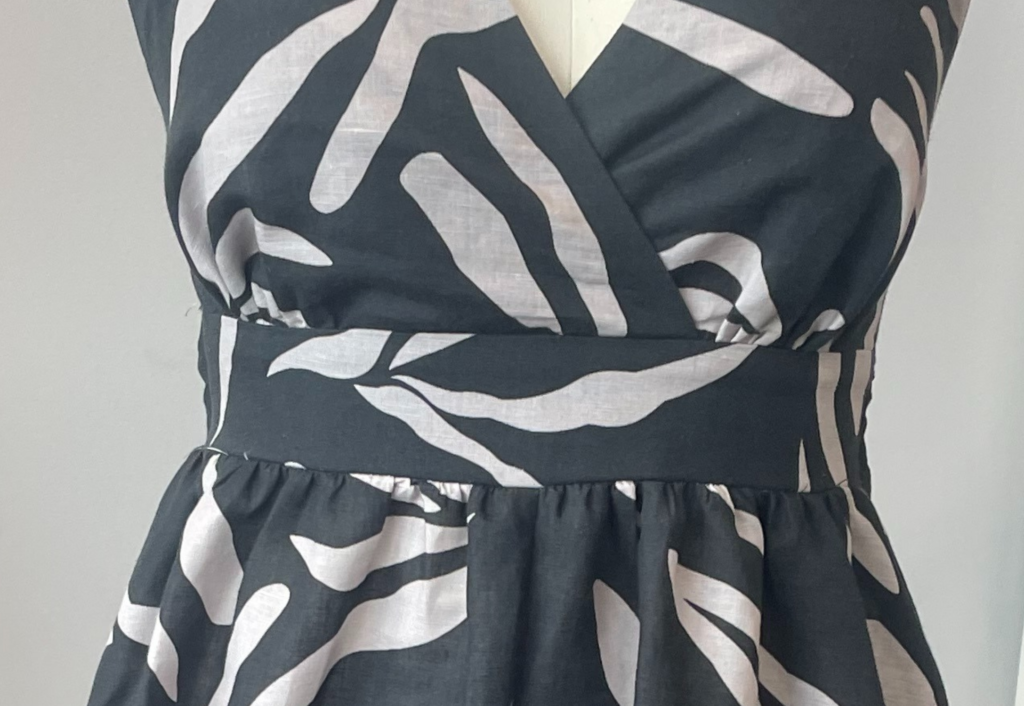
Press the bodice and match up the under bust seam of the outer and lining. Secure with a stay stitch and using a large stitch gather the under bust sections to match the notches on the front waistband. Overlap the front wrap matching at Centre Front notch and secure with a stay stitch.
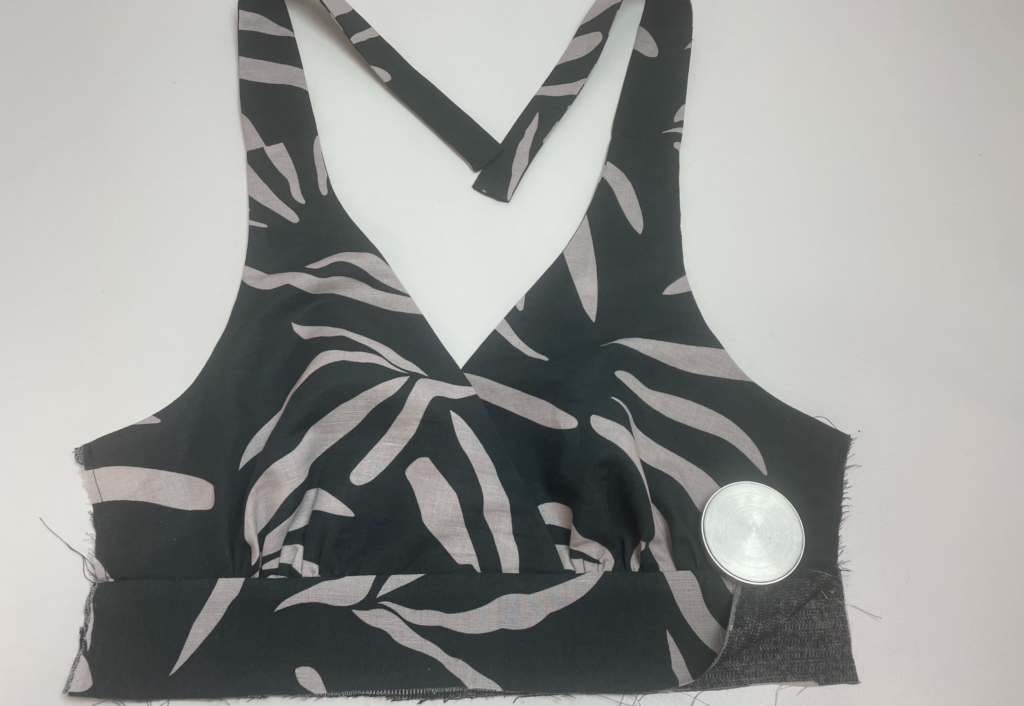
With right sides together sandwich the bodice between each waistband. Match Centre Front notches and make sure the side seams match. Sew all layers together. Fold waistband pieces over to right side, press the seam downwards and sew an understitch on top of the seam on the side of the inner band.
Fold each tie lengthways with right sides together and sew along the long side and one end. Turn right side out and press. Sew the open end of the tie to the front side seam matching to the top of the waistband. Note: the tie will sit above the waist seam.
With right sides together sew the remaining raw edges of the back side panel to the front bodice side seam. Neaten with an overlocker or serger and press towards the centre back. Repeat for the opposite side and press.
INSEAM POCKETS:
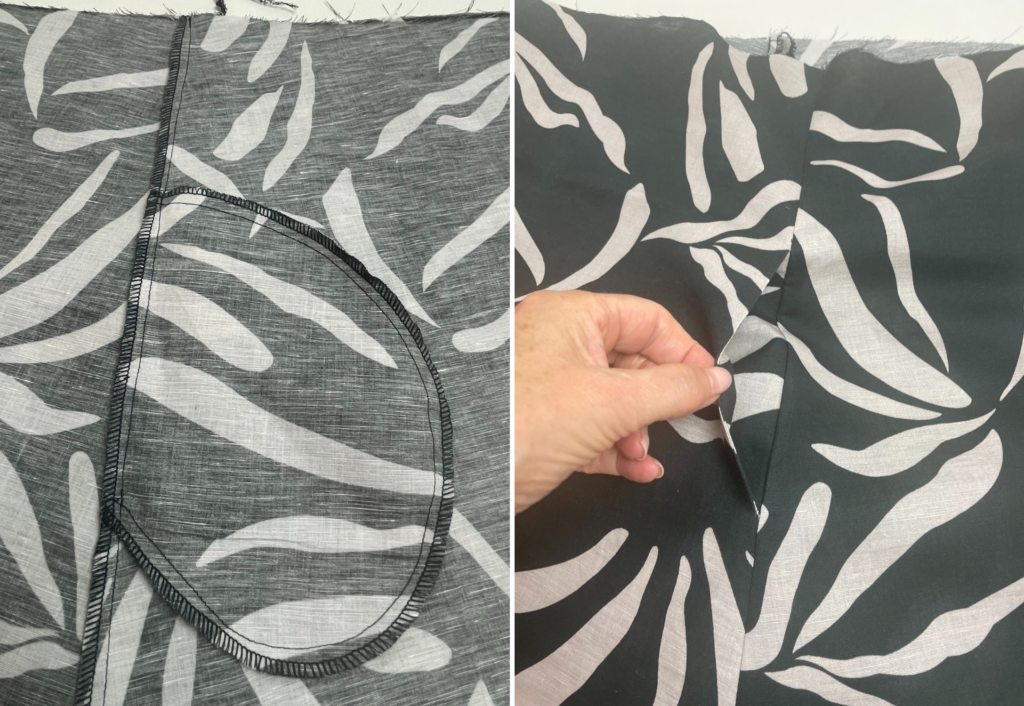
With right sides together sew one set of the pockets marked “A” to the front skirt side seam marked “A” on the pattern, clip at the notches and understitch close to the seam on the side of the pocket bag.
With right sides together sew the second set of pockets to the pockets that are sewn to the front side seam, stitch the two pocket bags together creating a pocket “B” to “B”, note that the straight edge of the under pocket is left free to sew to the back skirt side seam.
SKIRT:
With right sides facing sew the centre front skirt seams together, neaten with an overlocker or serger and press towards the wearer’s right.
With right sides facing sew the centre back skirt seams together, neaten with an overlocker or serger and press towards the wearer’s right.
With right sides facing sew the side seams of the skirts together, start at the waist and stitch through the back pocket seam taking care not to catch the front pocket opening as you sew, finishing at the hem. Neaten the seam with an overlocker or serger and press towards the back.
Sew a large gathering stitch to the waist of the front skirt and gather up to the length of the front waistband. The back skirt waist will be gathered up with the shirring
With right sides facing sew the bodice to the skirt, matching the centre front and side seams. The back skirt is sewn to the back body stretching out the shirring as you sew. Neaten the waist seam with an overlocker or serger and press downward. If your fabric is a heavy weight, we suggest sewing 6mm (1/4”) elastic to the back waist seam in line with the shirring. This is optional.
Double turn and topstitch the hem.
COMPLETION:
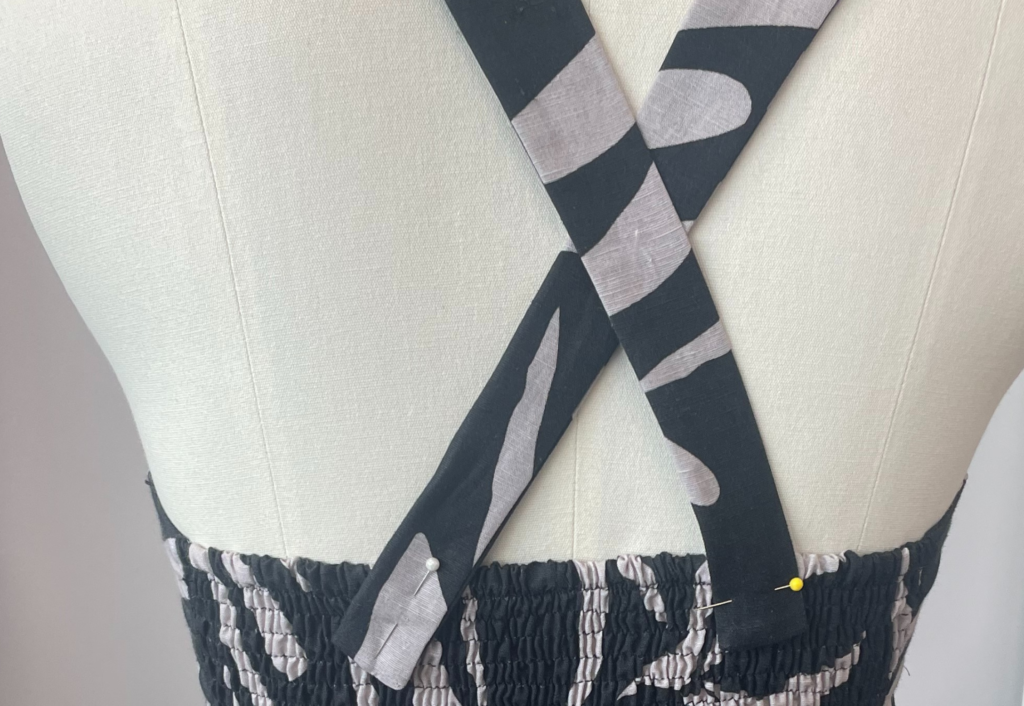
There are 2 button hole positions marked on the back strap. You can sew the buttonholes here or measure the back strap length on the body and mark the buttonhole in the correct position for the wearer if crossing the straps or not.
Sew the buttons to the inside or the outside, (your preference) of the back shirred panel. We suggest fitting the garment before sewing the buttons to fit the wearer. Sew the buttons on with a small piece of backing fabric to reinforce the buttons
Press thoroughly including steaming the shirring, elastic and gathering.