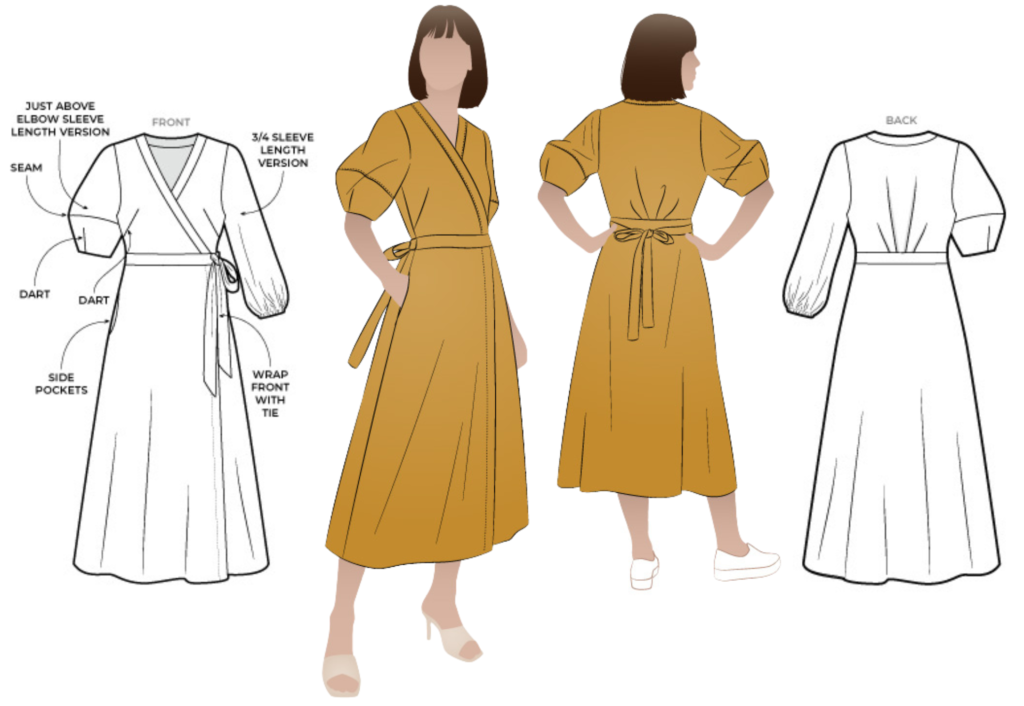
Shop the Millicent Wrap Dress
NECKBAND & BODICE:
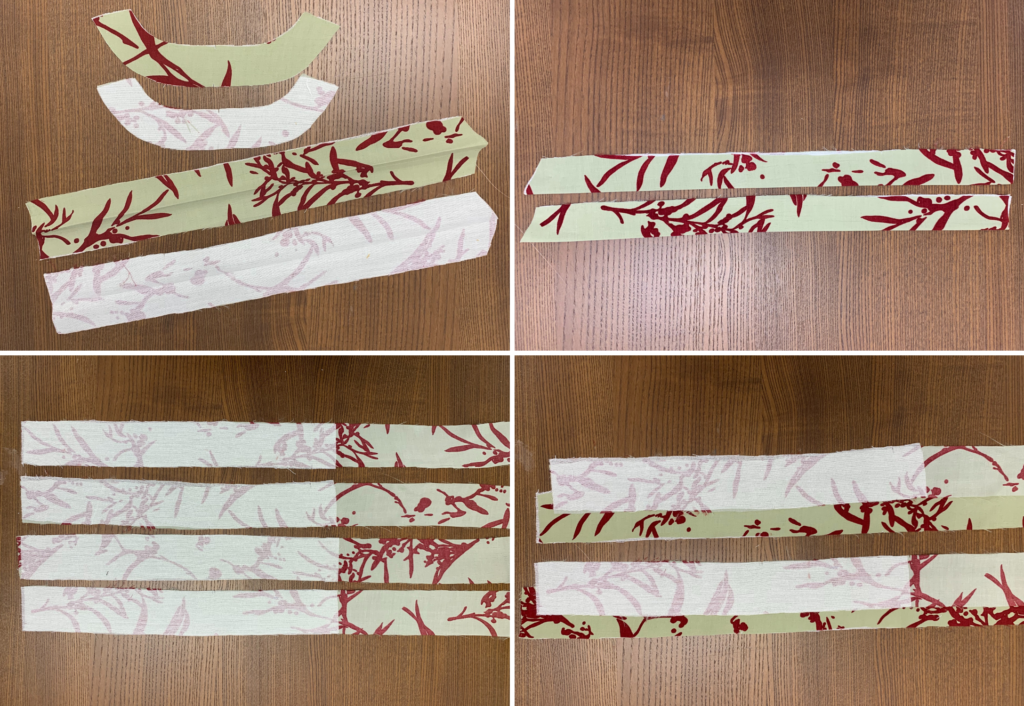
Fuse the back neck band, front neck band (and fold in half lengthwise wrong sides together), back waist insert and front waist insert & ties up until marked fuse line on the pattern.
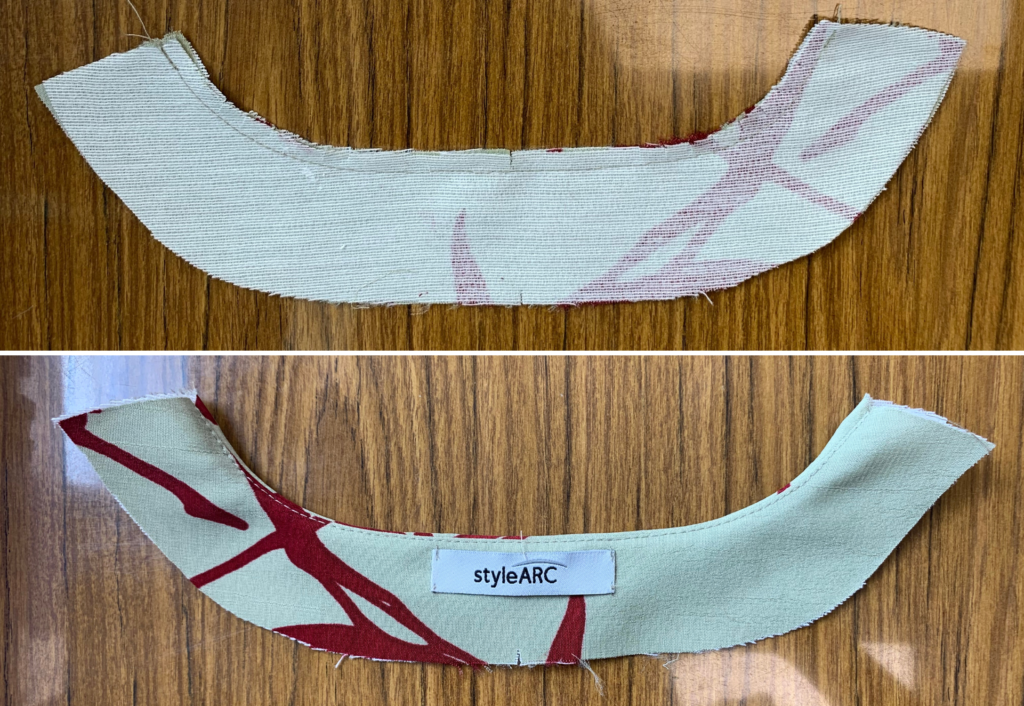
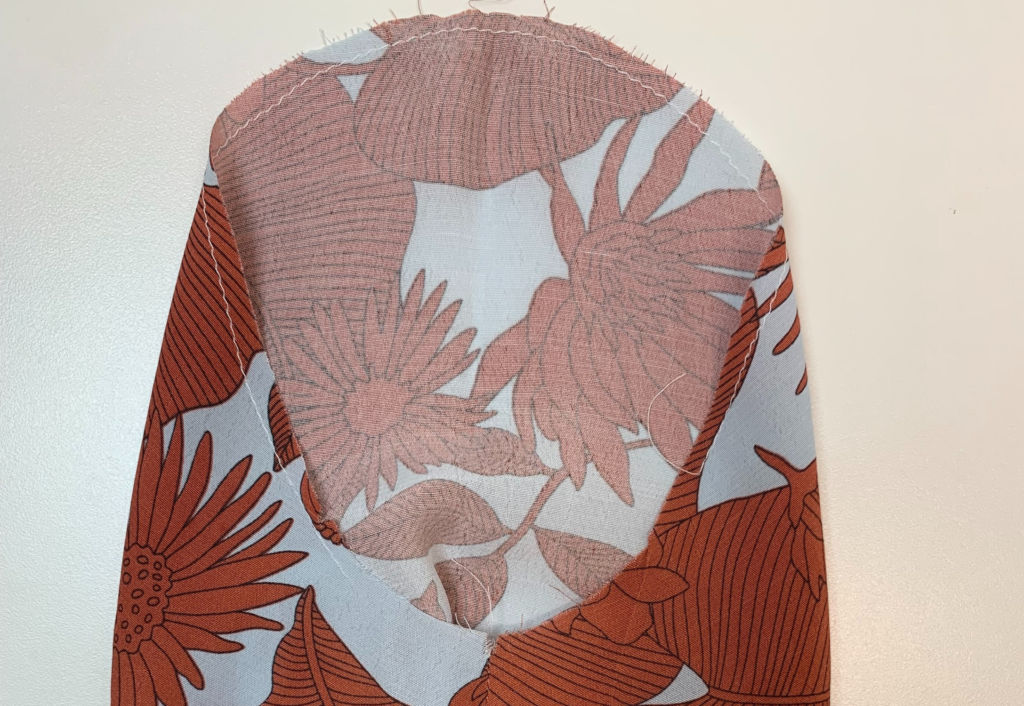
With RST, sew the pair of Back Neckbands (8) together at the top edge using a 6mm (1/4”) seam. Press the seam to one side and sew an understitch to the seam. This is the inner band.
With RST, sew the Front Neckband (7) to the back neckband at the shoulder seams. Press the seams open.
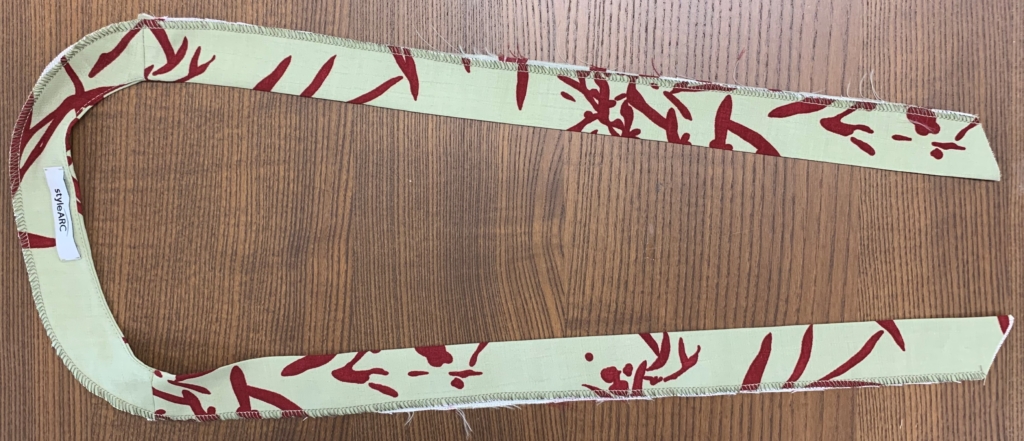
With WST, press the neckband in half lengthways. Neaten the edge of the inner neckband using an overlocker/serger. Put the neckband aside.
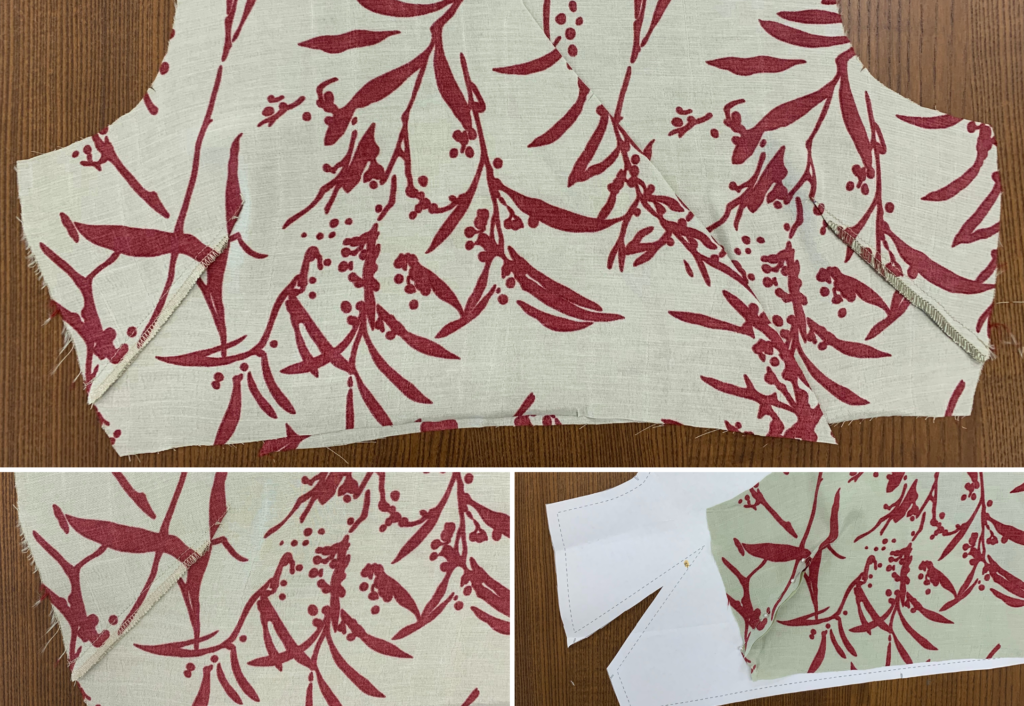
With RST, sew the front bodice bust darts. Neaten using an overlocker/serger and press down.
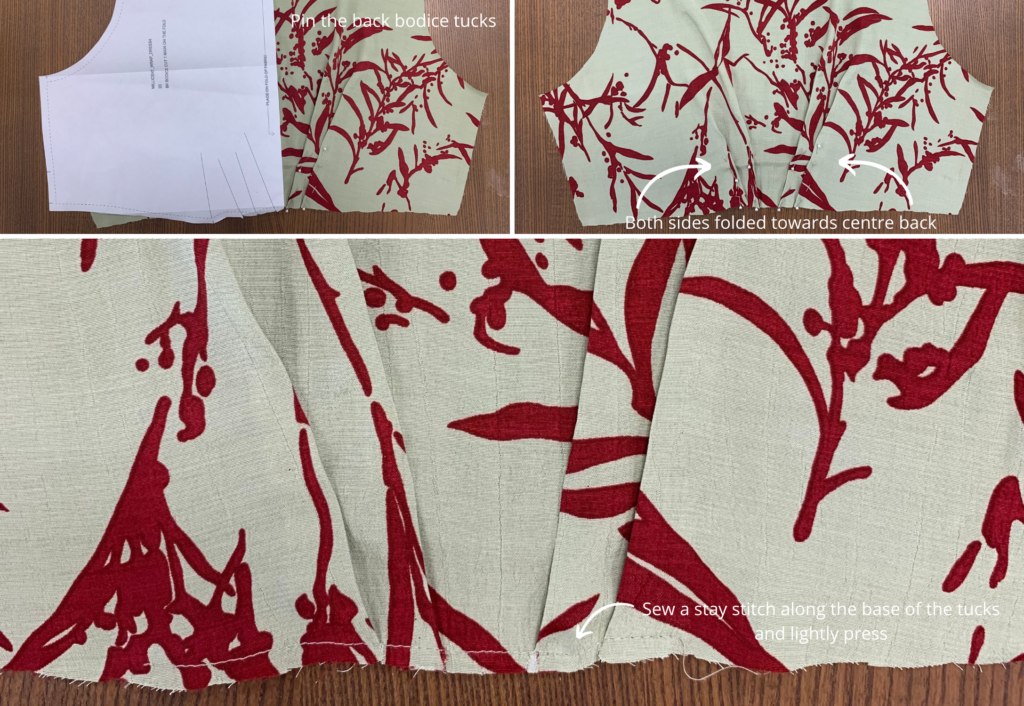
Following the markings on the pattern, pin the back bodice tucks, facing both sides toward the centre back. Once in place, baste the tucks into place and lightly press.
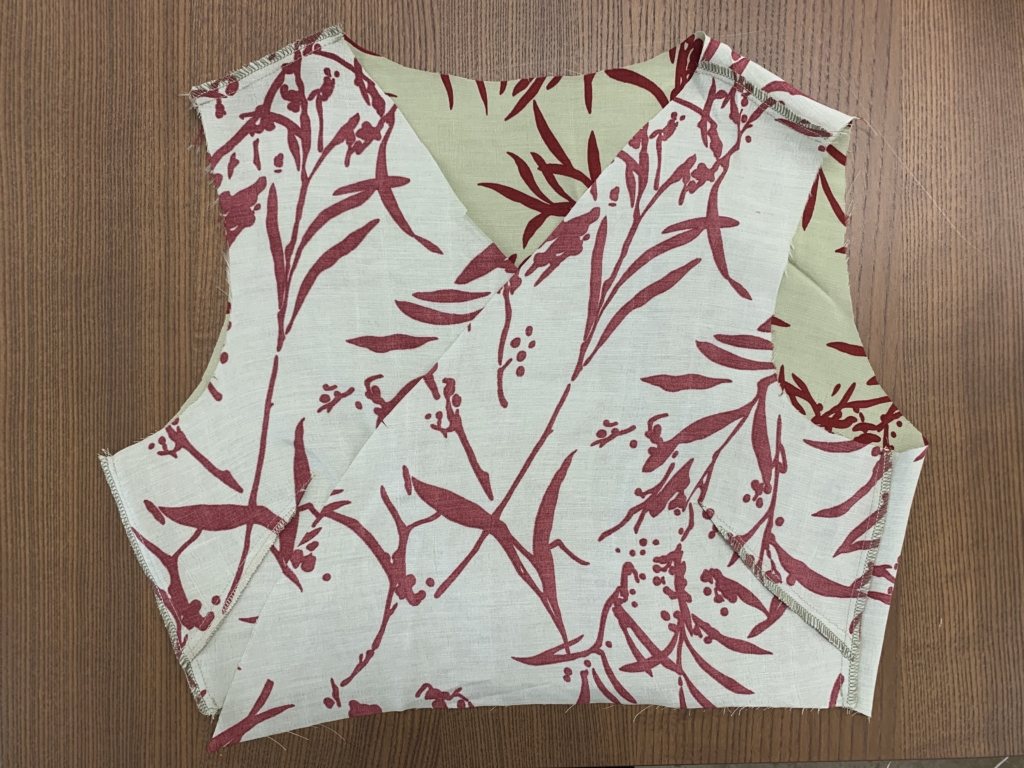
With RST, sew the front to back at the shoulder seams. Neaten using an overlocker/serger and press toward the back. Sew a stay stitch to the neckline to prevent stretching.
With RST, sew the front to back at the side seams. Neaten using an overlocker/serger and press toward the back.
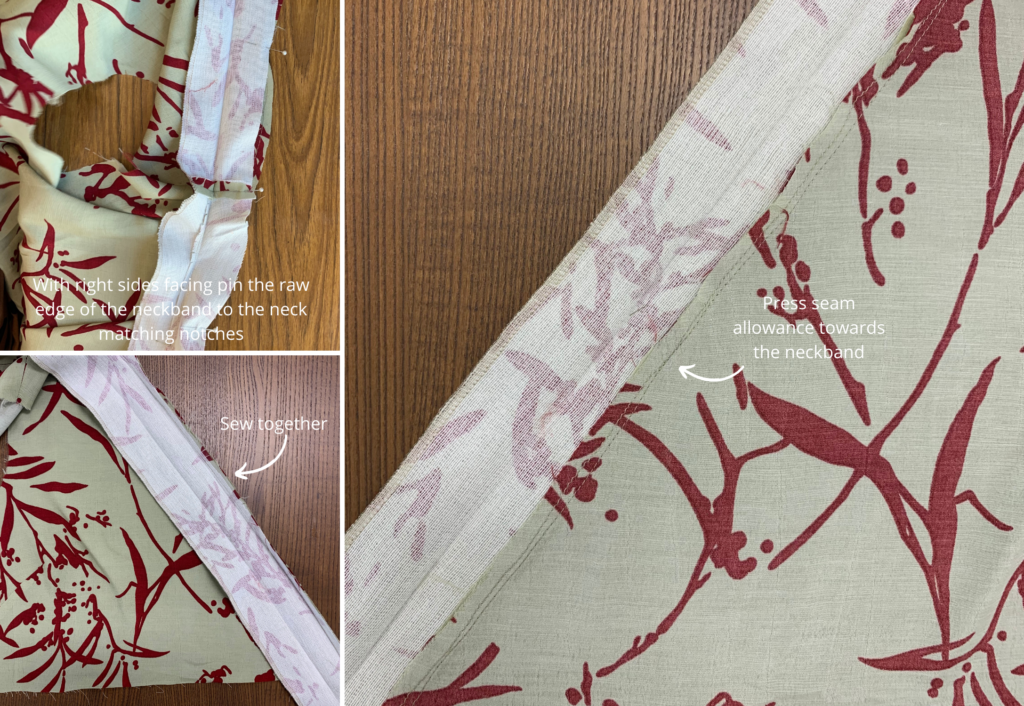
With RST and notches aligned, pin the outer (raw) edge of the neckband to the neck. Sew then press the seam toward the neckband.
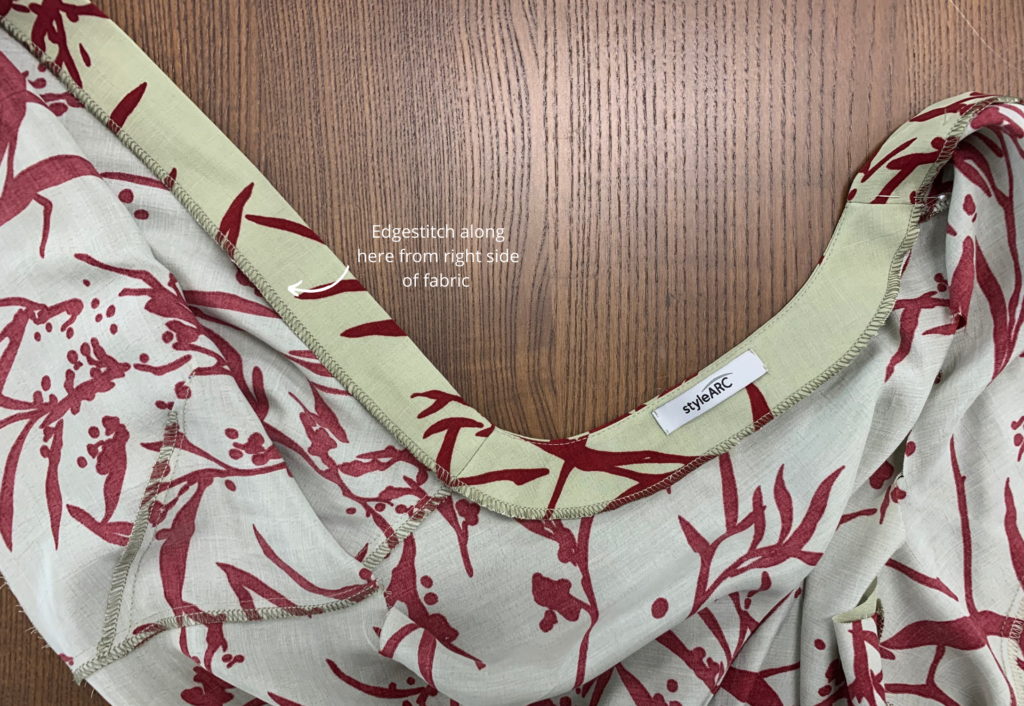
Pin the neatened edge into place along the neckline and sew using an edge stitch on the side of the neckband.
SLEEVES:
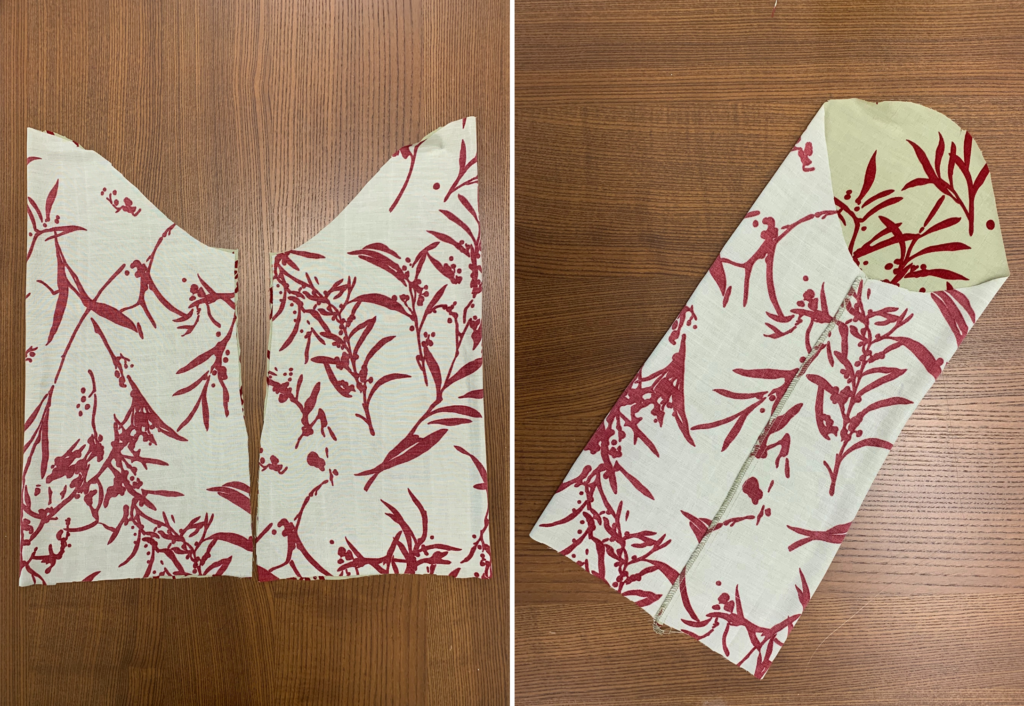
SHORT SLEEVES: (Note the lower section of sleeve is double fabric)
With RST, sew the darts in Lower Sleeve (10) and press toward the centre. You will have two pairs.
With RST, sew each of the under-arm seams of the lower sleeves together and press open.

With RST, sew the pairs of lower sleeves together at the bottom edge using a 6mm (1/4″) seam. Press the seam to one side.
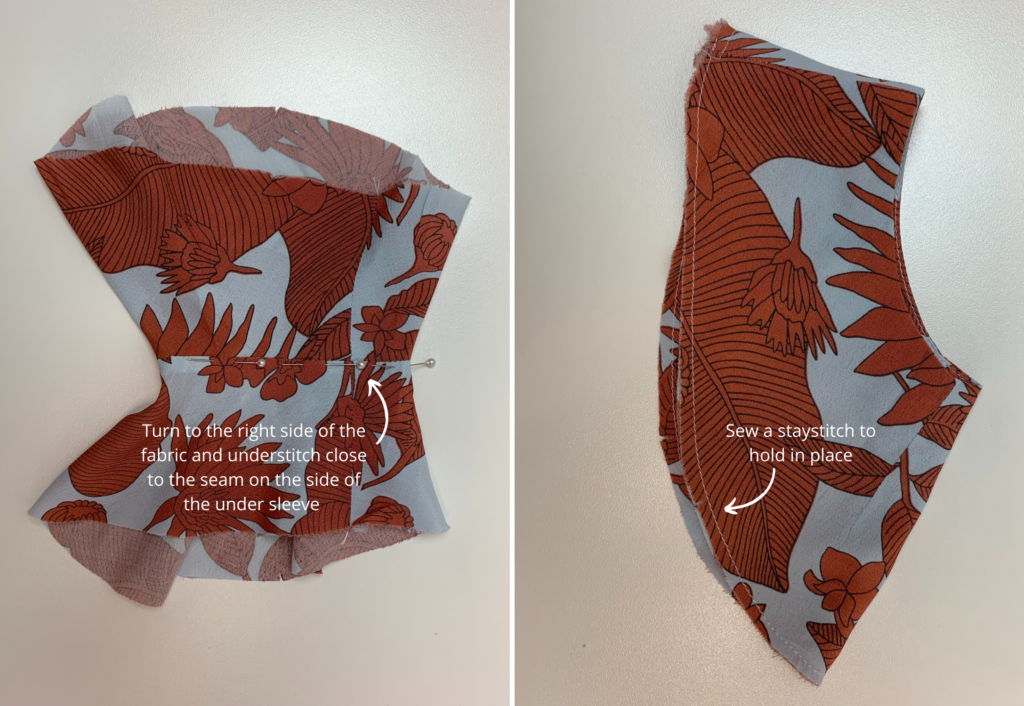
Turn to the right side and sew an understitch to the seam, this will be the inner sleeve.
With WST, turn the lower seam so the raw edges are together and press the bottom edge. Baste the raw edges together to hold in place.
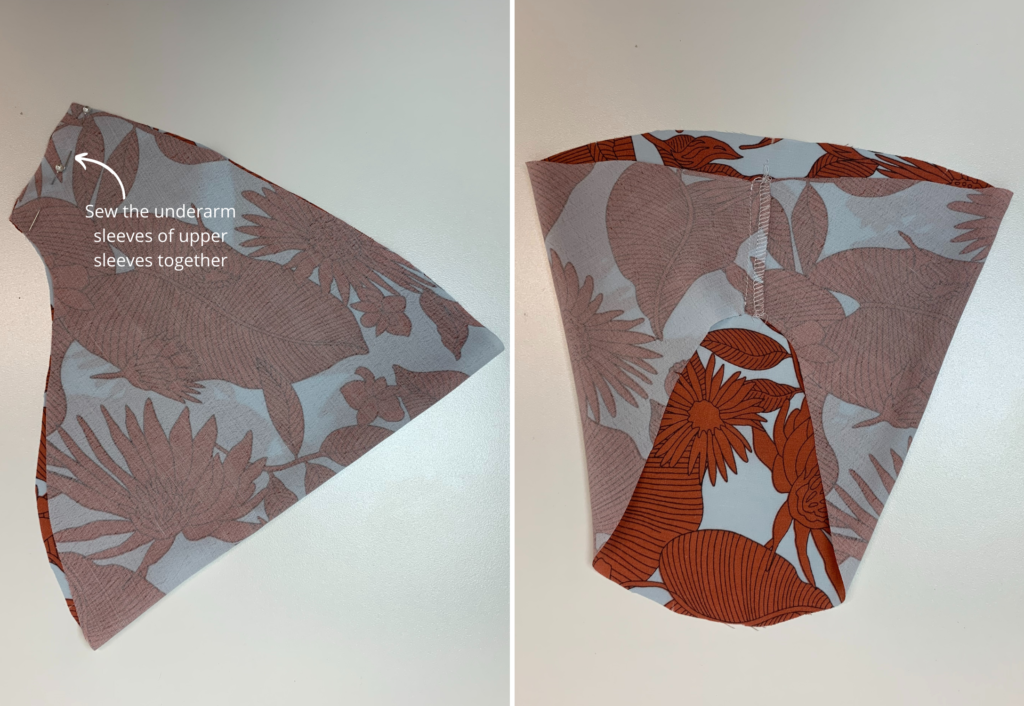
With RST sew the underarm seams of the Top Sleeve (9) together. Neaten with overlocker/serger and press toward the back.
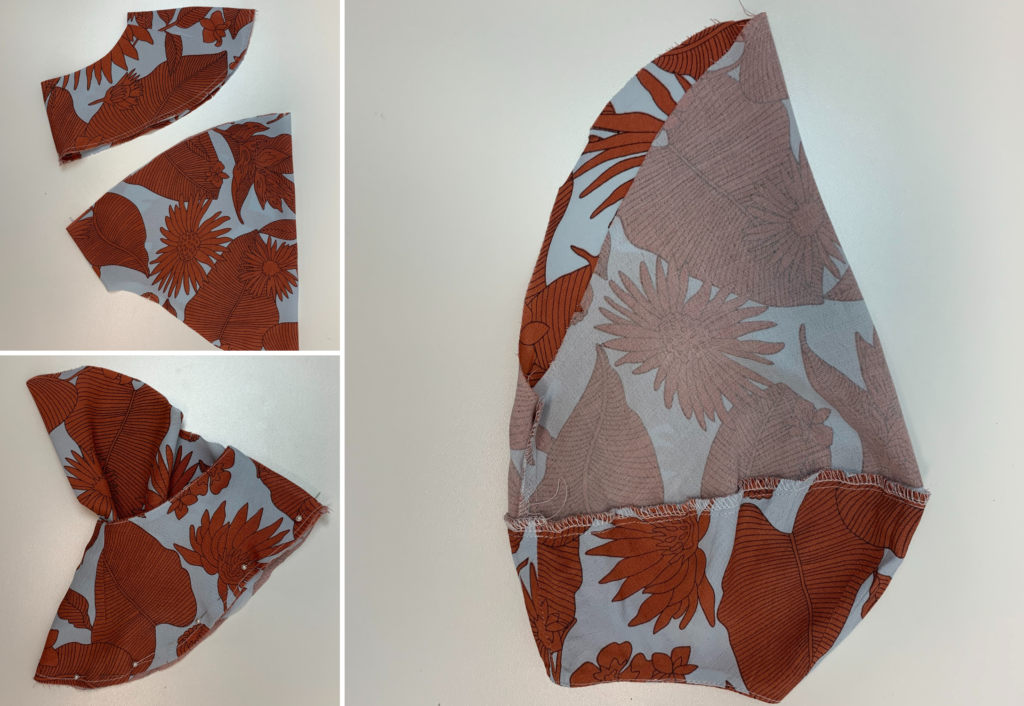
With RST and notches aligned, sew the upper sleeves to the lower sleeves. Neaten with an overlocker/serger and press the seam upward.
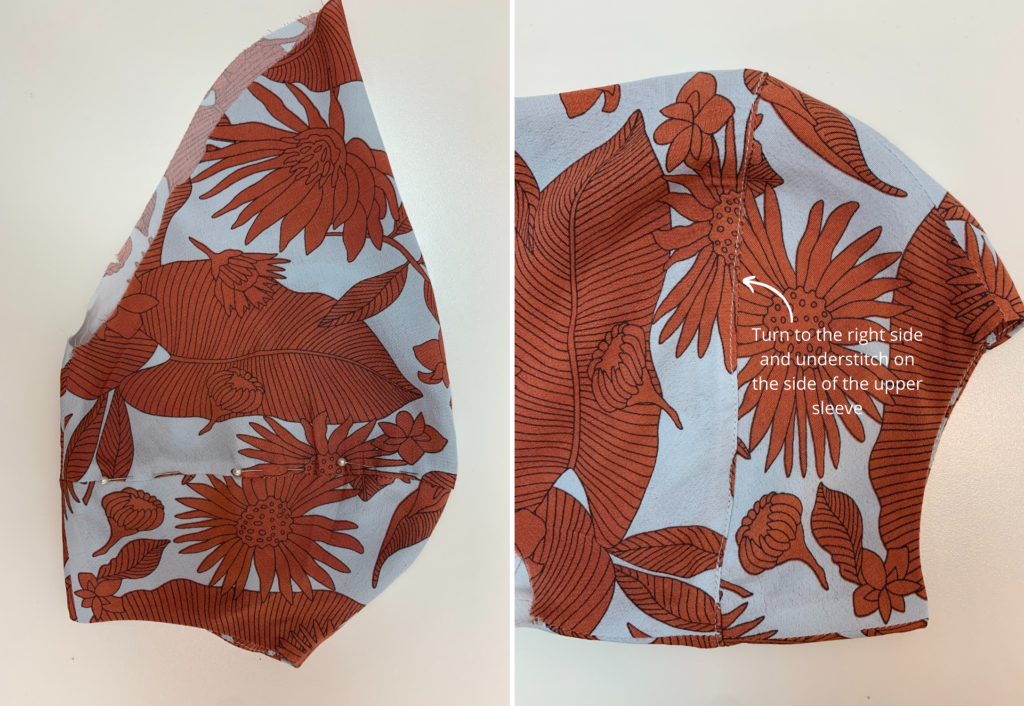
Turn to the right side of the fabric and sew an under stitch close to the seam on the side of the upper sleeve.
 Sew a long ease stitch to the head of the sleeve and slightly draw in (not gathered)- this makes it easier to sew the sleeve head into the armhole.
With RST and notches aligned, sew the sleeves into the armholes. Press toward the sleeve.
3/4 LENGTH SLEEVES:
With RST, sew the under-arm seams of Sleeve (11). Neaten using an overlocker/serger and press toward the back.
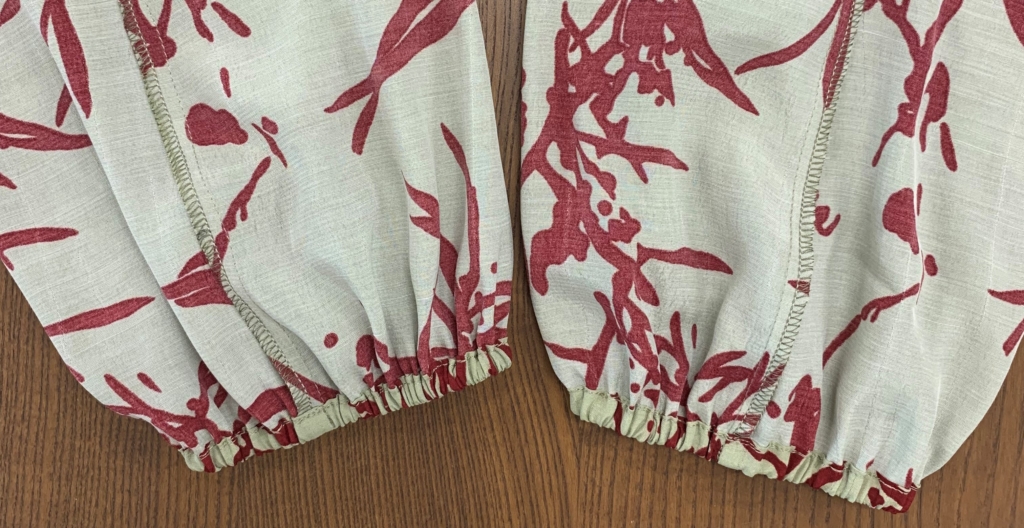
Turn the sleeve opening 6mm (1/4”) to the inside and press. Baste into place – this will make it easier to sew the elastic in.
Cut the elastic to your personal length (or refer to the measurement chart). Overlap the cut ends by 2cm (3/4”) and securely stitch together, creating a loop.
Press the seam allowance up at the notch and pin into place, encasing the elastic. Sew on top of the stay stitch, ensure not to catch the elastic as you sew.
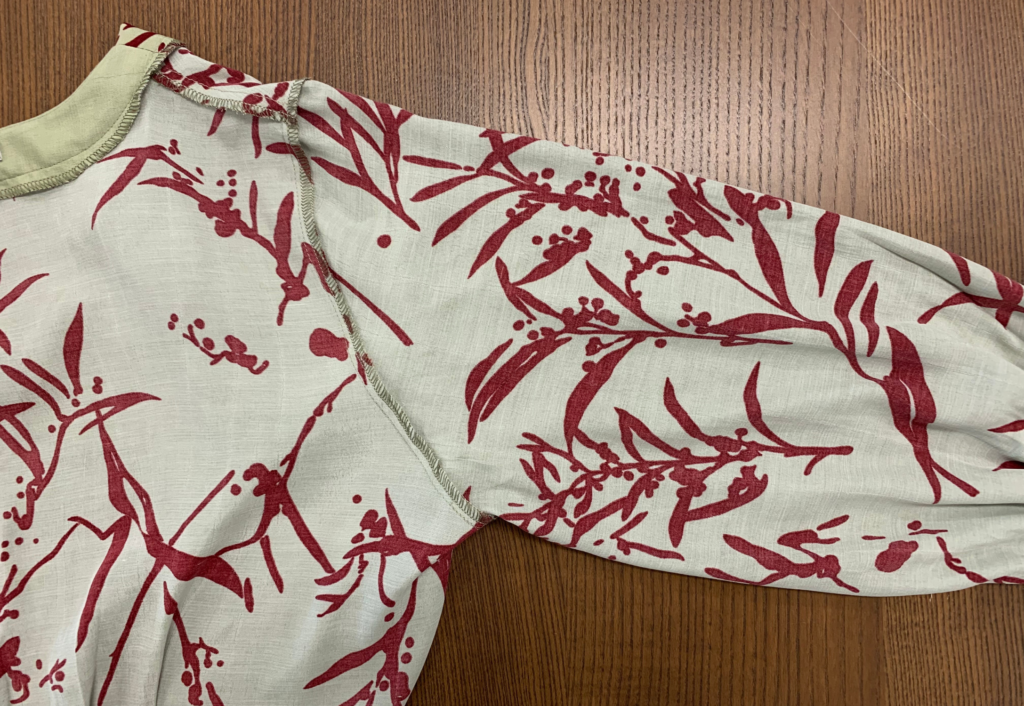
(Not pictured) Sew a long ease stitch to the head of the sleeve and slightly draw in (not gathered) – this makes it easier to sew the sleeve head into the armhole.
With RST and notches aligned, sew the sleeves into the armholes. Neaten with overlocker/serger and press toward the sleeve.
POCKETS & SKIRT:
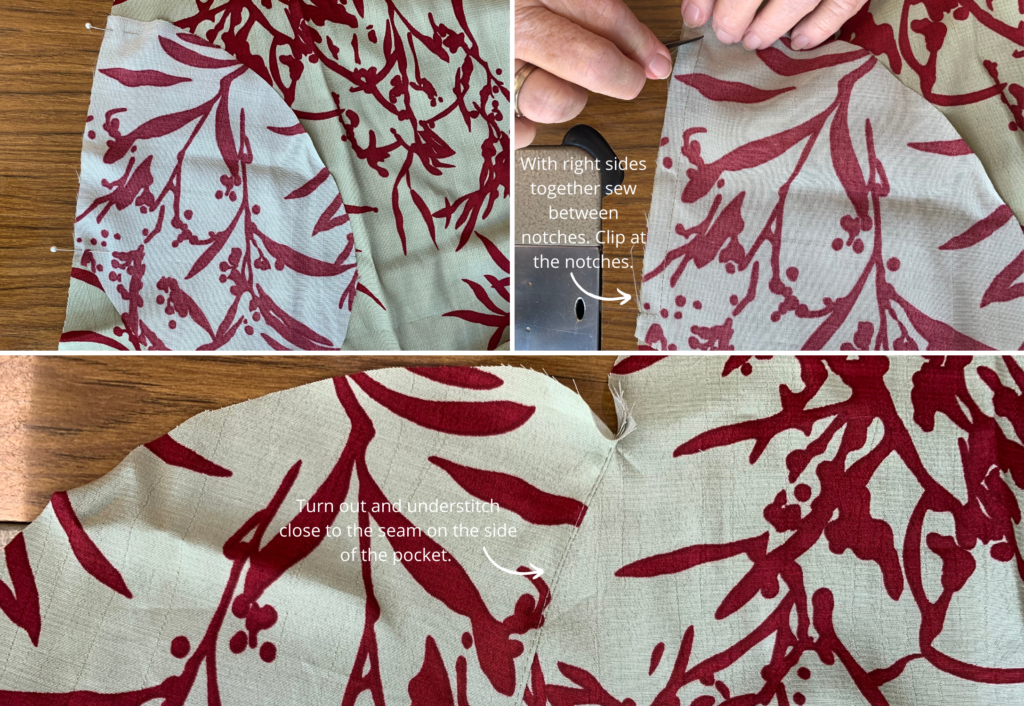
With RST and notches aligned, sew one set of Pockets (12) to the Front Skirt (4) at the side seam (seamline marked ‘A’ on the pattern). Stitch only between the notches. Clip the seam at the notches and sew an understitch on the side of the pocket bag. This is pocket bag 1.
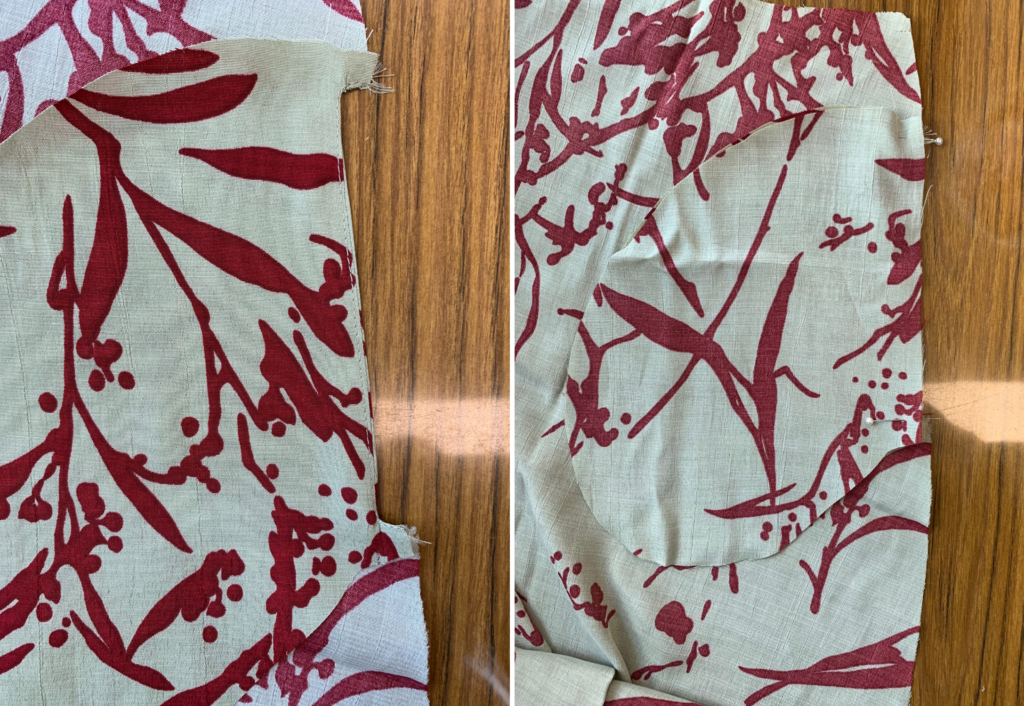
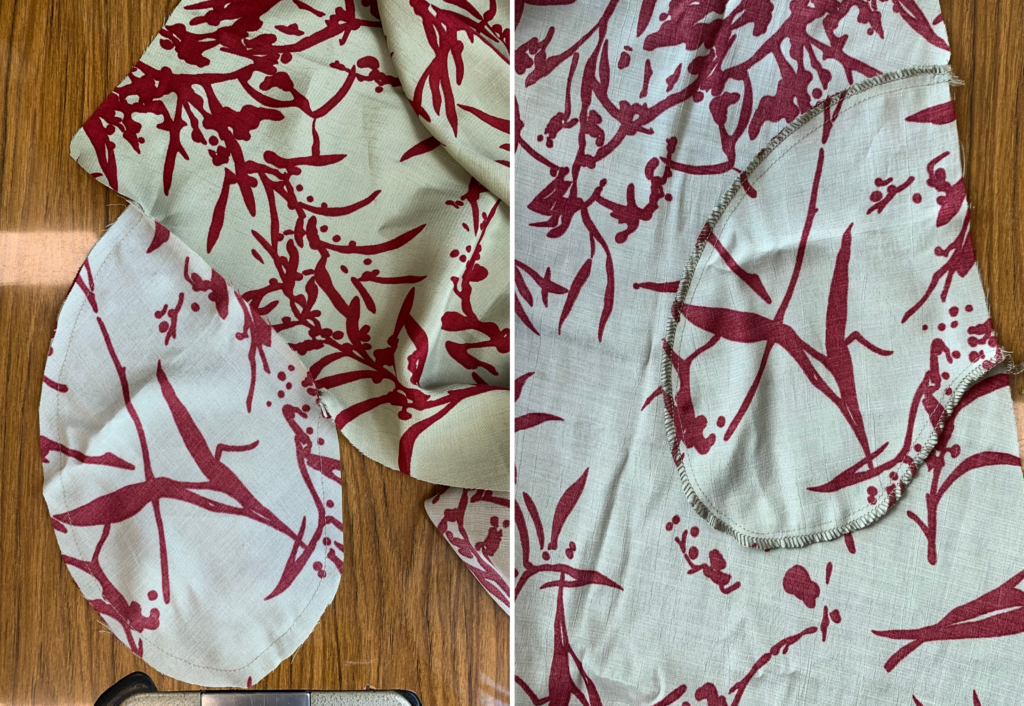
With RST, lay pocket bag 2 on top of pocket bag 1, align and sew both pocket bags together (seamline marked ‘B’ on the pattern). Note that the straight edge of pocket bag 2 is left free to sew to the back side seam. Neaten around the pockets using an overlocker/serger. Secure stitch each end of the pocket opening.
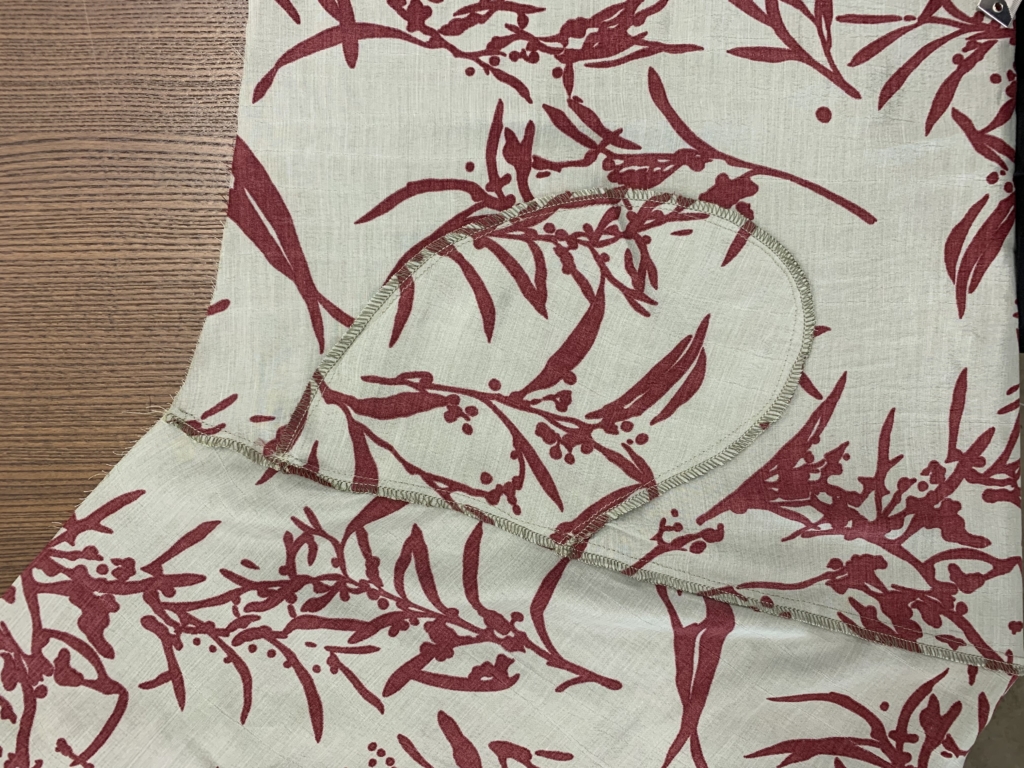
With RST, sew the front to the Back (3) at the side seam, start sewing the seams together at the waist, and continue down the side seam stitching through the straight edge of the back pocket as you sew. Be careful not to catch the front pocket opening, continue sewing the side seam finishing at the hemline. Neaten with overlocker/serger and press toward the back.
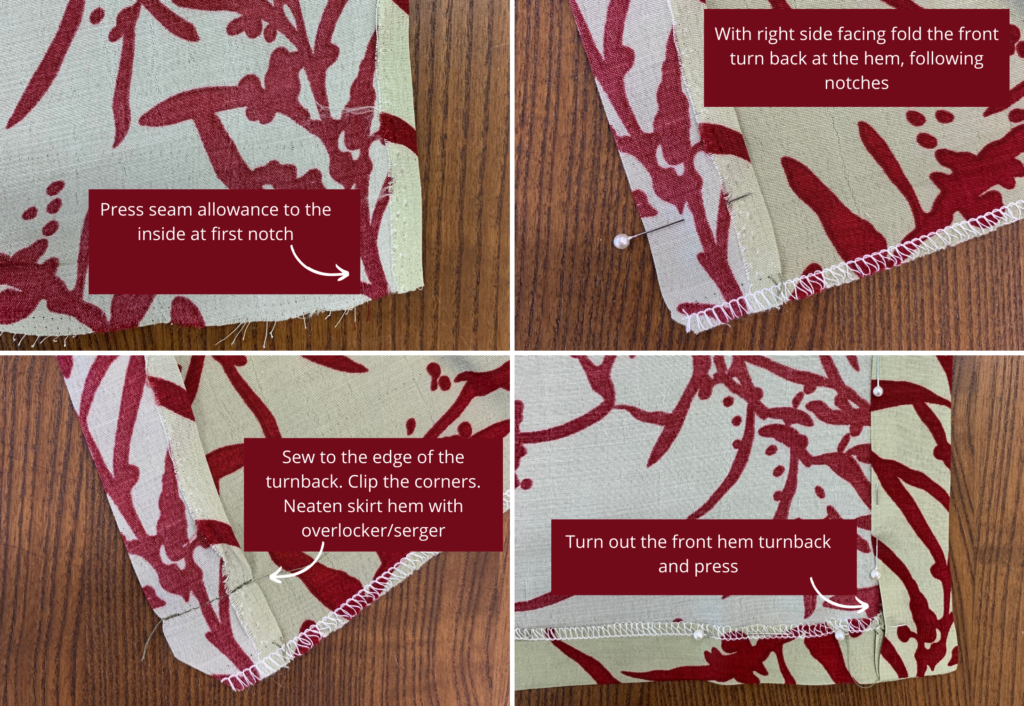
Press the seam allowance of the straight edge of the front skirt to the inside, at the first notch.
With RST, fold the front turn back at the hem, following notches. Once in place sew to the edge of the turnback, clip the corners. Neaten skirt hem with overlocker/serger. Turn out the front hem turnback and press.

Fold and press the front turnback at the second notch. Once in place stitch down the inner fold line with an edge stitch and continue along the hem of the skirt.
Fold and press the front turnback at the second notch. Once in place stitch down the inner fold line with an edge stitch and continue along the hem of the skirt. You may choose to finish your hem using a blind stitch by hand or machine.
WAISTBAND:
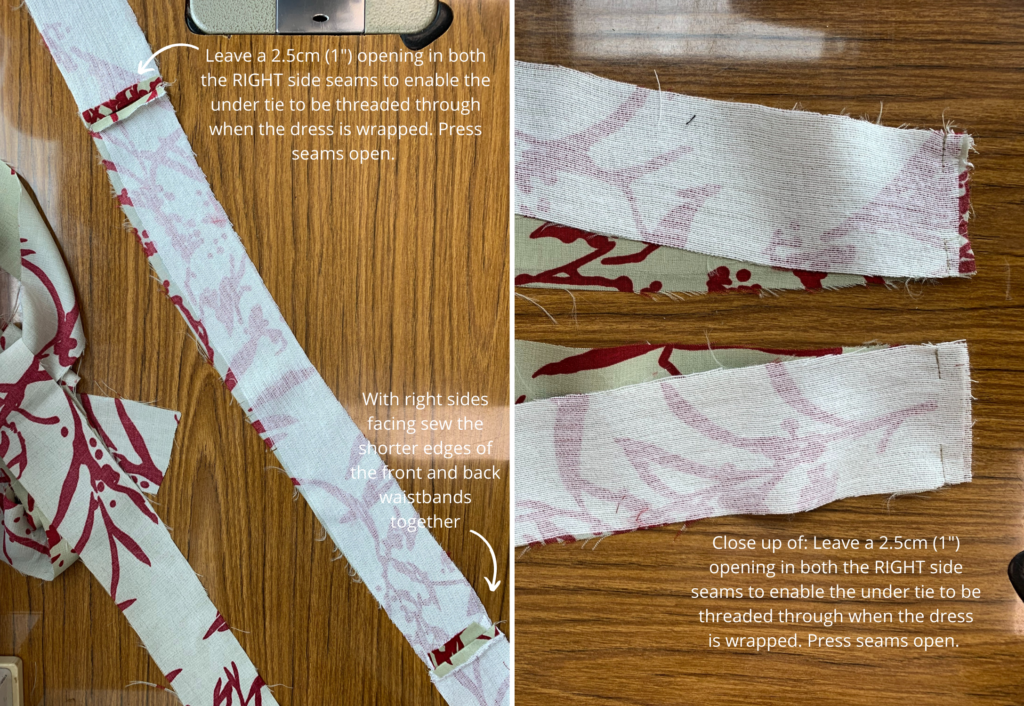
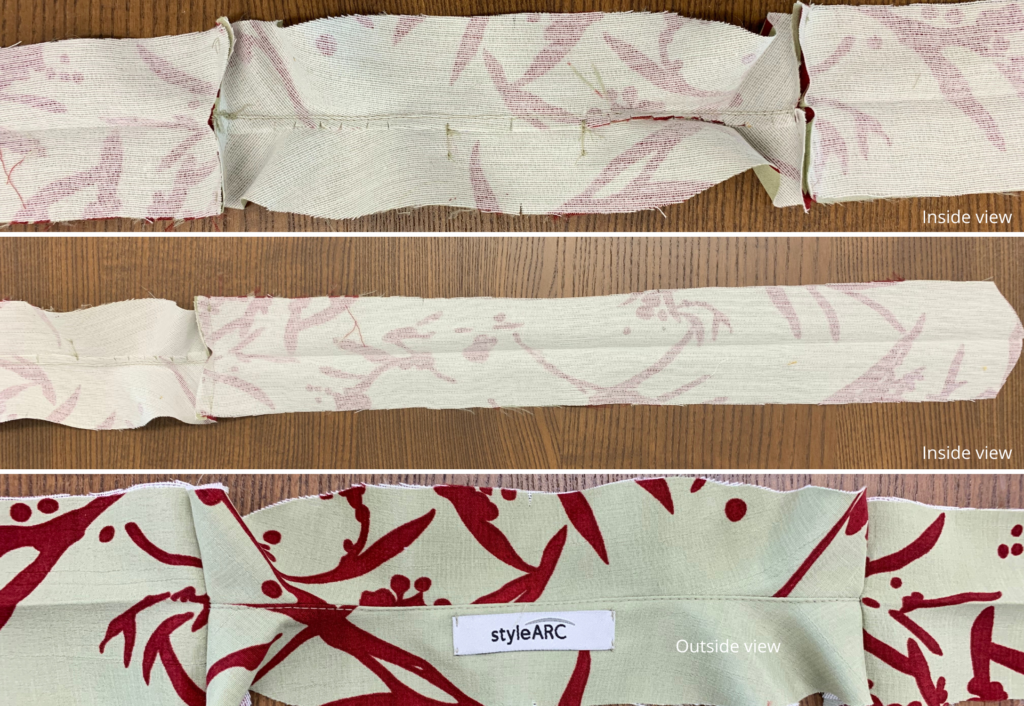
With RST, pin the short ends of the Front Waist Insert (6) and Back Waist Insert (5) together, with the back in the middle. Before sewing, decide which is the inner waistband and which is the outer.
On the outer waistband, sew the seams together, leaving a 2.5cm (1”) opening in the wearers right side to enable the under tie to be threaded through when the dress is wrapped. Press seams open.
On the inner waistband, sew the seams together, leaving a 2.5cm (1”) opening in the wearers left side to enable the under tie to be threaded through. Press seams open.
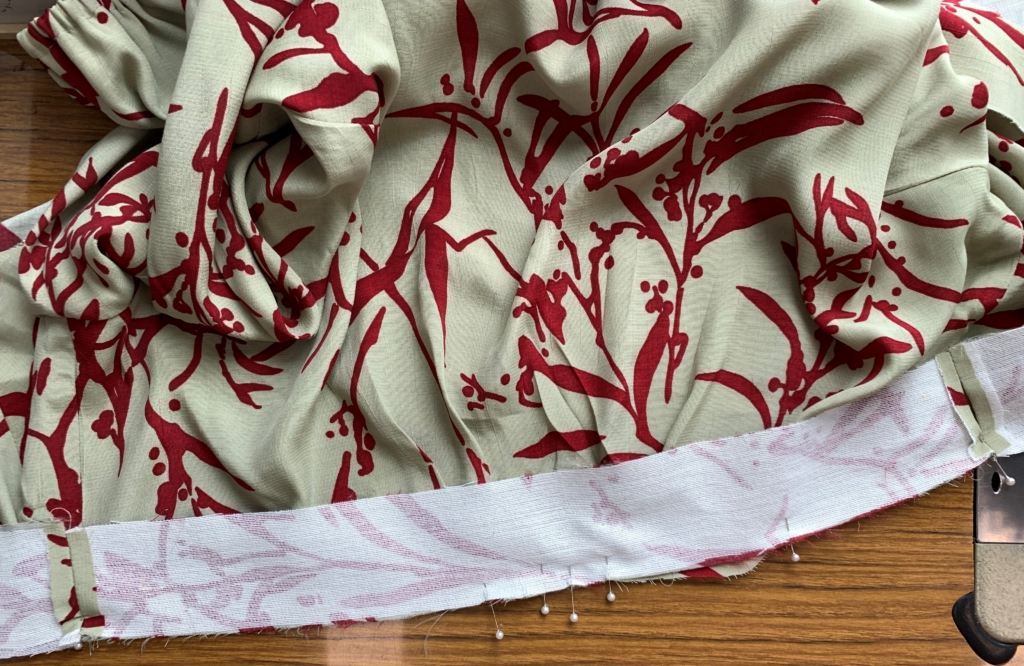
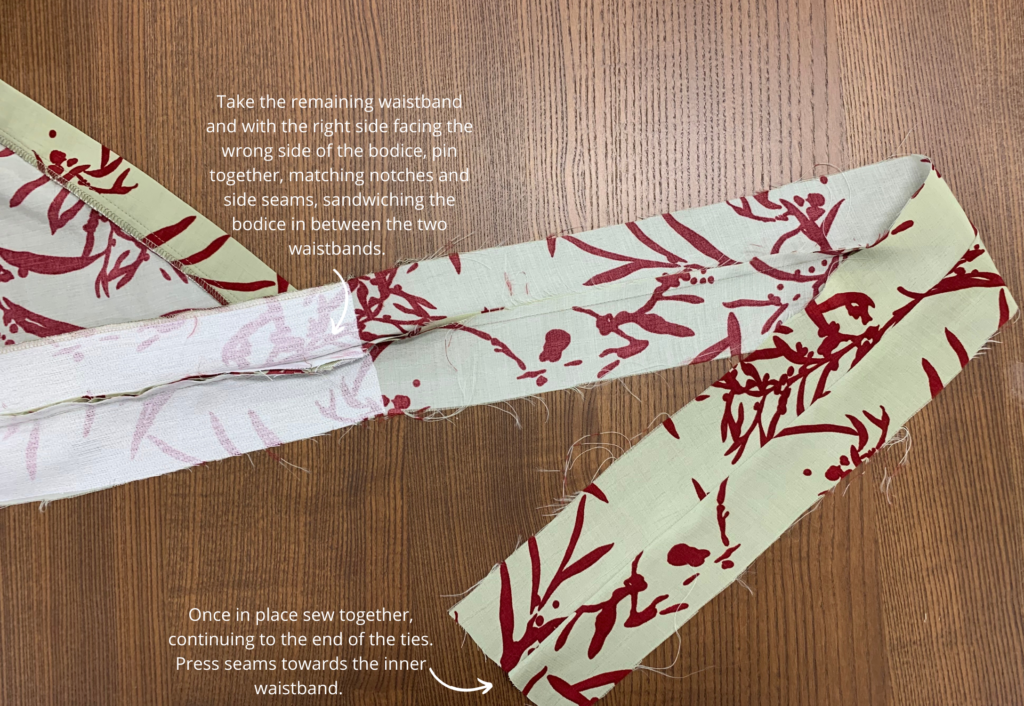
With RST and notches and side seams aligned, pin the outer waistband to the bodice, matching notches, and sew together. Take the inner waistband and with the right side to the wrong side of the bodice, pin into place, then sew, sandwiching the bottom edge of the bodice.
Sew the long waist ties together along the top edge. Press the seam toward the inner waistband.
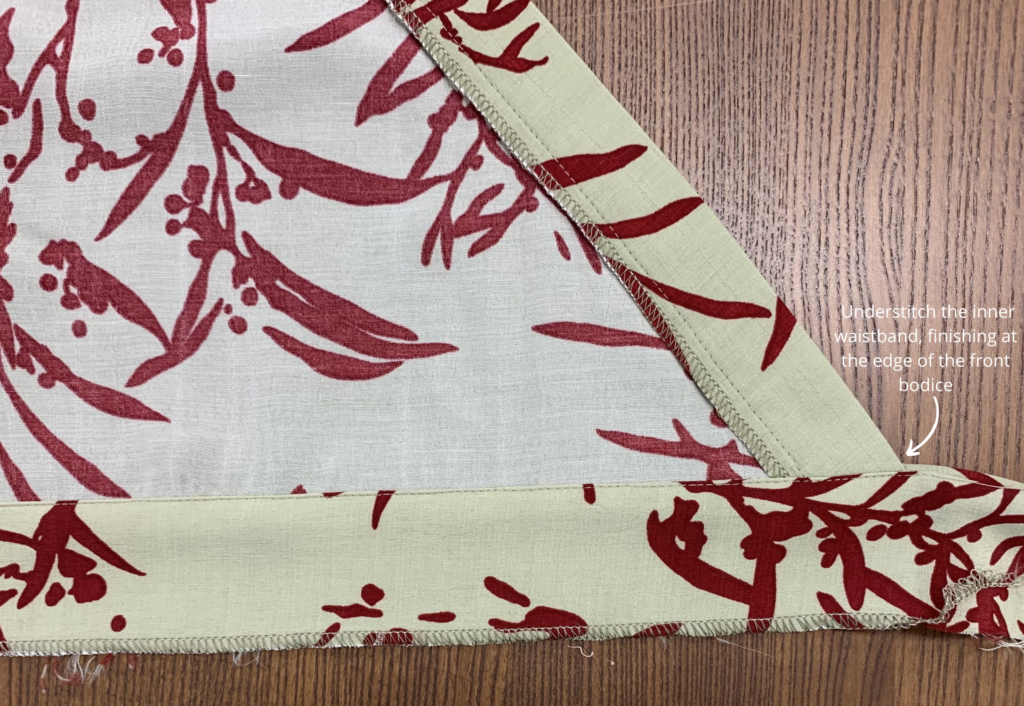
Turn to the correct side of the fabric and understitch the inner waistband, finishing at the edge of the front bodice.
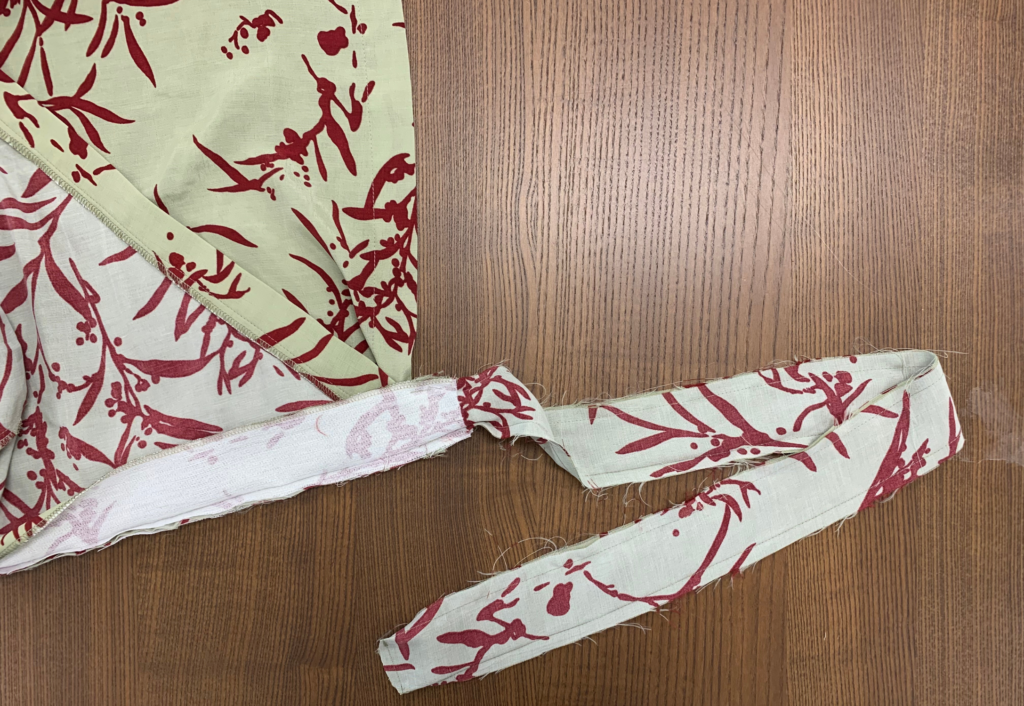
With RST and notches and side seams aligned, pin the outer waistband to the waist of the skirt. Once in place sew together. (not pictured). Bag out the ties by folding them lengthways with right sides together. Stitch the short ends together and with the needle down, turn corner and sew to the inner edge of the front skirt turnback. Clip the corners and turn out to the right side (not pictured).
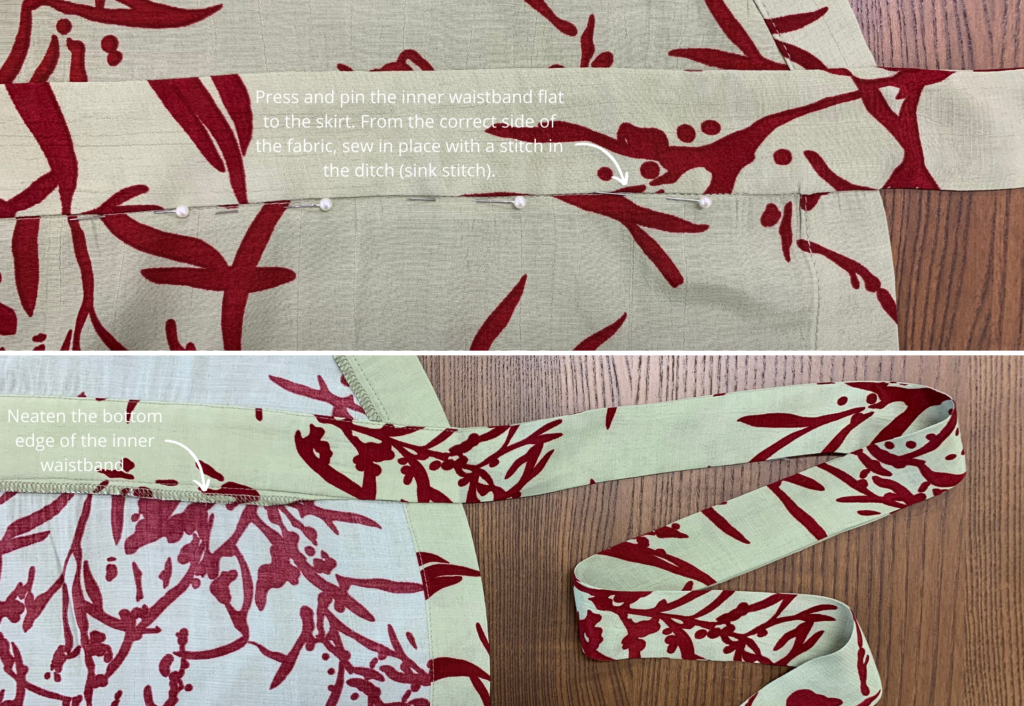
Neaten the bottom edge of the inner waistband. Press and pin the inner waistband flat to the skirt. From the correct side of the fabric, sew in place with a stitch in the ditch (sink stitch).
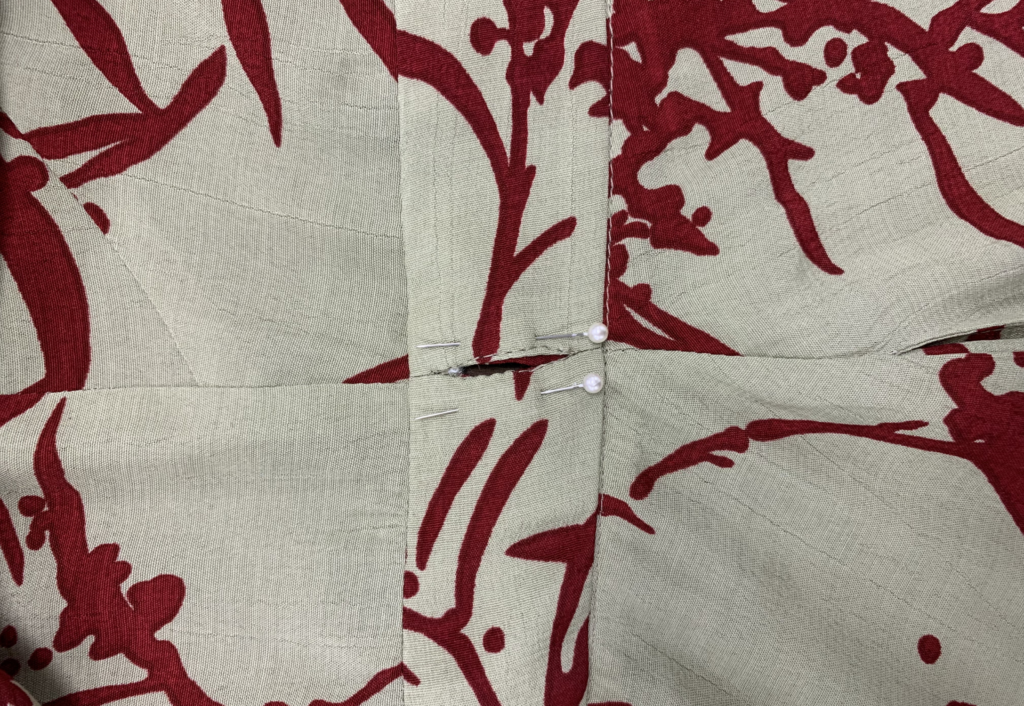
Sew an edge stitch around the right side seam waistband opening.
COMPLETION:
If required sew a snap to the front bodice band as marked on the pattern or to your personal bust position.
Lightly press your new dress.