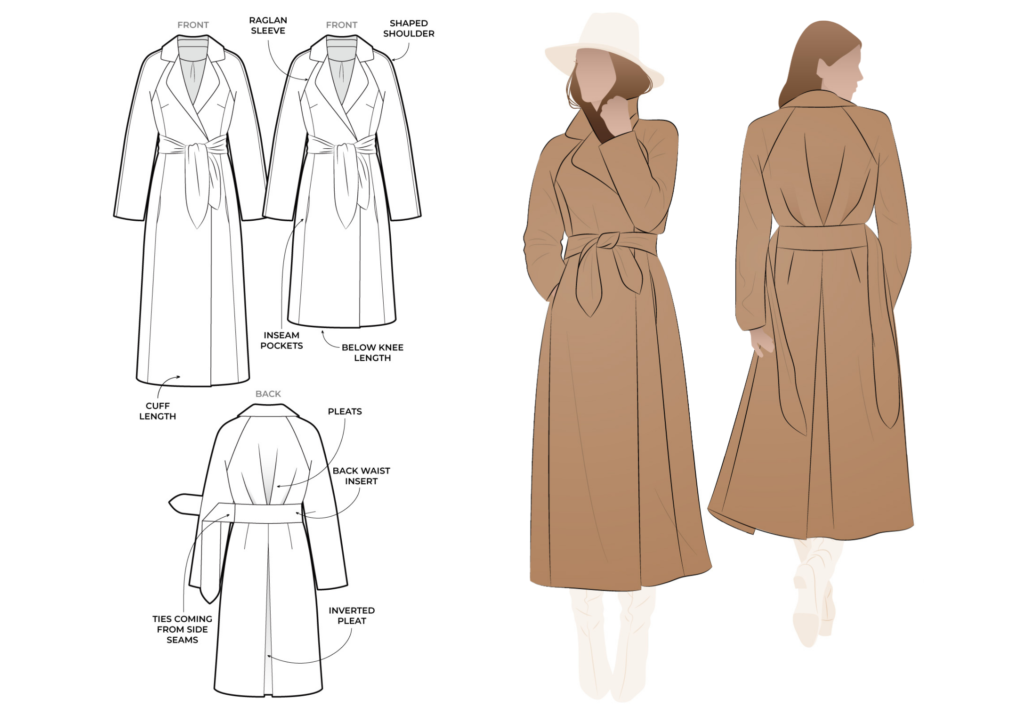
COLLAR:
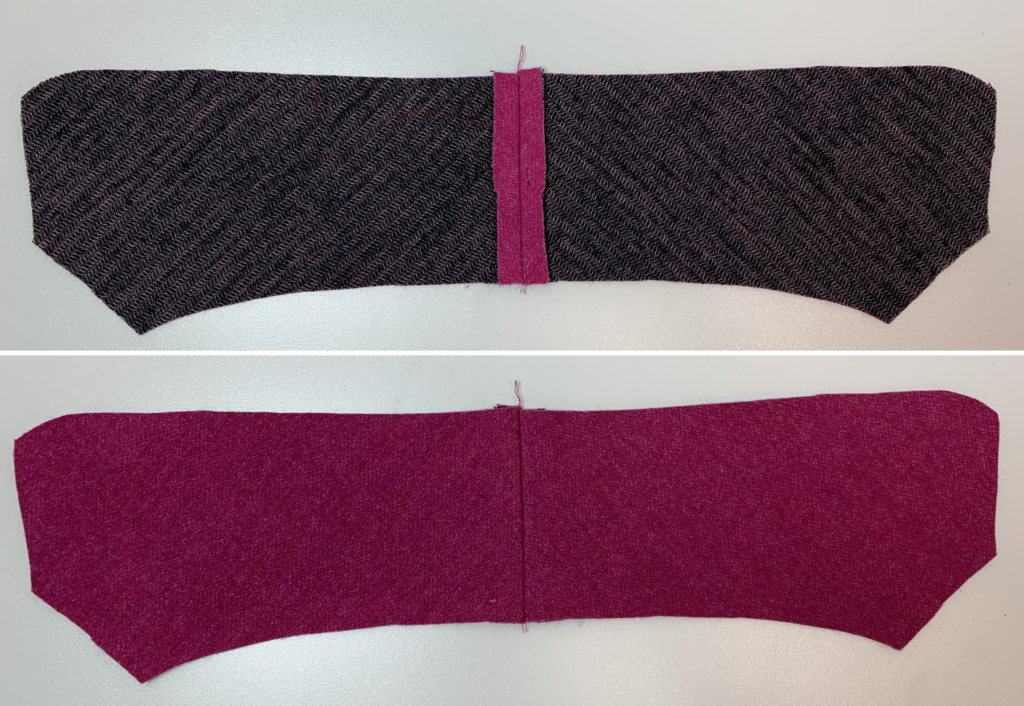
With right sides facing sew the under-collar centre back seams together and press open.
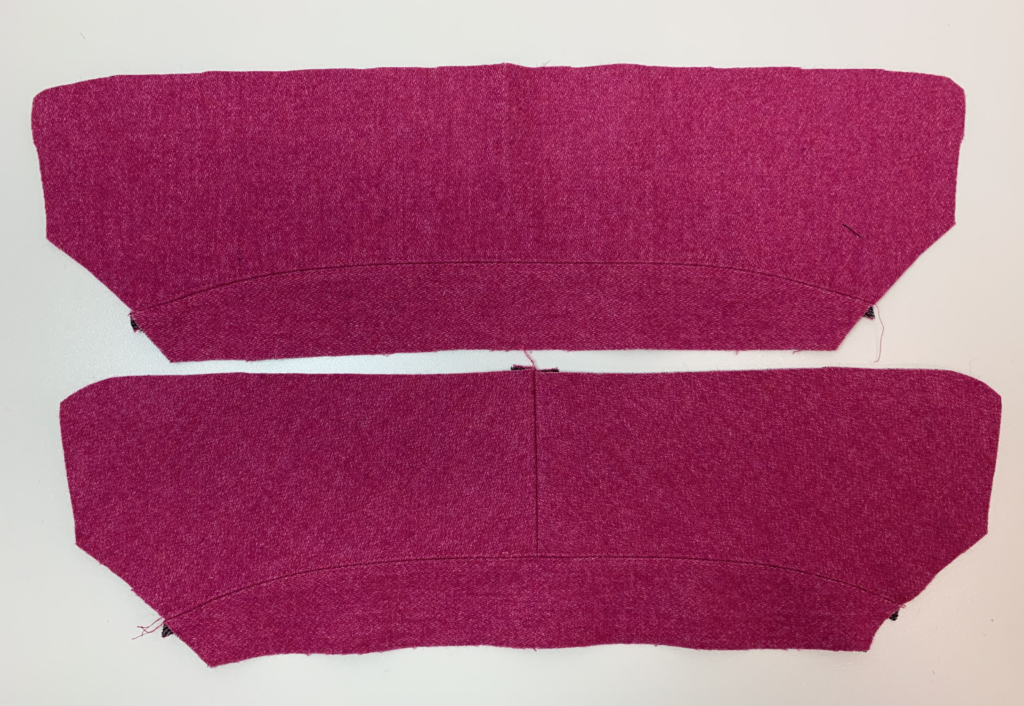
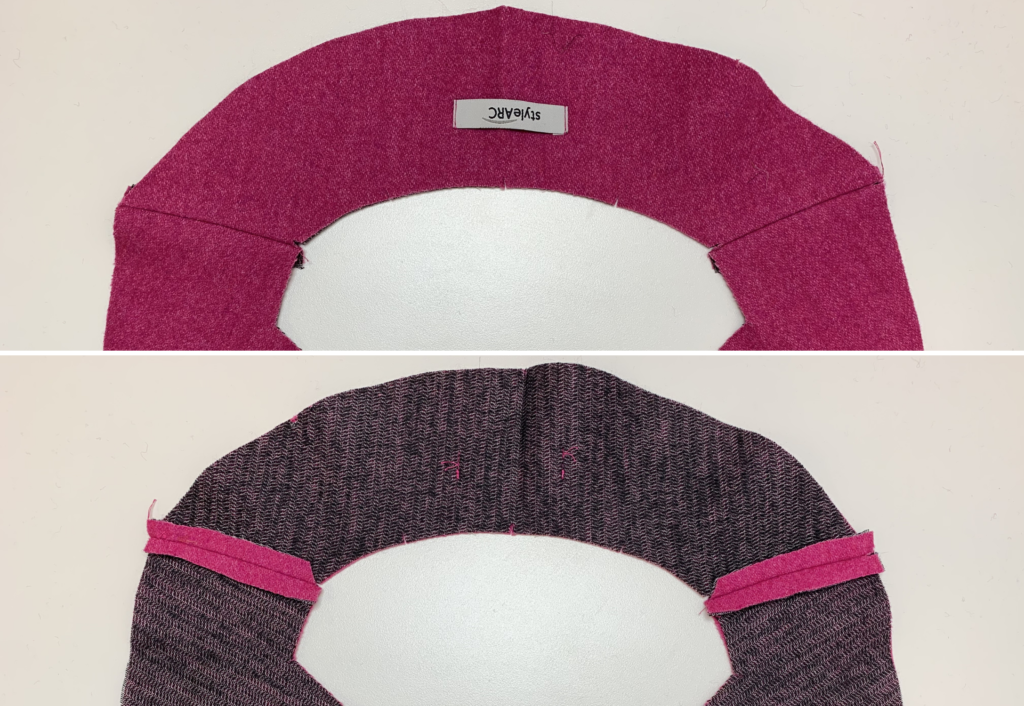
With right sides facing sew the longer edge of one collar stand to the bottom of the undercollar and repeat for the remaining collar stand and collar piece, press the seams open and sew and edge stitch either side of the seam.
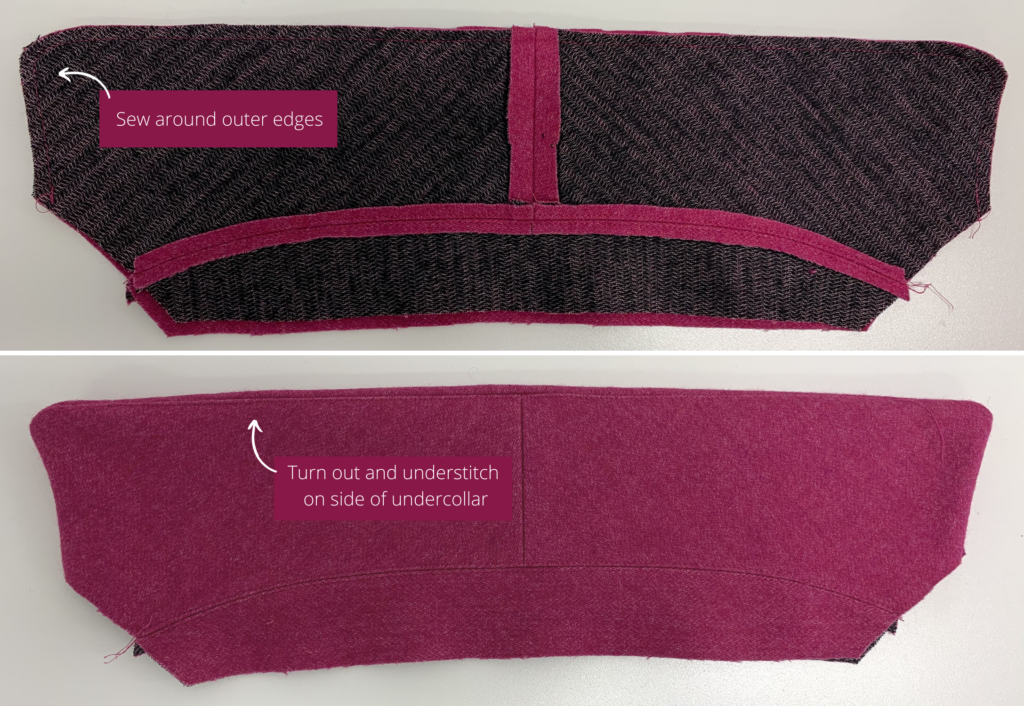
With right sides facing sew the outer edges of the collar and under collar together, turn out and sew an under-stitch / edge-stitch close to the seam on the side of the under collar, this is done in two sections as you can’t sew the under stitch to the rounded corners. Trim the corners before turning out.
Press and put aside until arriving at N0 22 on your instruction sheet.
TIES:
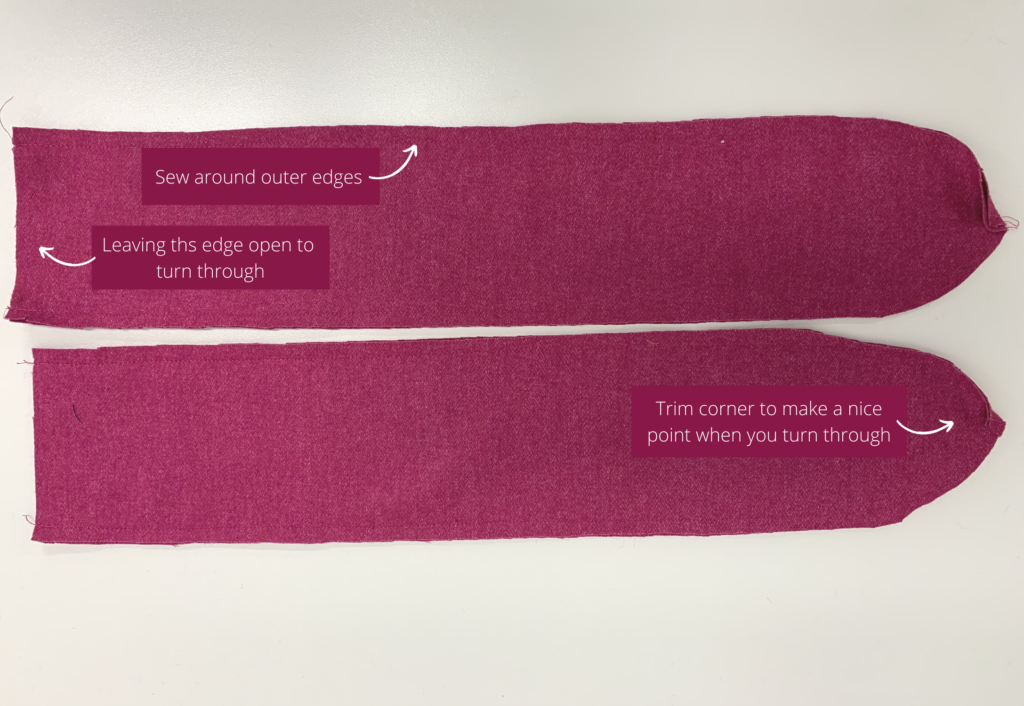
With right sides facing sew the outer edges of the ties together leaving the short ends open to turn out. Turn out, press, put aside until arriving at N0 12 on your instructions sheet.
BACK & BODY:
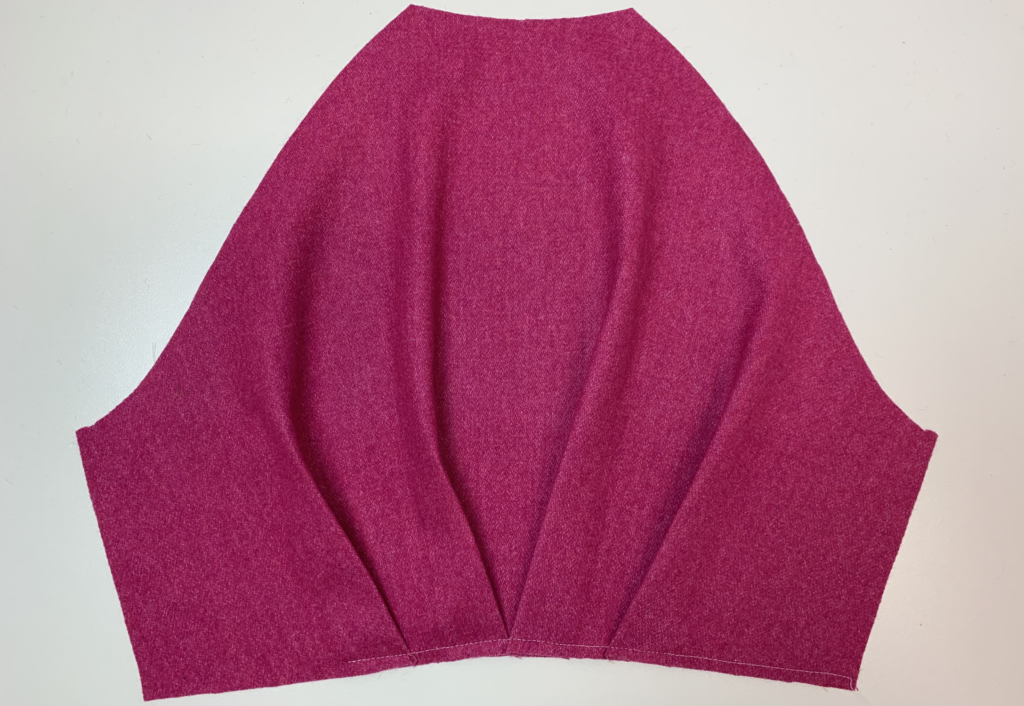
Pin the pleats on the back body following the markings on the pattern, once in place stitch across the base to hold in place.
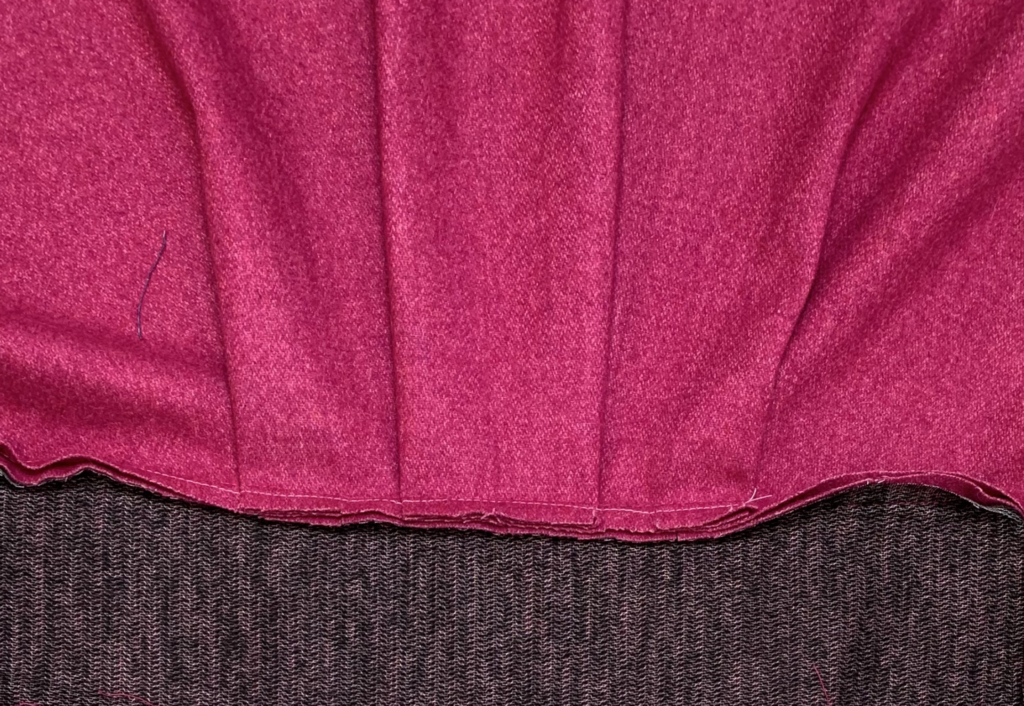
Sew one long edge of the back waist insert to the pleated waist of the top back body.
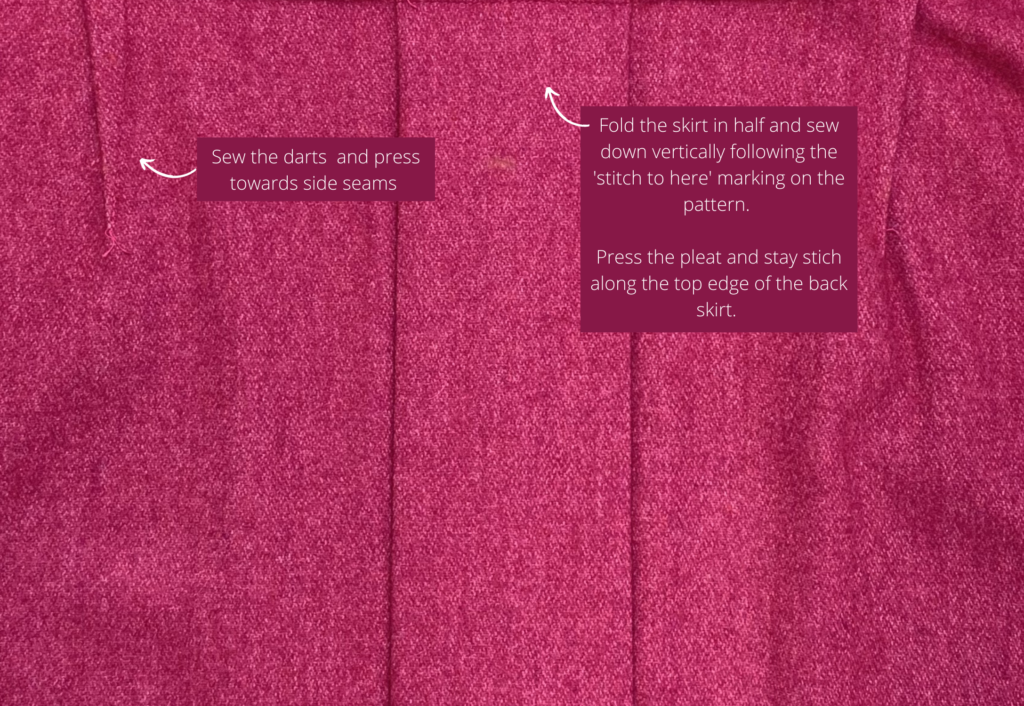
Sew the darts on the lower back skirt and press toward the side seams.
With right sides facing fold the centre back skirt in half and stitch a short distance down as marked on the pattern, turn to the right side and create an inverted pleat, press the pleat and sew across the top of the pleat to hold in place pleat in place.
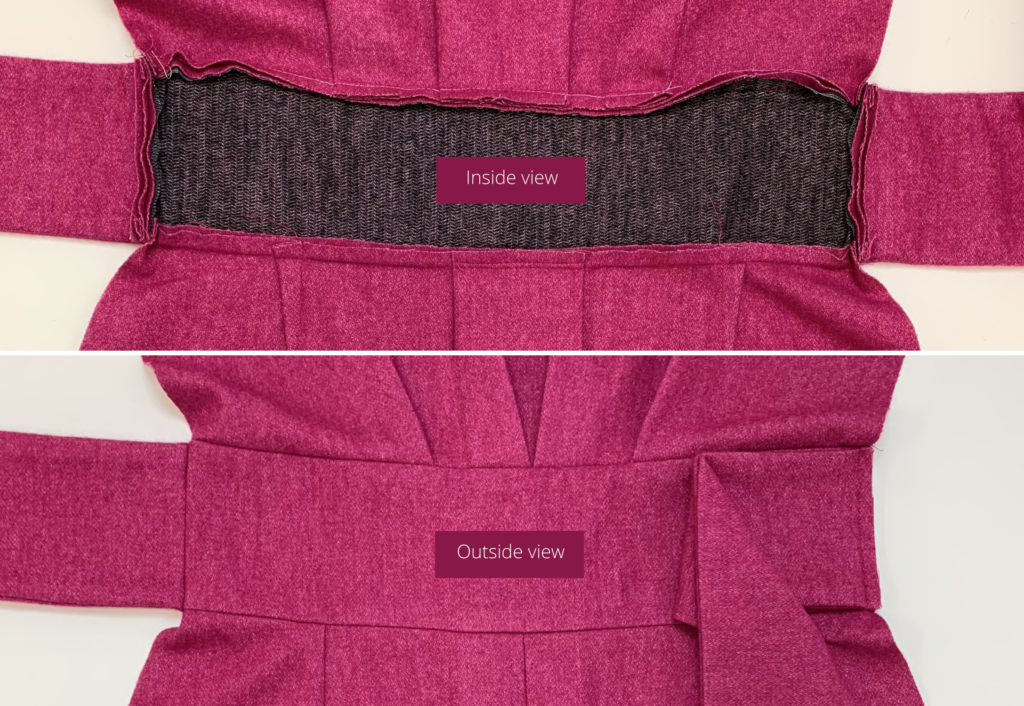
With right sides facing sew the remaining long edge of the back waist insert panel to the lower back skirt.
Sew the short edges of the ties to the side seams of the back waist insert.
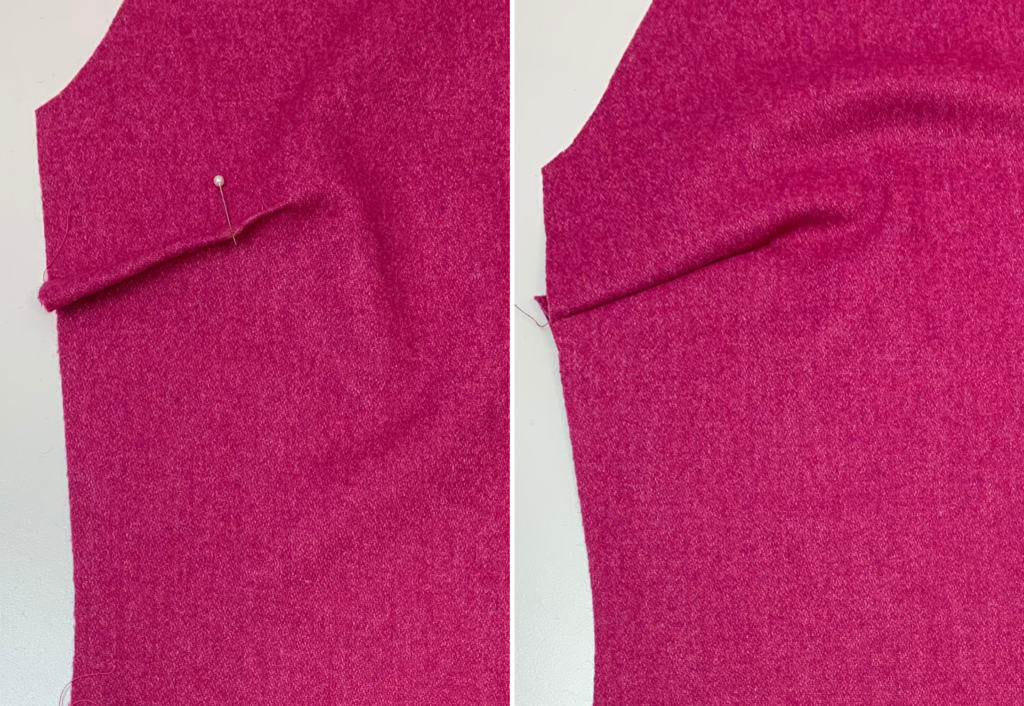
POCKETS:
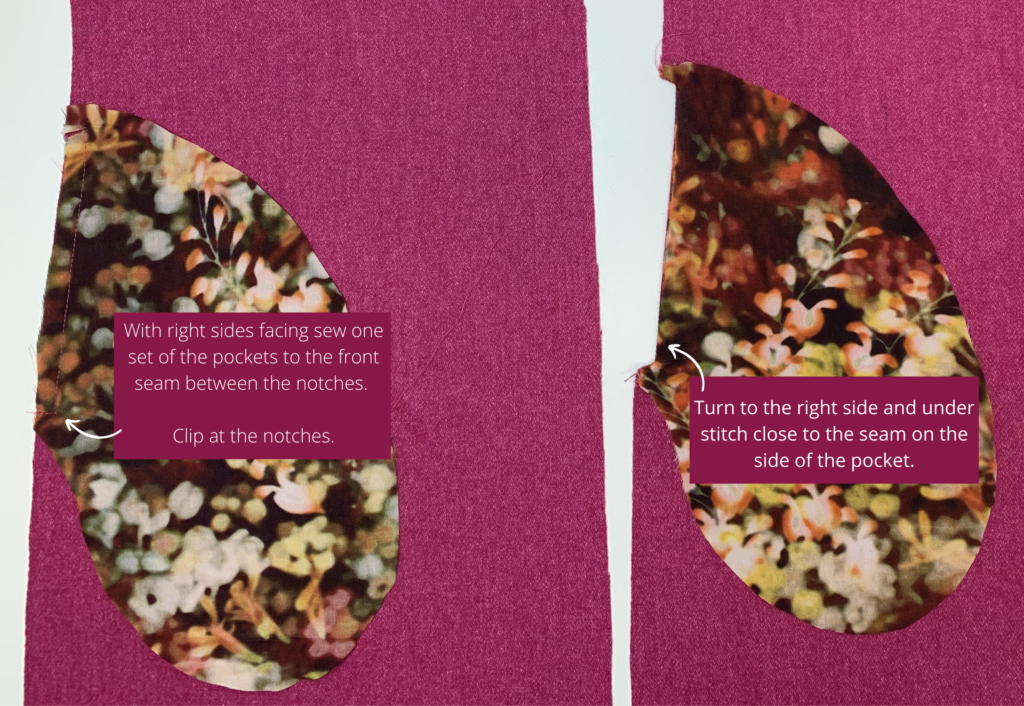
With right sides facing sew one set of the pockets to the front seam as marked on the pattern (A), clip at the notches, turn to the right side and under stitch close to the seam on the side of the pocket.
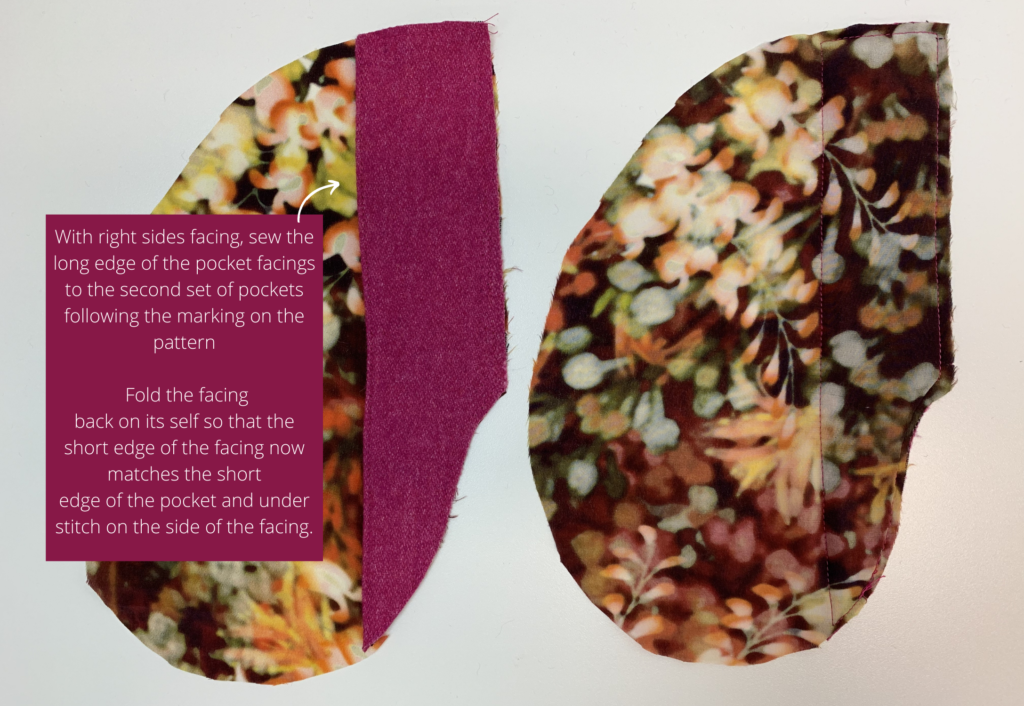
With right sides facing, sew the long edge of the pocket facings to the second set of pockets following the marking on the pattern, fold the facing back on its self so that the short edge of the facing now matches the short edge of the pocket and under stitch on the side of the facing.
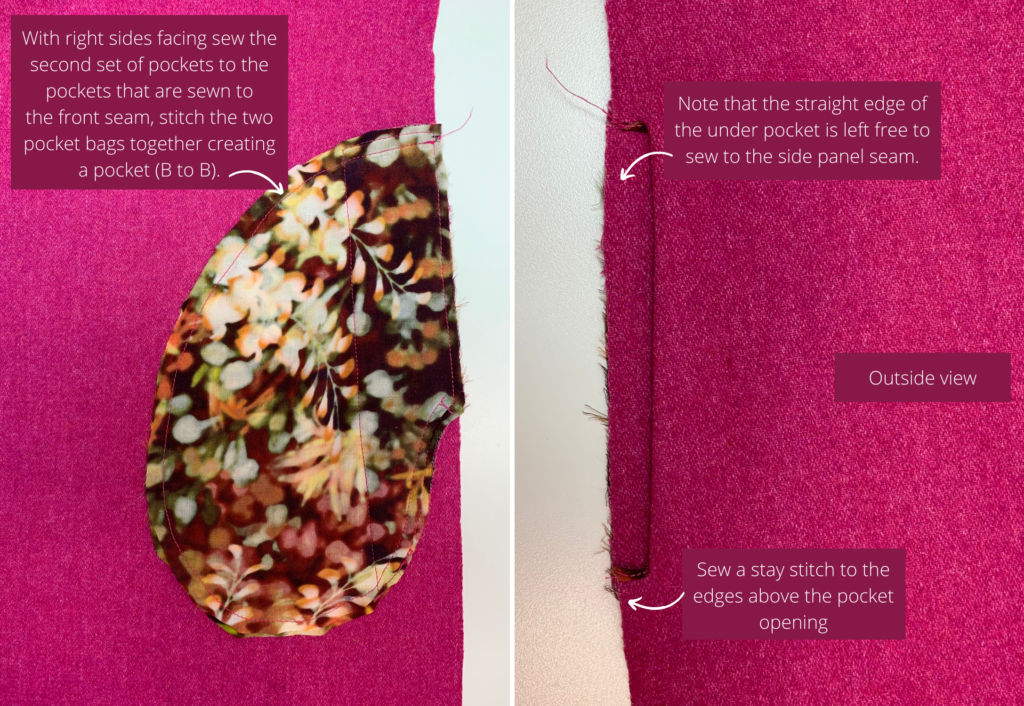
With right sides facing sew the second set of pockets (with the facing attached) to the pockets that are sewn to the front seam, stitch the two pocket bags together creating a pocket, (B_B). Note that the straight edge of the under pocket is left free to sew to the side panel seam.
Sew a stay stitch to each end of the pocket opening to secure it in place.
FRONT & BACK BODY:
Sew the bust darts on the front body and press downward.
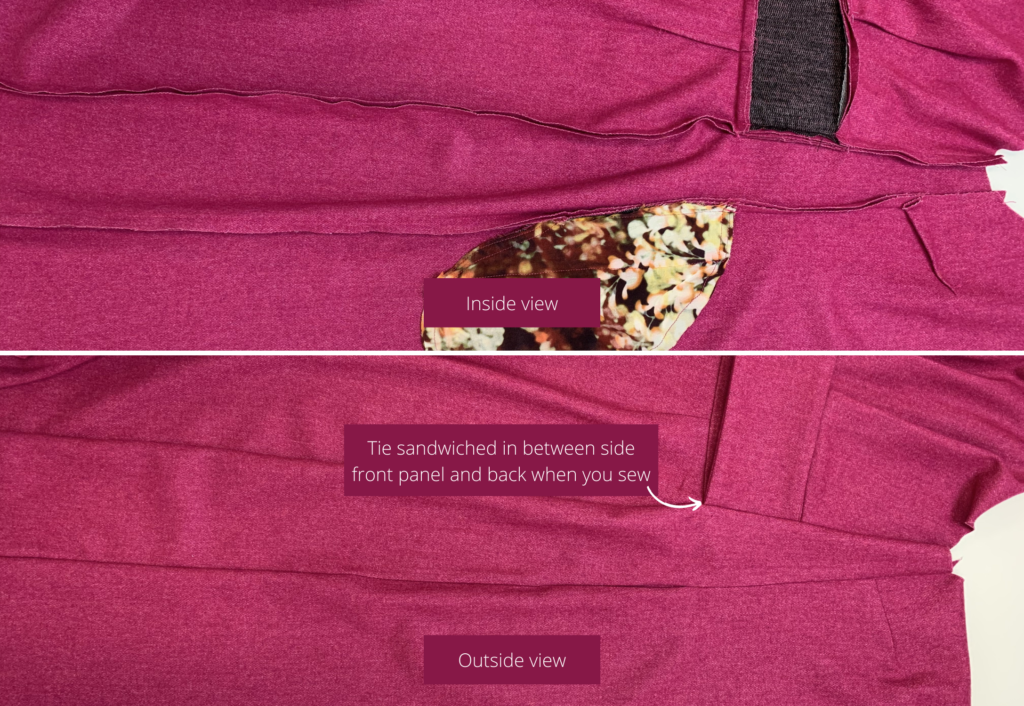
With right sides facing sew the front seam to the side panel, start stitching at the armhole, sew the seams together stitching through the straight edge of the back pocket, take care not to catch the front pocket opening, continue sewing down to the hemline.
With the rights sides facing sew the side front and back seams together, sandwiching the ties in between as you sew.
SLEEVES:
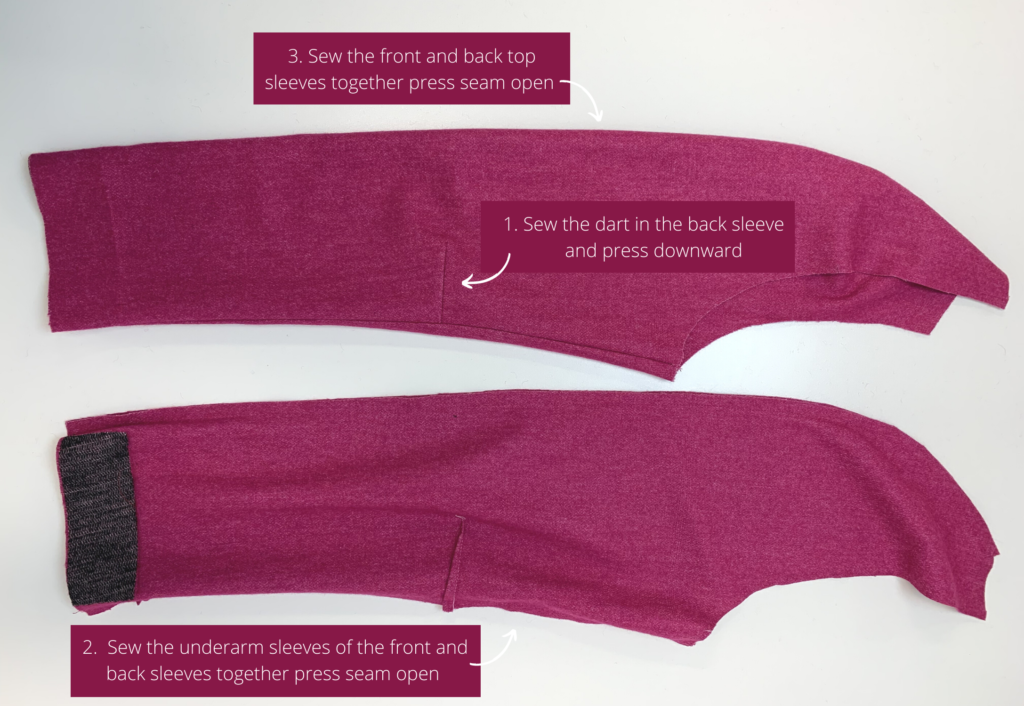
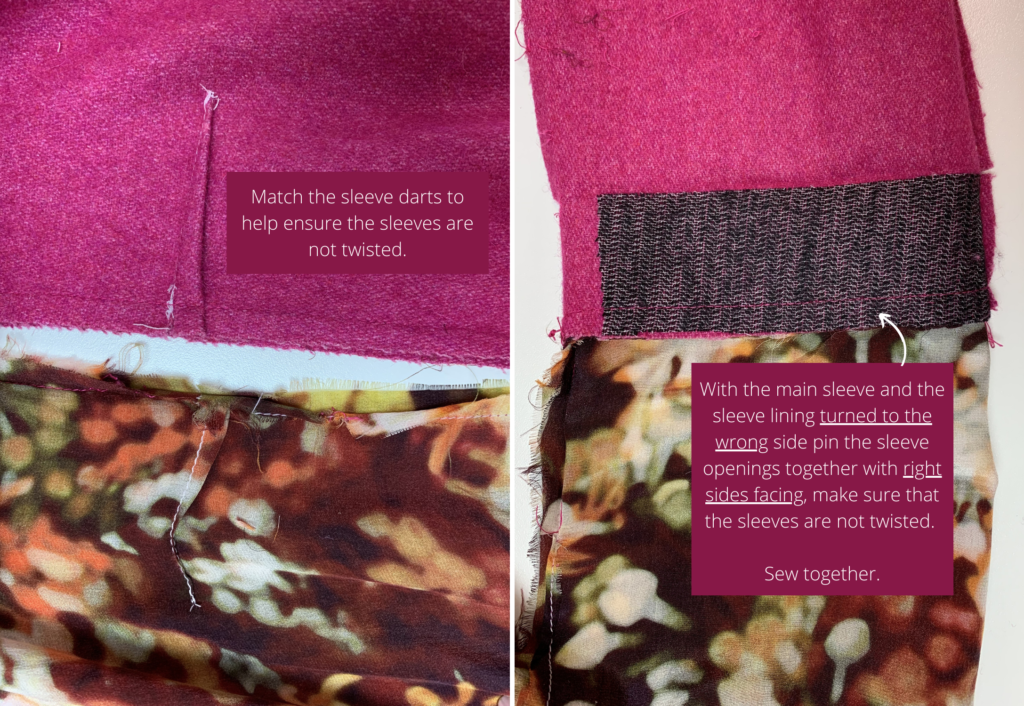
Sew the dart on the back sleeve and press downward.
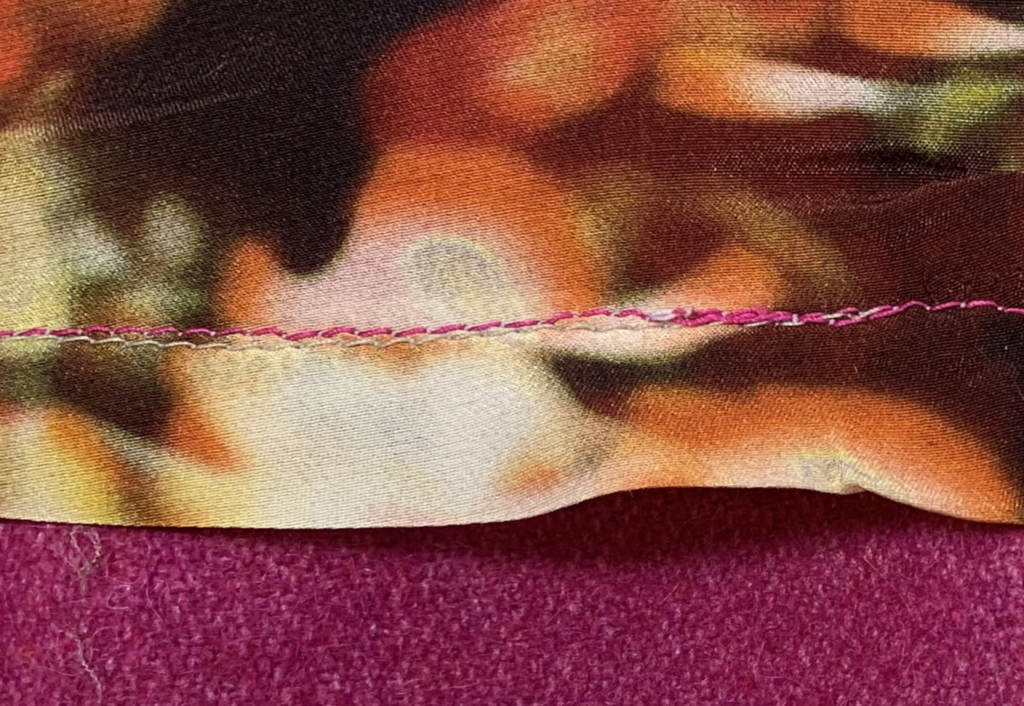
Sew the under seams of the front and back sleeves together followed by sewing the front and back top sleeve seams together and press open.
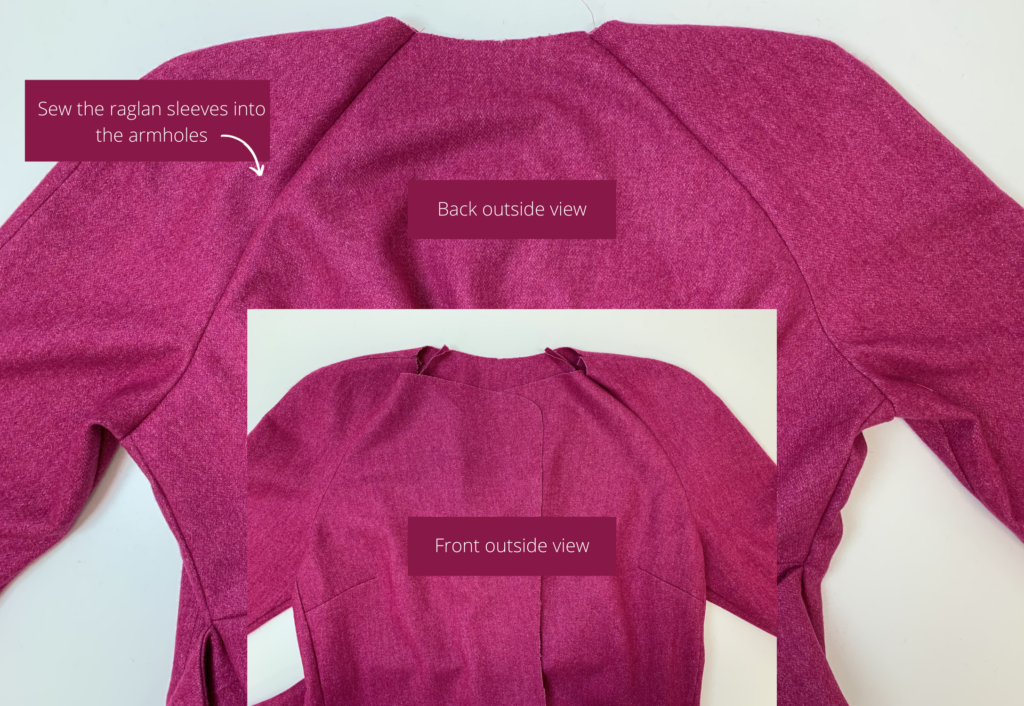
Sew the raglan sleeves into the armholes matching the notches as you sew, note the sleeve under seam matches the centre notch on the side panel.
MAIN & BODY COMPLETION:
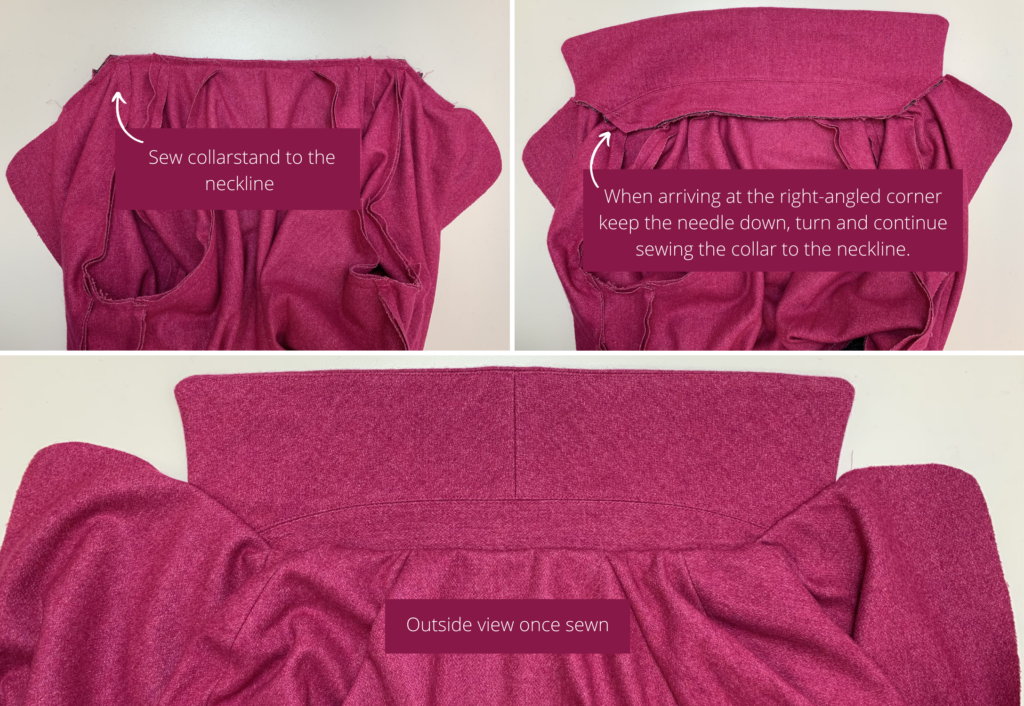
Sew a stay stitch around the neckline to prevent stretching.
Sew the collar stand to the neckline commencing at the centre front notch, when arriving at the right-angled corner keep the needle down, clip into the corner and continue sewing the collar to the neckline arriving back at the opposite centre front notch, match the notches as you sew.
With right sides together sew the front and back neck facings together at the shoulders and press open.
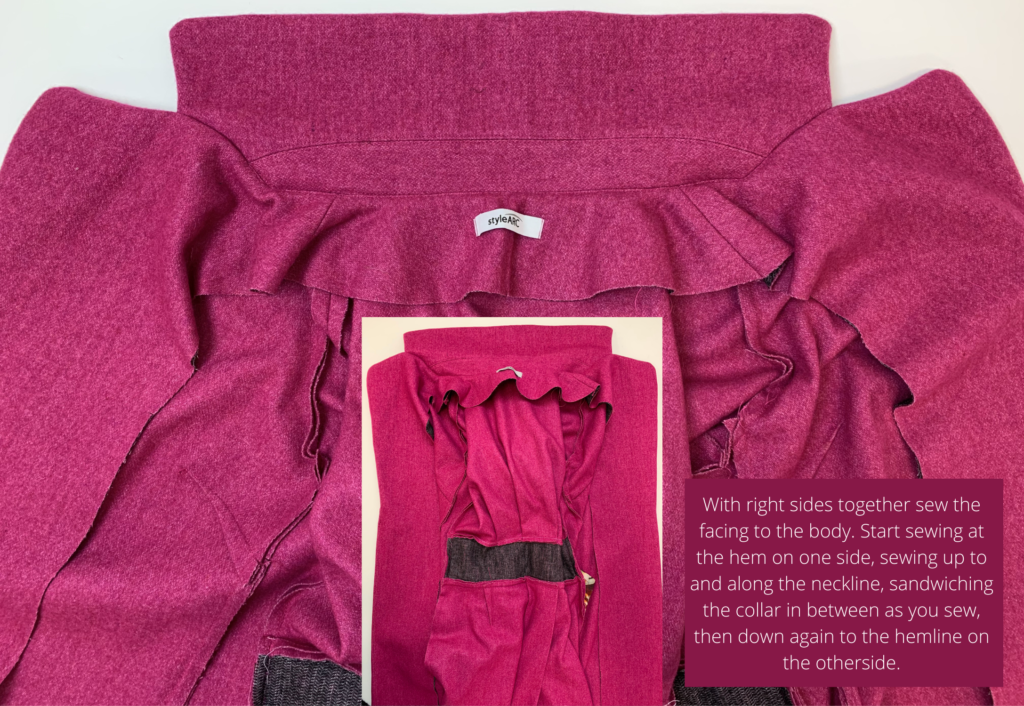
With right sides together sew the facing to the body sandwiching the collar in between as you sew.
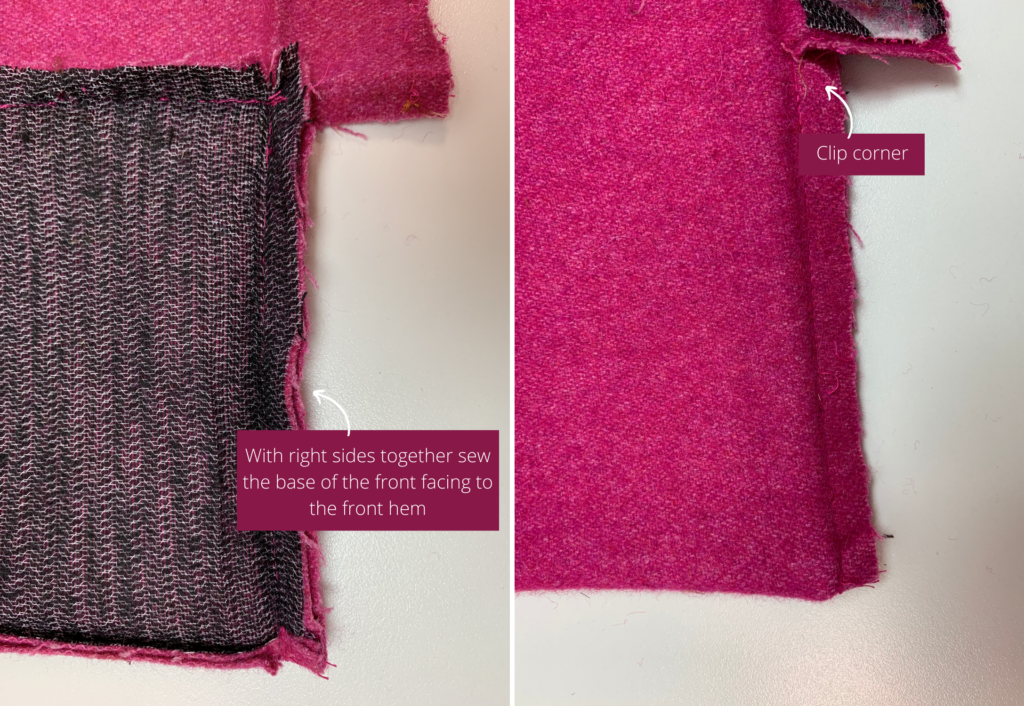
With right sides together sew the base of the front facing to the front hem, clip the corner and turn out.
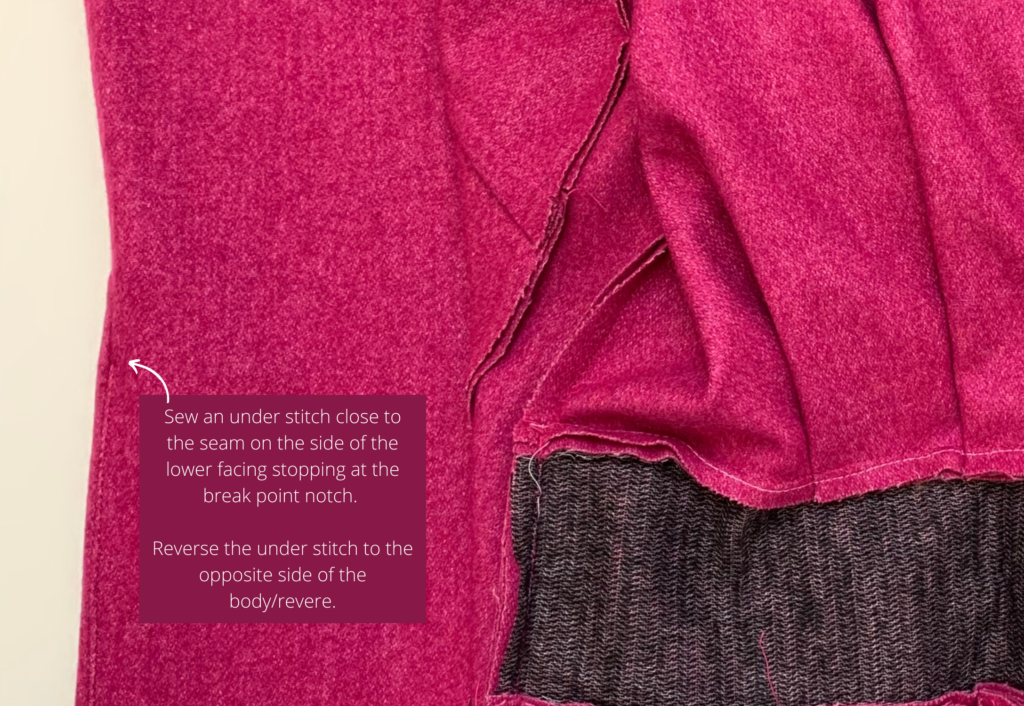
Sew an under stitch close to the seam on the side of the lower facing, at the break point notch reverse the under stitch to the opposite side of the body/revere, reason being when the revere is turned back the under stitch isn’t visible. The under stitch stops just below the rounded revere.
LINING:

On the top back lining piece stitch the top and lower back bodice knife pleats as marked on the pattern, press toward the left and sew a stay stitch across the top of the pleats to hold in place.
Sew one long edge of the back lining waist insert to the waist of the top back lining body.
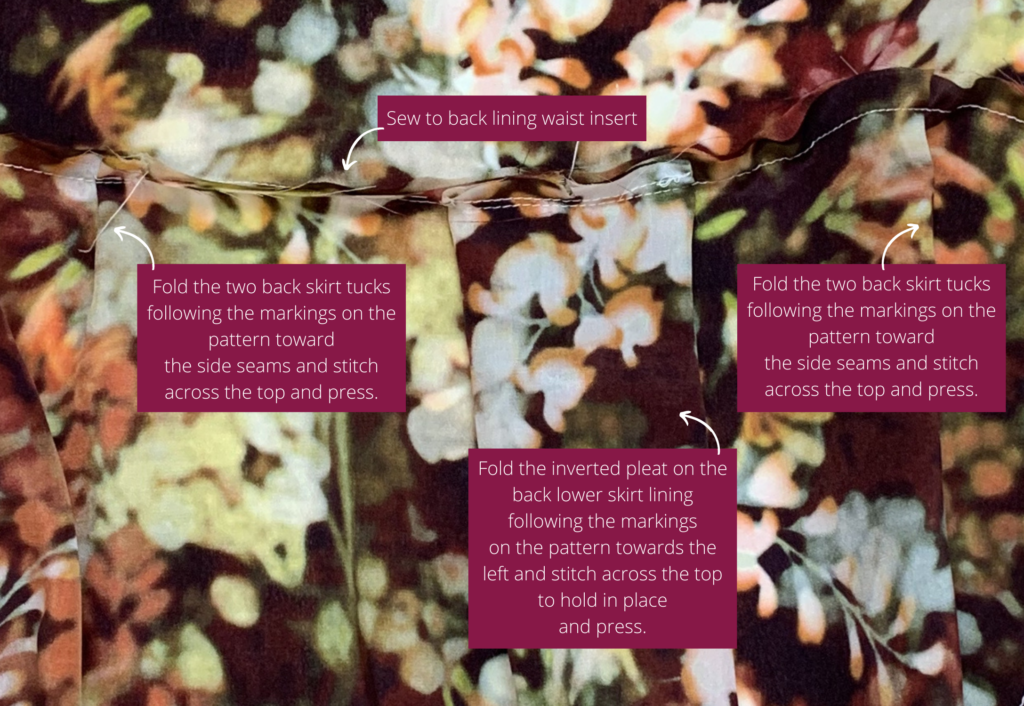
Fold the inverted pleat on the back lower skirt lining following the markings on the pattern towards the left and stitch across the top to hold in place and press.
Fold the two back skirt tucks following the markings on the pattern toward the side seams and stitch across the top and press.
Sew the remaining long edge of the back waist lining insert to the lower back skirt lining.
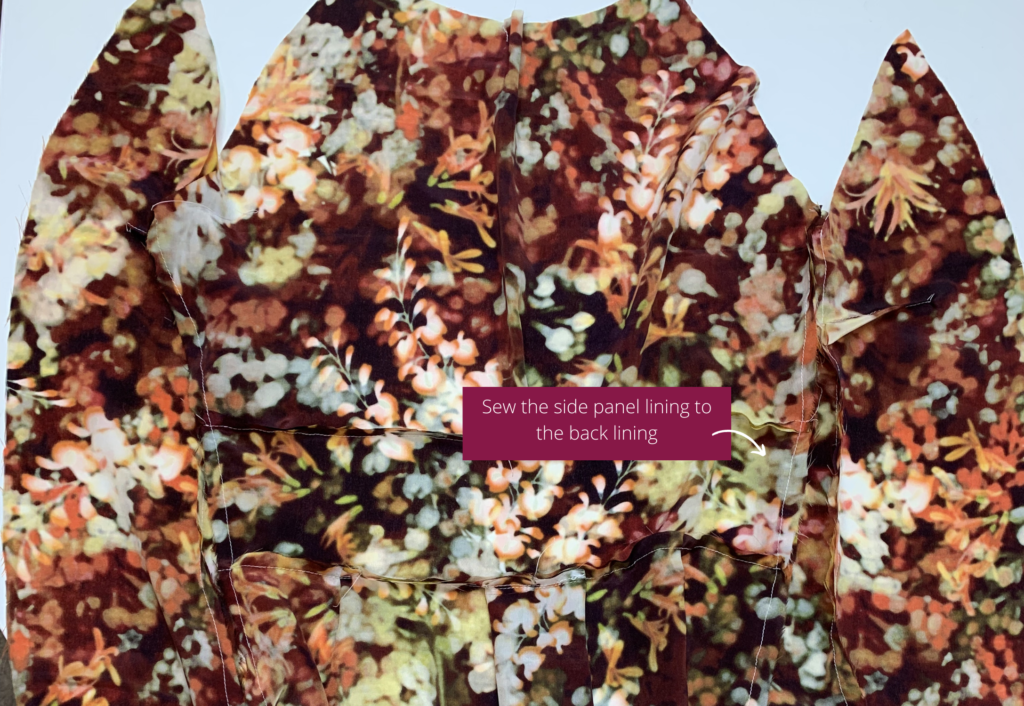
Sew the side panel lining to the back lining.
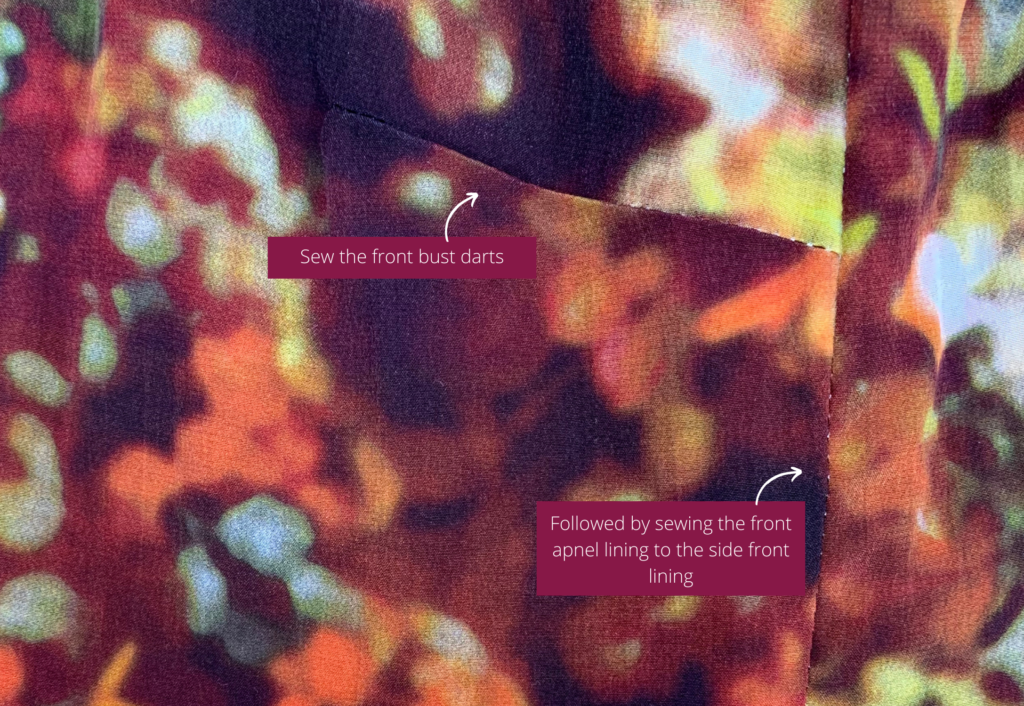
Sew the front bust darts on the lining and press downwards followed by sewing the front panel lining to the side front lining.
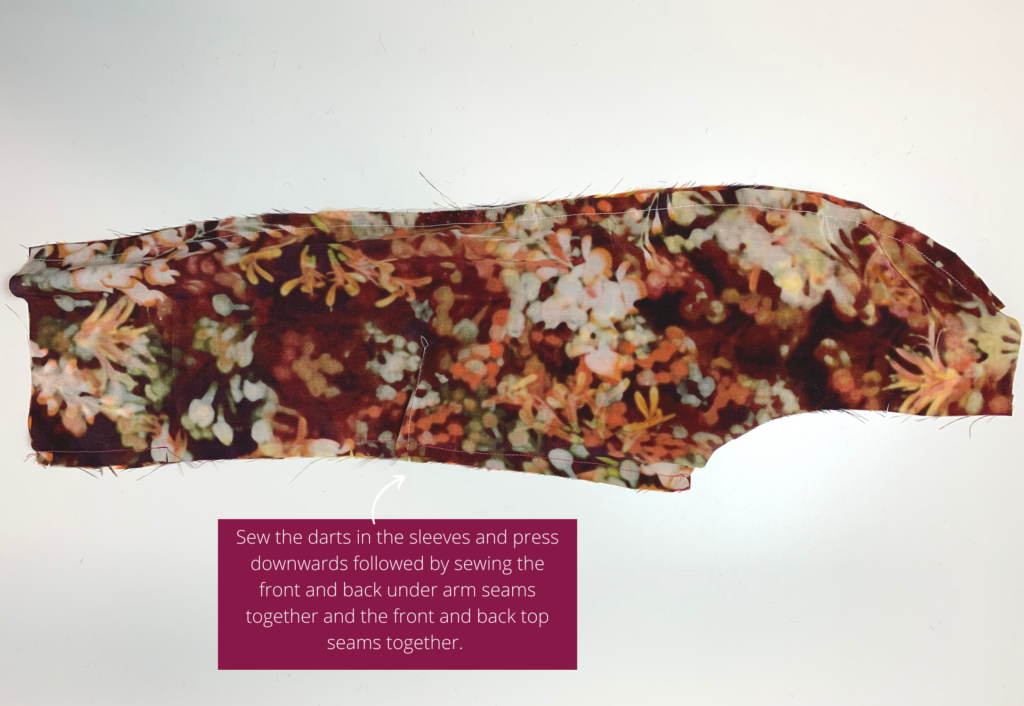
Sew the darts in the sleeves and press downwards followed by sewing the front and back under arm seams together and the front and back top seams together.
Sew sleeves into the lining armholes.
Hem the lining with a machine stitch.
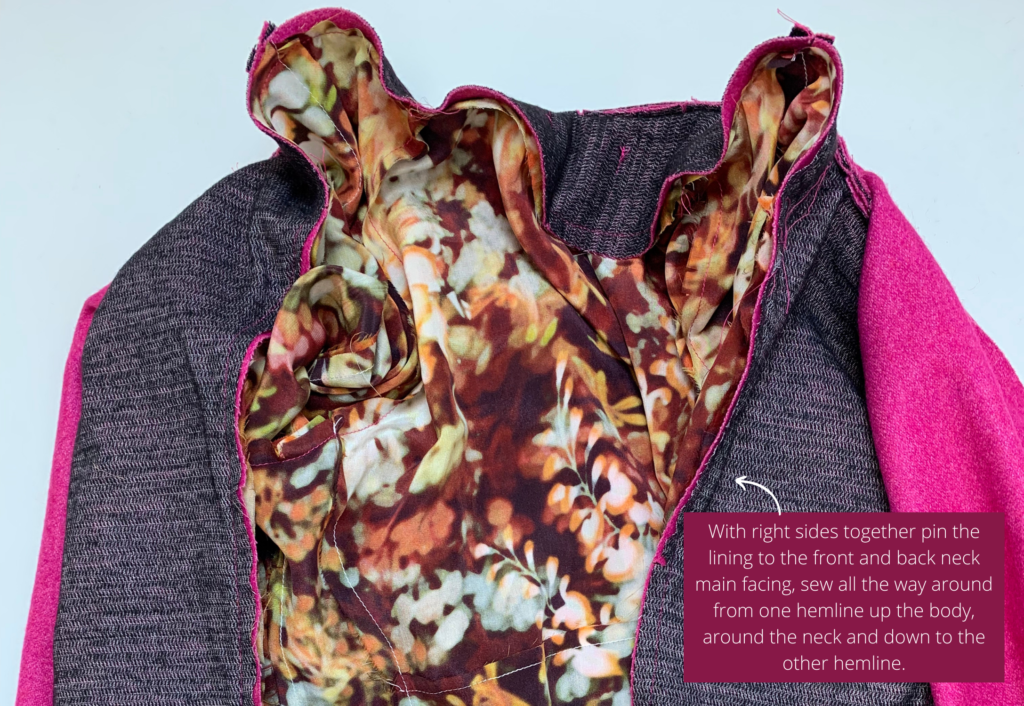
With right sides together pin the lining to the front and back neck main facing, once in place start sewing at the notch above the hemline and continue sewing all around until arriving at the opposite notch hemline.
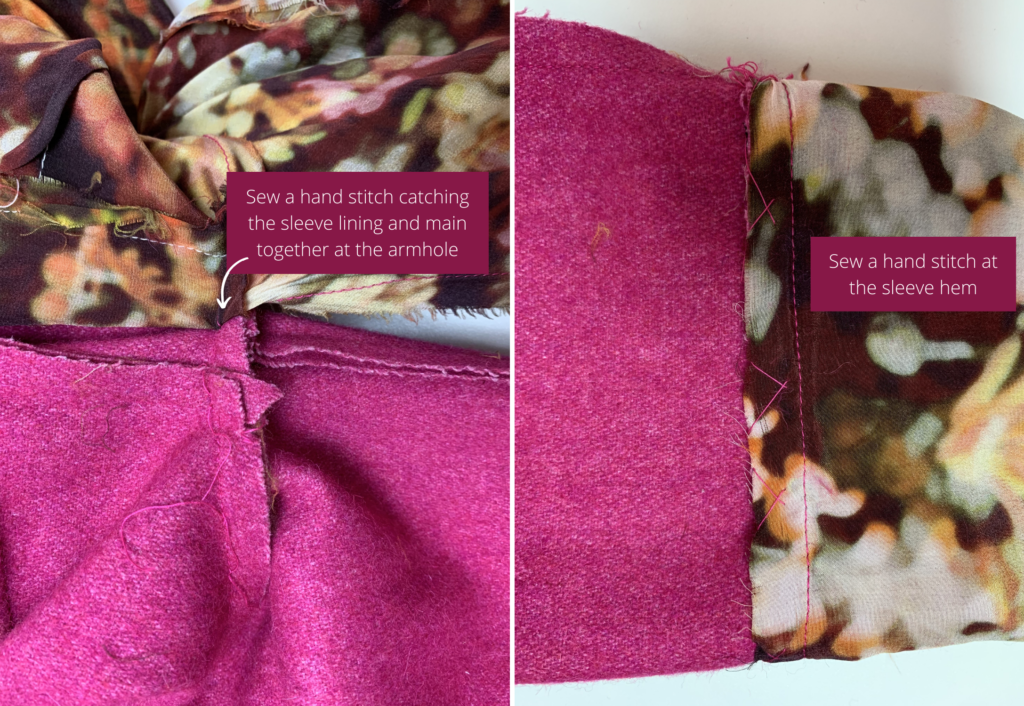
From the inside sew a small hand stitch joining the under-arm lining seam to the main underarm seam, and another at the sleeve hem to the sleeve lining, this creates a tuck over the sleeve hem and is to hold the lining in place when wearing.
Pull the coat out to the right side using the hem opening.
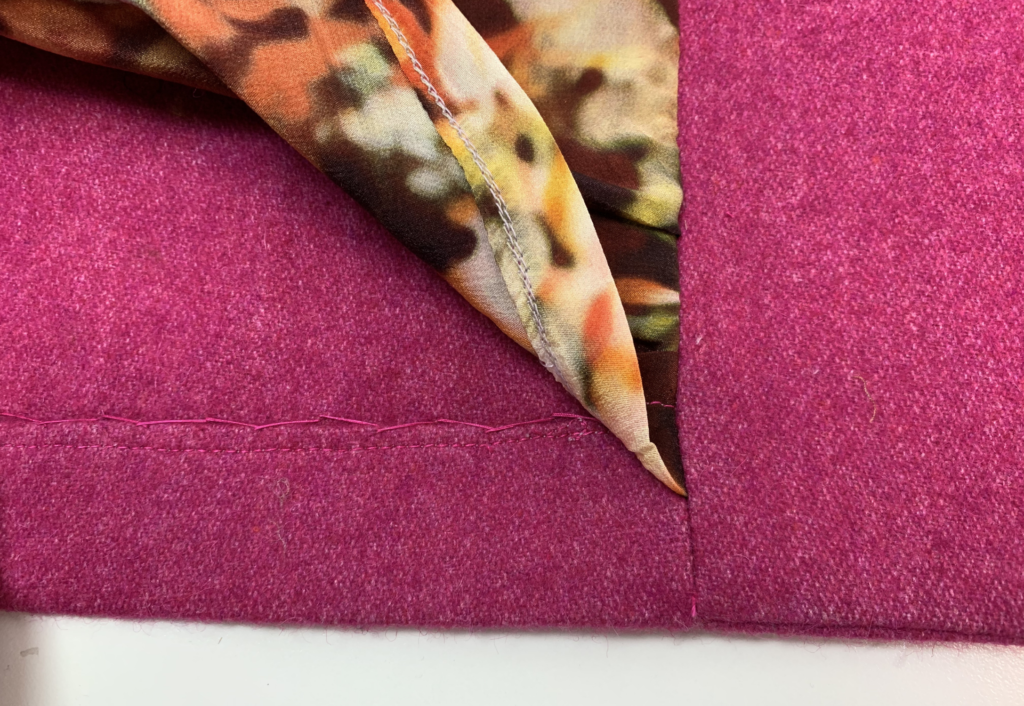
Neaten the edge of the hem with an overlocker/serger and pin the hem in place and lightly press, then hand-stitch the hem.
Press your new coat!