Shop the Twig Woven Pant
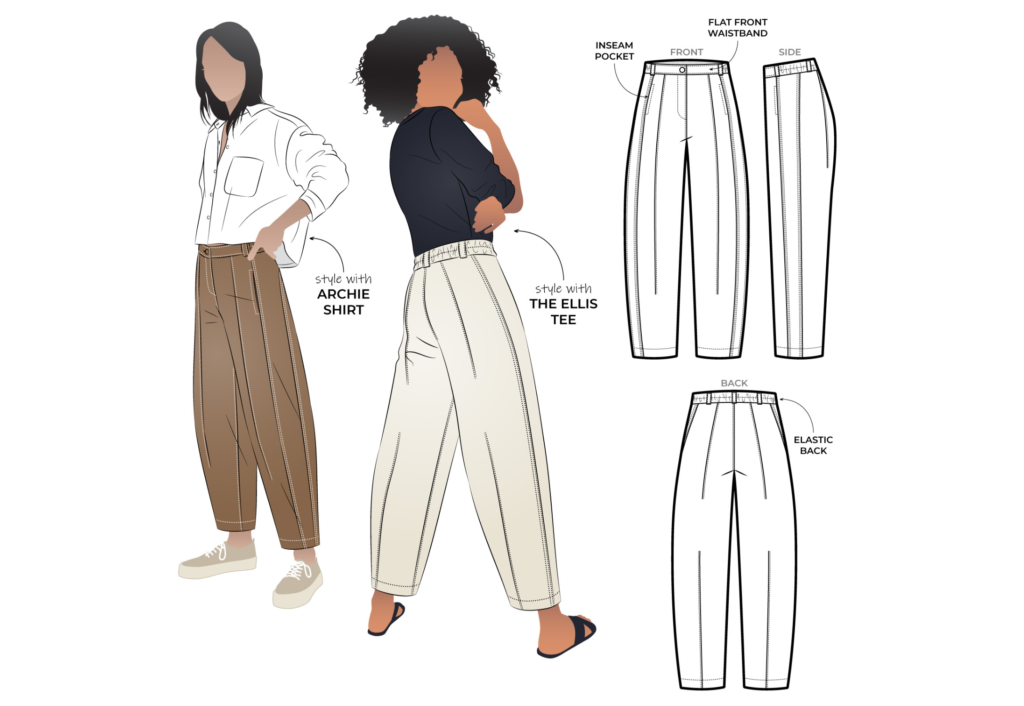
CONSTRUCTION
Please note: all seam allowances are 1cm (3/8″) unless otherwise stated, and are marked on each pattern piece with a dashed line.
PINTUCKS:
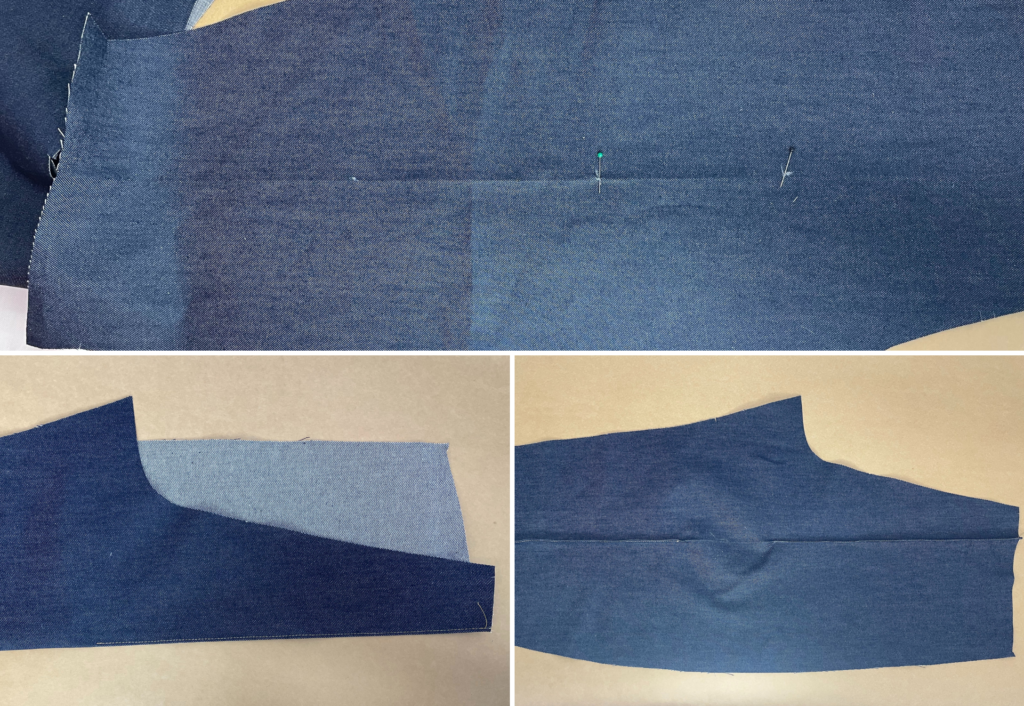
With wrong sides together, fold along the Front (6) and Back (7) pin tuck lines and press. With a contrast or matching thread sew the pintucks down the front and back legs following the markings on the patterns.
POCKETS:
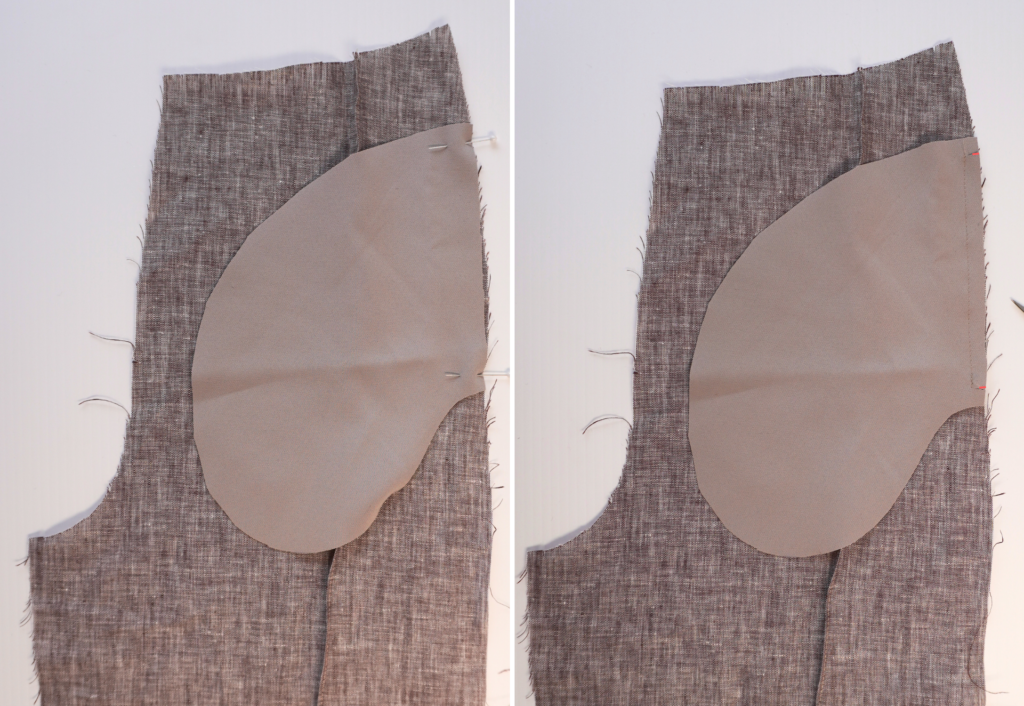
With right sides together sew one set of the Pocket (9) marked “A” to the front leg marked “A” on the pattern, clip at the notches and understitch the seam on the side of the pocket bag.
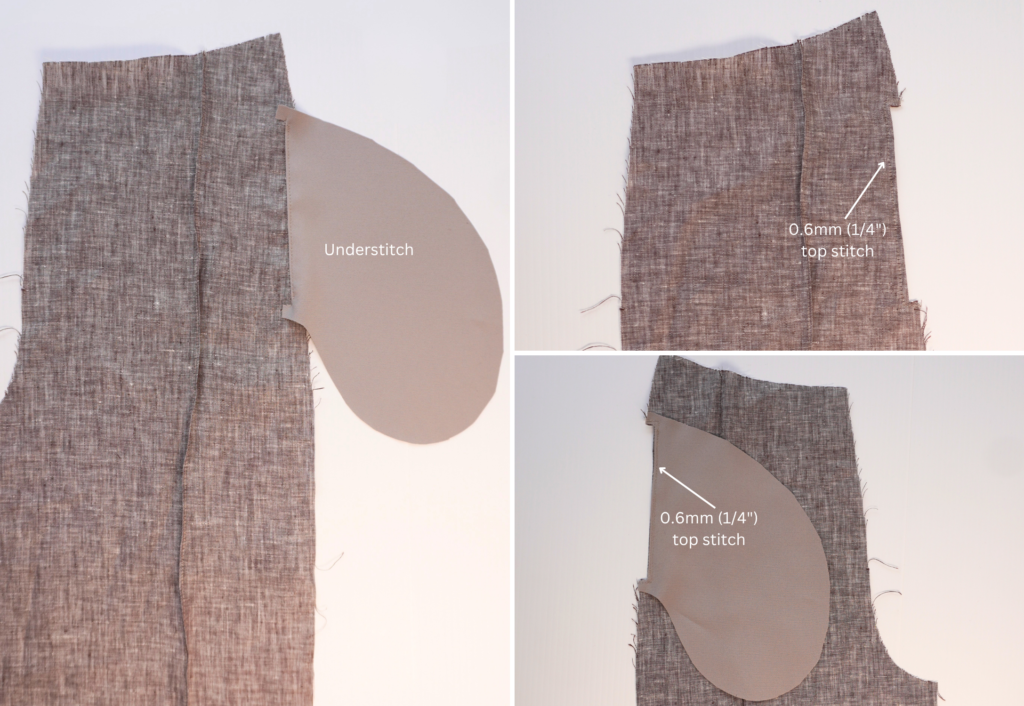
Press and sew a 6mm (¼”) contrast topstitch around each end and the length of the pocket opening.
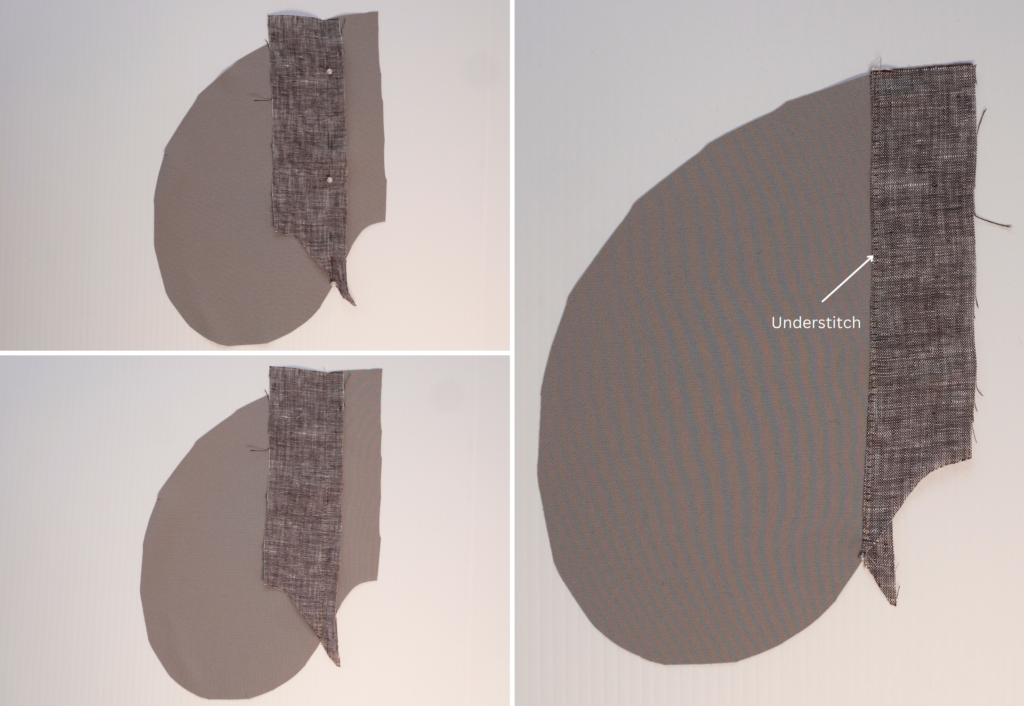
With right sides together, sew the long edge of the Pocket Facings (11) to the second set of pockets using a 0.6cm (1/4″) seam.
Fold the facing back on itself so that the short edge of the facing now matches the short edge of the pocket and understitch on the side of the facing.
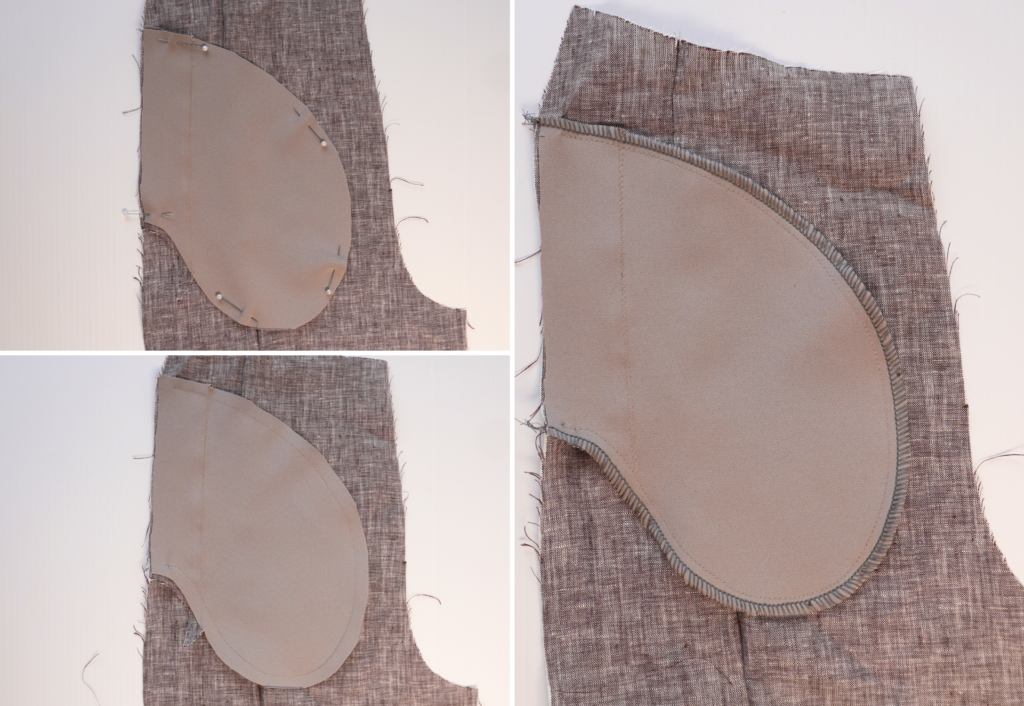
With right sides together sew the second set of pockets to the pockets that are sewn to the front seam, sew the two pocket bags together creating a pocket (B to B).
Note that the straight edge of the under pocket is left free to sew to the side panel seam. Neaten around the outer edge of the pocket with an overlocker/serger.
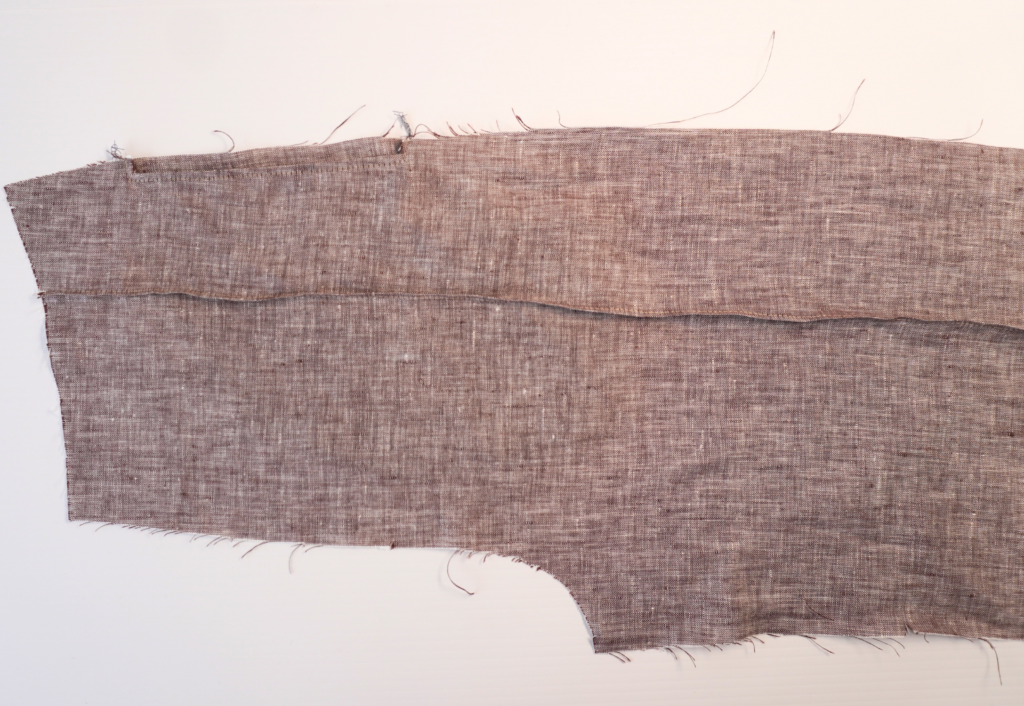
Sew a staystitch to each end of the pocket opening to secure it in place.
If you need more help constructing the pockets, click here for our Inseam Pockets tutorials.
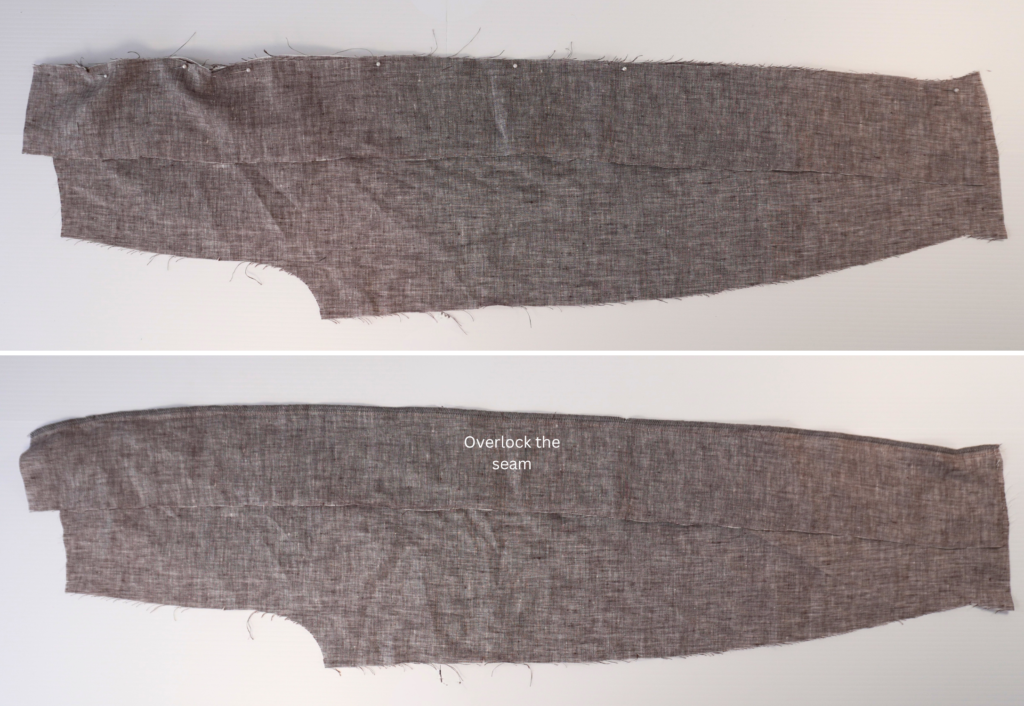
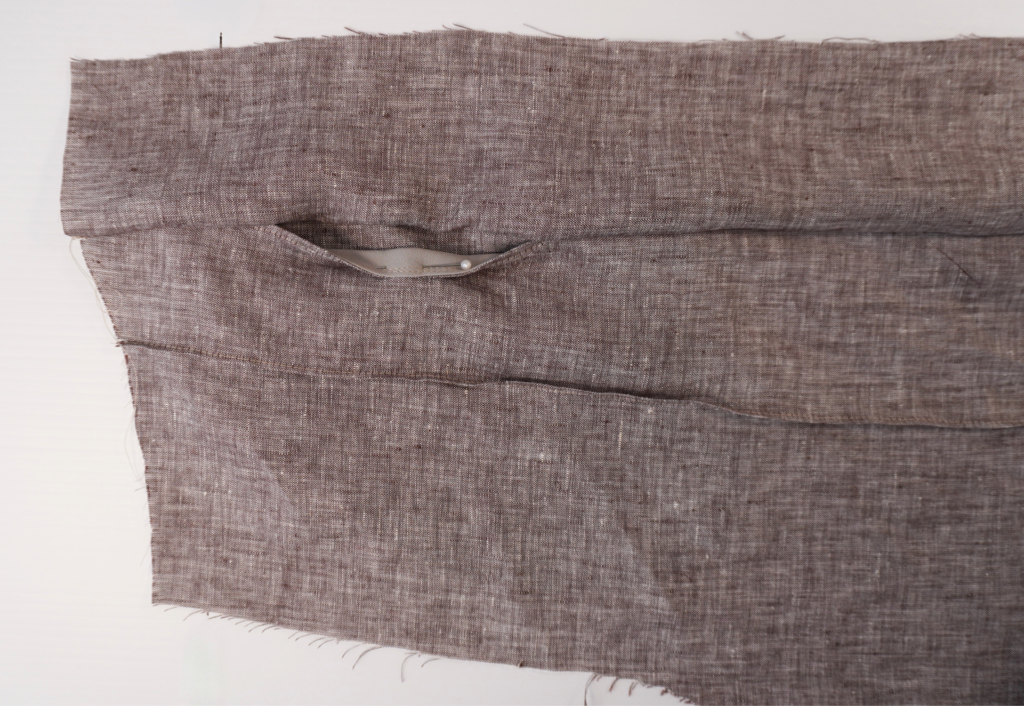
With right sides together sew the front leg to the Side Panel (8) leg. Start at the waist, sew through the back pocket taking care not to catch the front pocket opening as you sew, and continue sewing down to the leg opening.
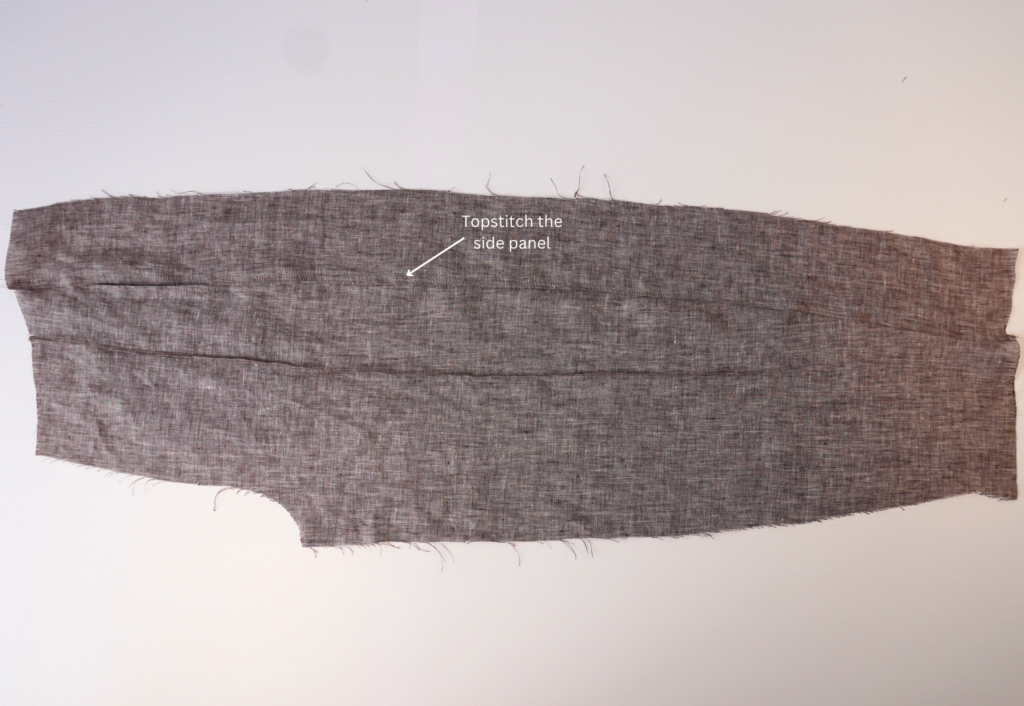
Neaten with an overlocker/serger, press the seam towards the back and sew a contrast twin needle topstitch on top of the seam.
FLY FRONT: These instructions are for a right over left zip construction
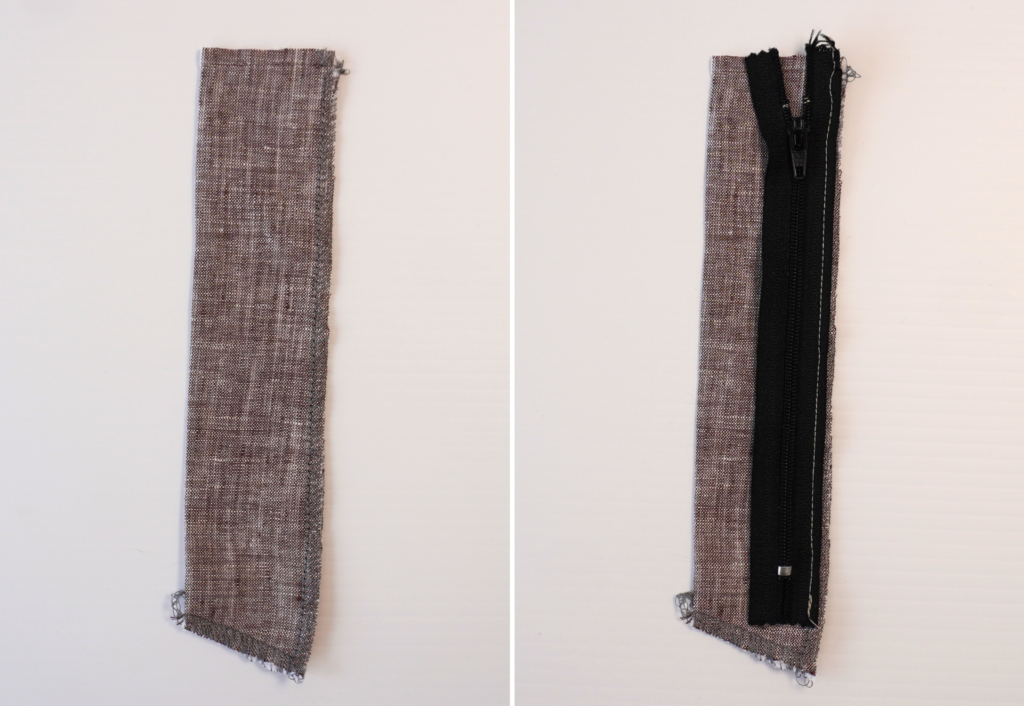
With wrong sides together press the Fly Extension (4) in half and neaten the base and long edge with an overlocker/serger.
Sew the left side of the zip tape along the overlocked/serged edge of the fly extension.
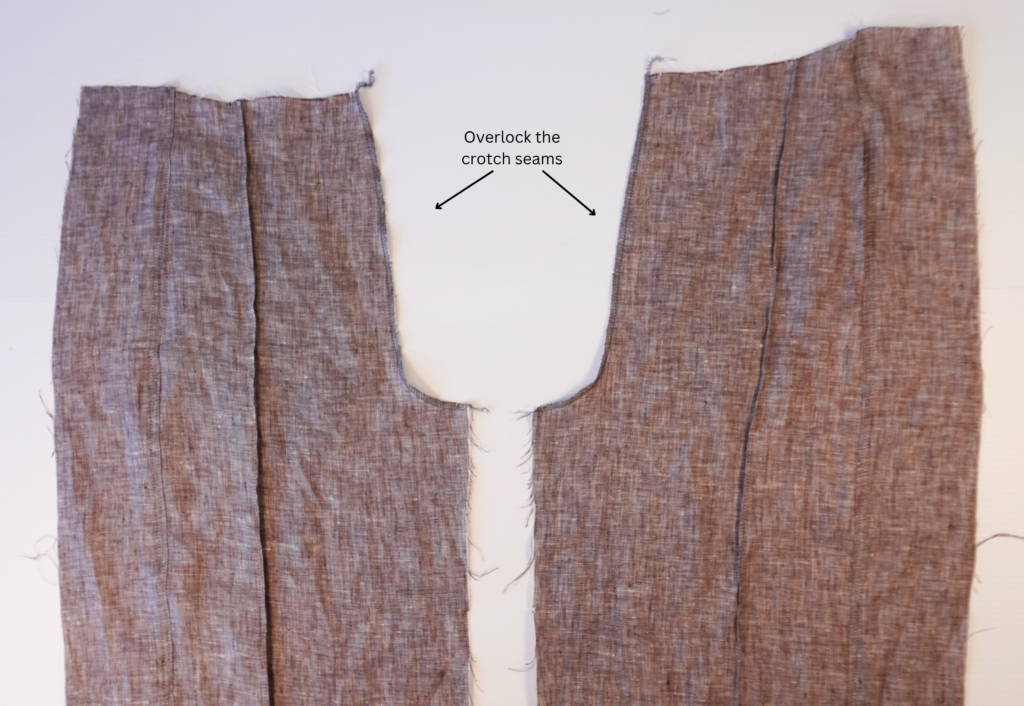
Neaten the front crotch seams separately with an overlocker/serger.
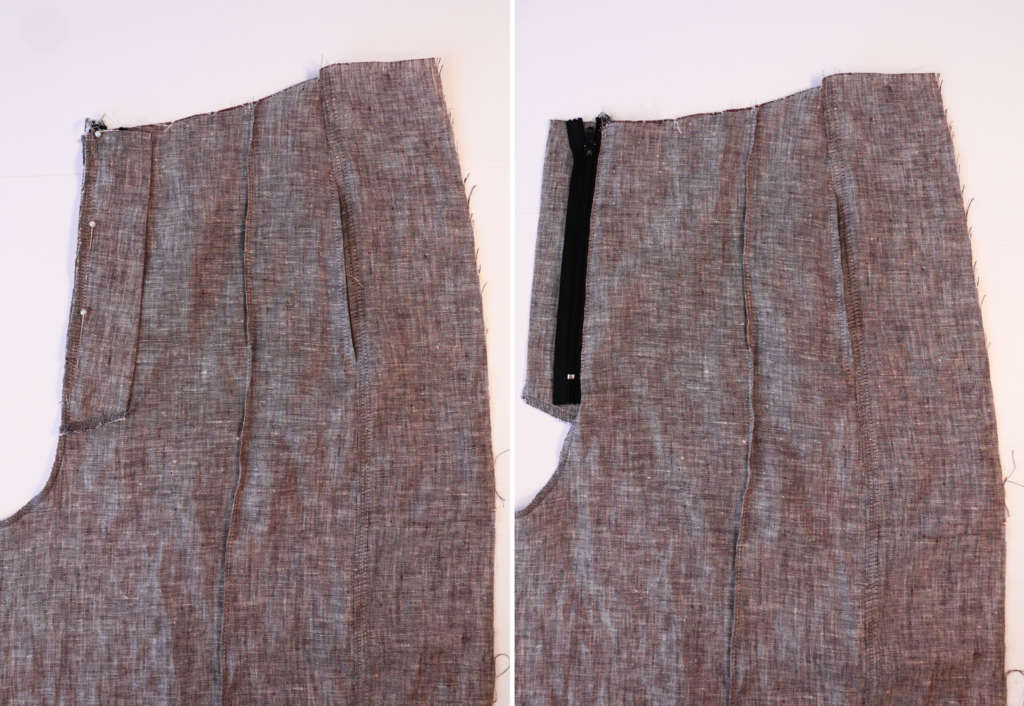
With right sides together sew the fly extension to the left front and press the seam allowance toward the leg.
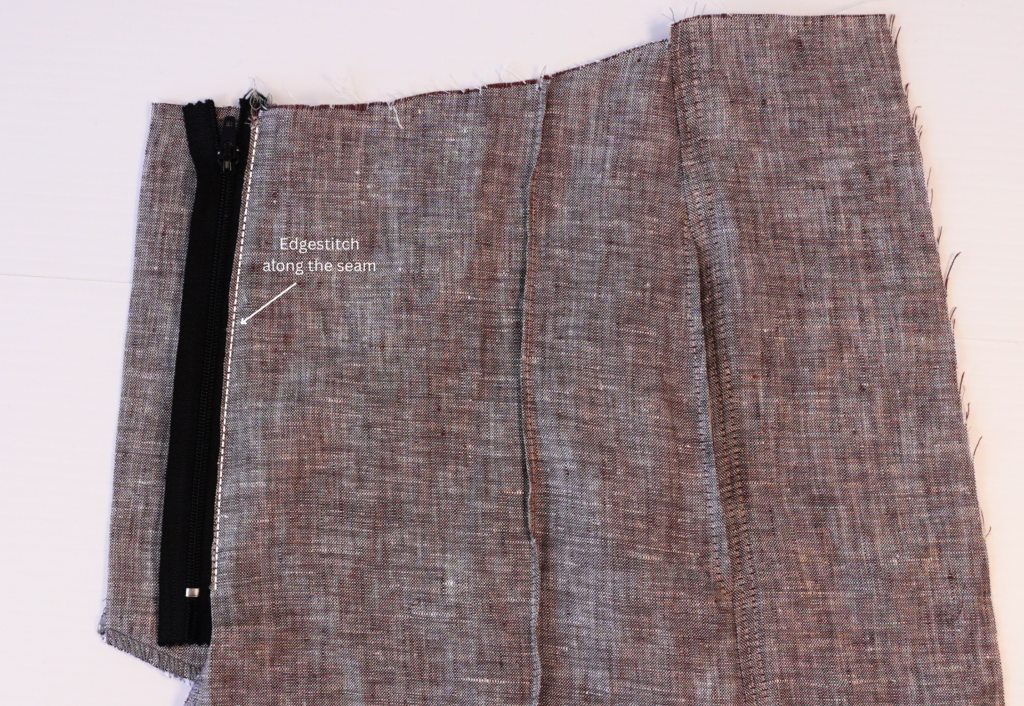
Sew an edge stitch on top of the seam for the length of the zip.
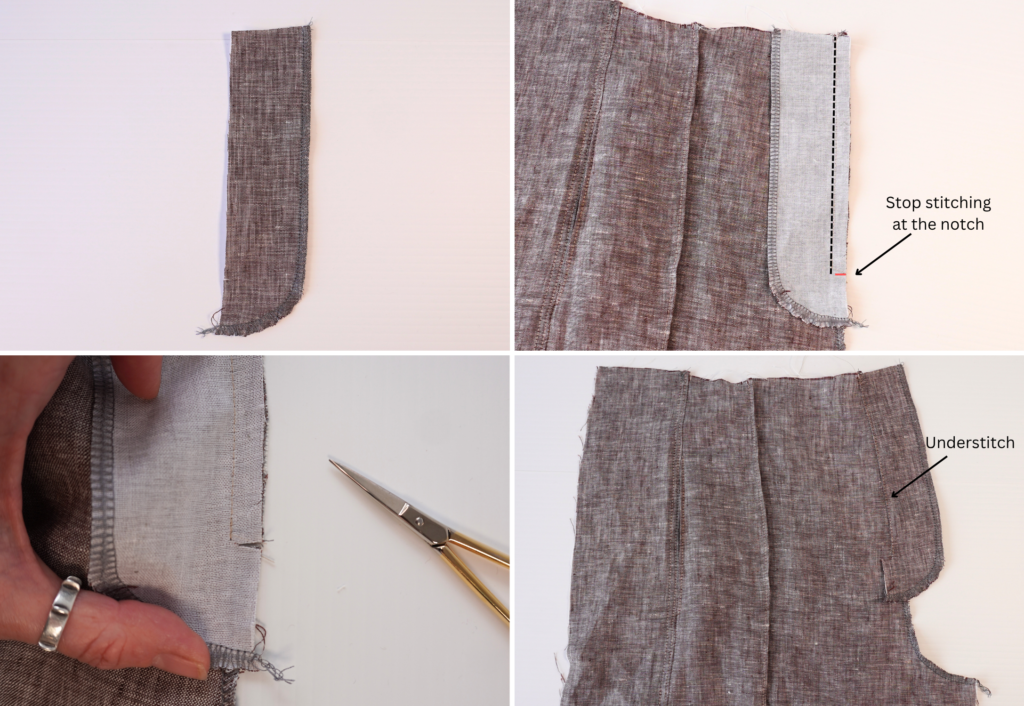
Neaten the curved edge of the Fly Facing (5) with an overlocker/serger.
With right sides together sew the fly facing to the right front, stopping at the notch.
Clip the notch at the base of the fly facing to obtain a step so that the crotch seam can be sewn.
Understitch the seam on the side of the fly facing, finishing at the step notch.
Turn the fly facing to the inside (wrong side) and press. * Optional: sew an edge stitch along the seam, finishing at the zipper notch.
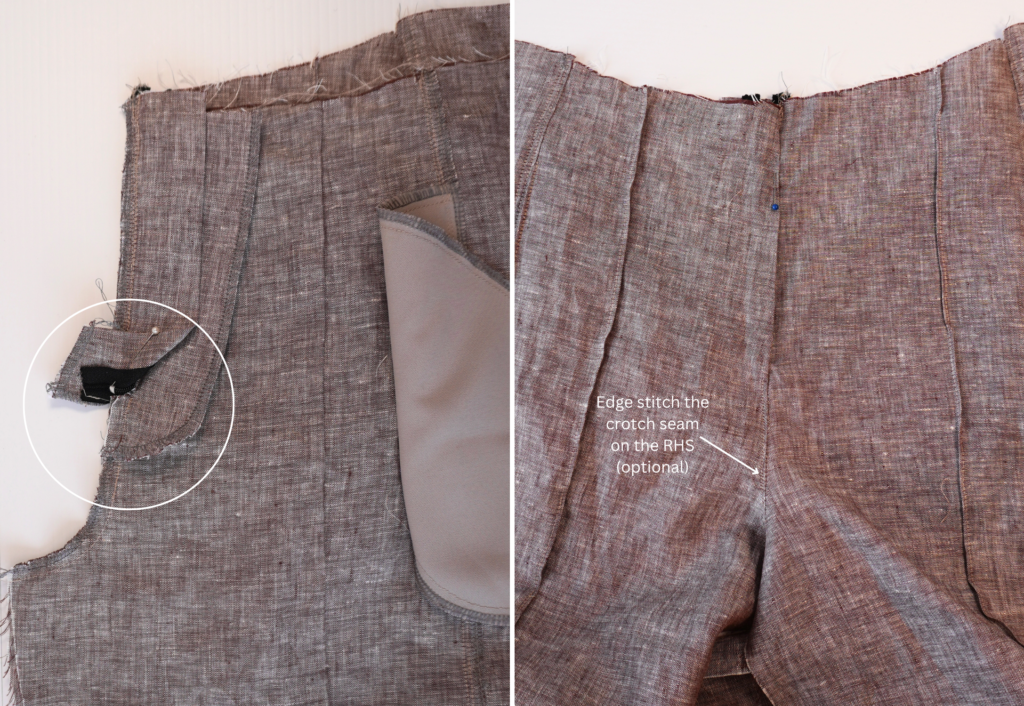
With right sides together sew the front crotch seams together. Start from the base of the crotch and finish at the step at the base of the zip.
Keep the fly extension out of the way while stitching the crotch seam. Neaten with an overlocker/serger and press the seam toward the wearer’s right.
* Optional: sew an edge stitch along the right hand side crotch seam, starting at the zipper notch and continuing to the end of the front crotch seam.
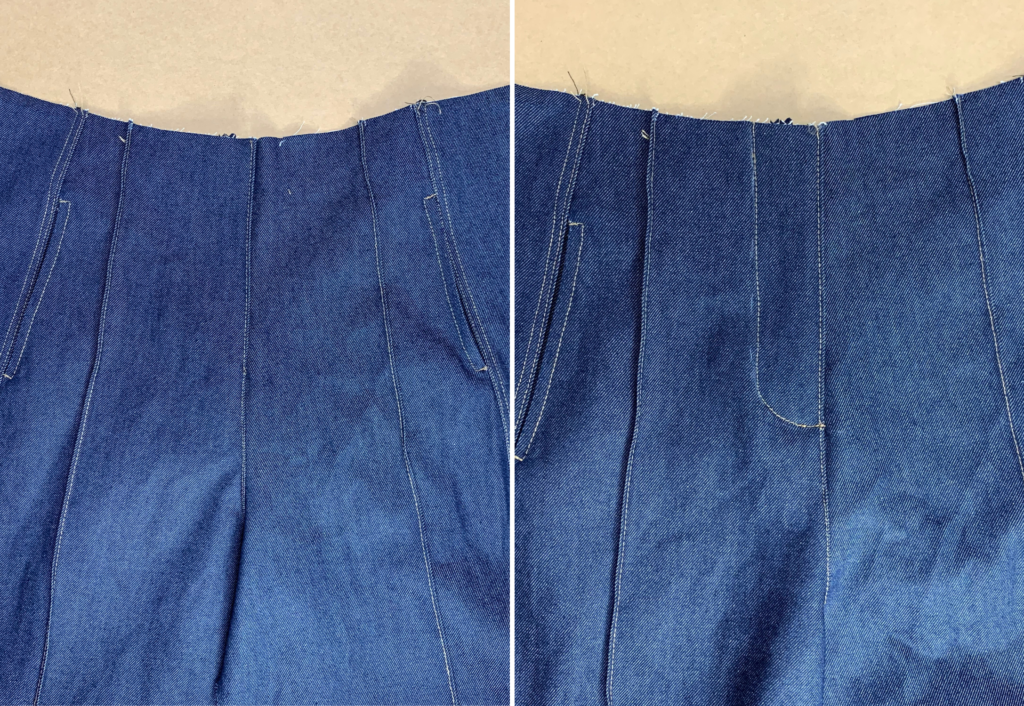
* Picture above shows the fly and crotch seams with optional edge stitching in a contrasting thread.
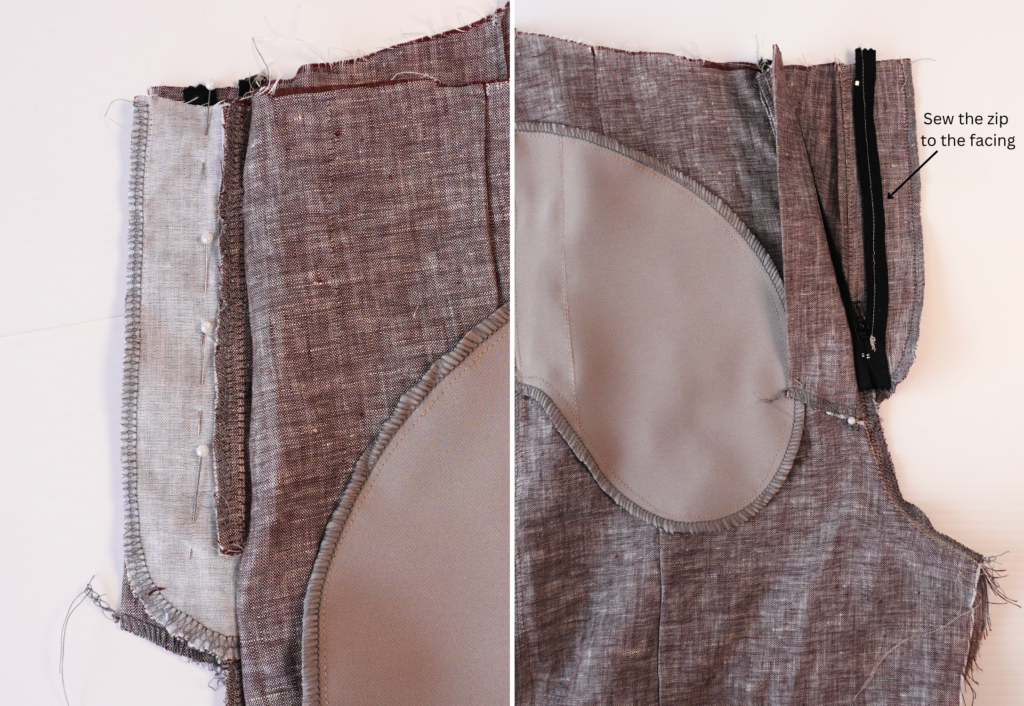
Close the zip and from the inside make sure the right side of the fly covers the left fly.
Once in place pin the right side of the zipper to the fly facing, which is not stitched down at this point. Sew the zip tape to the fly facing.
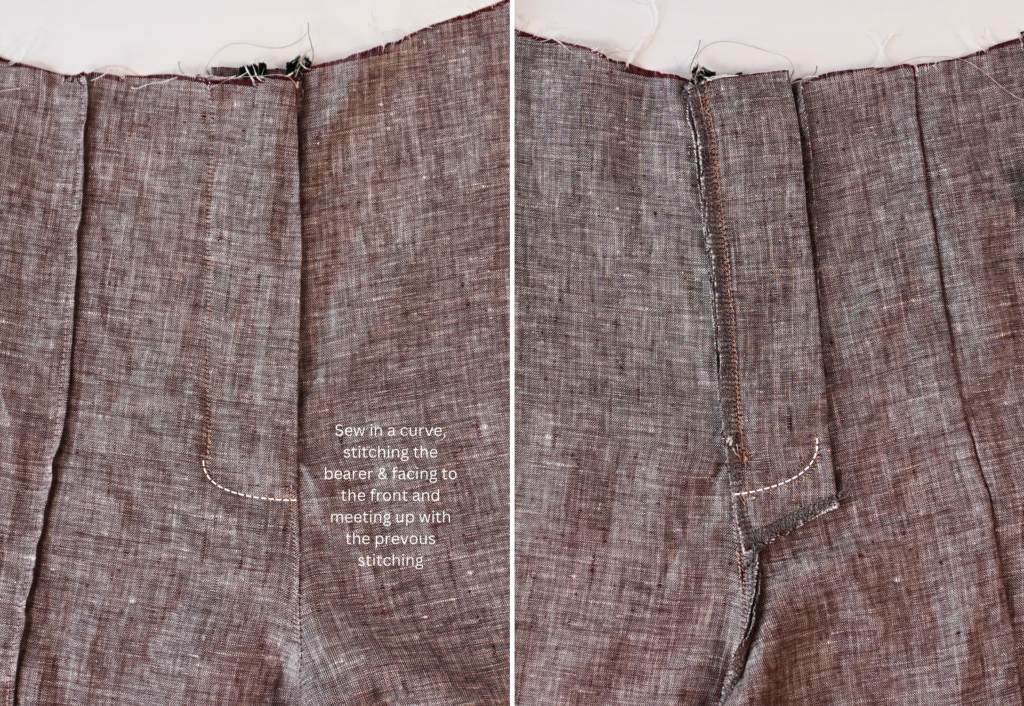
Close up the zip and pin the fly facing to the right front.
Using the fly facing pattern as a guide, mark the fly topstitch line with chalk. Once marked, sew a topstitch around the fly, securing the fly facing to the right front.
BACK LEGS:
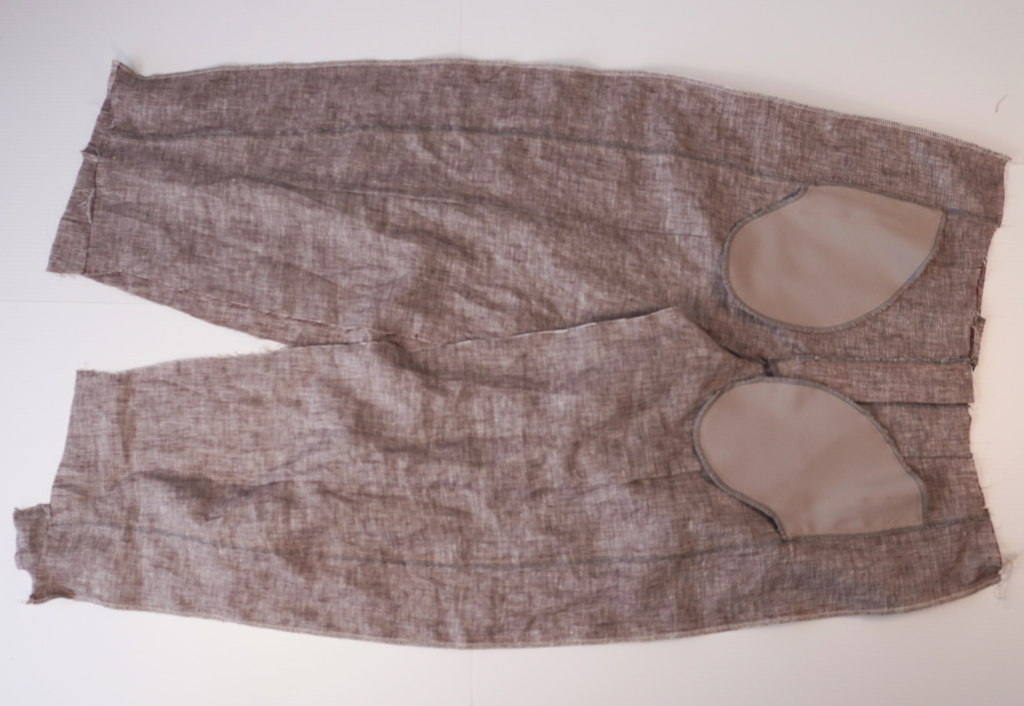
With right sides together sew the back and front side seams together.
Neaten with an overlocker/serger and press toward the back.
* Optional: Sew a twin needle contrast topstitch along the leg on top of the seam.
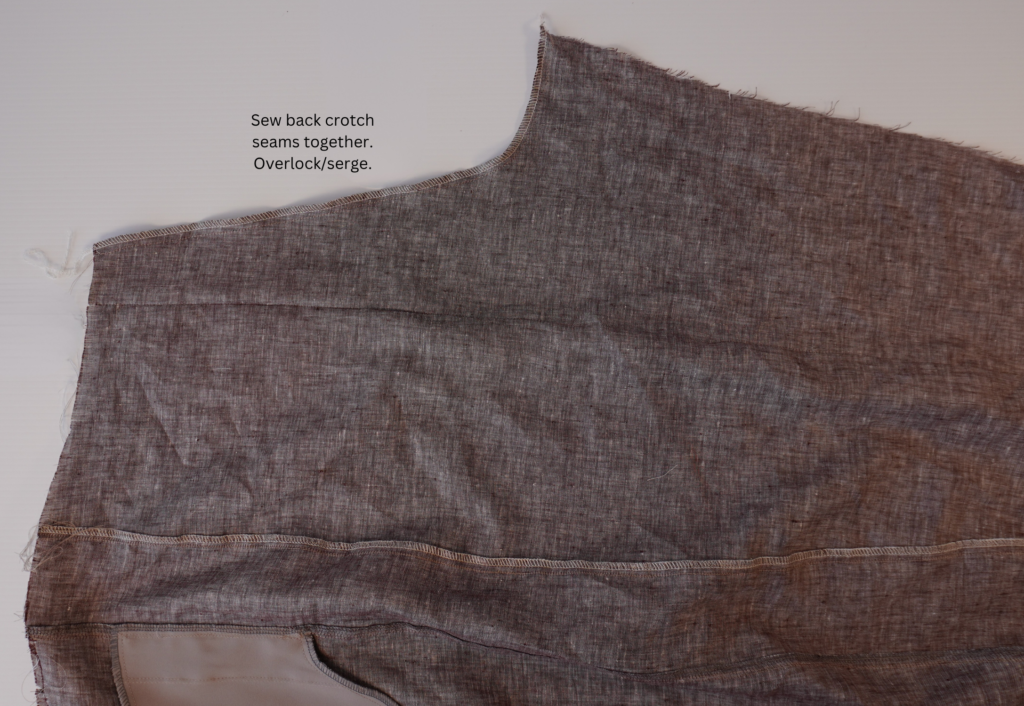
With right sides together sew the two back crotch seams together.
Neaten with an overlocker/serger and press toward the wearer’s right.
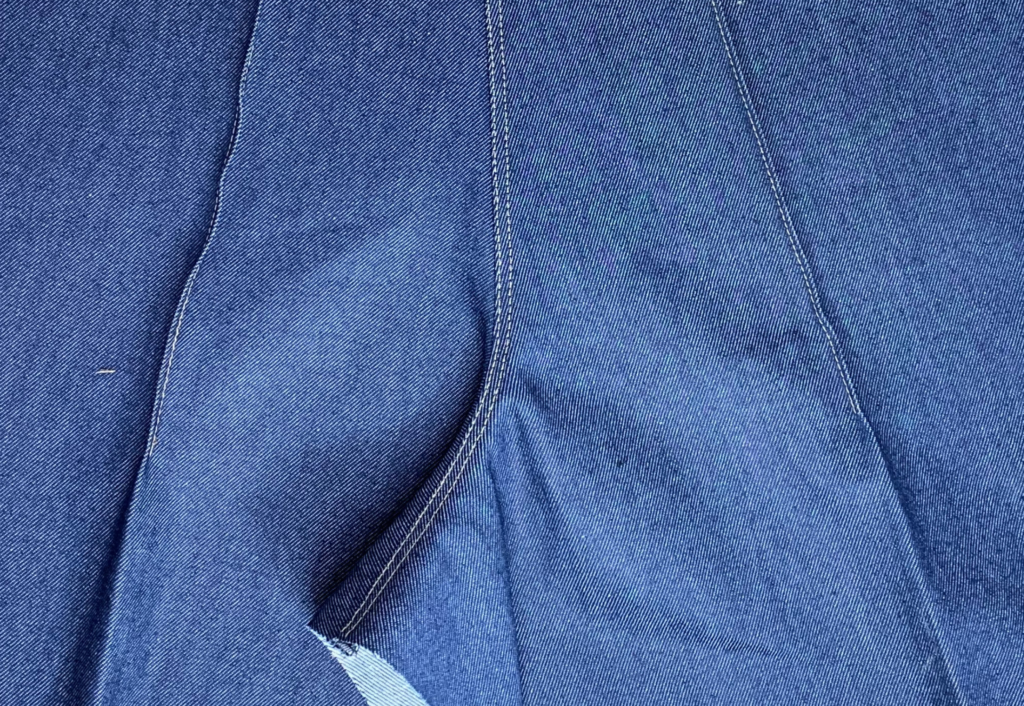
* Optional: Sew a twin needle contrast topstitch on top of the seam.
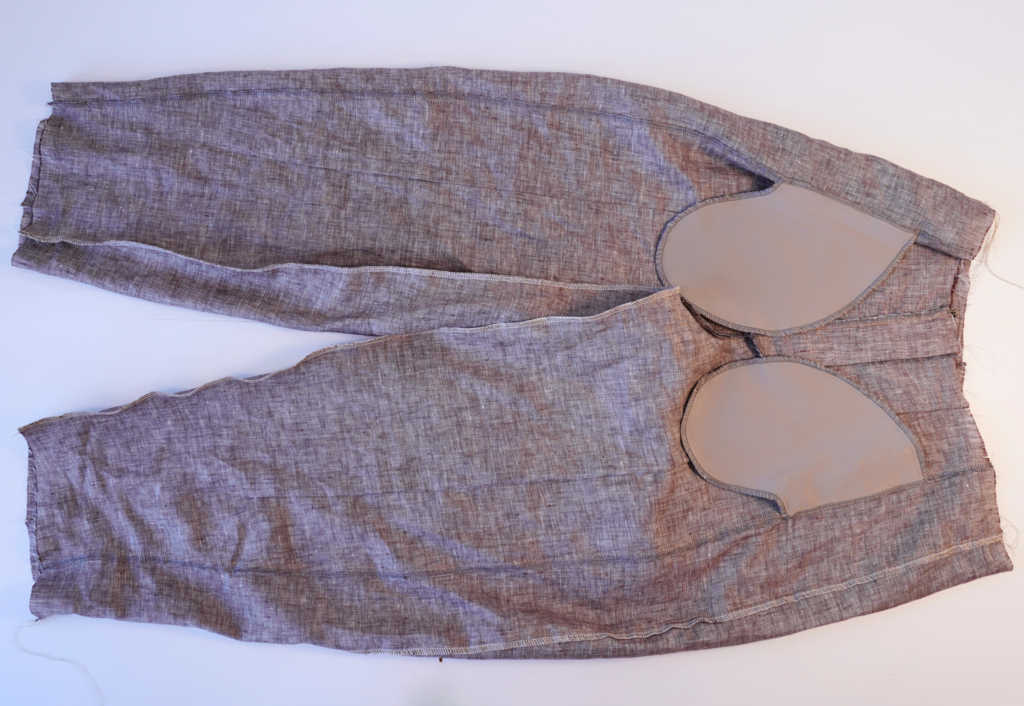
With right sides together sew the back and front inleg seams together.
Neaten with an overlocker/serger and press toward the back.
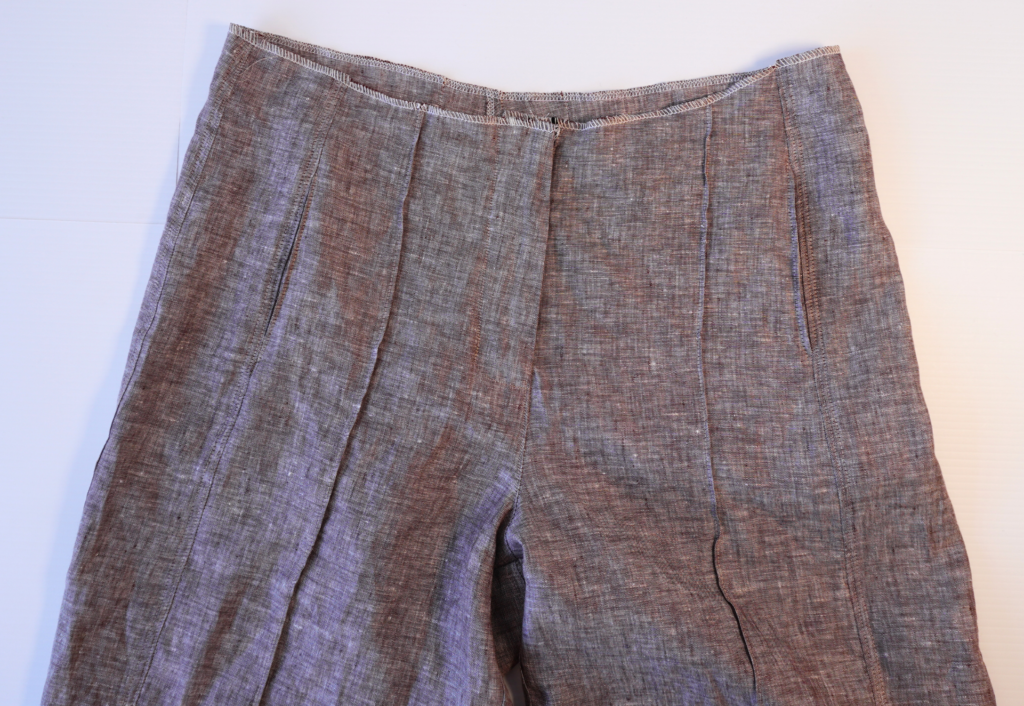
Neaten the waist of the pant with an overlocker/serger.
WAISTBAND & BELT LOOPS:
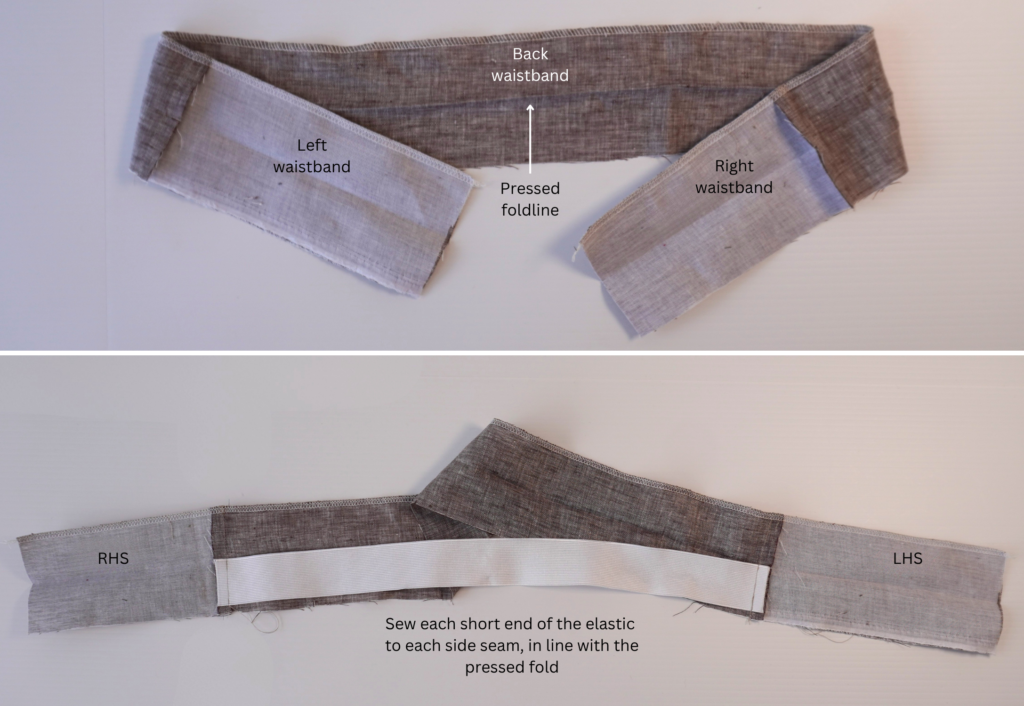
With right sides together sew the Front Right Waistband (1) and Front Left Waistband (2) to the Back Waistband (3).
Press the side seams toward the front and overlock/serge the length of the inside waistband edge.
With wrong sides together press the waistband in half as a guide for your elastic.
Cut the elastic to your preferred personal measurement (or refer to the measurement chart for cut length), and sew each short end of the elastic to each side seam, in line with the pressed fold line.
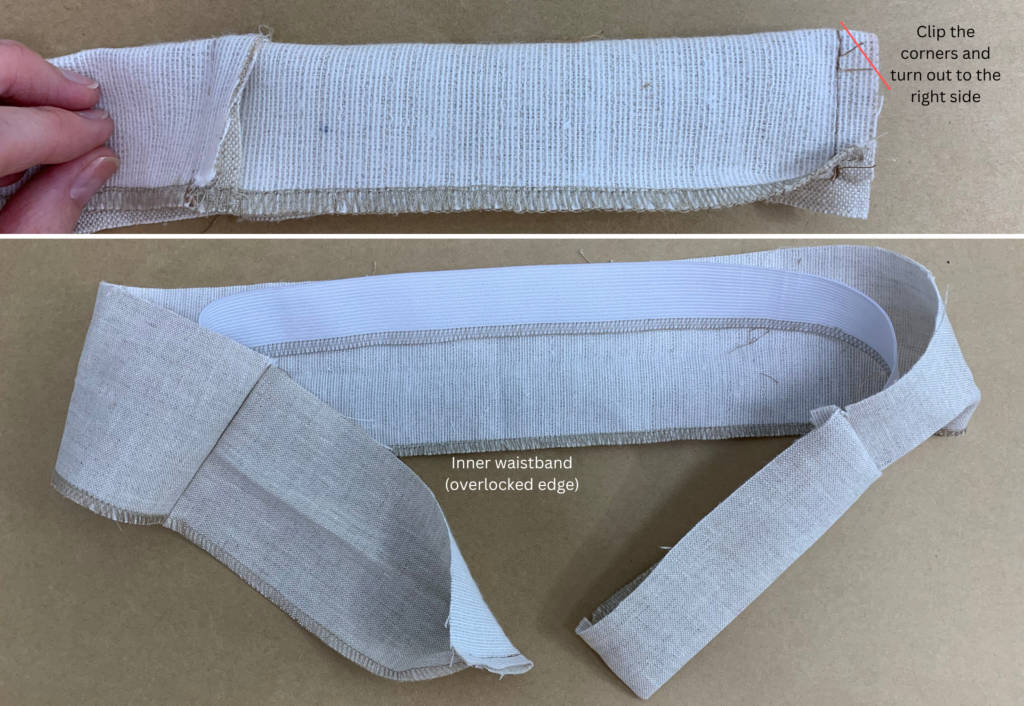
With right sides together fold the waistband in half and sew along each front edge of the waistband, clip the corners and turn out to the right side.
Make sure the left waistband is on the left side and the right waistband is on the right.
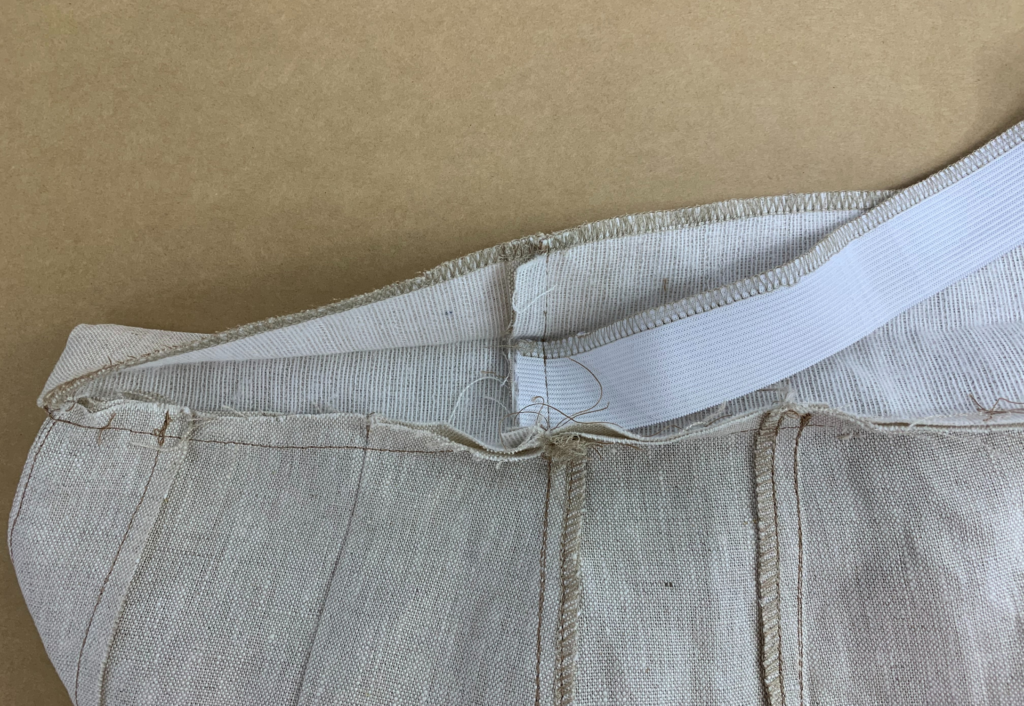
With right sides together sew the outer waistband seam to the waist of the pant.
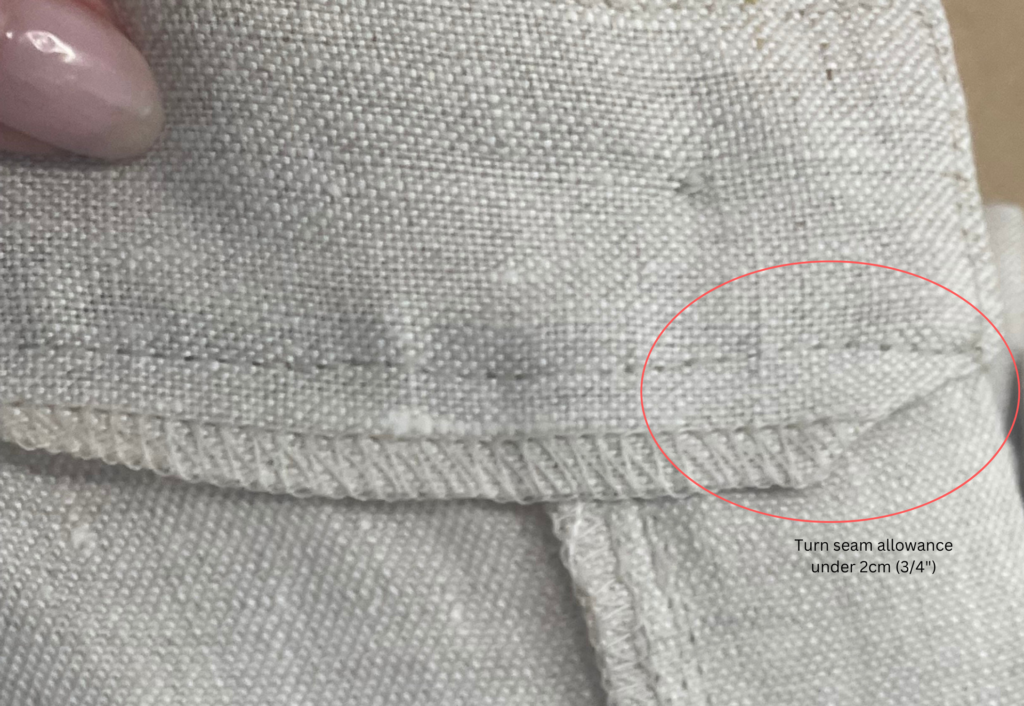
Turn the seam allowance of the inner waistband under for the first 2cm (¾”) of both centre front inner waistbands to the inside to achieve a clean finish over the zip/fly area.
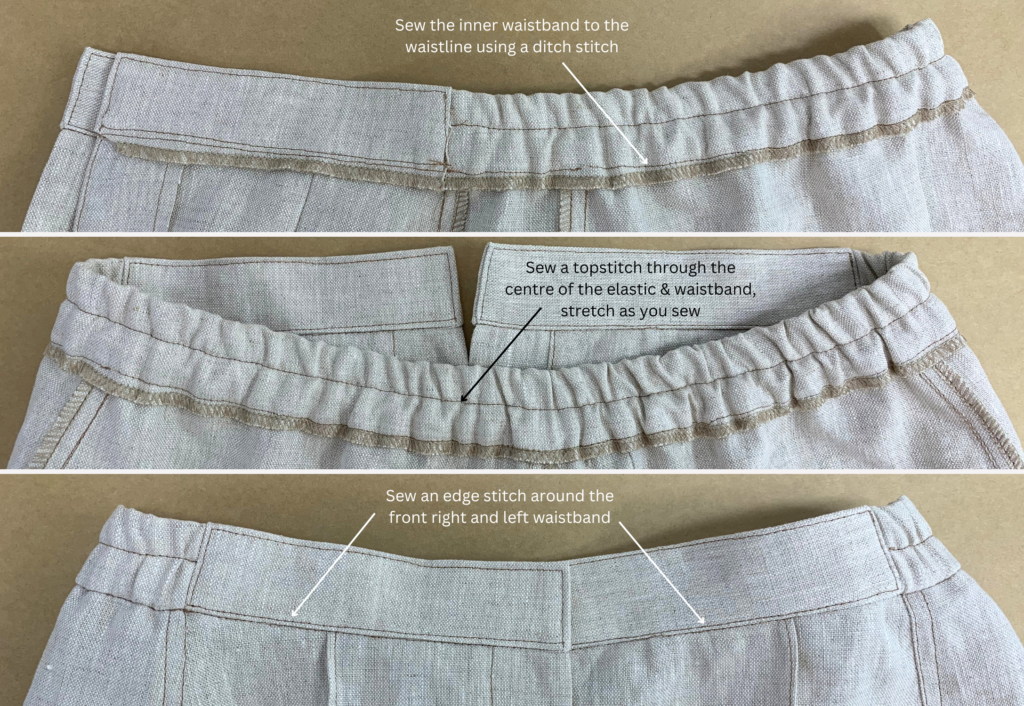
Press the waist seam of the outer waistband upwards to the inside and sew the inner waistband down with a ditch stitch (sink stitch).
Sew a topstitch through the centre of the elastic and the waistband, stretching the elastic as you sew.
Sew an edge stitch around the front right and left waistband.
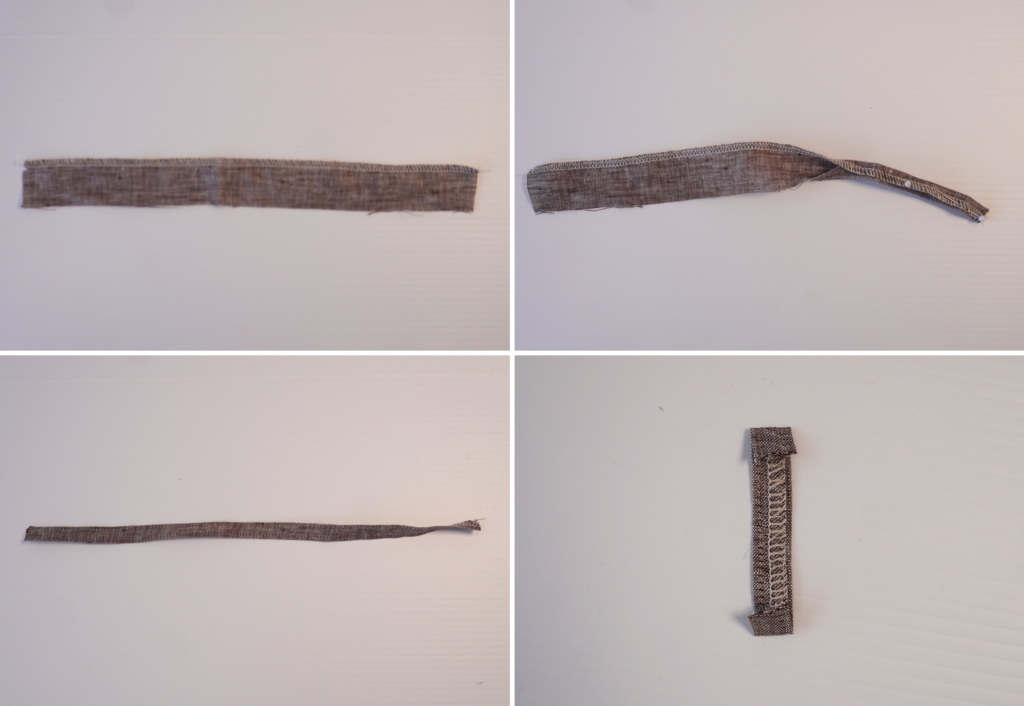
Neaten one length of the Belt Loops (10) with an overlocker/serger.
Fold the opposite edge of the belt loop under the overlocked/serged edge and sew an edge stitch along each side of the belt loop.
Cut the belt loops into five 6.5 cm (2 5/8”) lengths pieces, this allows a 1cm (3/8”) seam to turn under for each belt loop.
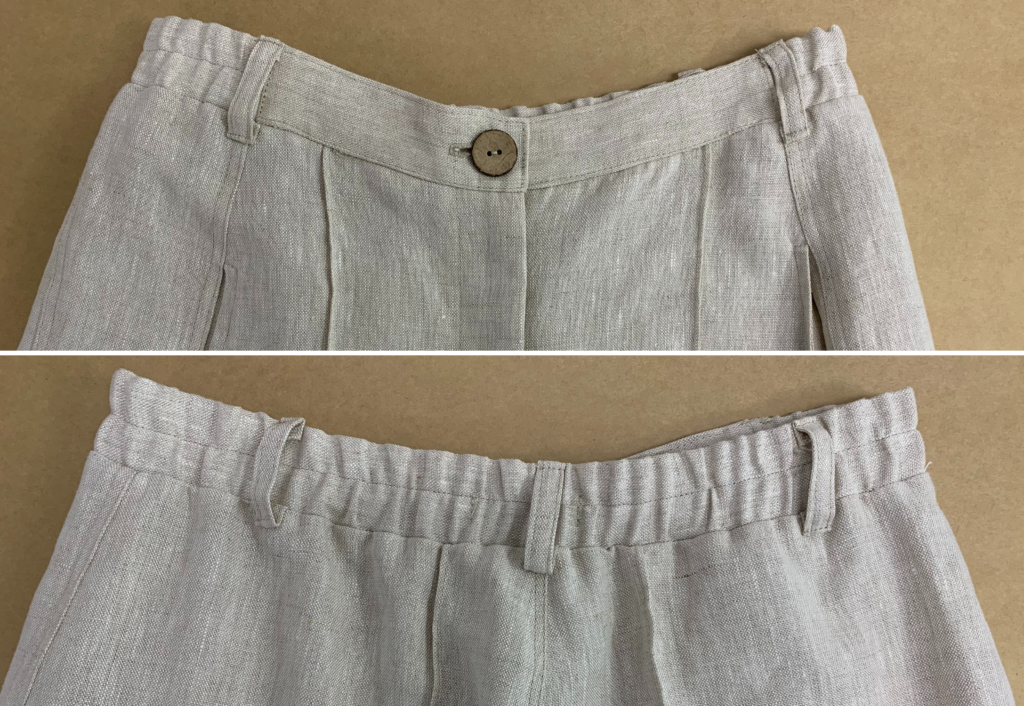
Press the top and base of the belt loops to the inside and pin the belt loops in place. One belt loop is to be positioned at the centre back and one on each side back and one over the side seam, refer to the markings on the pattern.
Once in place stitch the top of the belt loop to the top of the waistband and the base of the belt loop to the pant below the waistband.
COMPLETION:
Sew the buttonhole to the right front waistband and button to the left waistband, checking the zip is concealed when fastened.
Neaten the pant hem with an overlocker/serger.
Turn the hem allowance to the inside at the hem notch and sew into place with a topstitch (optional: use contrasting thread).
Trim any loose threads and thoroughly press your new pants!