With so many options to print at home, there maybe some troubleshooting involved to ensure your Tiled A4/letter paper pattern prints correctly, and at scale as per the test square supplied.
We always recommend that you install Adobe Acrobat Reader to print and edit patterns. This software is useful for using the layering tool for our nested multi-size patterns. The software is free to download HERE
Printing from a PC or laptop is easiest. If you have trouble using an Apple device we reccomend finding a friend or family member that can print it for you. Handheld Apple devices don’t offer the reccommended printer configurations.
See below for the most common printer hurdles and how to resolve them.
- Basic Printer Settings for Correct Orientation
- Pattern is Printing with large black squares
- Test Square is too big/Printing from an iPad
Basic Printer Settings for Correct Orientation
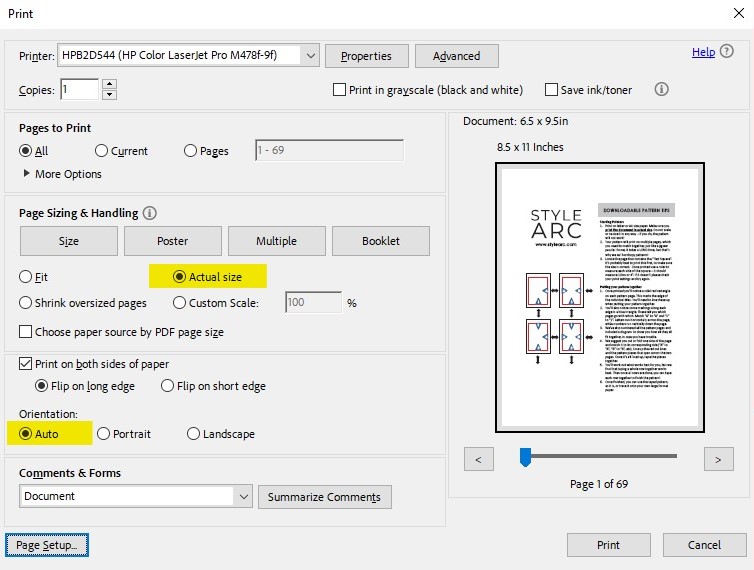
These are basic printer dialogue box steps to make sure your pattern is centred and at scale. Some customers have issues with off centre printing, cutting the edge of Tile pages.
Open your Tiled pattern in Adobe. Select Print. Then you need to check all the below settings on the dialogue box.
- Always make sure Adobe Software is up to date.
- Change Printer Orientation to Auto: In your printer settings, change the page orientation to Auto. This ensures the printer automatically adjusts to the correct orientation for your PDF.
- Make sure Page Sizing is set to Actual Size
- Test Print a Pattern Piece: Print one pattern piece to check the page orientation.
Your printer dialogue box should look like the below if all the above is followed:
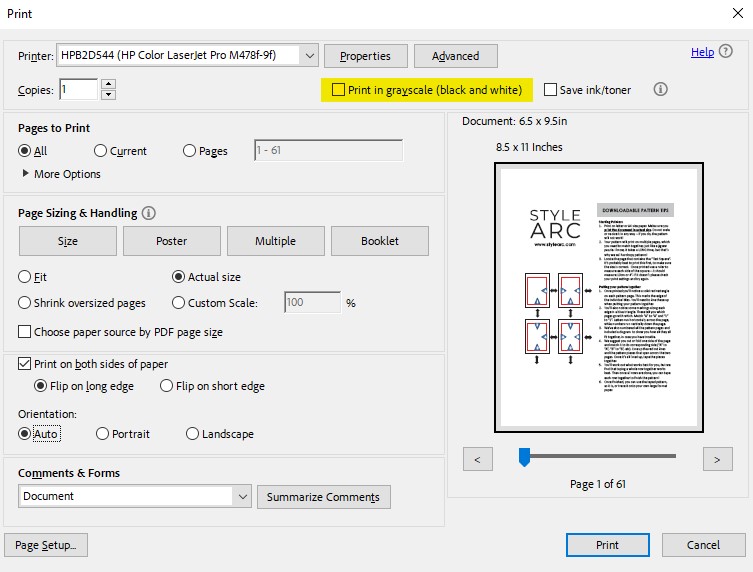
Pattern is Printing with large black squares
Some customers have had problems with large black squares/diamonds appearing on their Tile pieces once printed. This bizarre glitch seems to impact a handful of users only. We don’t know why it happens however it seems to linked to Mac users primarily.
The most common fix is very simple and fast.
Deselect ‘grayscale’ in your printer settings- see image below.
Test Square is too big/Printing from an Apple Device
The most common cause for incorrect test square measurements is when a customer prints from a weblink, instead of downloading the pattern fully. This is paired to customers using iPads to print from as the print process is very different to using your laptop/PC through Adobe Acrobat.
It is simple enough to resolve, if you complete some basic steps below. Please make sure that you already have a printer connected to your iPad before commencing print. Please take time to read the below thoroughly.
STEP 1
Open your email order and click on the Tiled file you wish to print at home.
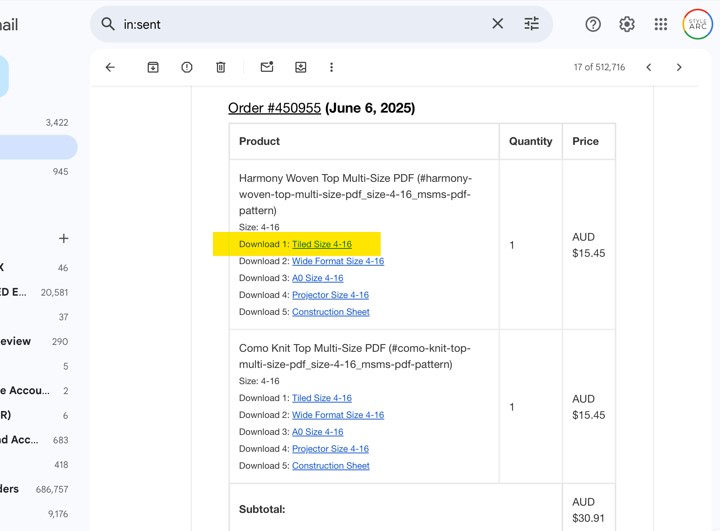
This will then open the document in a new window, note that it is a weblink document and not the actual PDF file yet.

Most customers try to print from this step, it will not work, you must finish saving it as a PDF.
STEP 2
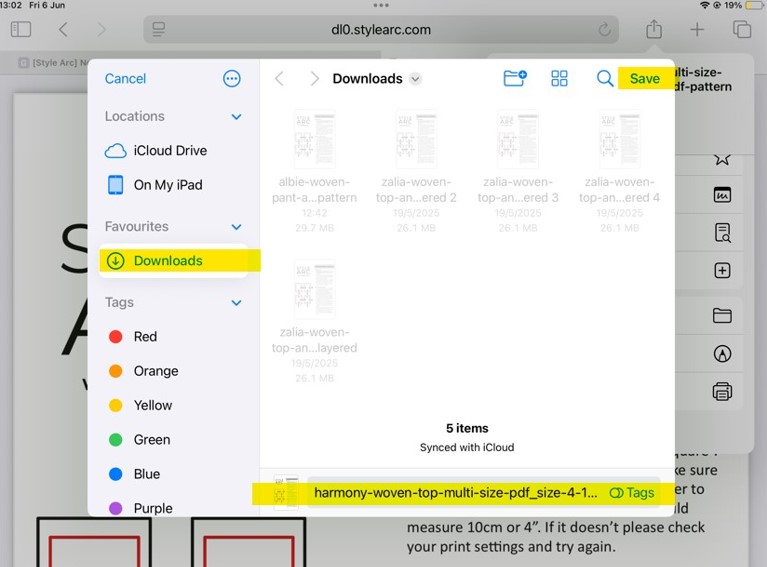
Now we need to save the file as a download. Select the Send To logo at the top right of the screen. This will prompt a drop down menu of options, scroll down until you see the one titled Save to Files. Click this option.
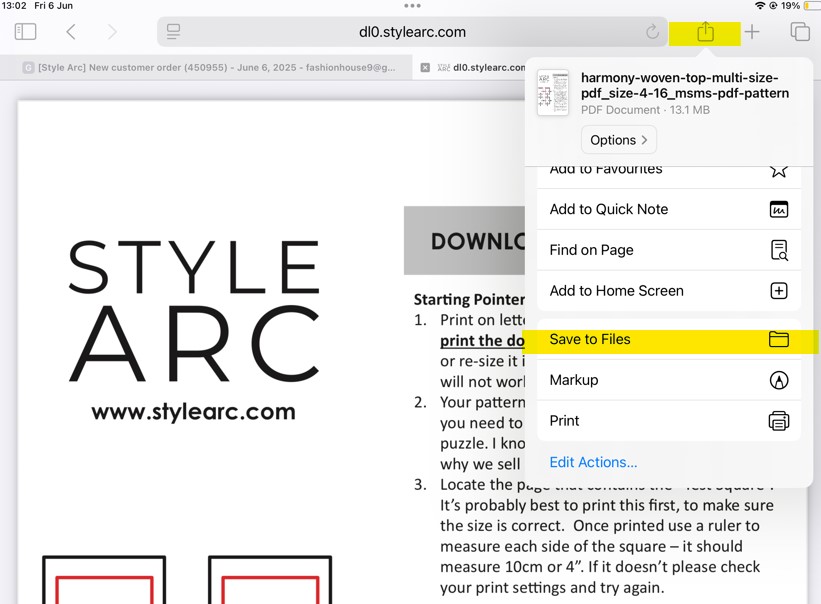
This will take you to the Download Files section on your iPad, the title will appear in the text box (you can change the name of the file if you wish, we recommend leaving it as is). All you need to do is click Save in the top right corner.
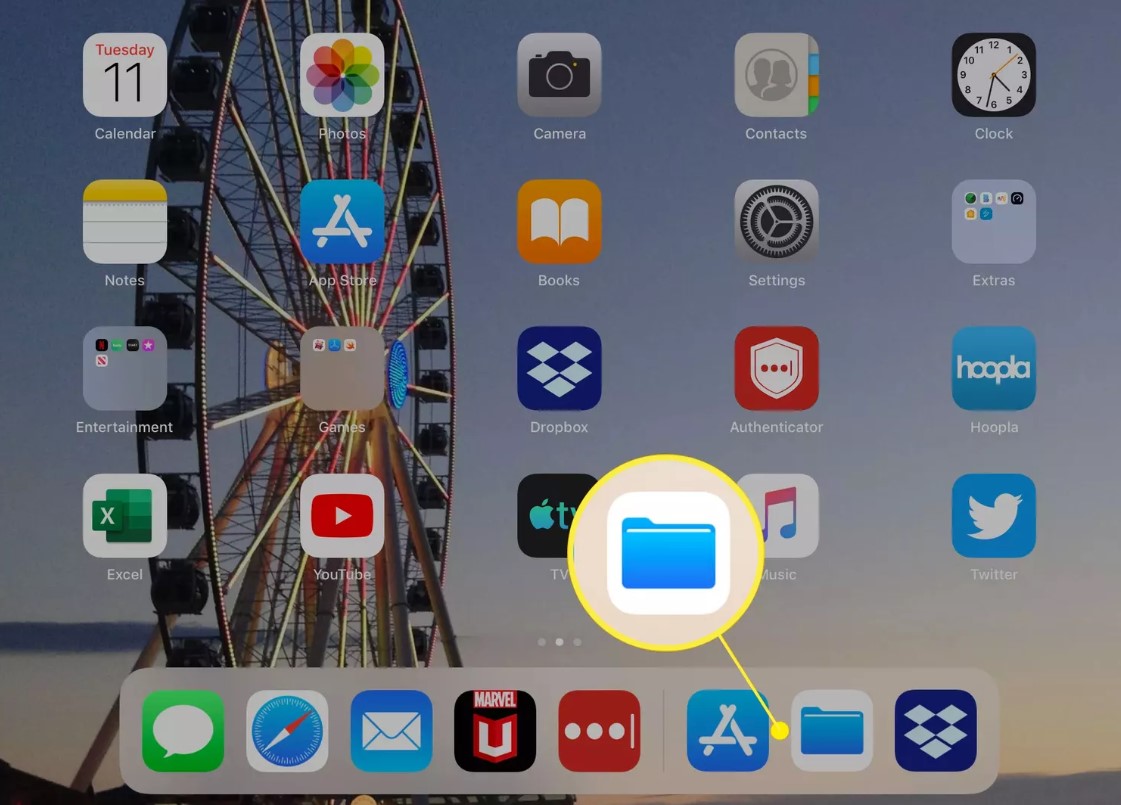
Now exit this screen and go to the menu on your iPad.
STEP 3
On your iPad home screen, look for the FILES App
Double click to open this folder. This will bring you back to the download folder you saved your pattern in just prior.
Select the pattern you wish to print and double click to open
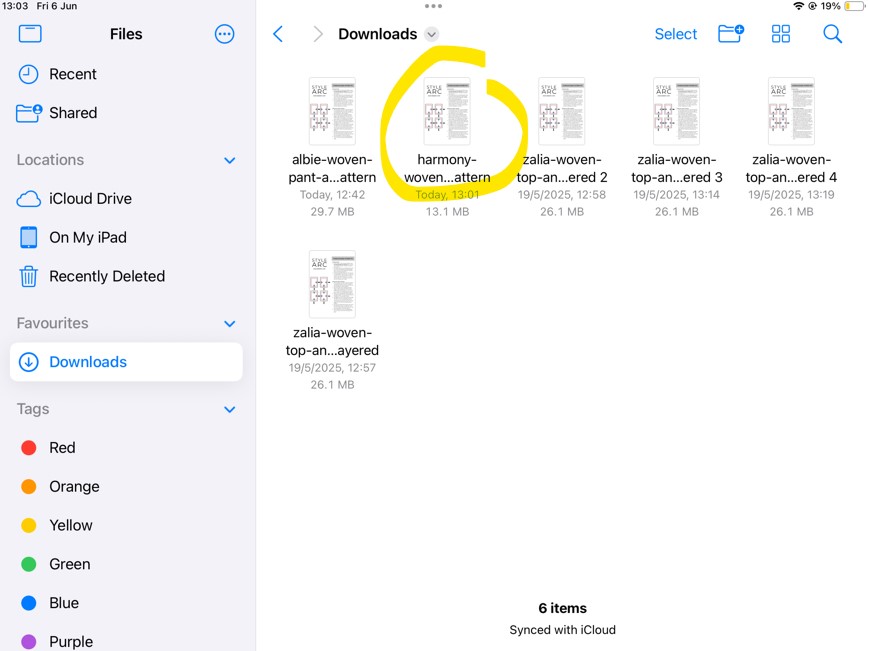
The pattern will now open as a downloaded PDF ready for printing.
STEP 4
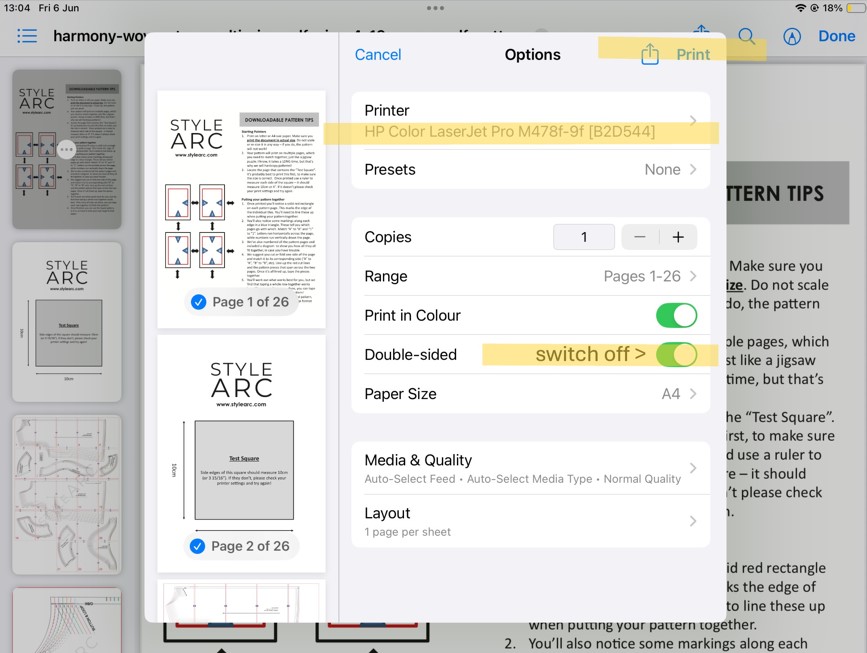
Once again you need to select the Send to icon at the top right of the screen. Again the dropdown menu will appear, this time click on the word PRINT .
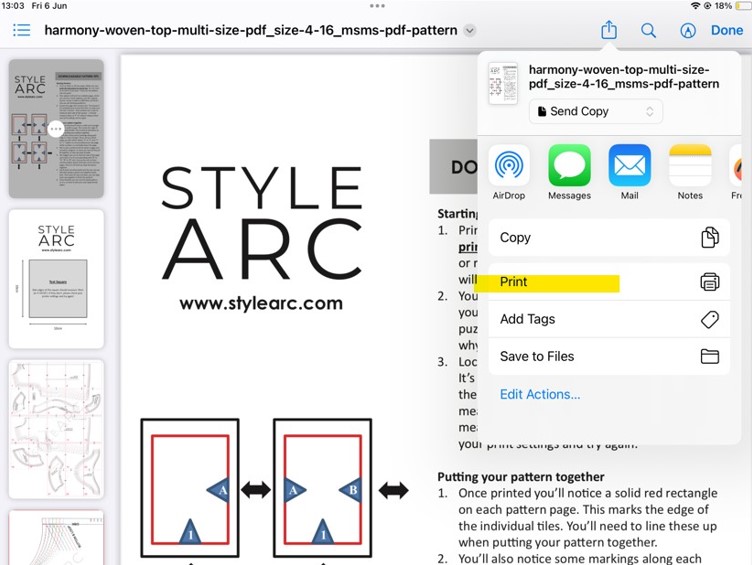
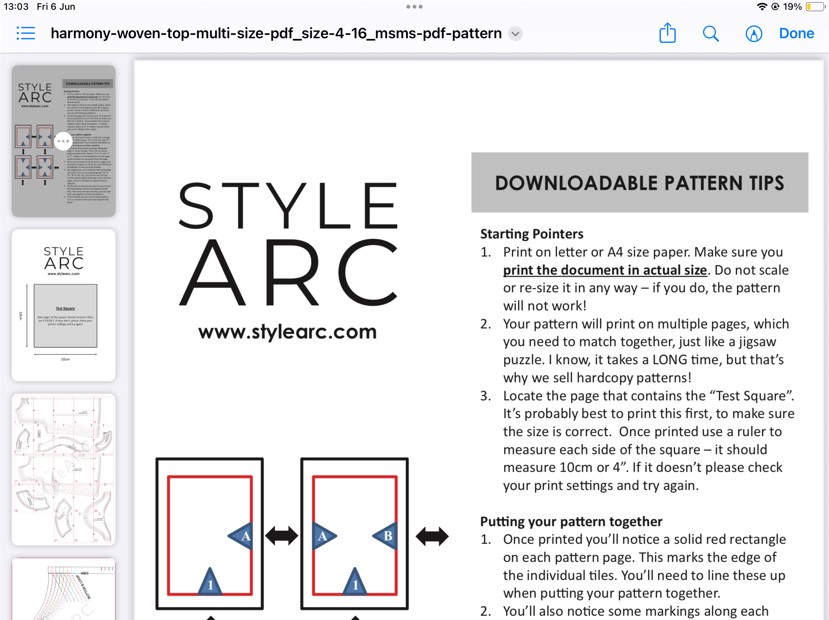
The PRINT dialogue box will open. Make sure you have a printer connected and adjust the page settings if you wish. We recommend printing single side only and in colour always when using a nested pattern
The last step is to measure the printed test square. If you have followed all these steps correctly it should be 10cm x 10cm and you can start assembling your pattern pieces. Ta Da!