Shop the Jess Knit Polo

#SAJessKnitPolo
PHOTO TUTORIAL
CONSTRUCTION
Please note: all seams are 1cm (⅜”) unless otherwise stated.
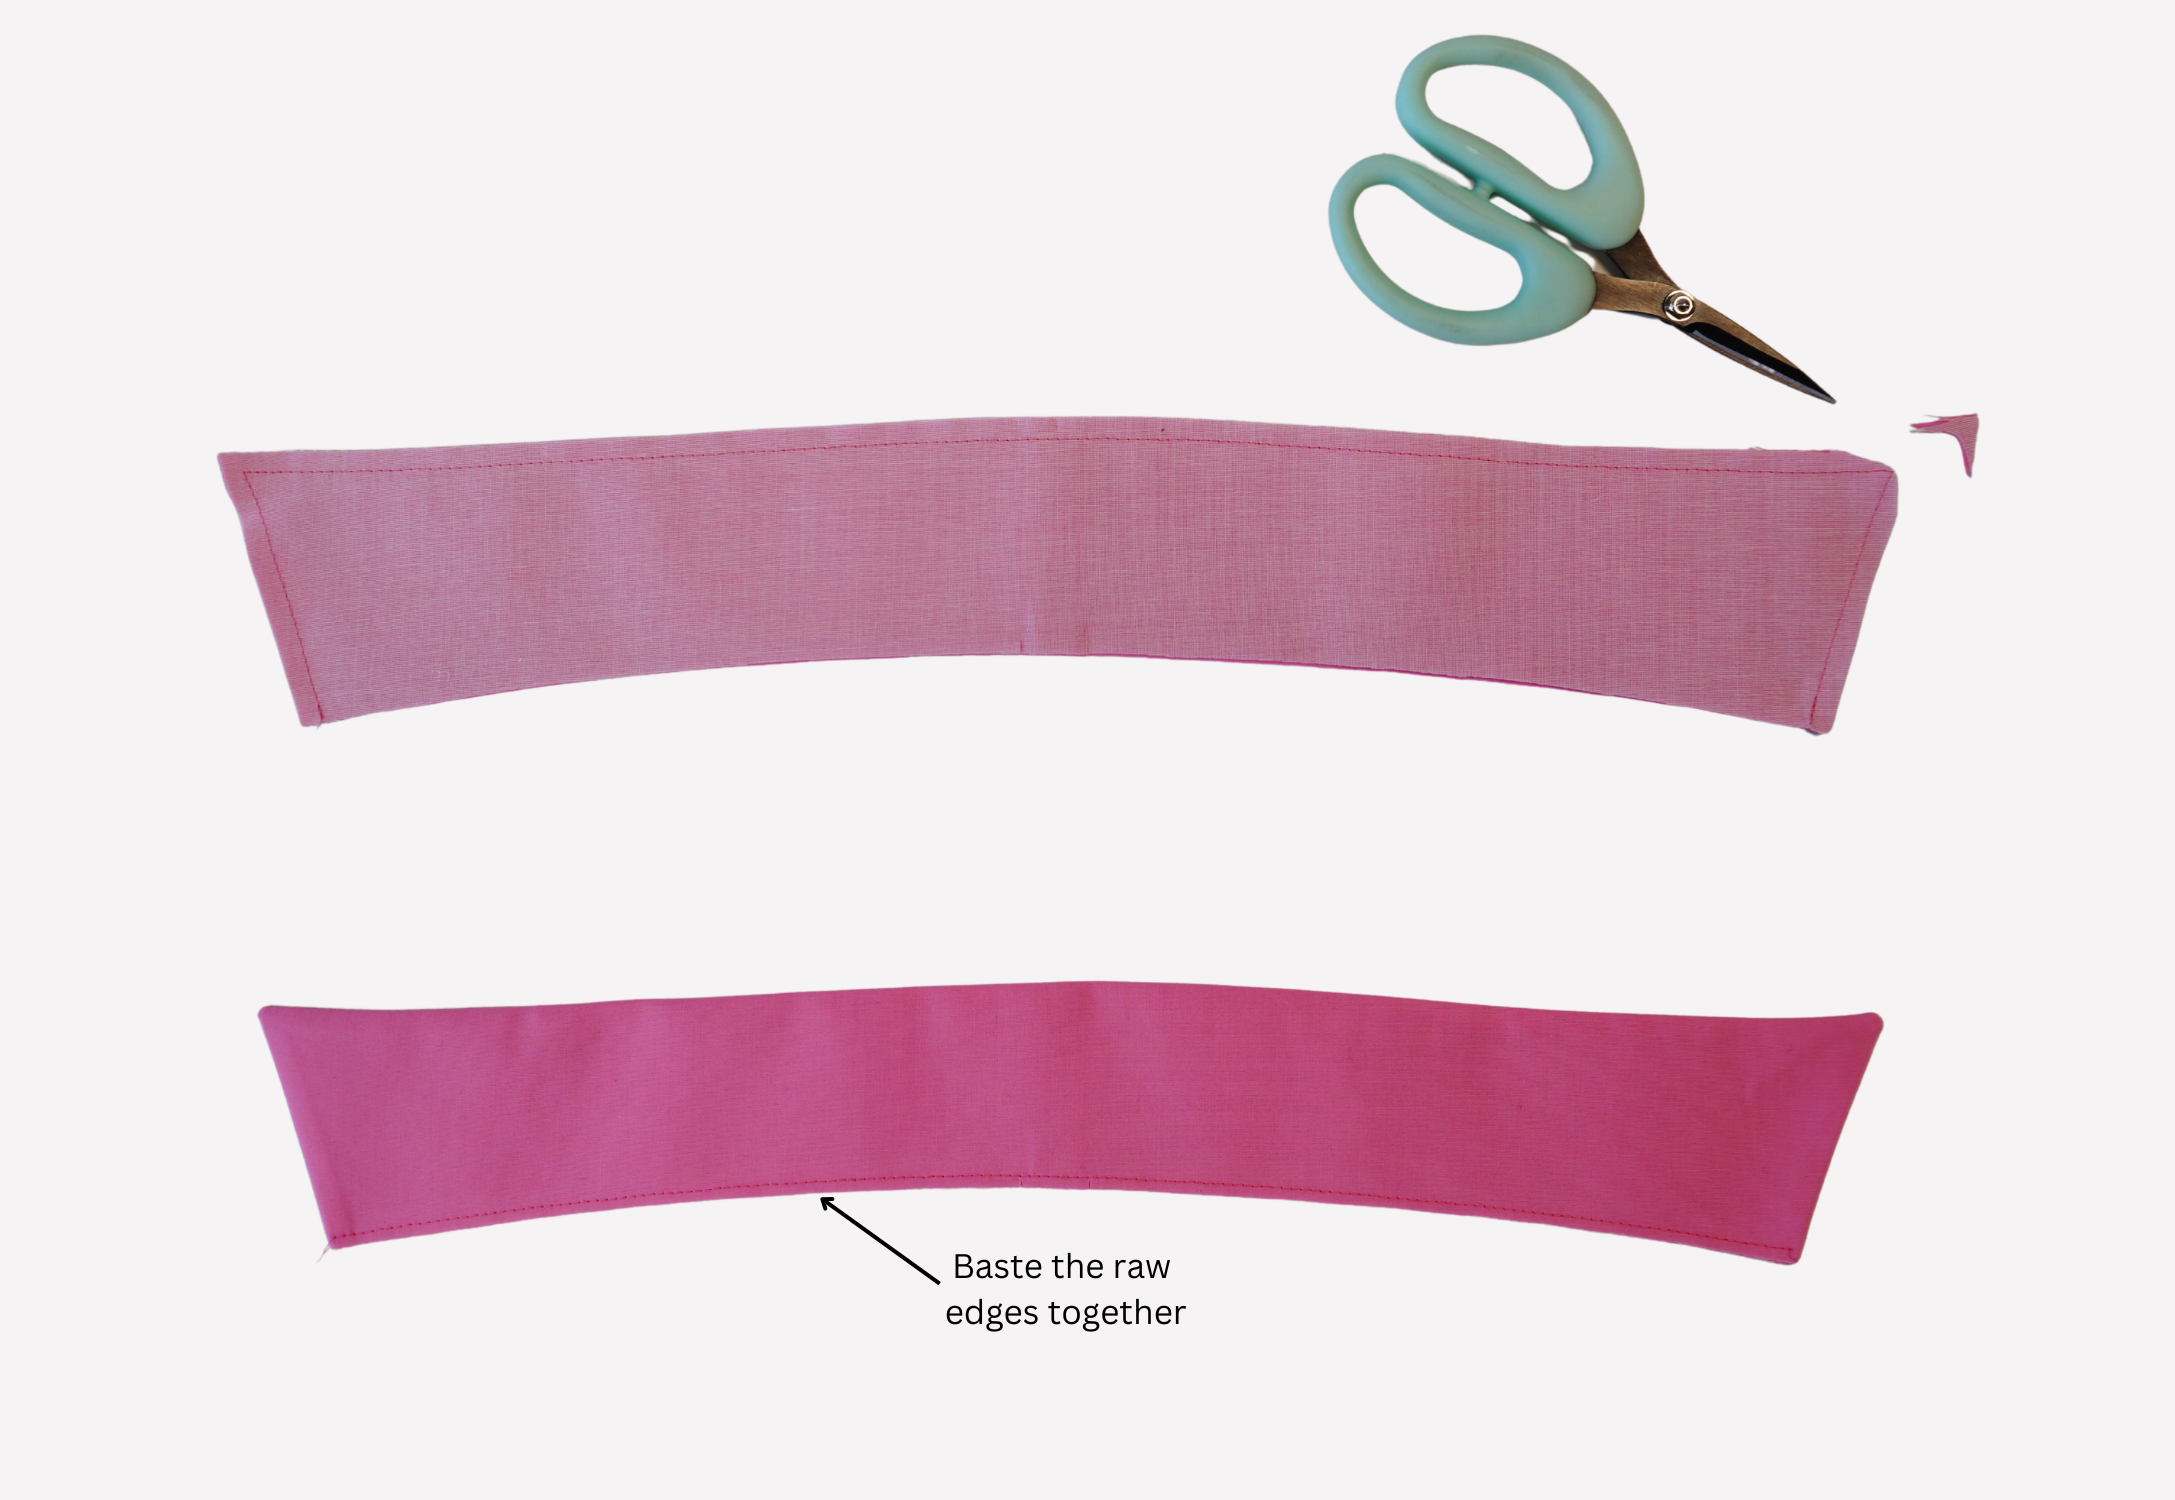
With RST, sew the pair of Collars (6) together using a 6mm (1/4”) seam.
Clip the corners, turn out to the right side and press.
Baste the raw edges together.
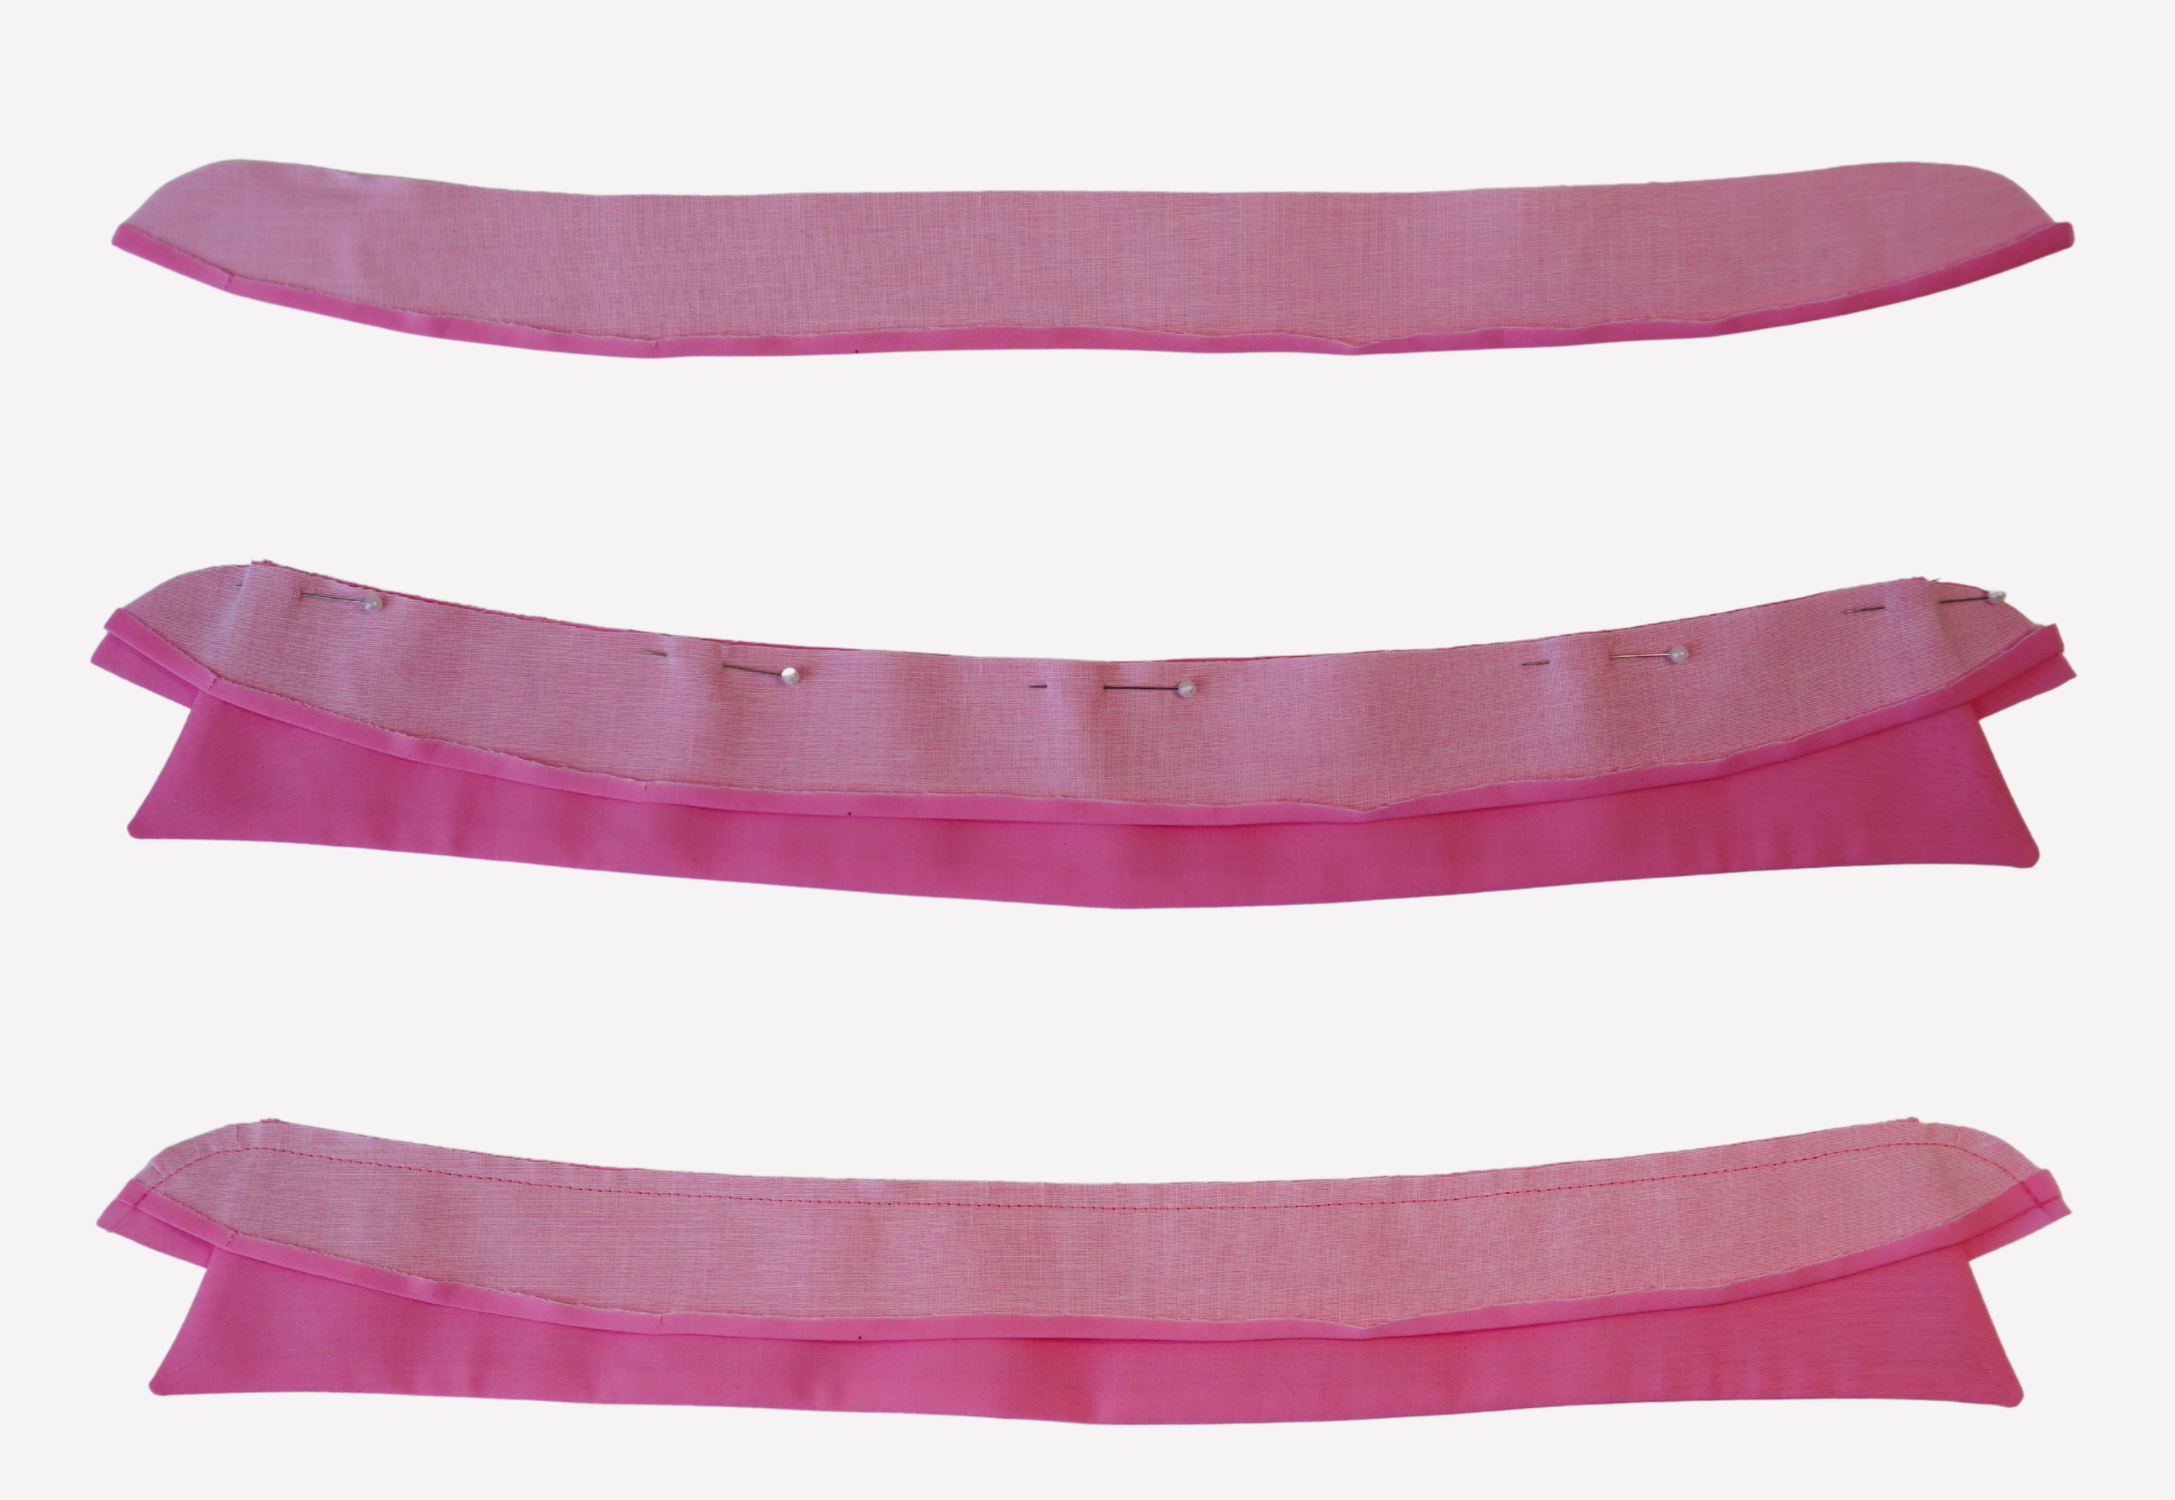
Press the lower edge of one of the Collar Stand (5) pieces to the inside 6mm (1/4”). This will be the outer collar stand.
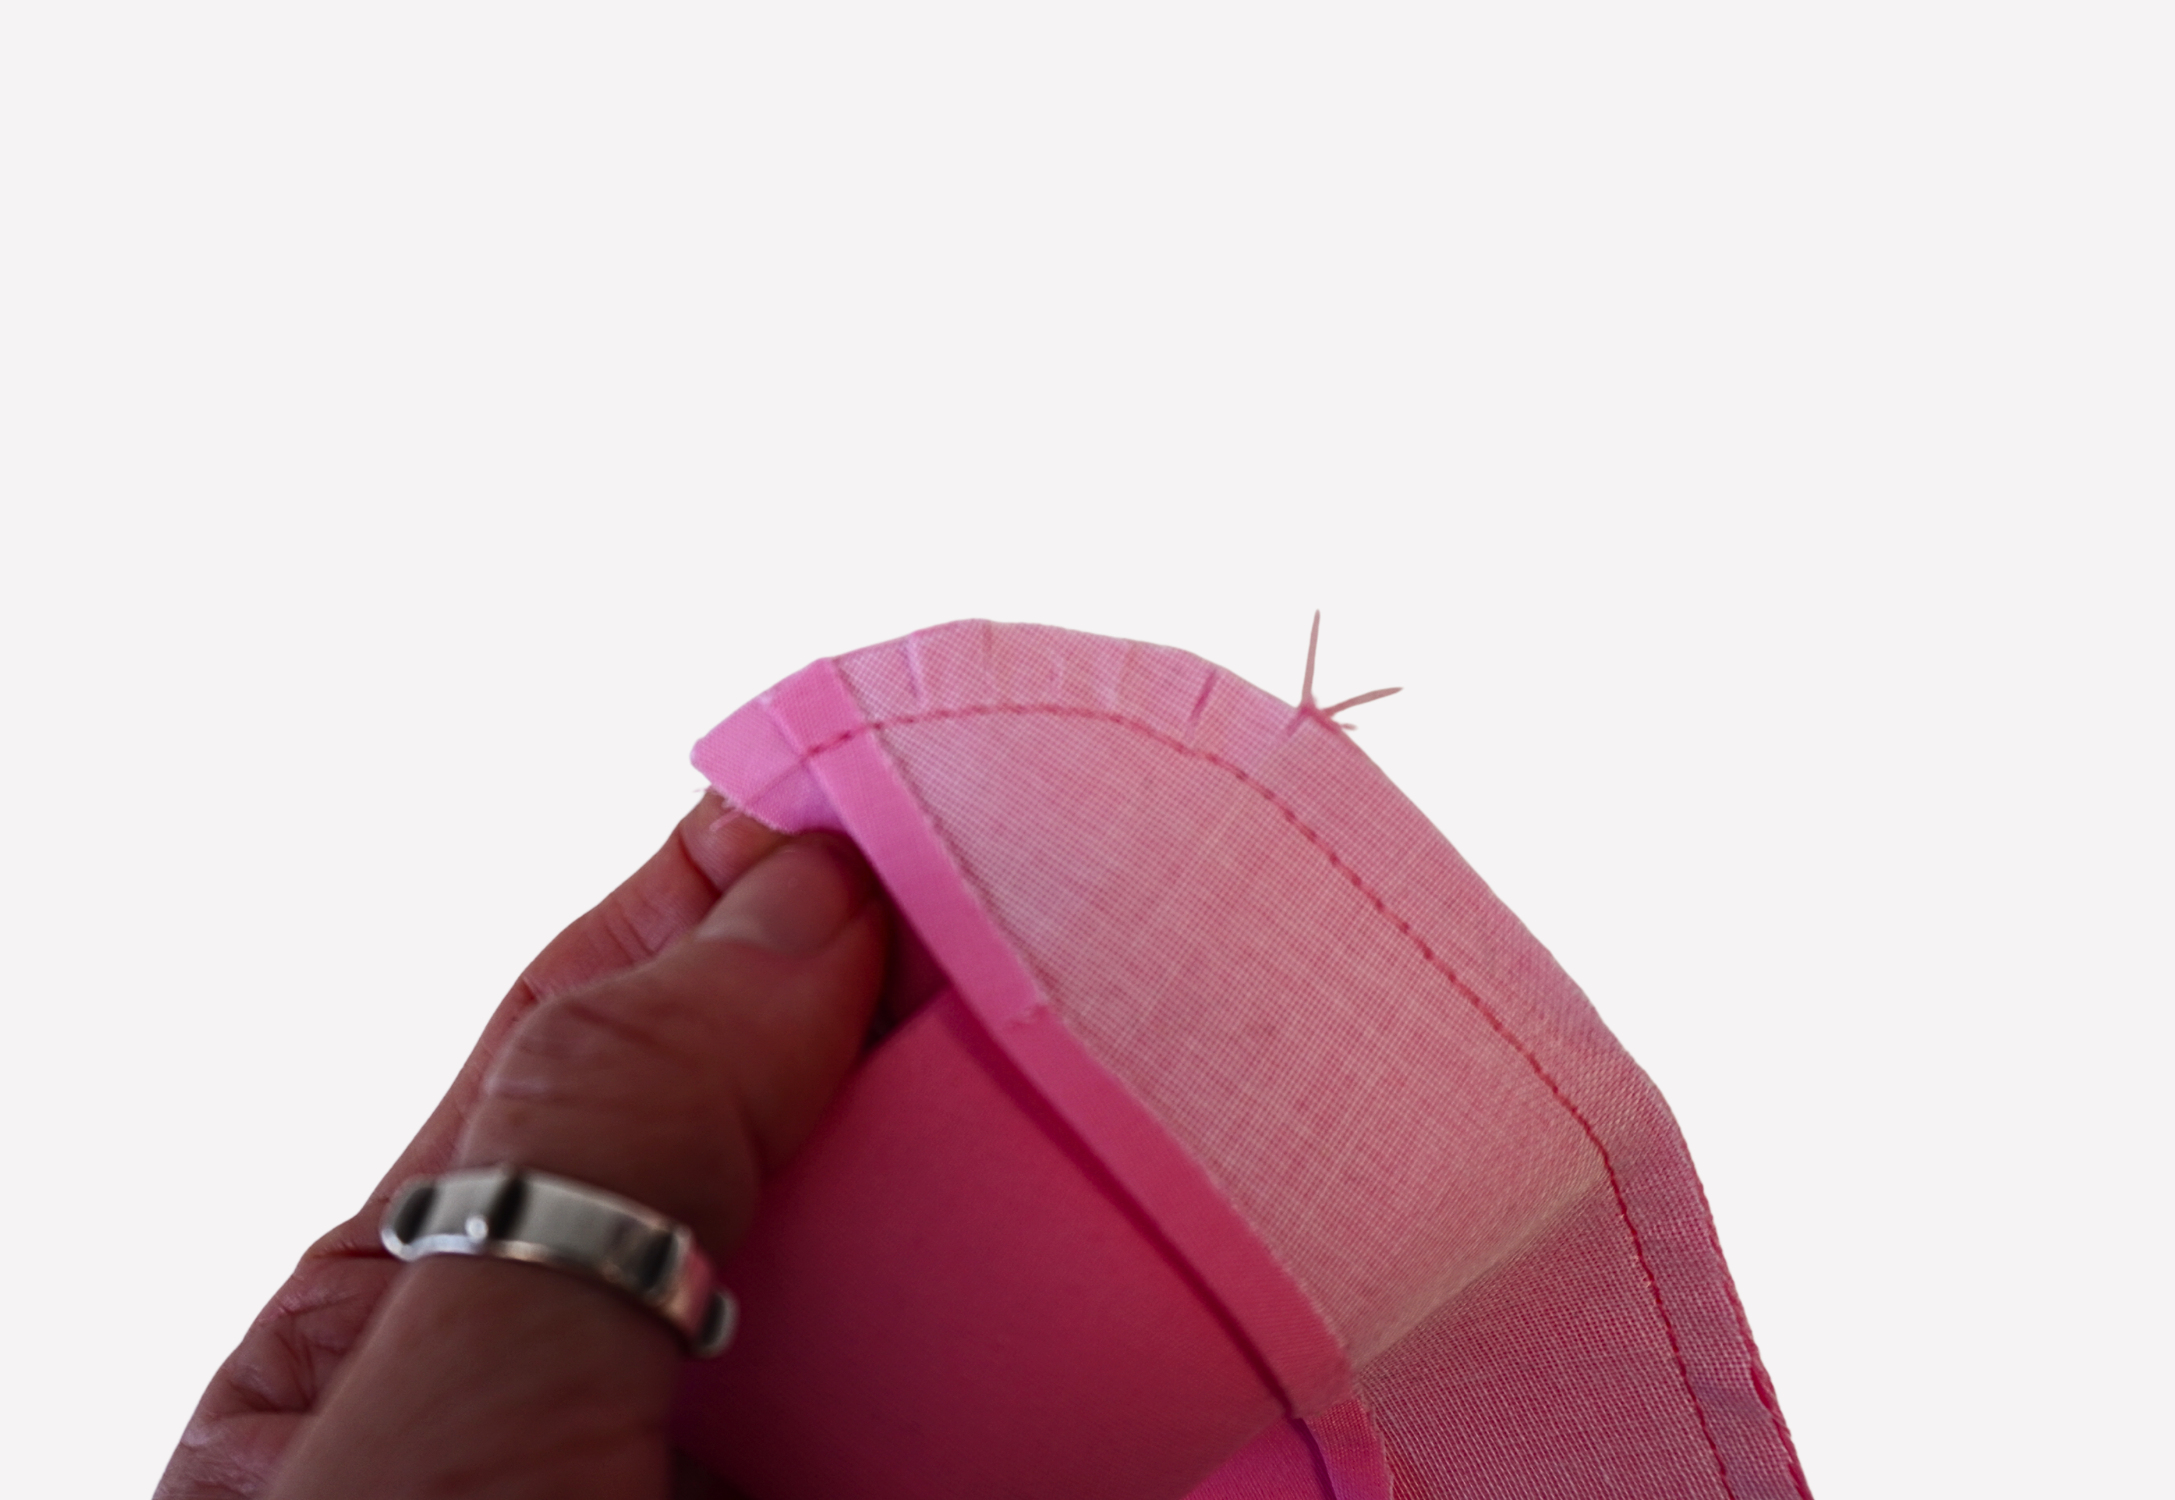
With notches aligned, place the collar between the collar stands and sew together, using a 6mm (1/4”) seam. Clip the curved seam of the collar stand.
Turn the collar stand out to the right side and press. Set the collar aside until the step marked with ***.
Apply fusing to the Front (2) tab opening on the wrong side of the fabric. This will stabilize the fabric, making the next steps easier.
Mark the placket width and length and the angled cuts on the corners to the wrong side of the front.
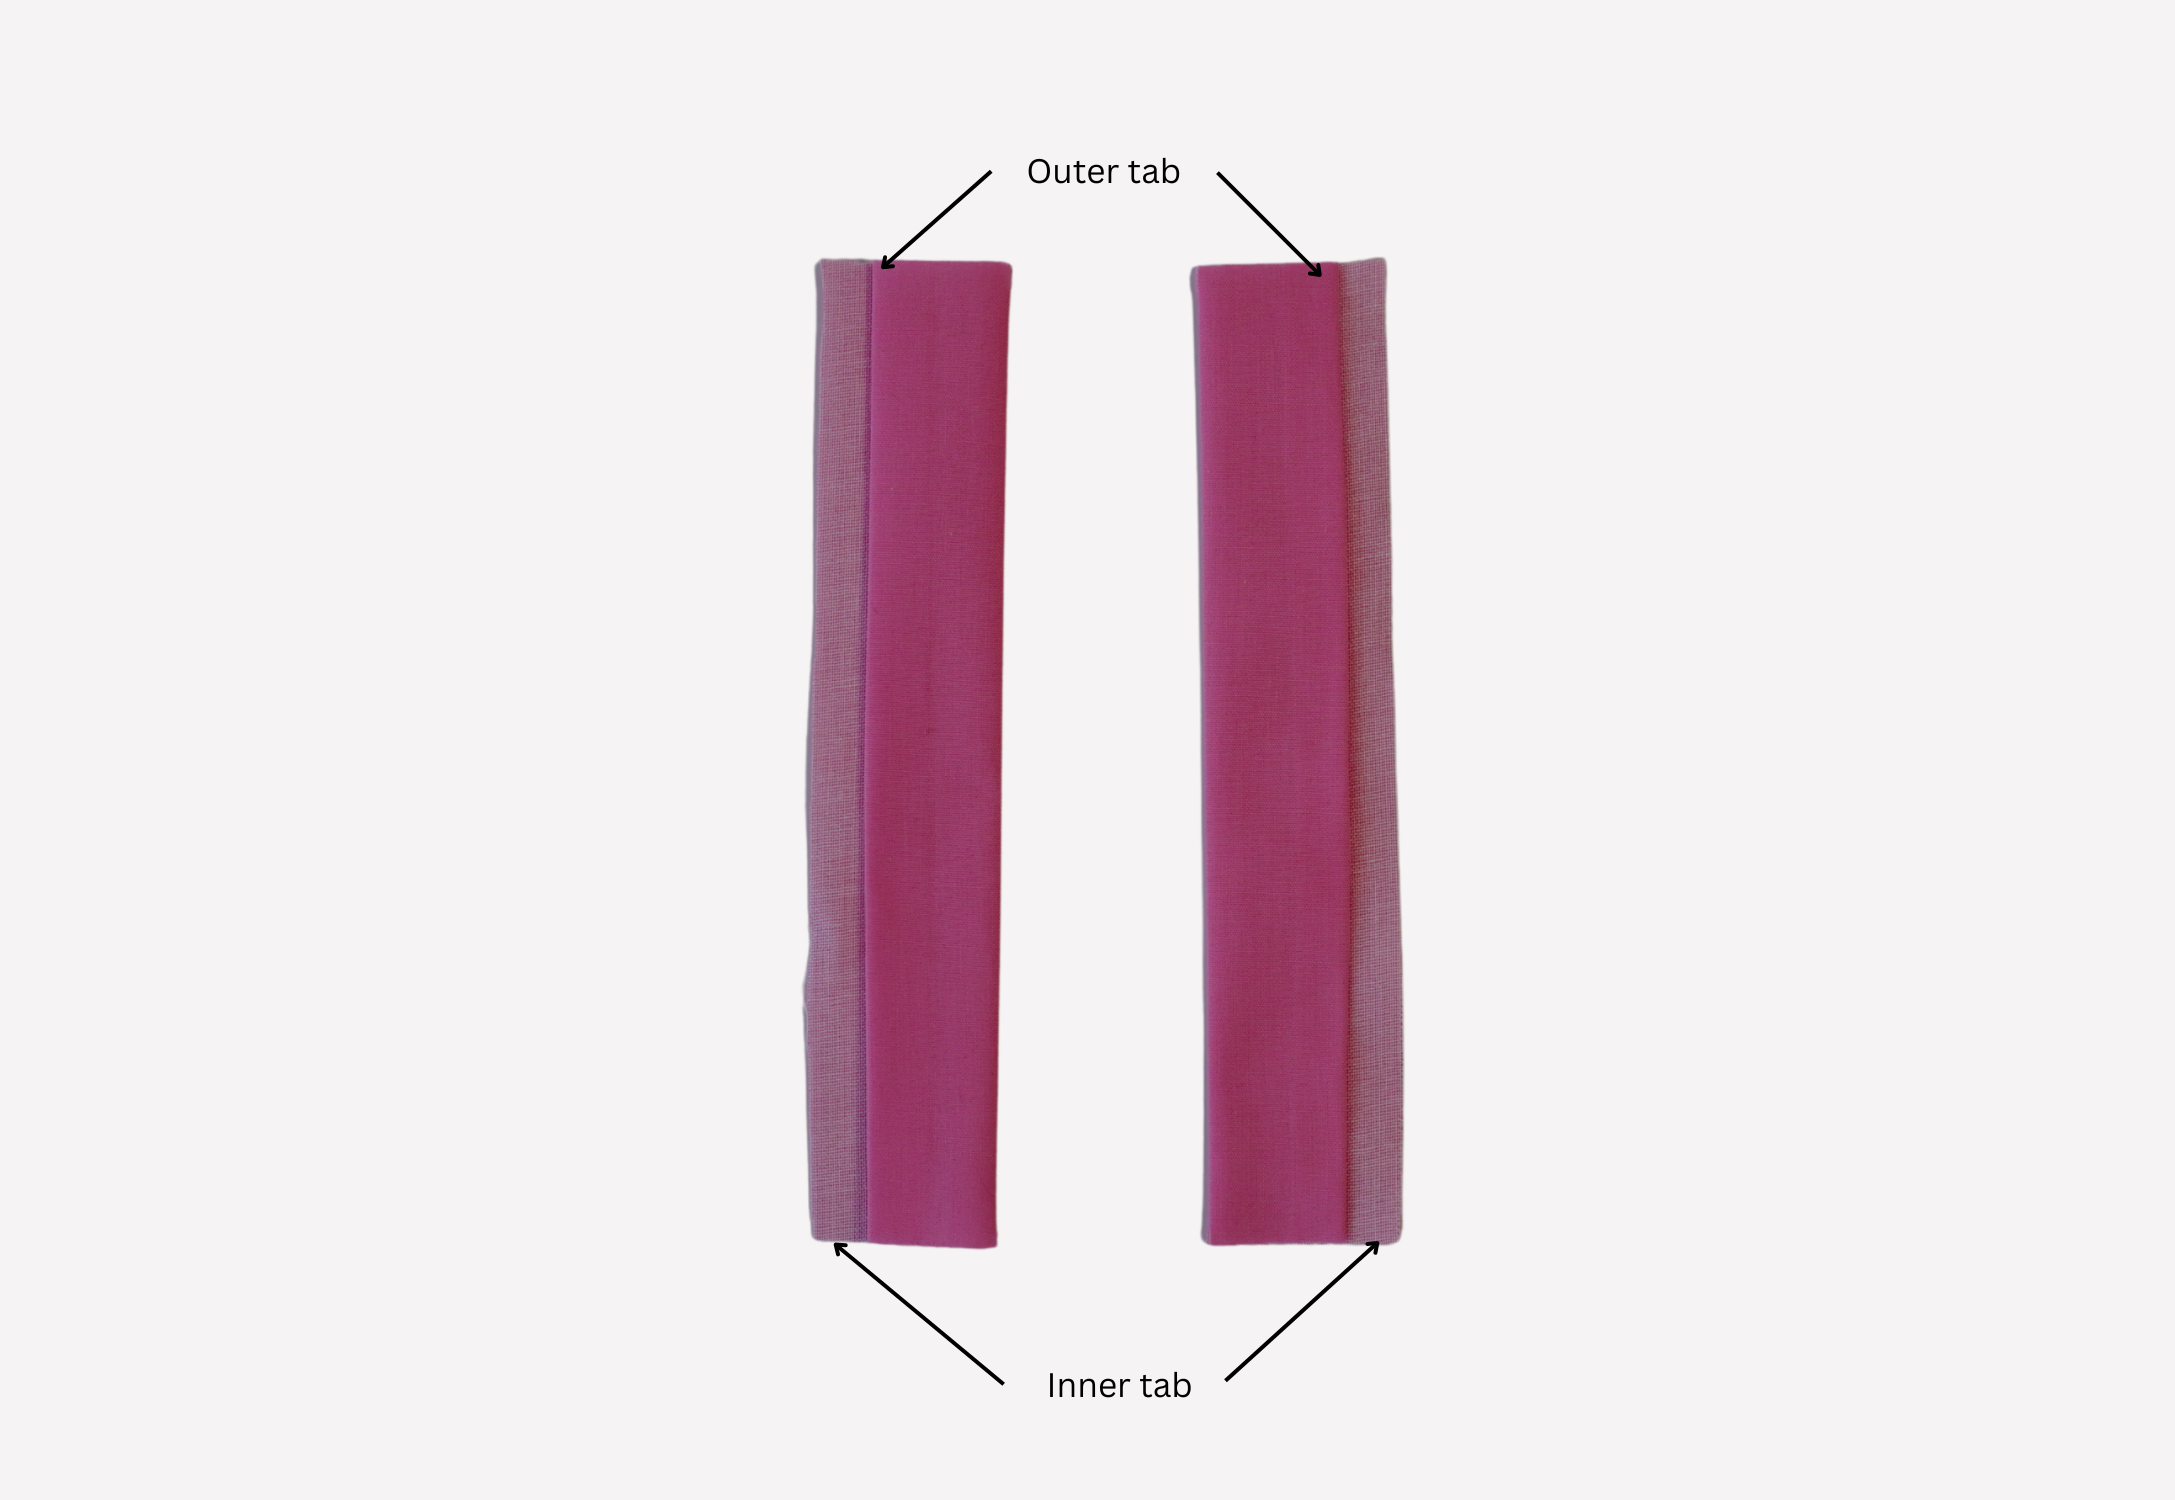
With WST, fold the Front Tab (7) in half lengthways. Press.
Press one long edge under 1cm (3/8”), to the inside (wrong side of fabric). This will be the outer tab. You should have a mirrored pair.
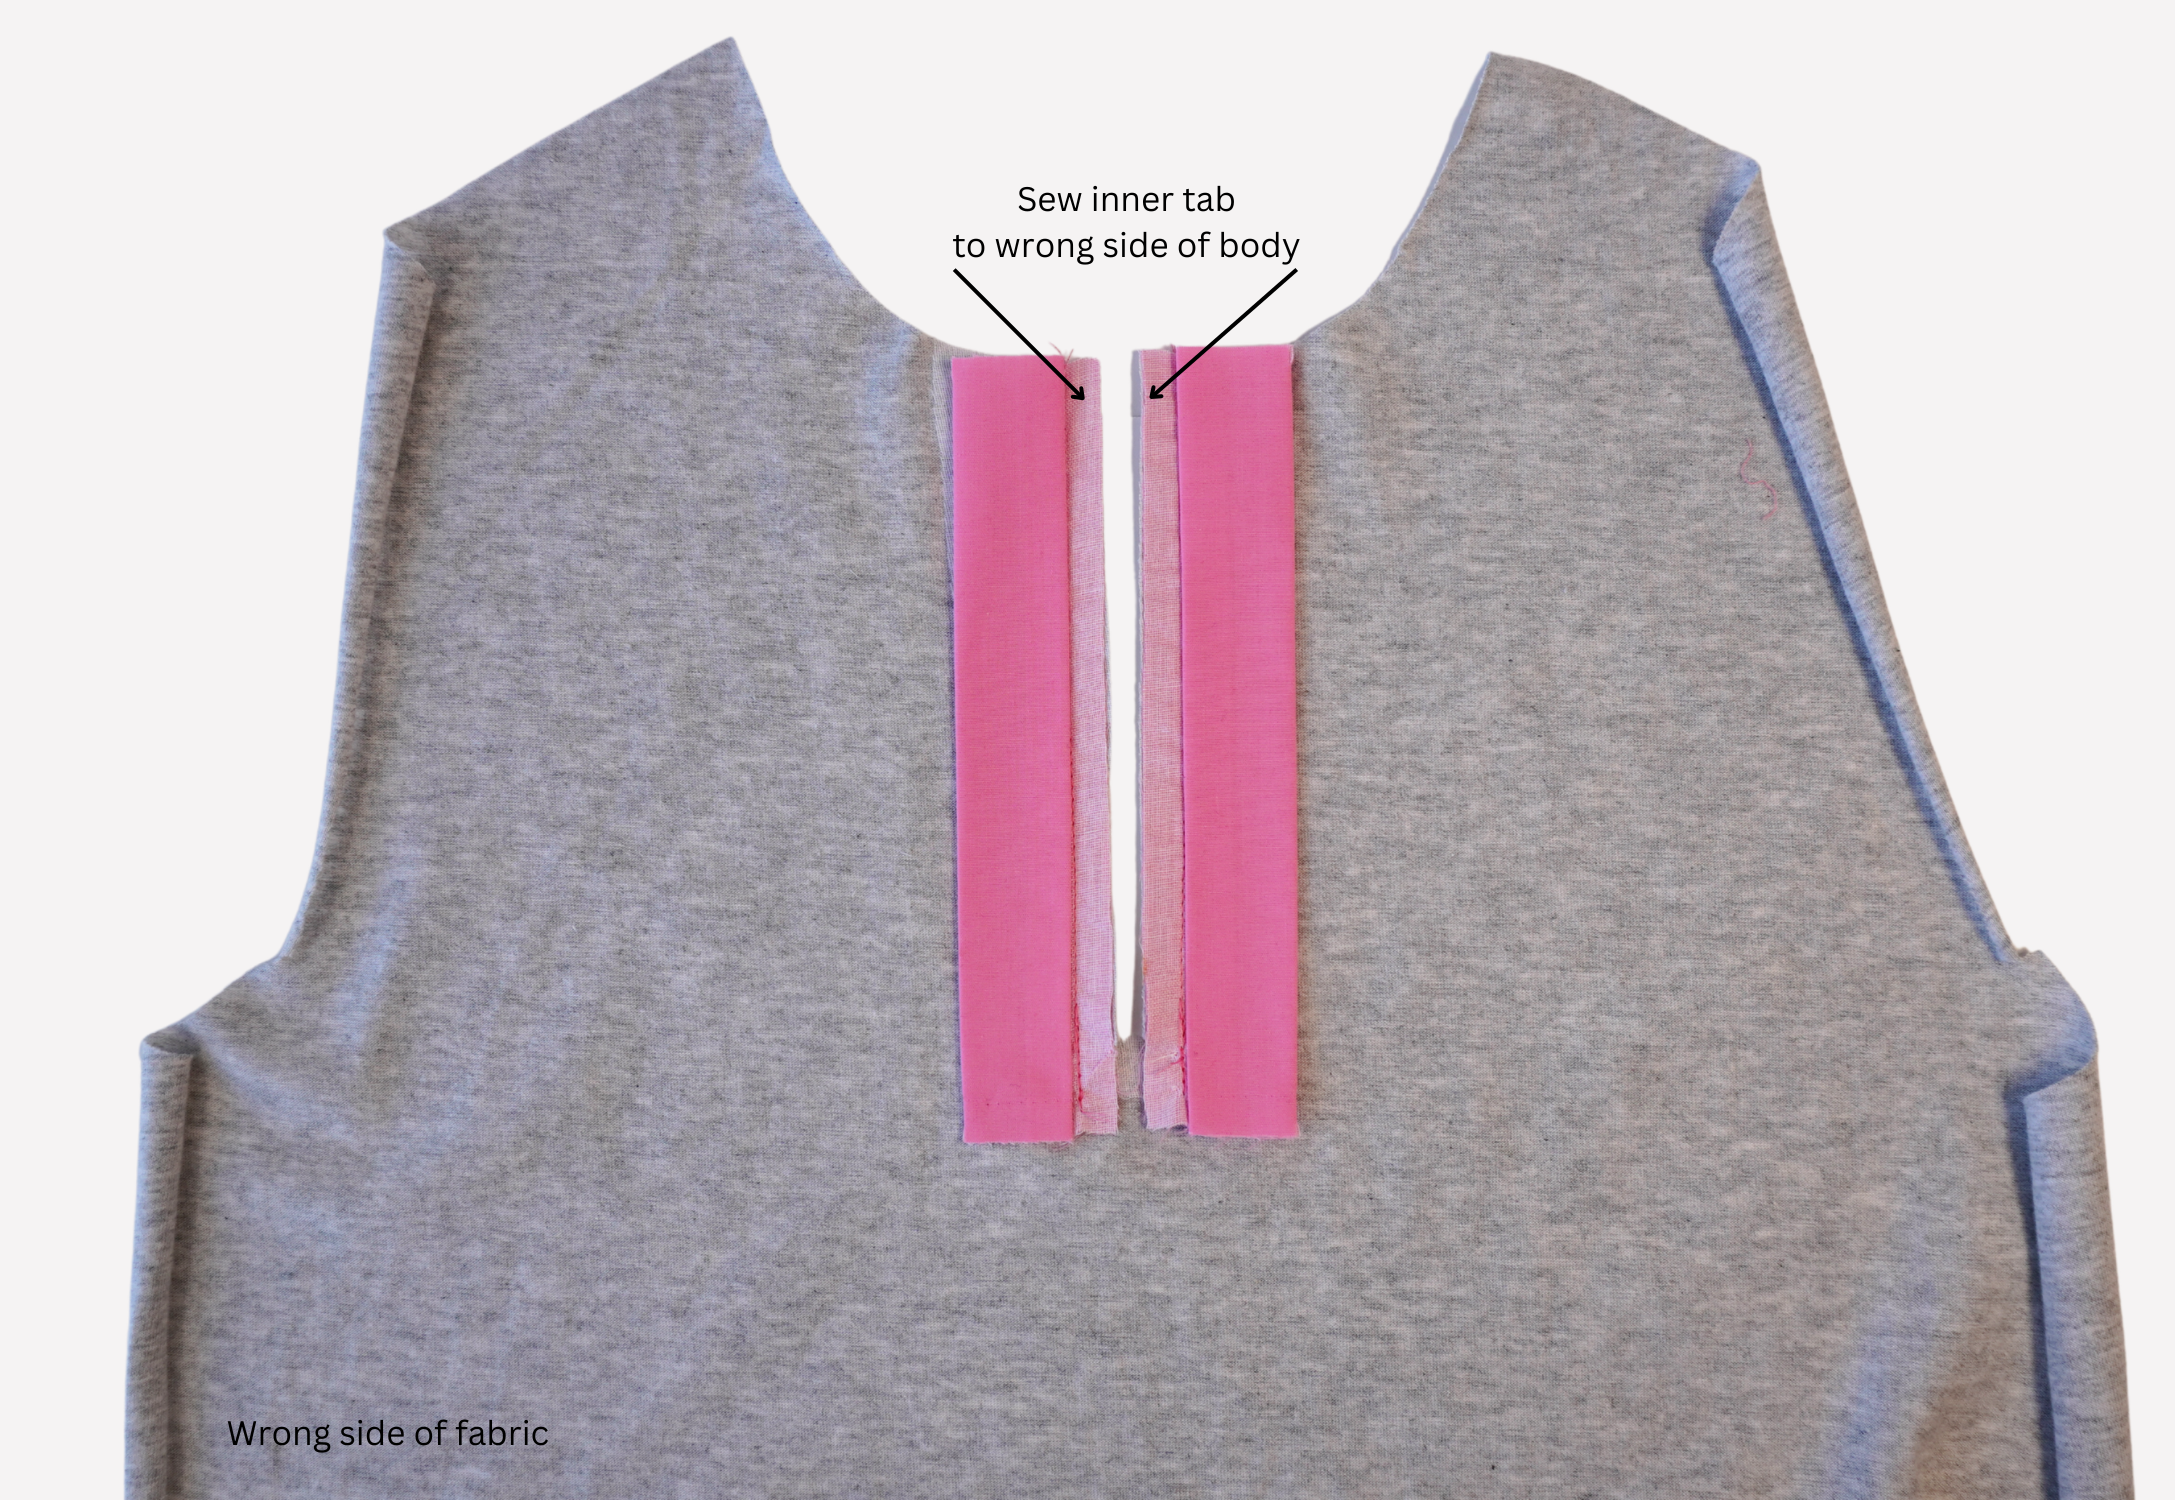
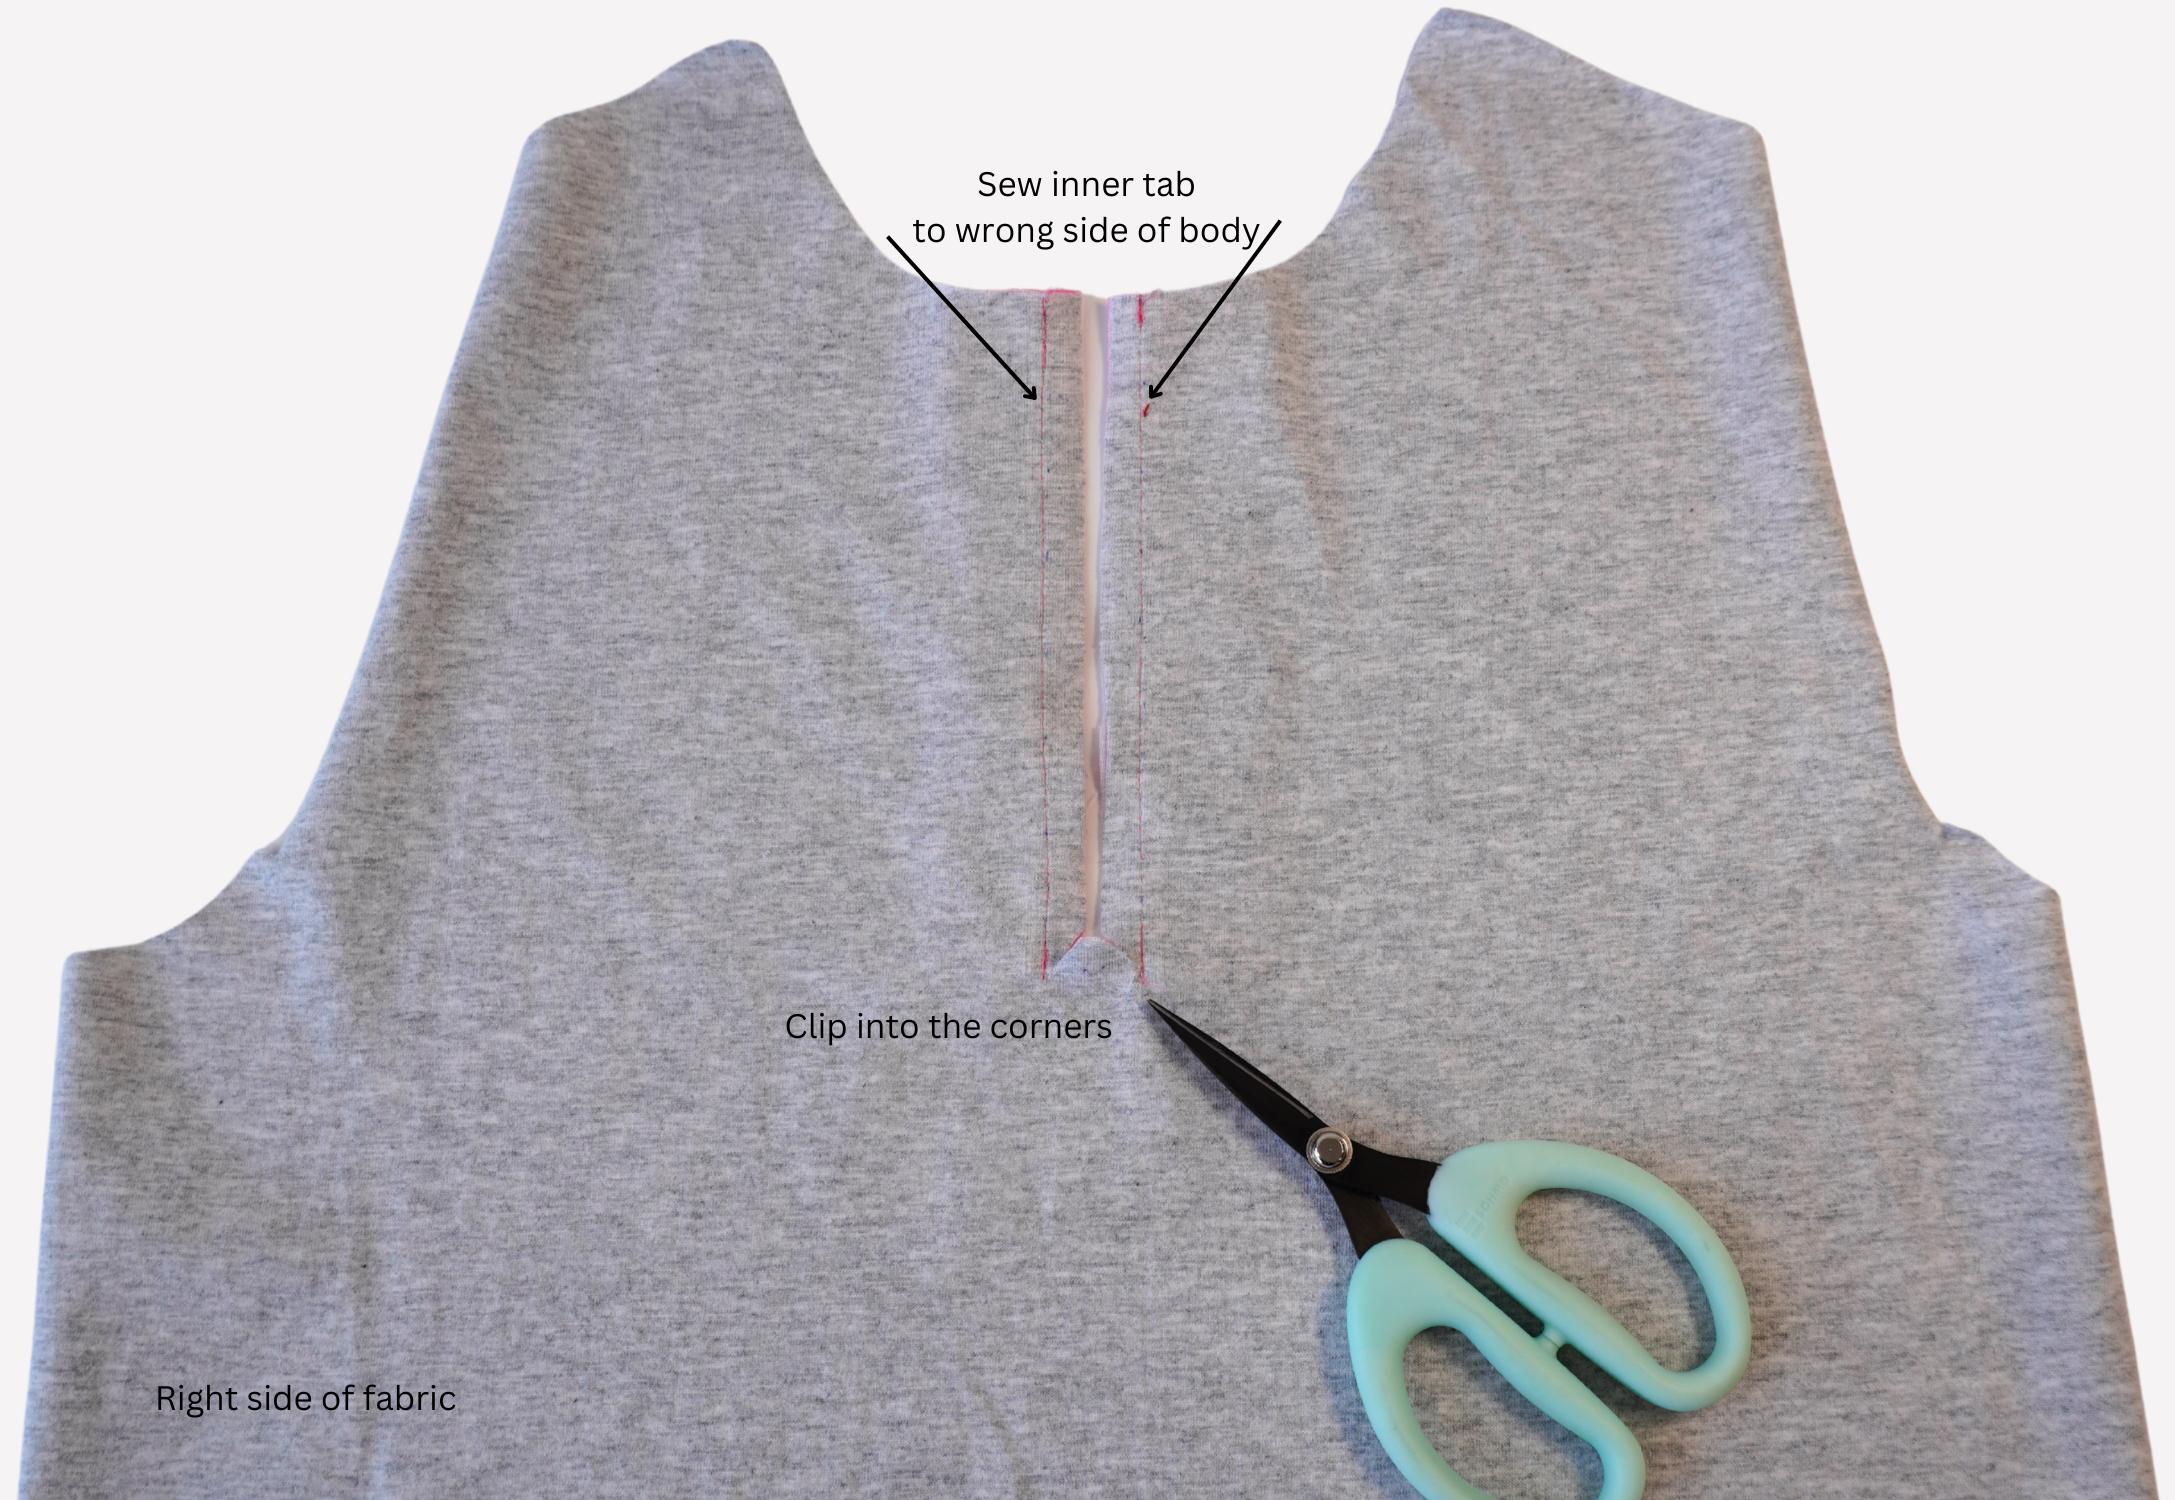
Pin the right side of the inner tab to the wrong side of the front tab opening and sew.
Carefully clip into the corner as shown on the pattern.
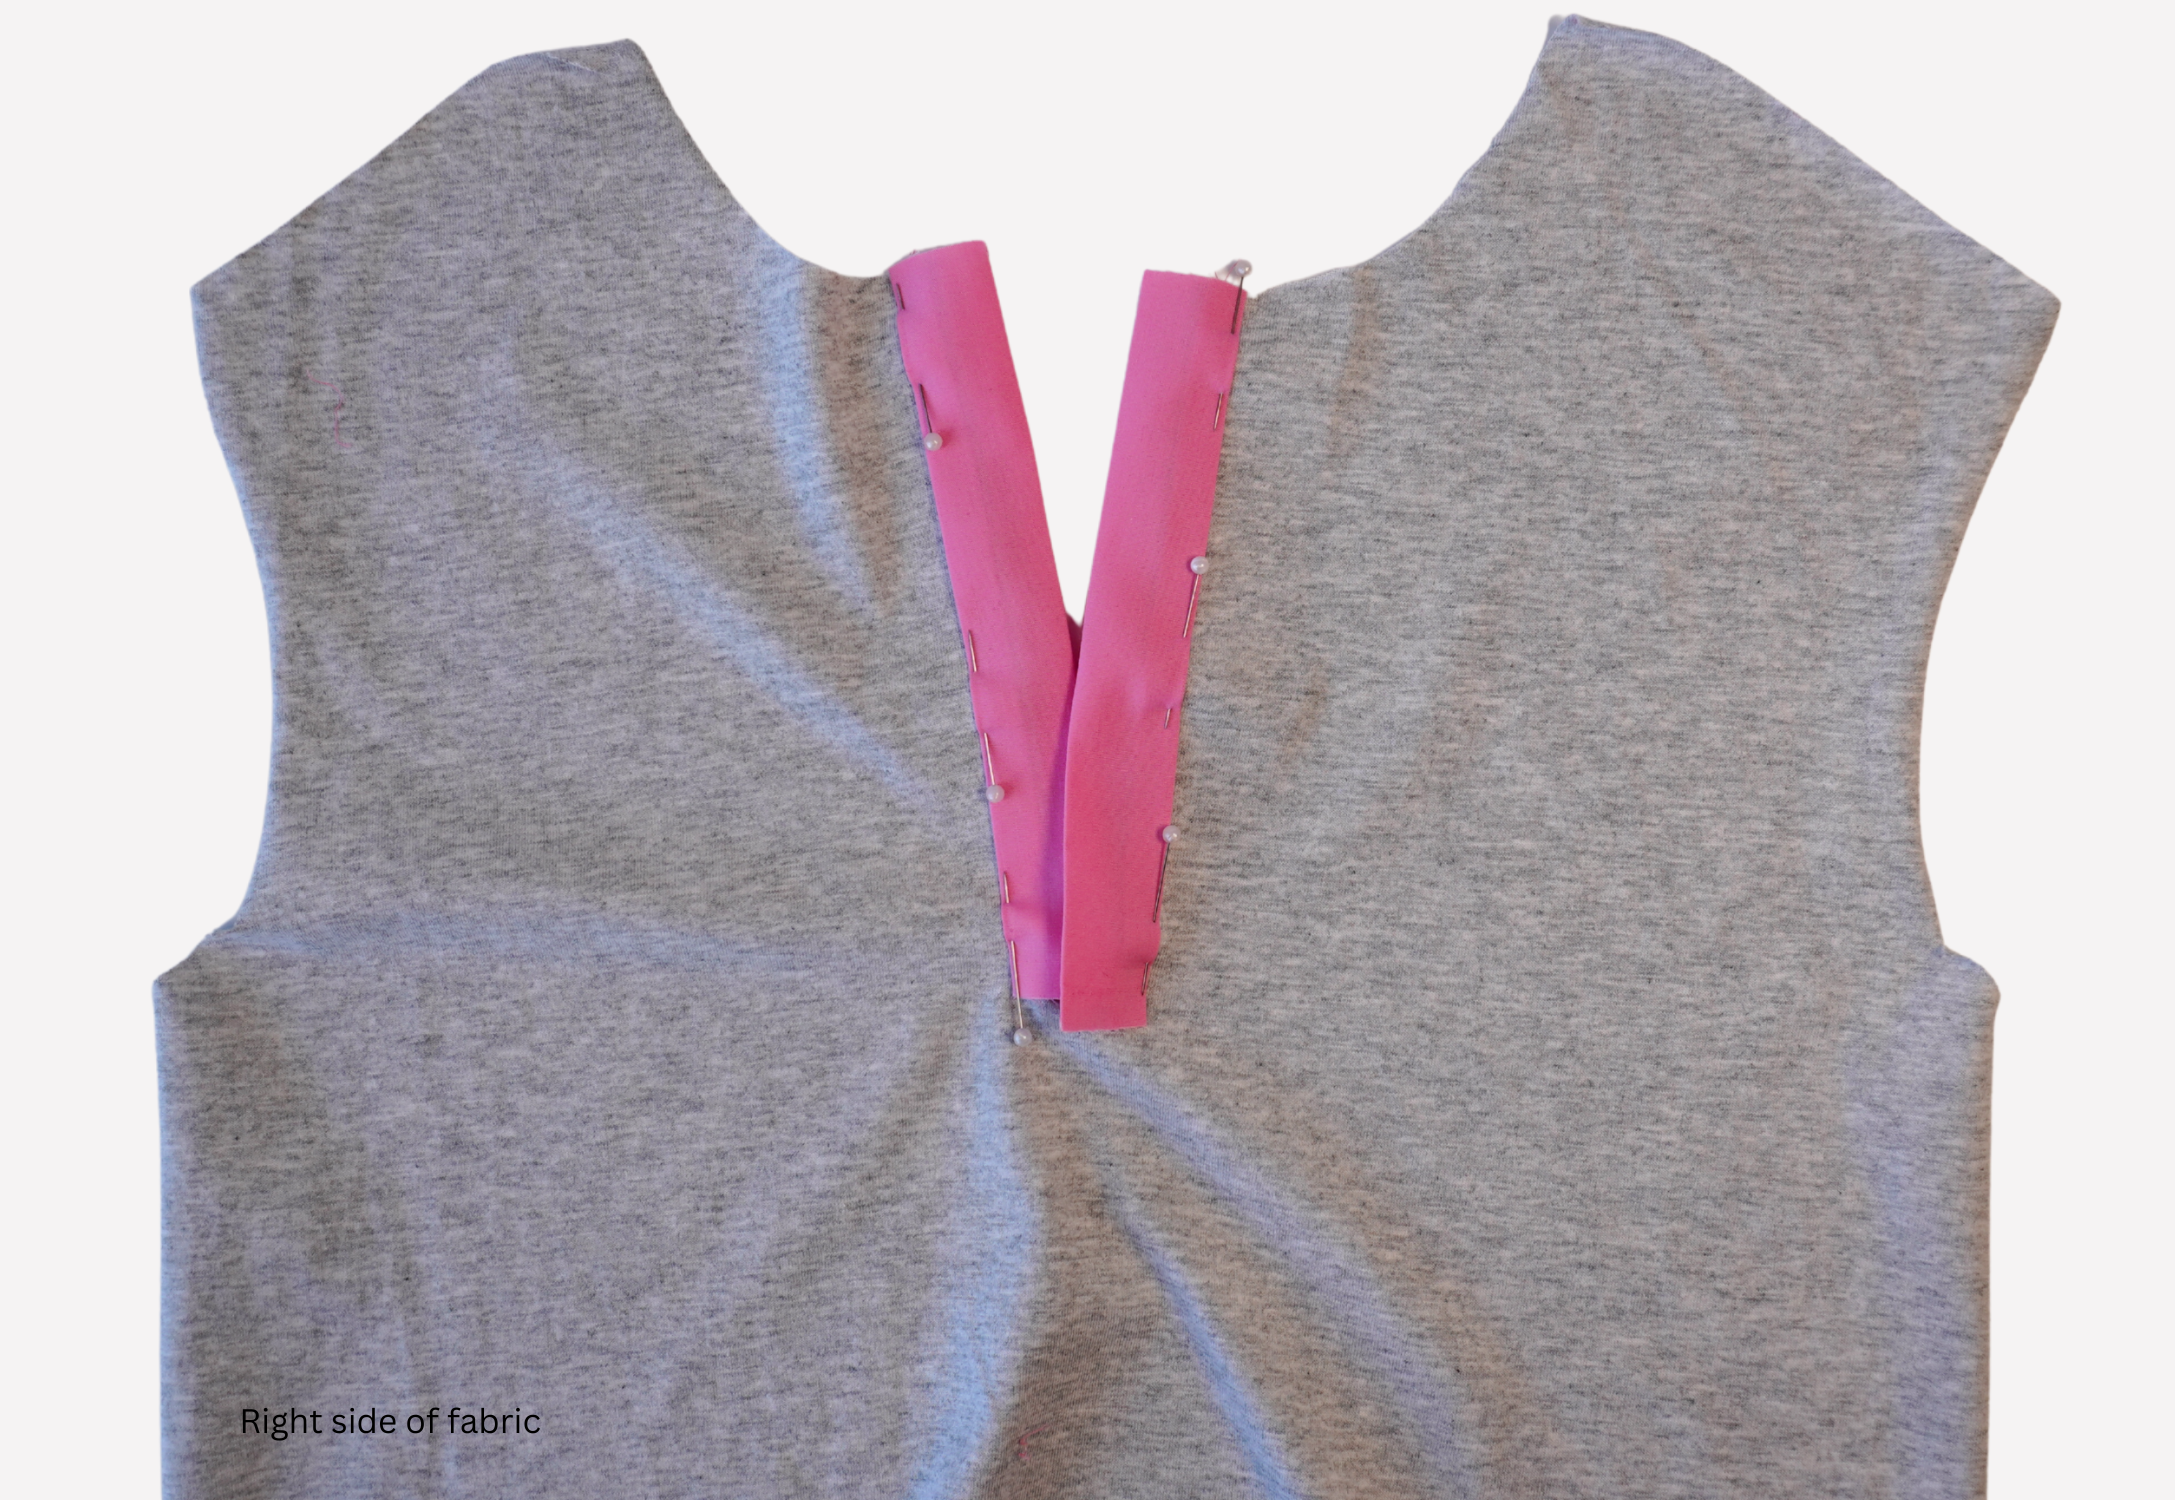

Pin the pre-pressed outer tab to the right side of the front tab opening and edge sew into place.
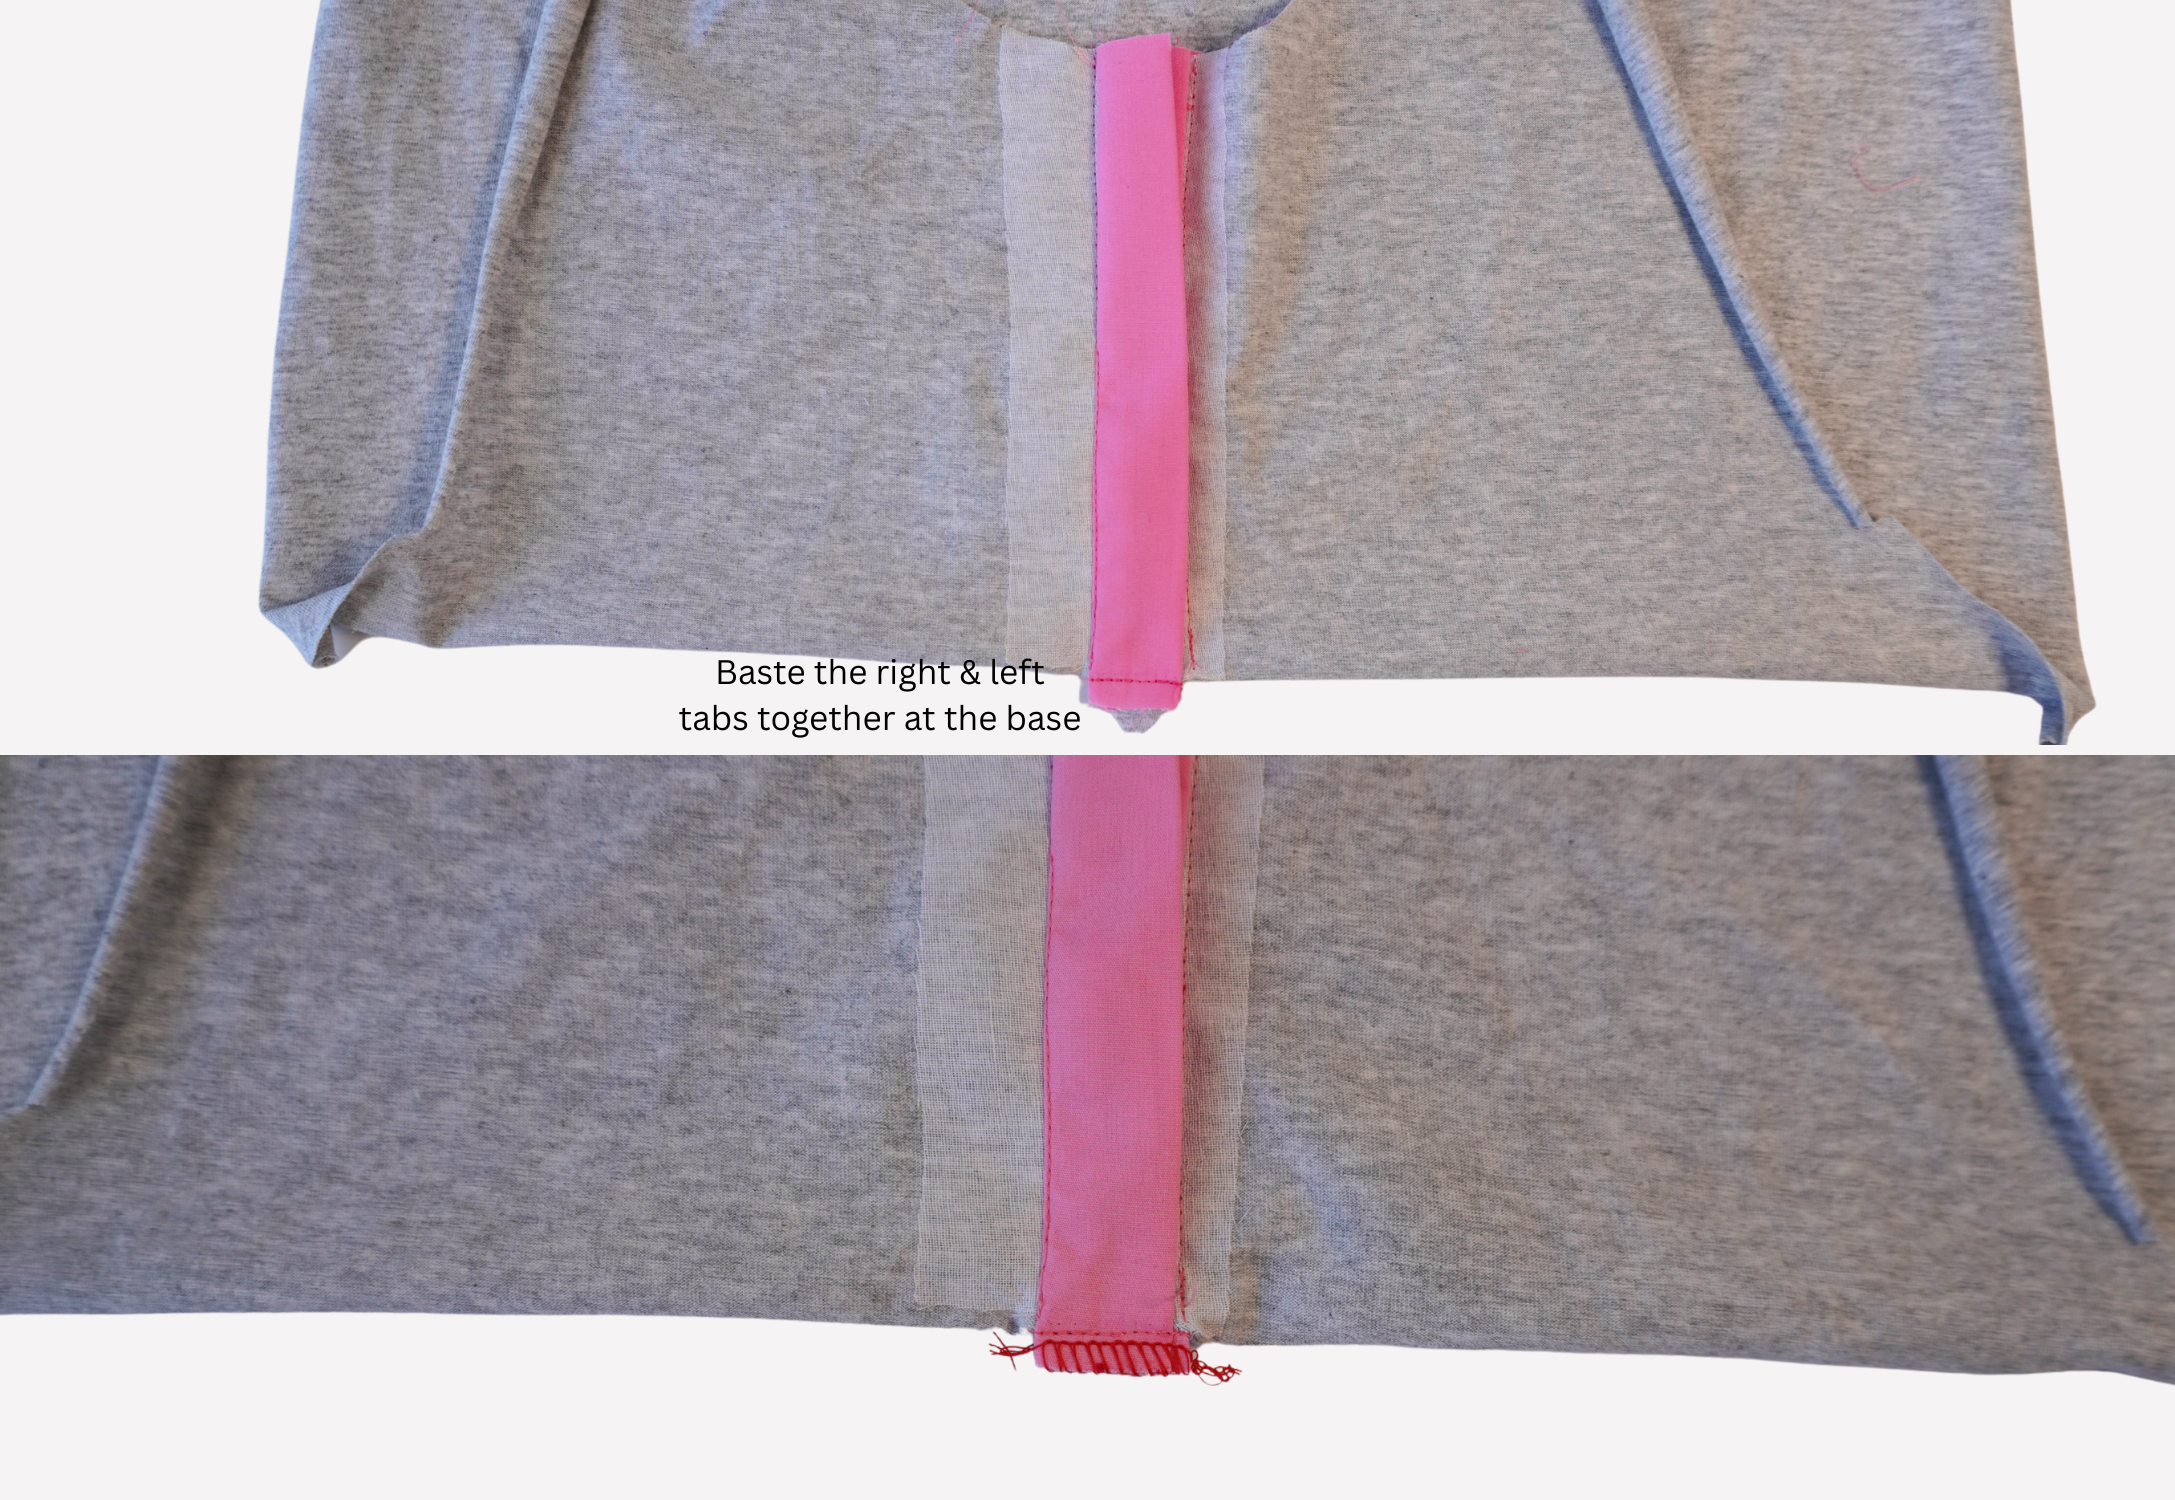
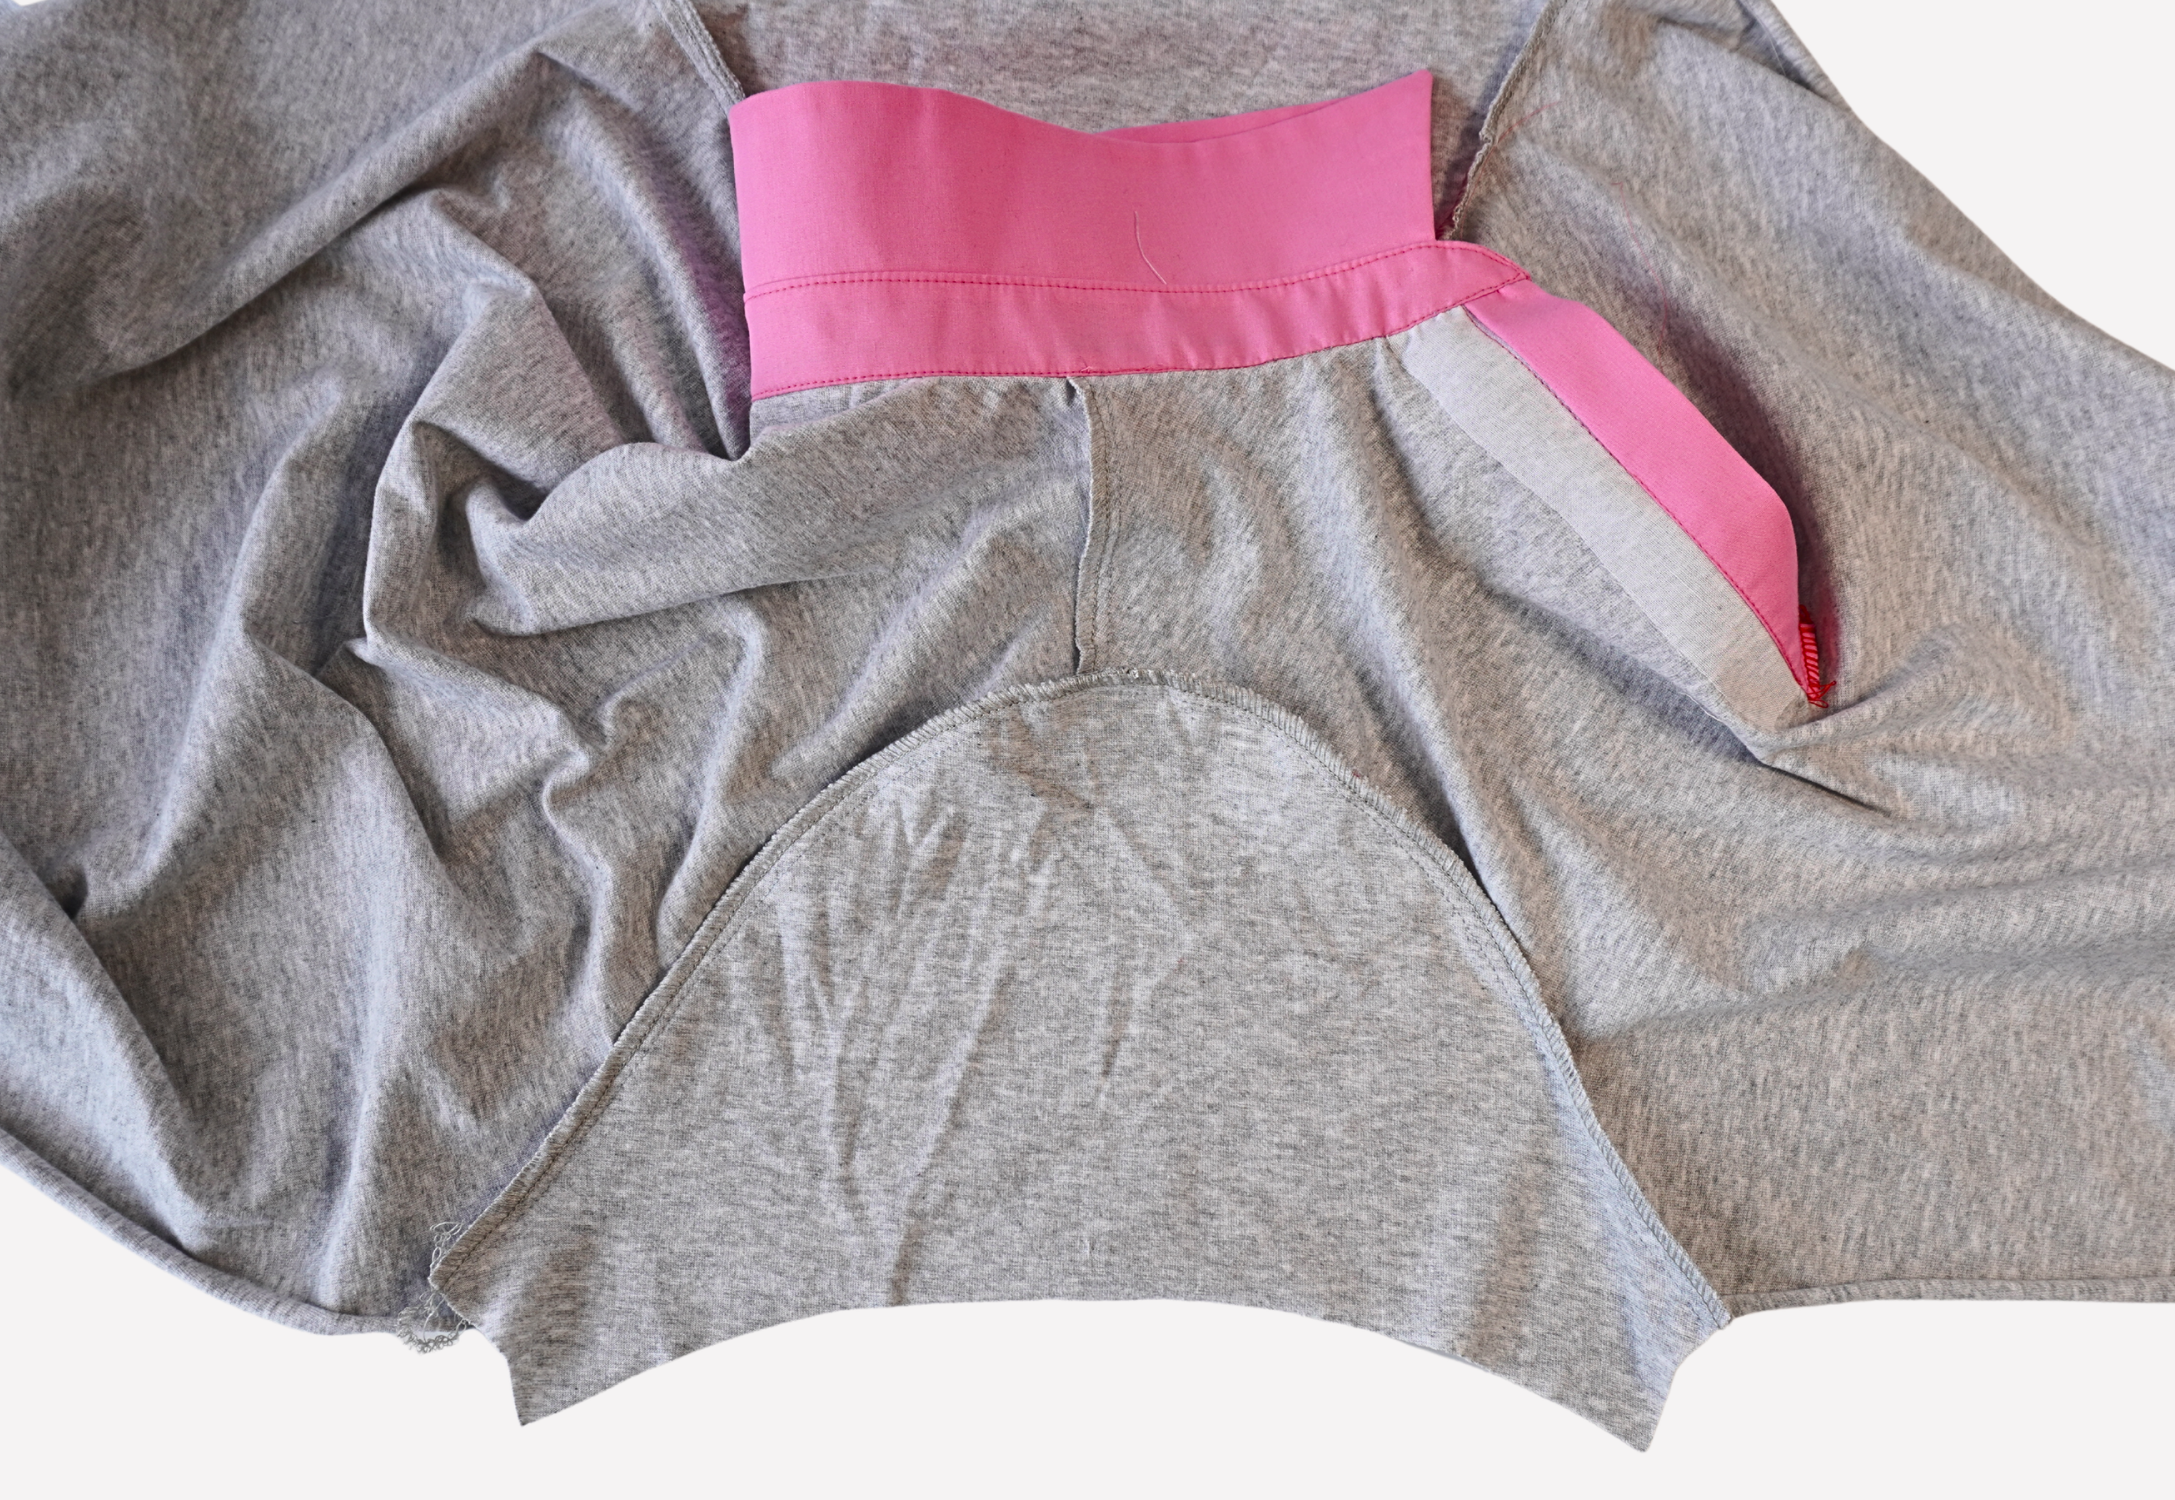
Fold the right tab in front of the left tab and baste the tabs together along the base.
Pin the base of the tabs to the right side of the front tab opening at the base, sandwiching the right tab and from the inside, sew the bottom edge of the tabs to the bottom edge of the tab opening. Sew from one clipped corner to the other, taking care not to catch the corners to prevent any little tucks appearing.
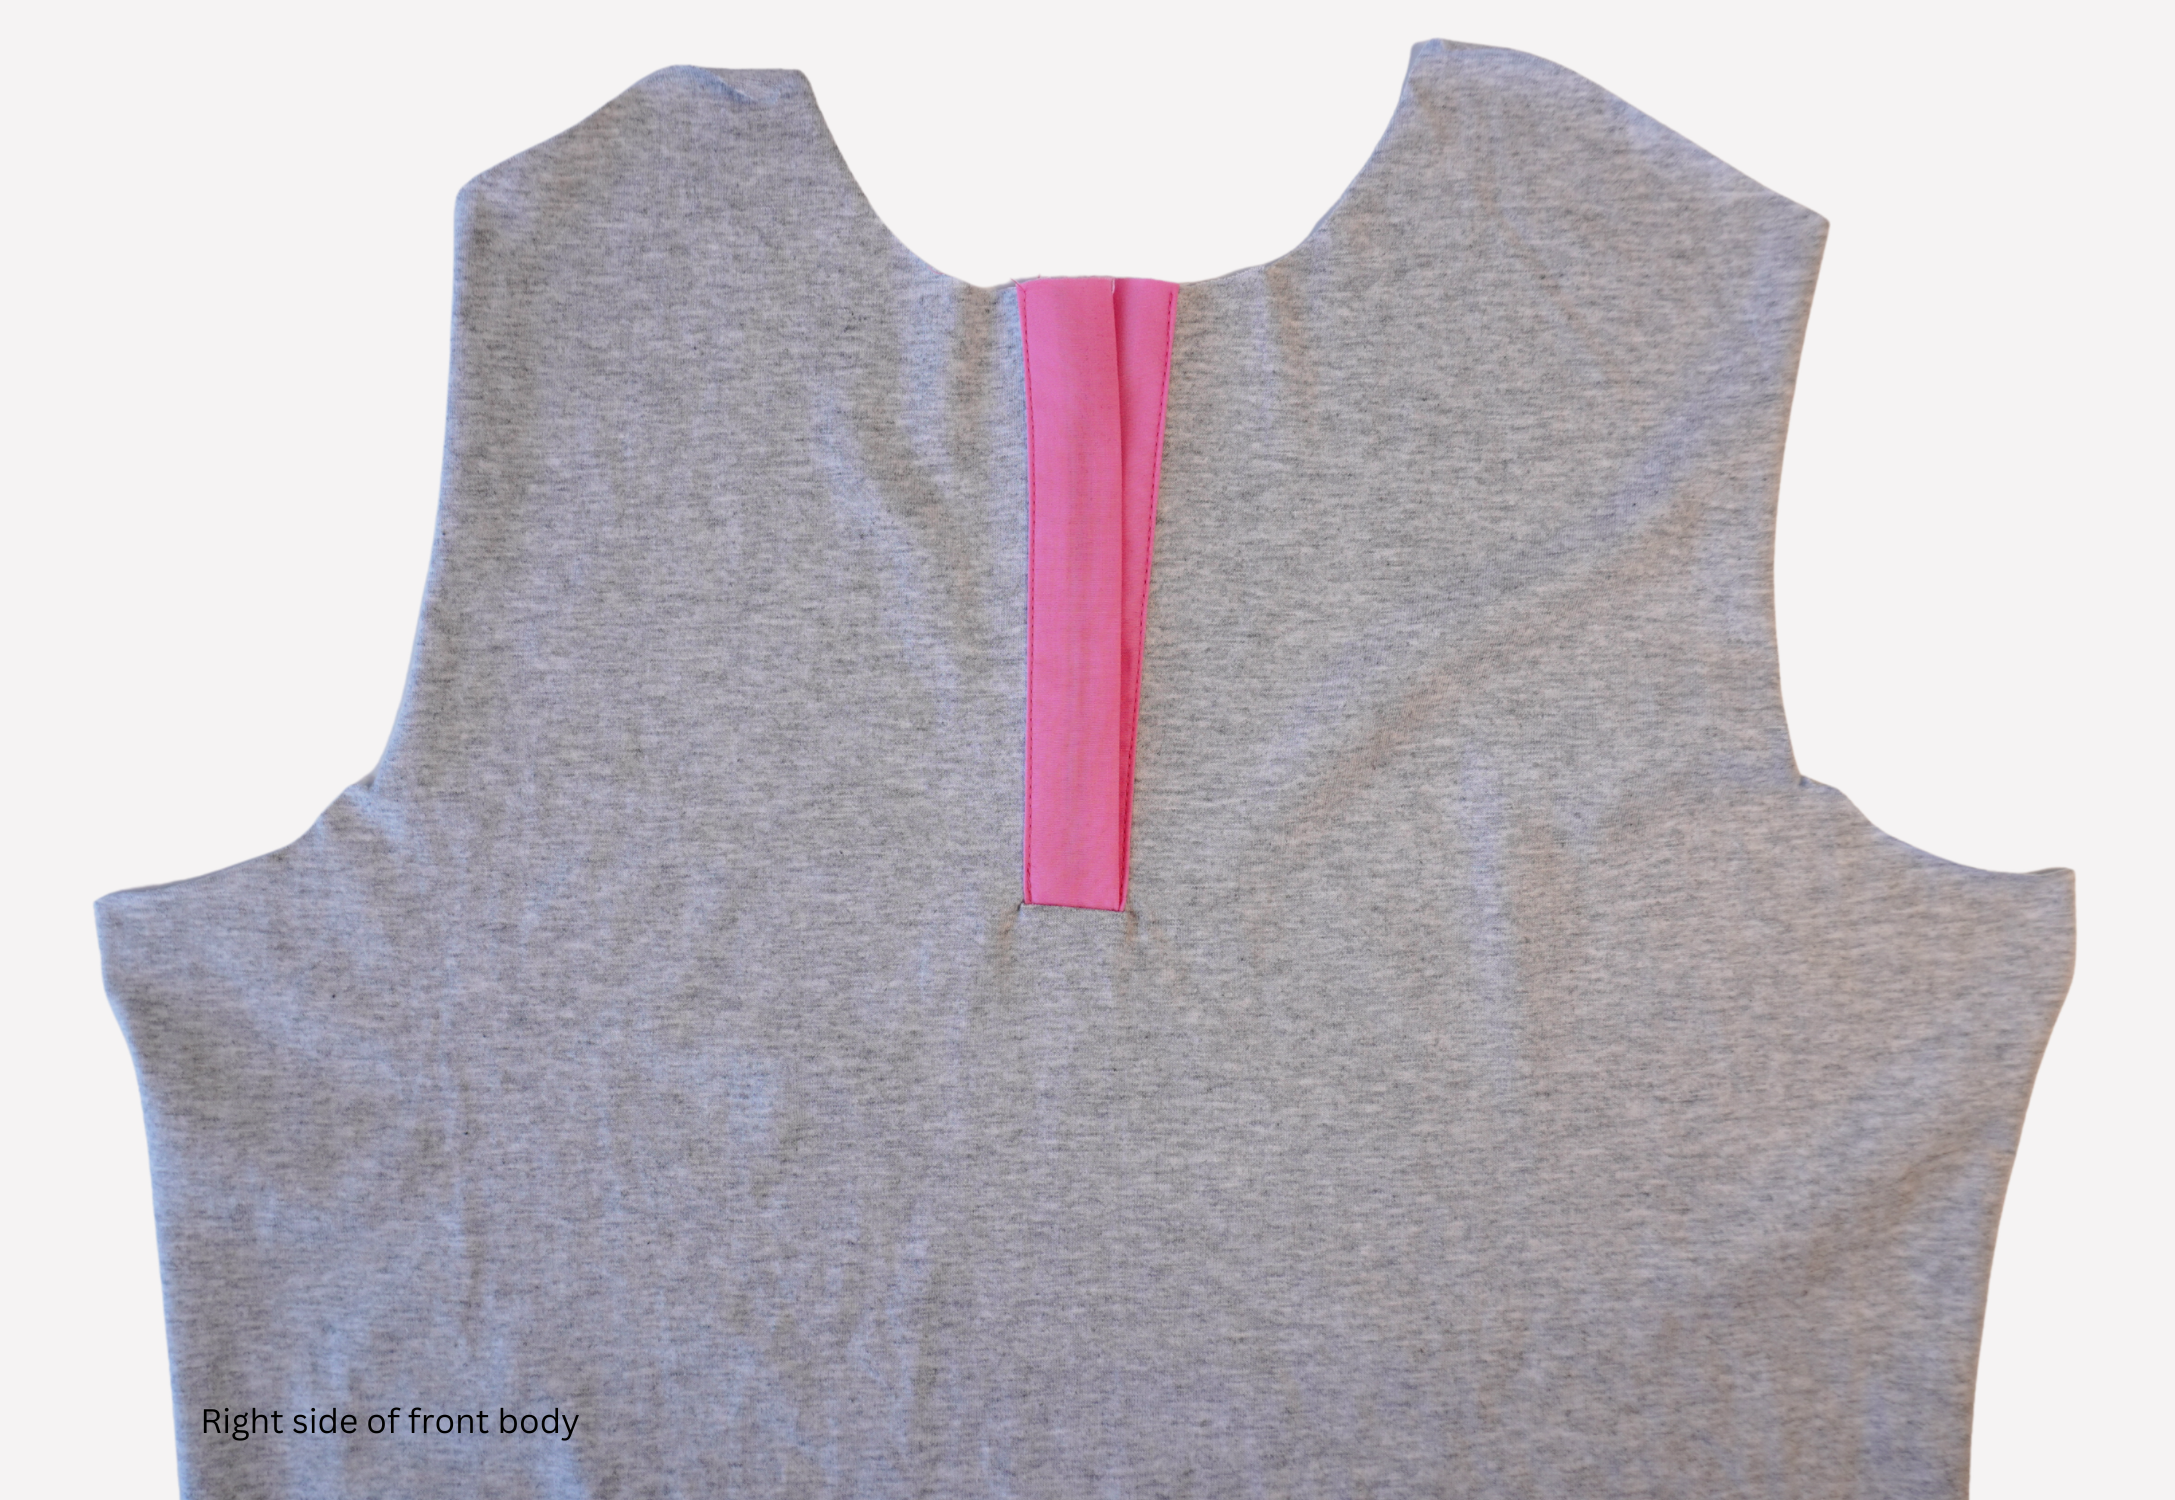
Neaten using an overlocker/serger and press.
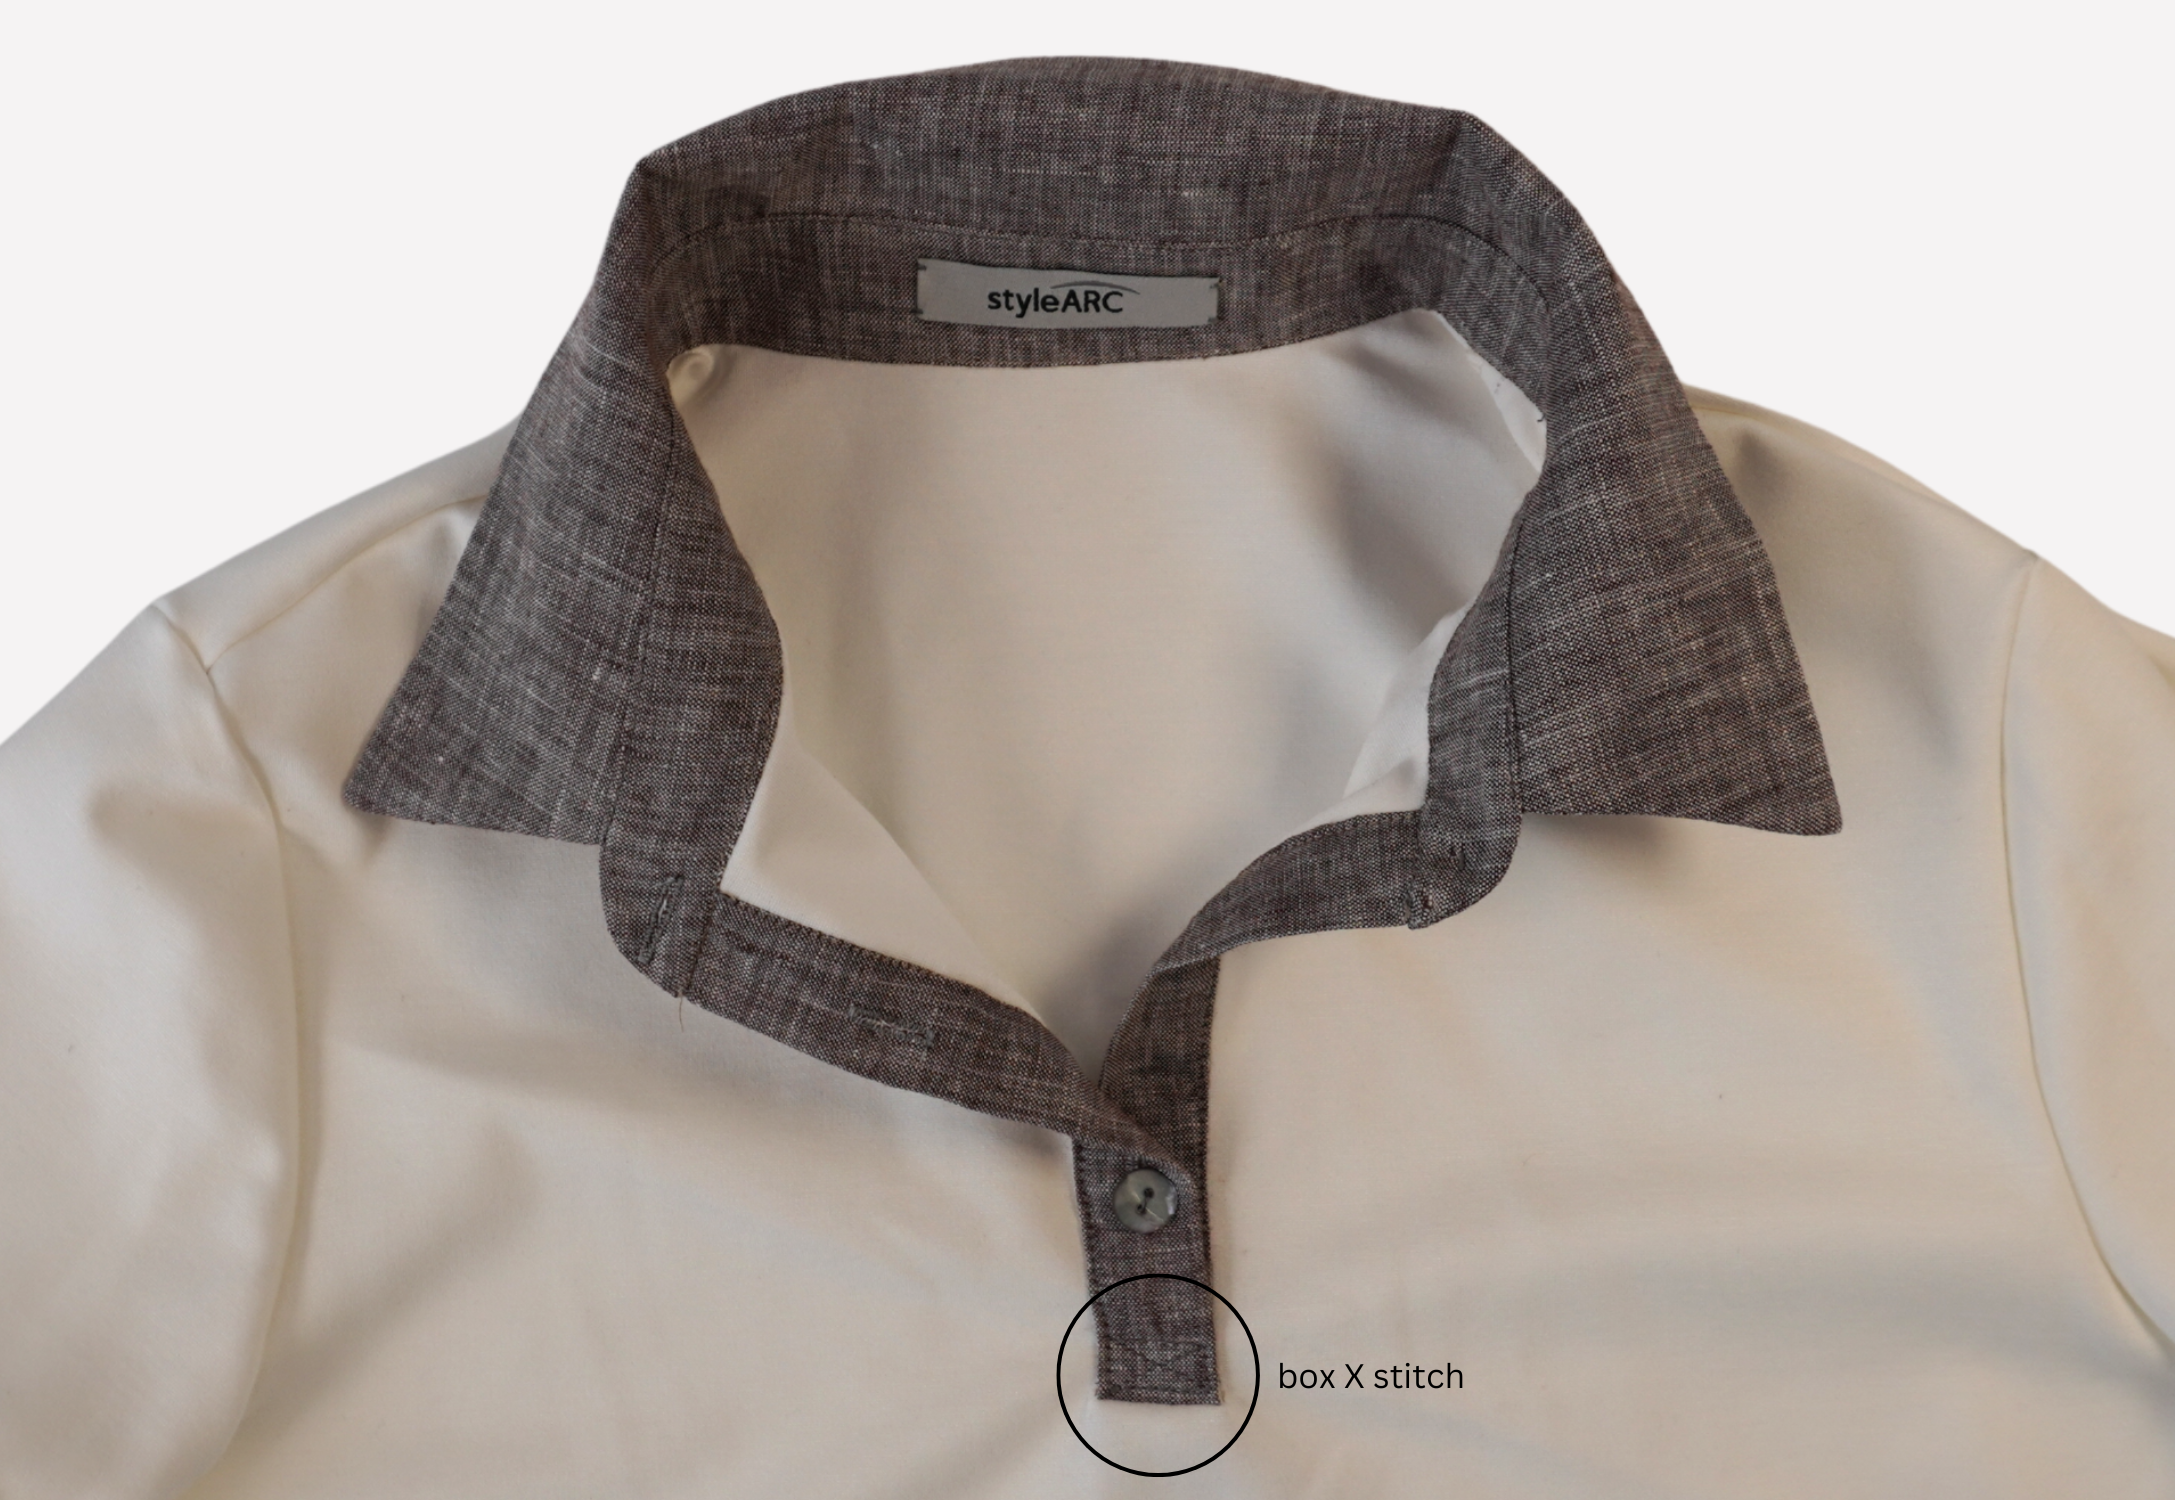
You may choose to finish the base of the tab using a box X stitch – see the video Sewing a Box X Stitch on our YouTube channel.

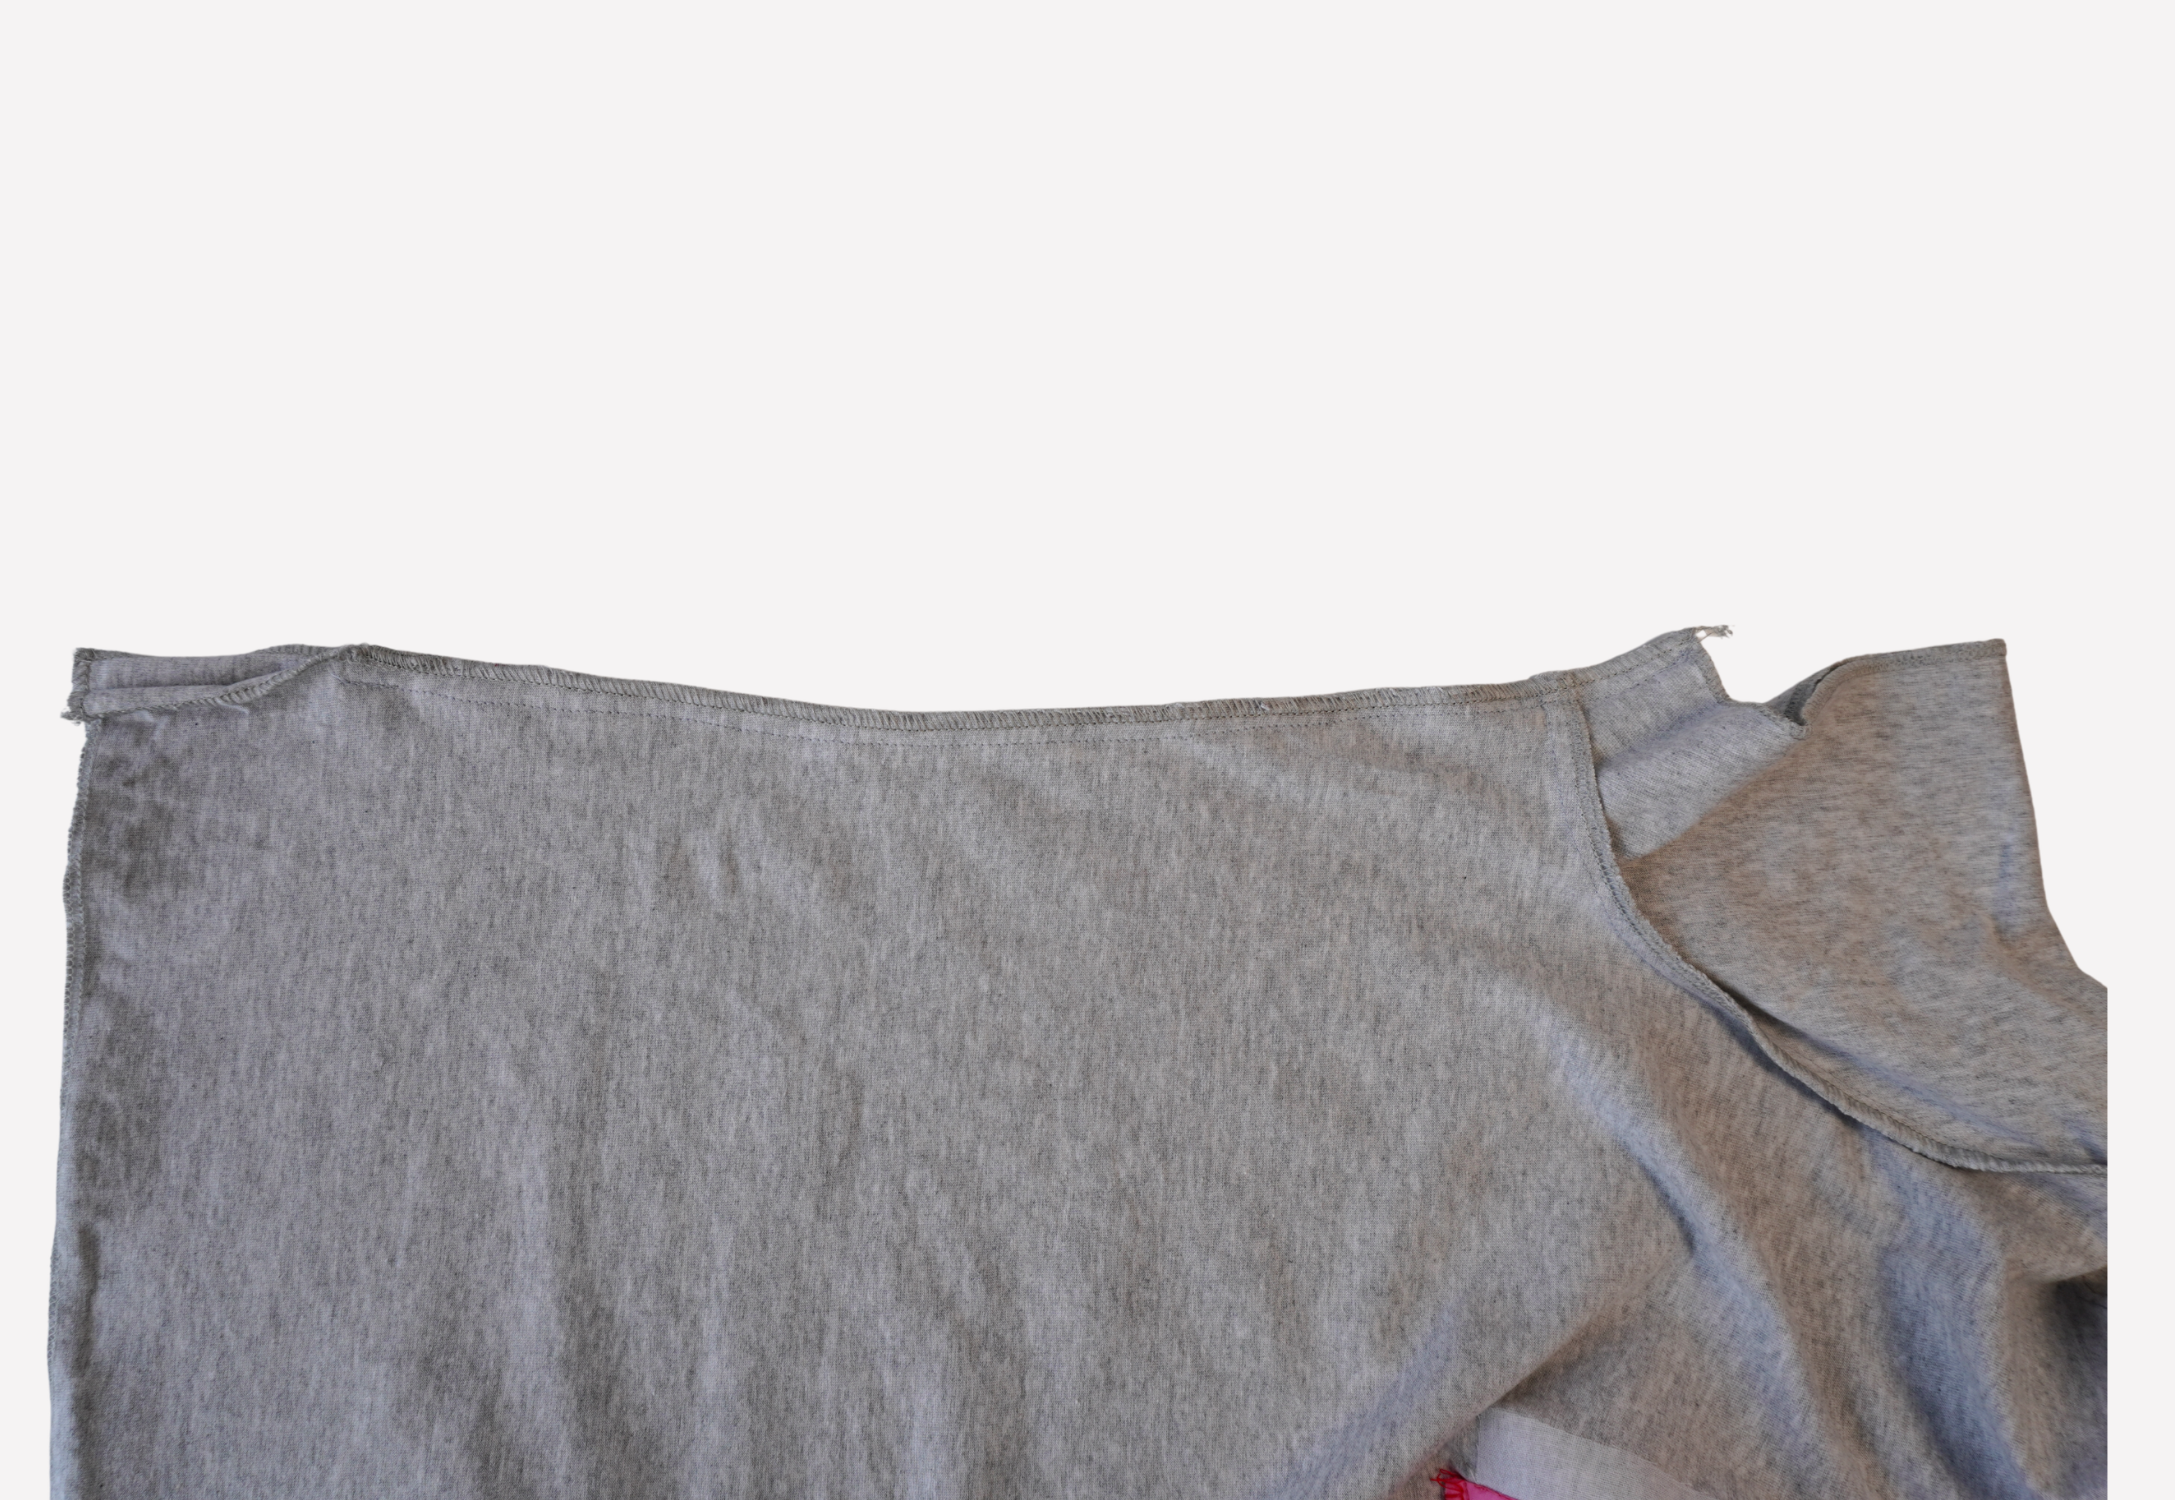
With RST, sew the front to Back (1) at the shoulder seams. Neaten using an overlocker/serger and press toward the back.
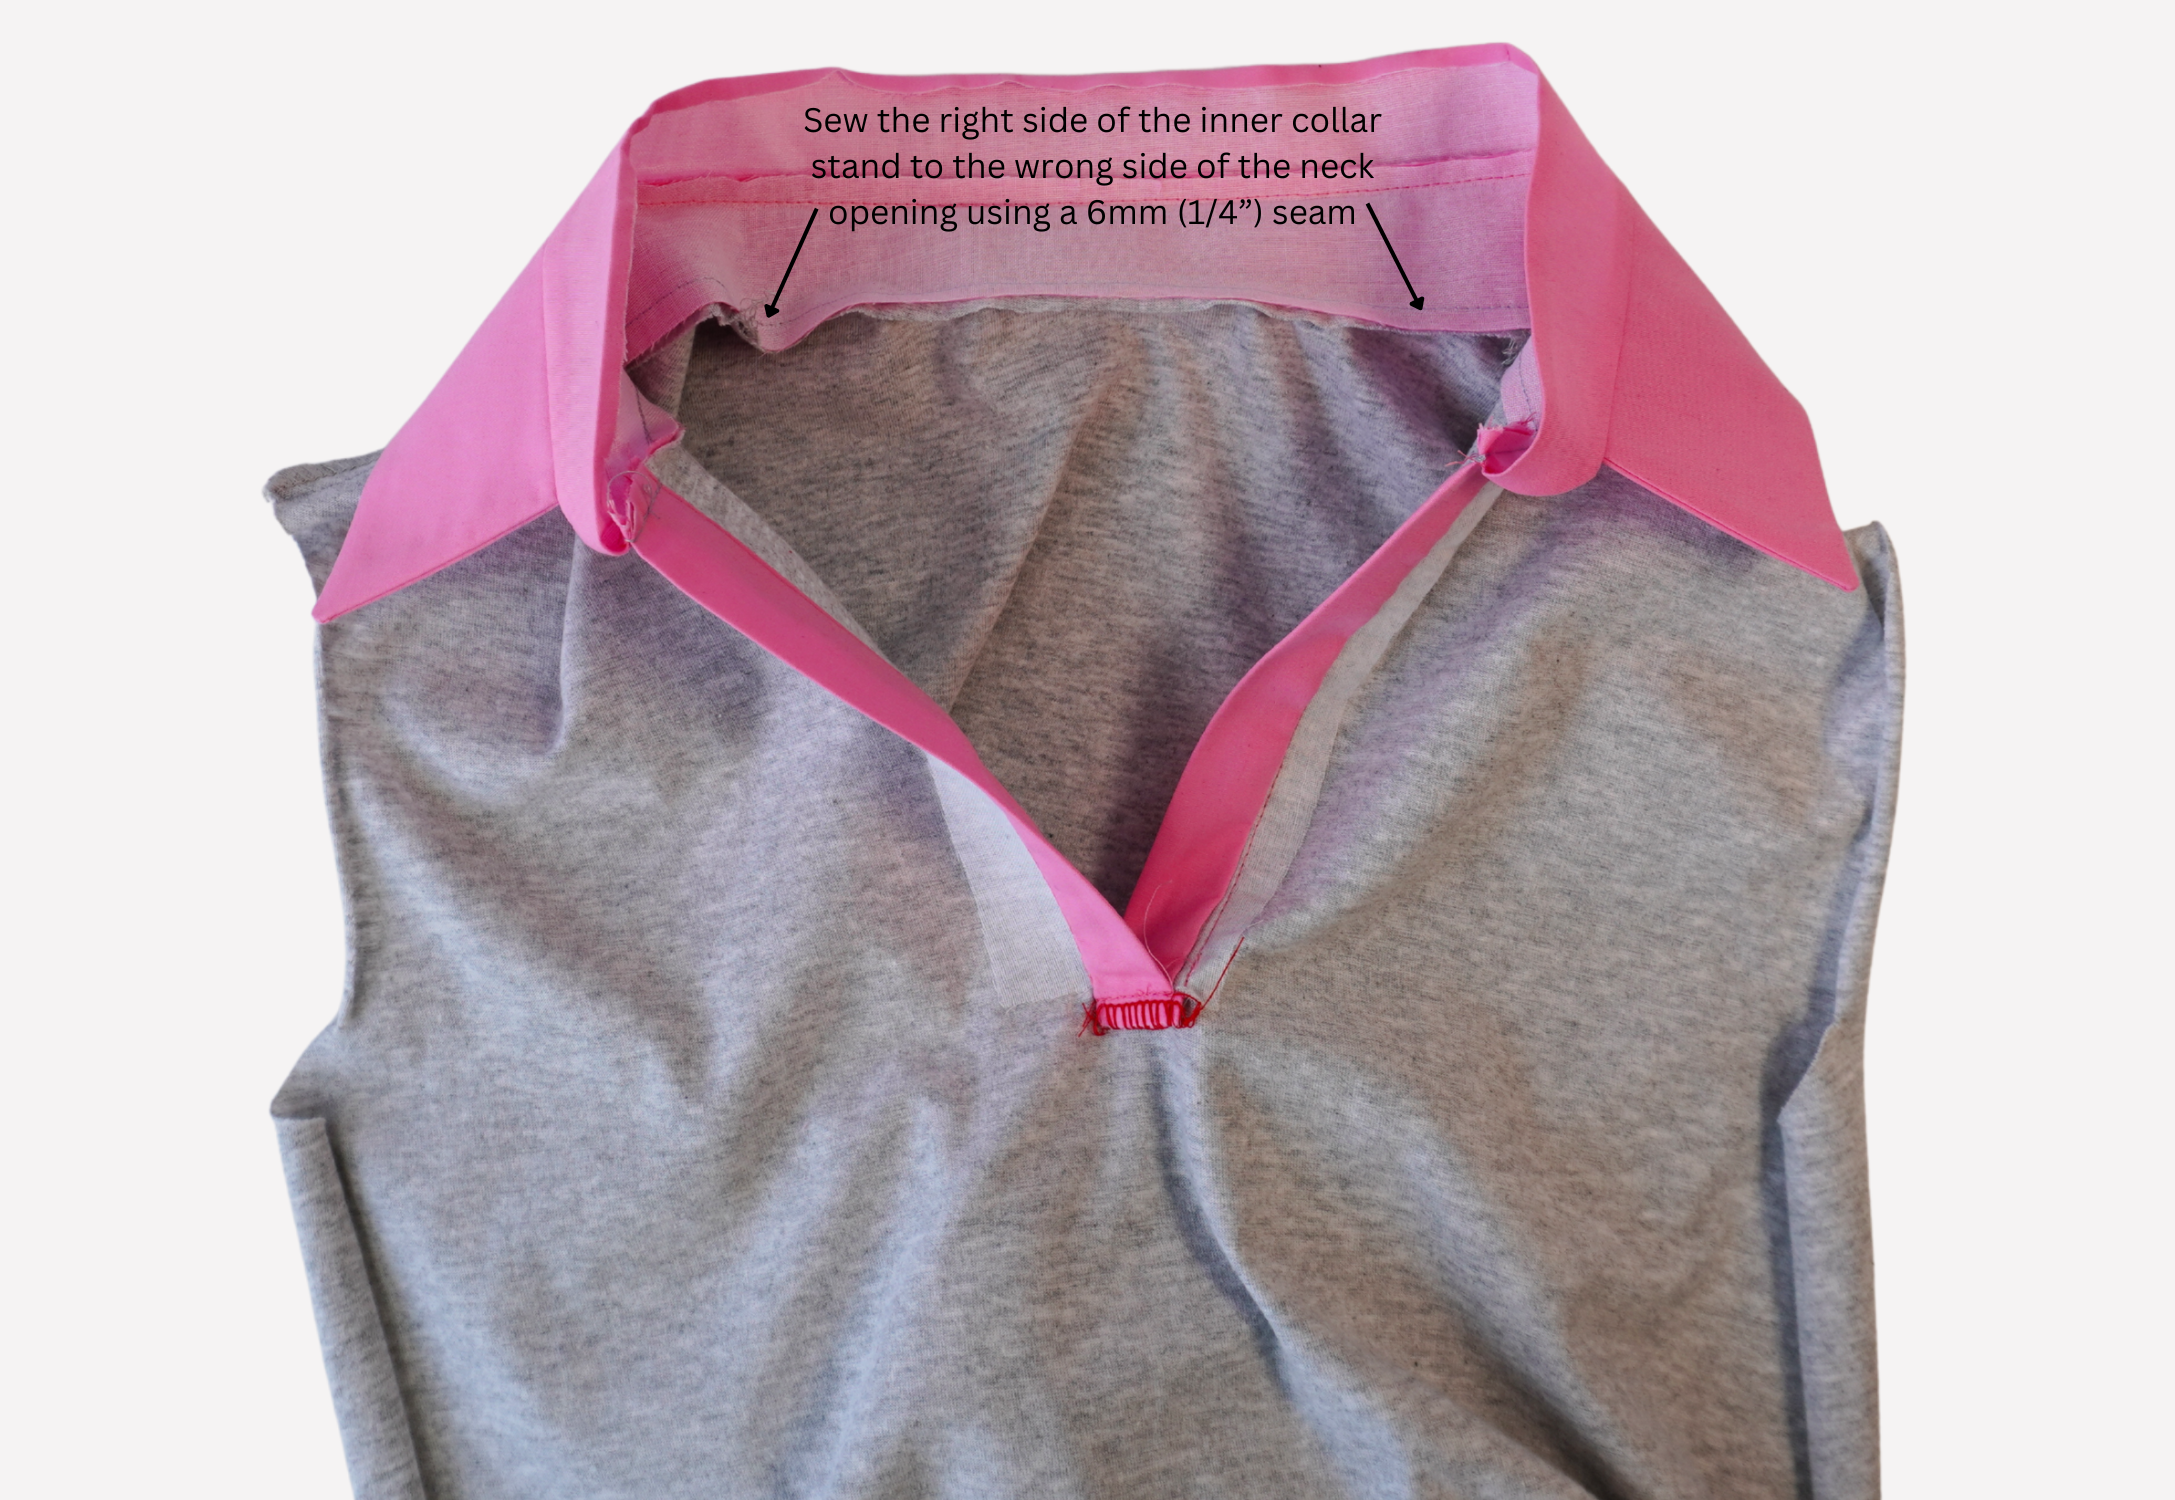
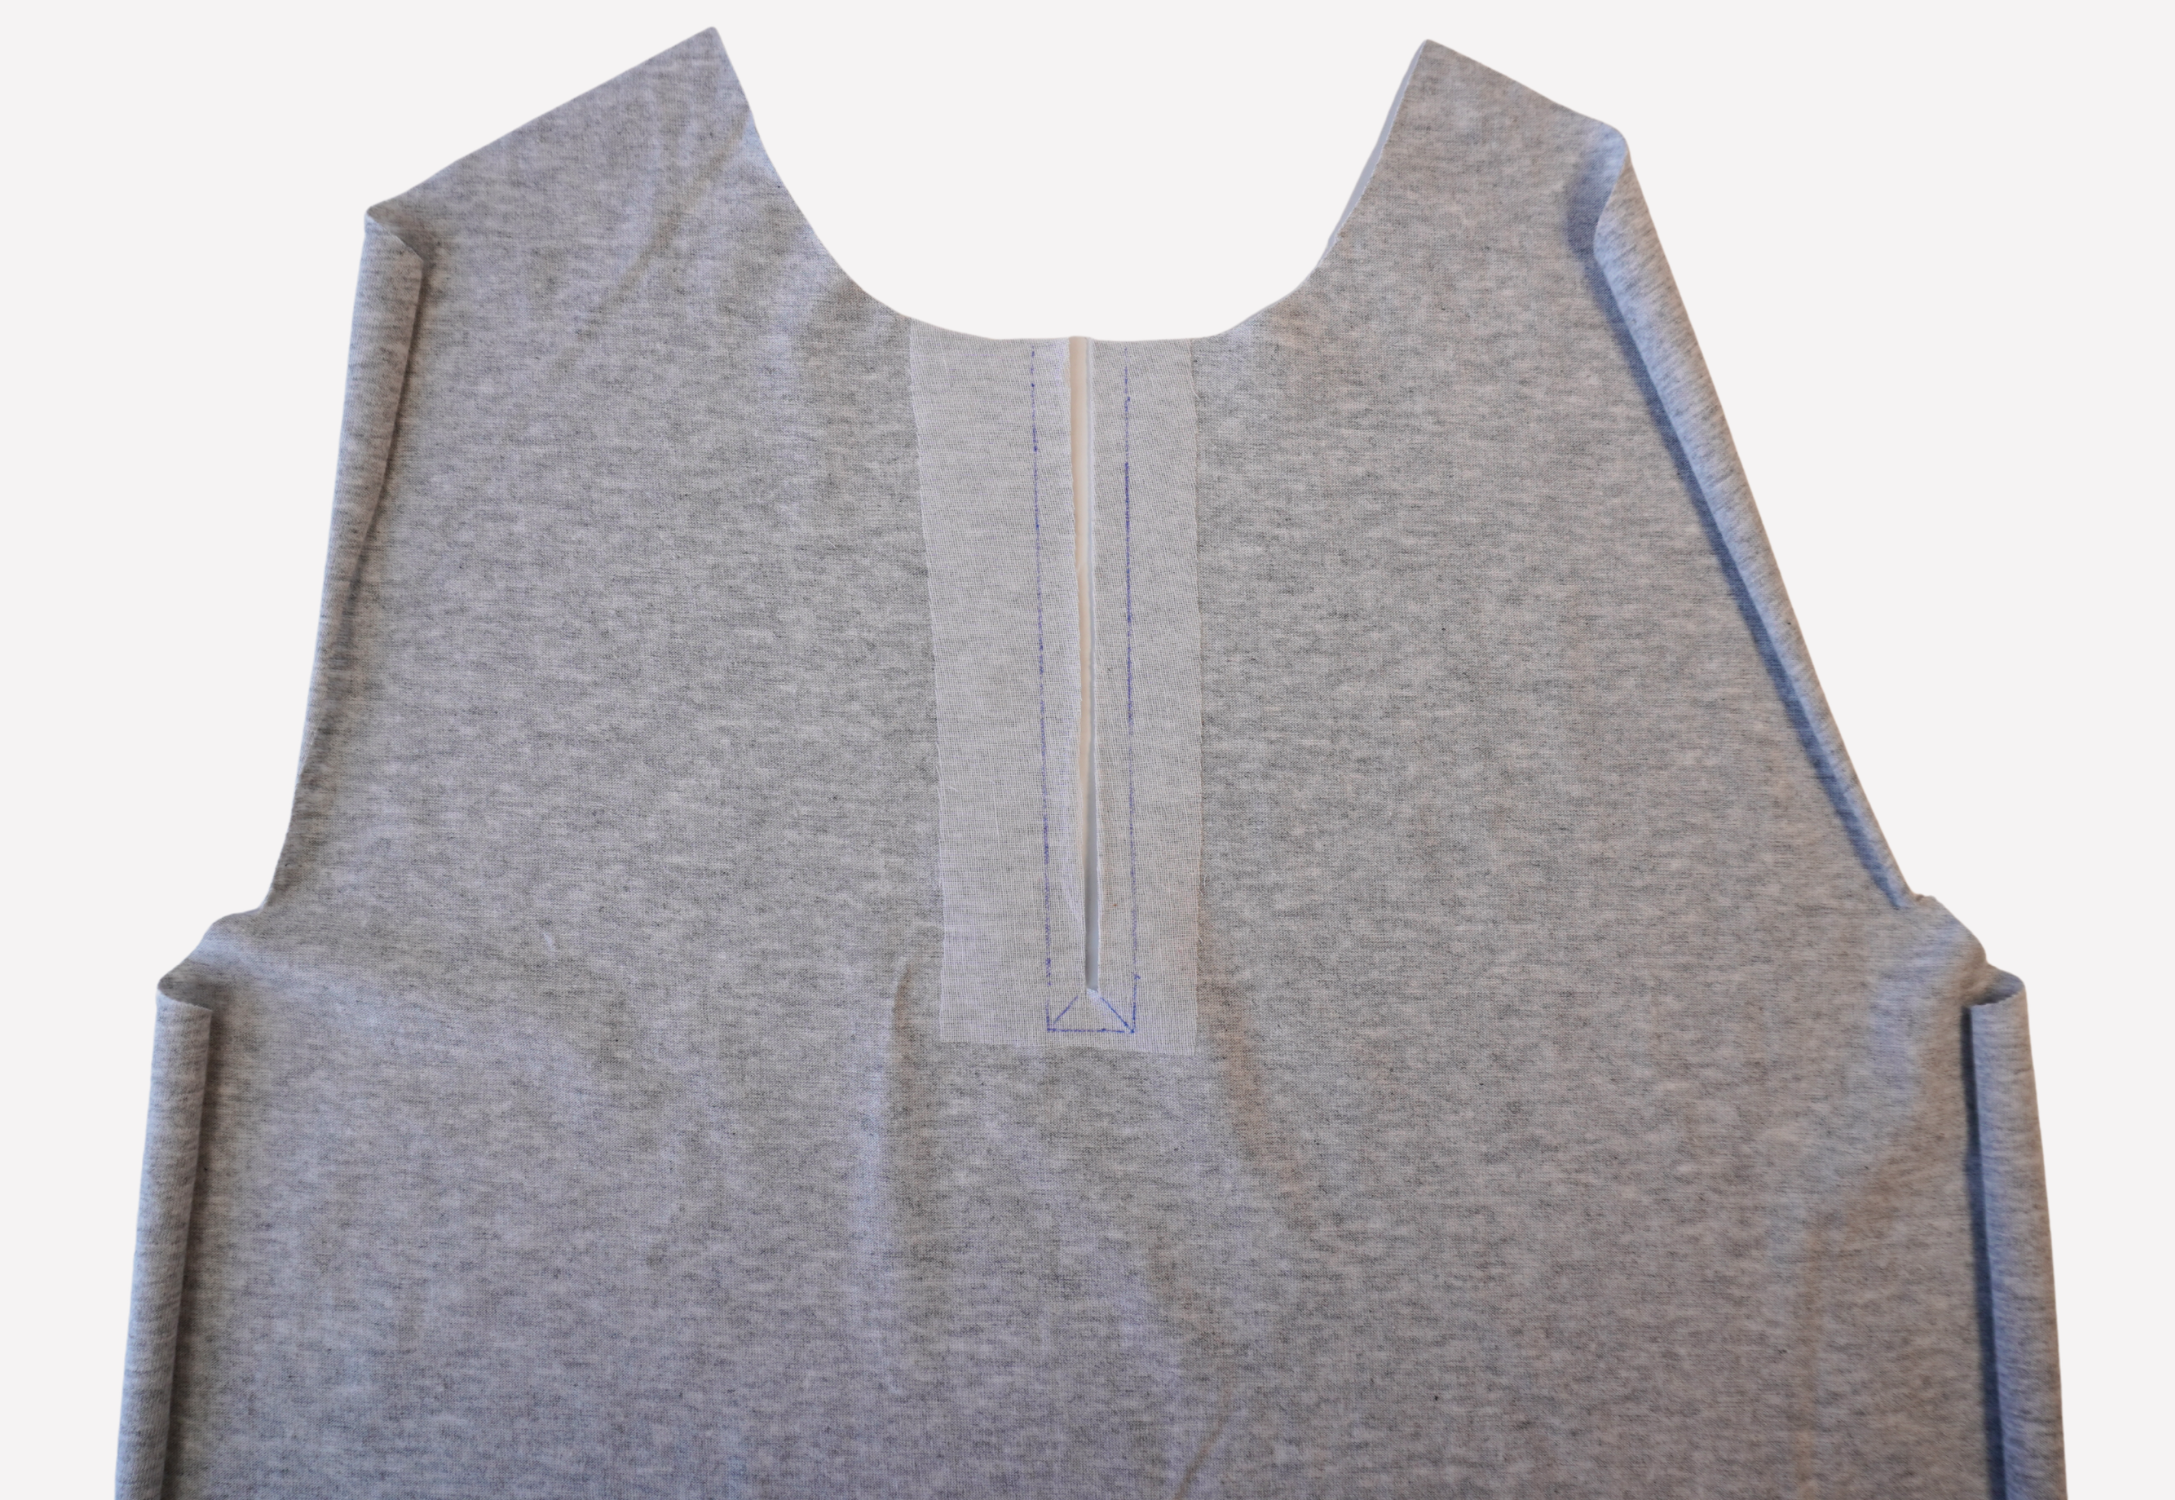
*** Pin the right side of the inner collar stand to the wrong side of the neck opening and sew using a 6mm (1/4”) seam.
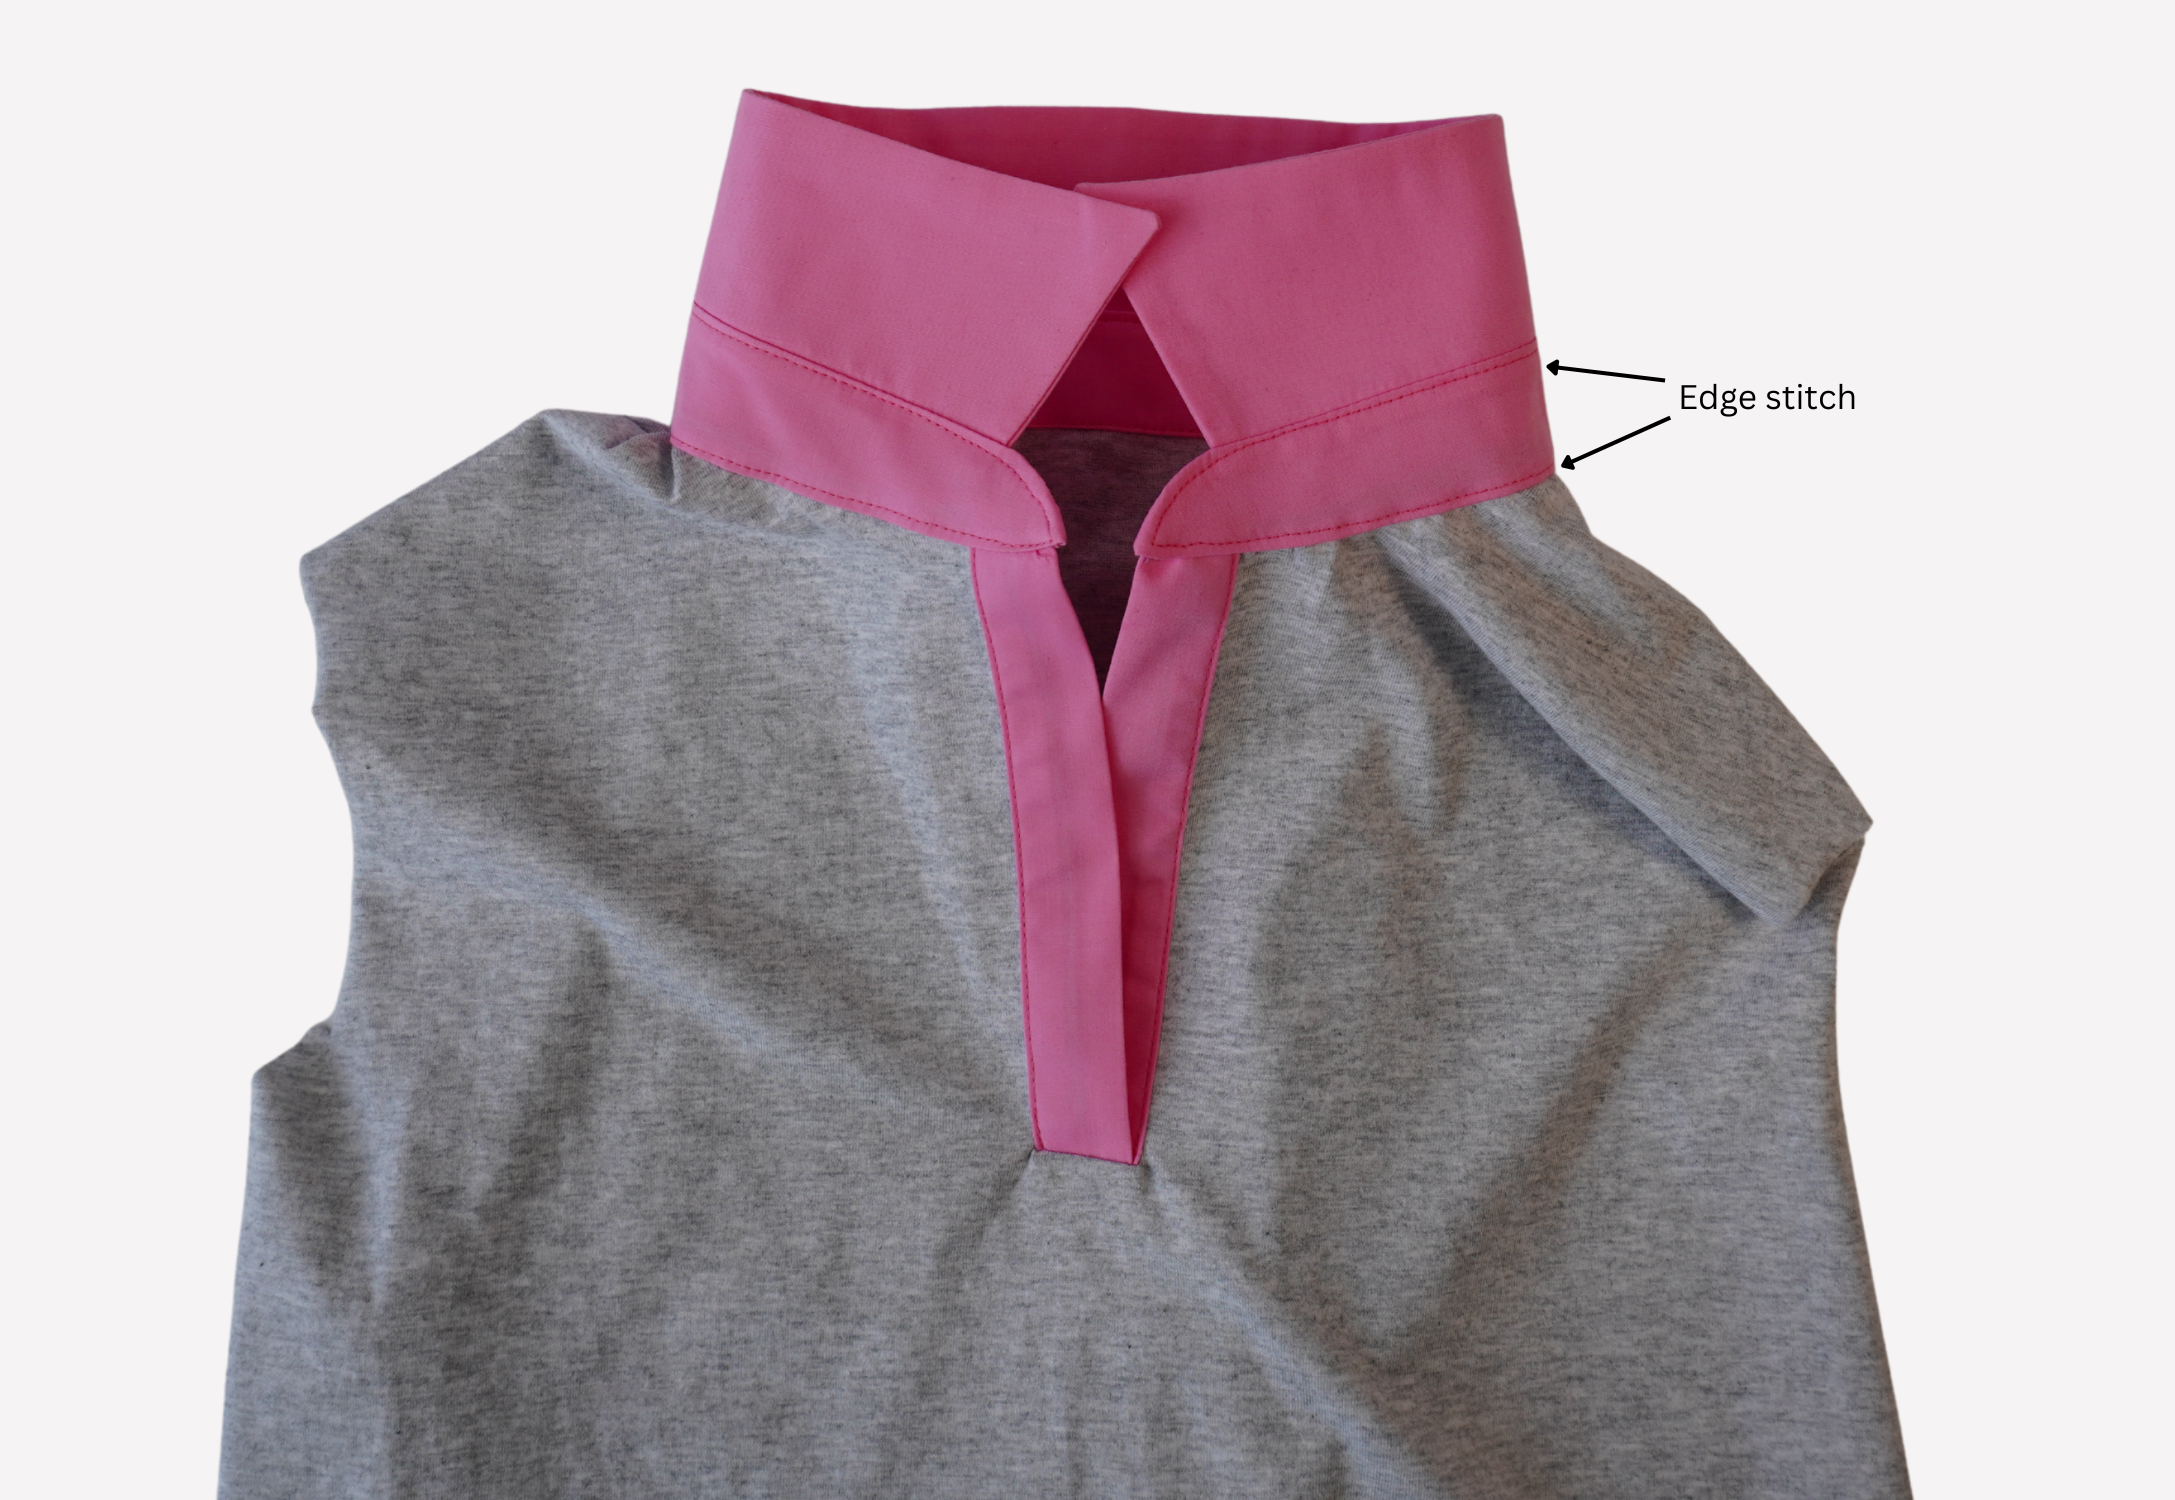
Pin the pre-pressed outer collar stand to the right side of the neck opening and edge stitch into place.
Edge stitch around the collar stand.
With RST and notches aligned, pin the Short Sleeve (3) OR Long Sleeve (4) to the arm openings. Sew, then neaten using an overlocker/serger and press toward the sleeve.
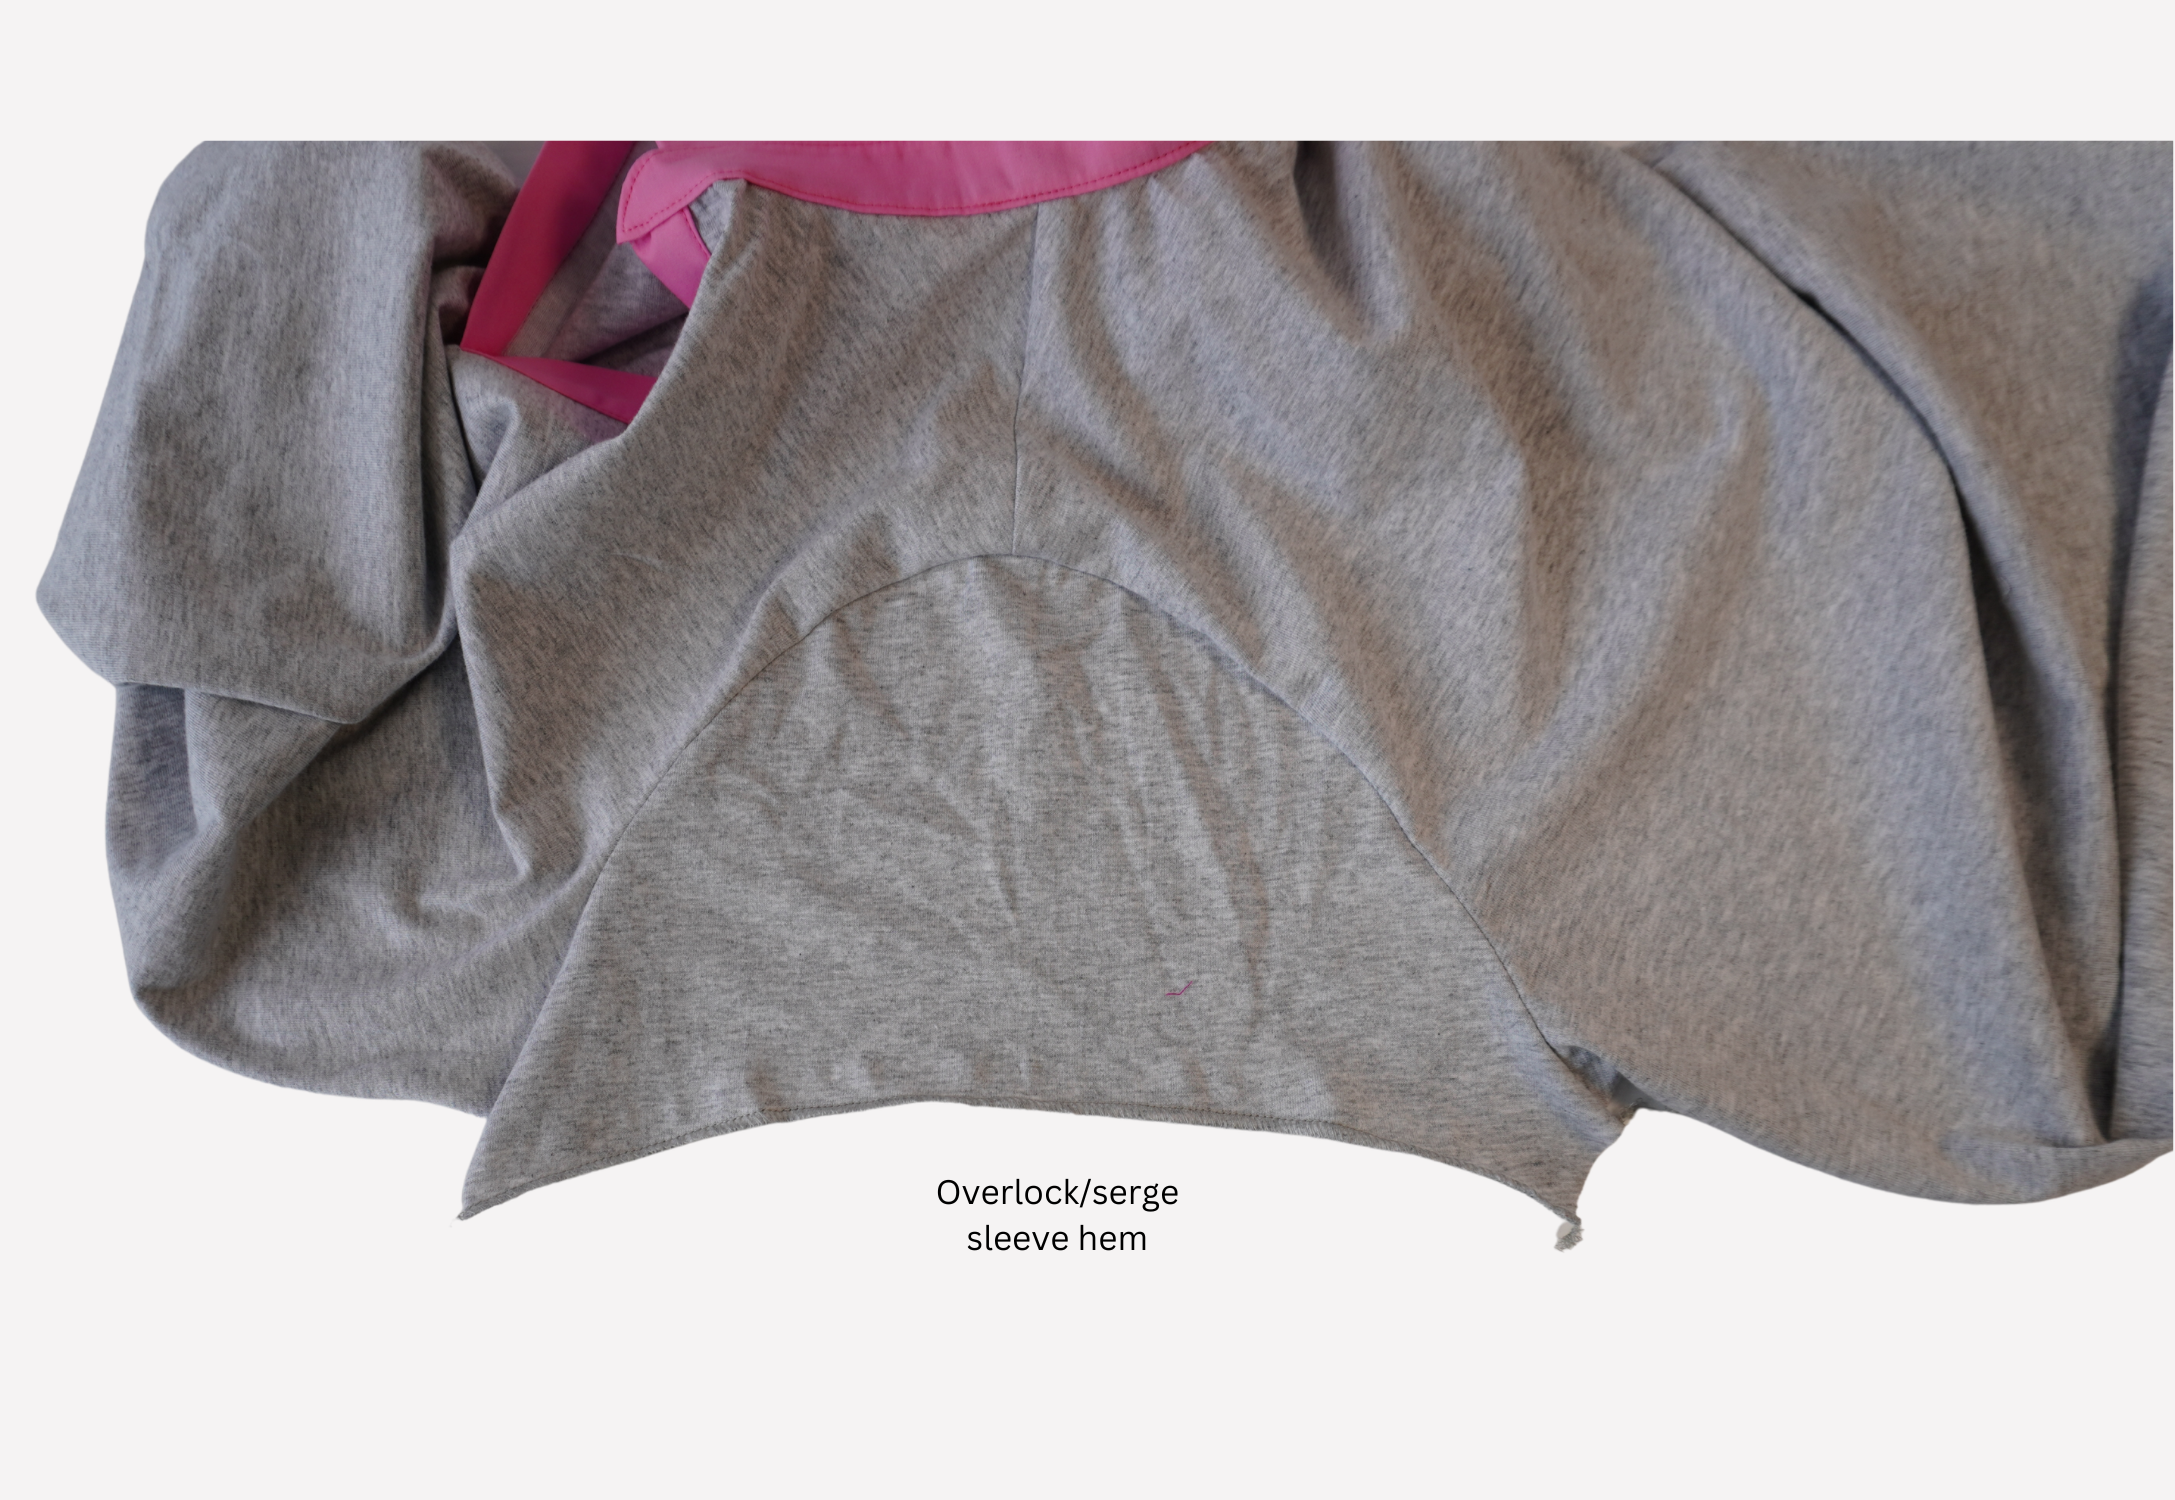
Neaten the hems of the sleeves using an overlocker/serger.
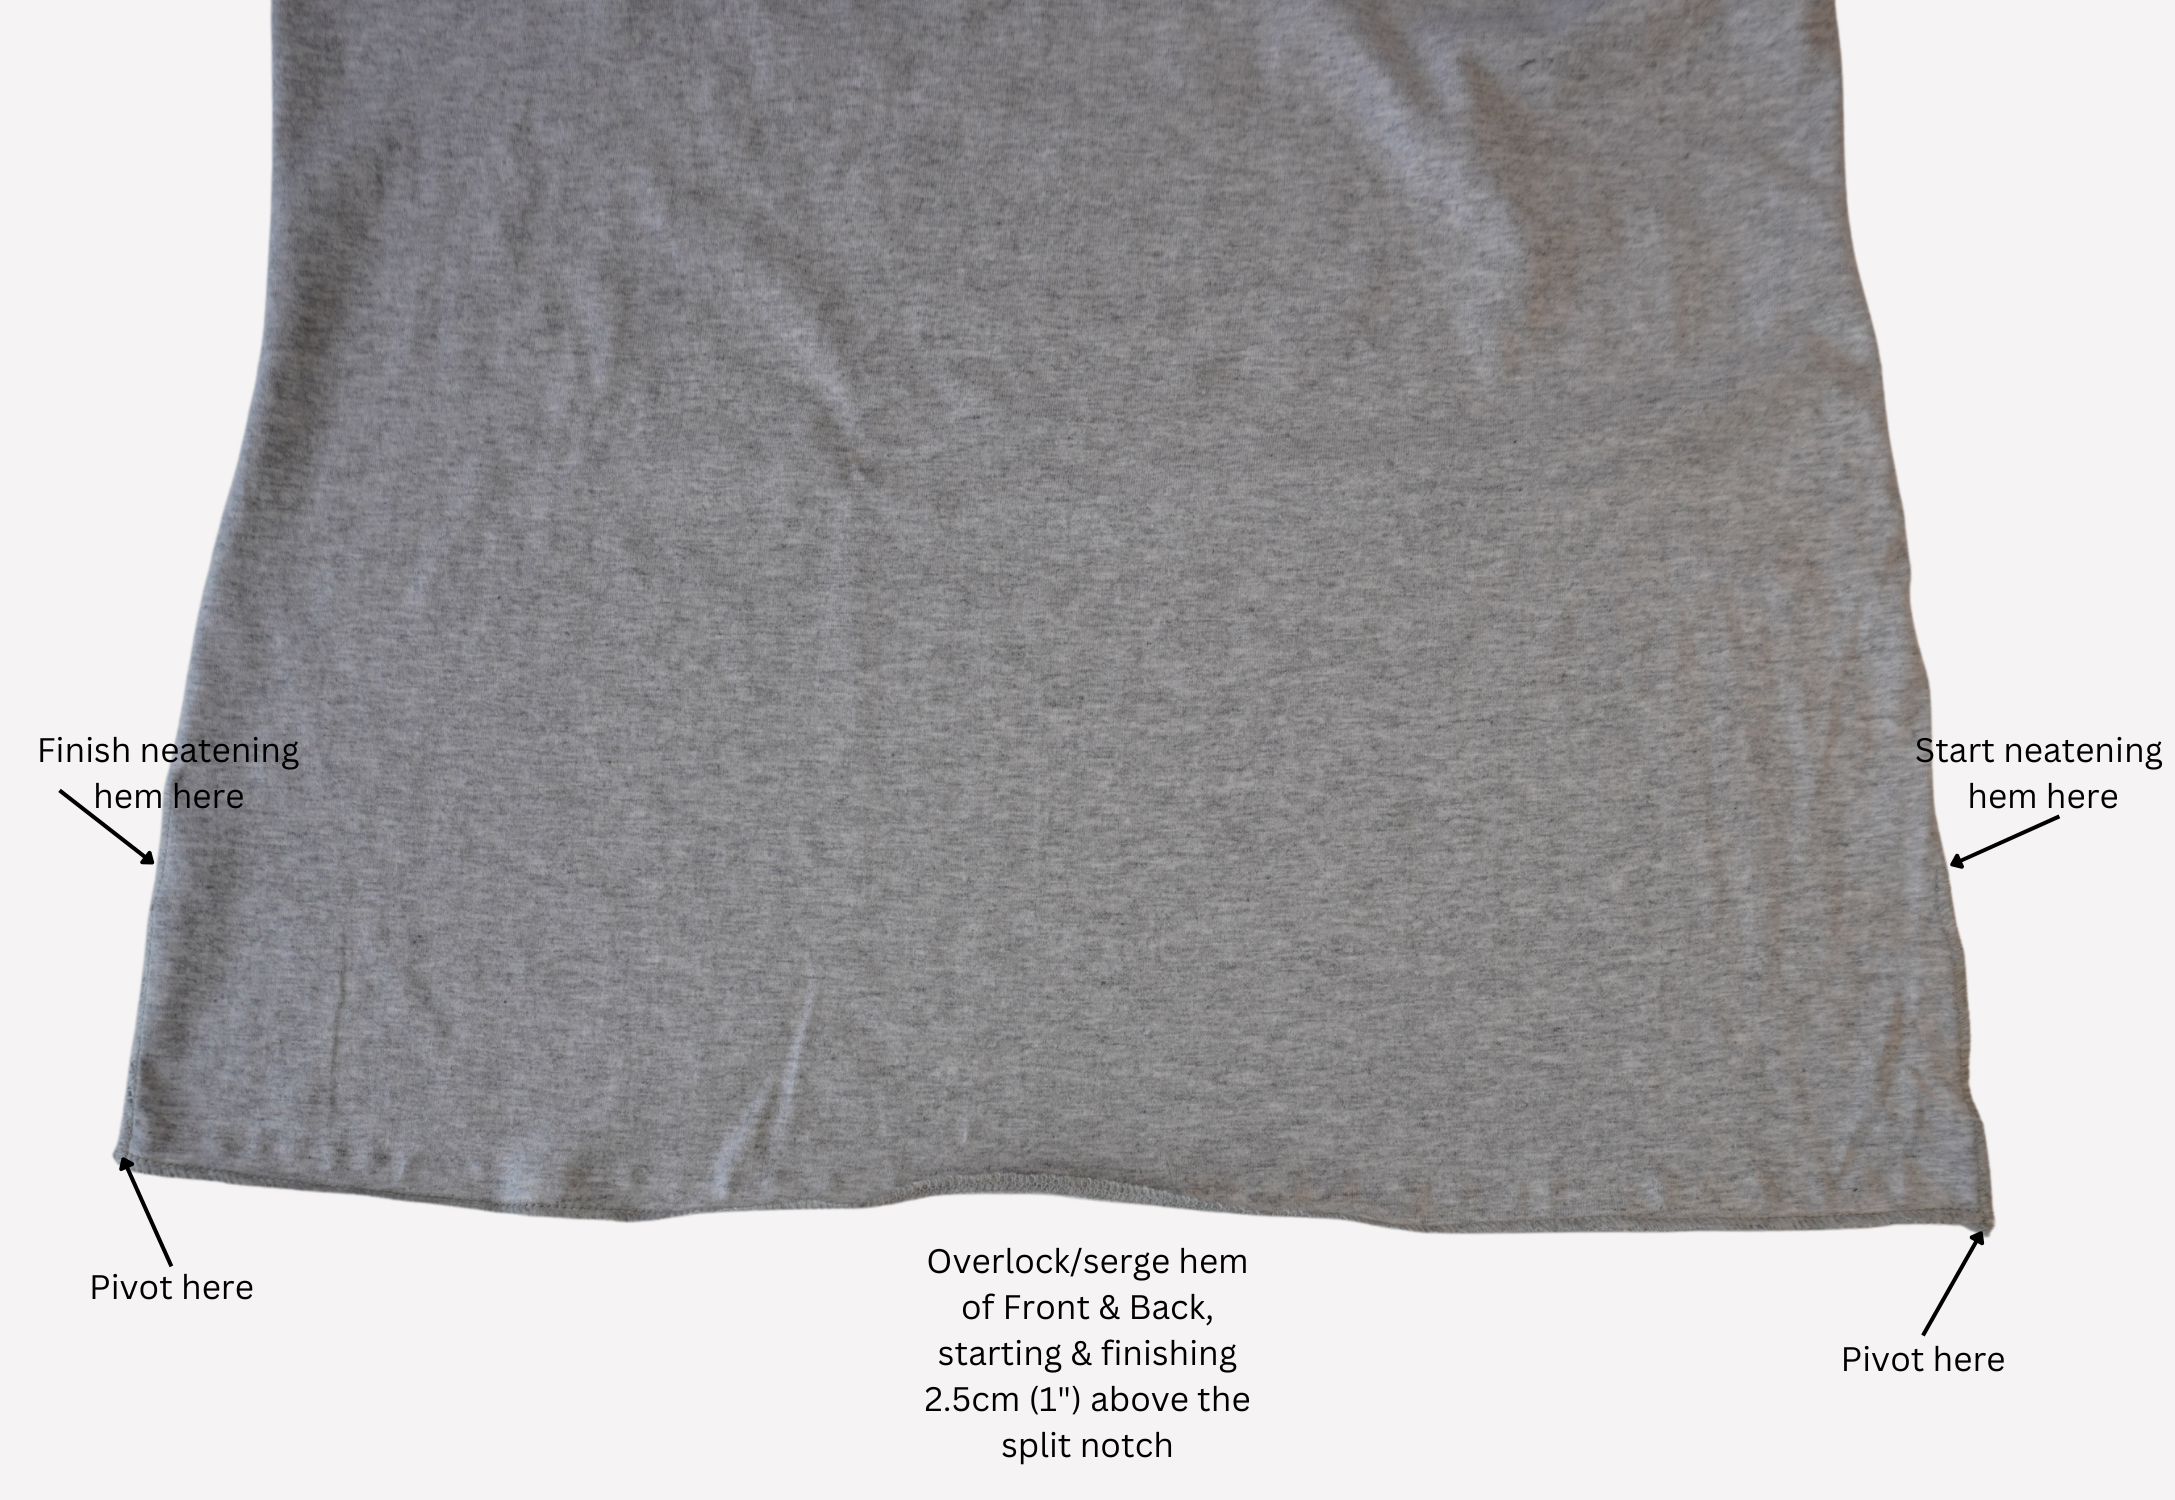
Neaten the lower part of each side seam and hem separately using an overlocker/serger. Start from approximately 2.5 cm (1”) above the split notch, pivot at the corner and continue neatening along the hem, pivot again at the corner, and finish approximately 2.5 cm (1”) above the split notch on the opposite side.
Pin the Back to Front at the side seam and under sleeve seam. Starting at the sleeve hem, sew the under sleeve and side seam, finishing at the notch indicating the split.
Neaten using an overlocker, as far as the previously neatened edges. Press toward the back.
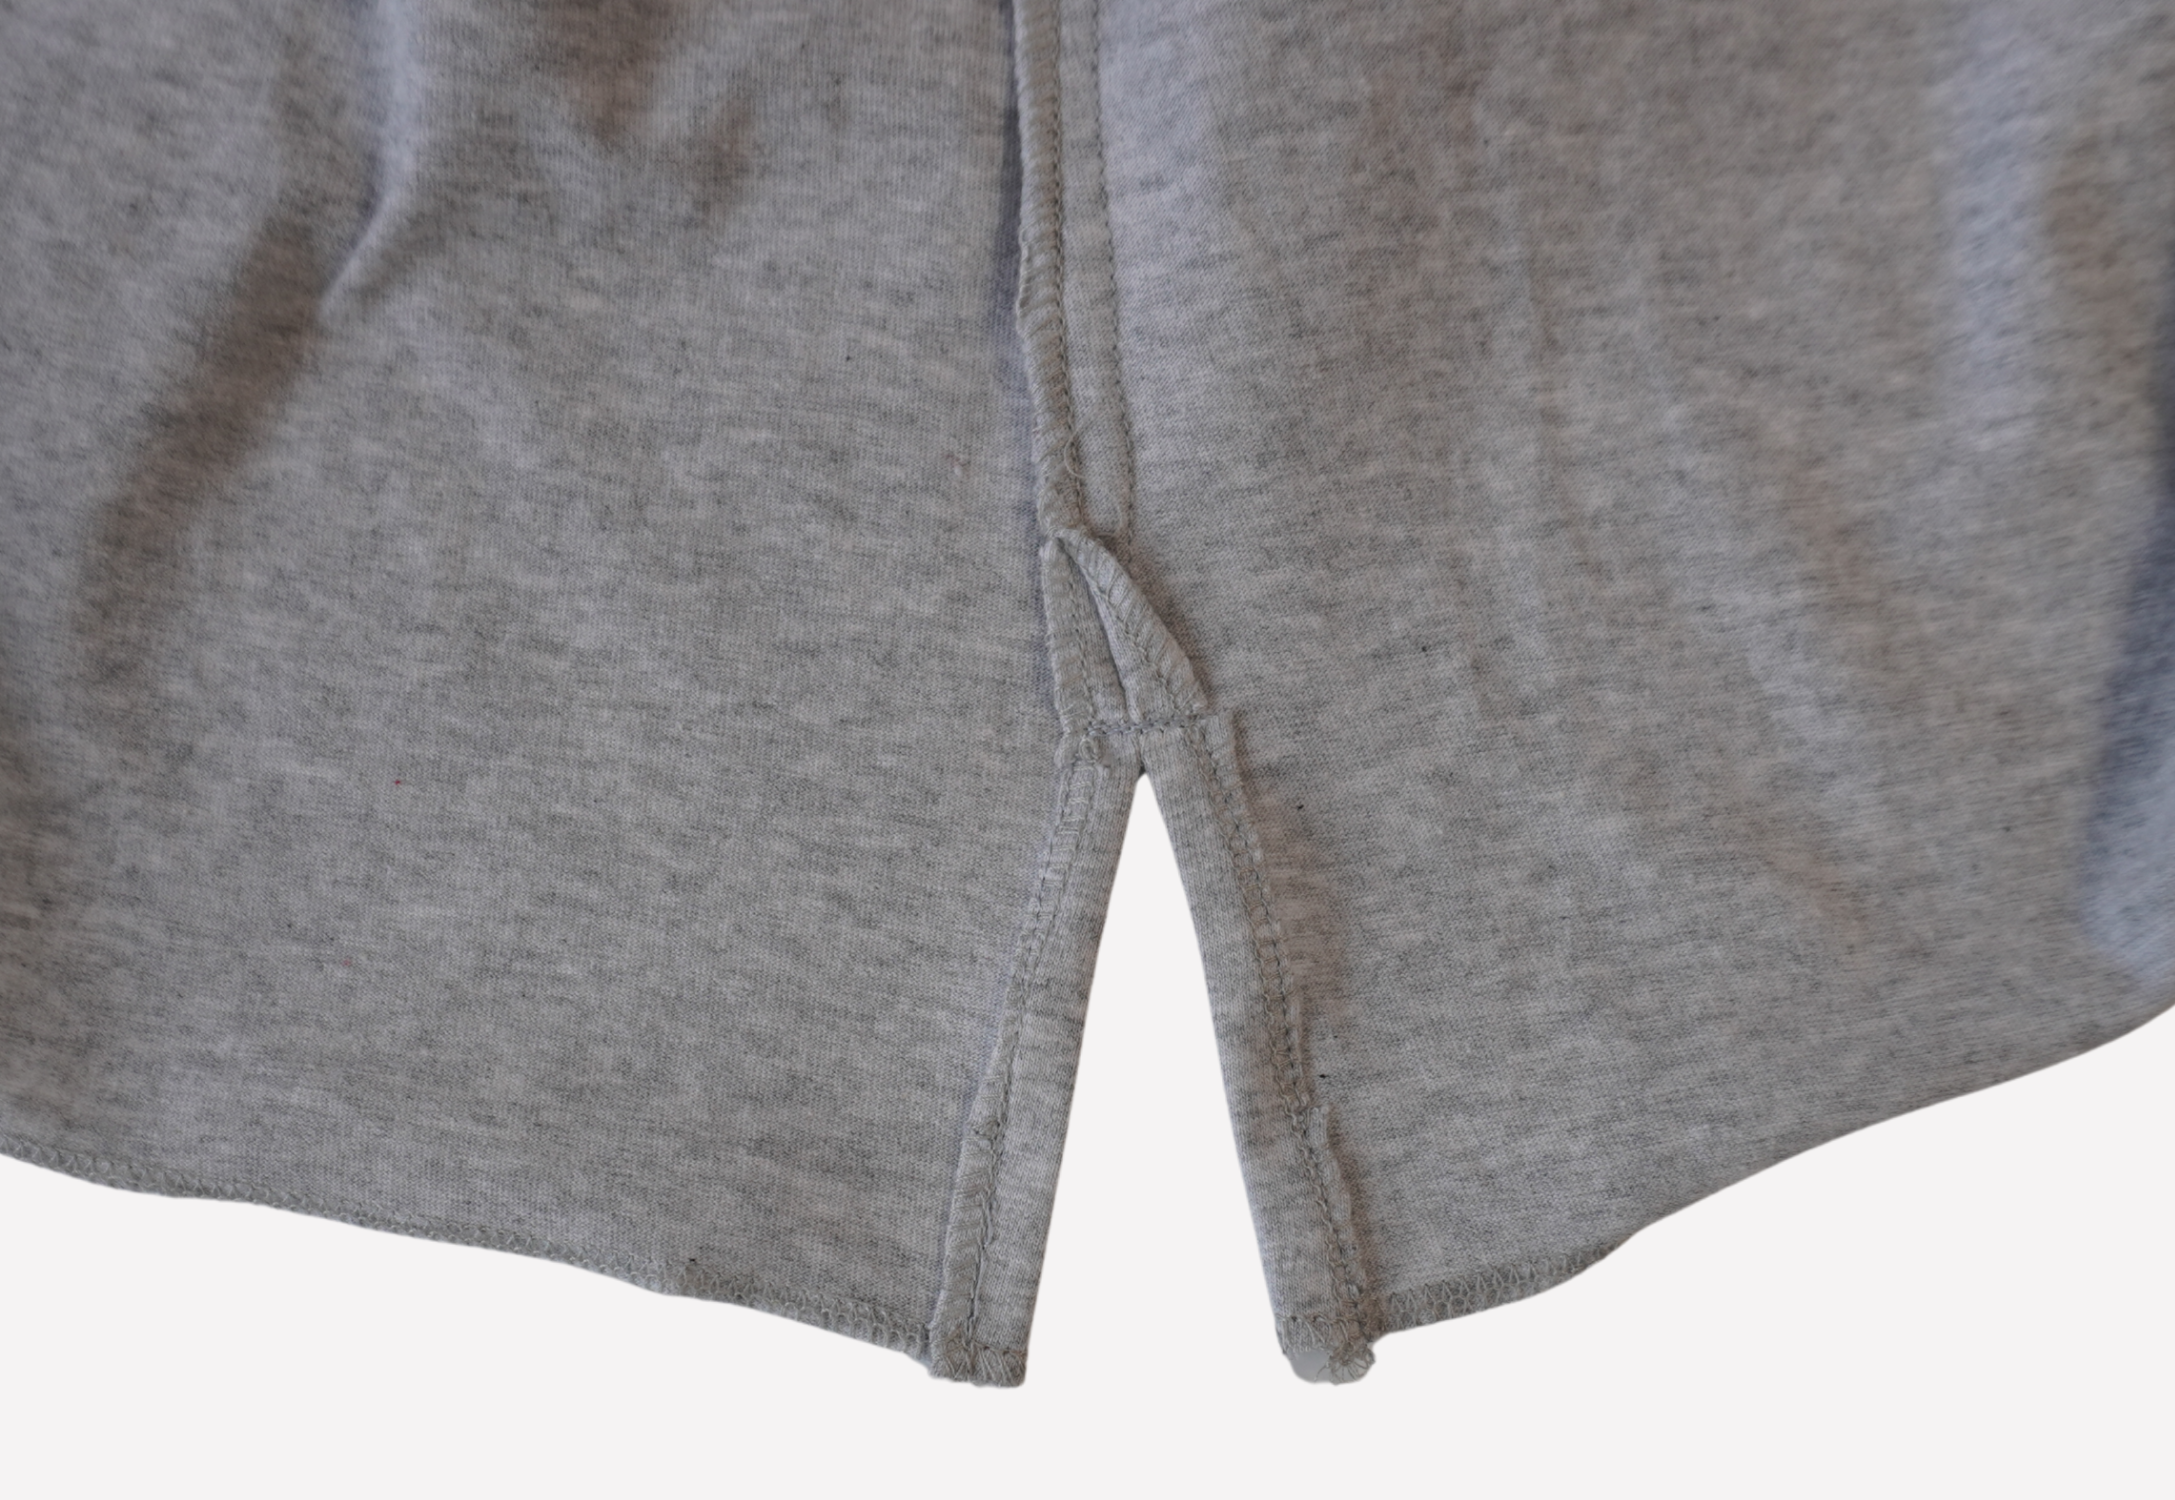
Turn the seam allowance of the splits to the inside at the notches and press. Top stitch the splits into place and make a bar tack at the top of the split to add strength to this area.
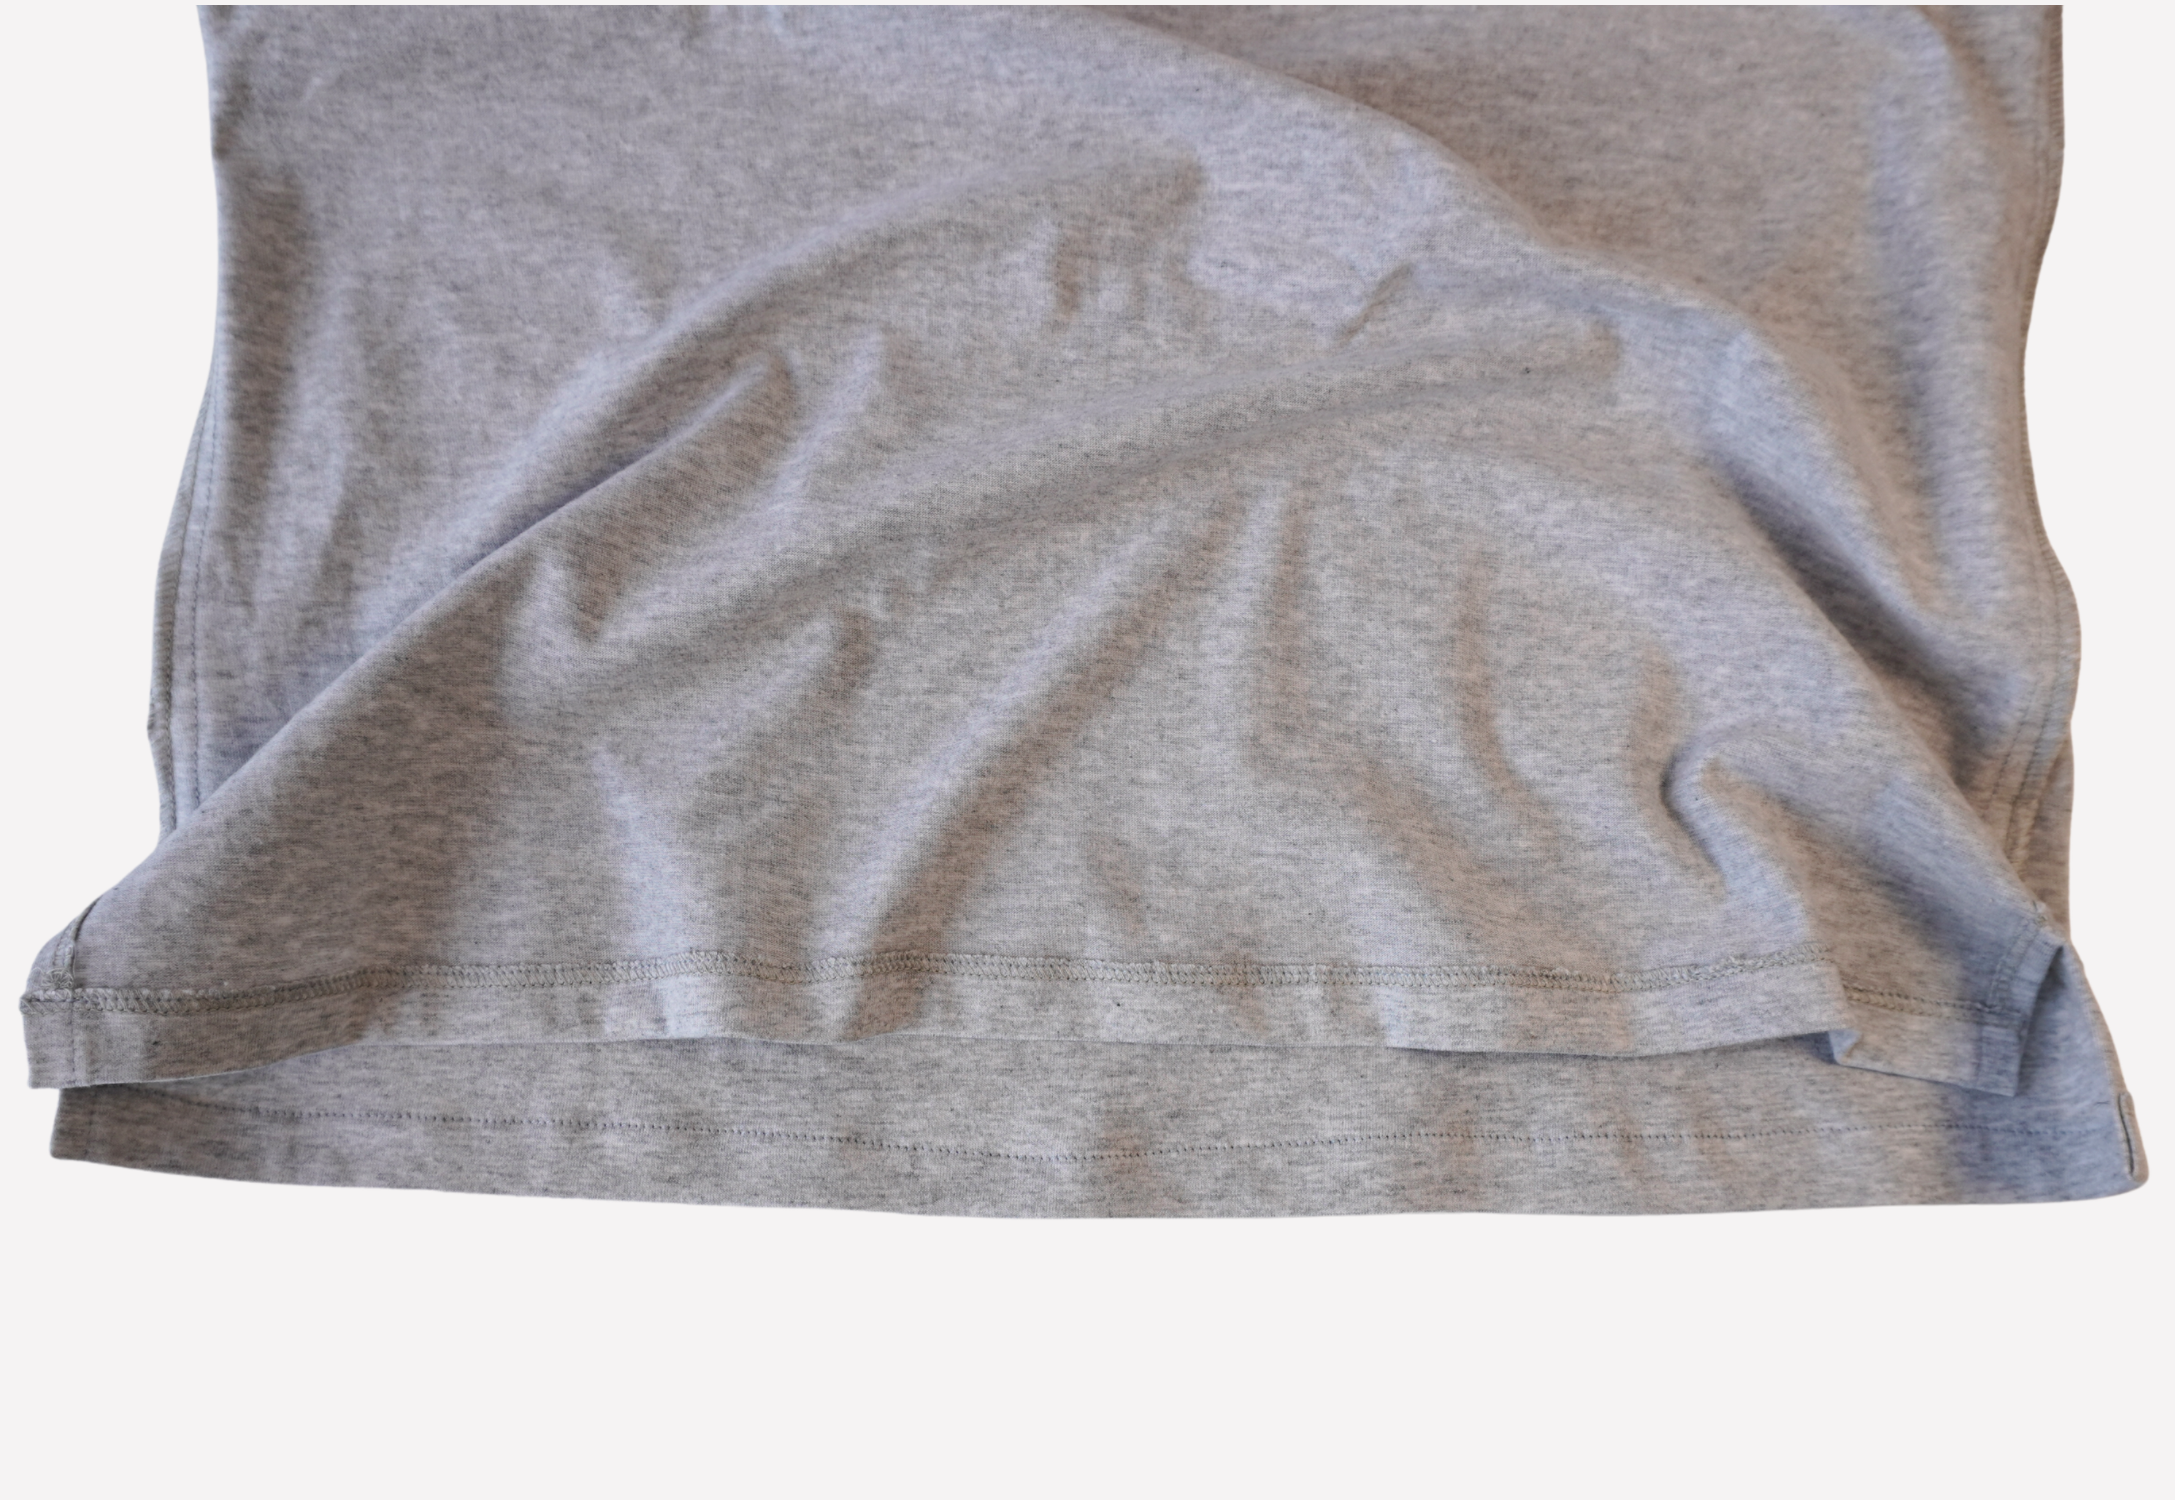
Turn the hem 2cm (3/8”) to the inside, press and top stitch into place. You may choose to use a twin needle.
Turn up the sleeve hem 2cm (3/4”) to the inside and topstitch into place. You may choose to use a twin needle.
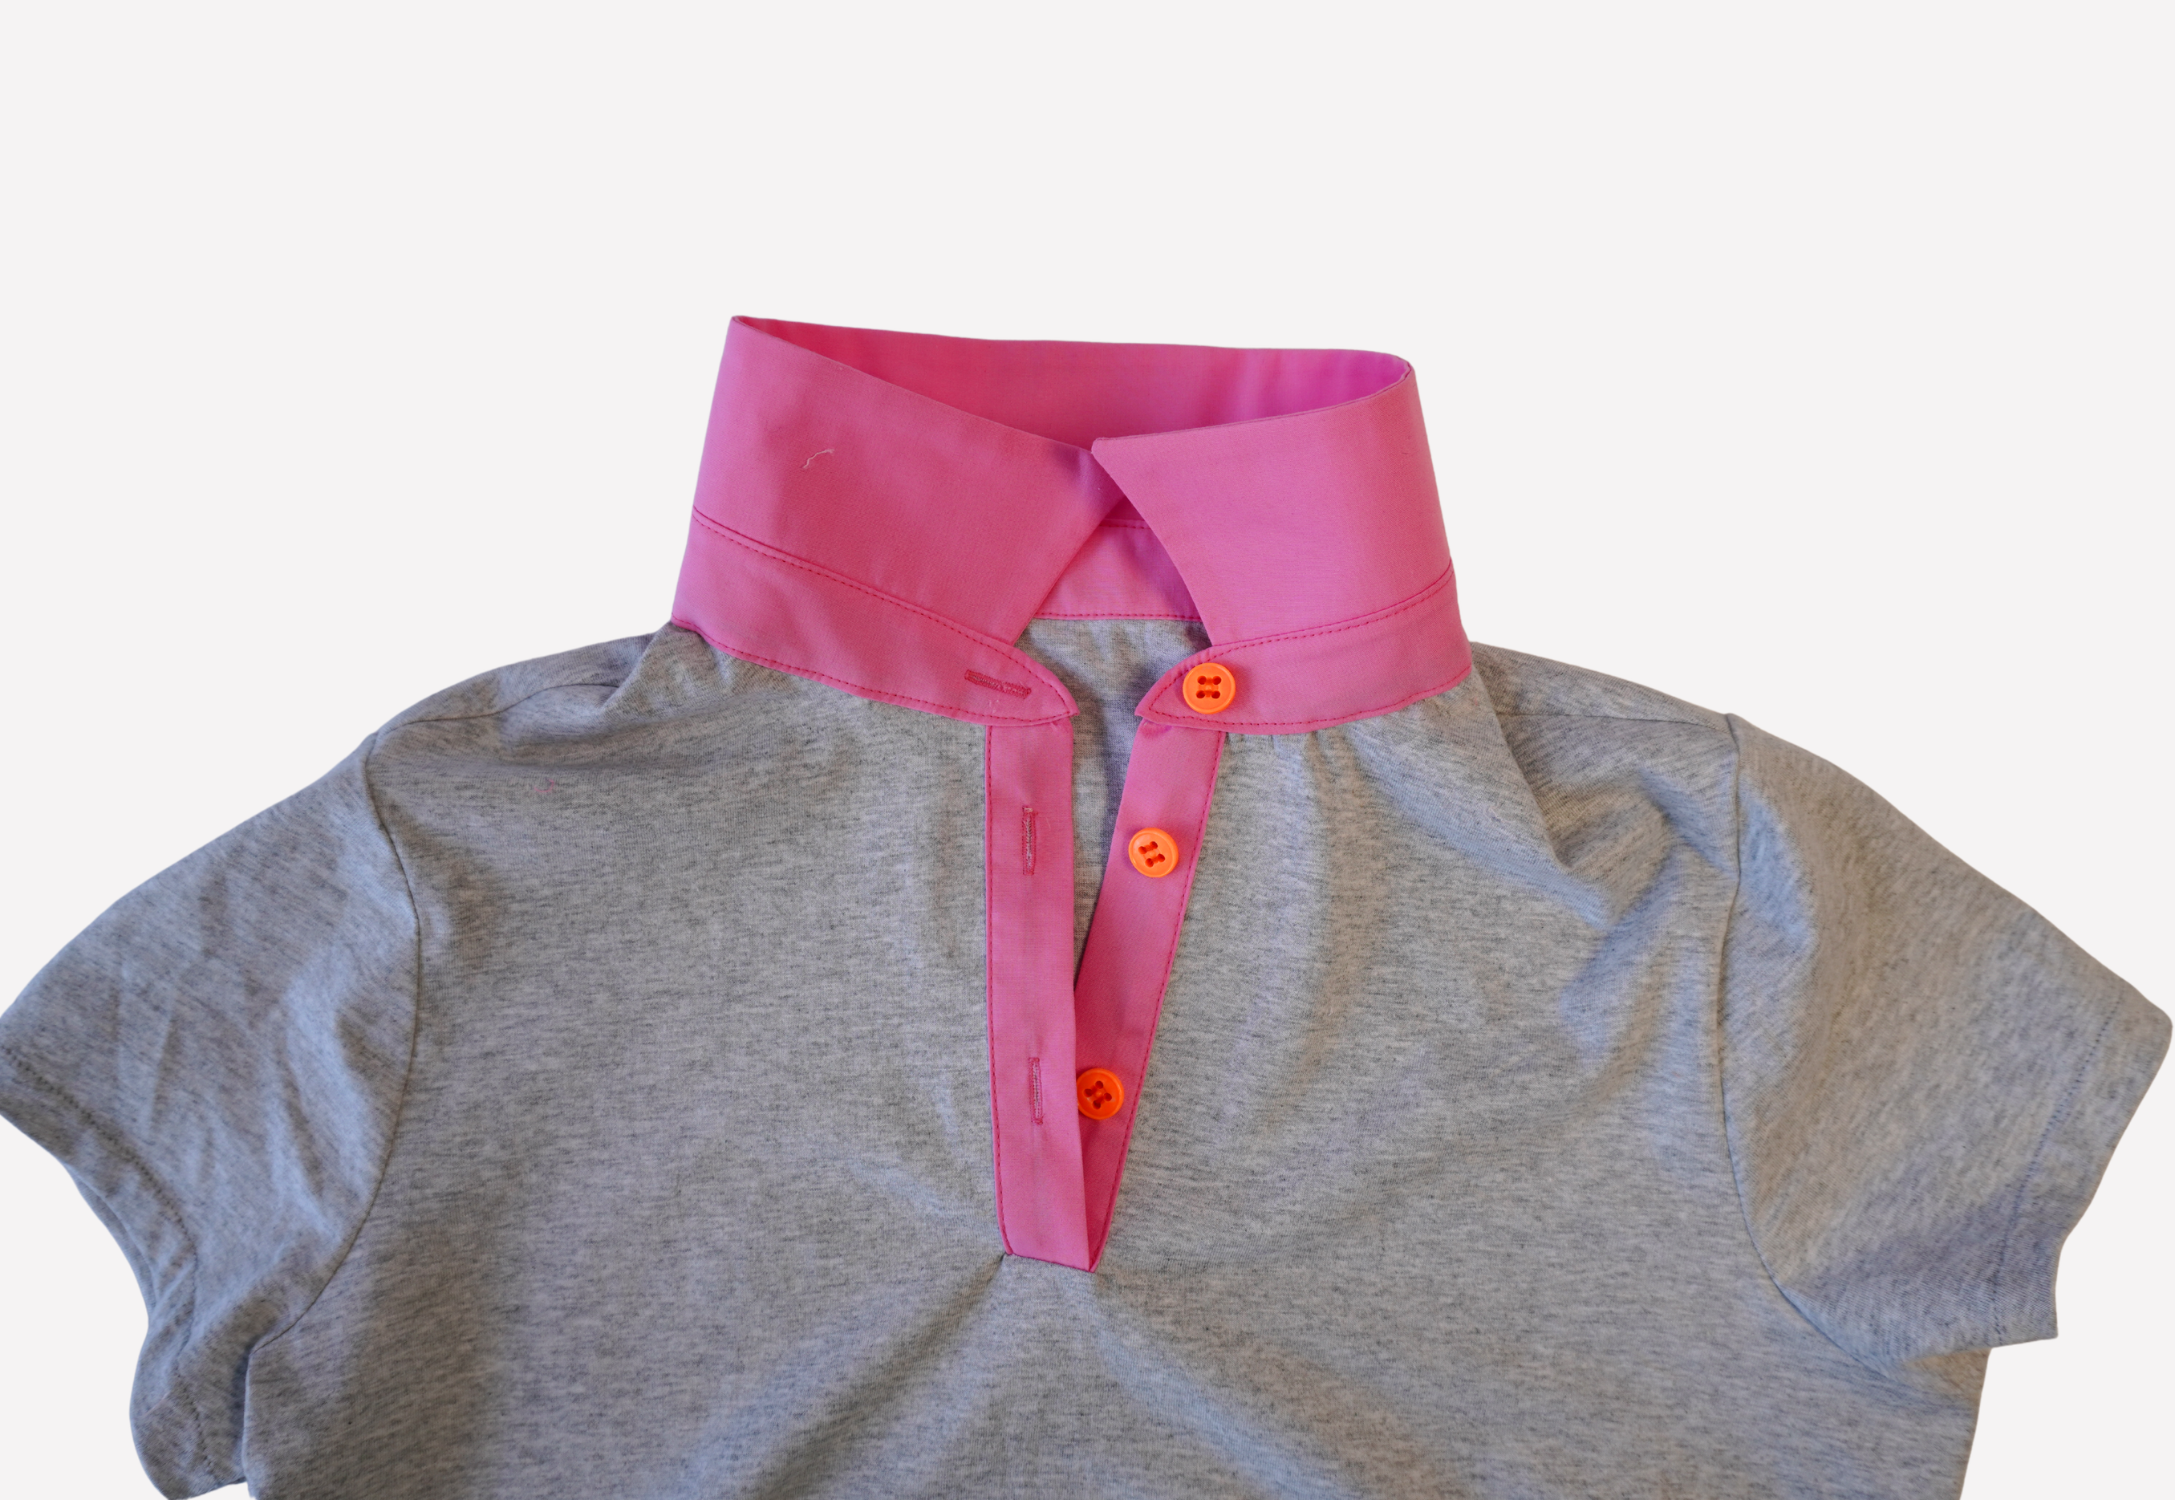
Optional: Make the buttonholes on the wearer’s right side of the collar stand and tab as marked on the pattern and attach the buttons using your preferred method.
Trim any loose threads and carefully press your new top!