Shop the Belmore Knit Tunic
#SABelmoreKnitTunic

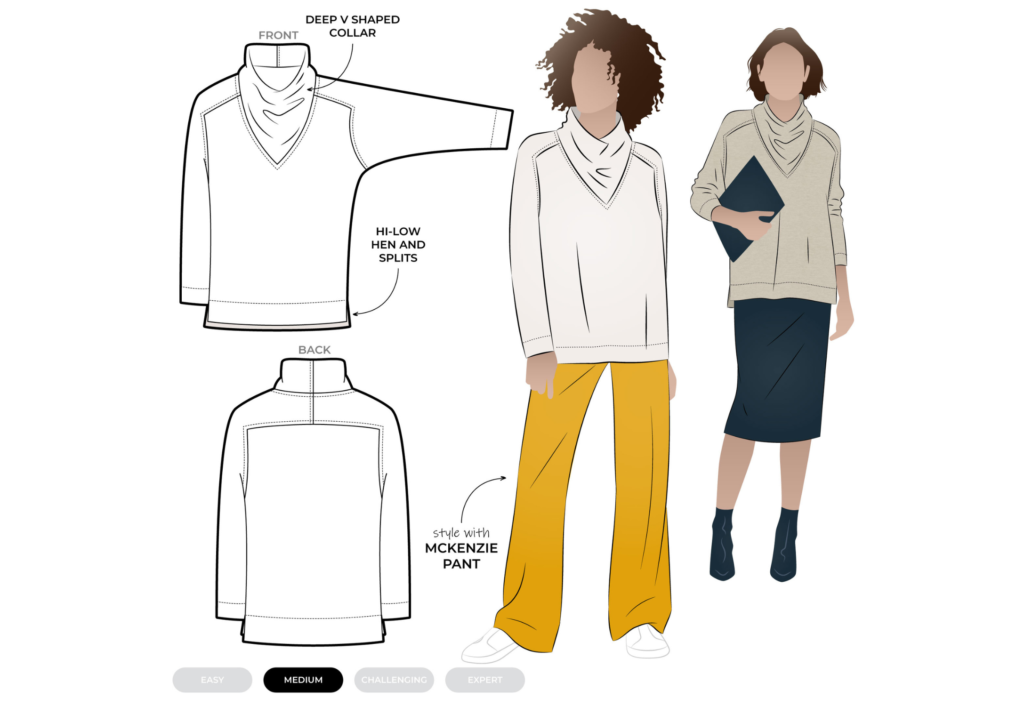
CONSTRUCTION
COLLAR:
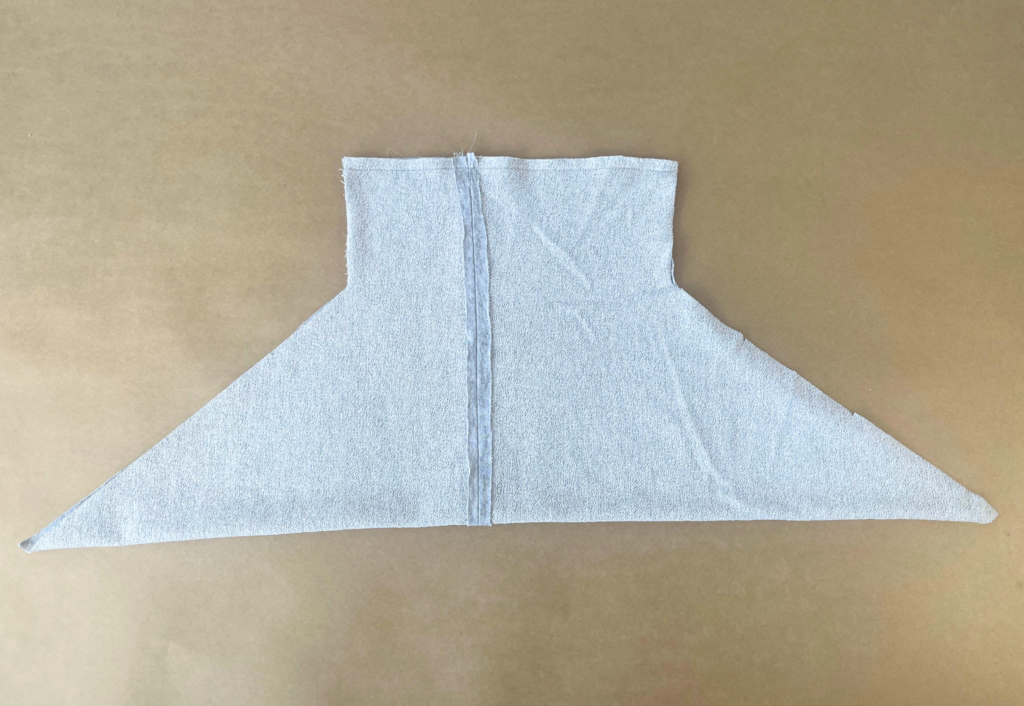
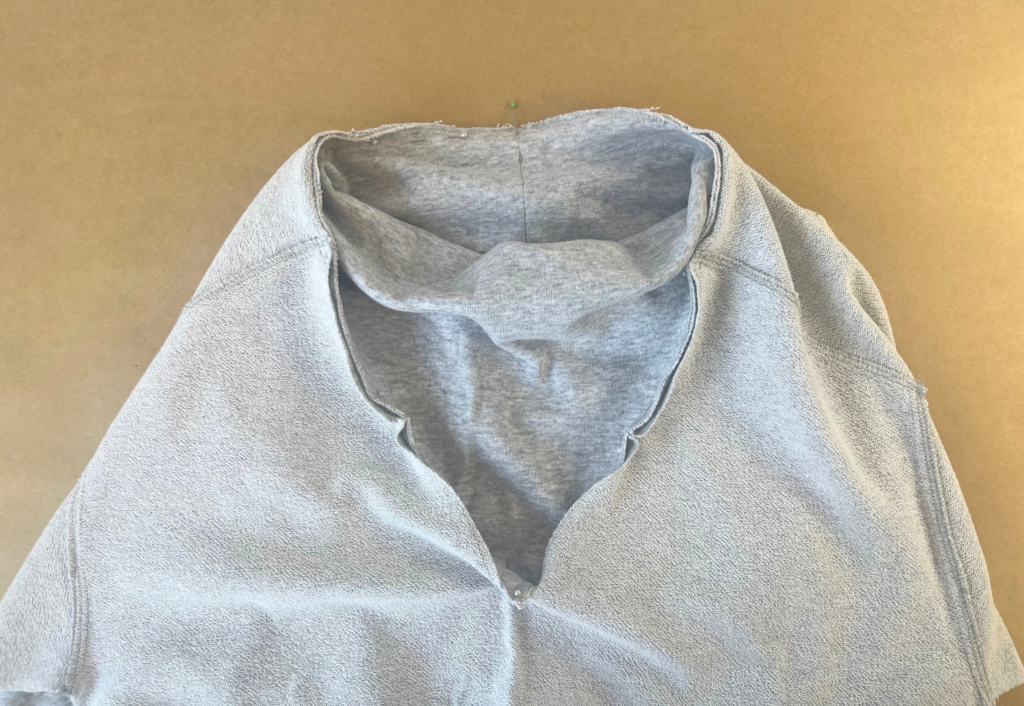
With RST, sew the centre back seam of the Collar (1) together. Press open.
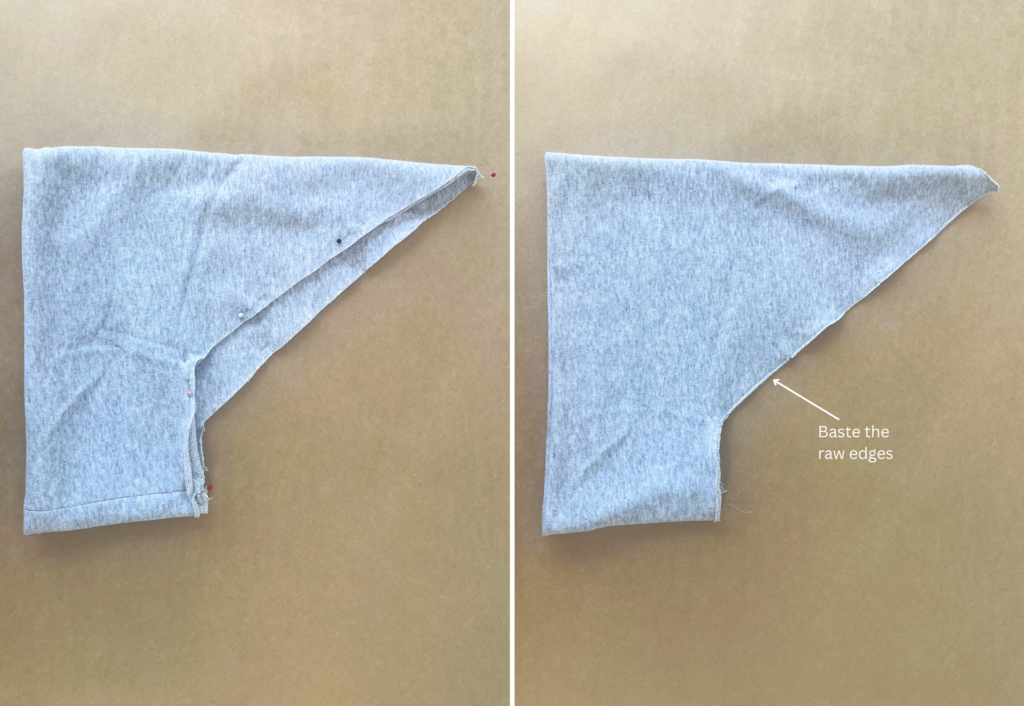
With WST and notches aligned, fold the collar in half and pin the raw edges together. Baste the raw edges. Set aside
BODY:
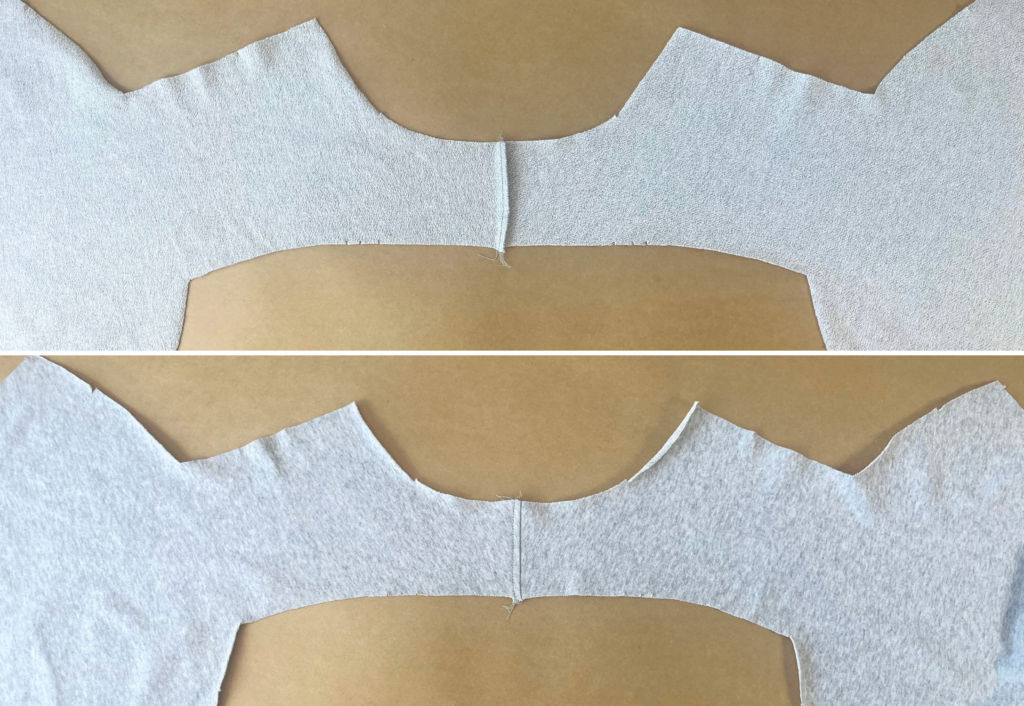
With RST sew the centre back seam of the Sleeve and Shoulder Yoke (3). Neaten using an overlocker/serger. Press the seam to the wearer’s left and sew a 6mm (1/4”) top stitch.
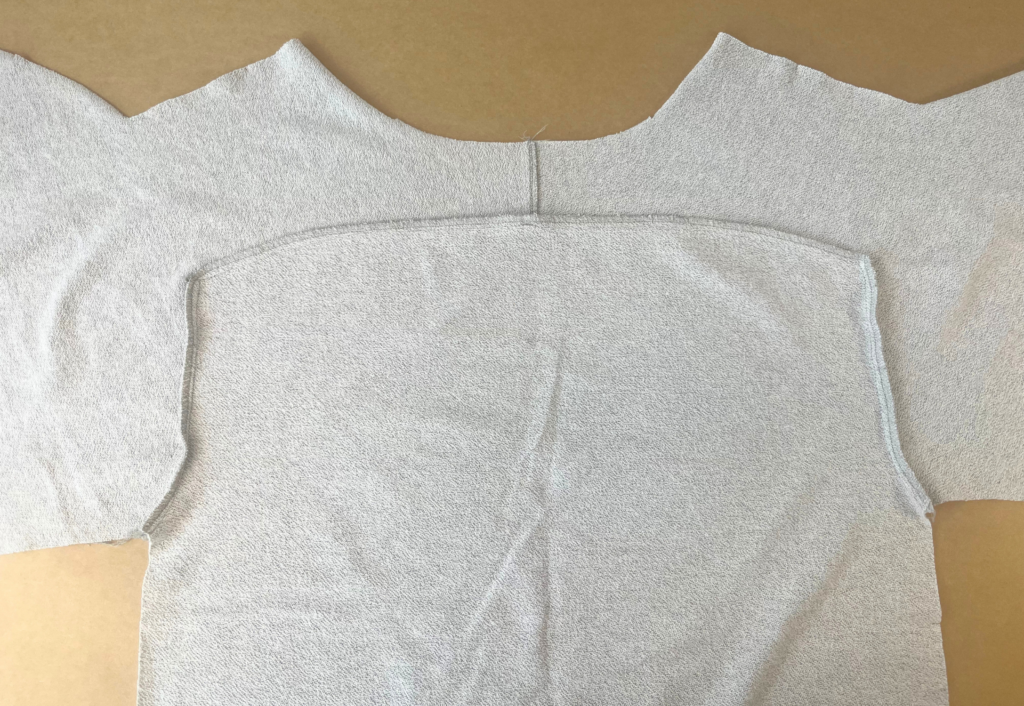

With RST and notches aligned, sew the Back (4) to the back yoke, start sewing at the centre back, sew across the right-angled seam, clip into the yoke seam, keep the needle down, turn the corner and continue sewing down the back armhole. Repeat for the opposite side.
Neaten using an overlocker/serger and press the yoke seam up and the armhole seams out. Sew a 6mm (1/4”) top stitch to the seams.
With RST and notches aligned, sew the Front (2) to the front yoke, start sewing at the neckline, when arriving at the armhole keep the needle down, clip into the corner of the yoke and continue sewing around the arm hole. Repeat for the opposite side.
Neaten using an overlocker/serger and press the yoke seam up and the armhole seams out. Sew a 6mm (1/4”) top stitch to the seams.
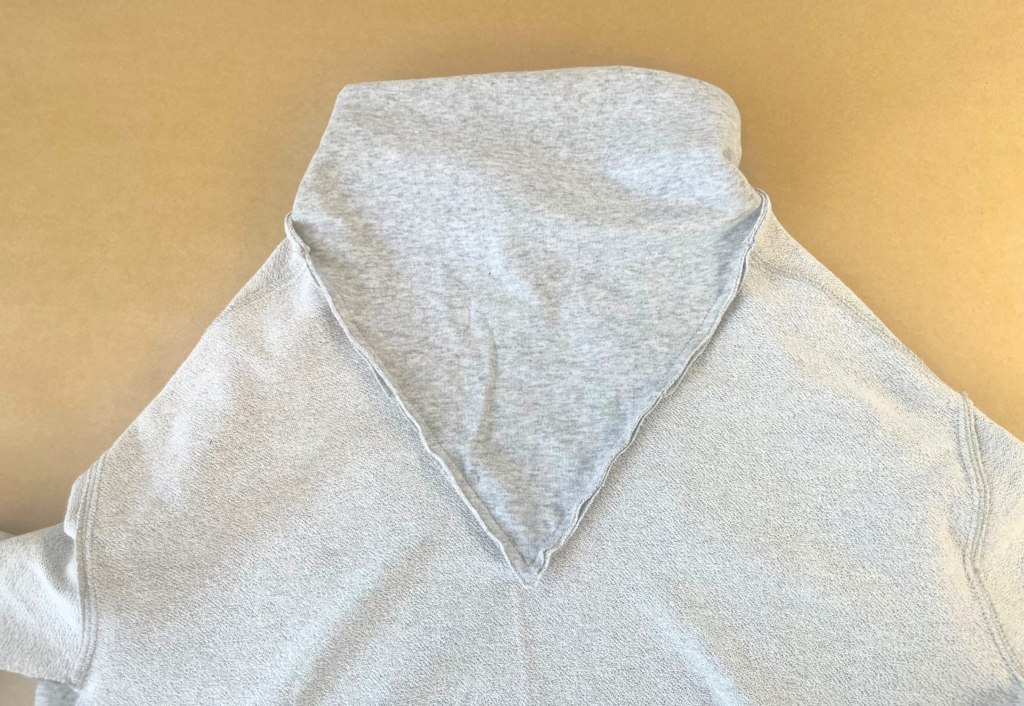
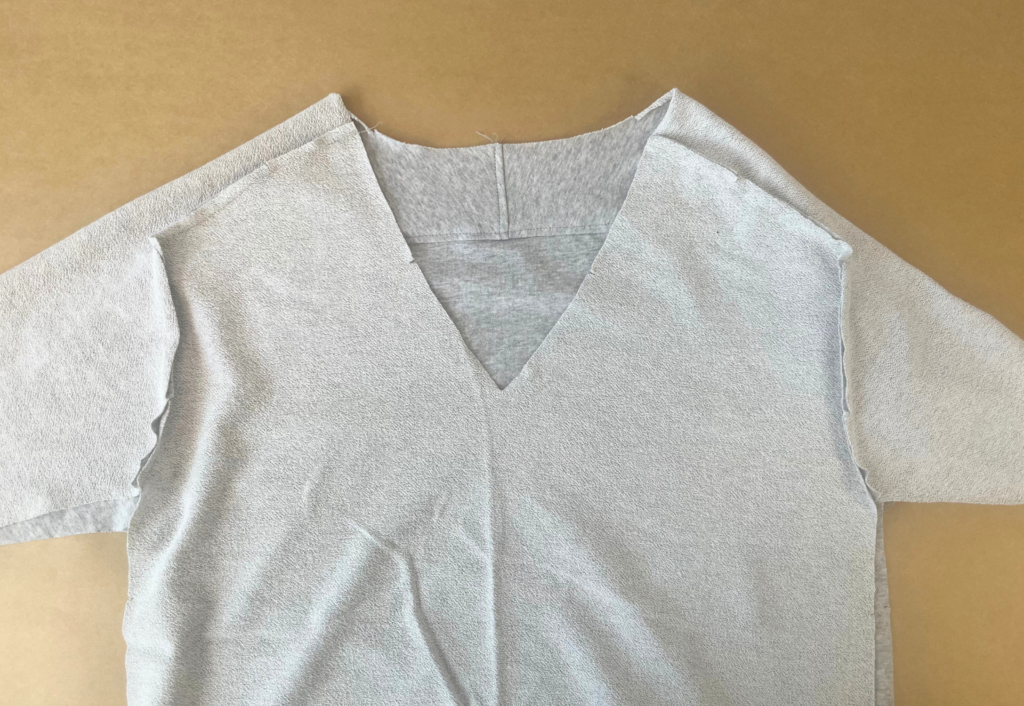
Sew a stay stitch to the neckline to prevent stretching.
With RST and notches aligned, pin the collar to the neckline. Start sewing at the centre back and stitch around the neck to the V, clip carefully into the body to achieve a sharp point. Repeat for the opposite side finishing at the V.
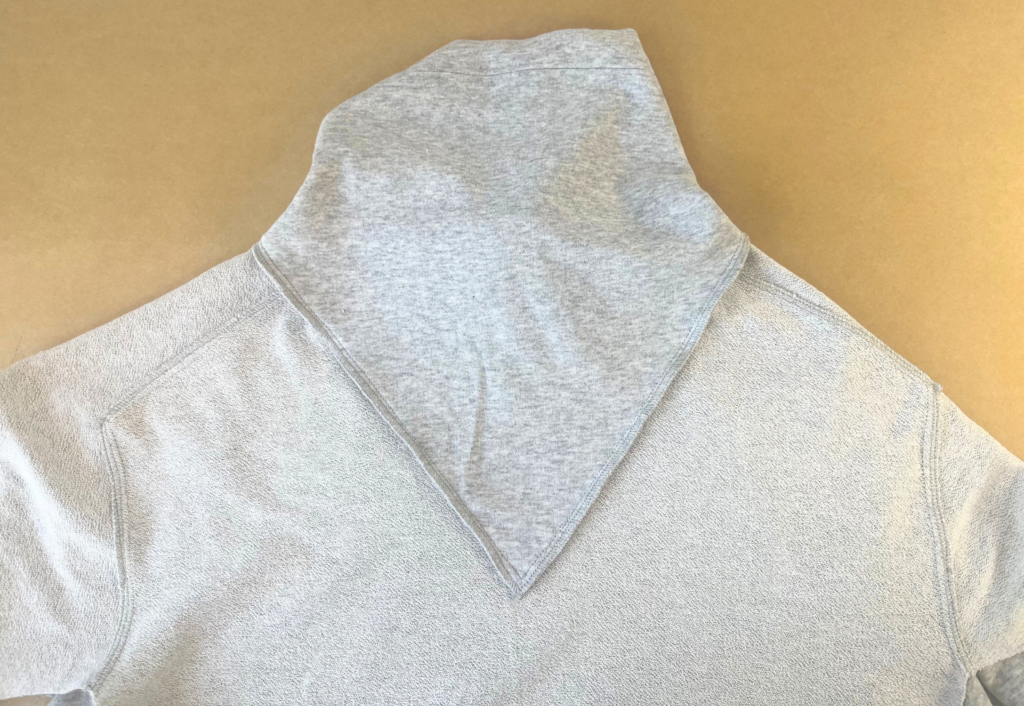
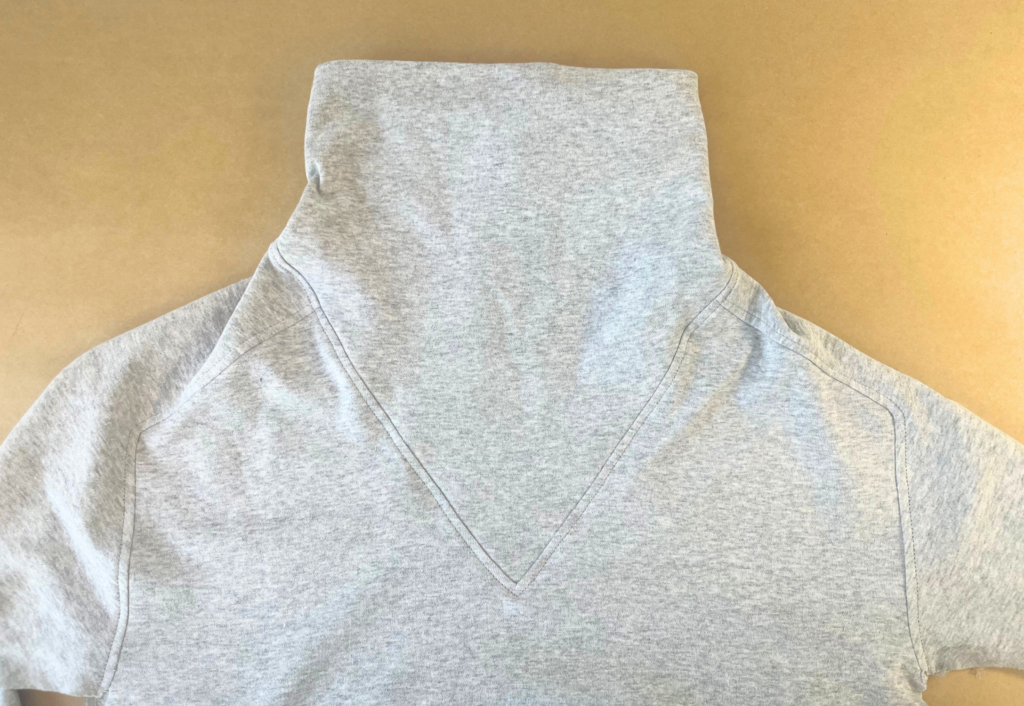
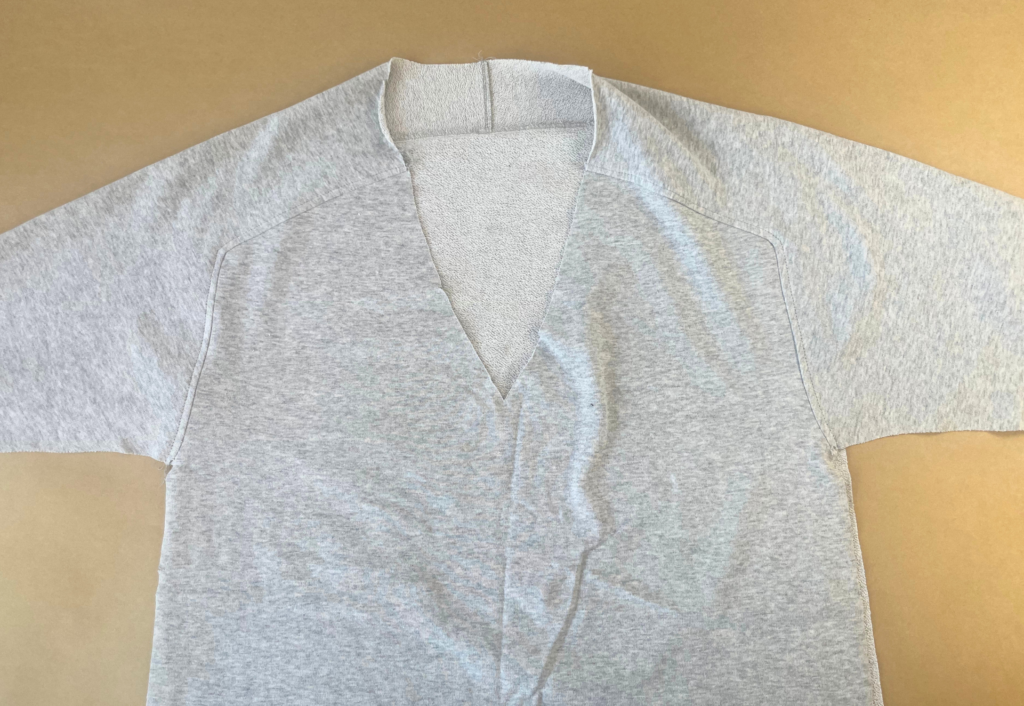
Neaten using an overlocker/serger and press toward the body. Sew a 6mm (1/4”) top stitch around the neckline, taking care to keep your nice V shape at the front.
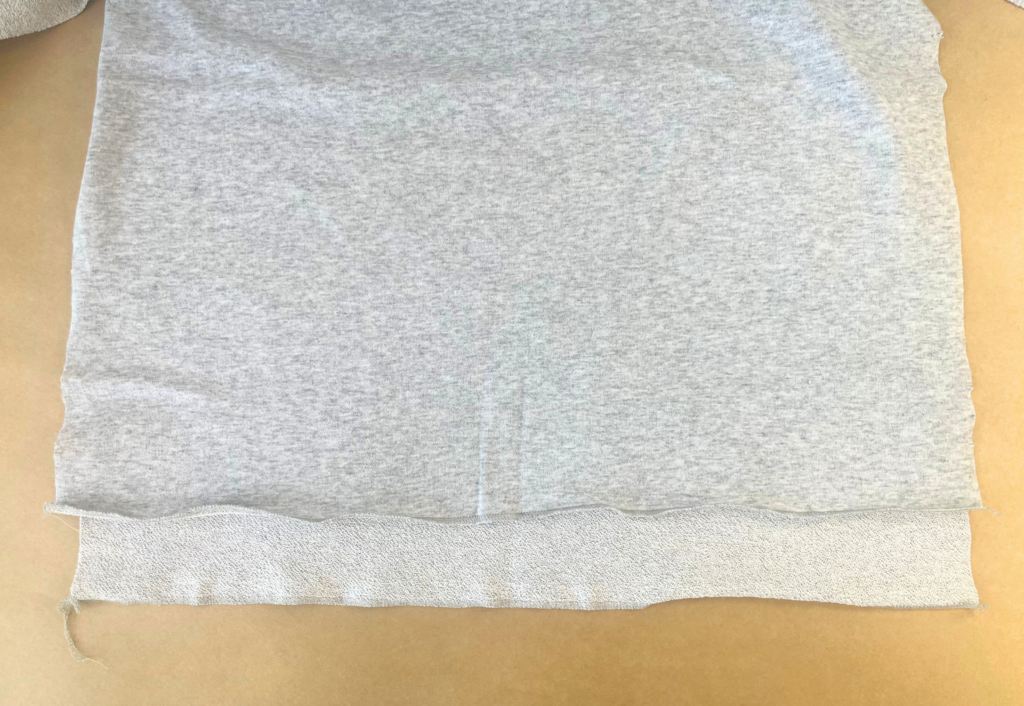
Neaten the hem and the sleeve hems using an overlocker/serger.

Neaten the front and back side seams and under sleeve seams separately.
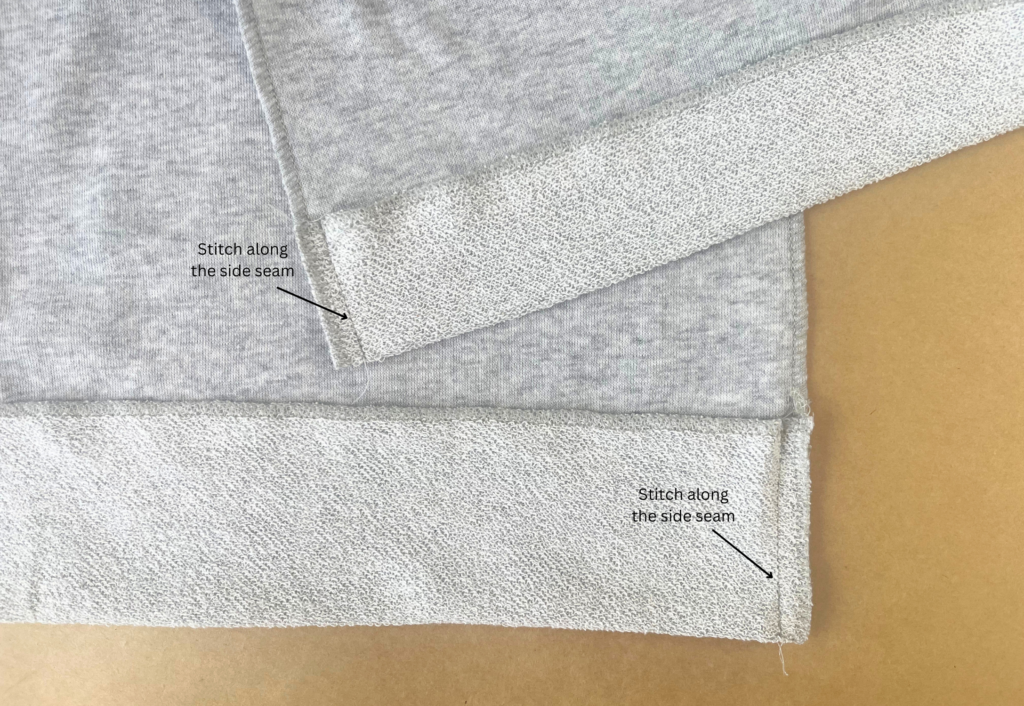
At the Back hem foldline notch, turn the hem under 7.5 cm (3”) to the outside (RST), and sew along the side seam to secure the hem. Turn the hem out and press.
At the Front hem foldline notch, turn the hem under 5 cm (2”) to the outside (RST), and sew along the side seam to secure the hem. Turn the hem out and press.
Press the hem along the foldline as indicated on the pattern, pin into place and sew using an edge stitch.
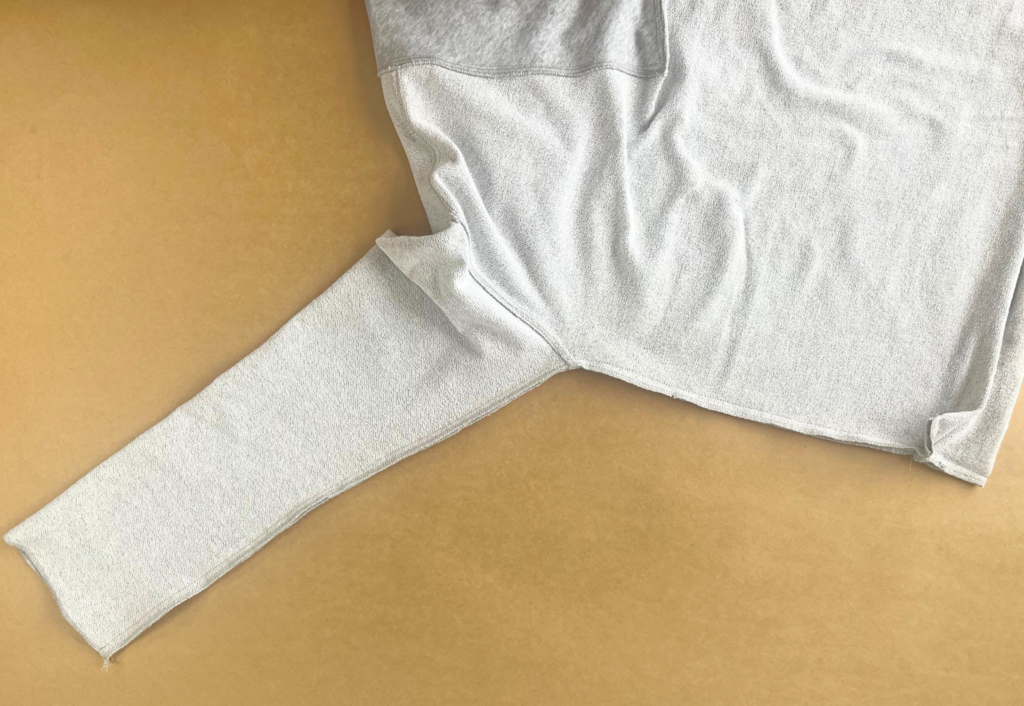
With RST, sew the front to back at the side seams and under sleeve seams, starting at the sleeve hem and finishing at the top of the split. Press open.
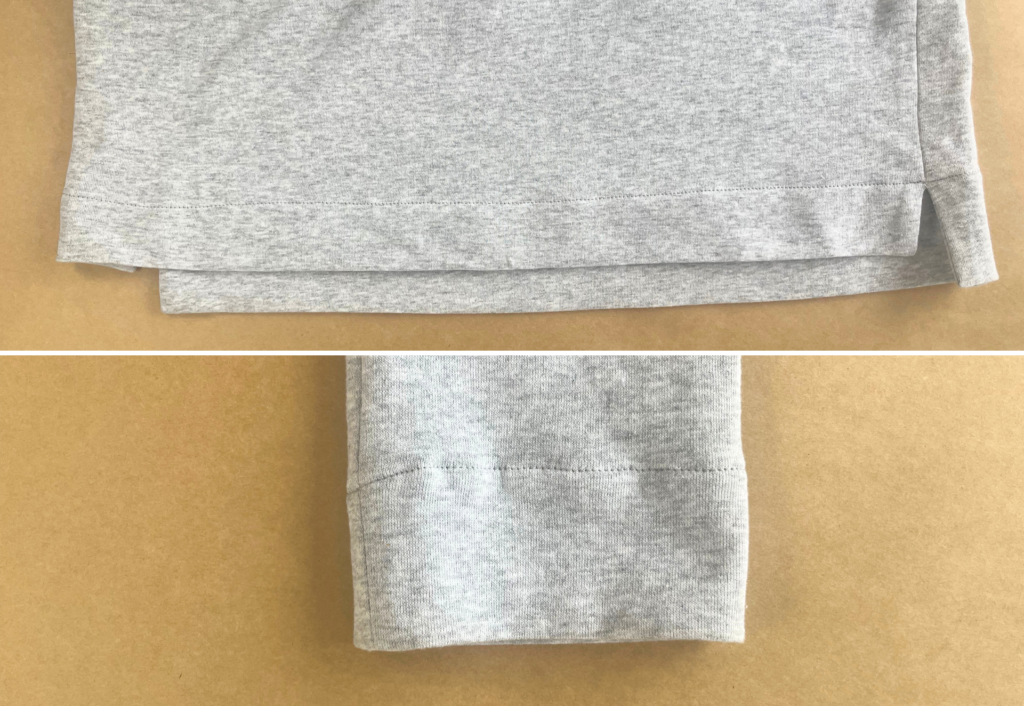
Turn the sleeve hems 6cm (2 3/8”) to the inside, press evenly, pin into place and sew using an edge stitch.
Trim any loose threads and carefully press your new tunic!
