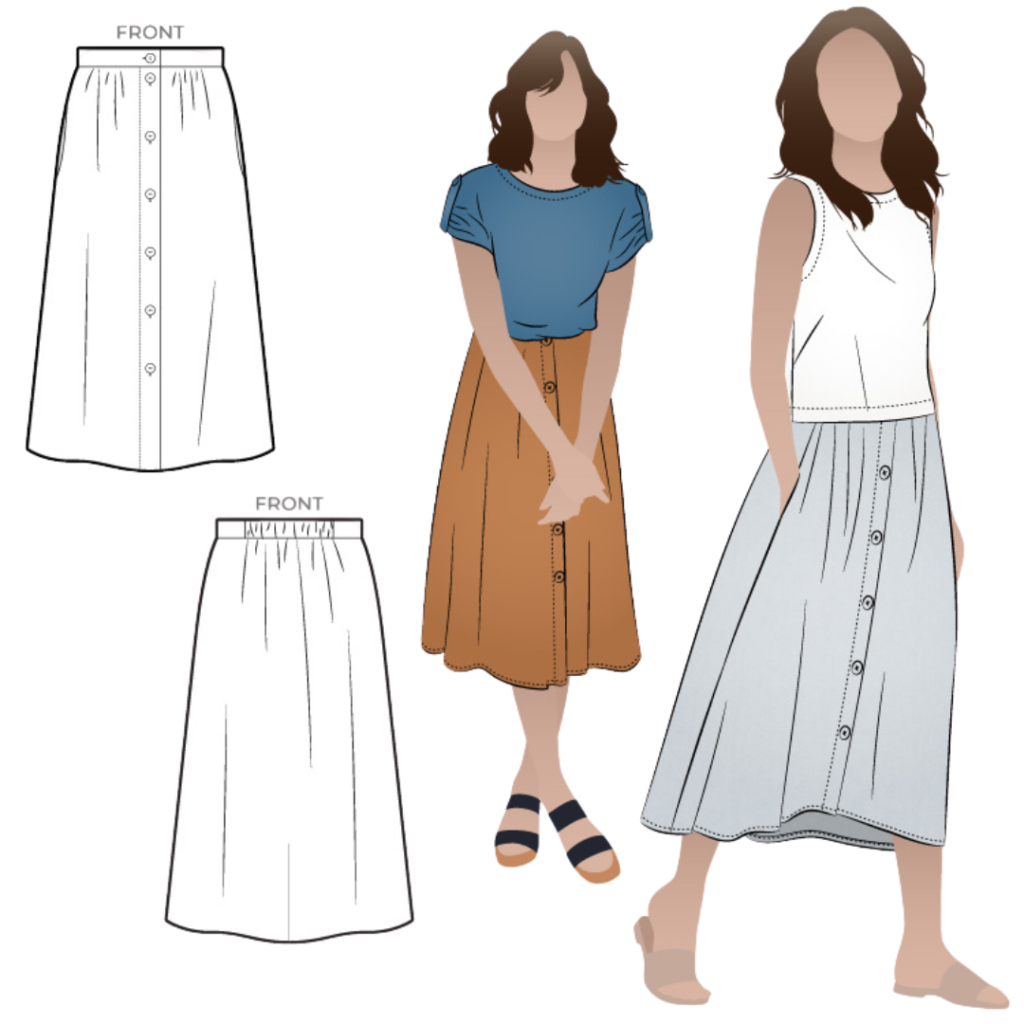

Sew along with Elise and Maggie as they guide you through constructing the waistband, and scroll down for the complete photo tutorial.
CONSTRUCTION
POCKETS:

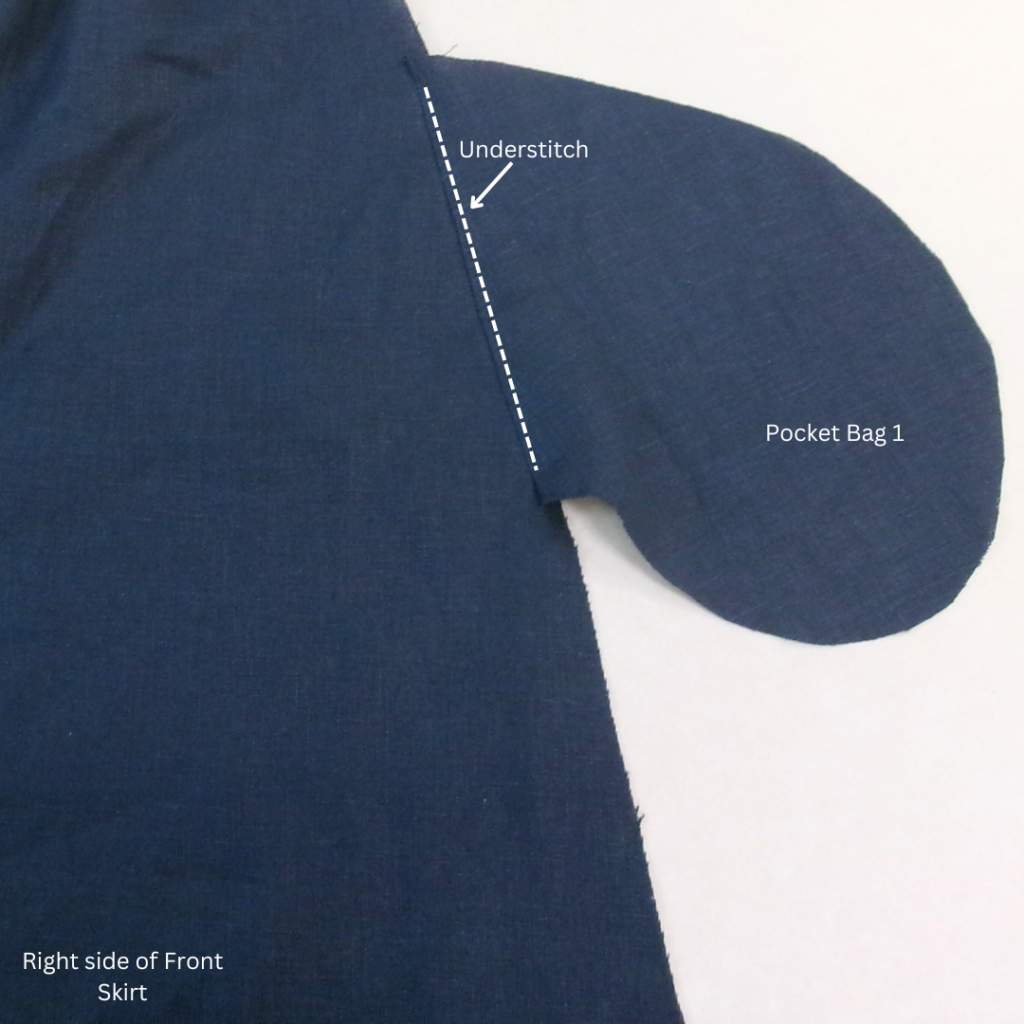
With RST and notches aligned, sew one set of Pockets (5) to the side Front Skirt (2) at the side seam (seamline ‘A’ on the pattern). Clip the seam at the notches and sew an understitch on the side of the pocket bag. This is pocket bag 1.

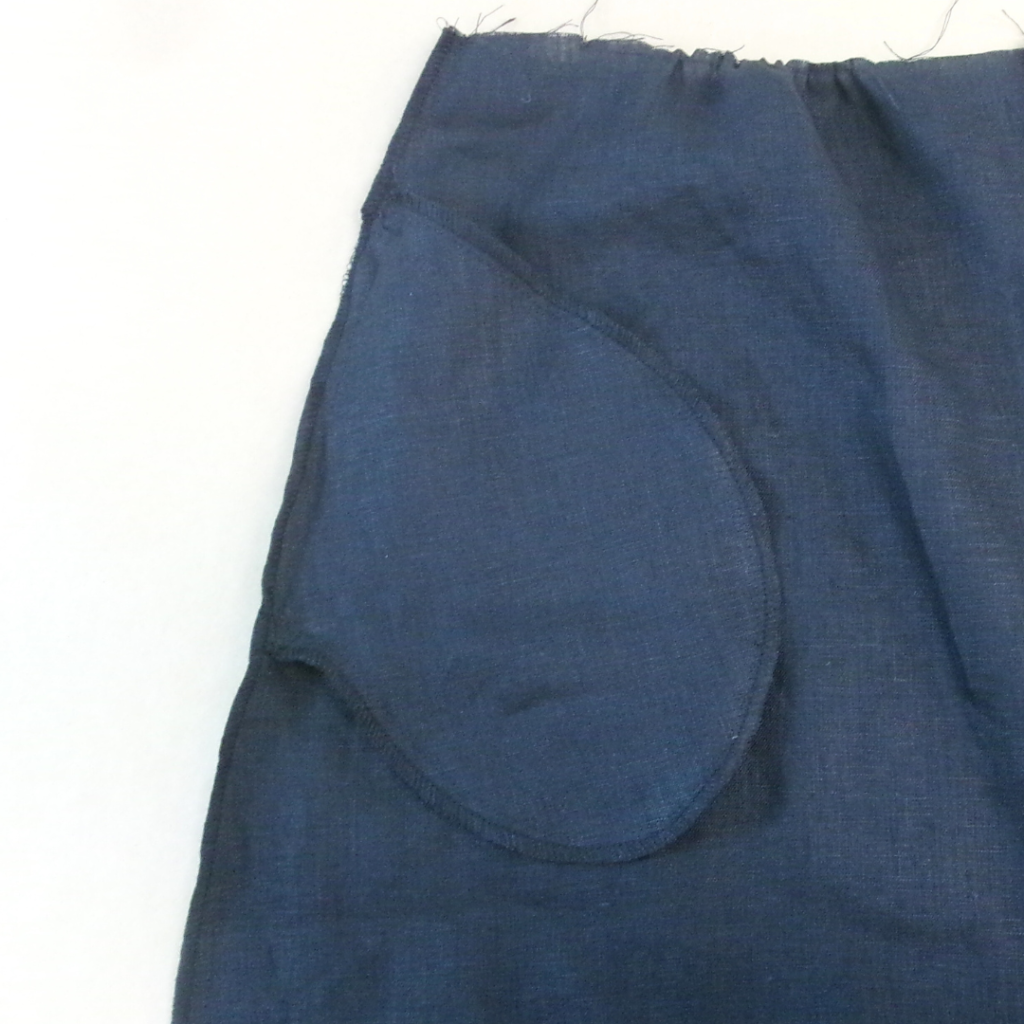
With RST, lay pocket bag 2 on top of pocket bag 1, align and sew both pocket bags together (seamline ‘B’ on the pattern). Note that the straight edge of the under pocket is left free to sew to the back skirt side seam. Neaten around the pockets using an overlocker/serger. Secure stitch each end of the pocket opening.
SKIRT:
With RST, pin the front skirt to the Back Skirt (1) at the side seam. Sew along the side seam, through the straight edge of the back pocket (if using) and finishing at the hem. Take care not to catch the front pocket opening as you sew. Neaten using an overlocker/serger and press toward the back.
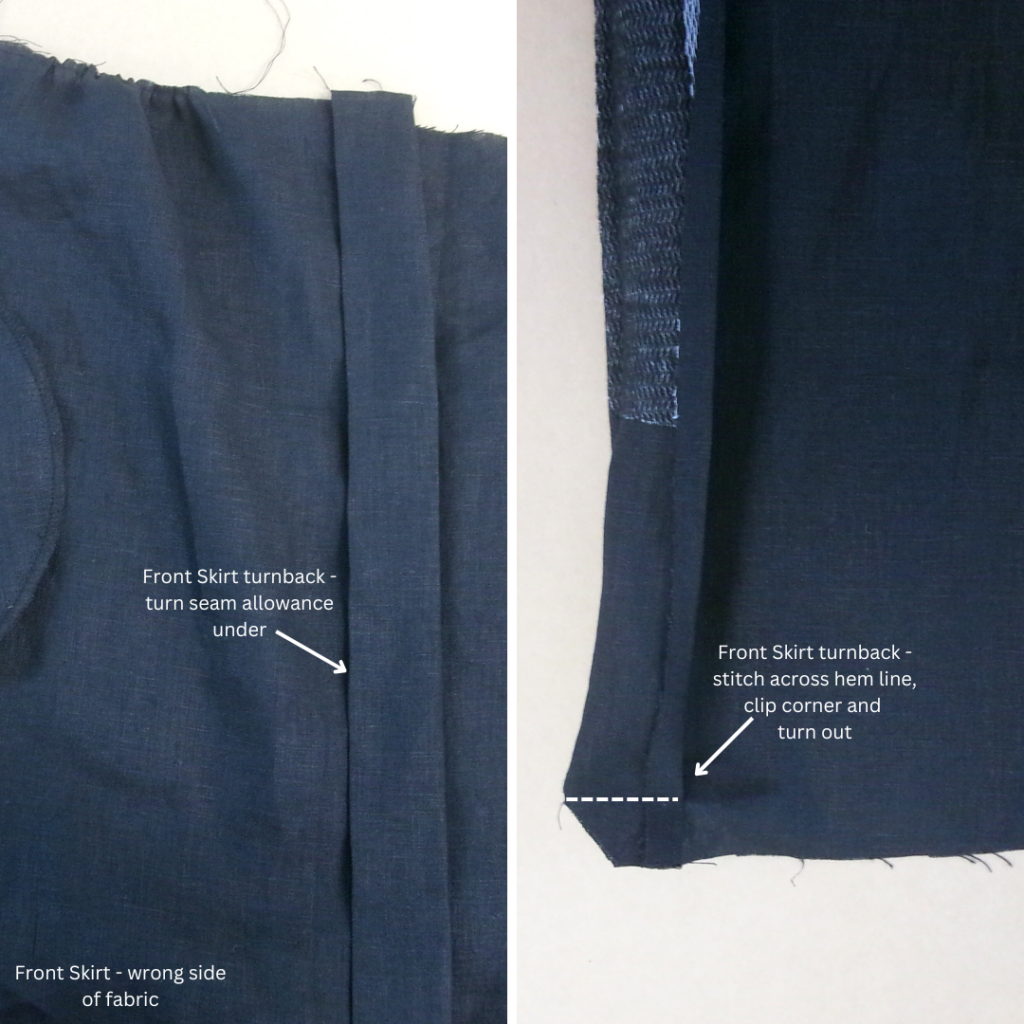
Press the front turnback seam allowance (1cm/⅜”) to the inside (wrong side). With RST fold the front skirt turnback at the vertical fold line, stitch across the hem line, clip the corners, turn out to the right side and press.
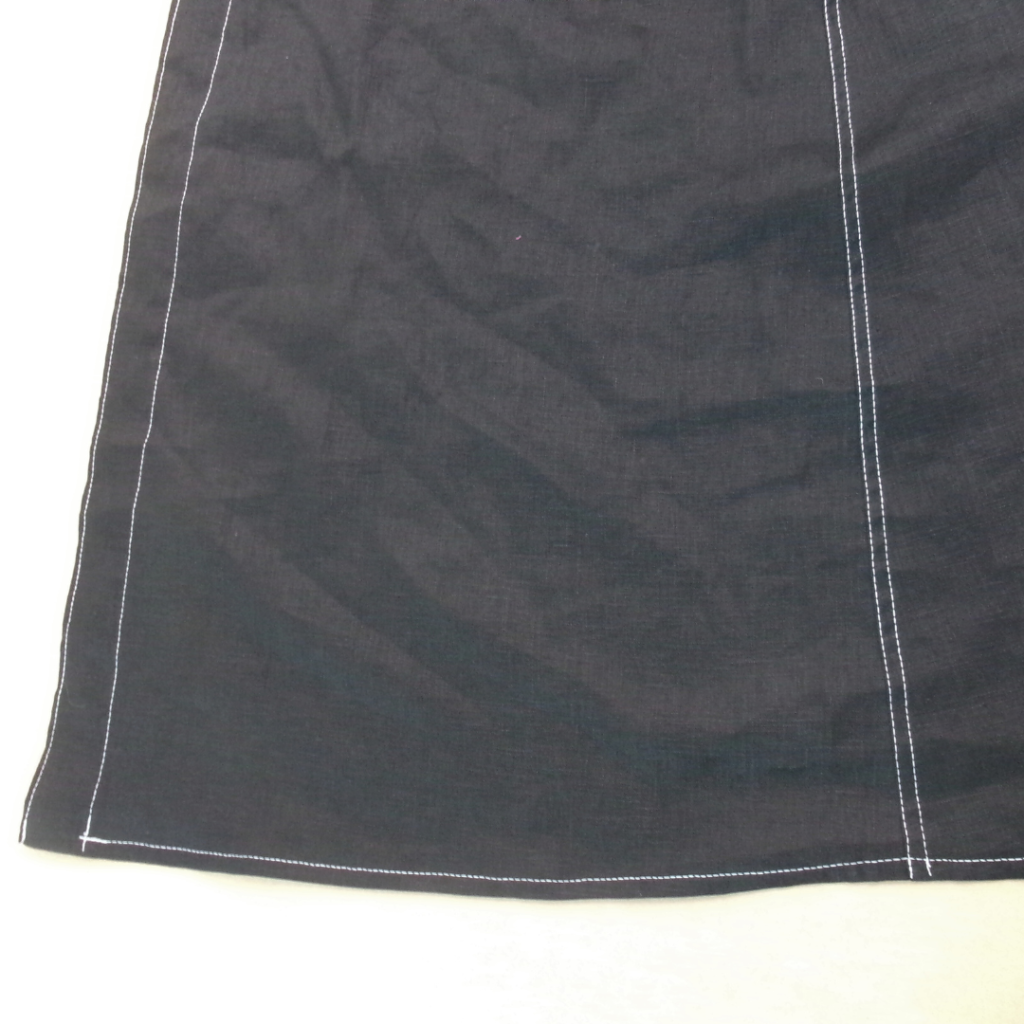
Neaten the hem using an overlocker/serger (or double neaten if you prefer). Pin and then top stitch the turnback and hem into place. Top stitch the side seams. Edge stitch along the button turnback at the centre front.
WAISTBAND AND COMPLETION:
Cut the elastic to your personal length (refer to the elastic chart).
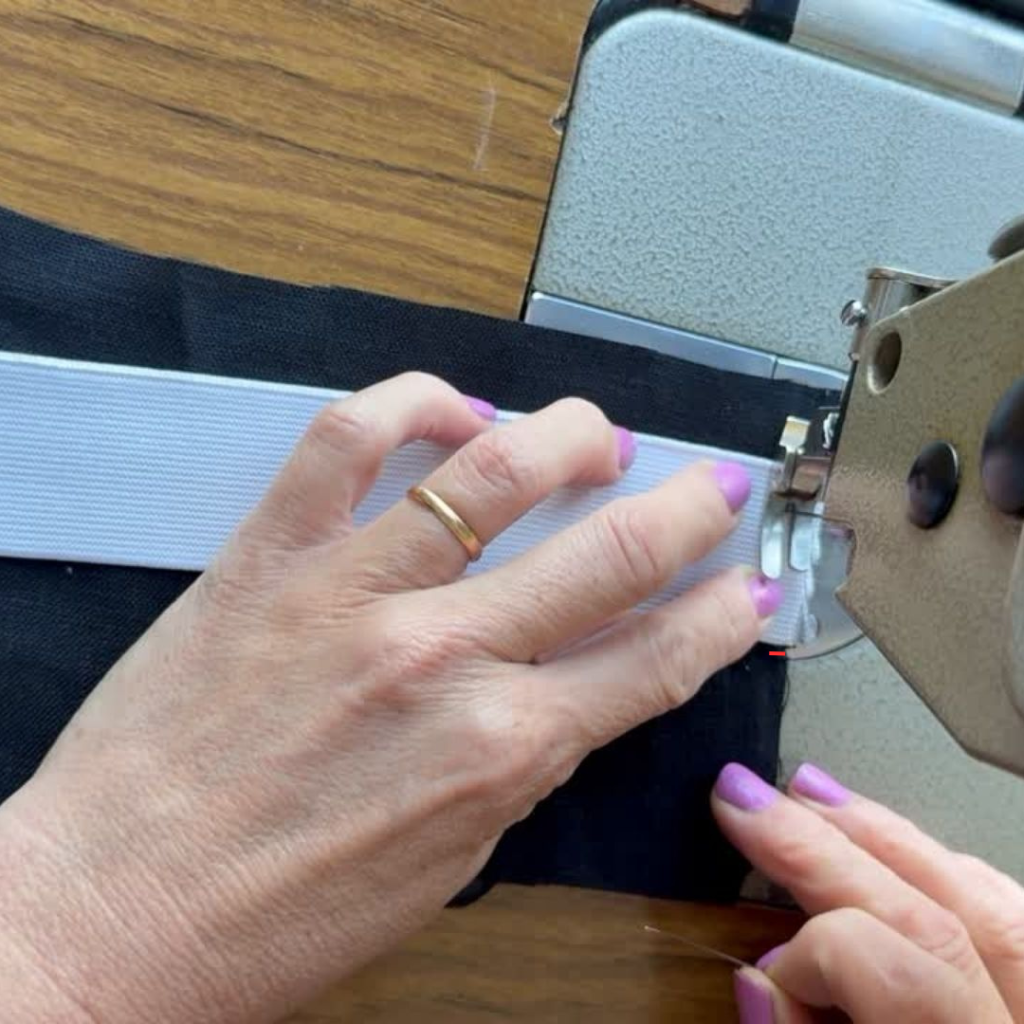
Stitch the elastic to the wrong side of each end of one half of the inside Back Waistband (3). Fold the waistband over the elastic, stitch down the sides and across the base of the waistband encasing the elastic.
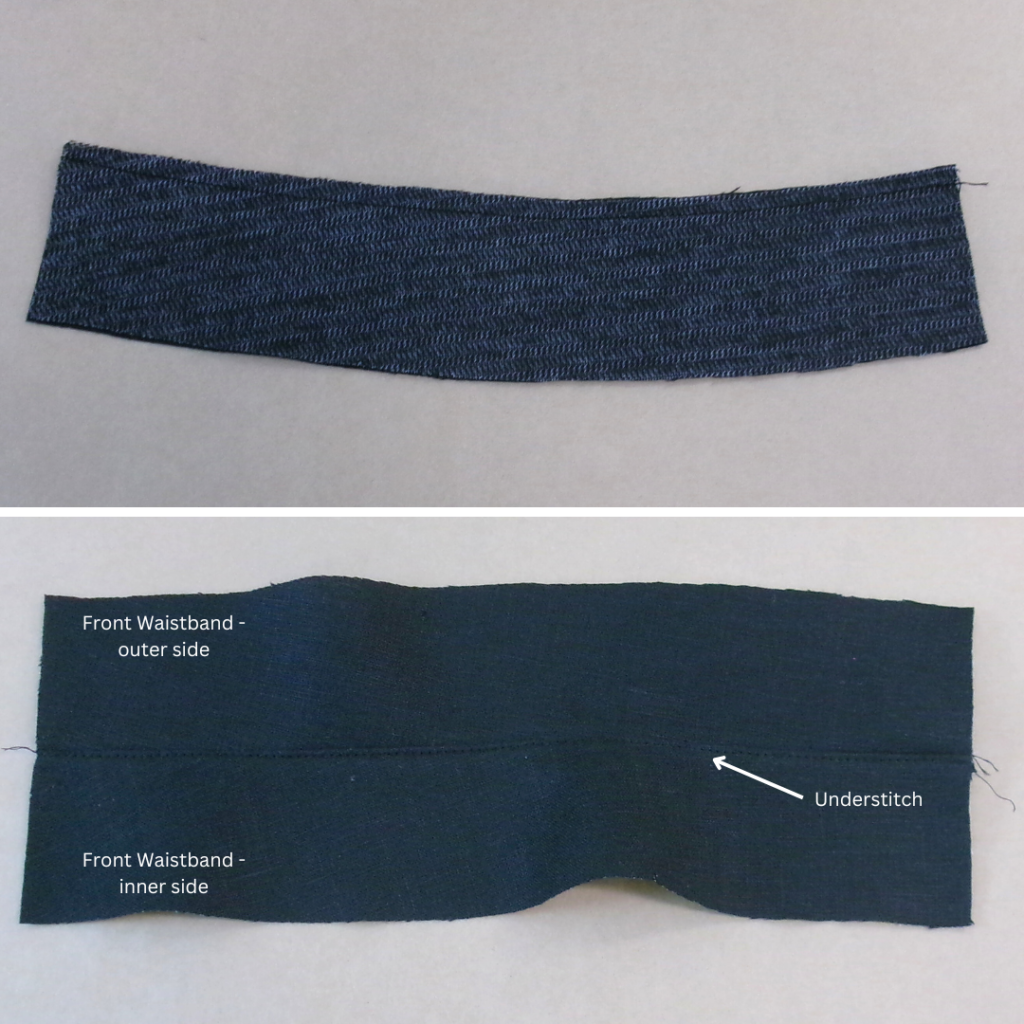
With RST sew the top edges of the Front Waistbands (4) together using a 6mm (⅜”) seam. Press the seam toward the inner waistband and understitch the seam. This is the inside/inner side of the waistband.
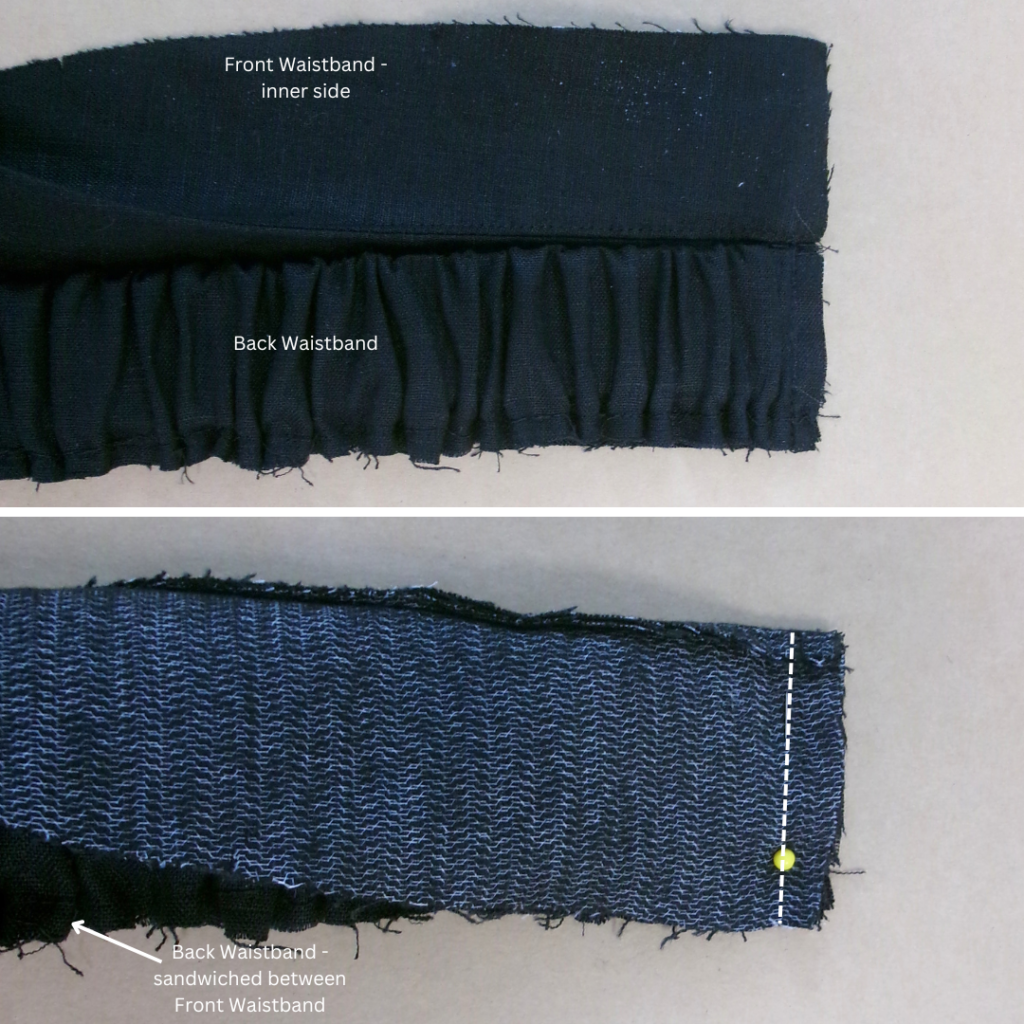
With RST, sandwich the back band between the two front bands. Sew securely.
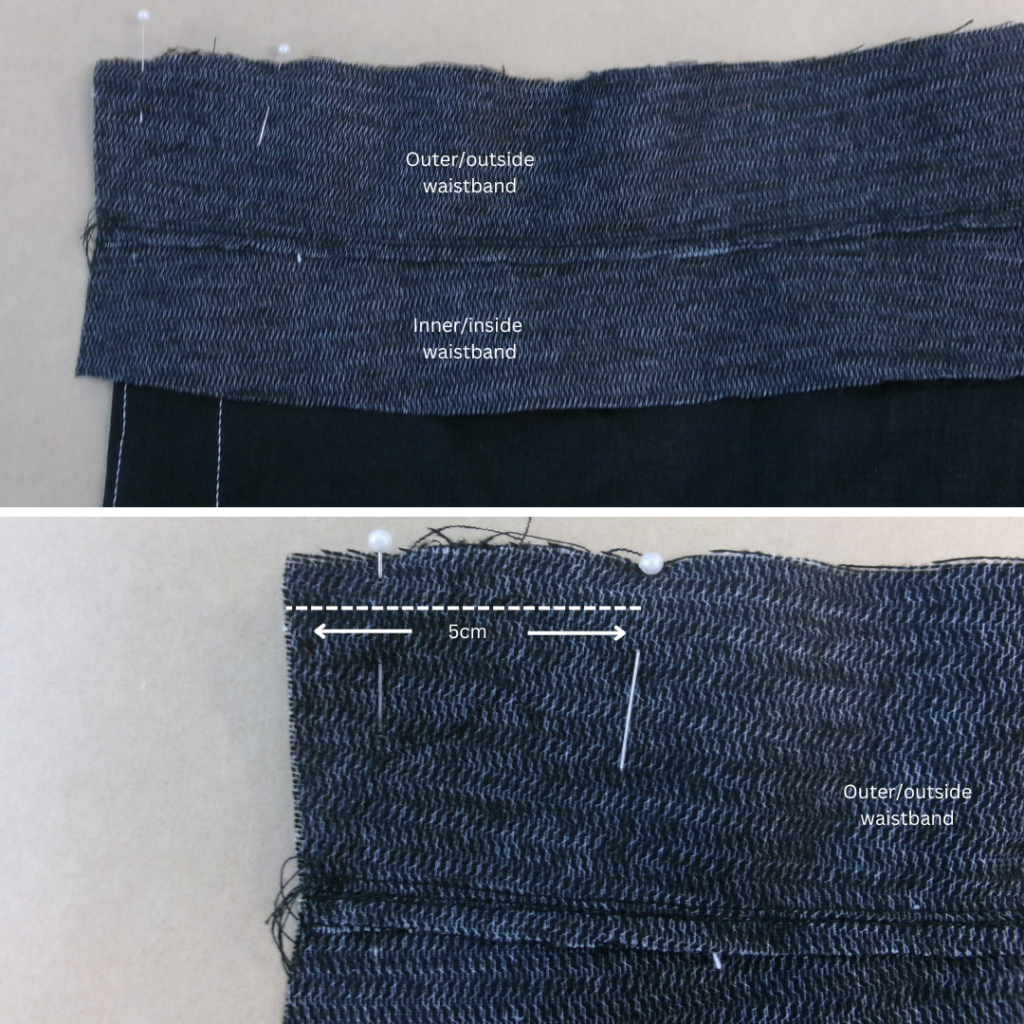
With RST, pin the front of the outside/outer waistband to the right side of the skirt and sew a 5cm (2”) section.
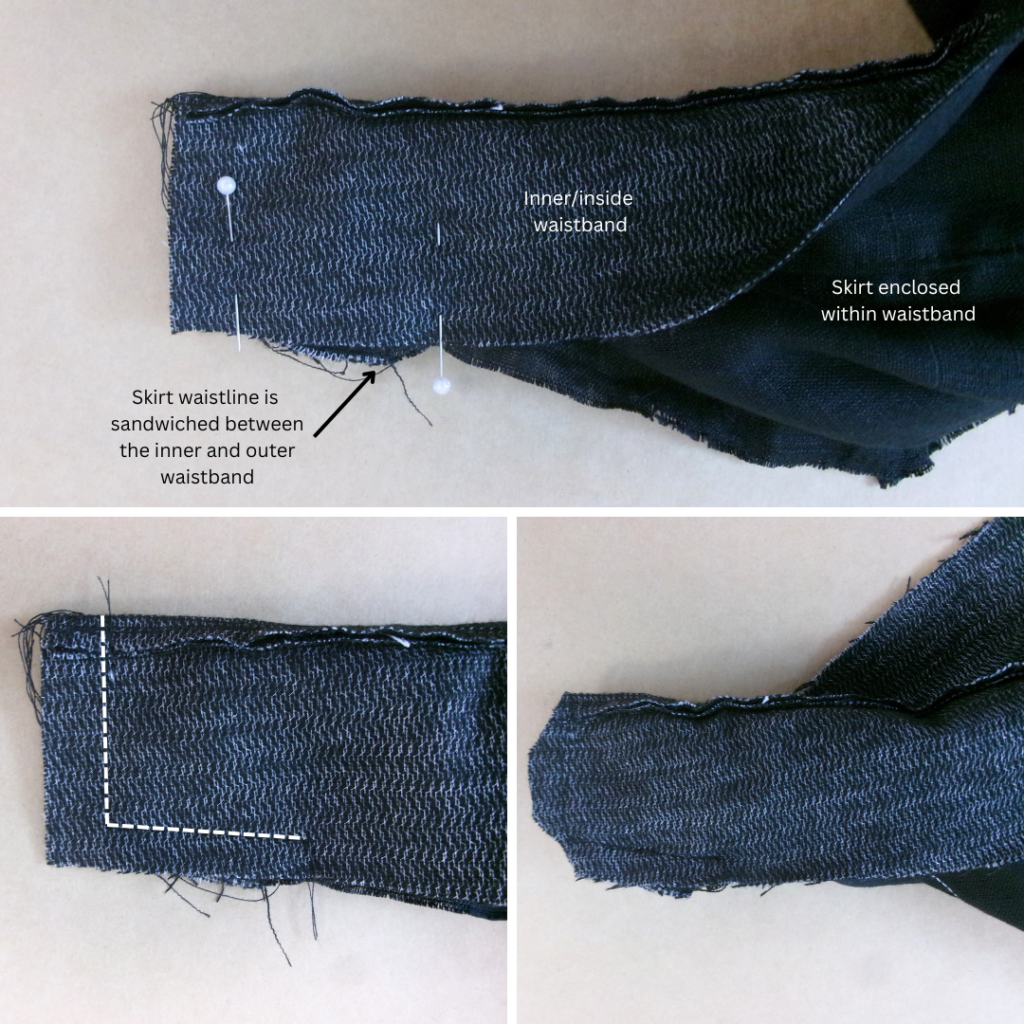
With RST, fold the inner and outer waistband over so that they align at the front edge (the skirt will be enclosed inside the waistband). Pin the right side of the inside/inner waistband to the wrong side of the skirt waistline, sandwiching the skirt front. Sew on top of the previous stitch line (5cm/2″) and along the front edge of the waistband. Clip the corners, turn out and press.
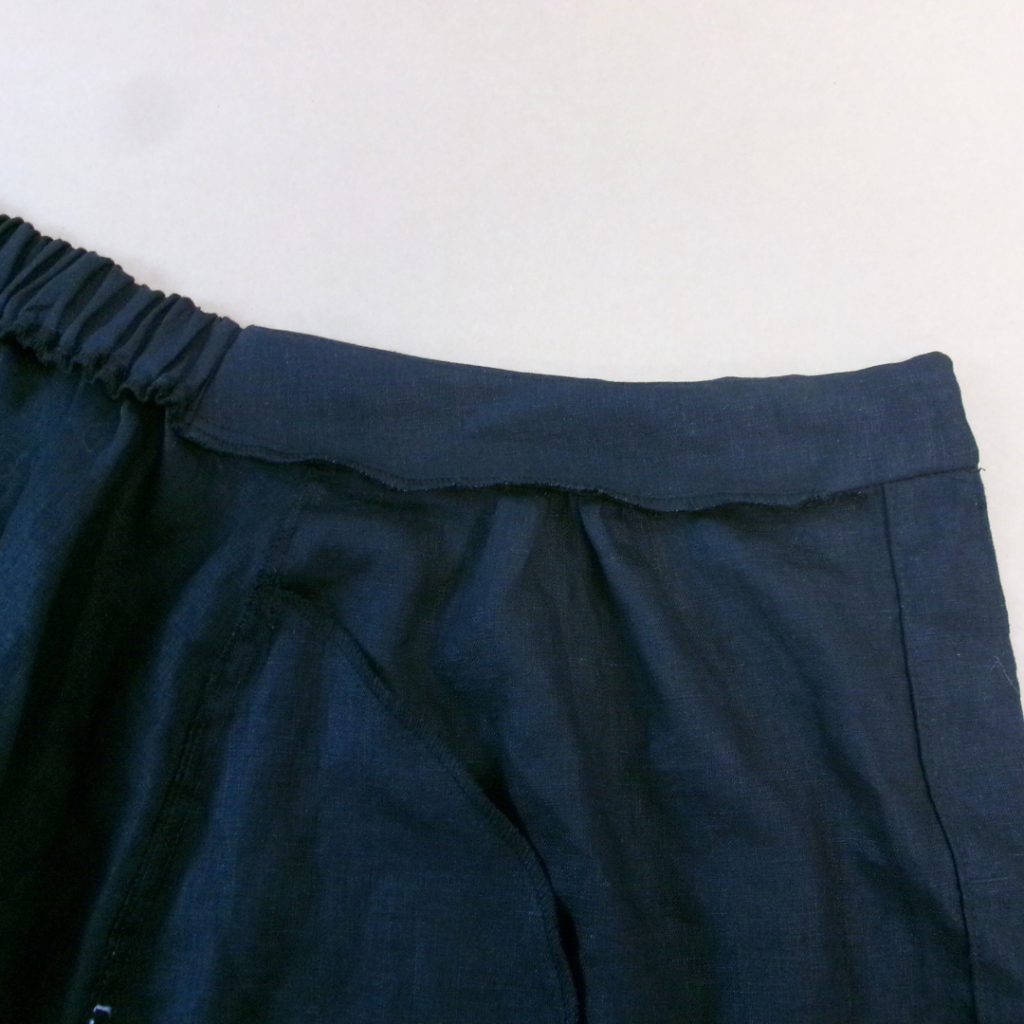
Sew a large gathering stitch between the notches marked on the front waistline and draw the fabric up to align the notches with the notches on the front waistband. With RST and notches aligned, pin the waistband to the skirt. Sew, stretching the back elastic as you sew. Neaten with an overlocker/serger.

Top stitch the waistband.
Make the button holes as shown on the pattern using your preferred method and sew the buttons.
Trim any loose threads and press your new skirt.