Before you start sewing, you might want to rummage through your fabric scraps/stash and plan a colour/print layout for the Carter Dress.
Click the link below to download the Carter Dress Colour It Your Way PDF and have some fun!
✏️ Colour It Your Way PDF Download ✏️
Did you know that you can do a full bust adjustment on knit garments? Watch our YouTube video for a step-by-step guide!

Struggling to sew neckbands on your knit garments? Watch our YouTube video for a how-to guide.
First time using transparent elastic tape? Watch our YouTube video for a how-to guide.
CONSTRUCTION
HIGH NECK TEE (18, 19, 20) OR SCOOP NECK TEE (4, 21, 22) WITH SHORT (10) OR LONG (11) SLEEVE OPTION:
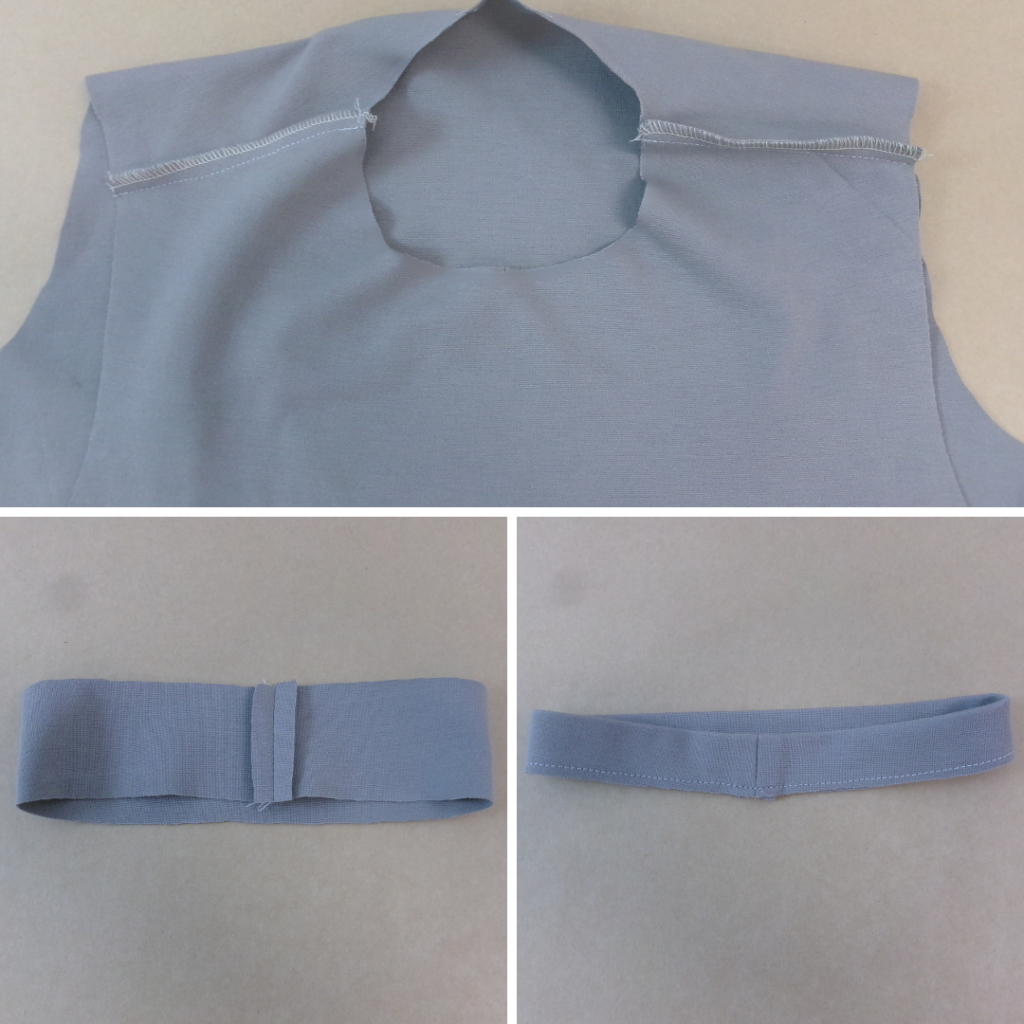
With RST, sew the Front (18/21) to Back (19/22) at the shoulder seams. Neaten using an overlocker/serger and press toward the back.
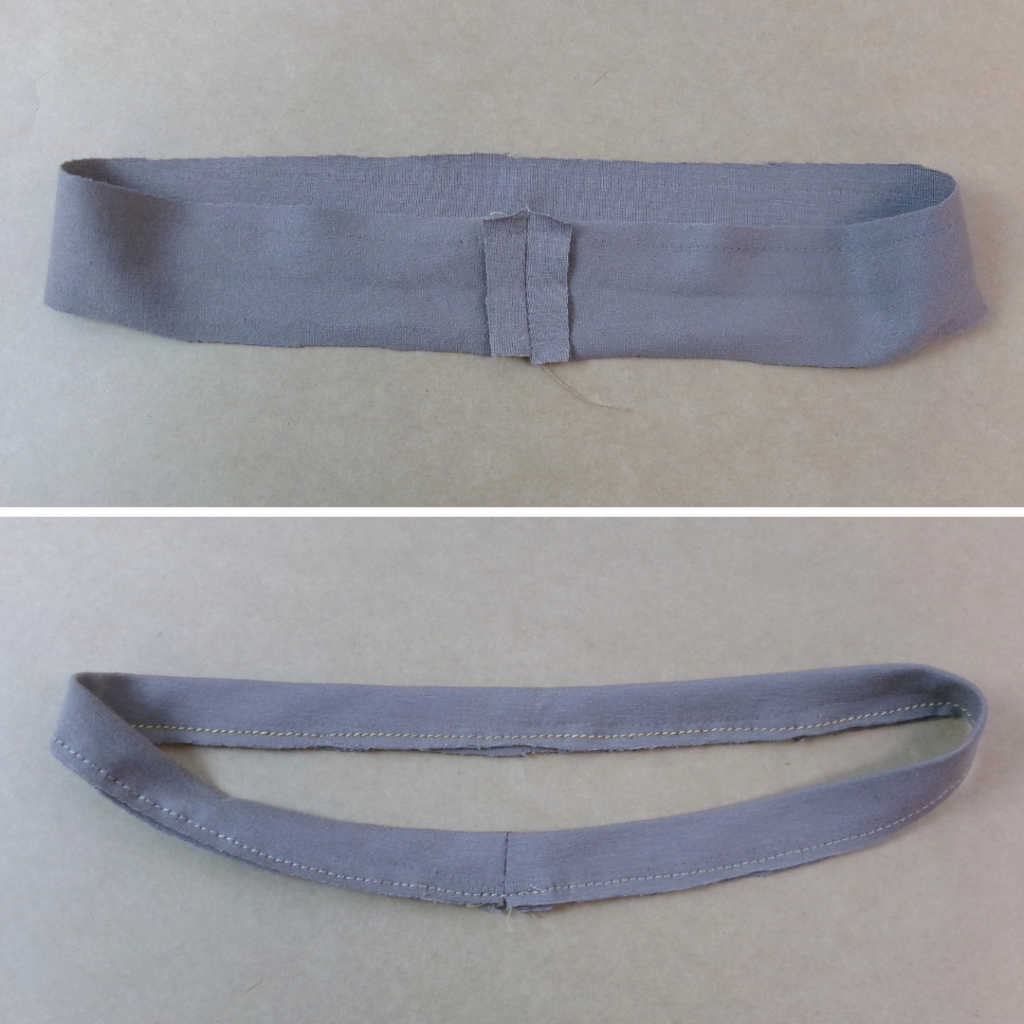
With RST, align the short ends of the Neckband (20/4) at the centre back and sew. Press open. With WST, fold the neckband in half lengthways and press. Baste the raw edges together.
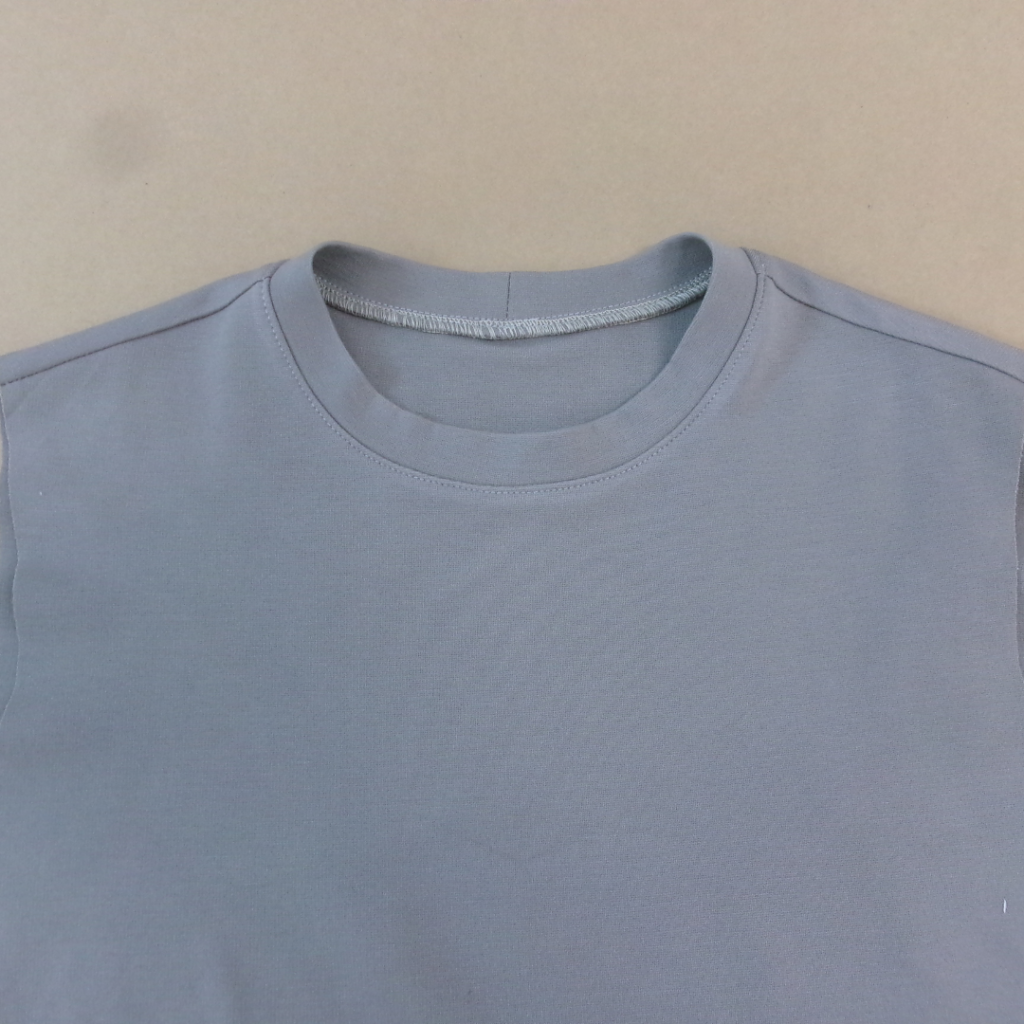
With RST and notches aligned, pin the neckband to the neck opening. Sew using a 6mm (1/4”) seam. Neaten using an overlocker/serger and press toward the body. Sew an edge stitch to the neckline on the side of the body.
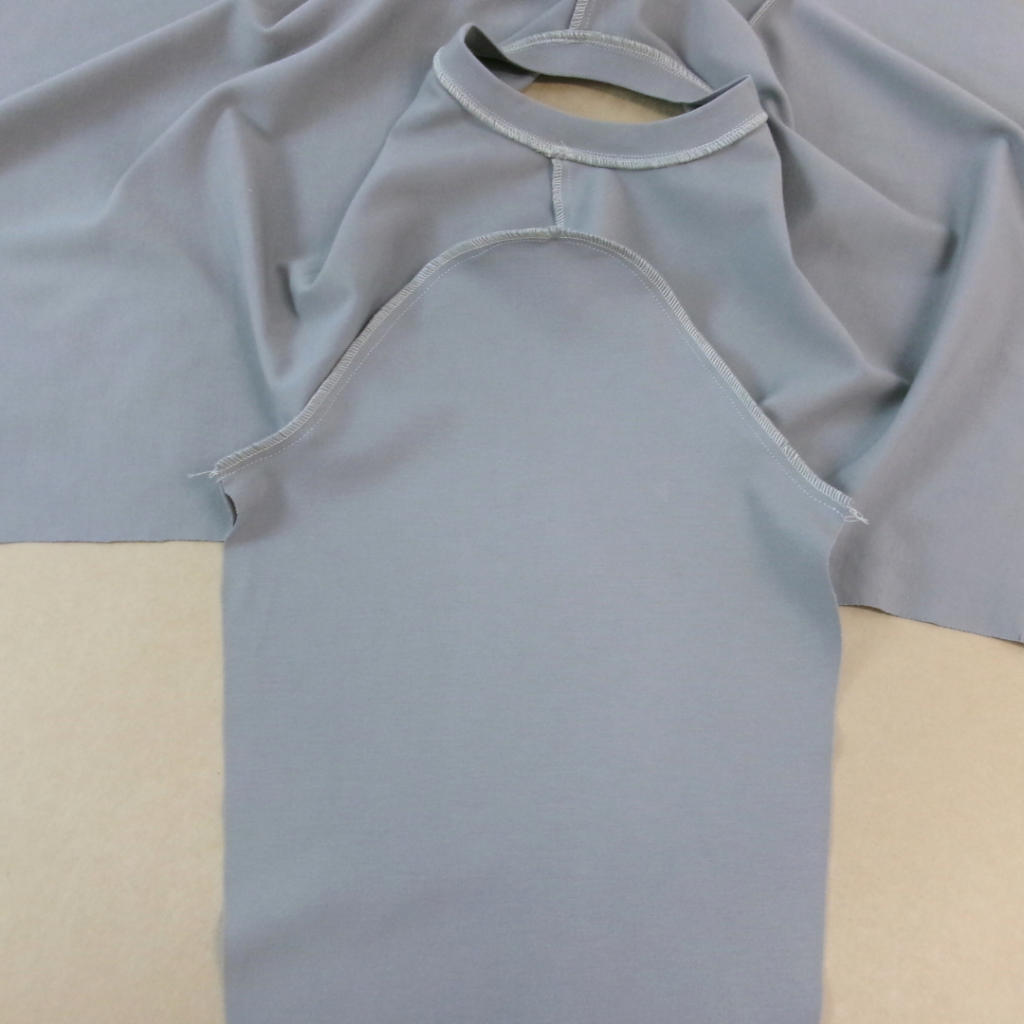
With RST and notches aligned, pin the Sleeves (10/11) to the arm openings. Sew, then neaten using an overlocker/serger and press toward the sleeve. Neaten the hems of the sleeves using an overlocker/ serger.
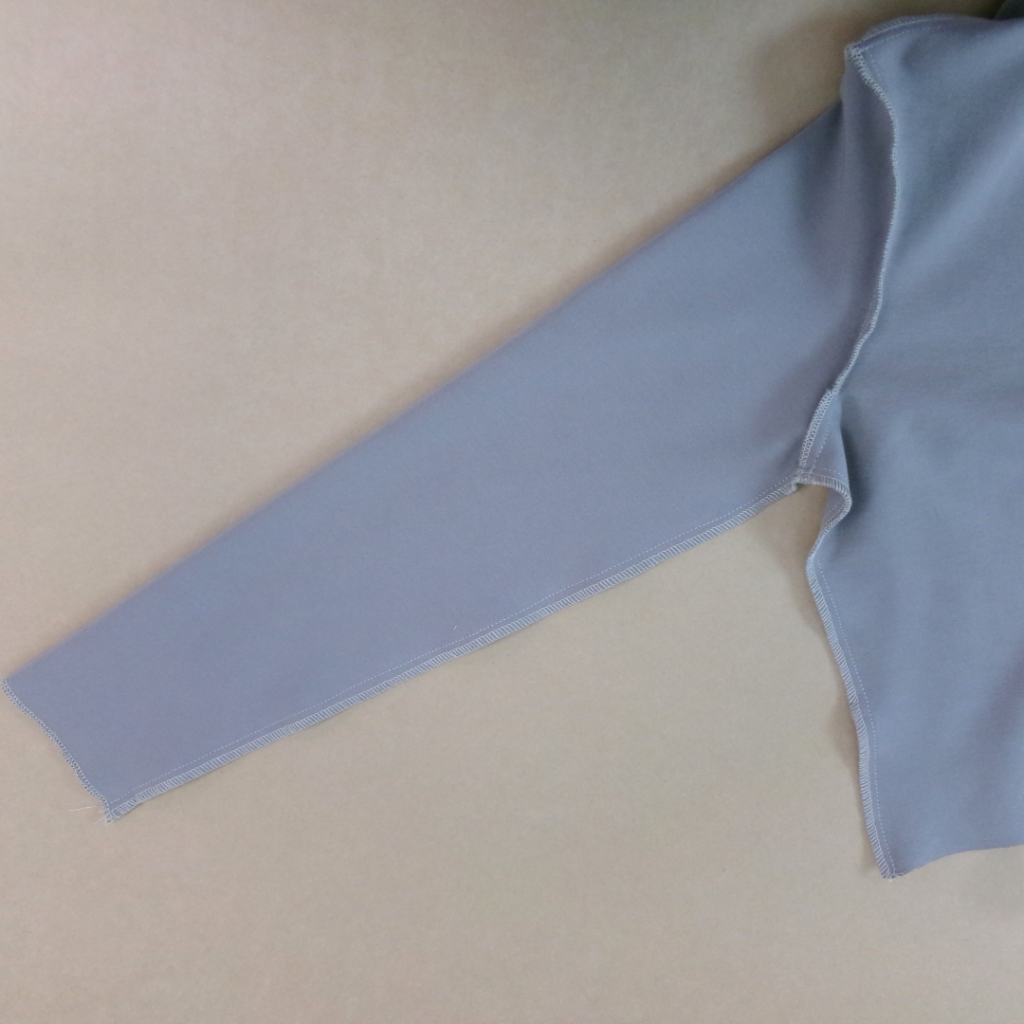
With RST, sew the front to back, starting at the waist, sew through the body and undersleeve to the sleeve hem. Neaten using an overlocker/serger and press toward the back.
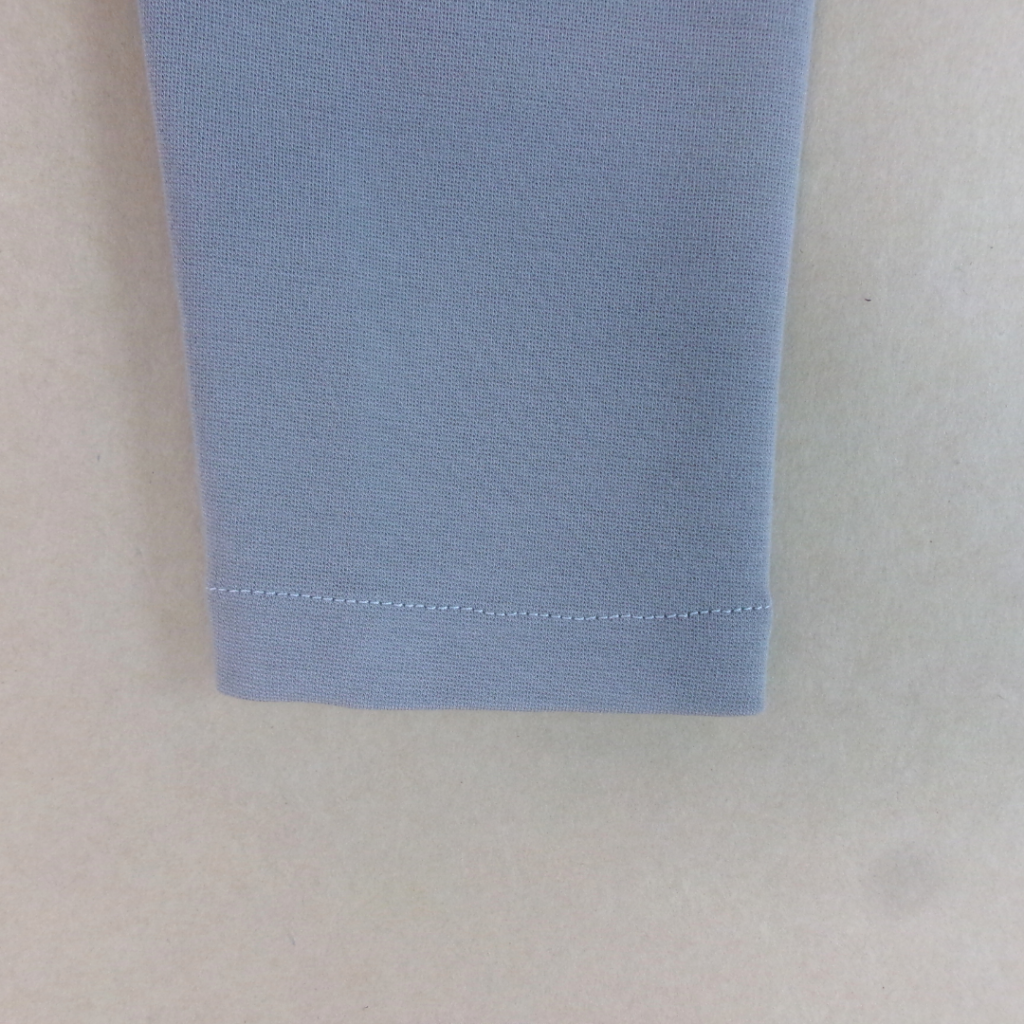
Turn up the sleeve hem 2cm (3/4”) to the inside and topstitch into place.
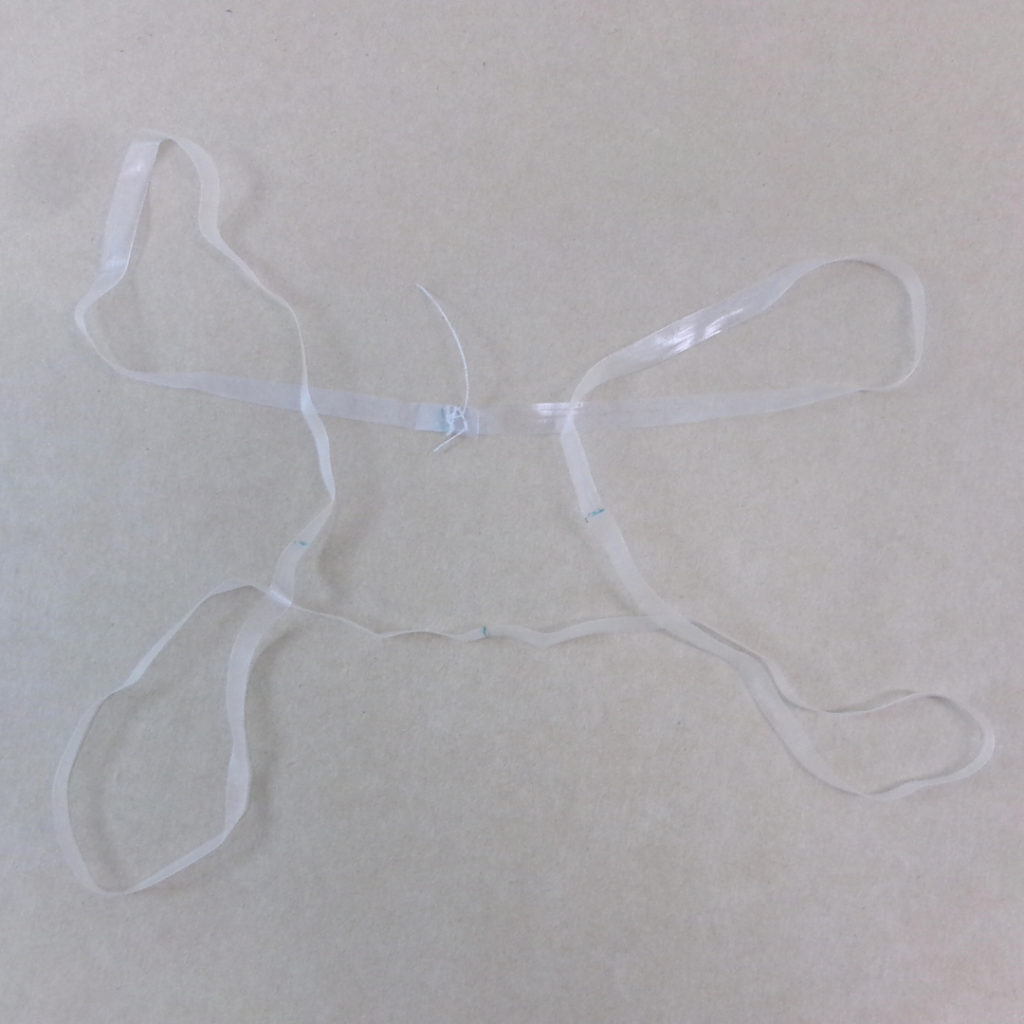
Overlap the ends of your stay tape and sew together securely. Using a pen or chalk, mark the quarter way points to align with the notches. Pin, then sew to the wrong side of the waistline of the bodice (see YouTube video). Set the bodice aside.
SCOOP NECK TANK (1, 2, 3, 4) OR BOAT NECK TANK (2, 3, 16, 17) OPTION:
With RST, sew the Front (1/16) to Back (2) at the shoulder seams, and front to back at the side seams. Neaten using an overlocker/serger and press towards the back. (See High Neck Tee example above).
With RST, align the short ends of the Neckband (4/17) at the centre back and sew. Press open. With WST, fold the neckband in half lengthways and press. Baste the raw edges together. With RST and notches aligned, pin the neckband to the neck opening. Sew using a 6mm (1/4”) seam. Neaten using an overlocker/serger and press toward the body. Sew an edge stitch to the neckline on the side of the body. (See High Neck Tee example above).
With RST, align the short ends of the Armhole Band (3) at the underarm seam and sew. Press open. With WST, fold the armhole band in half lengthways and press. Baste the raw edges together.
With RST and notches aligned, pin the armhole band to the arm opening. Sew using a 6mm (1/4”) seam. Neaten using an overlocker/serger and press toward the body. Sew an edge stitch to the armhole on the side of the body.
Overlap the ends of your stay tape and sew together securely. Using a pen or chalk, mark the quarter way points to align with the notches. Pin, then sew the tape to the wrong side of the waistline of the bodice. Set the bodice aside.
V NECK TANK (2, 3, 14, 15):
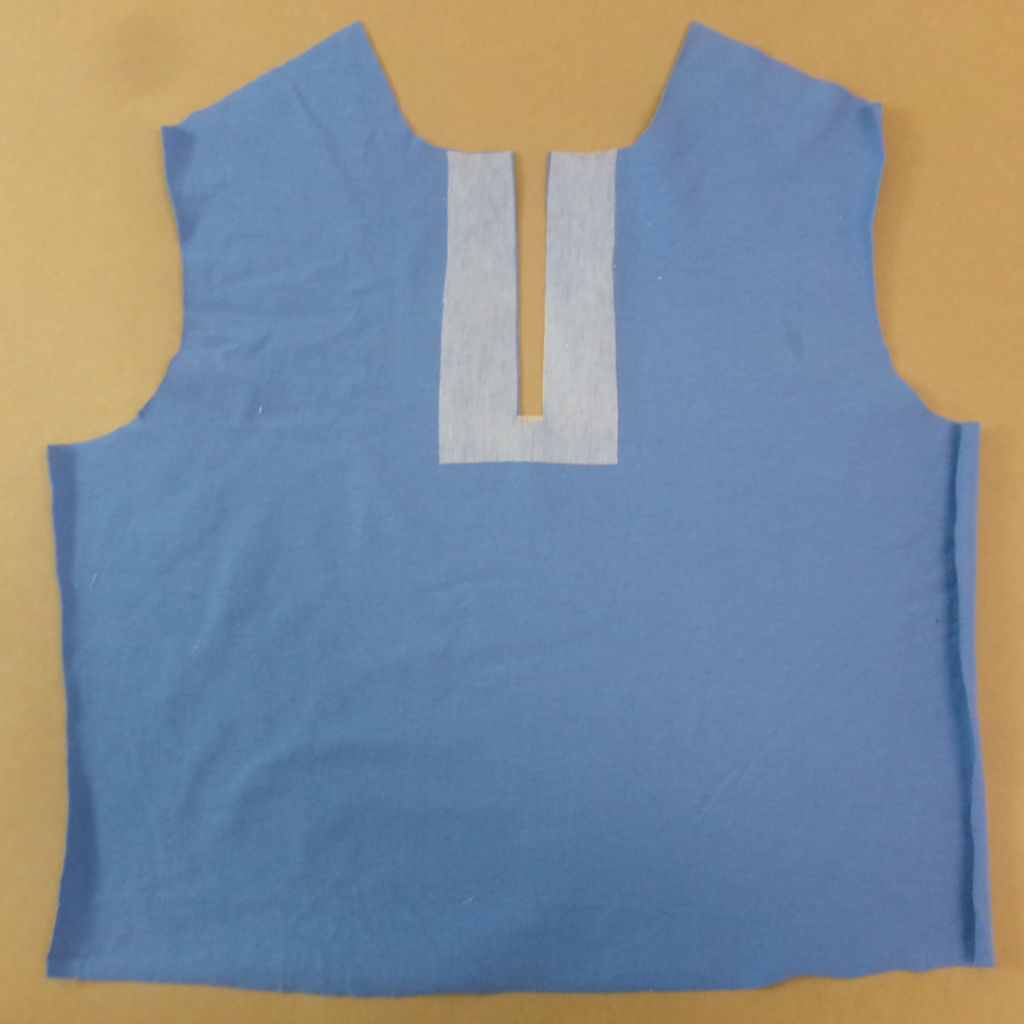
With RST, sew the Front (14) to Back (2) at the shoulder seams, and front to back at the side seams. Neaten using an overlocker/serger and press toward the back. (See High Neck Tee example above).
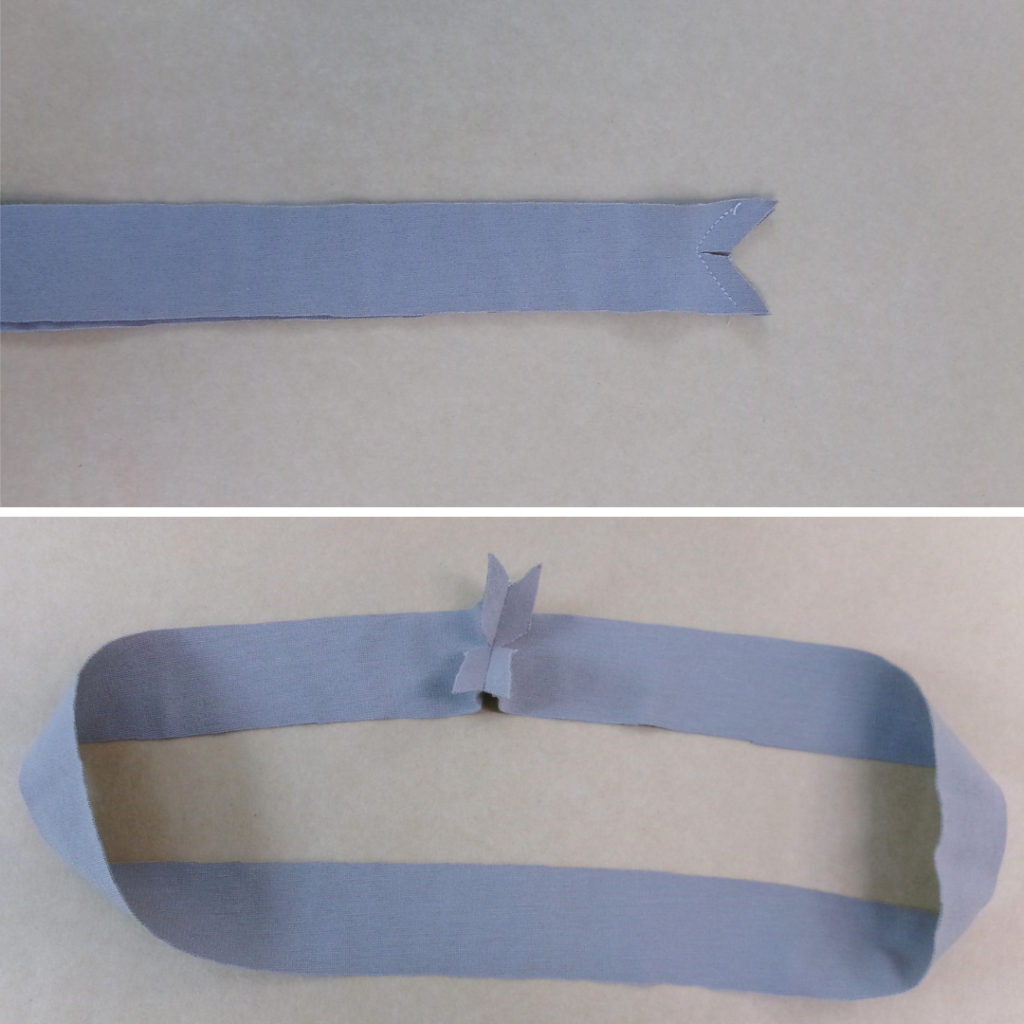
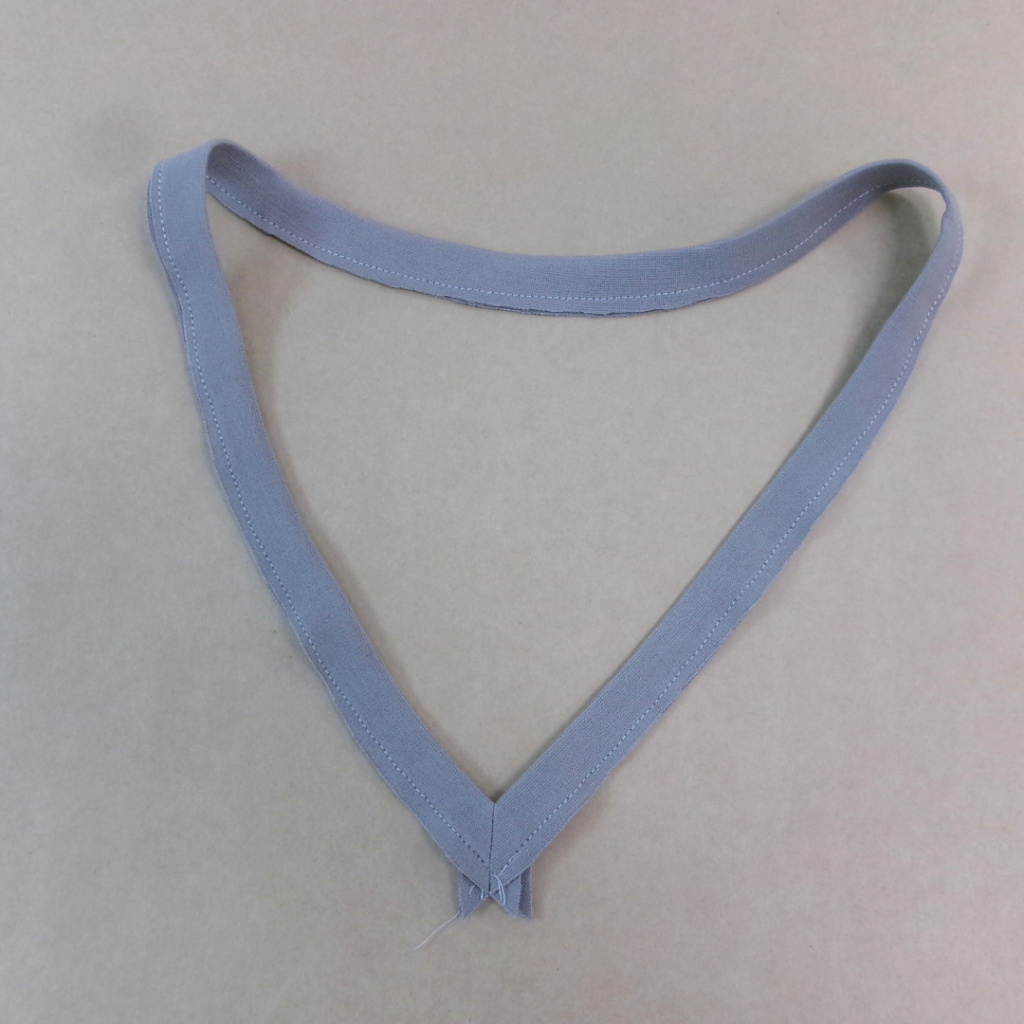
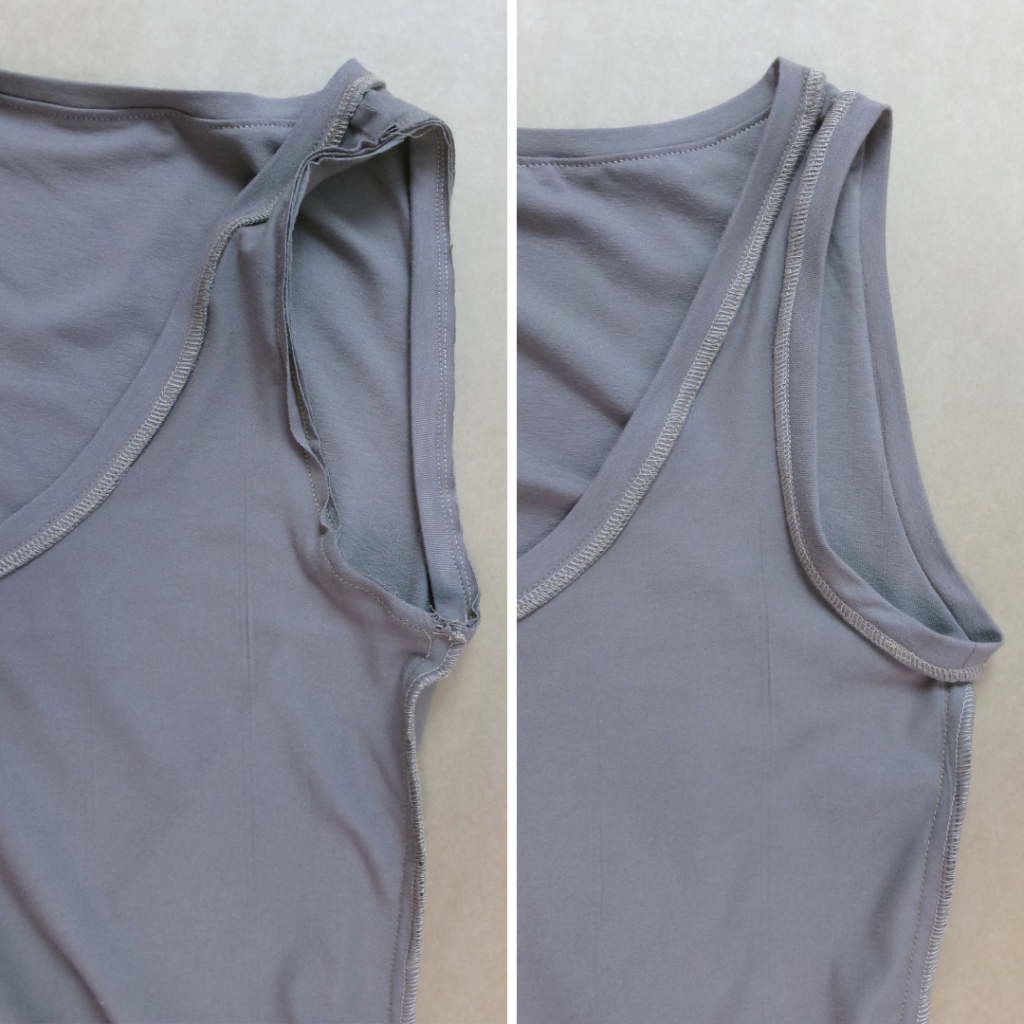
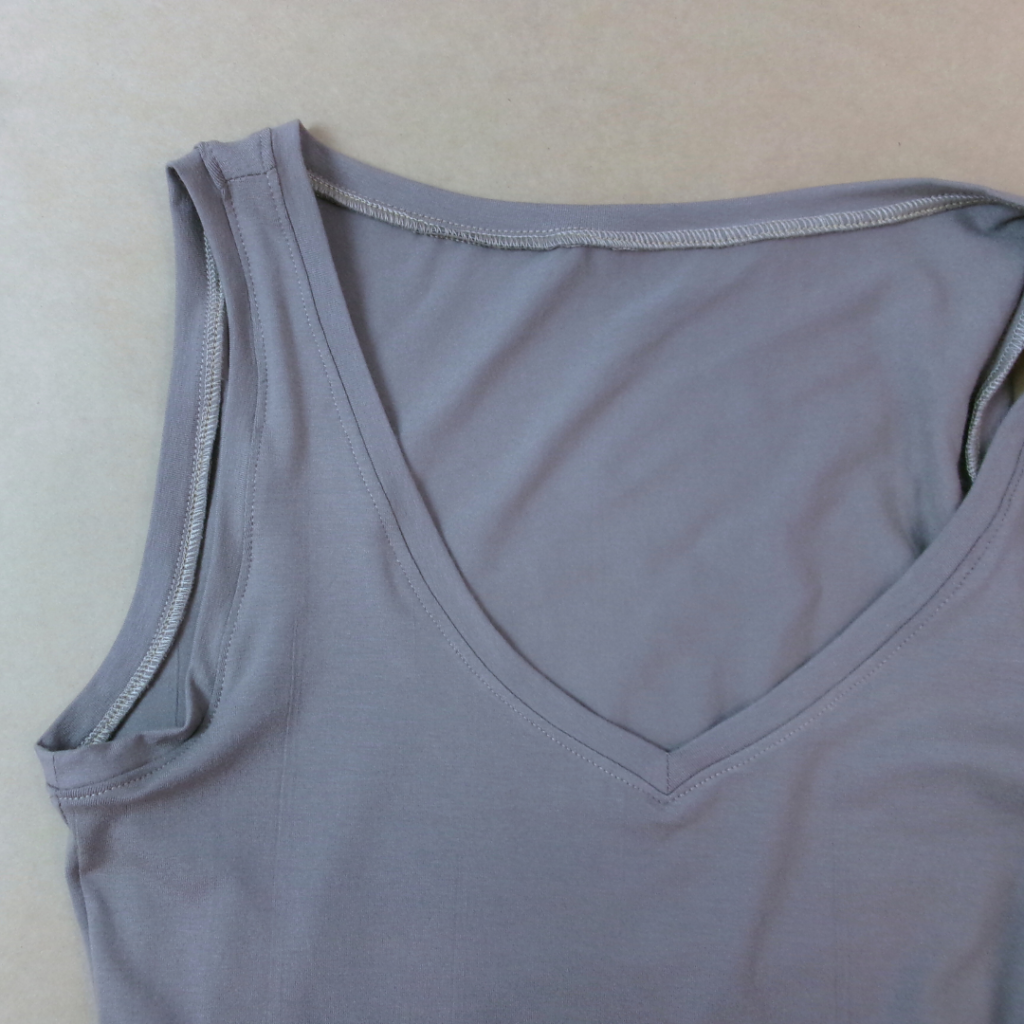
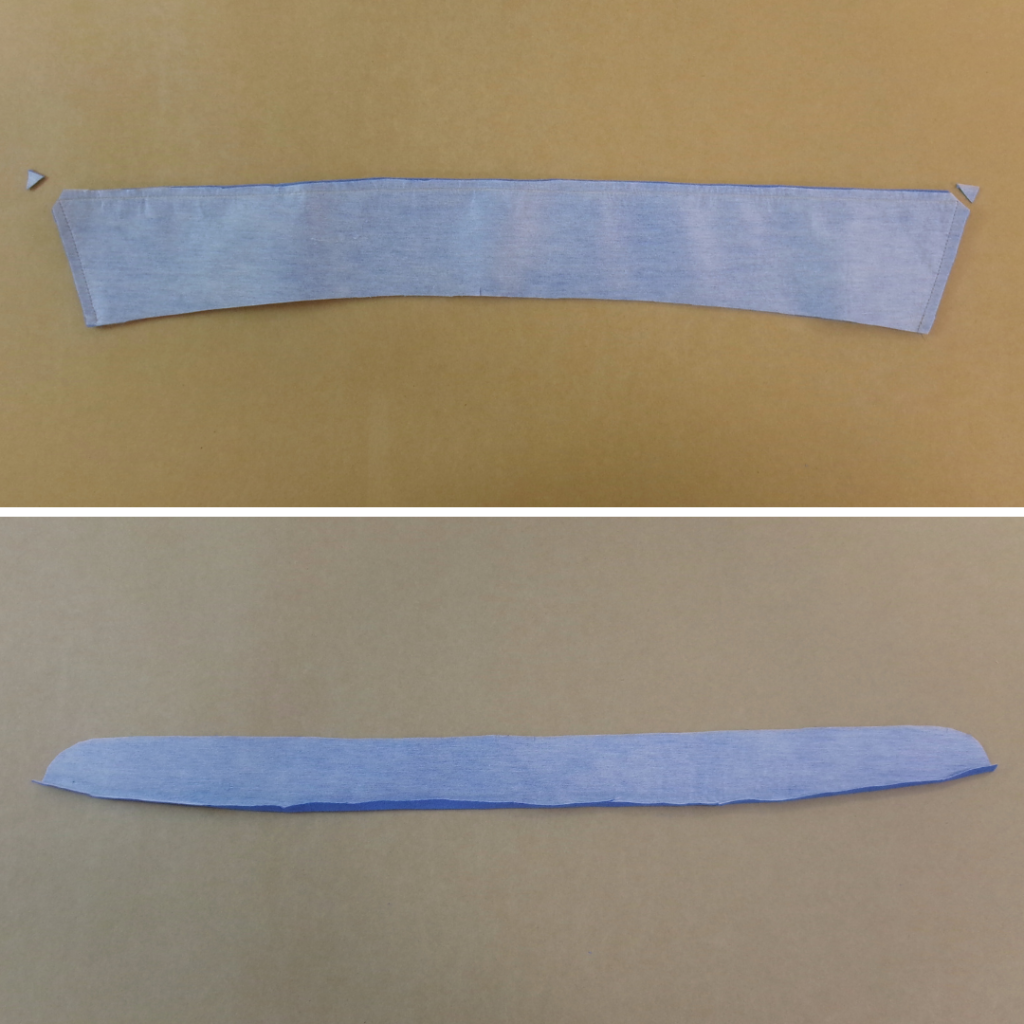
With RST, sew the angled edges of V Neck Band (15) together. Clip into the centre of the V and press open. With WST, fold the neckband in half lengthways and press. Baste the raw edges together.
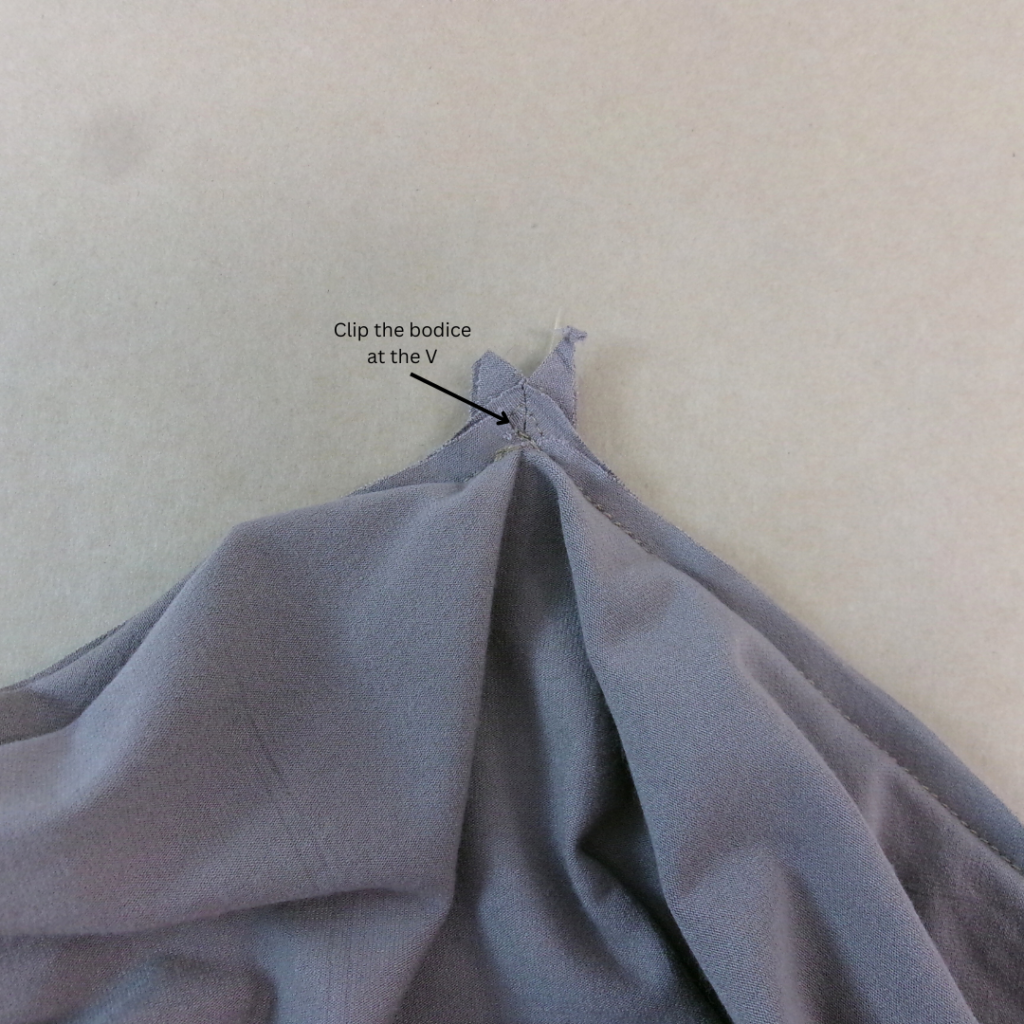
With RST and seams aligned with the notches, pin the neckband to the neck opening. Starting at the centre front, sew a 6mm (1/4”) seam around the neck opening. Before you come back to the other side of the centre front, carefully clip the fabric at the V in the main body to create a nice V shape.
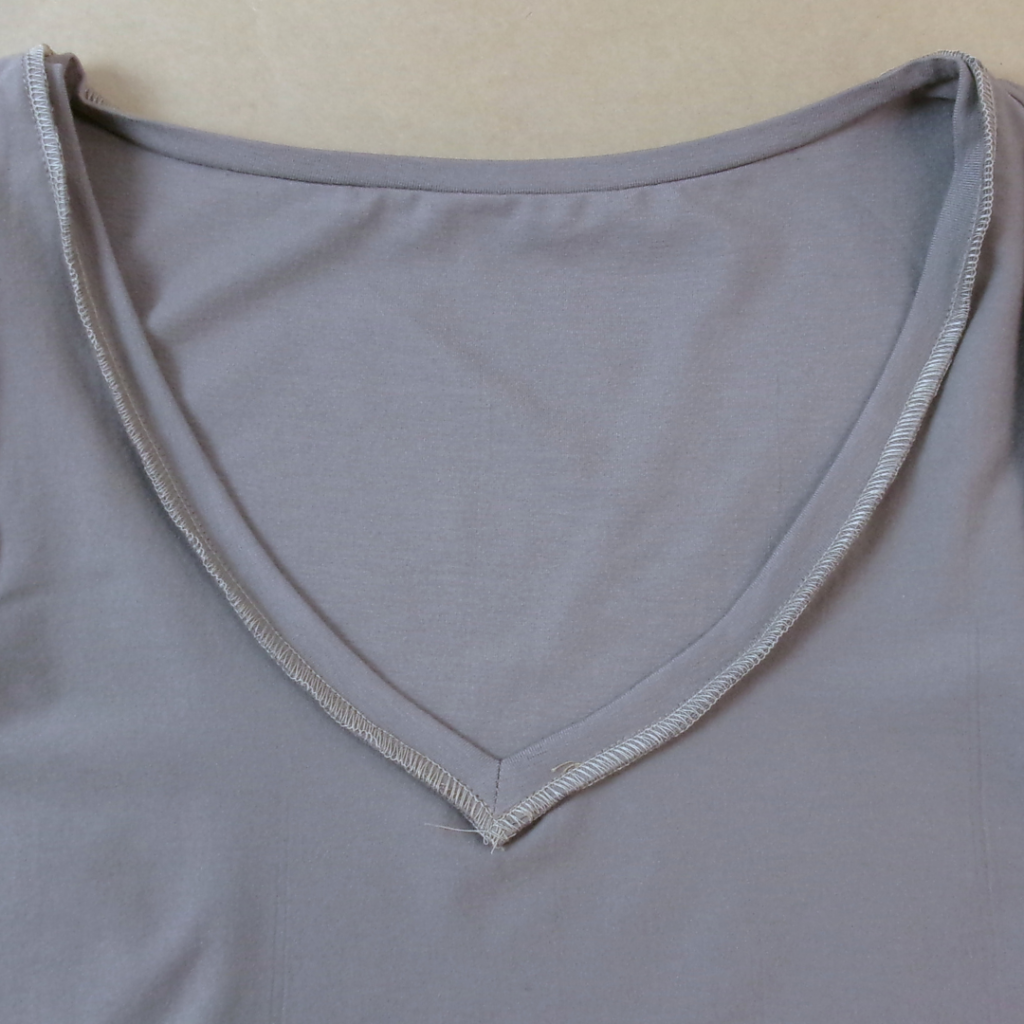
Neaten using an overlocker/serger and press toward the body. Sew an edge stitch to the neckline on the side of the body.
With RST, align the short ends of the armhole band at the underarm seam and sew. Press open. With WST, fold the armhole band in half lengthways and press. Baste the raw edges together.
With RST and notches aligned, pin the armhole band to the arm opening. Sew using a 6mm (1/4”) seam. Neaten using an overlocker/serger and press toward the body.
Sew an edge stitch to the armhole on the side of the body.
Overlap the ends of your stay tape and sew together securely. Using a pen or chalk, mark the quarter way points to align with the notches. Pin, then sew the tape to the wrong side of the waistline of the bodice. Set the bodice aside.
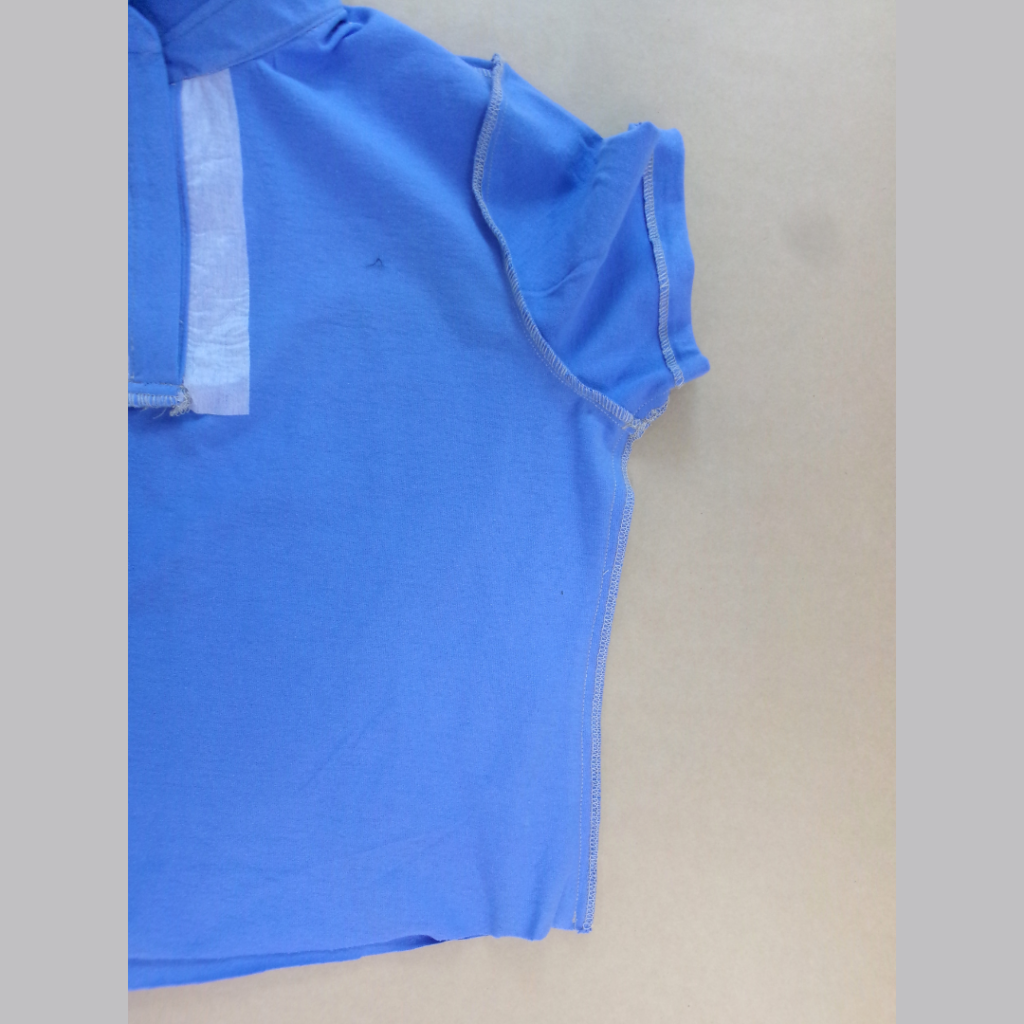
POLO TOP OPTION (5, 6, 7, 8, 9, 23, 10 OR 11):
Apply the front fusing to the placket opening on the Front (5).
With RST, sew the pair of Collars (9) together using a 6mm (1/4”) seam. Clip the corners, turn to the right side. Sew an edge stitch to the seams, then baste the raw edges together.
Press the lower edge of one of the Collar Stand (8) pieces to the inside 6mm (1/4”). This will be the outer collar stand.
Place the collar between the collar stands and sew together, using a 6mm (1/4”) seam. Turn the collar stand to the right side and press. Set the collar aside until step 5.
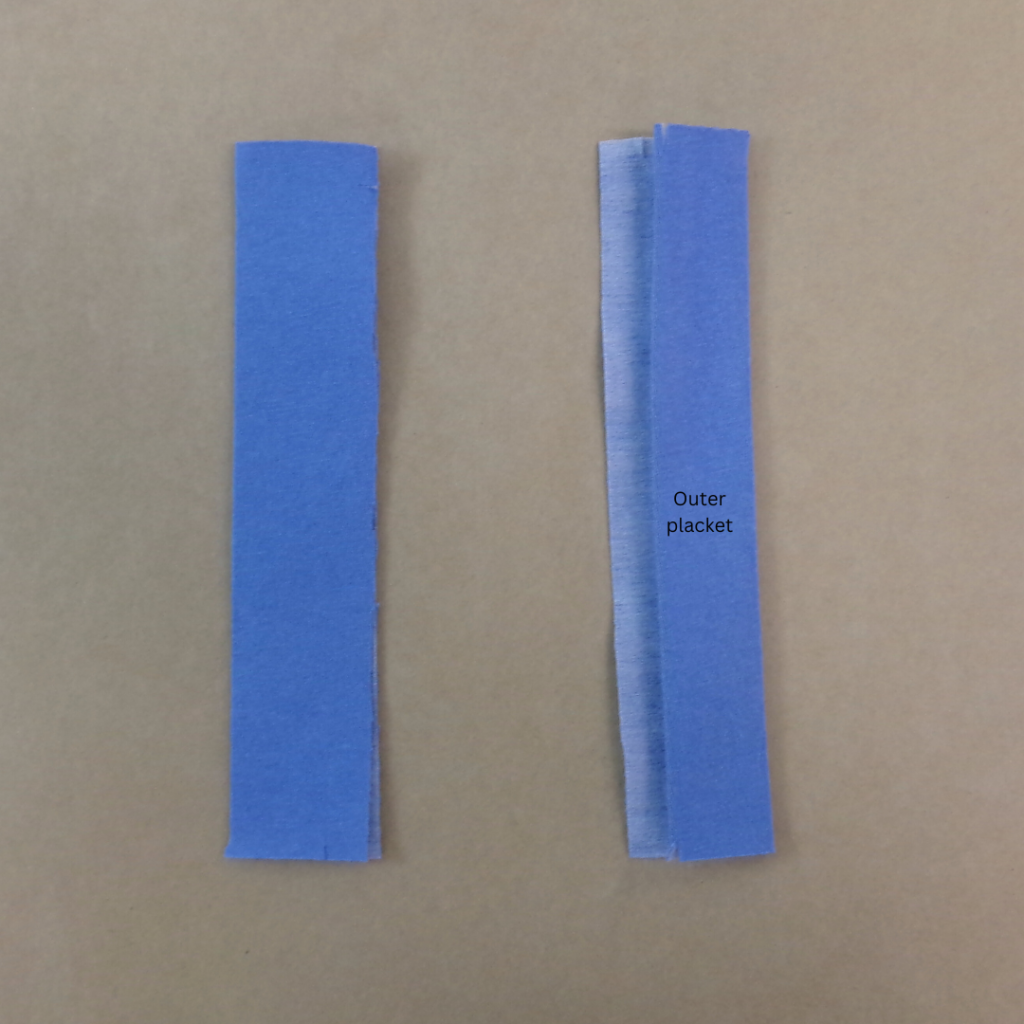
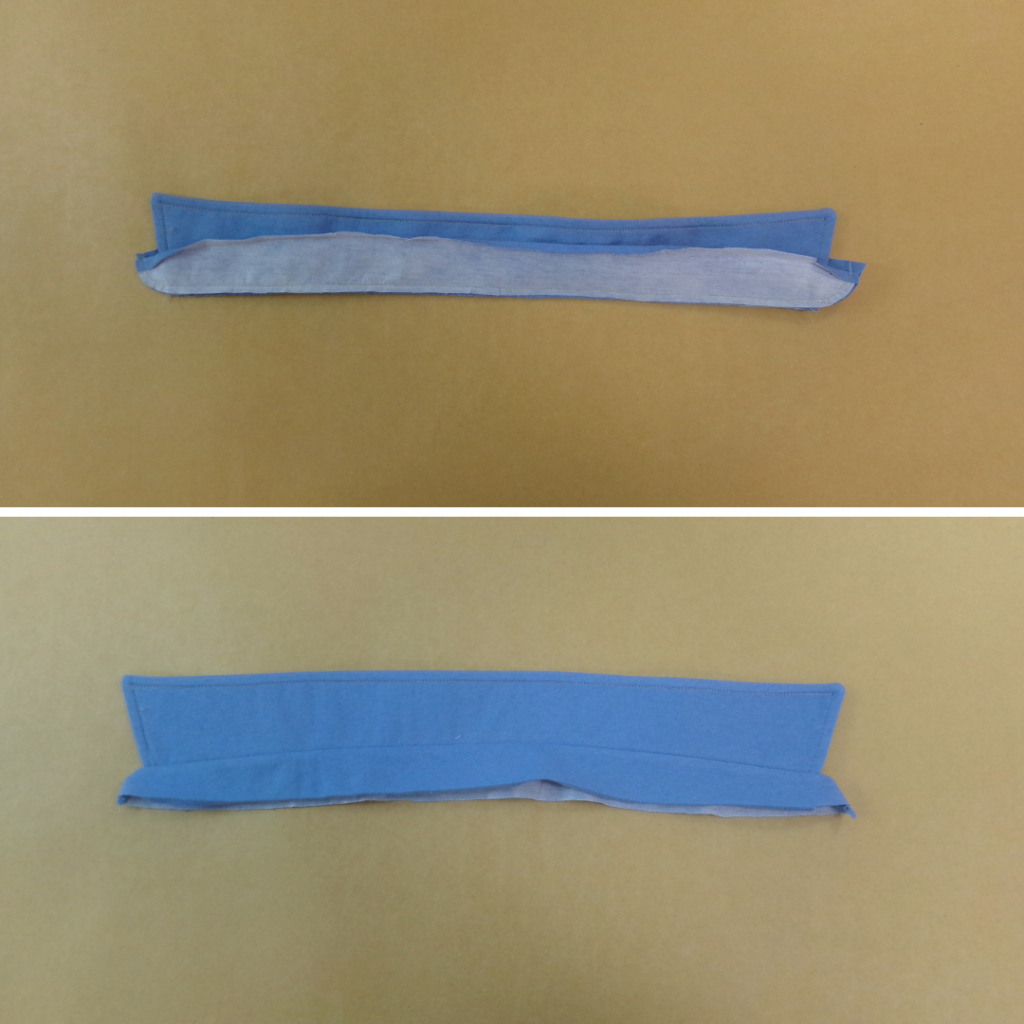
With WST, fold the Placket (7) in half lengthways. Press. Press one edge under 1cm (3/8”) to the inside (wrong side). This will be the outer placket.
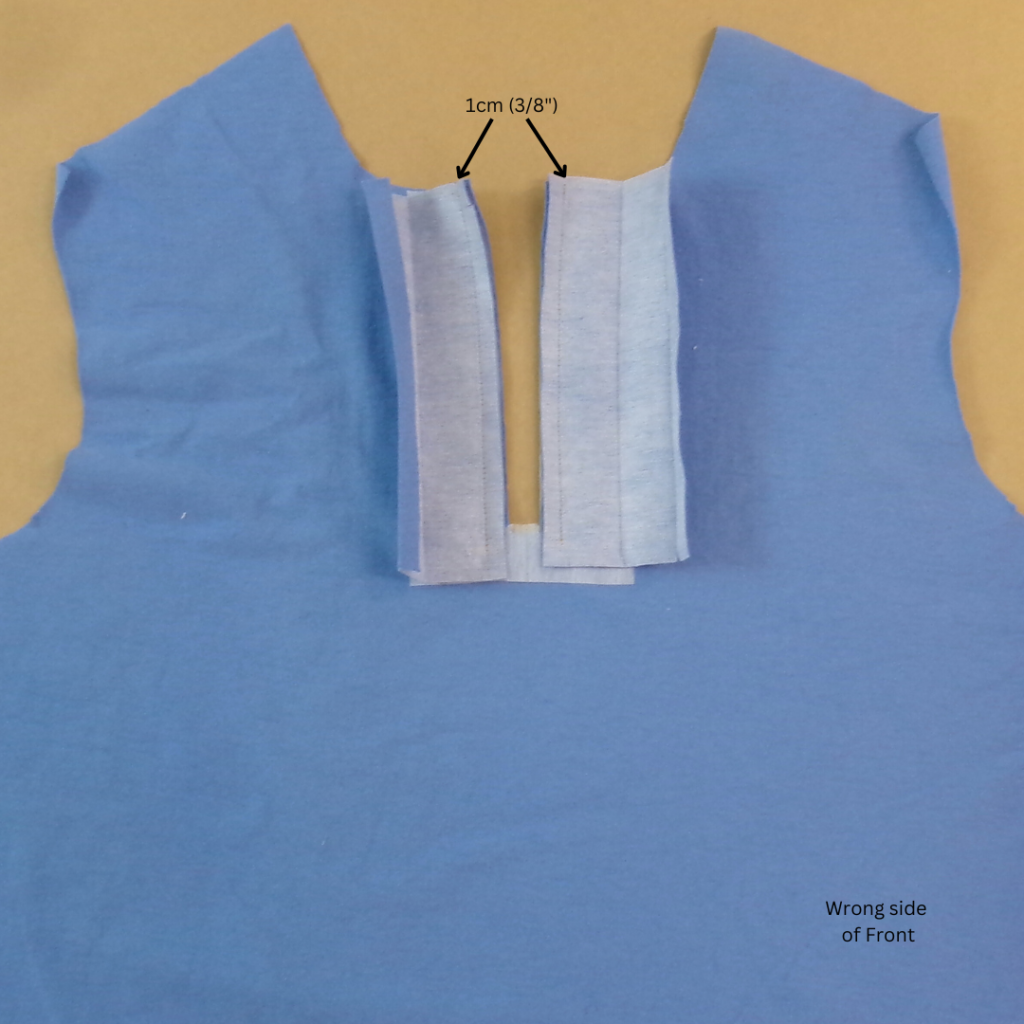
Pin the right side of the inner placket to the wrong side of the front placket opening and sew, stopping 1cm before the bottom of the placket (marked by a notch).
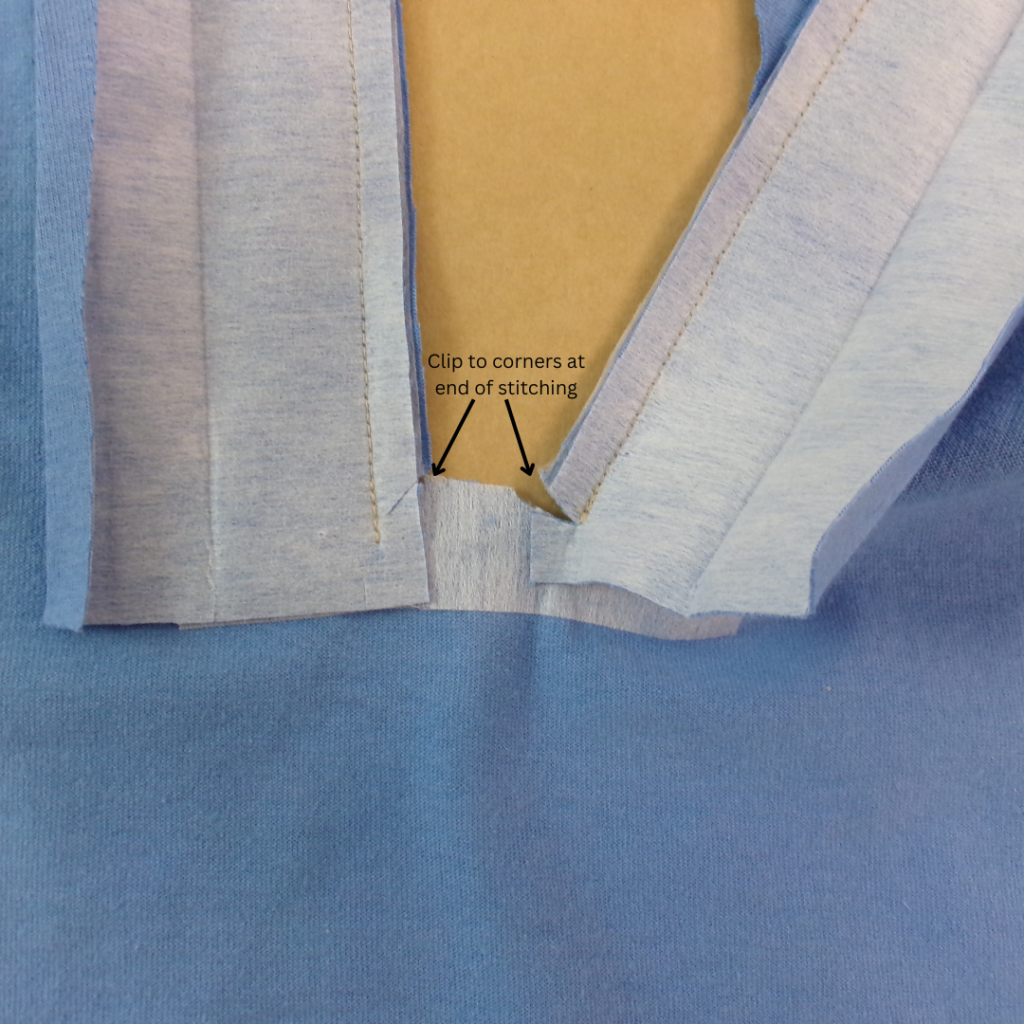
Carefully clip into the corners as shown on the pattern.
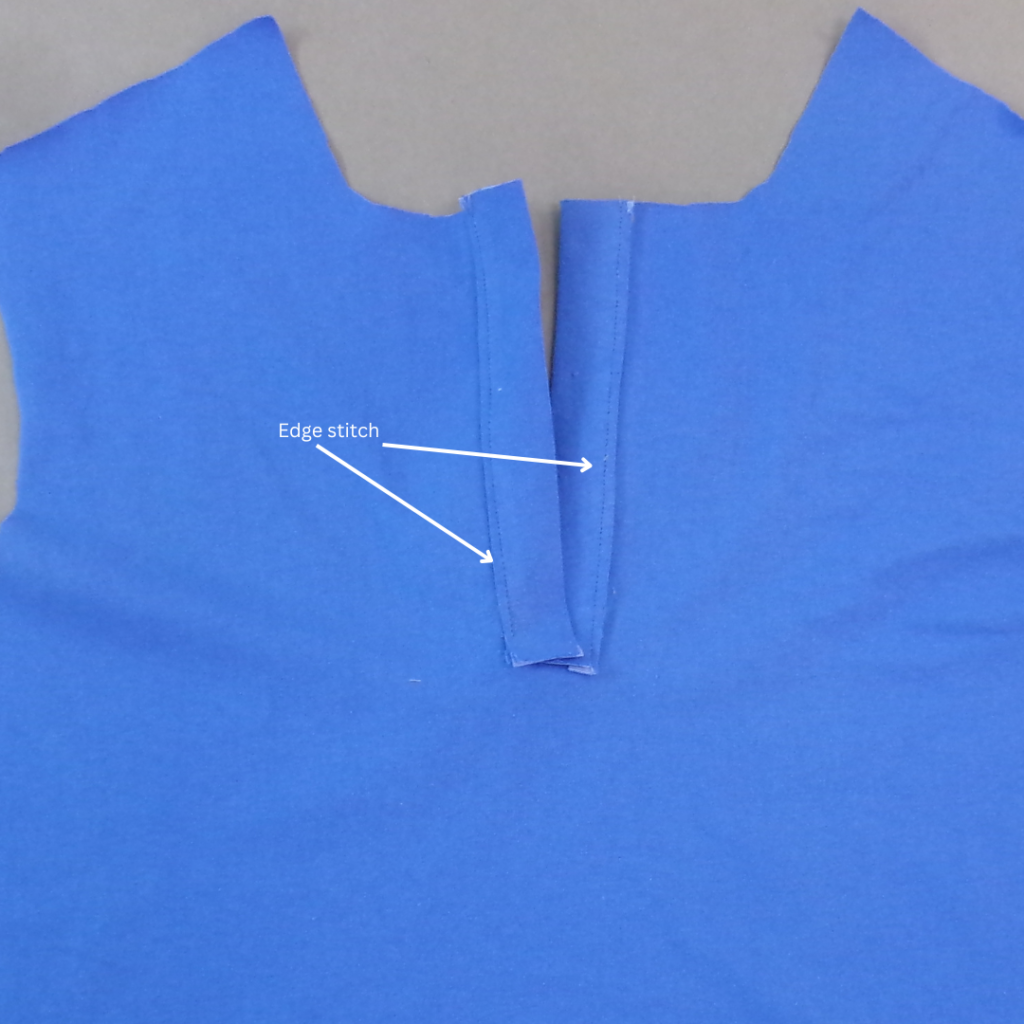
Pin the outer placket to the right side of the front placket opening and edge stitch the placket into place.
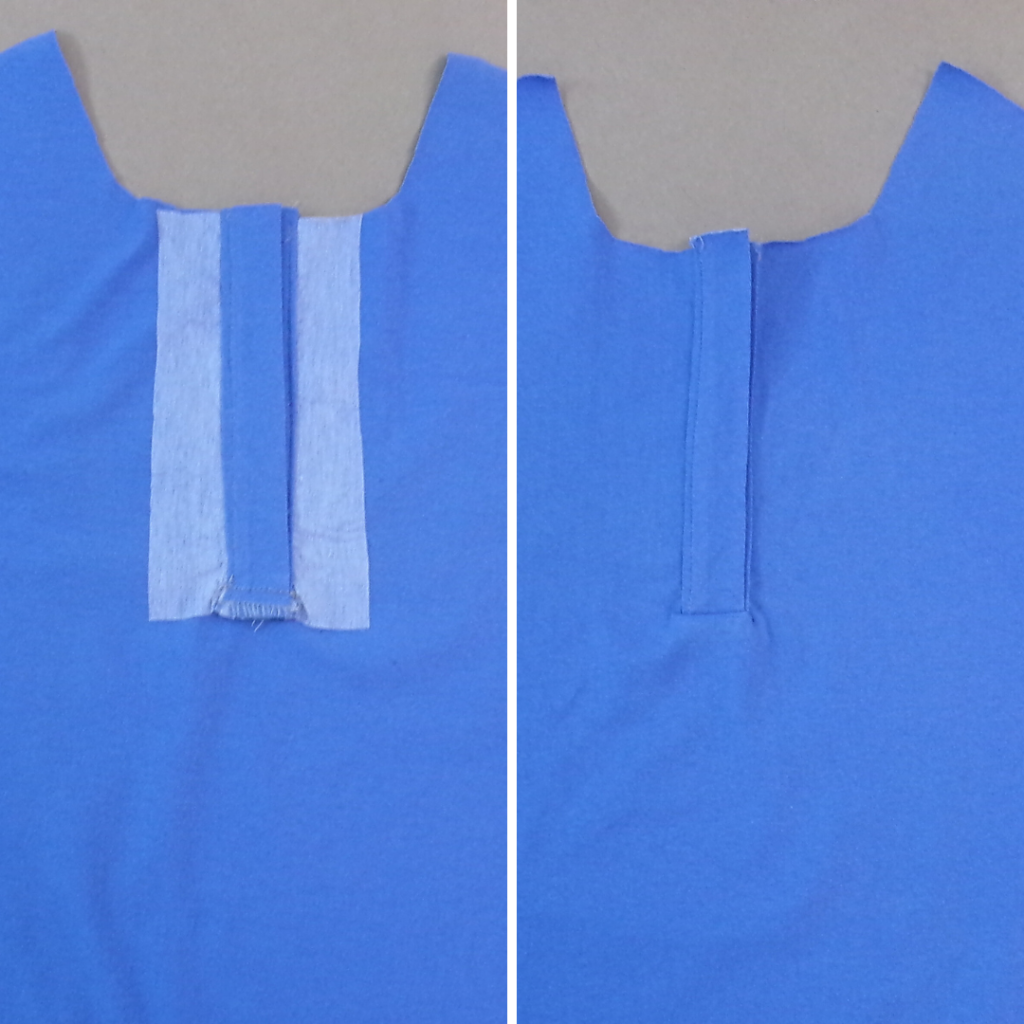
Fold the right placket in front of the left placket and from the inside, sew the bottom edges of the plackets to the bottom edge of the placket opening. Neaten using an overlocker/serger and press.
Optional: Make the button holes to the right side of the of the collar stand and placket as marked on the pattern and sew on your buttons.
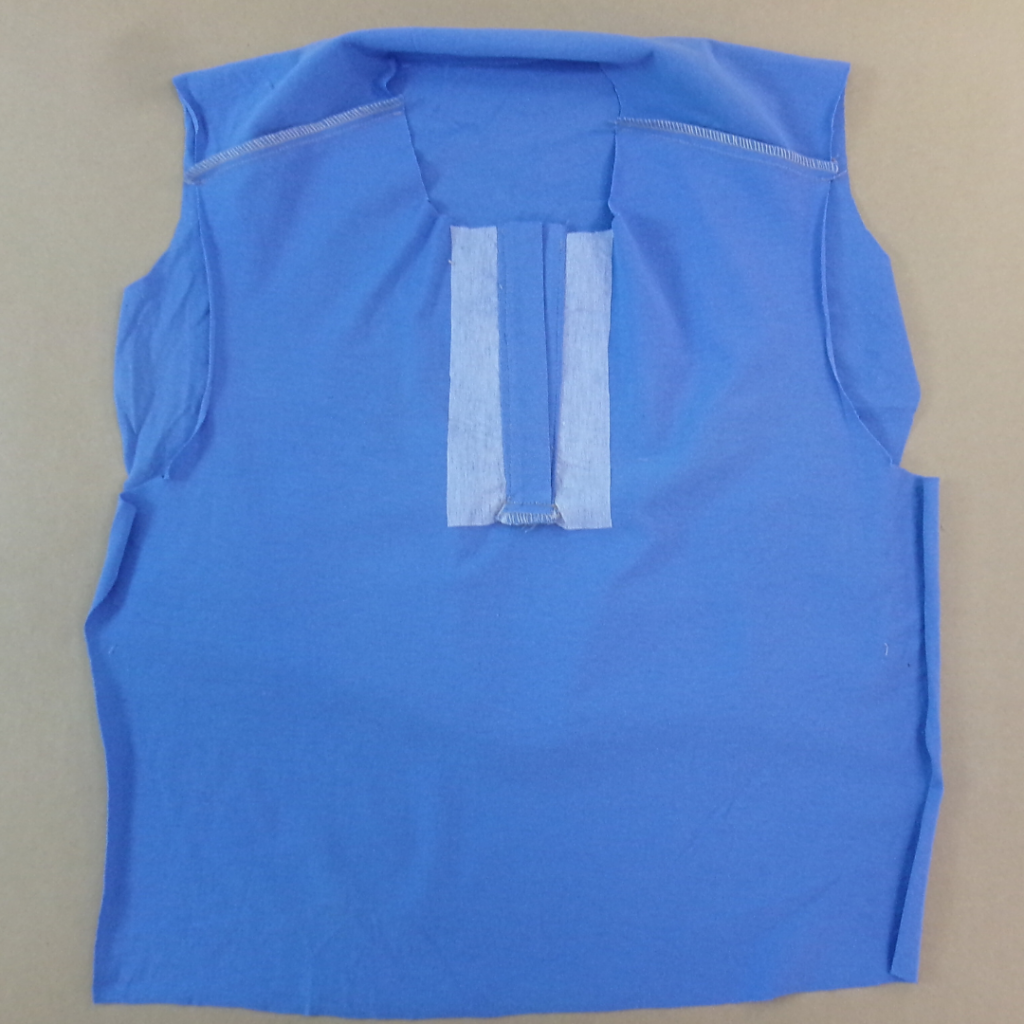
Sew the front to back at the shoulder seams. Neaten using an overlocker/serger and press toward the back.
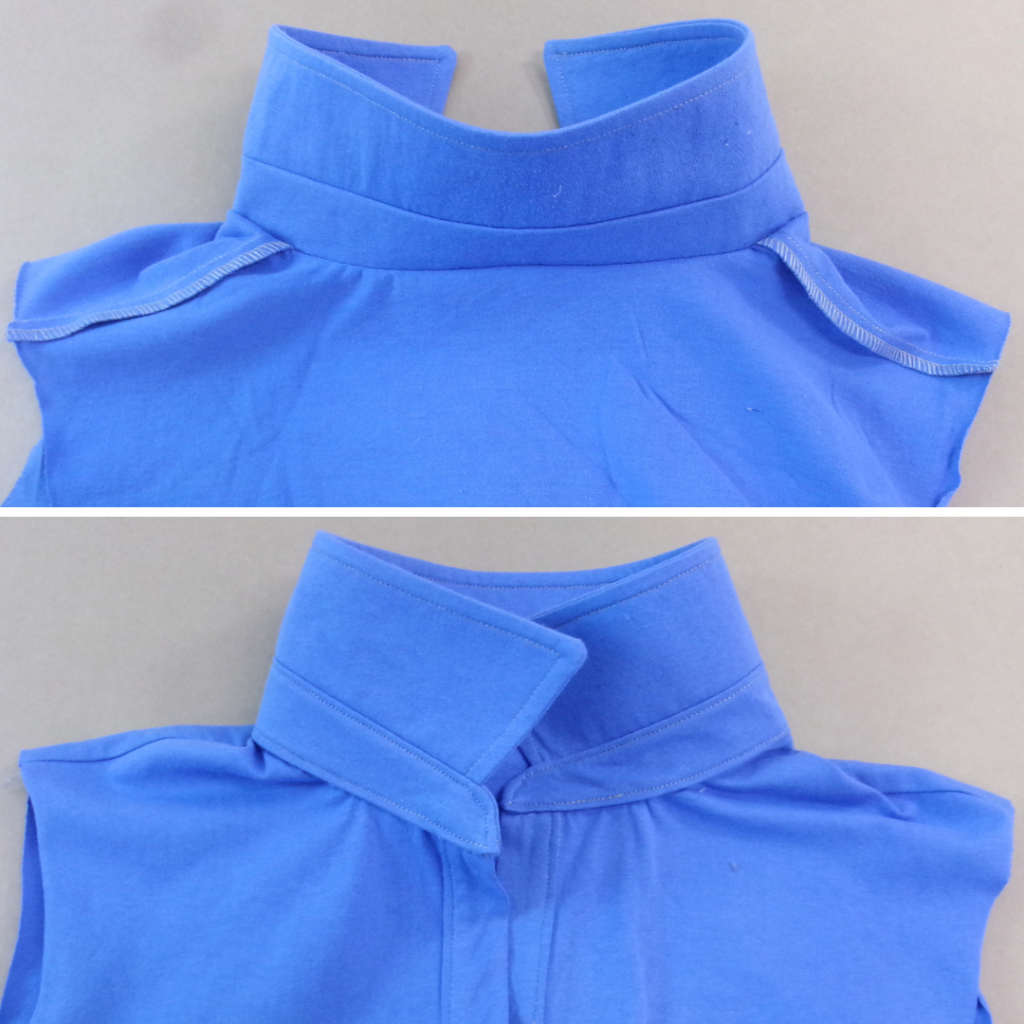
Pin the right side of the inner collar stand to the wrong side of the neck opening and sew using a 6mm (¼”) seam. Pin the outer collar stand to the right side of the neck opening and edge stitch into place. Edge stitch around the collar stand.
With RST and notches aligned, pin the sleeves to the arm openings. Sew, then neaten using an overlocker/serger and press toward the sleeve. Neaten the hems of the sleeves using an overlocker/ serger.
With RST, sew the front to back, starting at the waist, sew through the body and undersleeve to the sleeve hem. Neaten using an overlocker/serger and press toward the back. Turn up the sleeve hem 2cm (¾”) to the inside and topstitch into place.
Overlap the ends of your stay tape and sew together securely. Using a pen or chalk, mark the quarter way points to align with the notches. (See High Neck Tee example above). Pin, then sew the tape to the wrong side of the waistline of the bodice. Set the bodice aside.
SKIRT WITH INSEAM POCKET OPTION (12, 13) & COMPLETION:
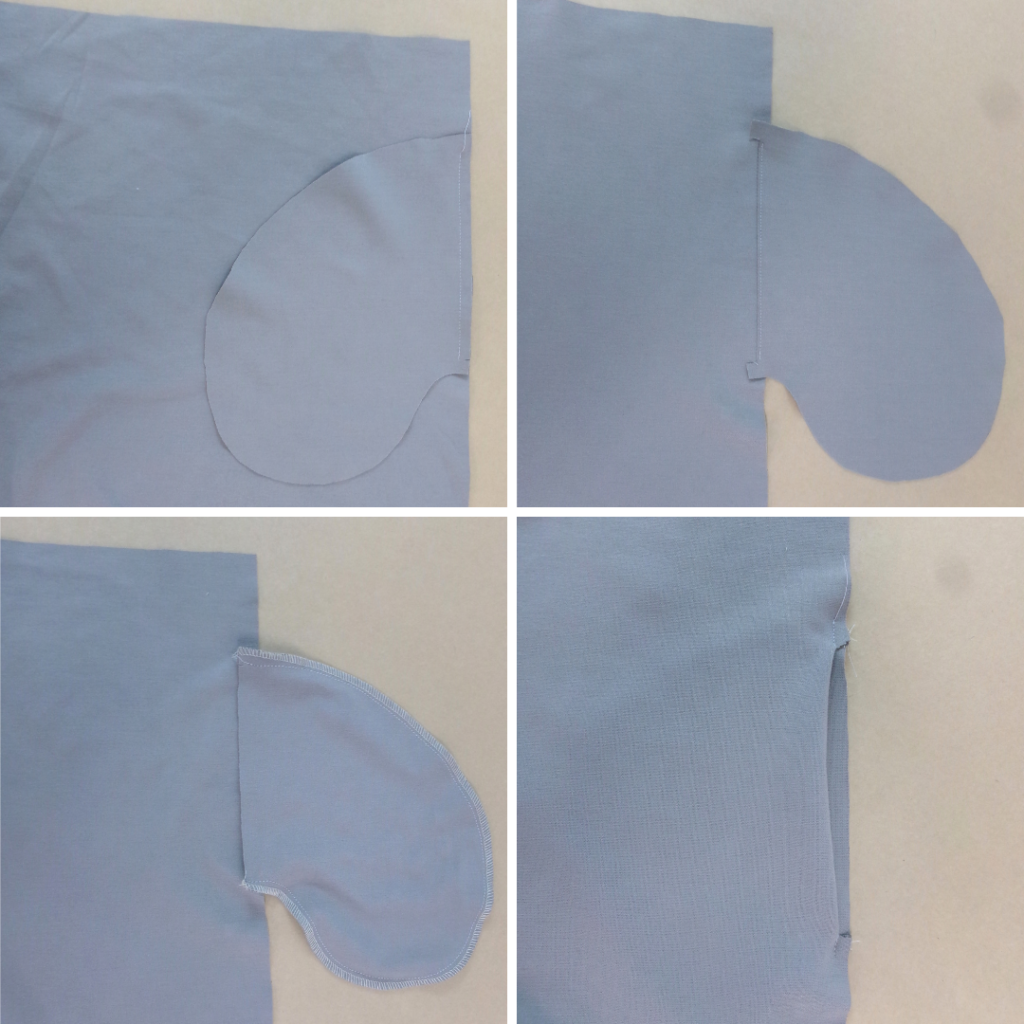
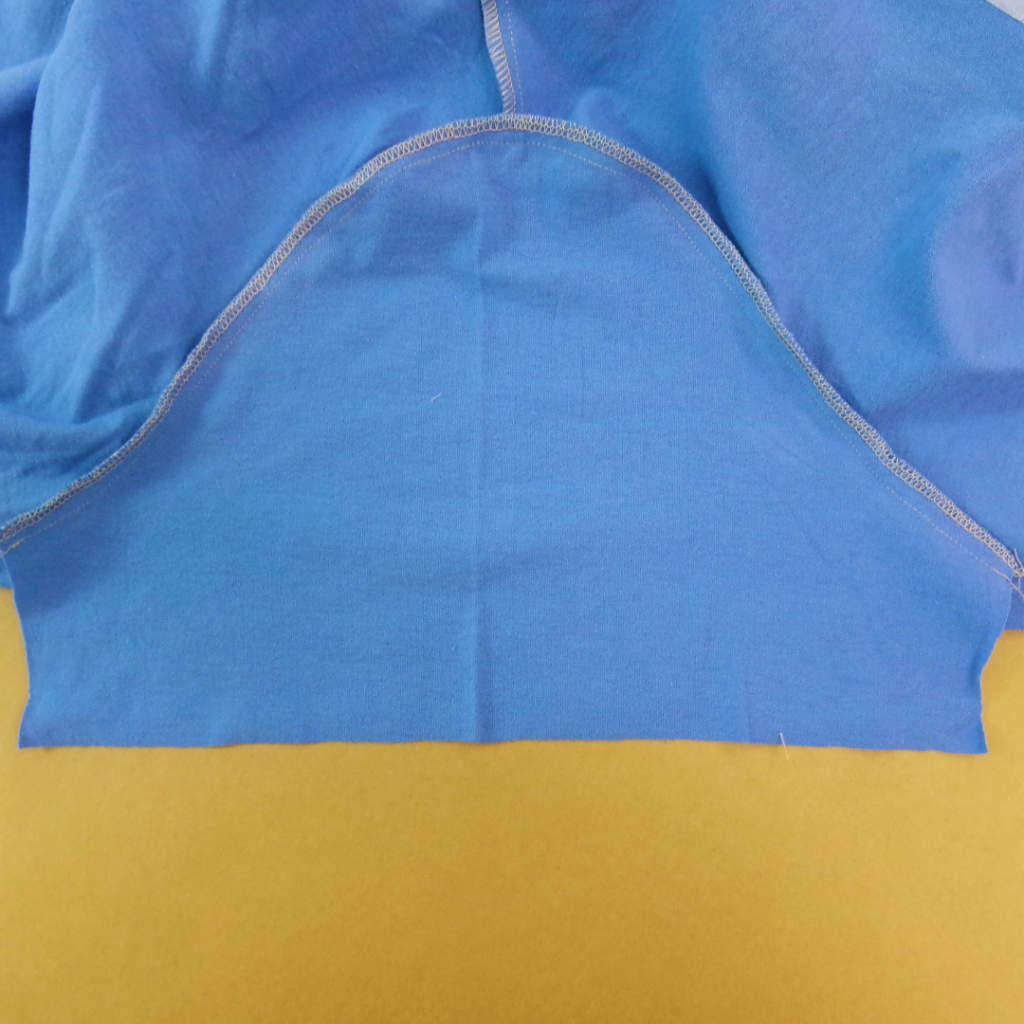
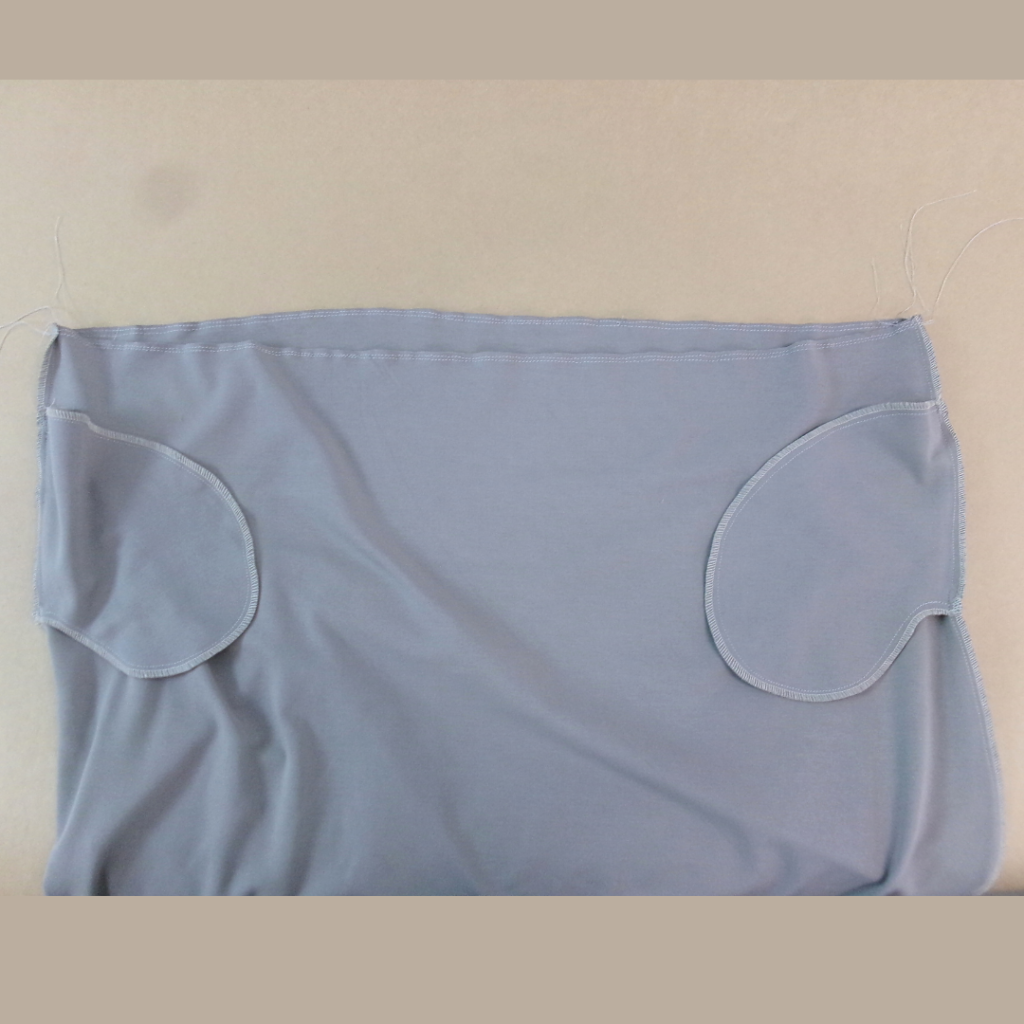
With RST and aligning notches, sew one set of Pockets (13) to one of the Skirt (12) pieces at the side seam (seamline ‘A’ on the pattern). This will be the front skirt. Clip the seam at the notches and sew an understitch on the side of the pocket bag. This is pocket bag 1.
With RST, lay pocket bag 2 on top of pocket bag 1, align and sew both pocket bags together (seamline ‘B’ on the pattern). Note that the straight edge of the under pocket is left free to sew to the back skirt side seam. Neaten around the pockets using an overlocker/serger. Secure stitch each end of the pocket opening.
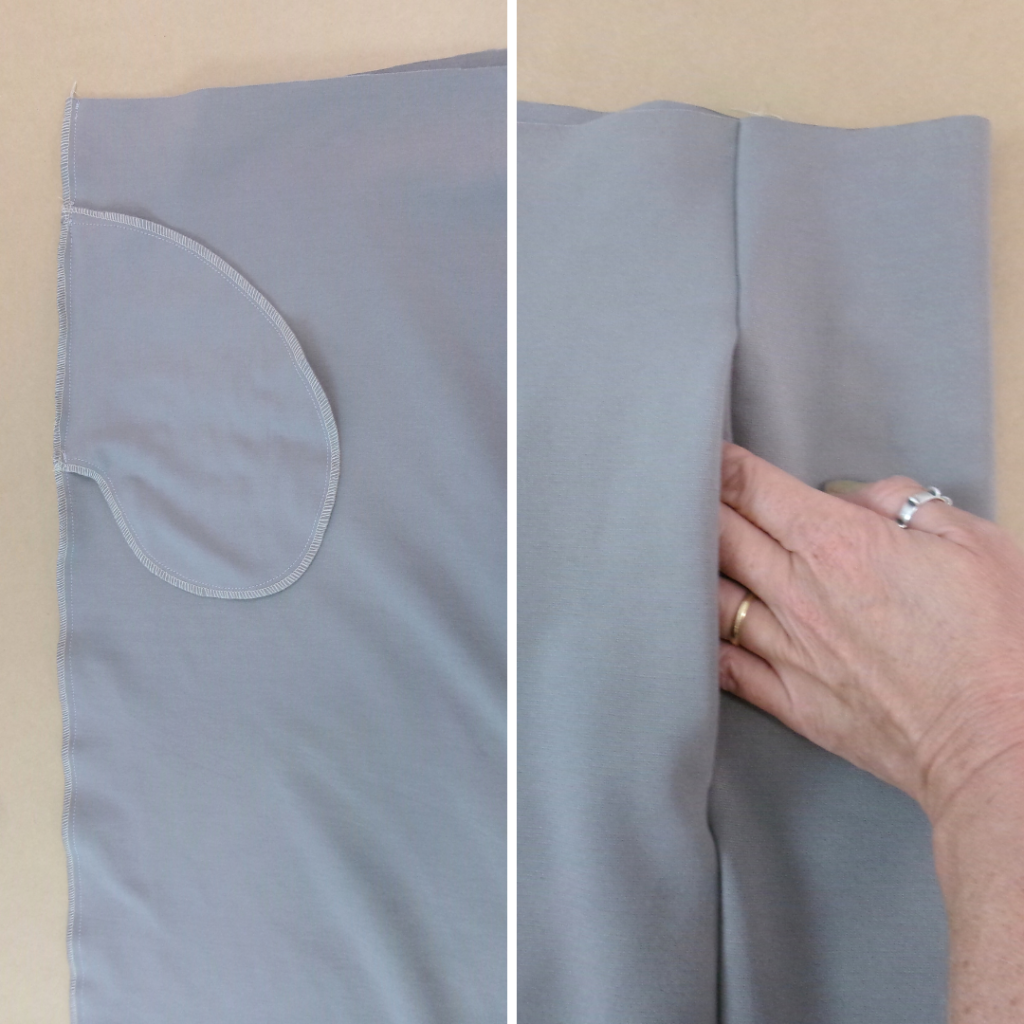
With RST, pin the skirt front to back at the side seam. Sew along the side seam, through the straight edge of the back pocket (if using) and finishing at the hem. (If using, take care not to catch the front pocket opening as you sew.) Neaten using an overlocker/serger and press toward the back.
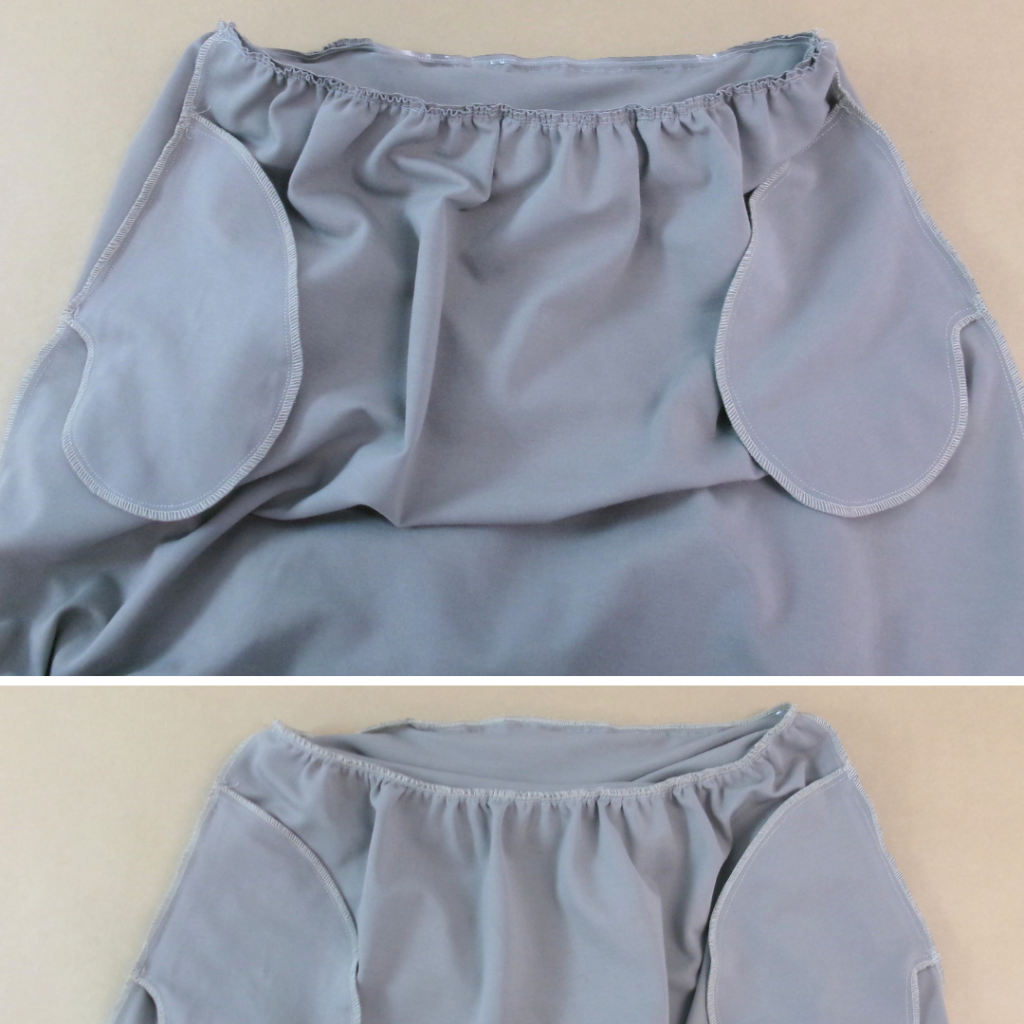
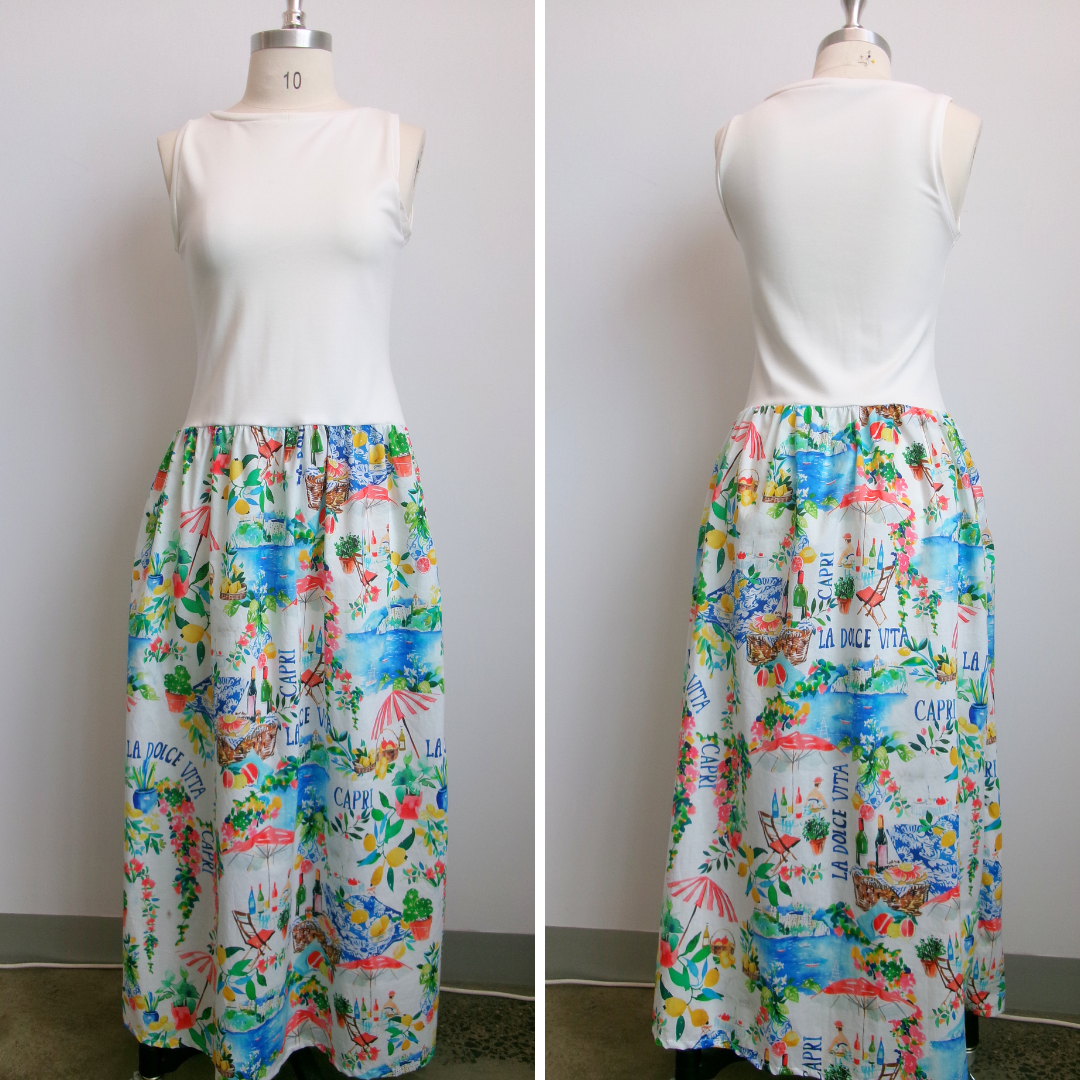
Sew a large gathering stitch to the waistline, and draw in slightly, with even gathers. With RST and aligning notches, pin the gathered skirt to the bodice. Note the skirt should be looser than the bodice, and you can stretch the bodice into the skirt slightly. This will allow the seam to stretch, making it easier to pull the dress on. Sew, then neaten using an overlocker/serger. Press toward the body. Using steam will help shrink the elastic or stay tape back into shape.
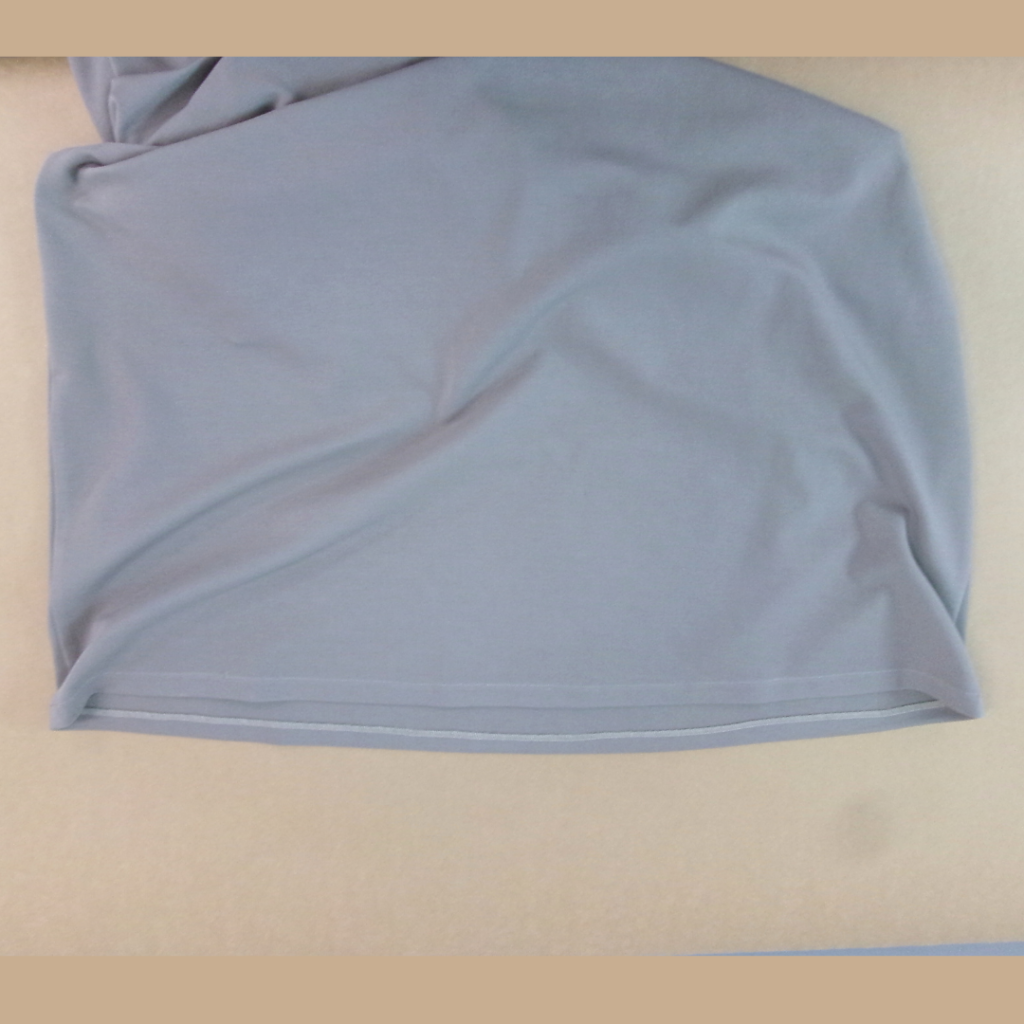
Neaten the hem and turn to the inside once for knit and twice for woven fabric. Sew then press. Trim any loose threads and press your new dress.