Shop the Cendrine Woven Blouse Set
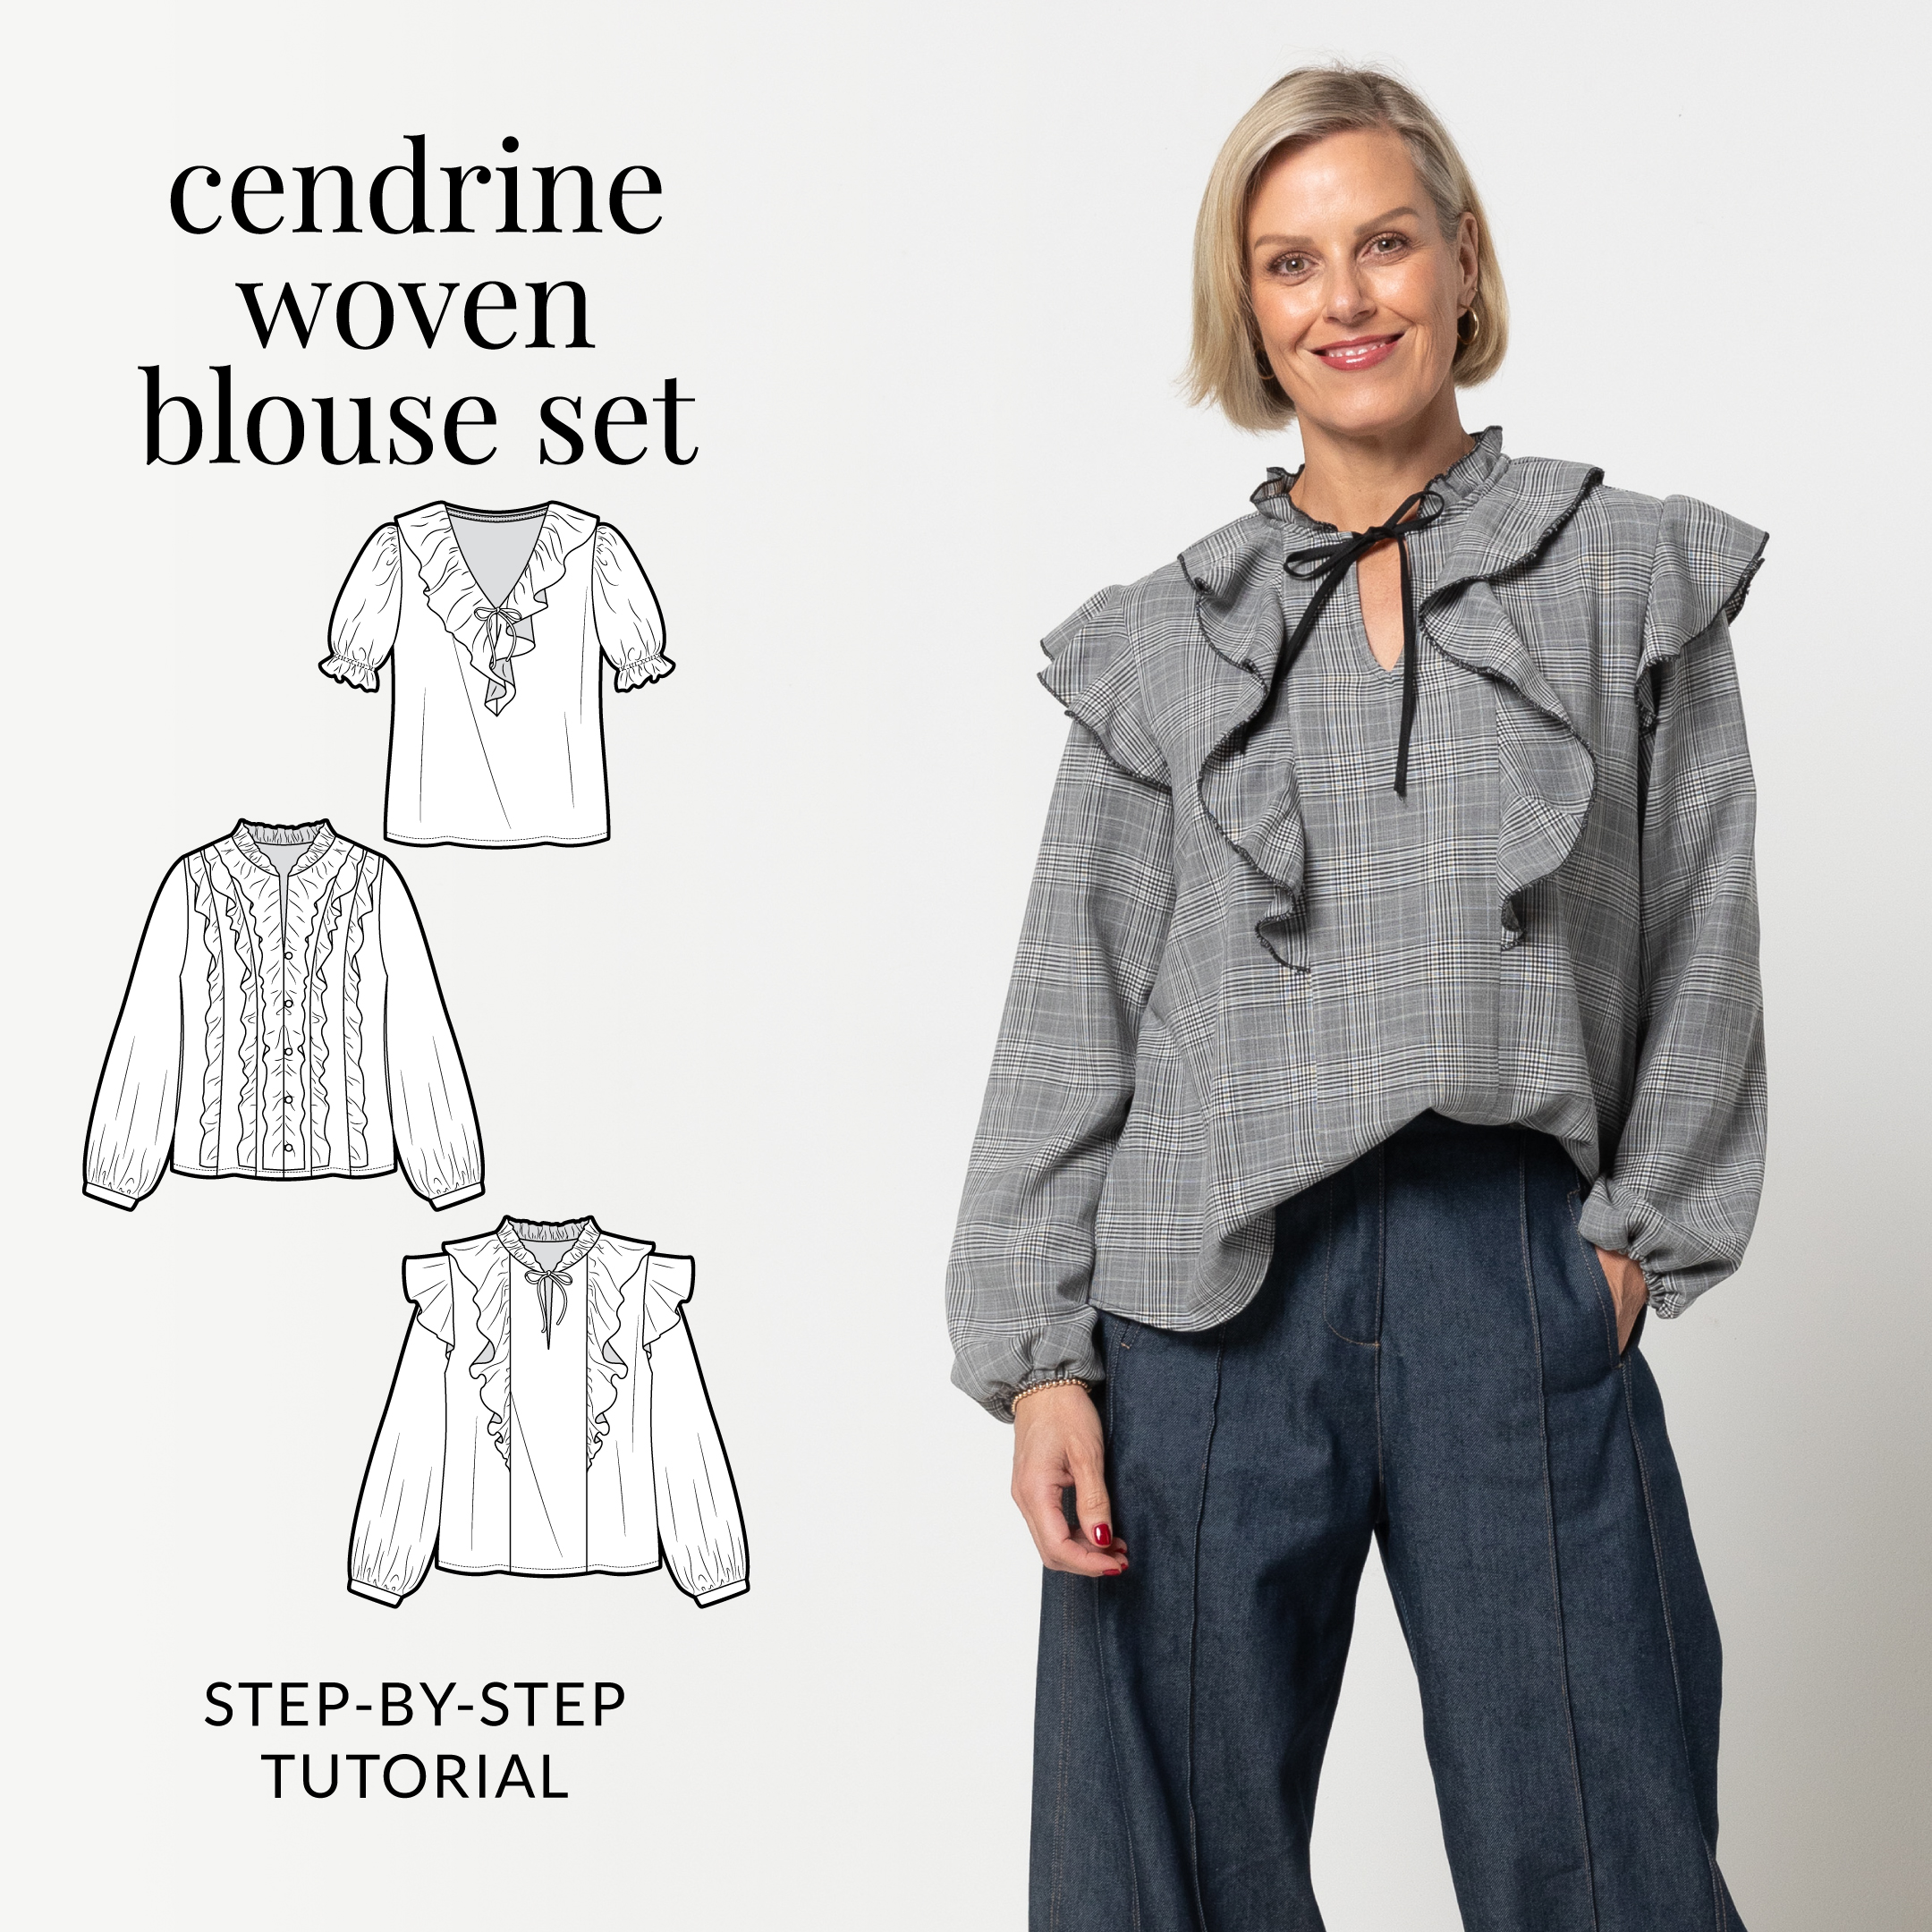
#SACendrineWovenBlouseSet
VIDEO TUTORIAL

PHOTO TUTORIAL
Please note: all seams are 1cm (3/8″) unless otherwise stated (seam allowances are marked on each pattern piece with a dashed line)
Blouse A – Back (1), Front (2), Back Neck Frill (17), V Neck or Front Frill (18), V Neck Bind and Tie (21):
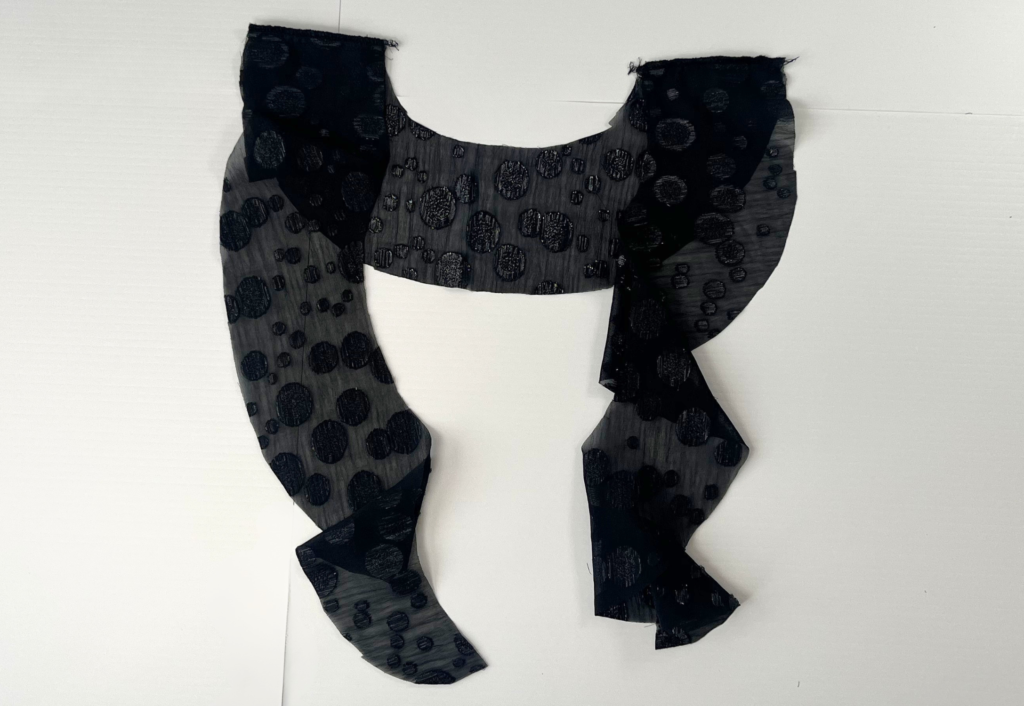
With RST, sew Back Neck Frill to V Neck Frill at the shoulder seams. Neaten using an overlocker/serger and press the seam toward the back.
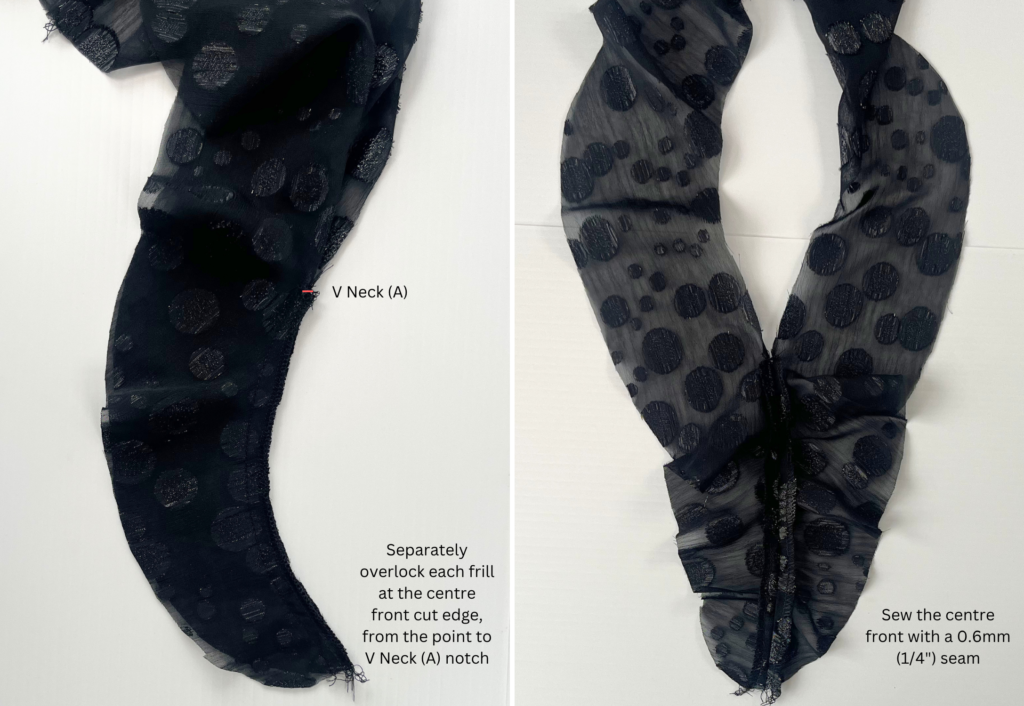
Using an overlocker/serger, neaten the centre front edge of each frill separately, from the point to the notch indicating the V Neck.
With RST, sew this section together with a 0.6mm (1/4″) seam, then press the seam open.
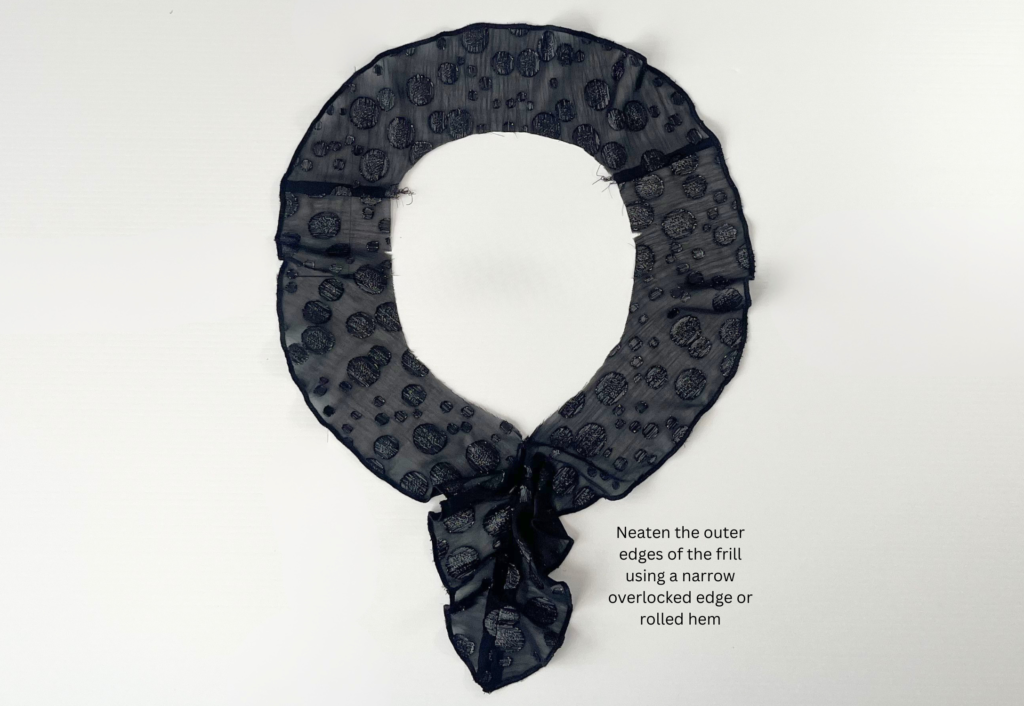
Neaten the outer edges of the front and back neck frill using a rolled hem or narrow overlocked (‘babylock’) edge.
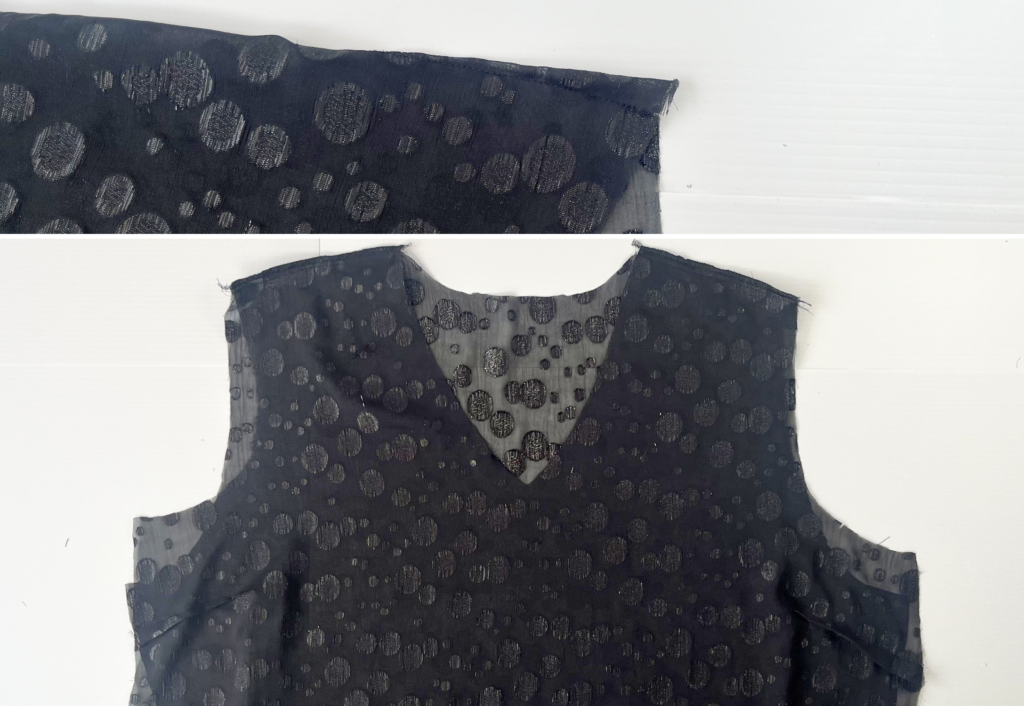
Sew the Front darts and press downward.
With RST, sew the Back to Front at the shoulder seams.
Neaten using an overlocker/serger and press the seam toward the back.
Sew a stay stitch to the neckline to prevent stretching.
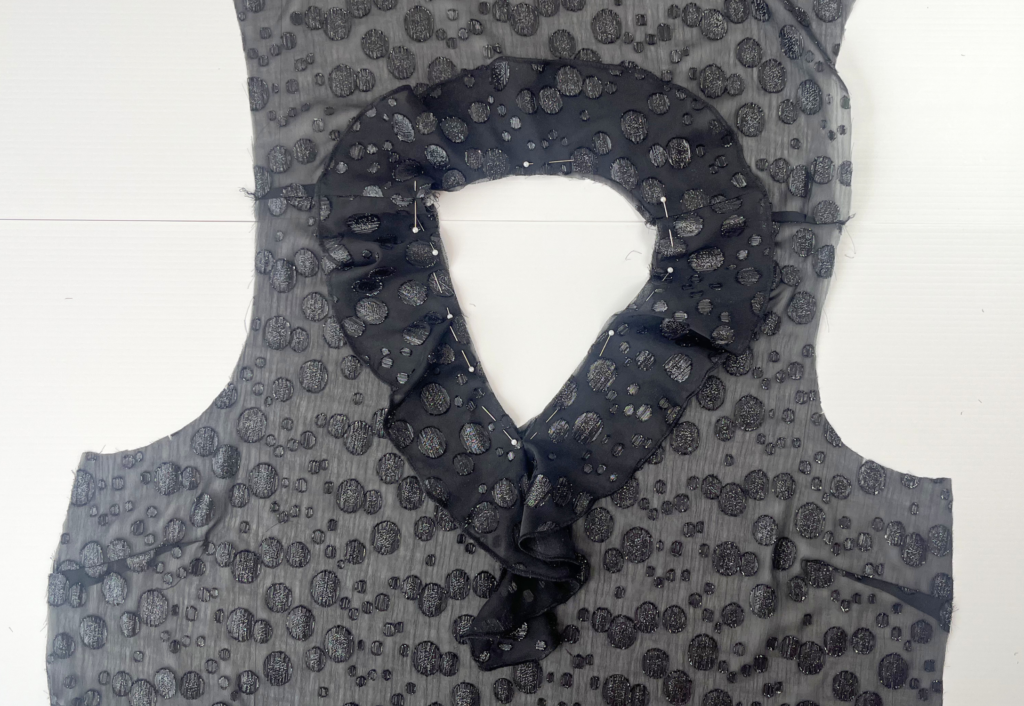
With the wrong side of the frill to the right side of the main body and with notches aligned, pin the frill to the body at the neckline.
Baste into place using a scant 6mm (1/4”) seam.
With RST, sew the two short ends of the V Neck Bind together, creating a loop. Press the seam open. With WST, fold the bind in half lengthways and press. Baste the raw edges together.
With RST and aligning the join with the centre back, pin the raw edge of the bind to the neckline, sandwiching the frill.
Sew the bind into place using a 6mm (1/4”) seam. Press the seam toward the binding and sew an understitch on the side of the bind.
Fold the frill up and out of the way, then turn the bind to the inside. Pin and edge stitch into place, taking care to not catch the frill as you sew (see diagram on page 6).
For a nice V shape, you may choose to sew a small dart to the binding at the centre front (see diagram on page 8).
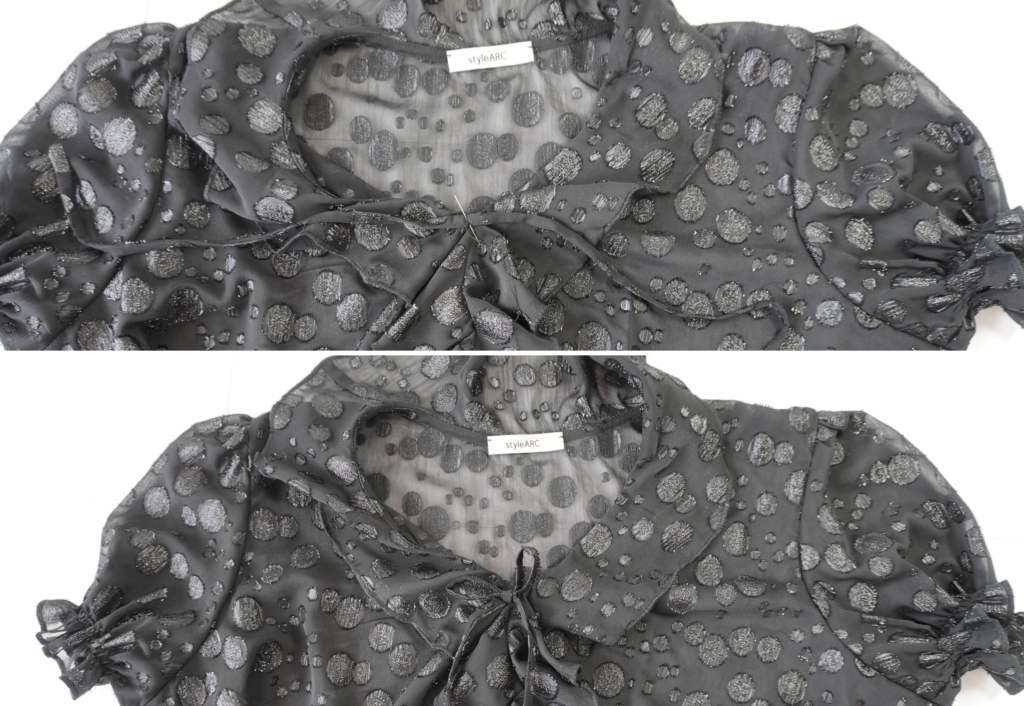
For the optional faux tie: With RST, fold the other neck bind and tie in half lengthways and sew the short ends and along the length of the tie using a 6mm (1/4”) seam, leaving a small gap halfway for turning out. Trim excess fabric from the ends and turn to the right side. Press. Sew the faux tie to the centre front by hand or machine.
Proceed to step 35.
Blouse B – Back (1), CF (5), Mid Front (6), Side Front (7), CF Frill (13), Mid Front Frill (14), Side Frill (15), Collar Frill (16):

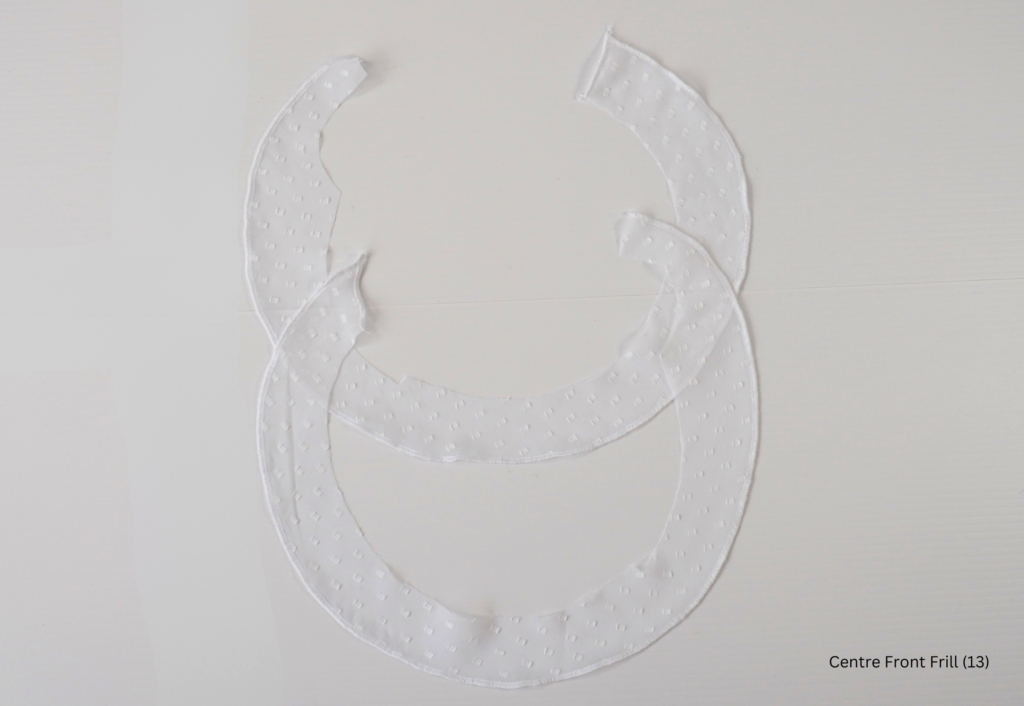
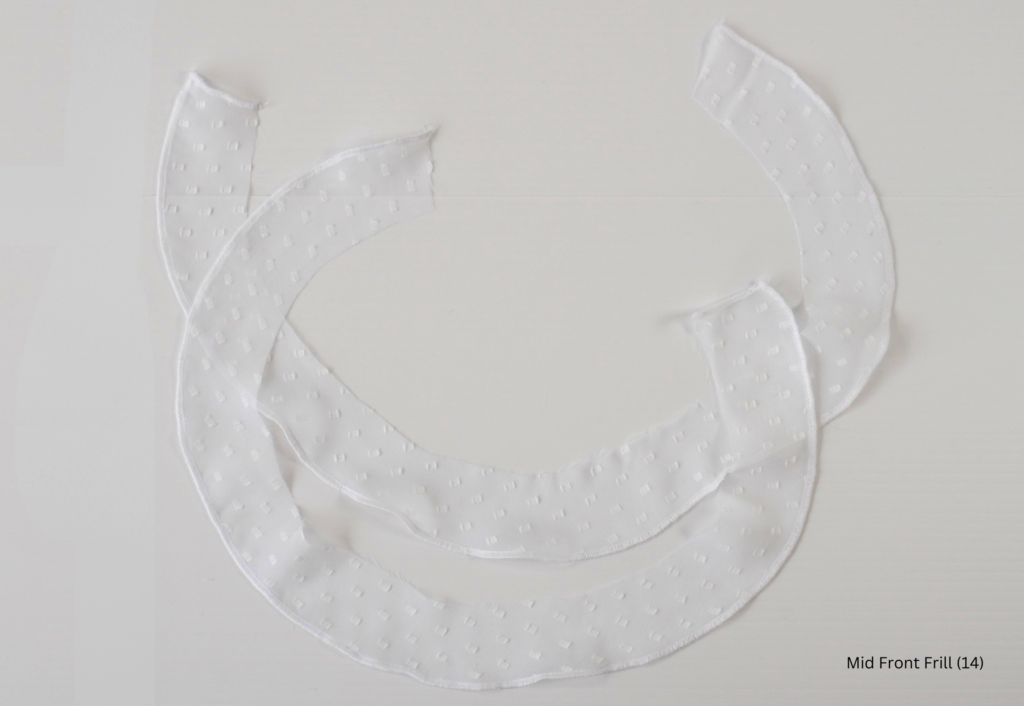
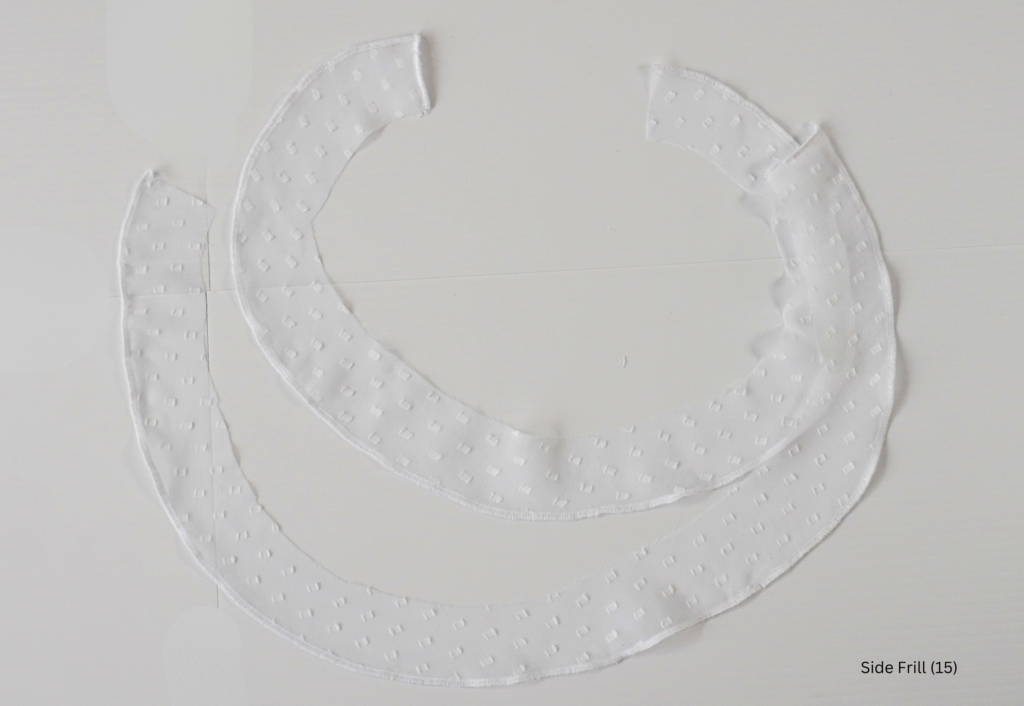
12. Neaten the outer and base edges of CF Frill, Mid Front Frill, Side Frill, and Collar Frill using a rolled hem or narrow overlocked (‘babylock’) edge. Press.
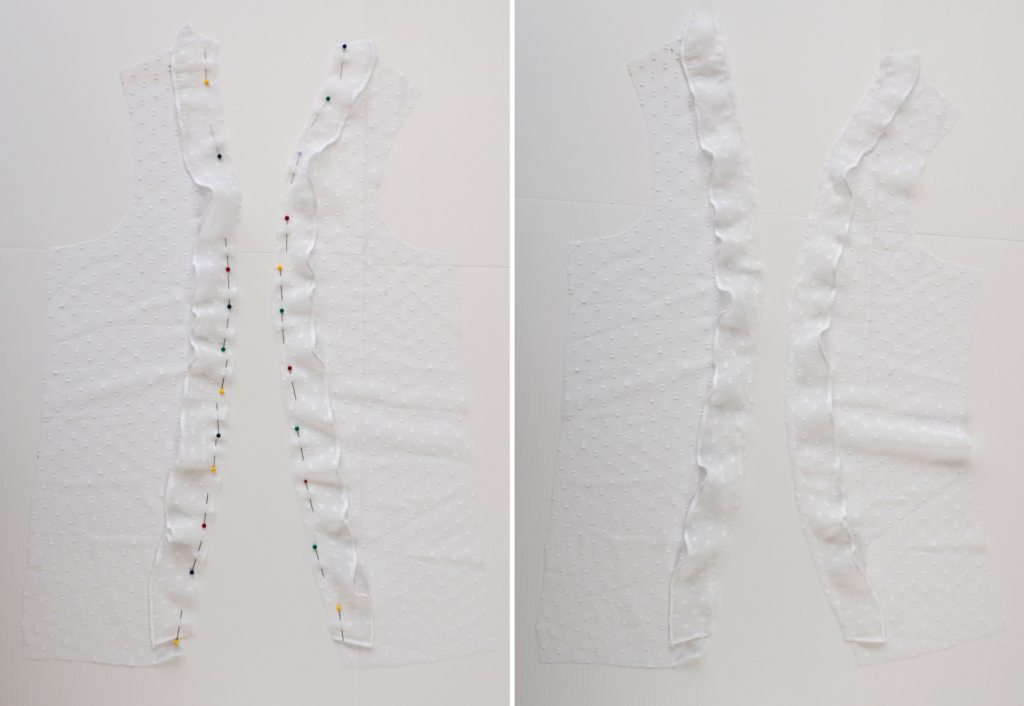
With the wrong side of the frill to the right side of the main body and with notches aligned, pin the Side Frill to Side Front. Baste into place using a 6mm (1/4”) seam.
Note the base of the frill finishes at the notch, not the hem.
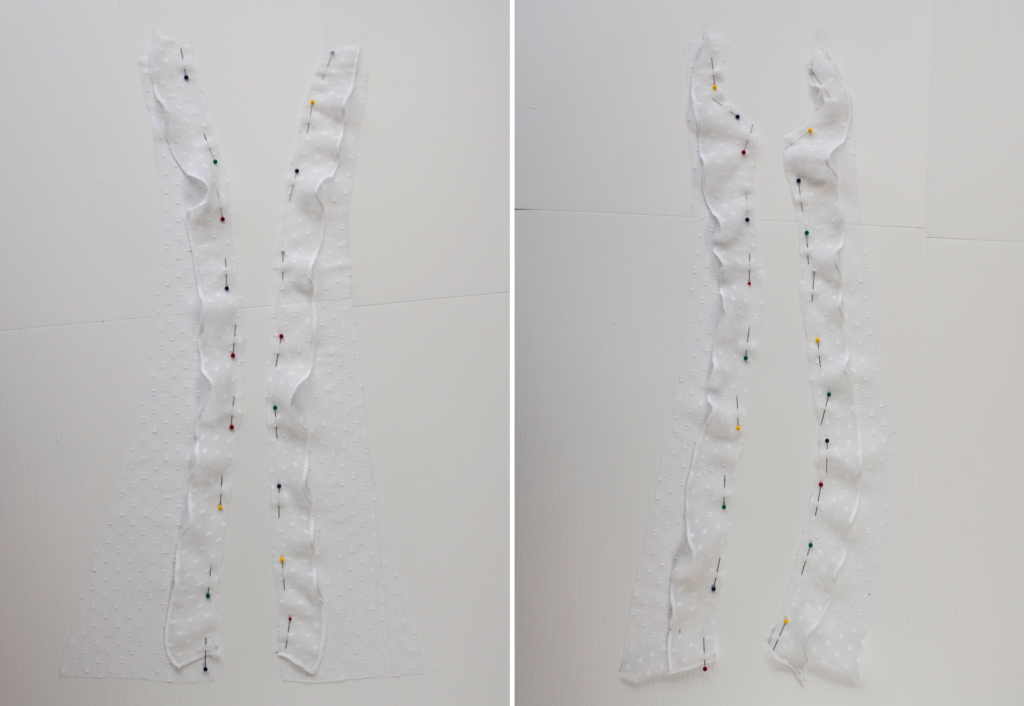
With the wrong side of the frill to the right side of the main body and with notches aligned, pin the Mid Front Frill to Mid Front.
Baste into place using a 6mm (1/4”) seam.
With the wrong side of the frill to the right side of the main body and with notches aligned, pin the CF frill to CF and around the front neckline.
Baste into place using a 6mm (1/4”) seam.
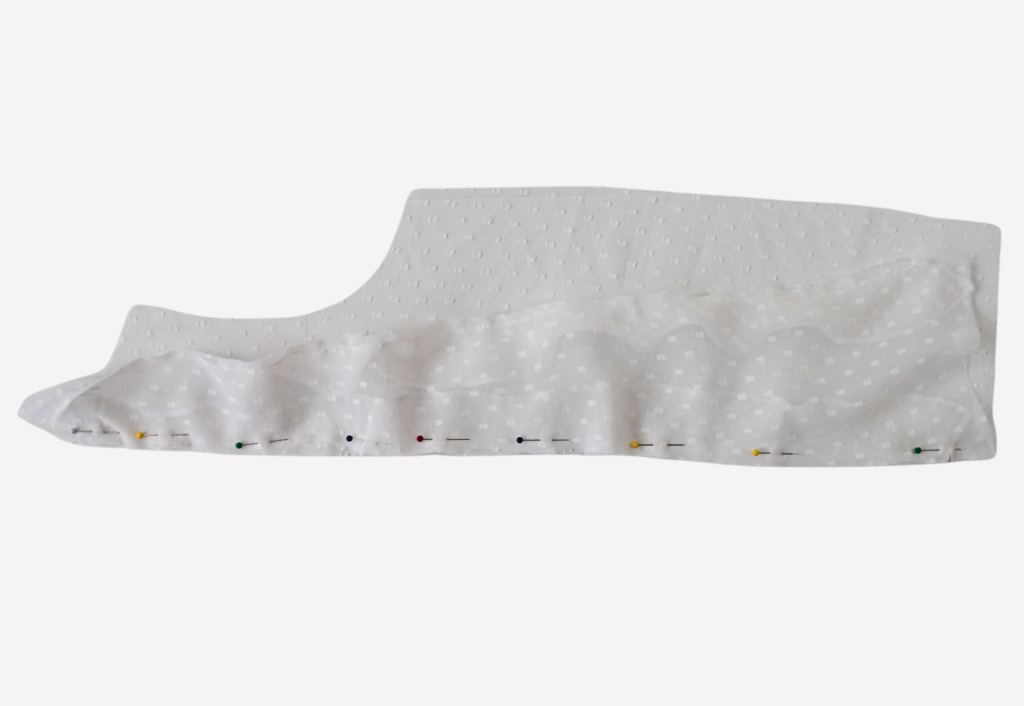
With RST and notches aligned, sew the Side Front to Mid Front, sandwiching the frill in between.
Neaten using an overlocker/serger and press toward the centre front.
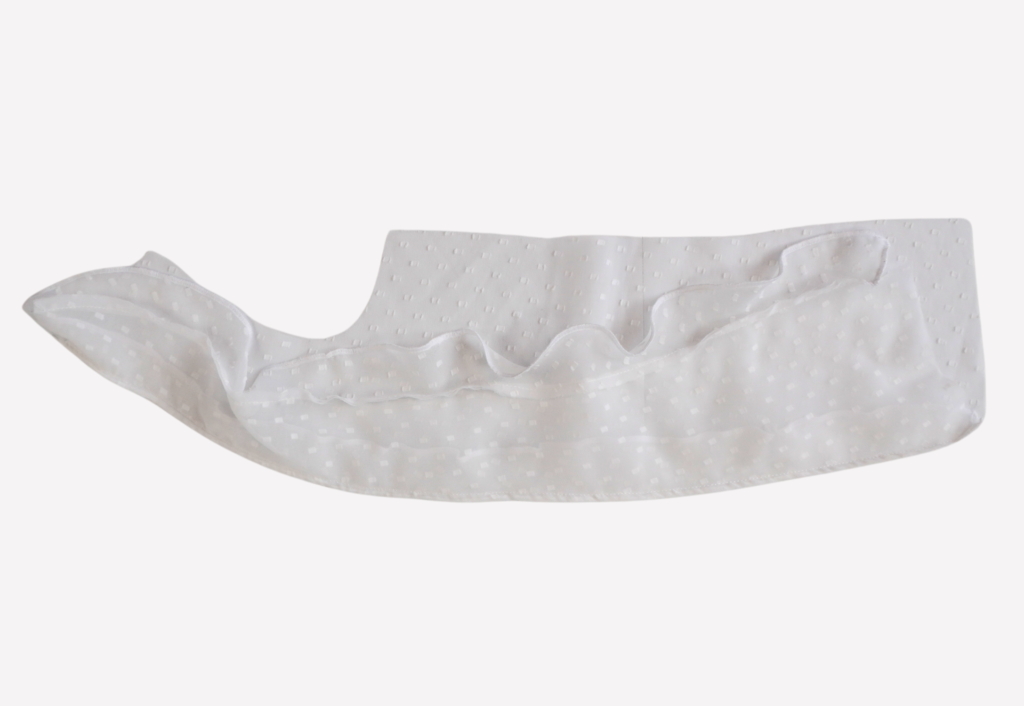
With RST and notches aligned, sew the CF to Mid Front, sandwiching the frill in between.
Neaten using an overlocker/serger and press toward the centre front.
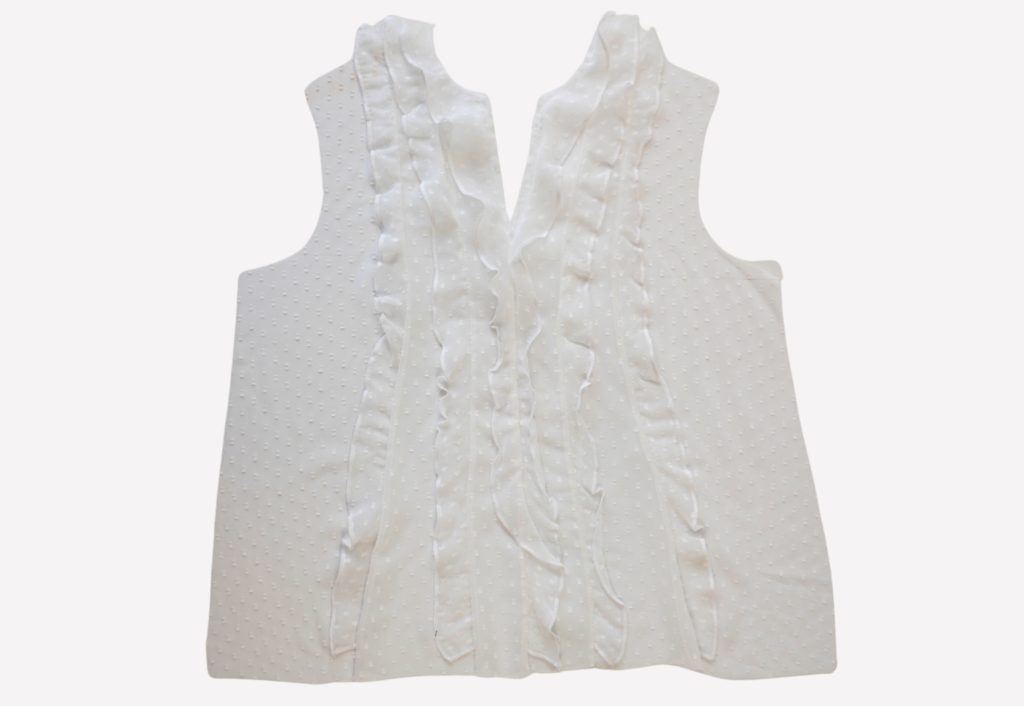
With RST, sew the CF to CF at the centre front. Neaten using an overlocker/serger and press to one side.
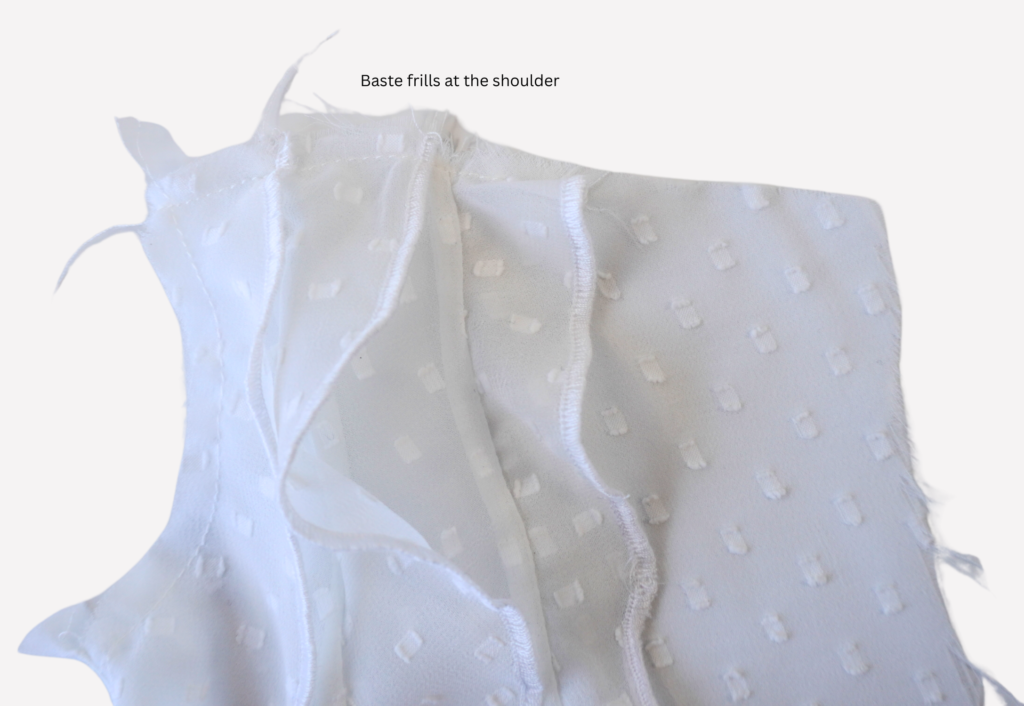
Baste the top of the frills into place along the shoulder seam toward the armhole.
With RST, sew the front to the Back at the shoulder seams.
Neaten using an overlocker/serger and press toward the back. Sew a staystitch to the neckline to prevent stretching.
Proceed to step 25.
Blouse C – Back (1), CF (8), Side Front (9), V Neck Bind (10), Collar Frill (16) Back Neck Frill (17), Front (C) Frill (18):
Please see our YouTube sew along (link at top of page) for the full Blouse C tutorial sew along

With RST, sew Back Neck Frill to Front Frill at the shoulder seams. Neaten using an overlocker/serger and press the seam toward the back.
Neaten the outer edges of the neck frill and Collar Frill using a rolled hem or baby locked edge.
With RST, sew Side Front to Back at the shoulder seams. Neaten using an overlocker/serger and press the seam toward the back. Sew a stay stitch to the neckline to prevent stretching.
V Neck Bind (10) – (B and C only):
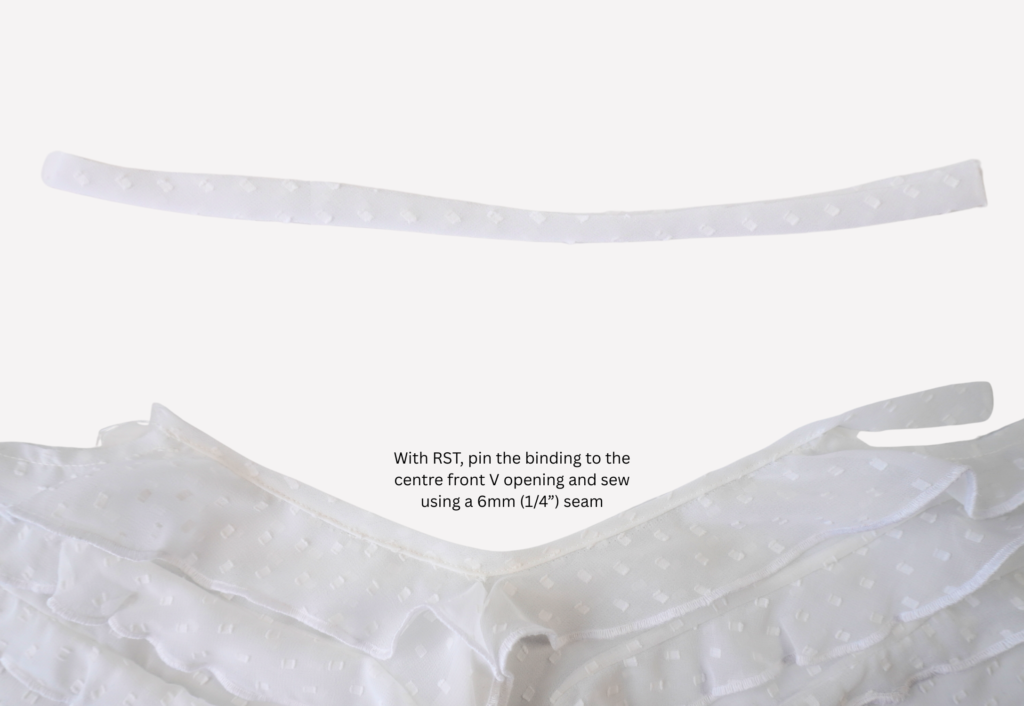
With WST, press the V Neck Bind in half lengthways and press. Baste the raw edges together using a 6mm (1/4″) seam.
With RST, pin the binding to the centre front V opening and sew using a 6mm (1/4”) seam, taking care to not catch the frill as you sew.
Carefully clip into the seam at the centre front to create a nice V shape.
Press the seam toward the binding and sew an understitch to the seam on the side of the binding.
Turn the binding to the inside and pin into place. Edge stitch the binding into place (see diagram on Page 8). Press. For a nice V shape, sew a small dart to the binding at the centre front.
Collar Frill (16) – (B and C only):
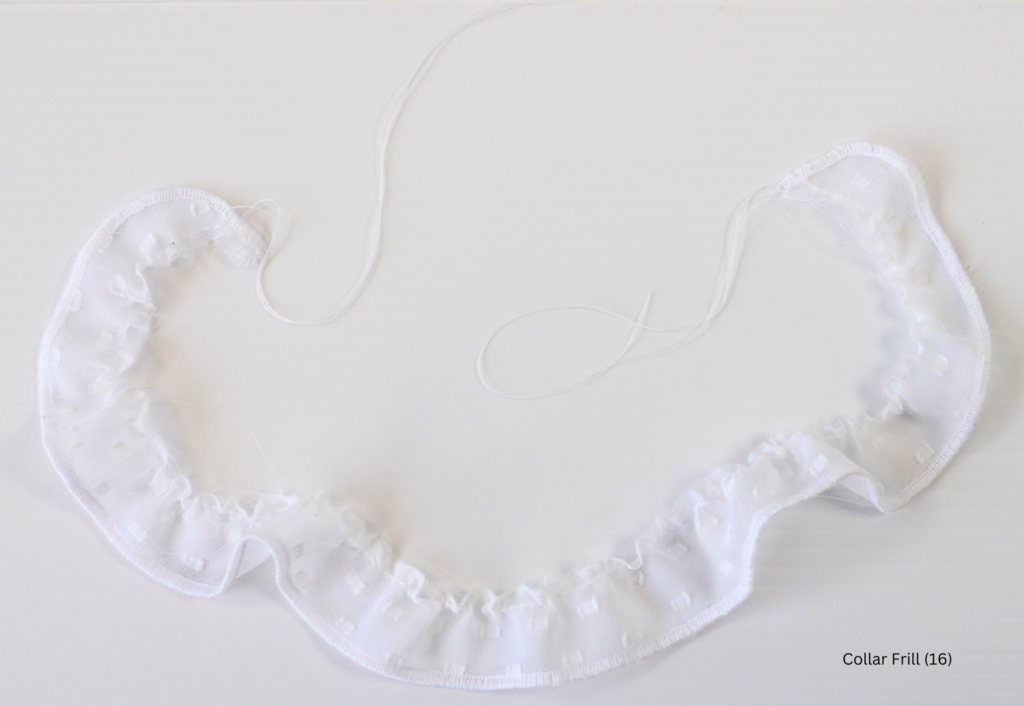
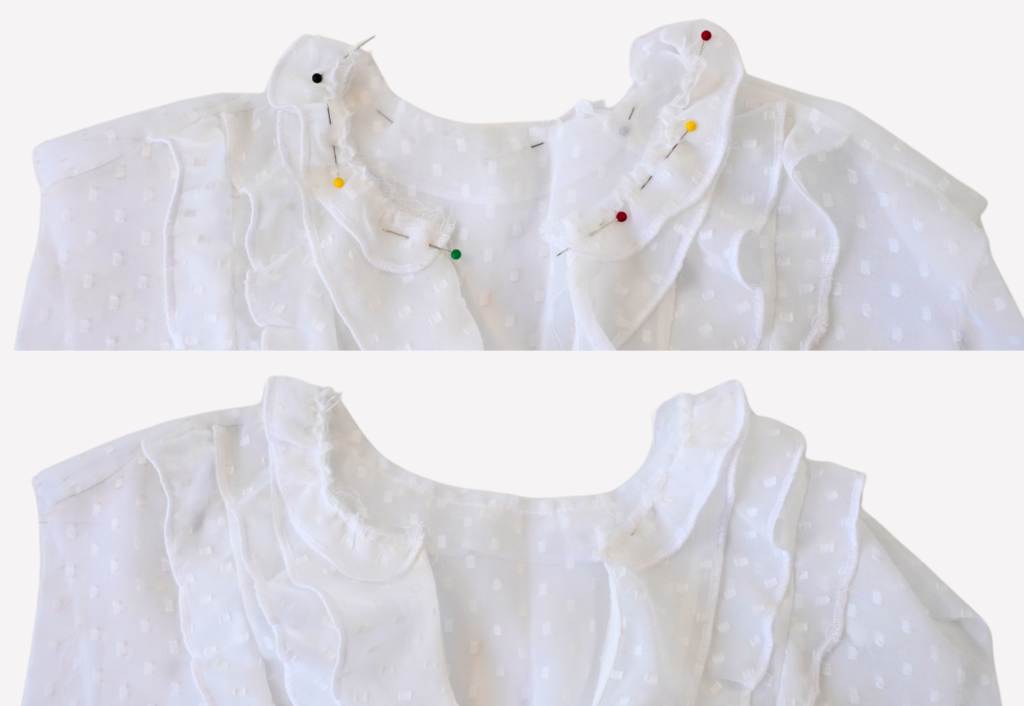
With RST and notches aligned, pin the pre-neatened Collar Frill to the neck opening and baste into place using a scant 6mm (1/4”) seam.
Round Neck Bind (12) option – (B and C only):
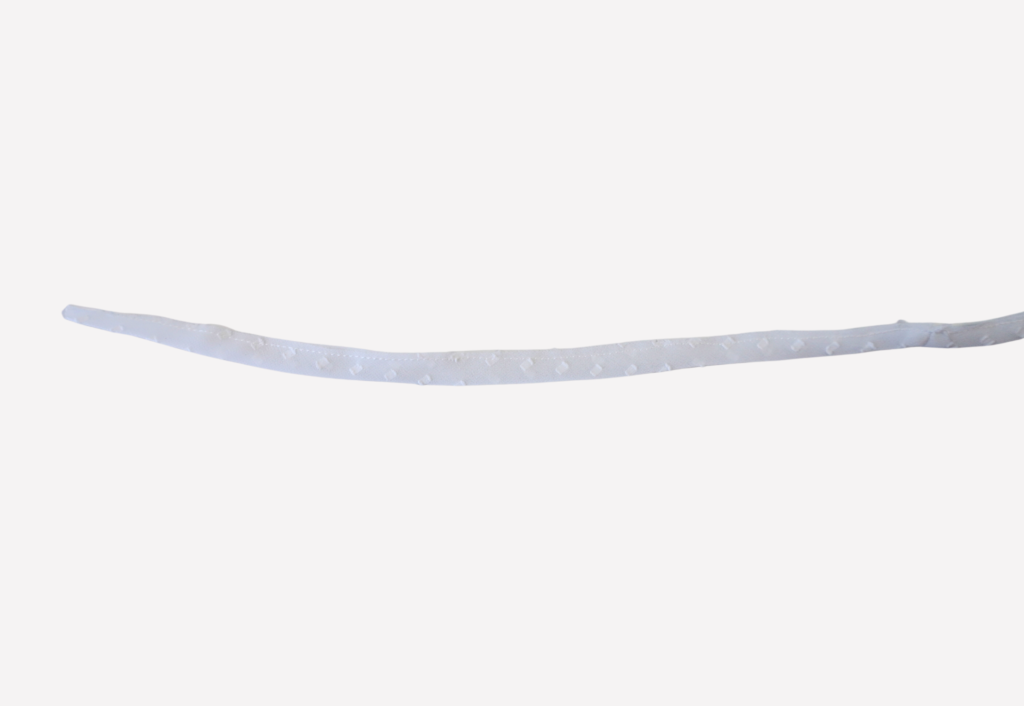
With WST, press the Round Neck Bind in half lengthways. Baste the raw edges together using a scant 6mm (1/4”) seam.
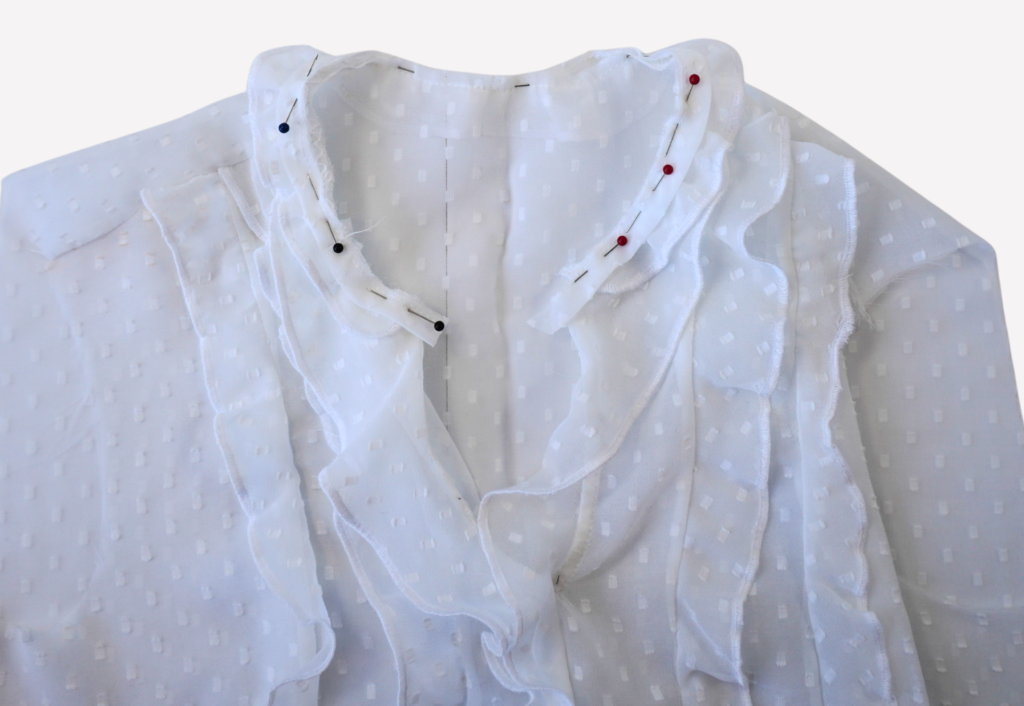
With RST and notches aligned, pin the binding to the neck opening, sandwiching the collar frill in between. Note there is an overlap at each end to be tucked in.
Sew the binding using a 6mm (1/4”) seam.
Press the seam toward the binding and sew an understitch on the side of the binding
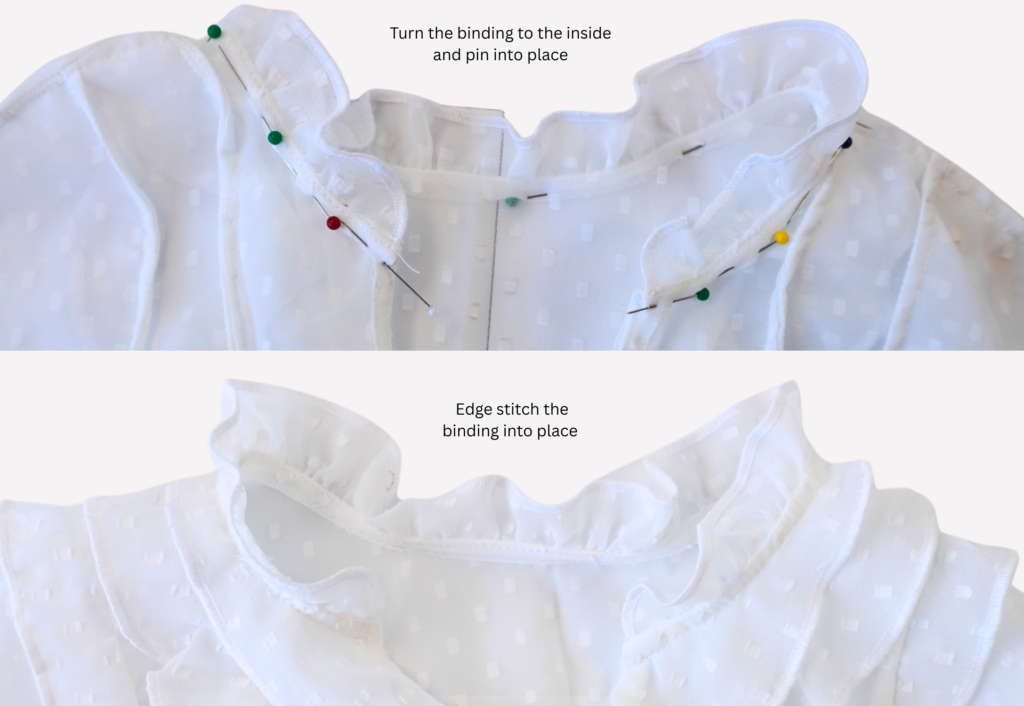
Turn the binding to the inside tucking the ends in neatly.
Edge stitch the binding into place, taking care to keep the frills lying flat against the garment body.
Neck Bind Incl Ties (11) option – (B and C only):
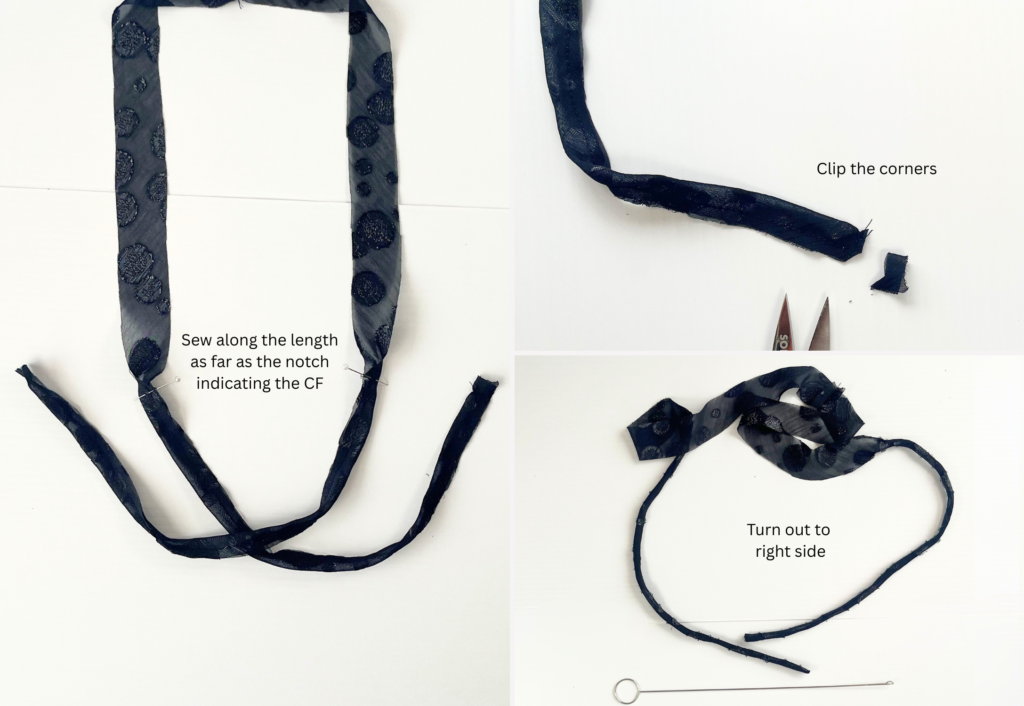
With RST, fold the Neck Bind Incl Ties in half lengthways and sew across the short ends and along the length as far as the notch indicating the CF, using a 6mm (1/4”) seam.
Trim excess fabric from the ends and turn the bind/tie to the right side.
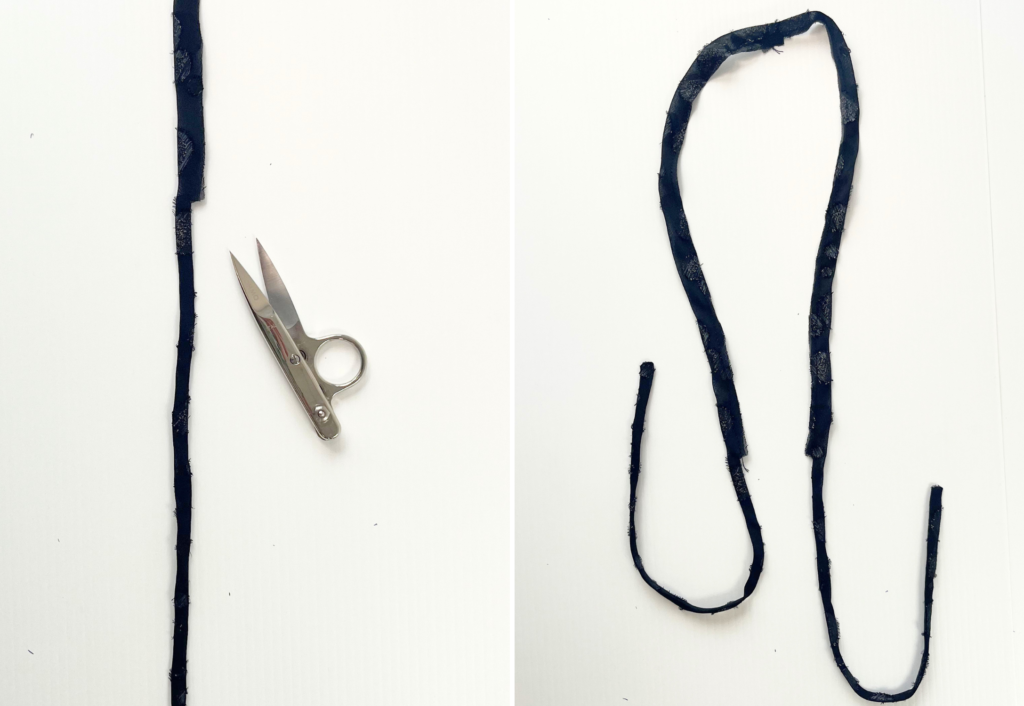
Carefully clip into the seam at the CF notch 6mm (1/4”) to release the fabric.
Press, then baste the raw edges of the binding together using a scant 6mm (1/4”) seam.
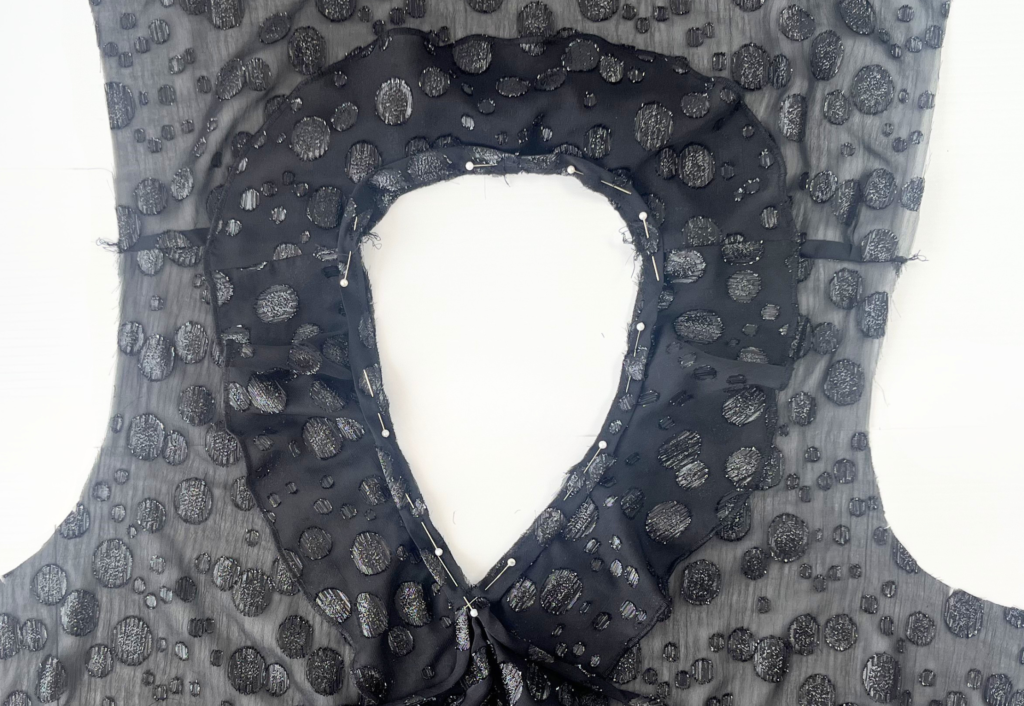
With RST, pin the raw edge of the bind to the neckline, sandwiching the collar frill in between. Sew the bind into place using a 6mm (1/4”) seam.
Press the seam toward the binding and sew an understitch on the side of the bind.
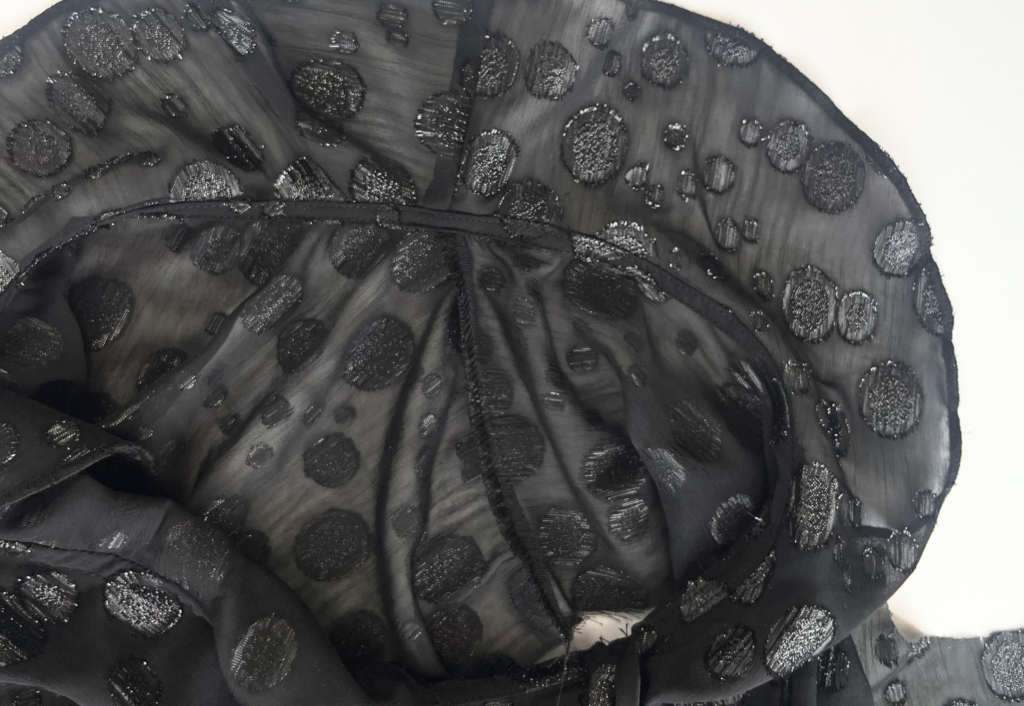
Turn the binding to the inside and edge stitch the binding into place, taking care to keep the frills lying flat against the garment body.
Side seams:
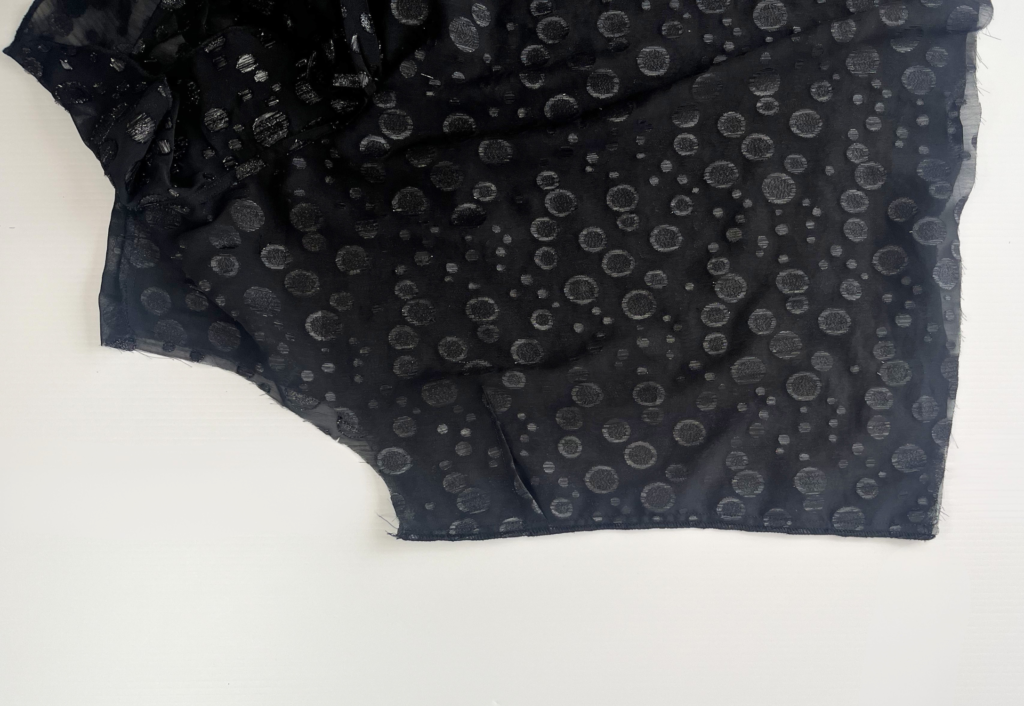
With RST, sew the front body to back body at the side seams. Neaten using an overlocker/serger and press the seams toward the back.
Long Sleeve (3) and Cuff (4) and optional Armhole Frill (19):
For the Armhole Frill – Neaten the outer edges of the Armhole Frill using your preferred method. With the wrong side of the frill to the right side of the sleeve and with notches aligned, pin the armhole frill to the head of the Long Sleeve. Baste into place using a 6mm (1/4”) seam. See our YouTube video for guidance on inserting the armhole frill.
Sew a long ease stitch to the head of the Long Sleeve and draw in slightly. This will make it easier to fit the sleeve into the armhole.
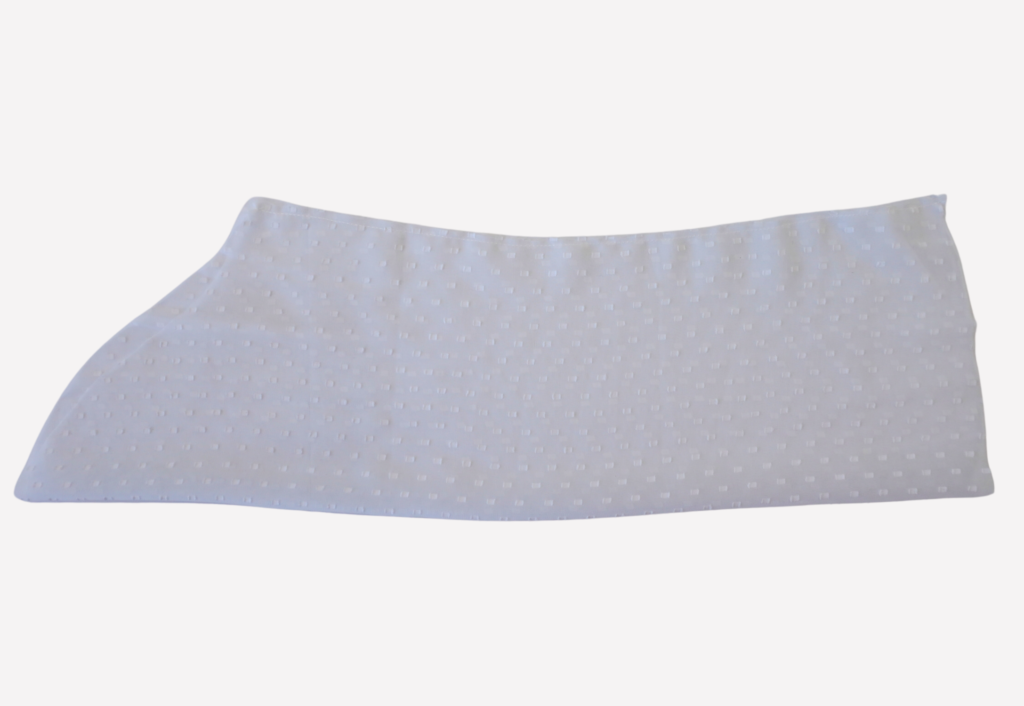
With RST, sew the under-sleeve seam. Neaten using an overlocker/serger and press the seam toward the back.
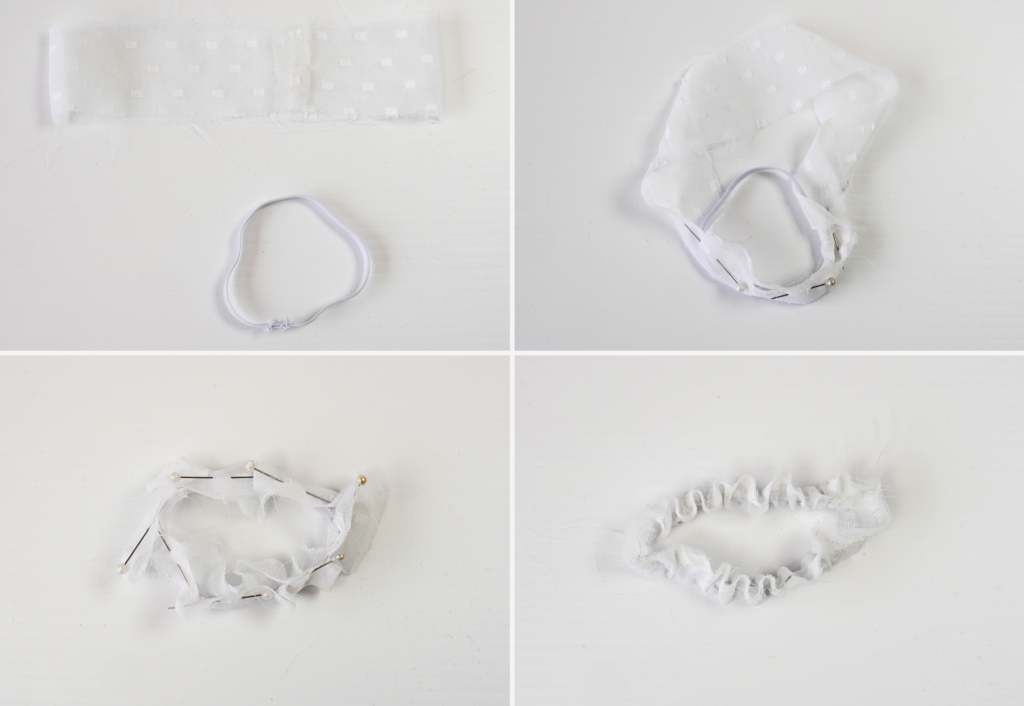
With RST, sew the short ends of the Cuff together, creating a loop. Press the seam open. Fold in half lengthways with WST and press.
Cut the elastic to your preferred personal length (or refer to the measurement chart for cut length). Overlap the cut ends by 2cm (¾”) and securely stitch together, creating a loop.
With the elastic on the inside, pin the raw edges of the cuff together and baste using a scant 6mm (1/4”) seam, pulling the elastic through as you sew.
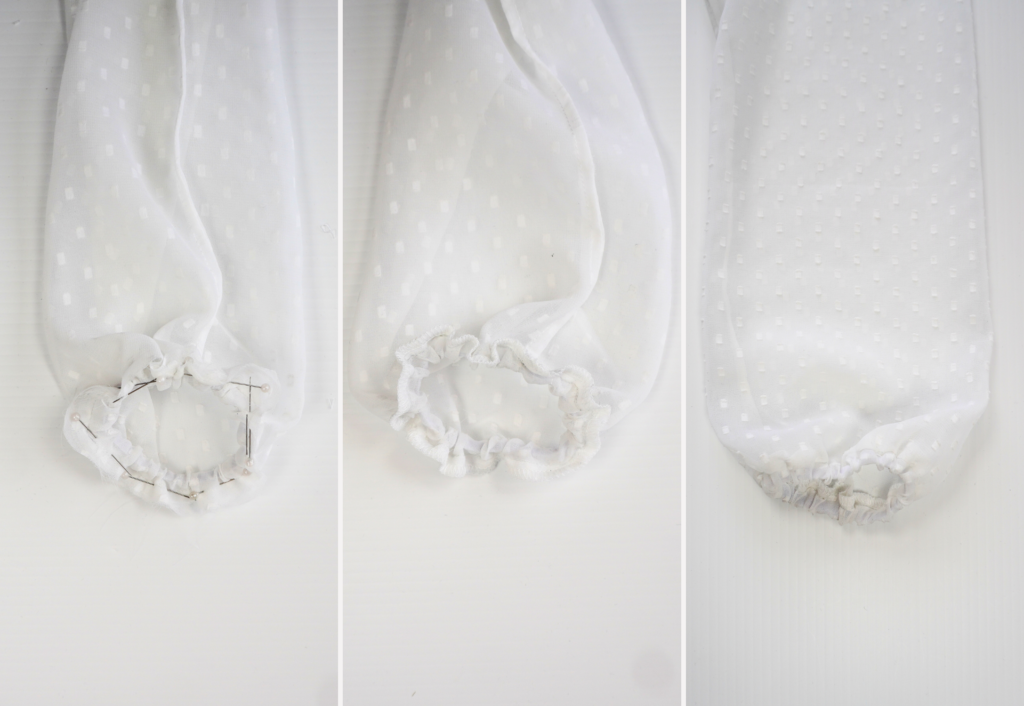
With RST, pin the cuff to the sleeve opening and sew using a 6mm (1/4”) seam. Neaten using an overlocker/serger and press the seam toward the sleeve.
With RST and notches aligned, pin the sleeve to the armhole. Sew then neaten using an overlocker/serger and press the seam toward the sleeve.
Short sleeve option Short Sleeve (20), Armhole Frill (19):
Please see our YouTube sew along (link at top of page) for help with Step 43 sewing the armhole frill.
Armhole Frill – neaten the outer edges of the Armhole Frill using your preferred method.
With the wrong side of the frill to the right side of the sleeve and with notches aligned, pin the armhole frill to the head of the Short Sleeve. Baste into place using a 6mm (1/4”) seam.
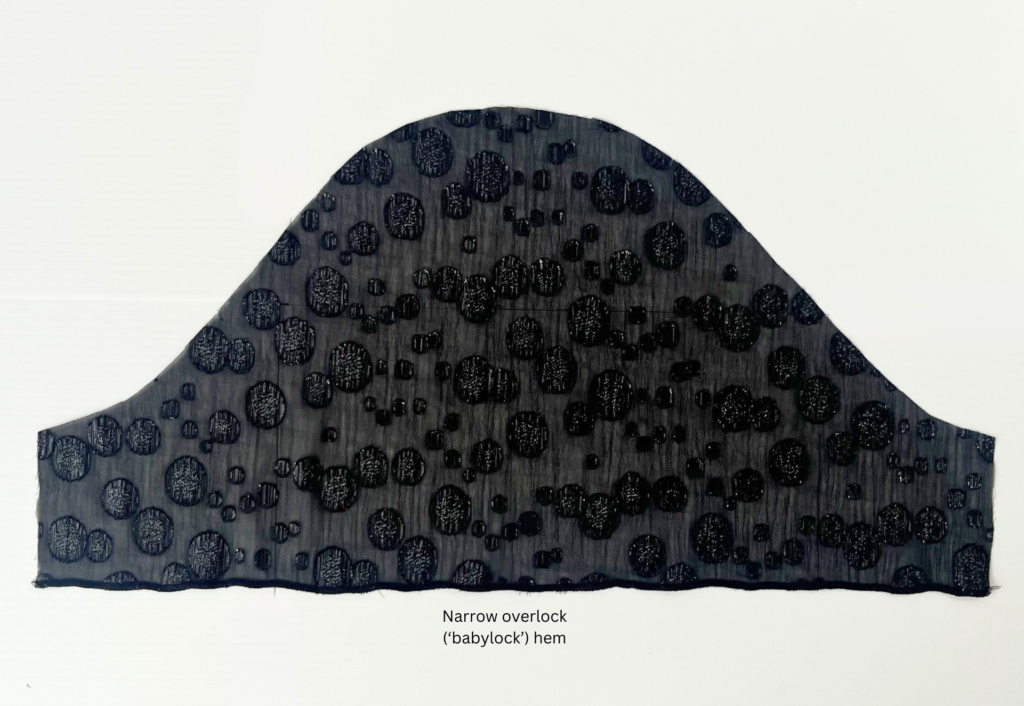
Neaten the hems of the short sleeves using your preferred method.
Sew two rows of shirring to the lower part of the sleeves in the position shown on the pattern.
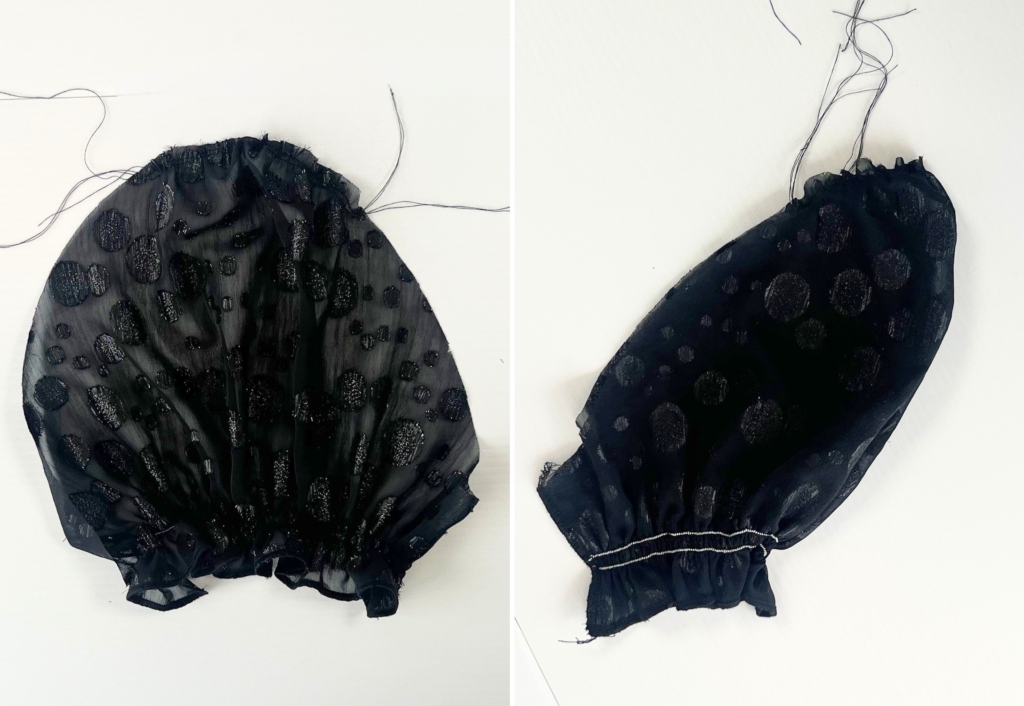
Using a long gathering stitch (4mm/⅛”), sew two rows of stitching along the seamline between the notches on the sleeve head.
Gather in to match the length between the notches marked on the armhole.
With RST, sew the under-sleeve seam. Neaten using an overlocker/serger and press the seam toward the back.
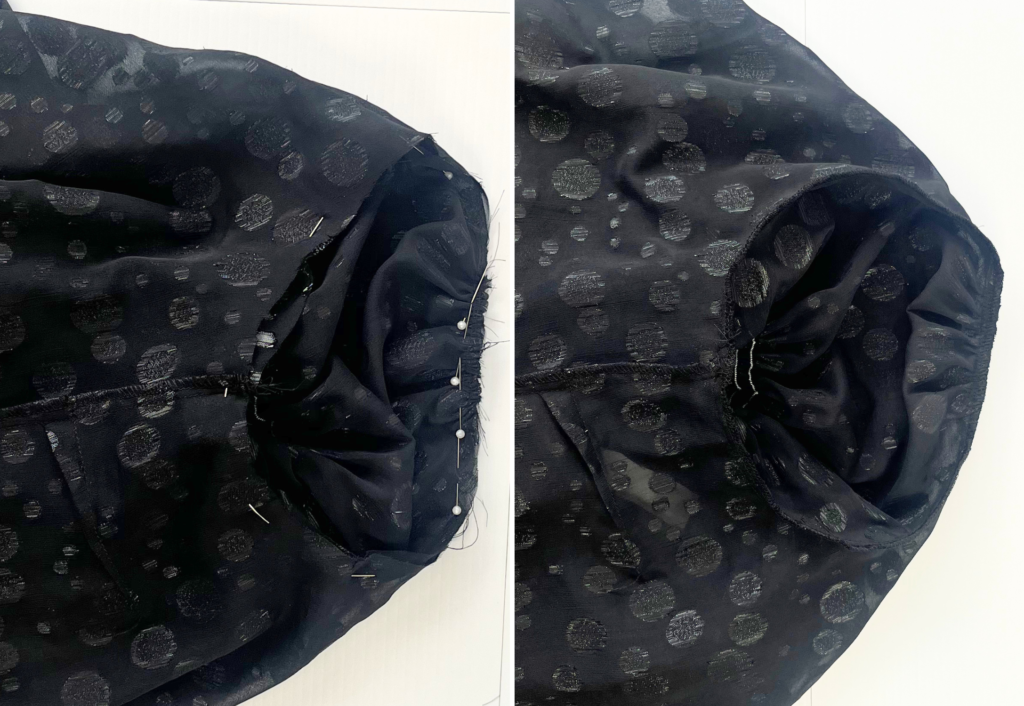
With RST and notches aligned, pin the sleeve to the armhole. Sew then neaten using an overlocker/serger and press the seam toward the body.
Hem and Completion:
Neaten the hem using an overlocker/serger, turn to the inside at the notch and edge stitch into place.
For Blouse A – mark the optional button placement to the centre front using the template provided and attach the buttons.
Trim any loose threads and carefully press your new top!