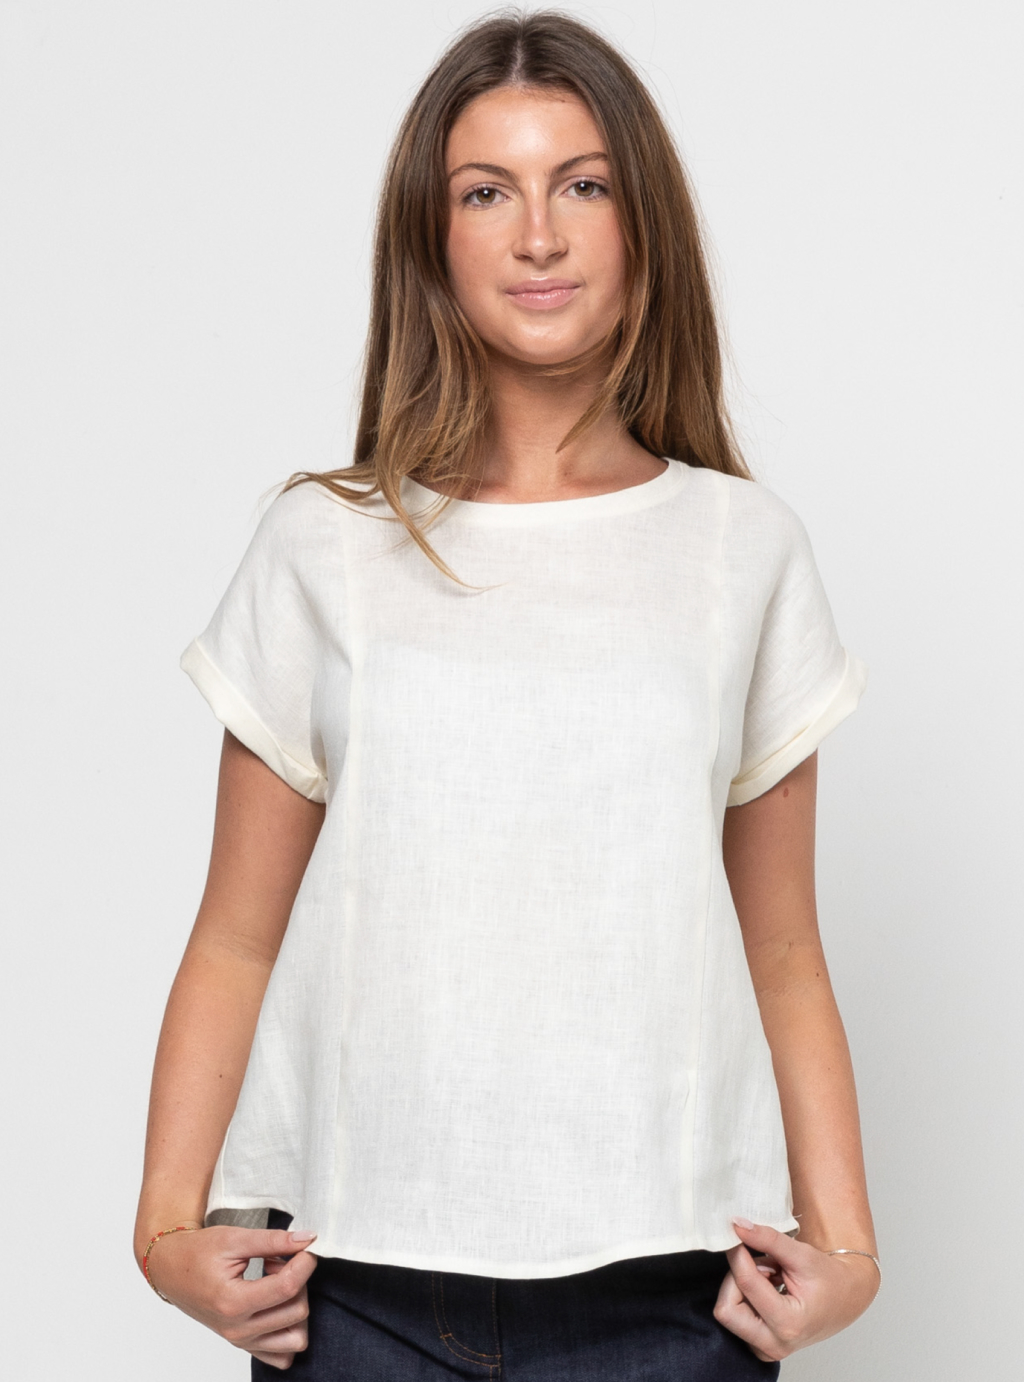
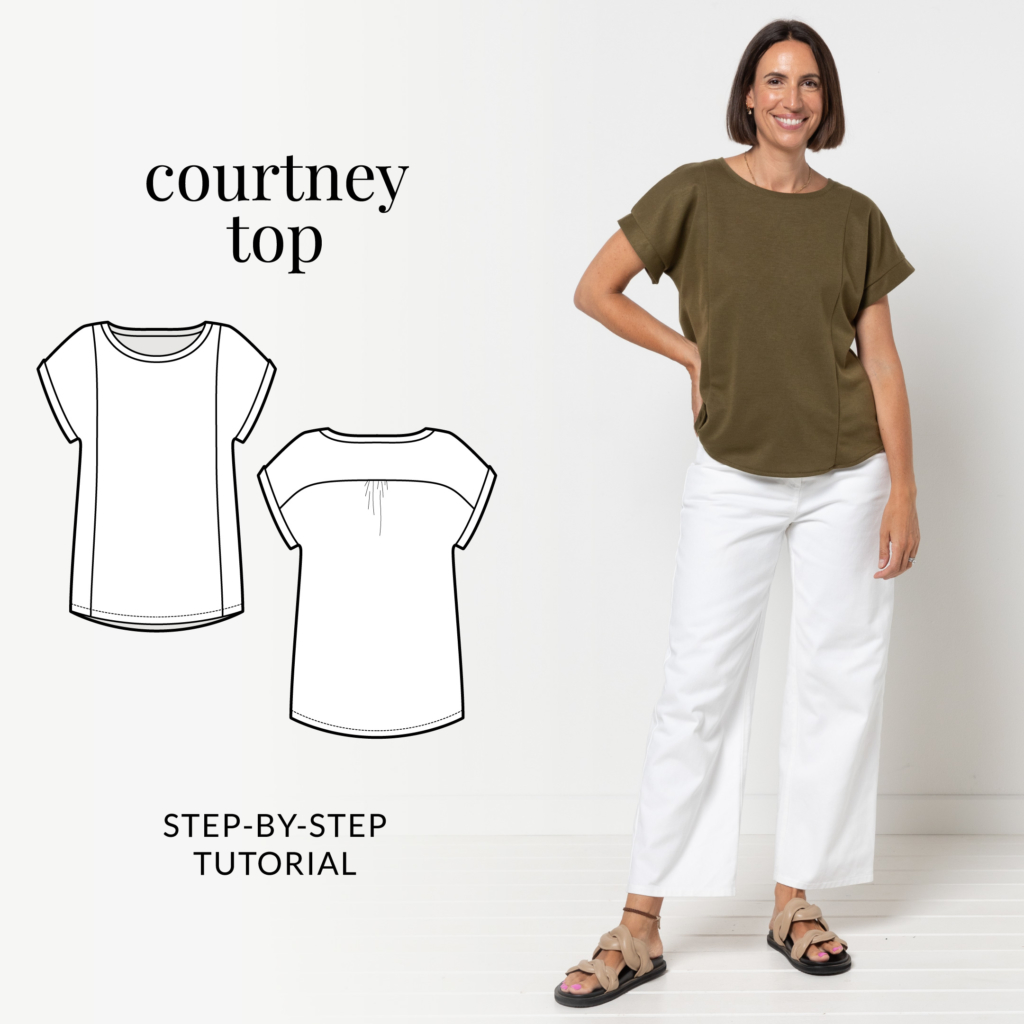
Shop the Courtney Top
#SACourtneyTop
CONSTRUCTION
MAIN BODY:

With RST and notches aligned, sew the Side Front Panels (2) to the Centre Front Panel (1). Neaten using an overlocker/serger and press toward the front.
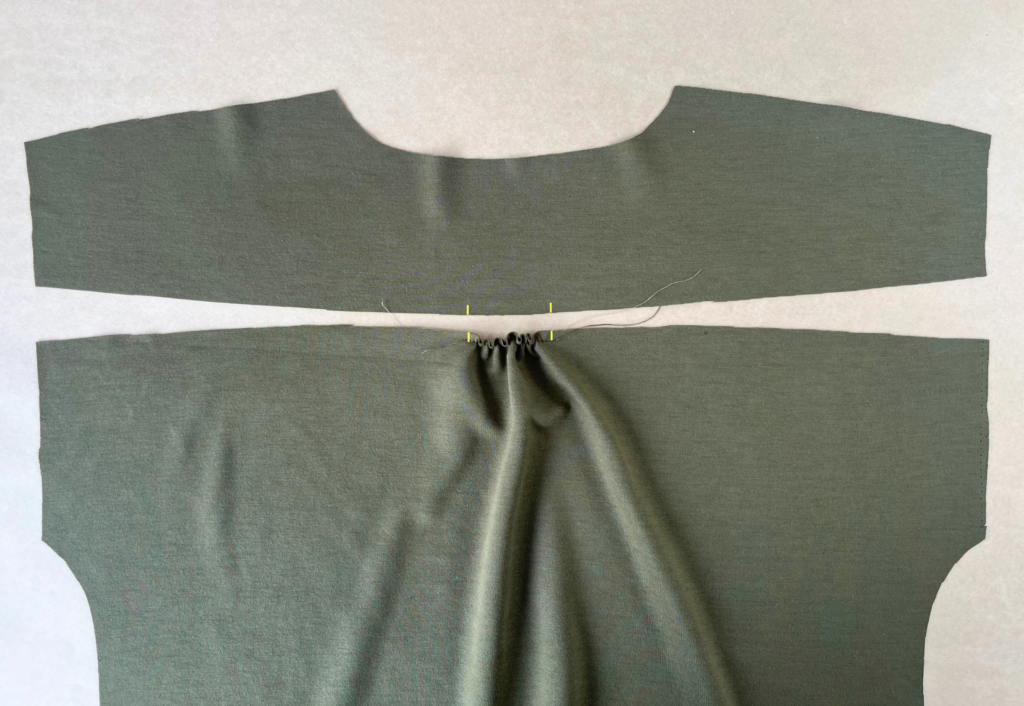
Using a long gathering stitch (4mm/ ⅛”), sew two rows of stitching along the Back (3) seamline between the notches, then gather in to align with the notches marked on the yoke.
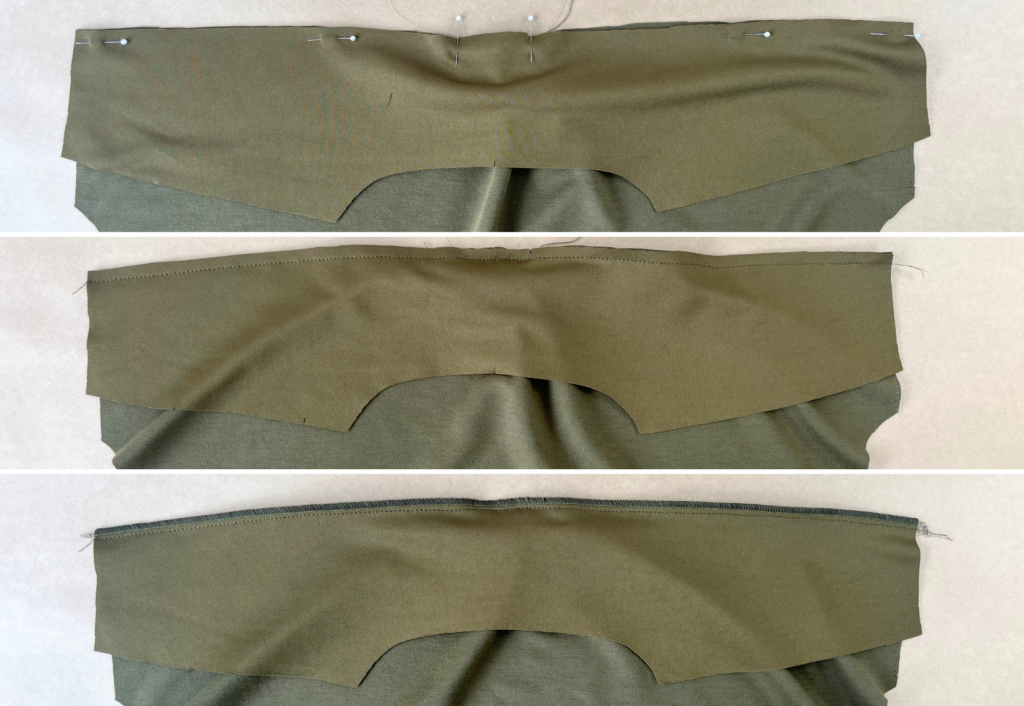
With RST and notches aligned, pin the back to the Back Yoke (4) and sew. Neaten using an overlocker/serger and press upward.
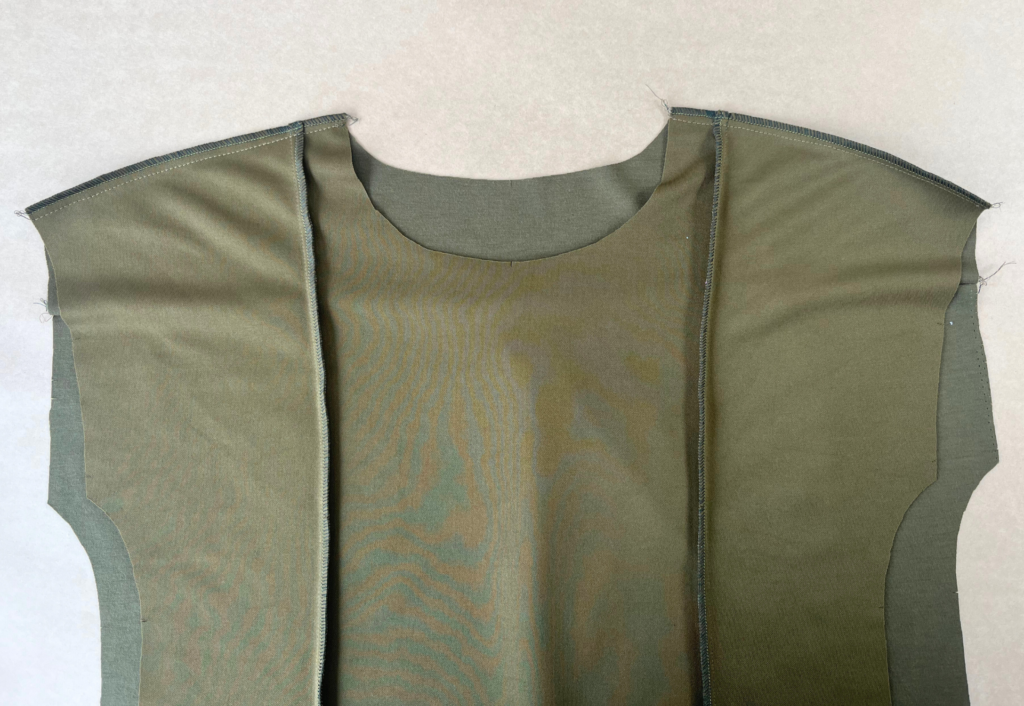
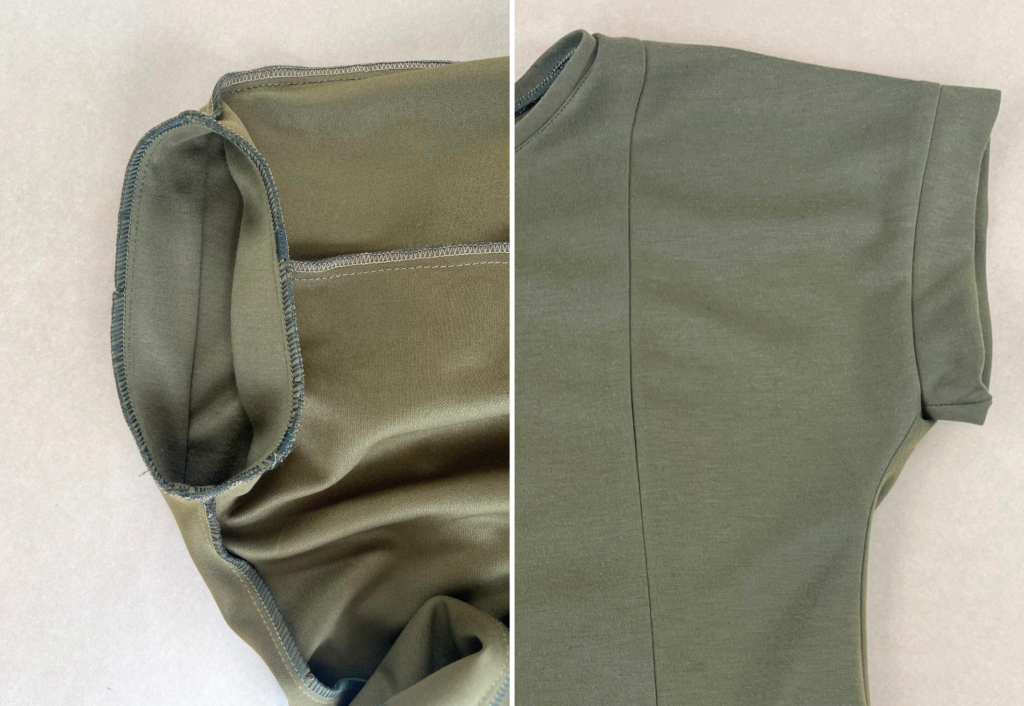
With RST, sew the back to front at the shoulder seams. Neaten using an overlocker/serger and press toward the back.
NECKBAND:
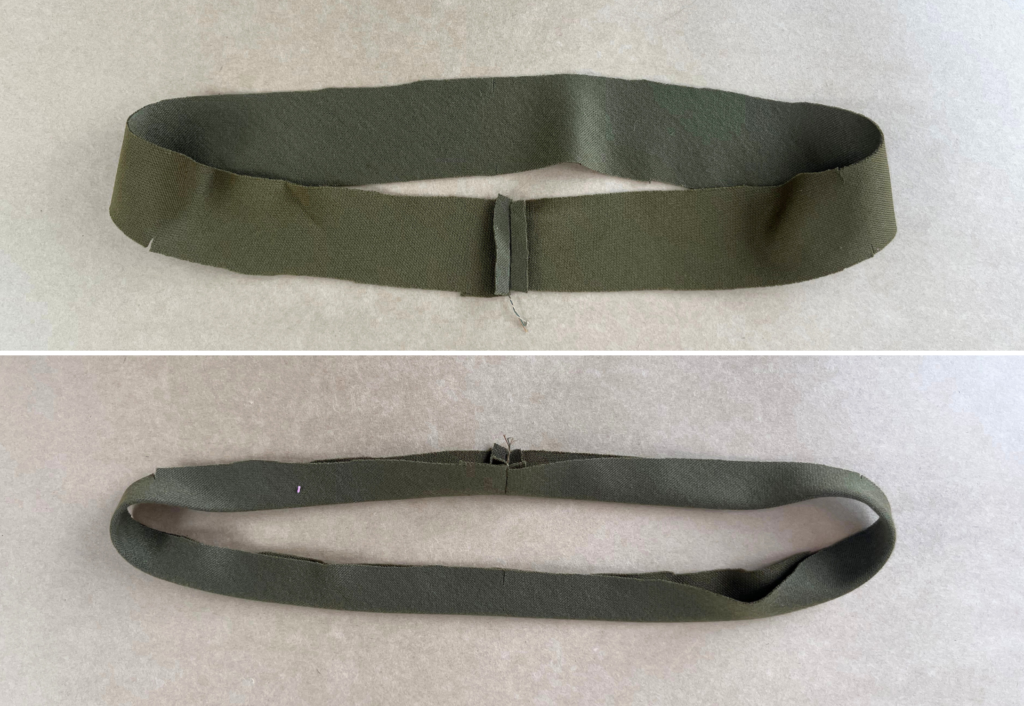
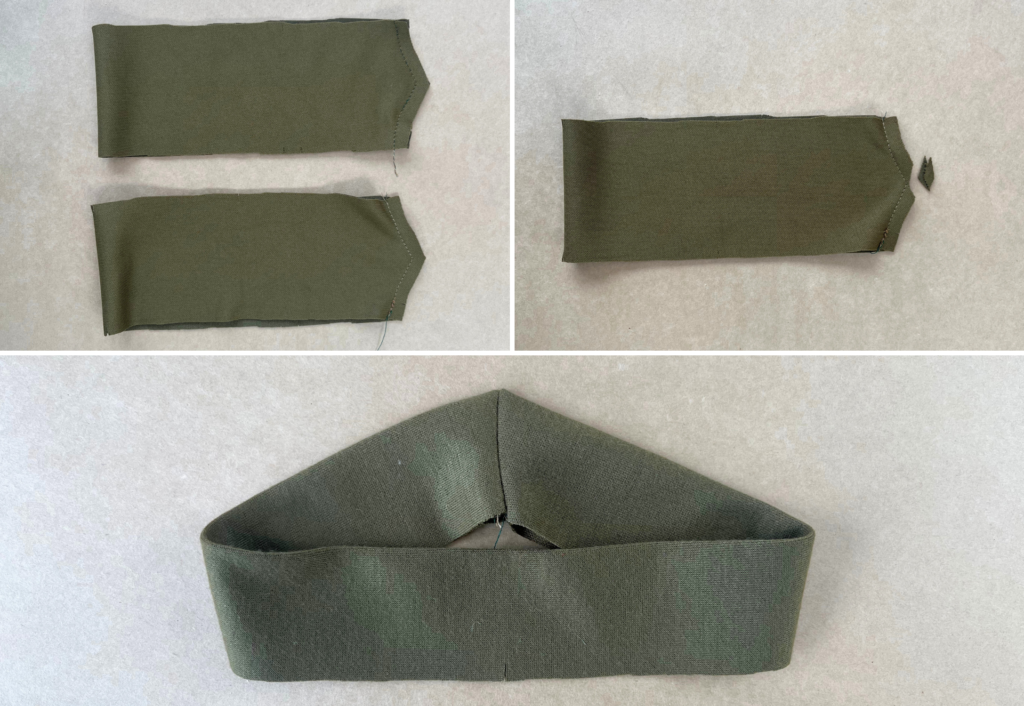
With RST sew the short ends of the Neck Band (6) together creating a loop. Press the seam open then fold the neck band in half lengthways with WST and press.
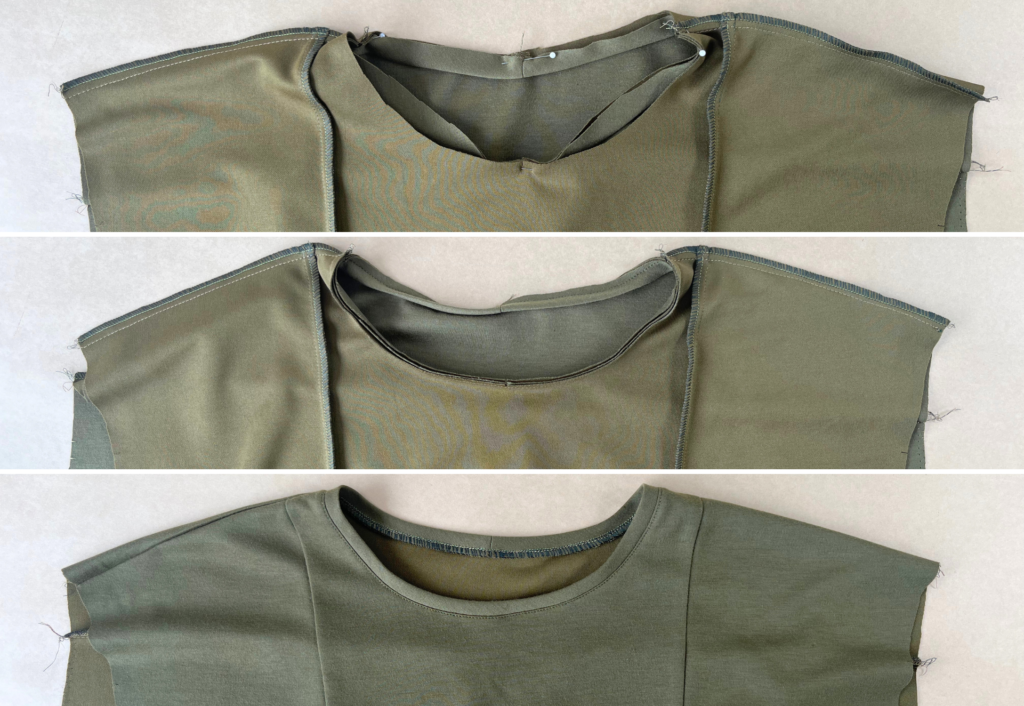
With RST and notches aligned, pin the neckband to the neck opening. Sew with a 6mm (¼”) seam then neaten using an overlocker/serger. You may choose to sew this seam using only an overlocker/serger. Press toward the body.
Sew a topstitch to the seam , you may choose to use a twin needle.
MAIN BODY CONTINUED:
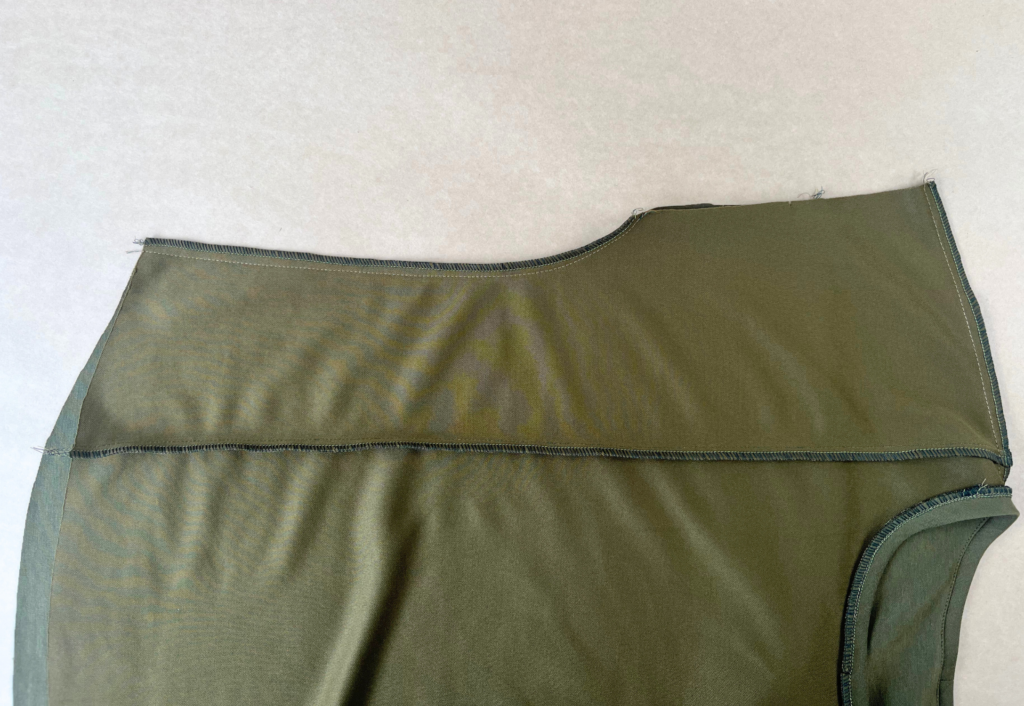
With RST, pin the front to back at the side seams. Neaten using an overlocker/serger and press toward the back.
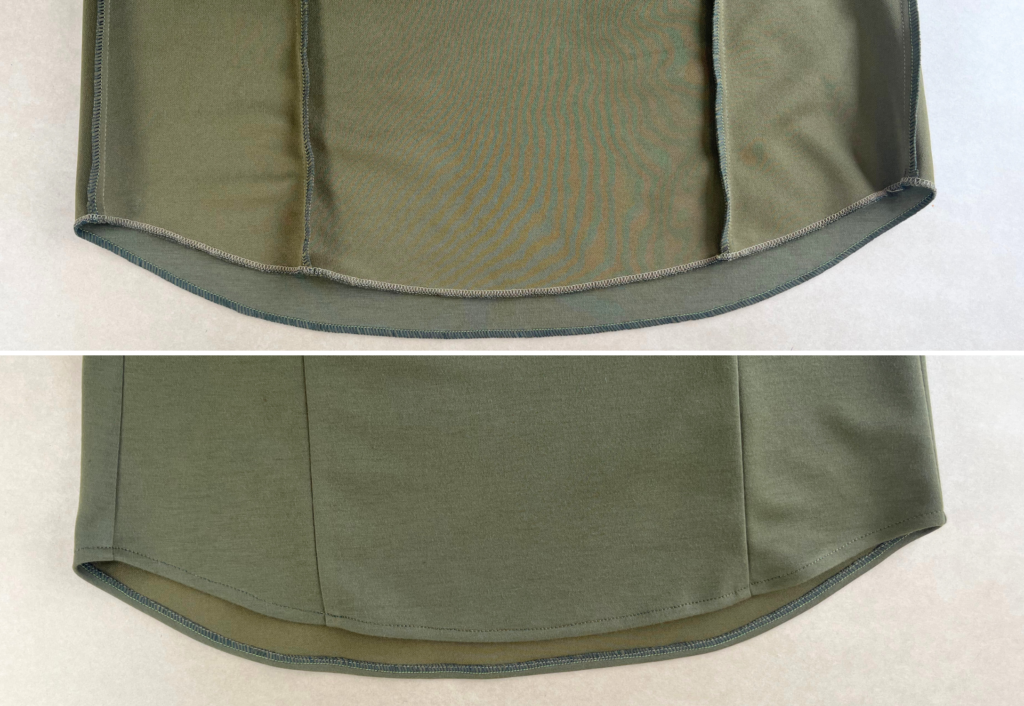
Neaten the hem using an overlocker/serger, press to the inside 1cm (3/8”) pin and sew using an edge stitch. You may choose to use a twin needle to finish your hem.
SLEEVE CUFF:
With RST, sew the short ends of the Sleeve Cuff (5) together, creating a loop. Clip the corner, fold in half lengthways with WST and press. Baste the raw edges together.
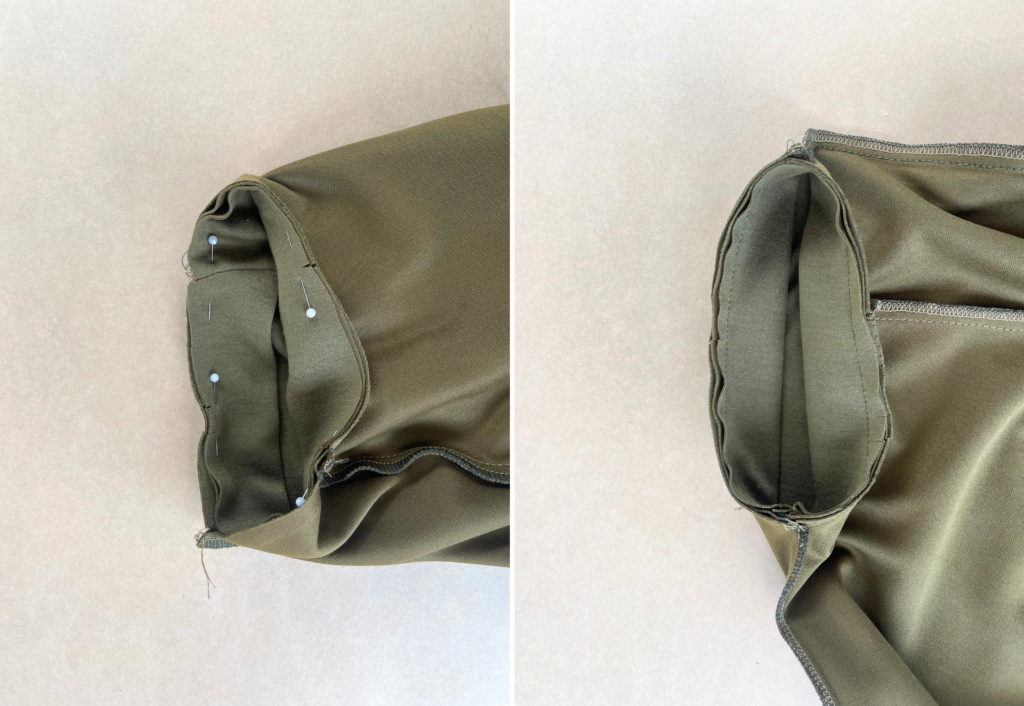
With RST and notched aligned, pin the cuff to the arm opening. Sew then neaten using an overlocker/serger and press toward the body.
Trim any loose threads and carefully press your new top!