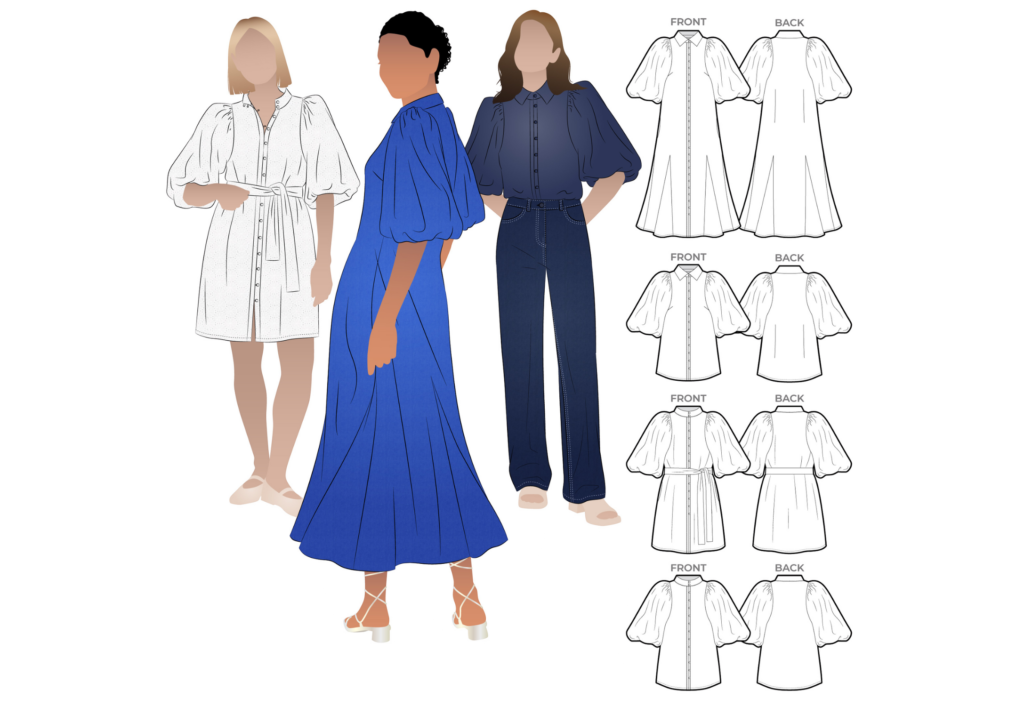
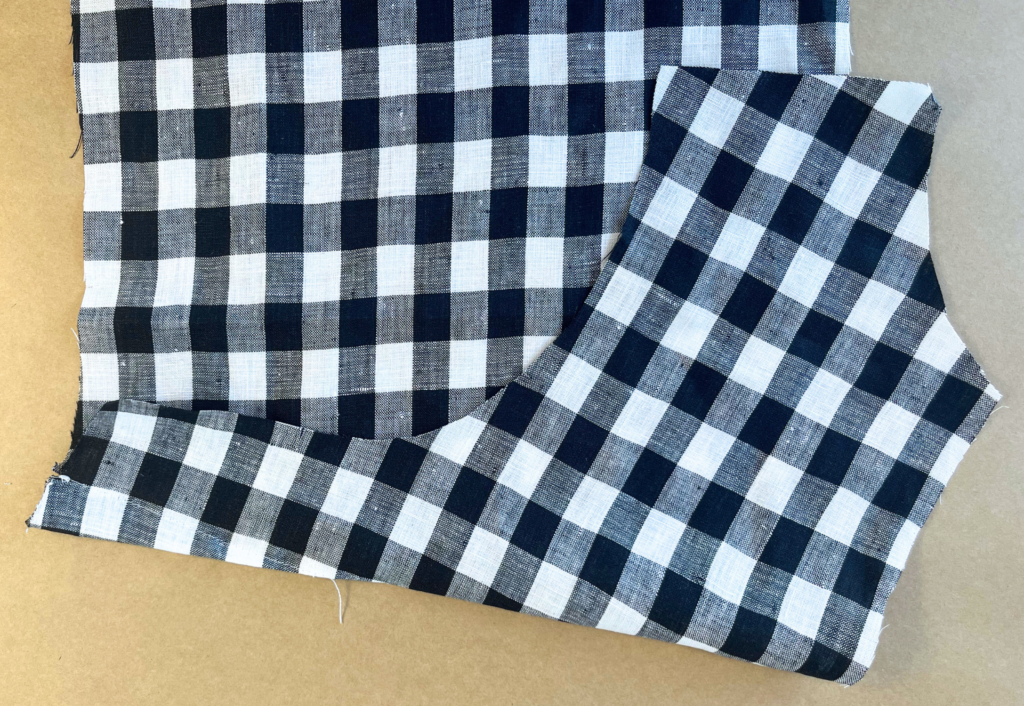
Shop the Dallas Woven Shirt and Dress
STEP-BY-STEP TUTORIAL
#SADallasWovenShirtAndDress
VIDEO TUTORIAL
Watch the step by step sew along video here for the high collar, darted front and back shirt version:

PHOTO TUTORIAL
Please note: all seams are 1cm (3/8″) unless otherwise stated. Seam allowances are also shown as a dashed line on each pattern piece.
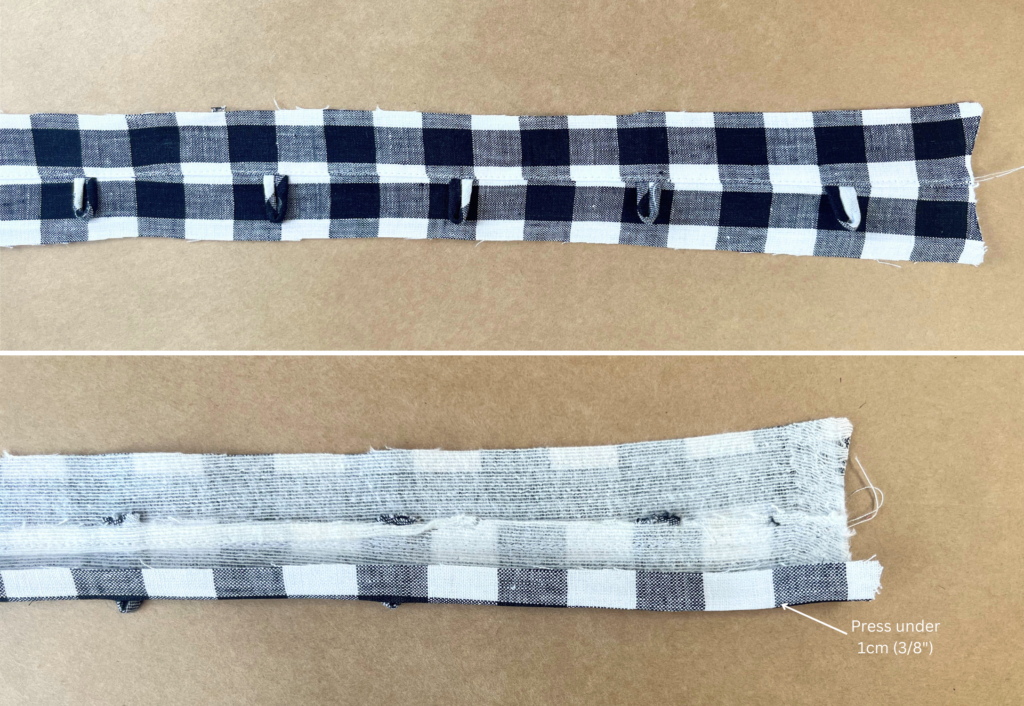
BUTTON LOOPS:
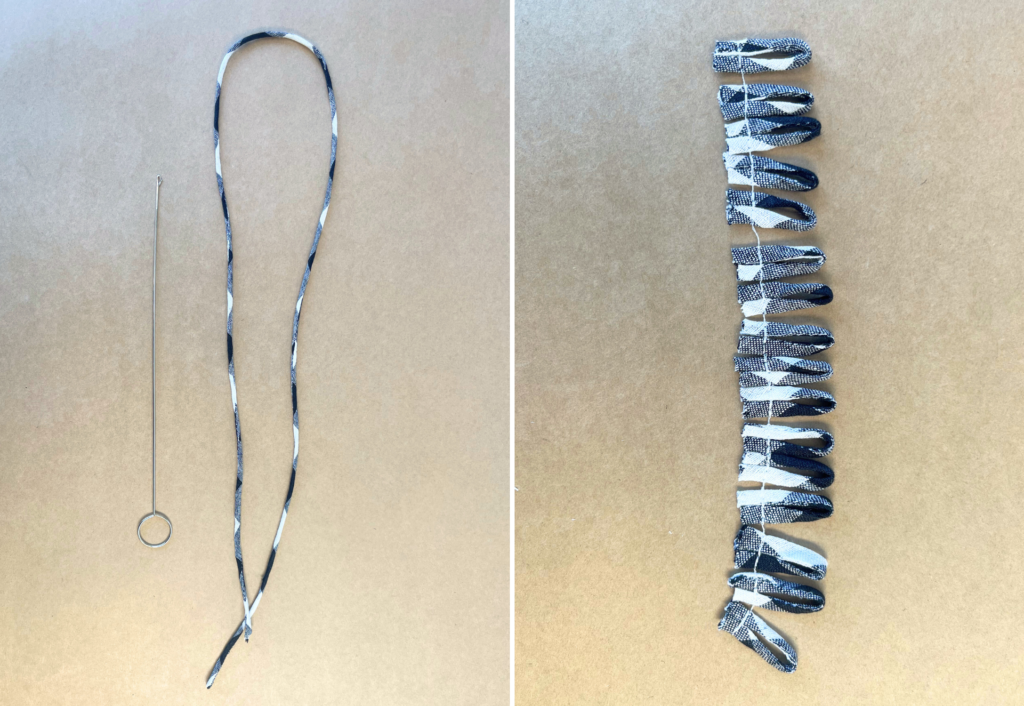
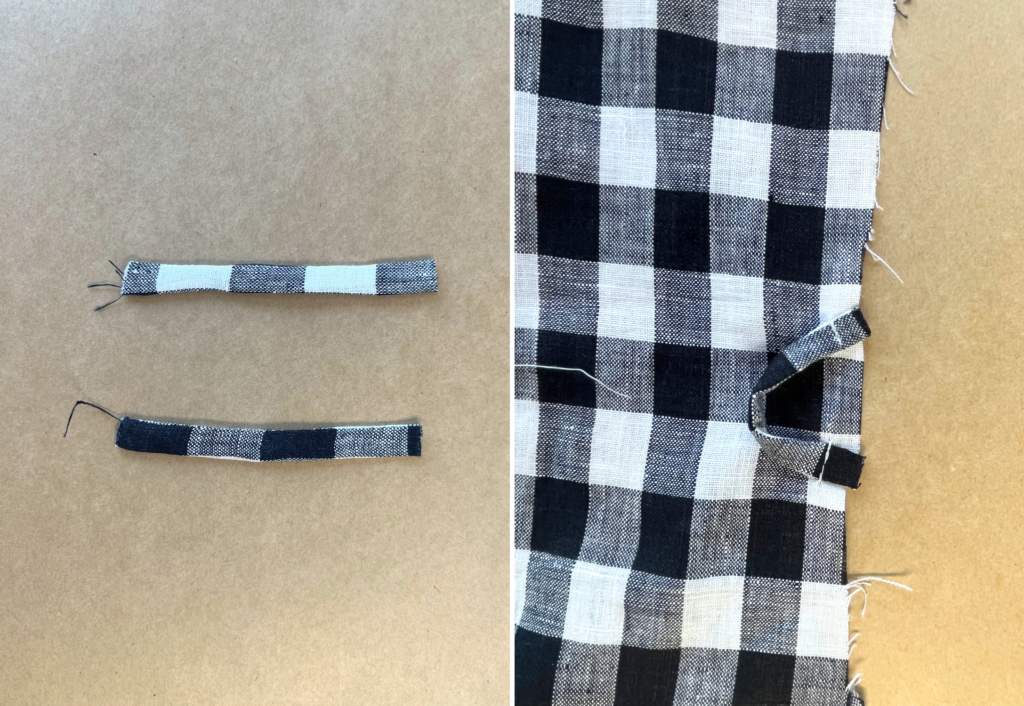
With RST, fold the Button Loops (8) in half lengthways and pin. Sew using a 6mm (1/4”) seam. Trim the seam allowance to around 3mm (1/8”). Turn out to the right side using a loop turner and lightly press. Cut the button loops into 5cm (2”) pieces. You may choose to use elastic instead, cut to the same length as the button loops. Make each piece into a loop shape and secure the ends together using a small bar tack. Set aside.
HIGH COLLAR OPTION:
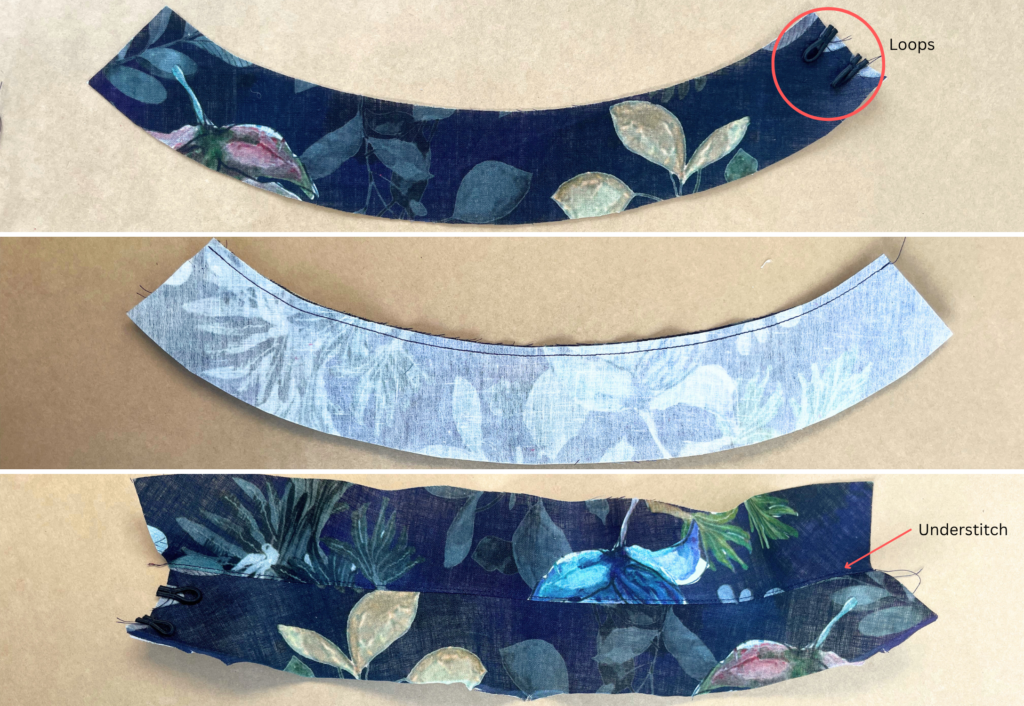
Pin two button loops to the wearer’s right, outer High Collar (3) as shown on the pattern and sew into place. The loops will face inward; when the collar is turned out the loops will be facing outward. Press the lower edge of the outer collar 6mm (1/4”) to the inside.
With RST, sew the pair of collars together along the top edge using a 6mm (1/4”) seam.
Press the seam toward the inner collar and sew an understitch on the side of the inner collar.
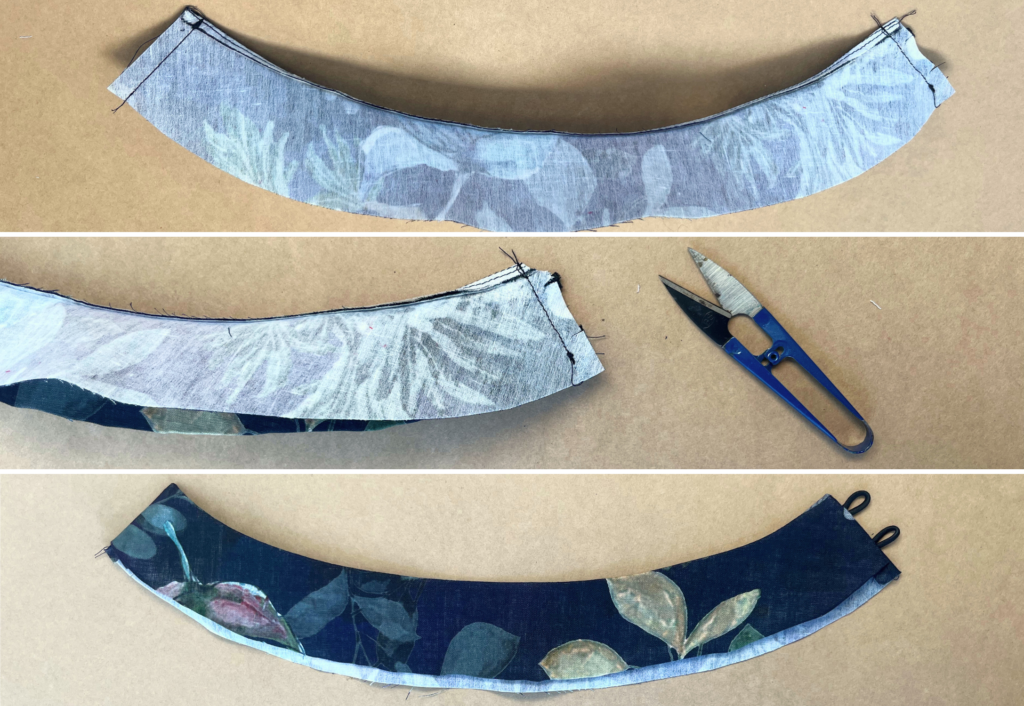
With RST, sew the short ends of the collar using a 1cm (3/8”) seam, sandwiching the loops in between.
Clip the corners and turn out to the right side. Press and put aside.
TWO PIECE COLLAR OPTION:
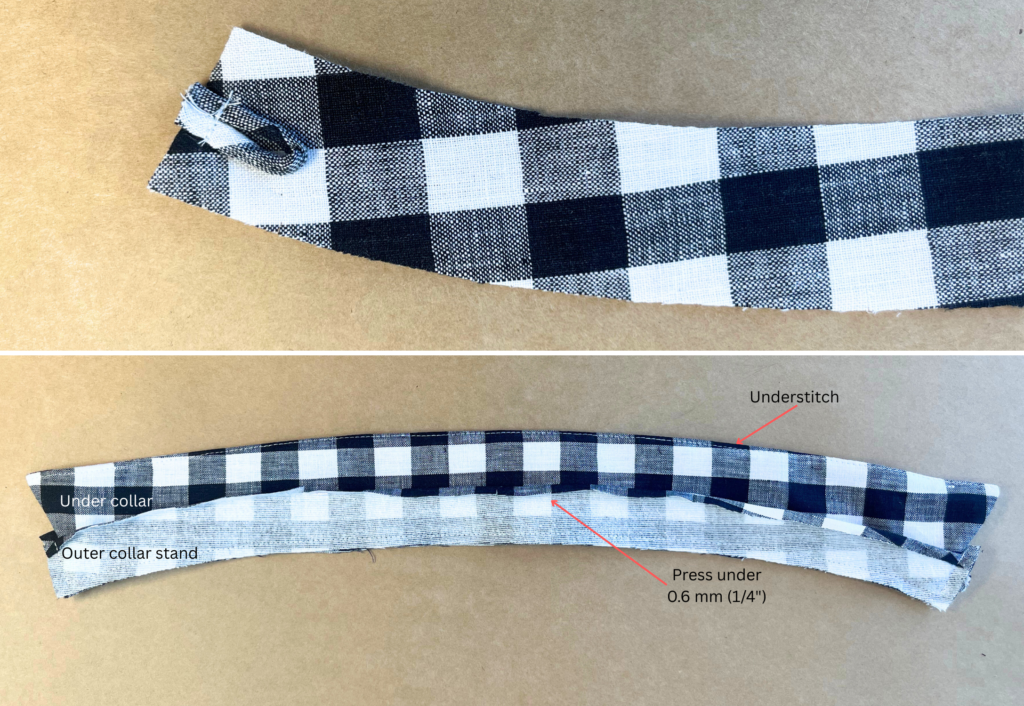
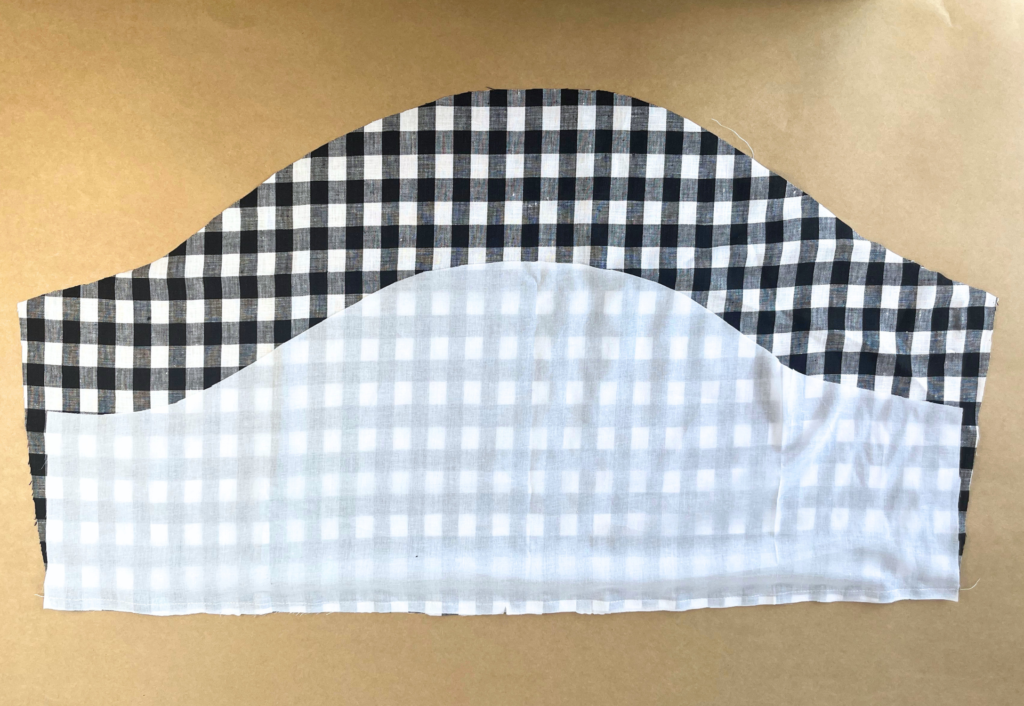
Pin one button loop to the wearer’s right, outer Collar Stand (10) as shown on the pattern and sew into place. The loop will face inward; when the collar is turned out the loop will face outward.
With RST, sew the pair of Collars (11) together along the top edge using a 6mm (1/4″) seam. Press the seam toward the under collar and understitch on the side of the under collar. Fold the collar with RST and sew the short ends together. Clip the corners, turn to the right side and press.
Press the lower edge of the outer collar stand 6mm (1/4”) to the inside.
Place the collar between the right sides of the collar stands, pin and sew together, sandwiching the collar between the two collar stands. Clip the curved corners and turn to the right side. Press and put aside.
OPTIONAL POCKETS (DRESS ONLY):
See our website tutorial and YouTube video for sewing inseam pockets.
With RST and notches aligned, sew one set of Pockets (15) to the Front Dress (2 or 9) at the side seam (seamline marked ‘A’ on the pattern). Stitch only between the notches. Clip the seam at the notches and sew an understitch on the side of the pocket bag. This is pocket bag 1.
With RST, lay pocket bag 2 on top of pocket bag 1, align and sew both pocket bags together (seamline marked ‘B’ on the pattern). Note that the straight edge of pocket bag 2 is left free to sew to the back dress side seam. Neaten around the pockets using an overlocker/serger. Secure stitch each end of the pocket opening. Set aside.
OPTIONAL TIE AND BELT LOOPS (DRESS ONLY):
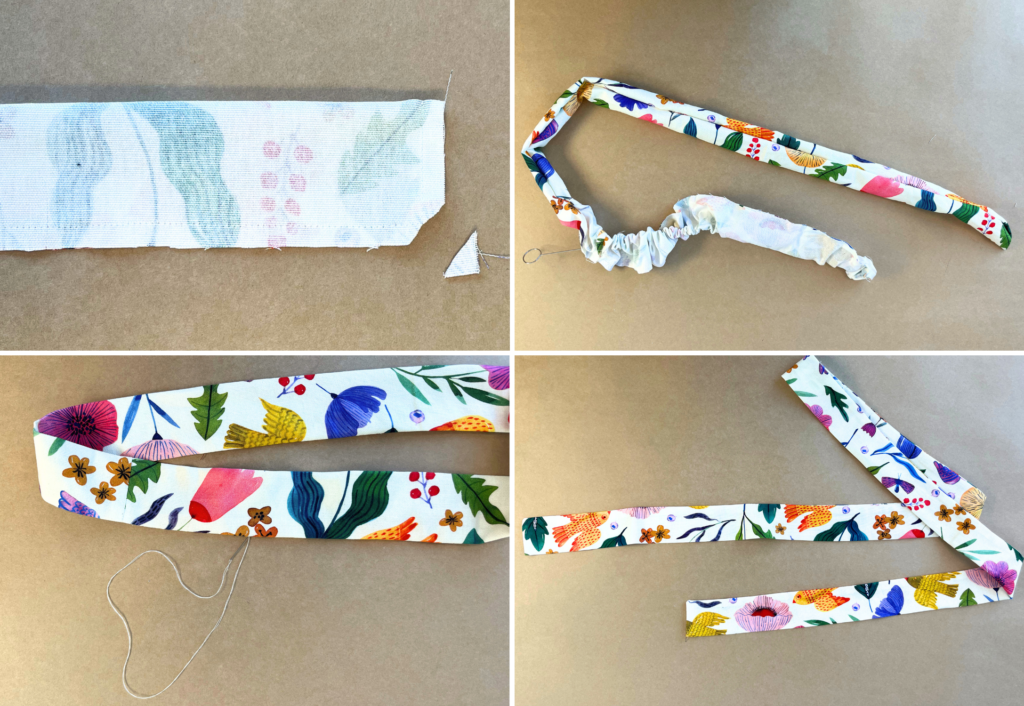
With RST, fold the Tie (14) in half lengthways. Sew the short ends and along the length, leaving a gap for turning out as shown on the pattern.
Clip the corners, turn to the right side and press, carefully pressing the seam allowance of the gap to the inside. Sew the gap closed by hand or machine. Press and set aside.
With RST, fold the two Loops (16) in half lengthways using a 6mm (1/4”) seam. Turn to the right side and press. Set aside.
SLEEVES:
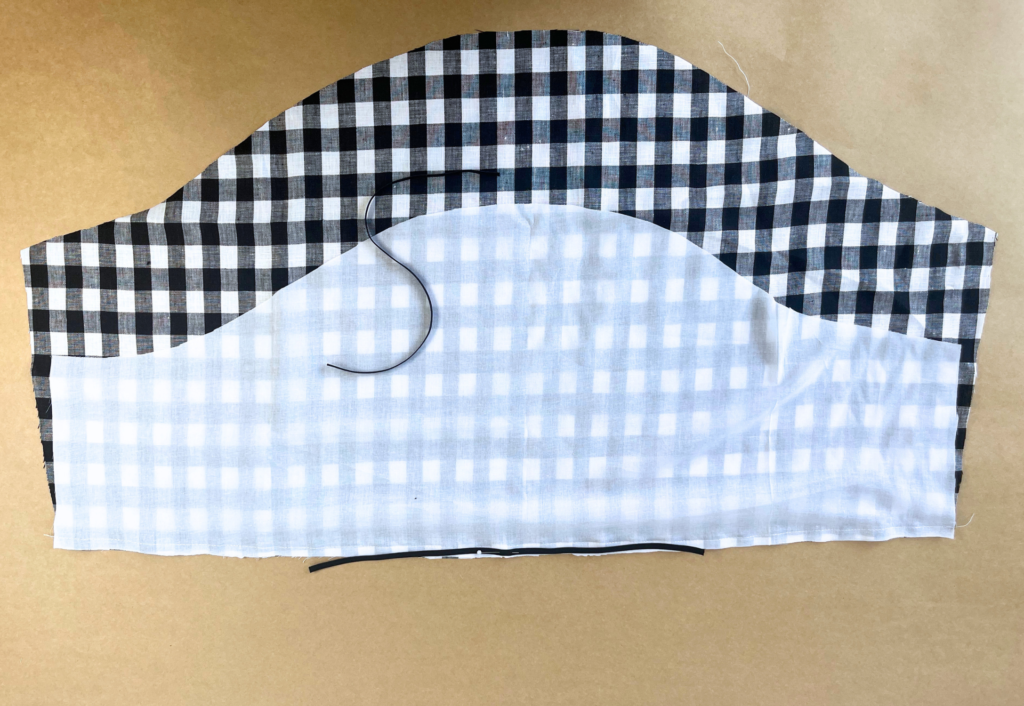
With RST, sew the Sleeve (6) to the Sleeve Lining (7) at the hem, ensuring you have the two right sleeves and two left sleeves together.
Sew a long gathering stitch to this seam allowance and gather in slightly. This will make it easier to fit to the elastic.
Mark the halfway point of the elastic and align with the notch in the sleeve hem. Pin the cut elastic to the seam allowance and sew into place using a zig zag stitch, stretching the elastic as you sew.

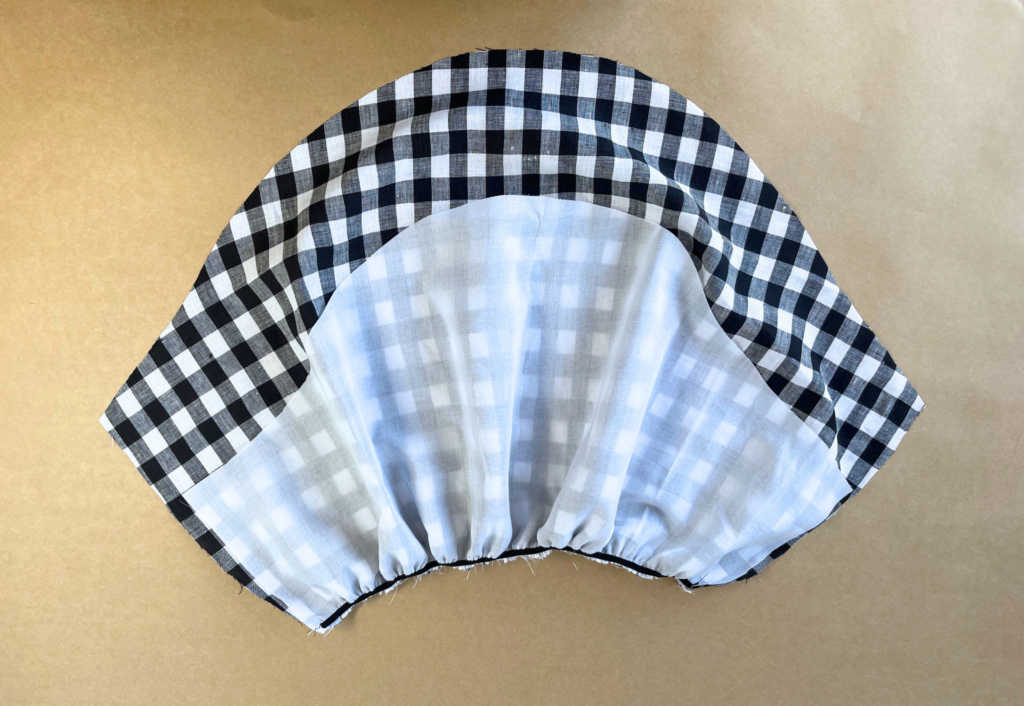
Fold the sleeve and sleeve lining in half lengthways with RST and sew the under sleeve of the main fabric and lining. Press toward the back.
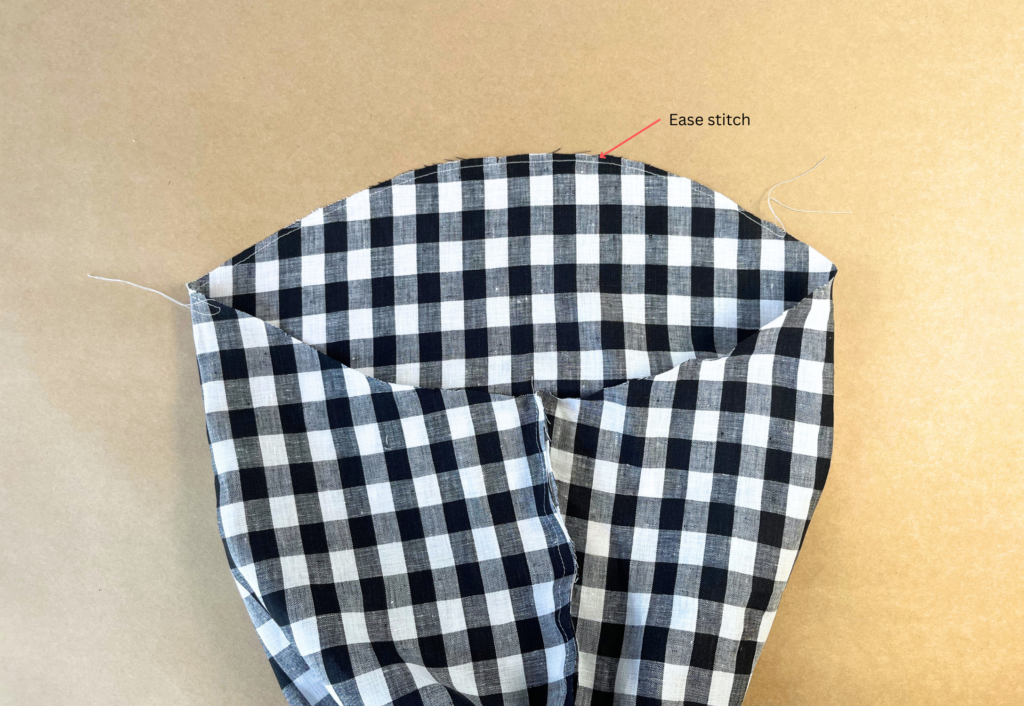
Sew a long ease stitch to the head of the main sleeve, draw in to match the lining and with WST and notches aligned, sew the main sleeve to the lining.
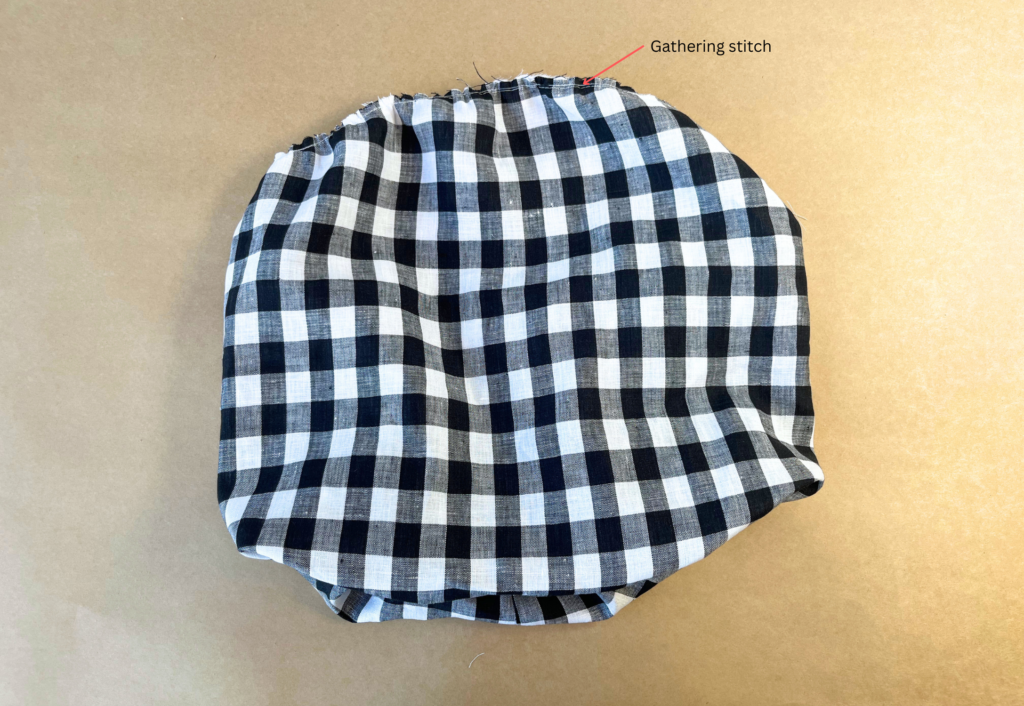
Sew a long gathering stitch to the head of the sleeve (main and lining are together) between the notches. Set aside.
OPTIONAL CENTRE FRONT EXTENSION (LHS ONLY):
With RST, fold the CF Extension (12) in half lengthways and sew the short ends together using a 1cm (3/8”) seam. Clip the corners, turn to the right side and press. Set aside.
PLACKETS:
Pin the remaining button loops to one of the RHS Placket (4) as shown on the pattern and baste into place. The loops will face inward; when the placket is turned out the loops will face outward.
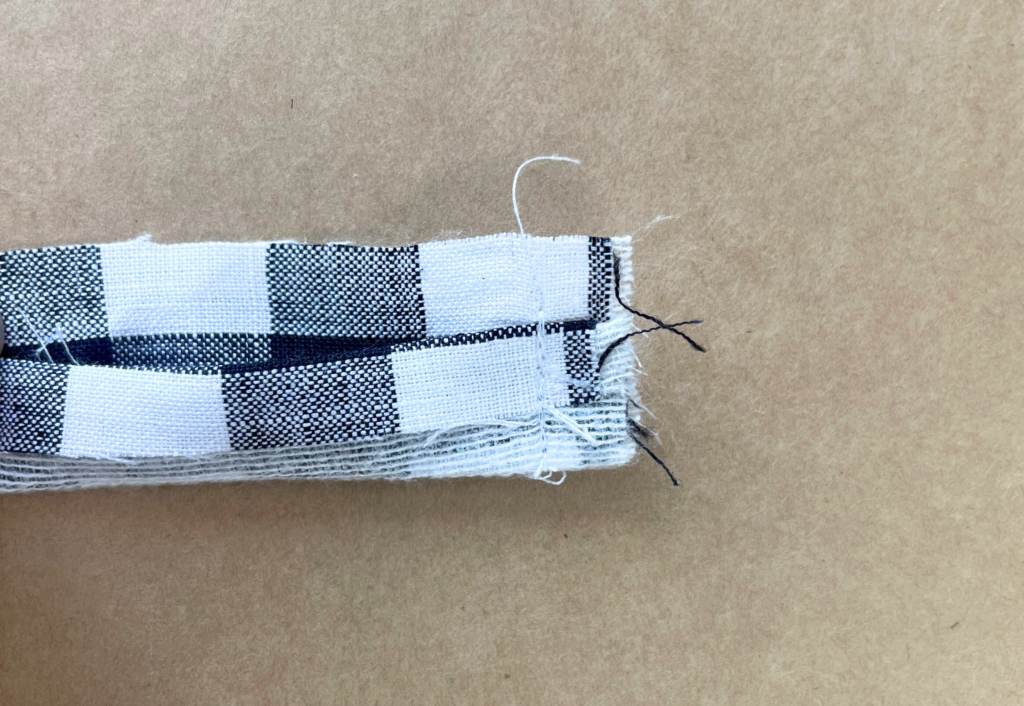
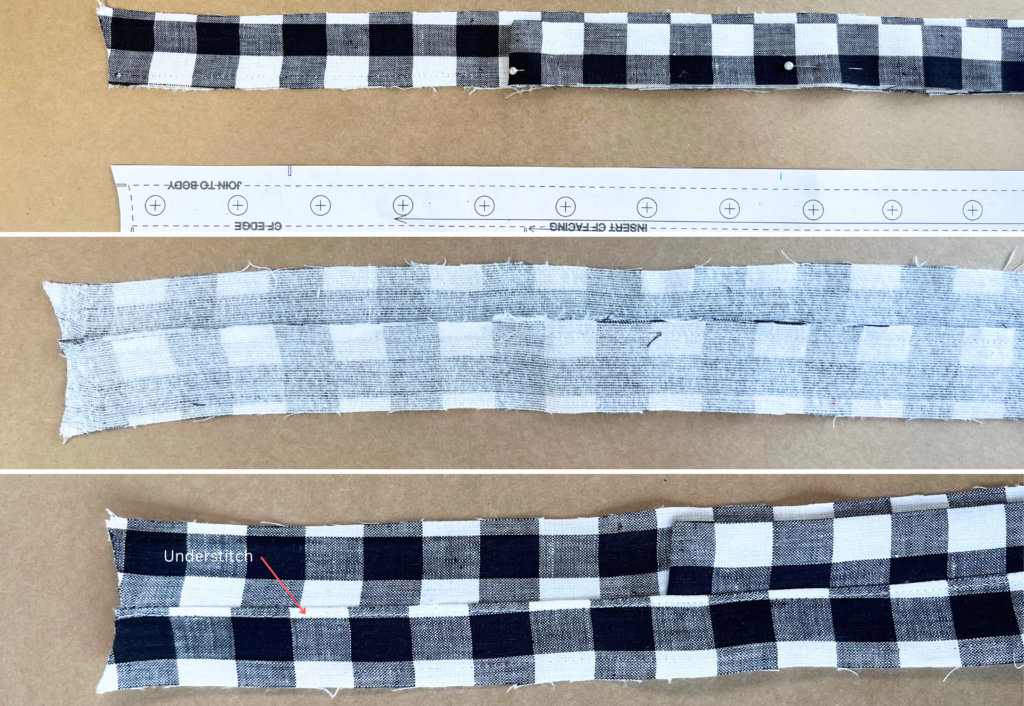
With RST, pin the pair of RHS Plackets together, and sew using a 6mm (1/4”) seam down the centre front edge, sandwiching the loops in between. Press toward the inner placket and sew an under stitch on the side of the inner placket. Press the seam allowance of the outer placket 1cm (3/8”) to the inside.
With RST, sew the bottom end of the placket, clip the corner, turn to the right side and press.
Optional Centre Front Extension: with RST, align the raw edge of the CF Extension with the notches on the LHS Placket (5) and baste into place along the centre front edge.
With RST, pin the pair of LHS Placket (5) together, and sew using a 6mm (1/4”) seam along the centre front edge, sandwiching the centre front extension in between (if using). Press toward the inner placket and sew an under stitch on the side of the inner placket. Press the seam allowance of the outer placket 1cm (3/8”) to the inside.
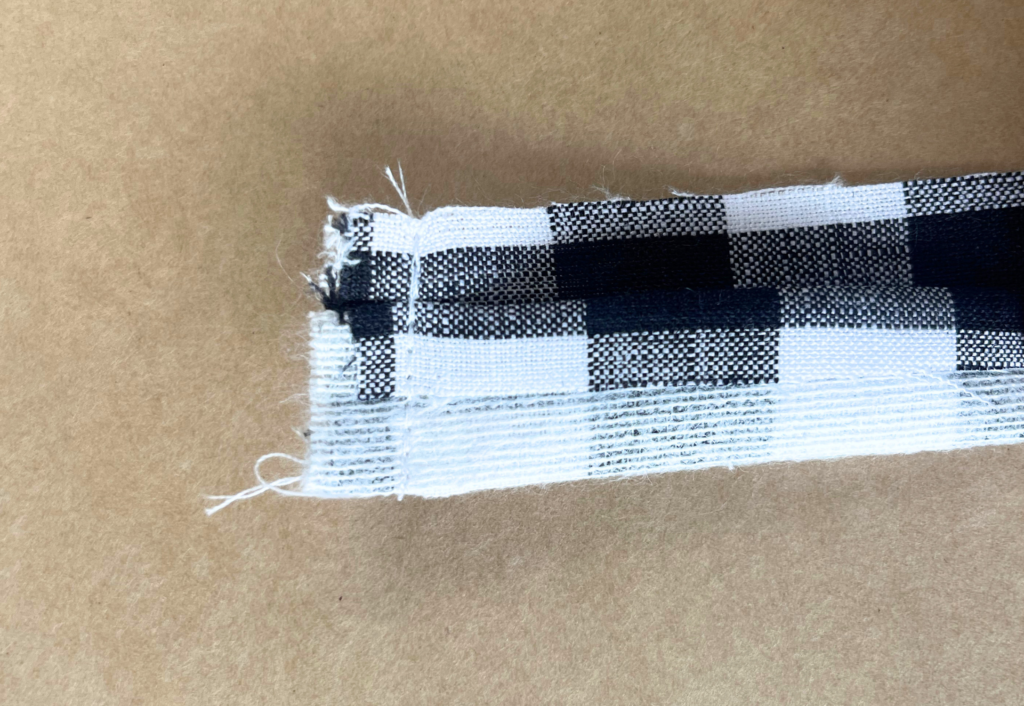
With RST, sew the bottom end of the placket using a 1cm (3/8”) seam, clip the corner, turn to the right side and press. You will have one placket for the right side and one for the left side. Set aside.
MAIN BODY – SHIRT AND STRAIGHT DRESS:
For Front-Darted (9) and Back (1) with optional darts only; sew the bust darts and press down. Sew the back darts and press toward the centre back.
With RST, sew the Front (2) OR (9) to Back (1) at the shoulder seams. Neaten using an overlocker/serger and press toward the back. Sew a stay stitch to the neckline to prevent stretching.
If using the belt loops (dress only): Align the ends of the belt loops with the notches as shown on the pattern and baste into place. The loops will face inward; when the side seams are complete, the loops will face outward.
With RST, sew the front to back at the side seams, sandwiching the belt loops if using, and taking care to not catch the back of the pockets (if using). Neaten using an overlocker/serger and press toward the back.
Neaten the hem using an overlocker/serger. Turn to the inside 1cm (3/8”), pin into place and topstitch. Press.
MAIN BODY – DRESS WITH GODETS:
For Front-Darted (9) and Back (1) with optional darts only: sew the bust darts and press down. Sew the back darts and press toward the centre back.
If using the belt loops: Align the ends of the belt loops with the notches as shown on the pattern and baste into place. The loops will face inward; when the side seams are complete, the loops will face outward.
Sew a stay stitch to the front and back necklines to prevent stretching.
For the front and back godets:
Please note: we recommend applying a small piece of fusing to the apex (marked on the pattern with a +) of the front and back godets before cutting.
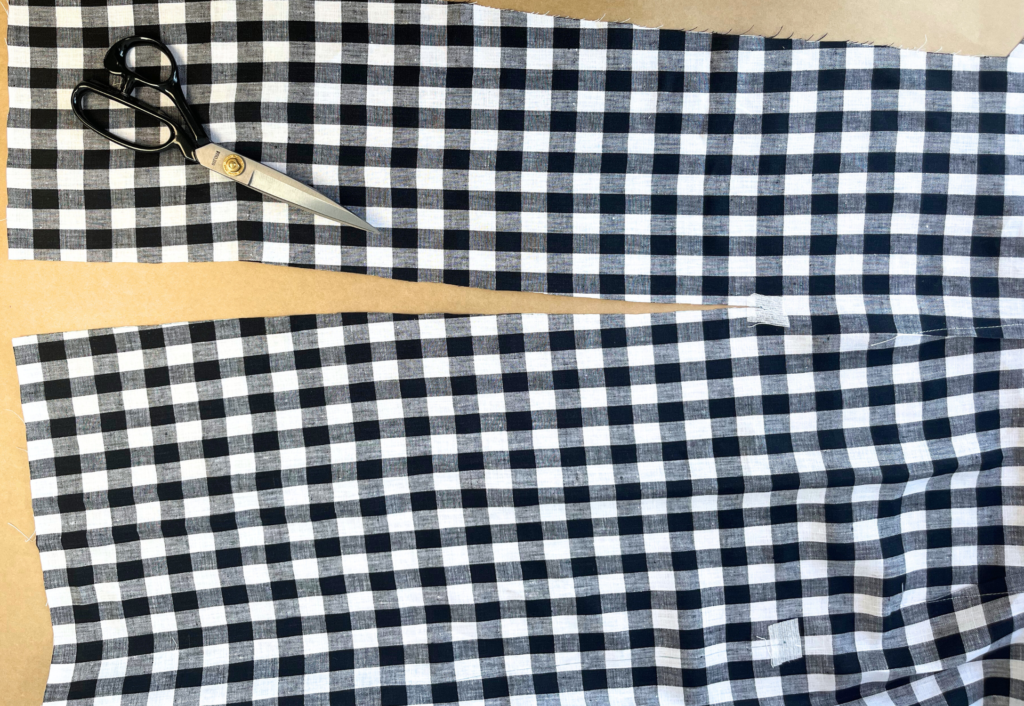
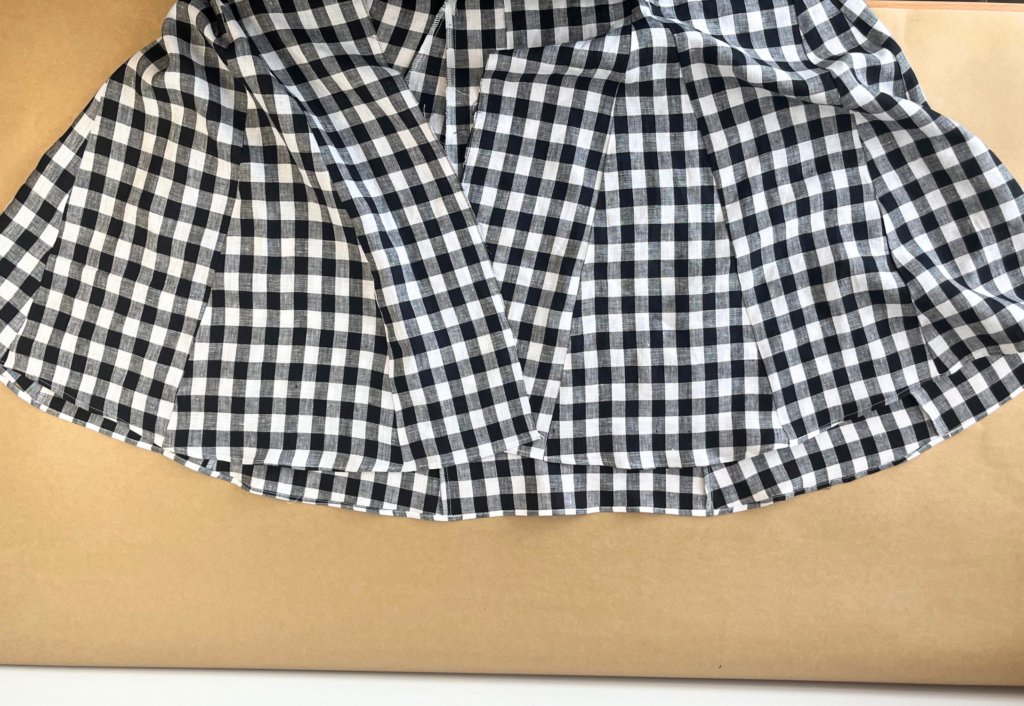
Carefully cut the four sections in the front and back as shown on the pattern for the godet inserts.
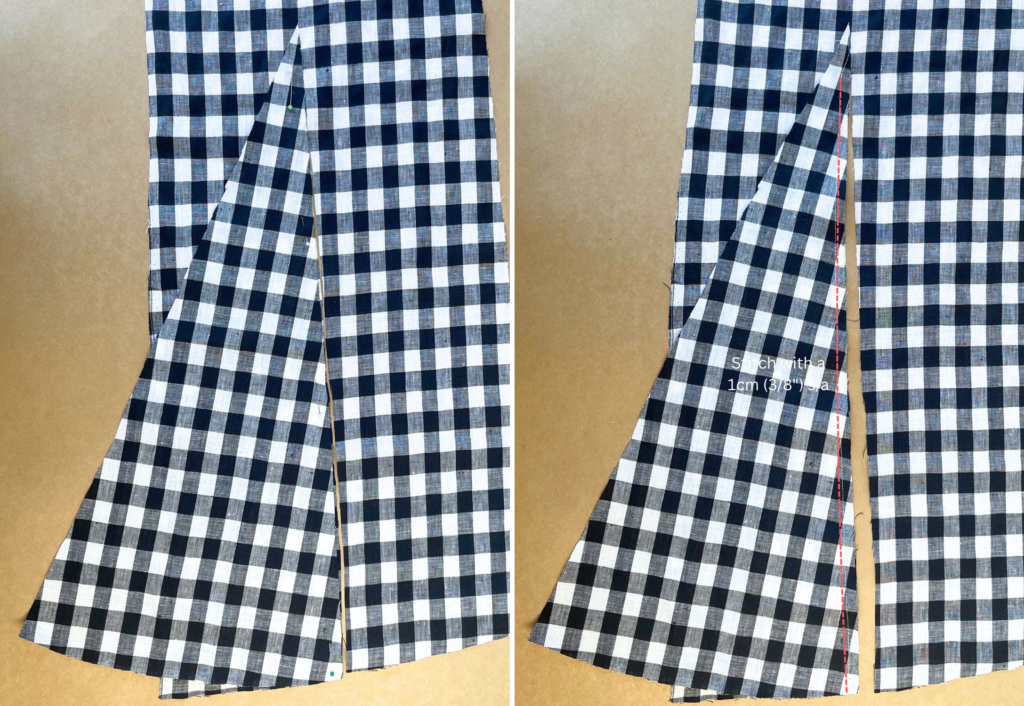
With RST and the Godet (13) on top, pin the godets to the insert. Carefully sew one side of the godet into place, from the + as shown on the pattern to the hem.
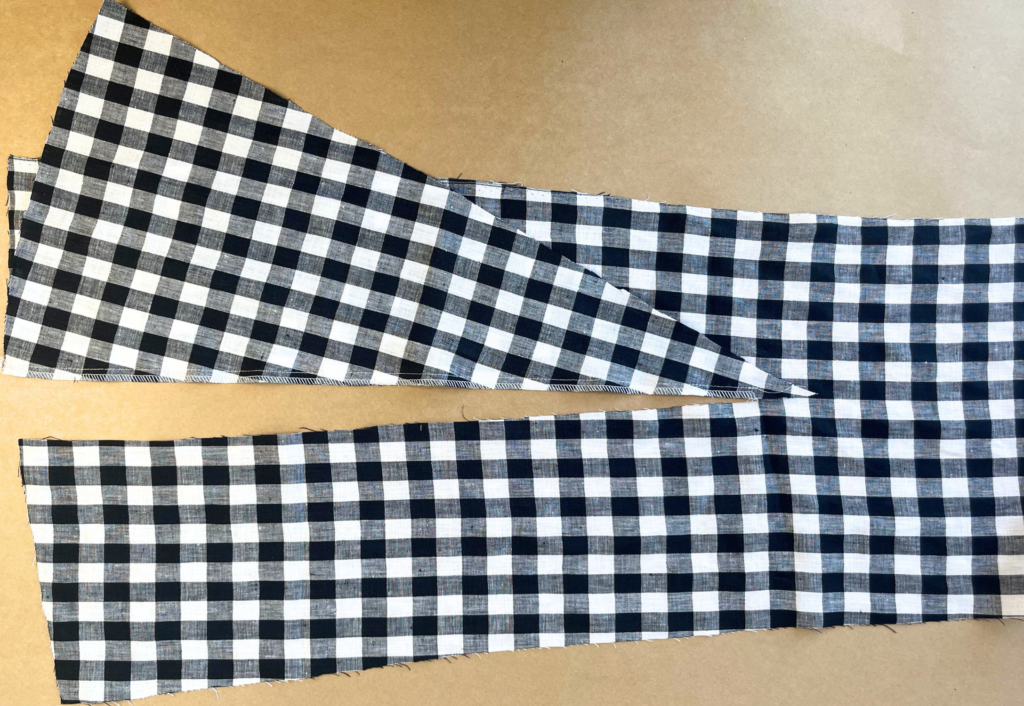
Neaten the seam using an overlocker/serger. Press toward the godet. Repeat with the other three godets.
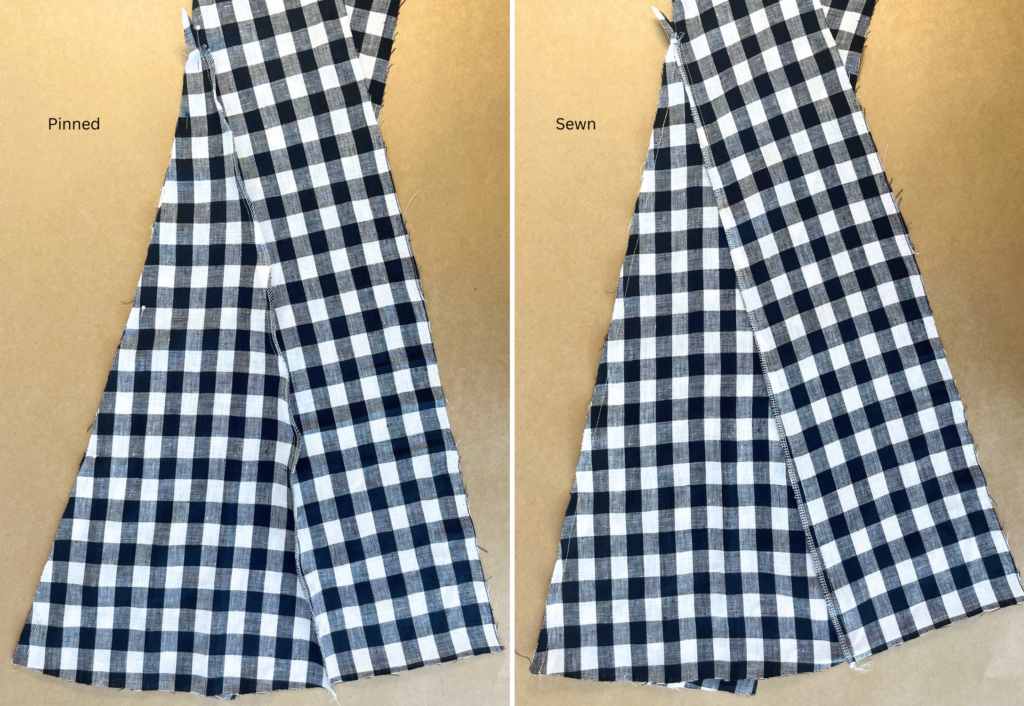
To finish the opposite side of the godet: with the godet on top, sew the seam from the hem and finish with a small dart at the top of the godet (ending at the second + symbol indicated on the pattern).
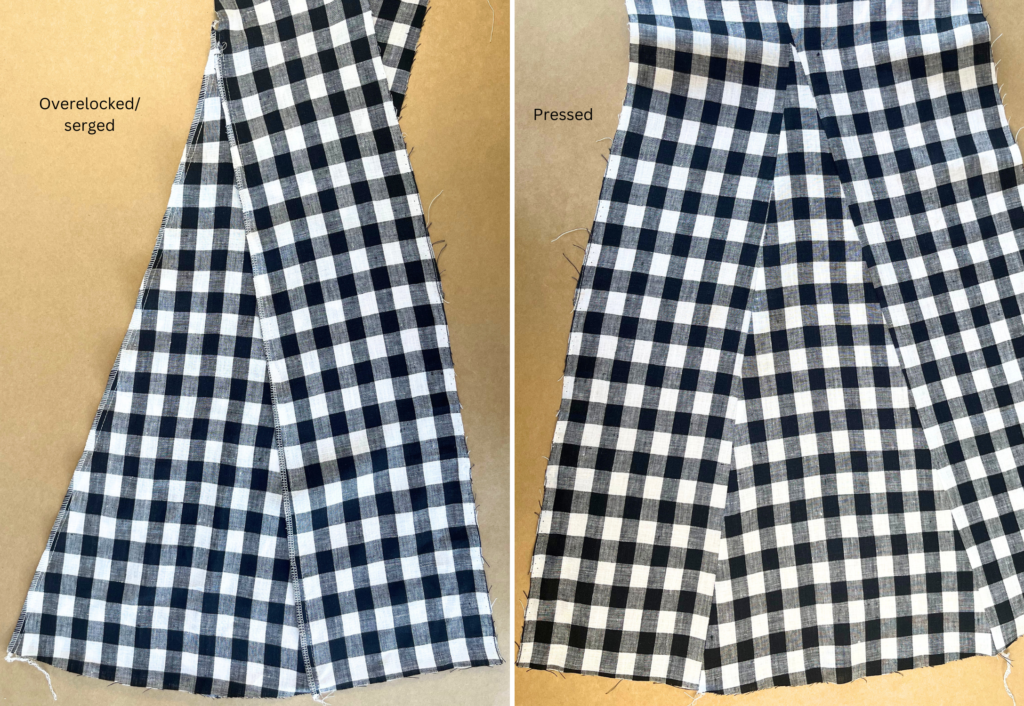
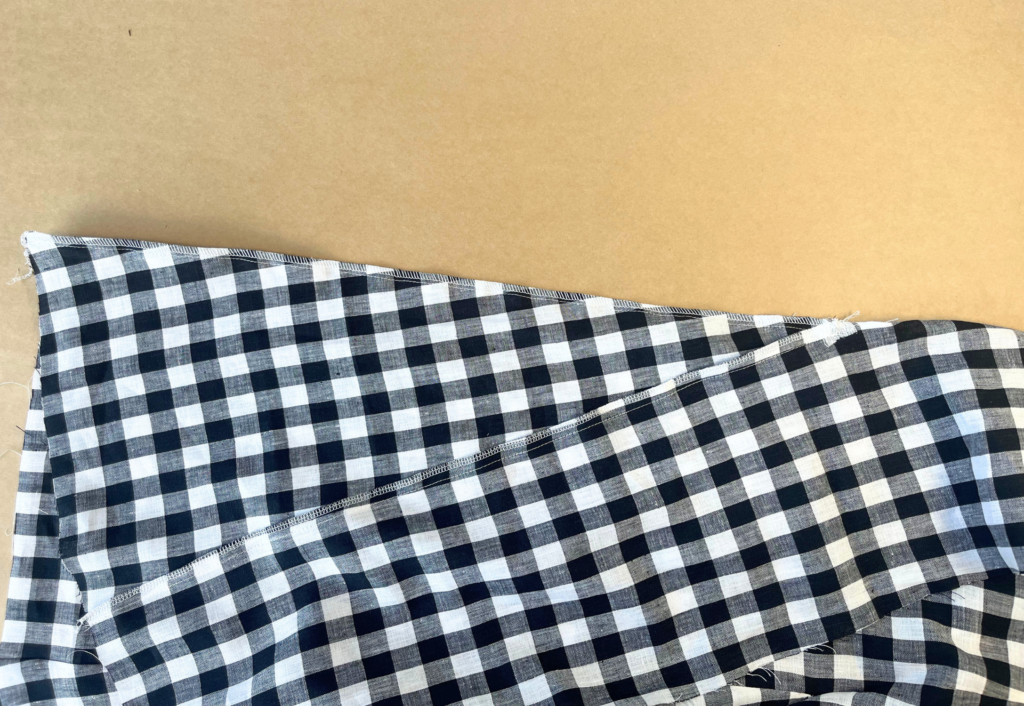
Neaten using an overlocker/serger and press toward the centre front or back.
For the two side godets:
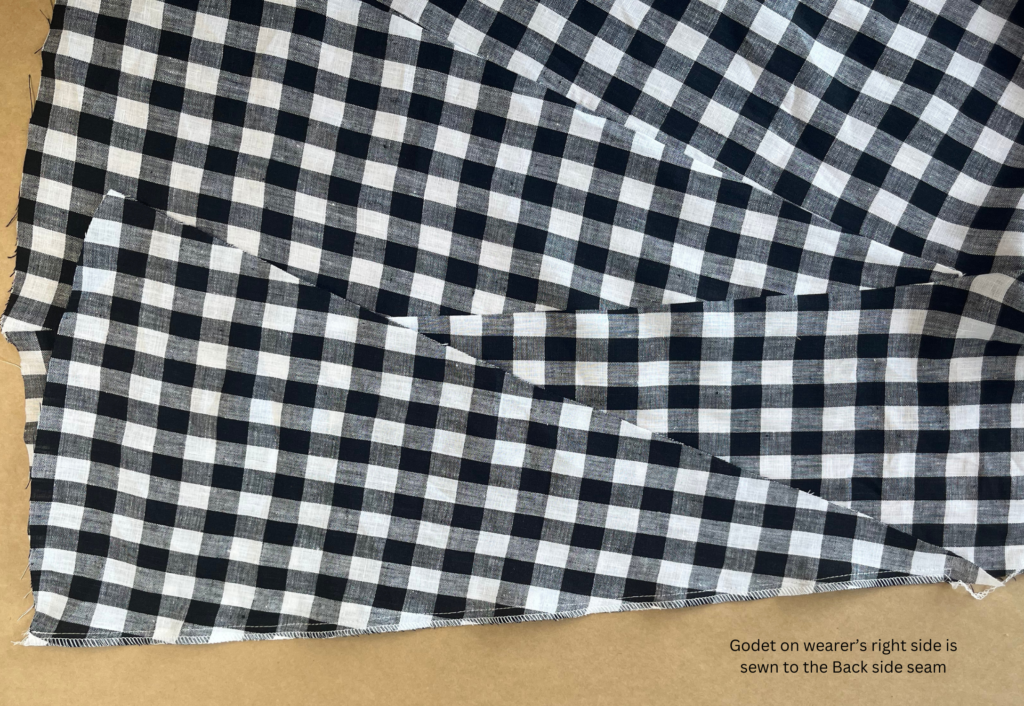
With RST and the godet on top, pin one godet to the lower side seam on the wearer’s right, back. Sew from the + as shown on the pattern to the hem. Neaten the seam using an overlocker/serger and press toward the godet.
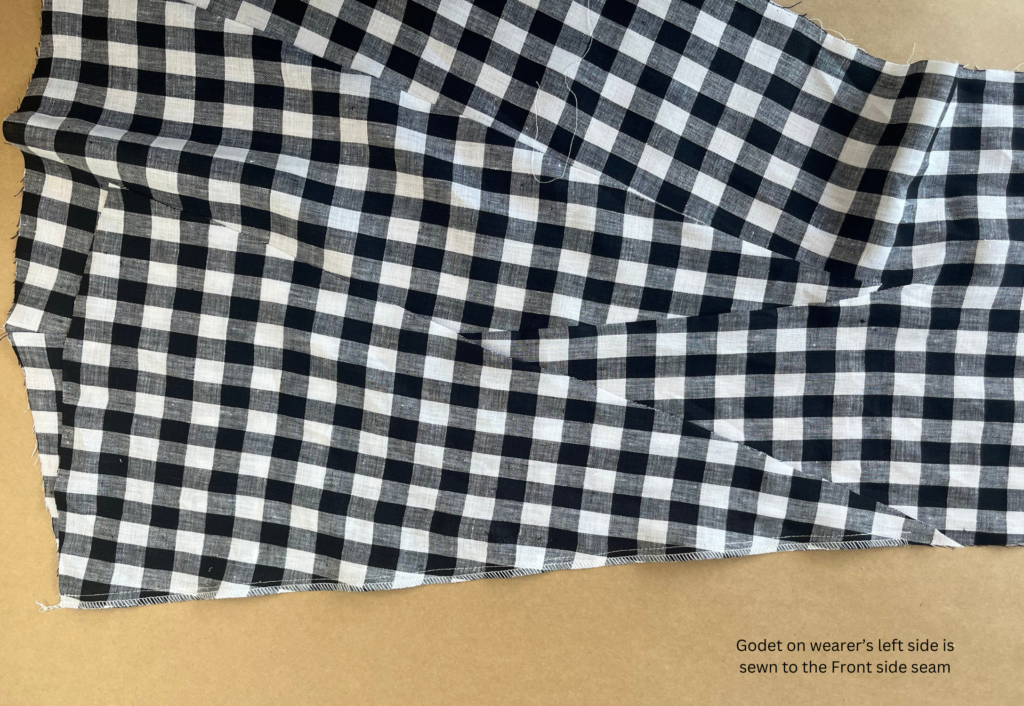
With RST and the godet on top, pin the last godet to the lower side seam on the wearer’s left, front. Sew from the + as shown on the pattern to the hem. Neaten the seam using an overlocker/serger and press toward the godet.
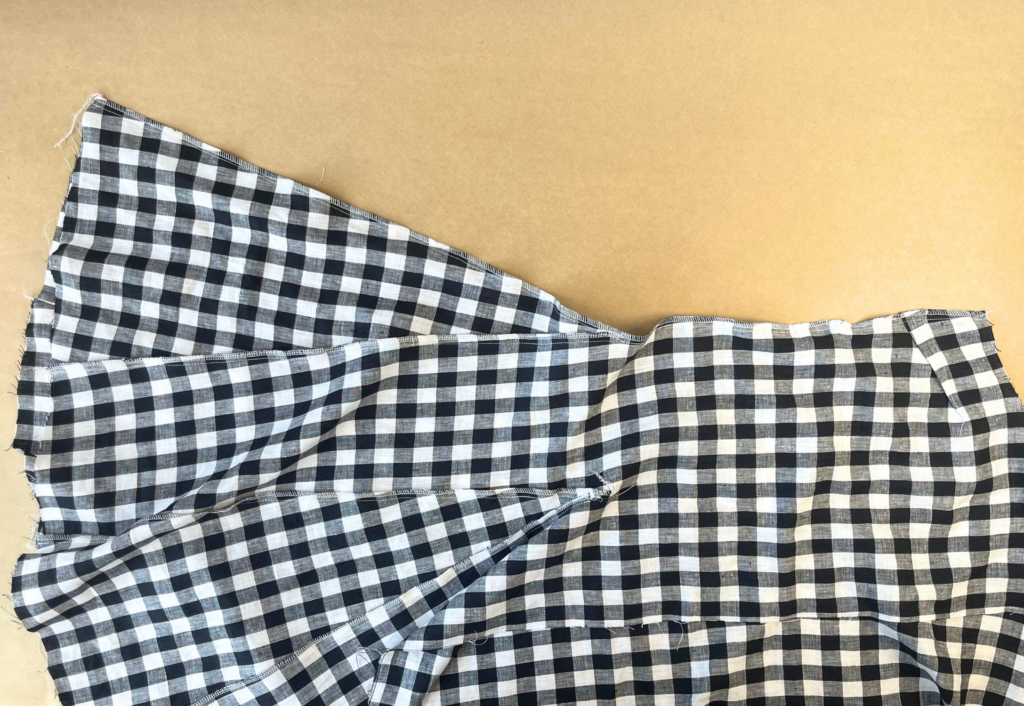
With RST and starting at the hem, sew the front to back at the side seams, sandwiching the belt loops if using. Take care to not catch the back of the pockets (if using), and sew the godet into place, finishing at the under arm. Neaten using an overlocker/serger and press toward the back.
Neaten the hem using an overlocker/serger. Turn to the inside 1cm (3/8”), pin into place and topstitch. Press.
COMPLETION – ALL STYLES:
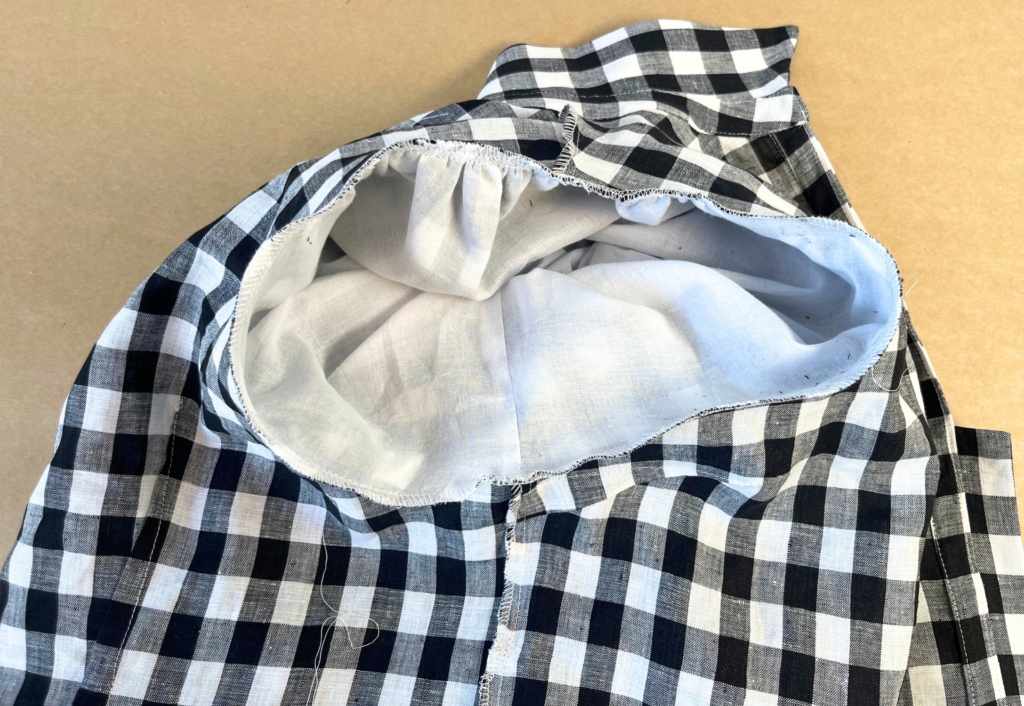
With RST and notches aligned, pin the sleeve to the sleeve opening, drawing in the gathering stitch to match the armhole circumference. Sew then neaten using an overlocker/serger. Press toward the sleeve.
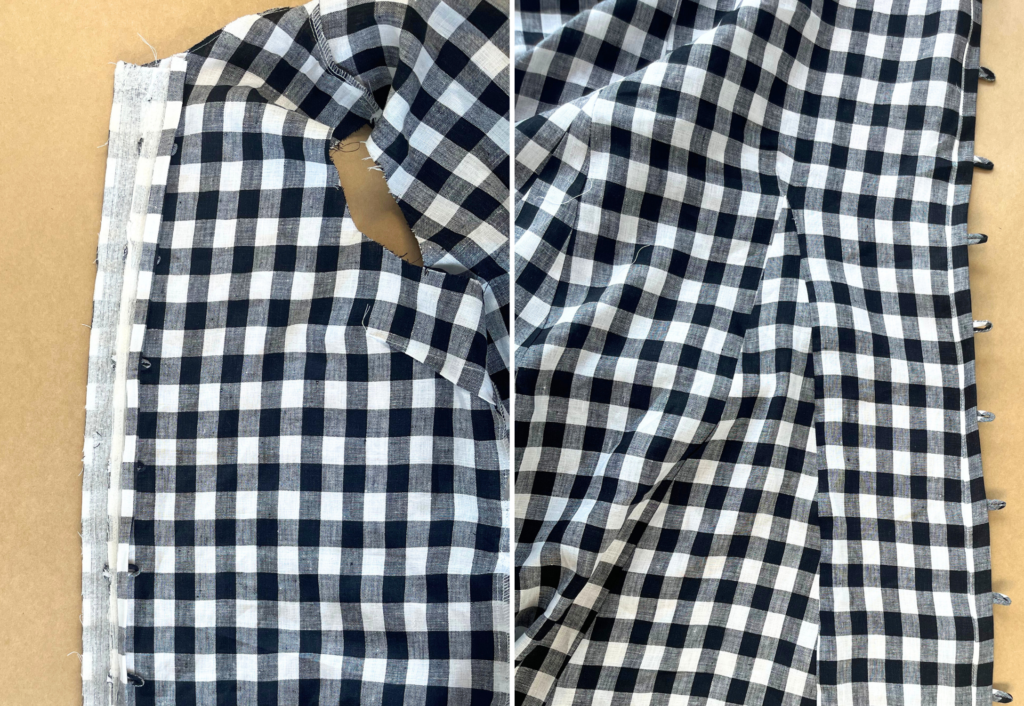
Pin the inner edge of the RHS placket to the wrong side of the wearer’s right at the centre front body and sew. Press the seam toward the placket.
Pin the inner edge of the LHS placket to the wrong side of the wearer’s left at the centre front body and sew. Press the seam toward the placket.
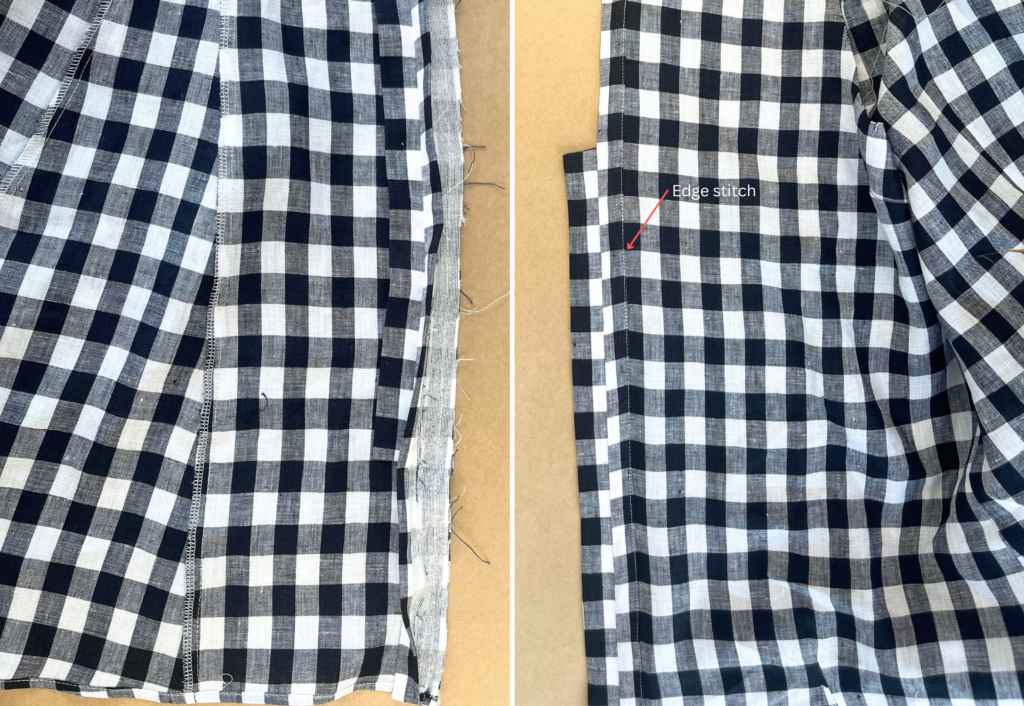
Pin the outer pre-pressed edge of the plackets to the fronts and edge stitch into place. Sew an edge stitch along the outer edge of each placket.
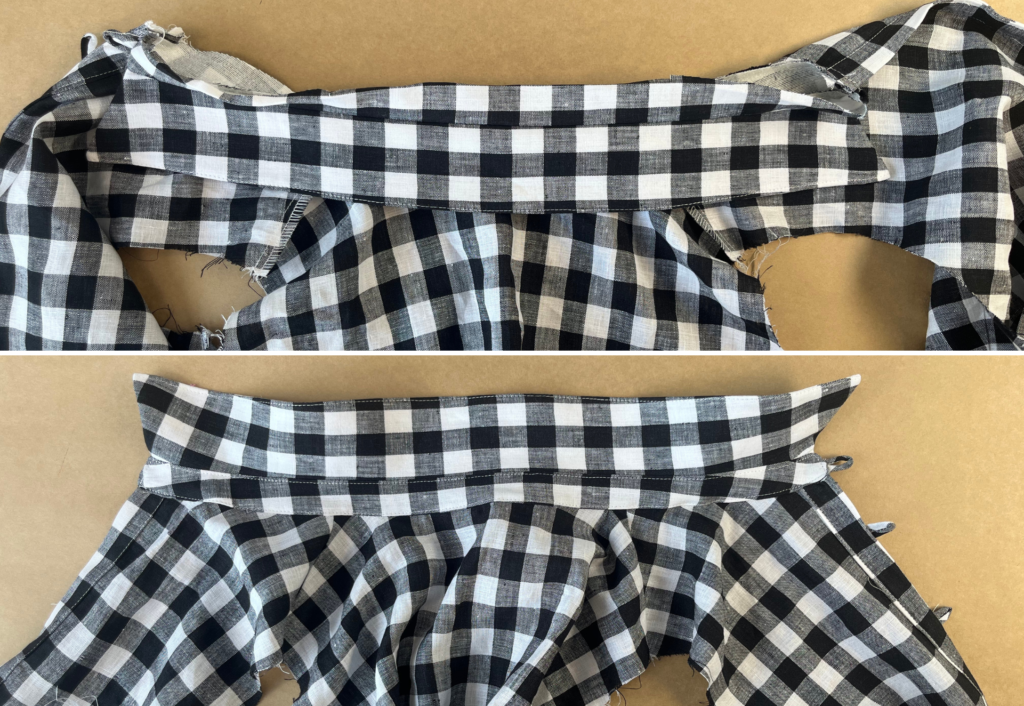
Pin the inner collar to the wrong side of the neck opening and sew using a 6mm(¼”) seam. Press toward the collar.
Pin the pre-pressed outer collar to the neckline and edge stitch into place. If using the two-piece collar, continue the edge stitch all around the stand.
Mark the button placement as shown on the pattern and sew the buttons into place using your preferred method.
Trim any loose threads and carefully press your new shirt or dress.