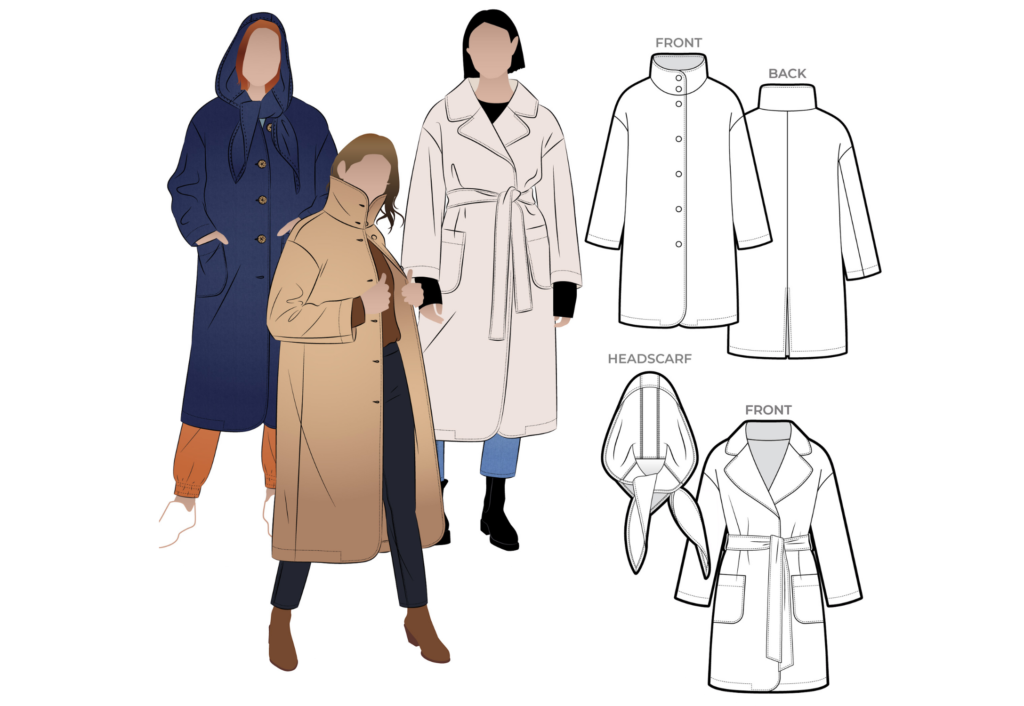
Shop the Gracie Coat and Headscarf
STEP-BY-STEP TUTORIAL
#SAGracieCoat
Click below to watch a video sewing tutorial

CONSTRUCTION
OPTIONAL PATCH POCKETS:

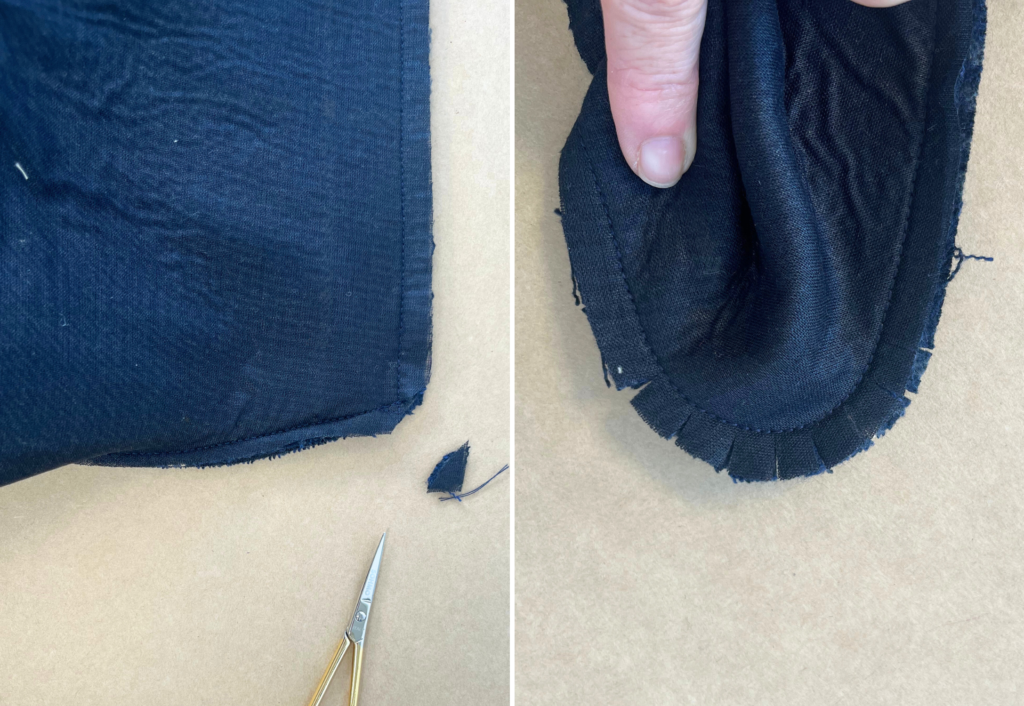
Neaten the top edge of the Patch Pocket (8) using an overlocker/serger. With RST, fold the top edge of the pocket over. Sew down each side of the turnover, clip the corners and turn the fold out to the right side. Press. Top stitch the turnover.
Sew a large ease stitch to the bottom half of the pocket, between the notches. Draw in slightly so the edges curl to the inside.
Fold the outer edges 1cm (3/8”) to the inside and press. You should have a nice rounded pocket.
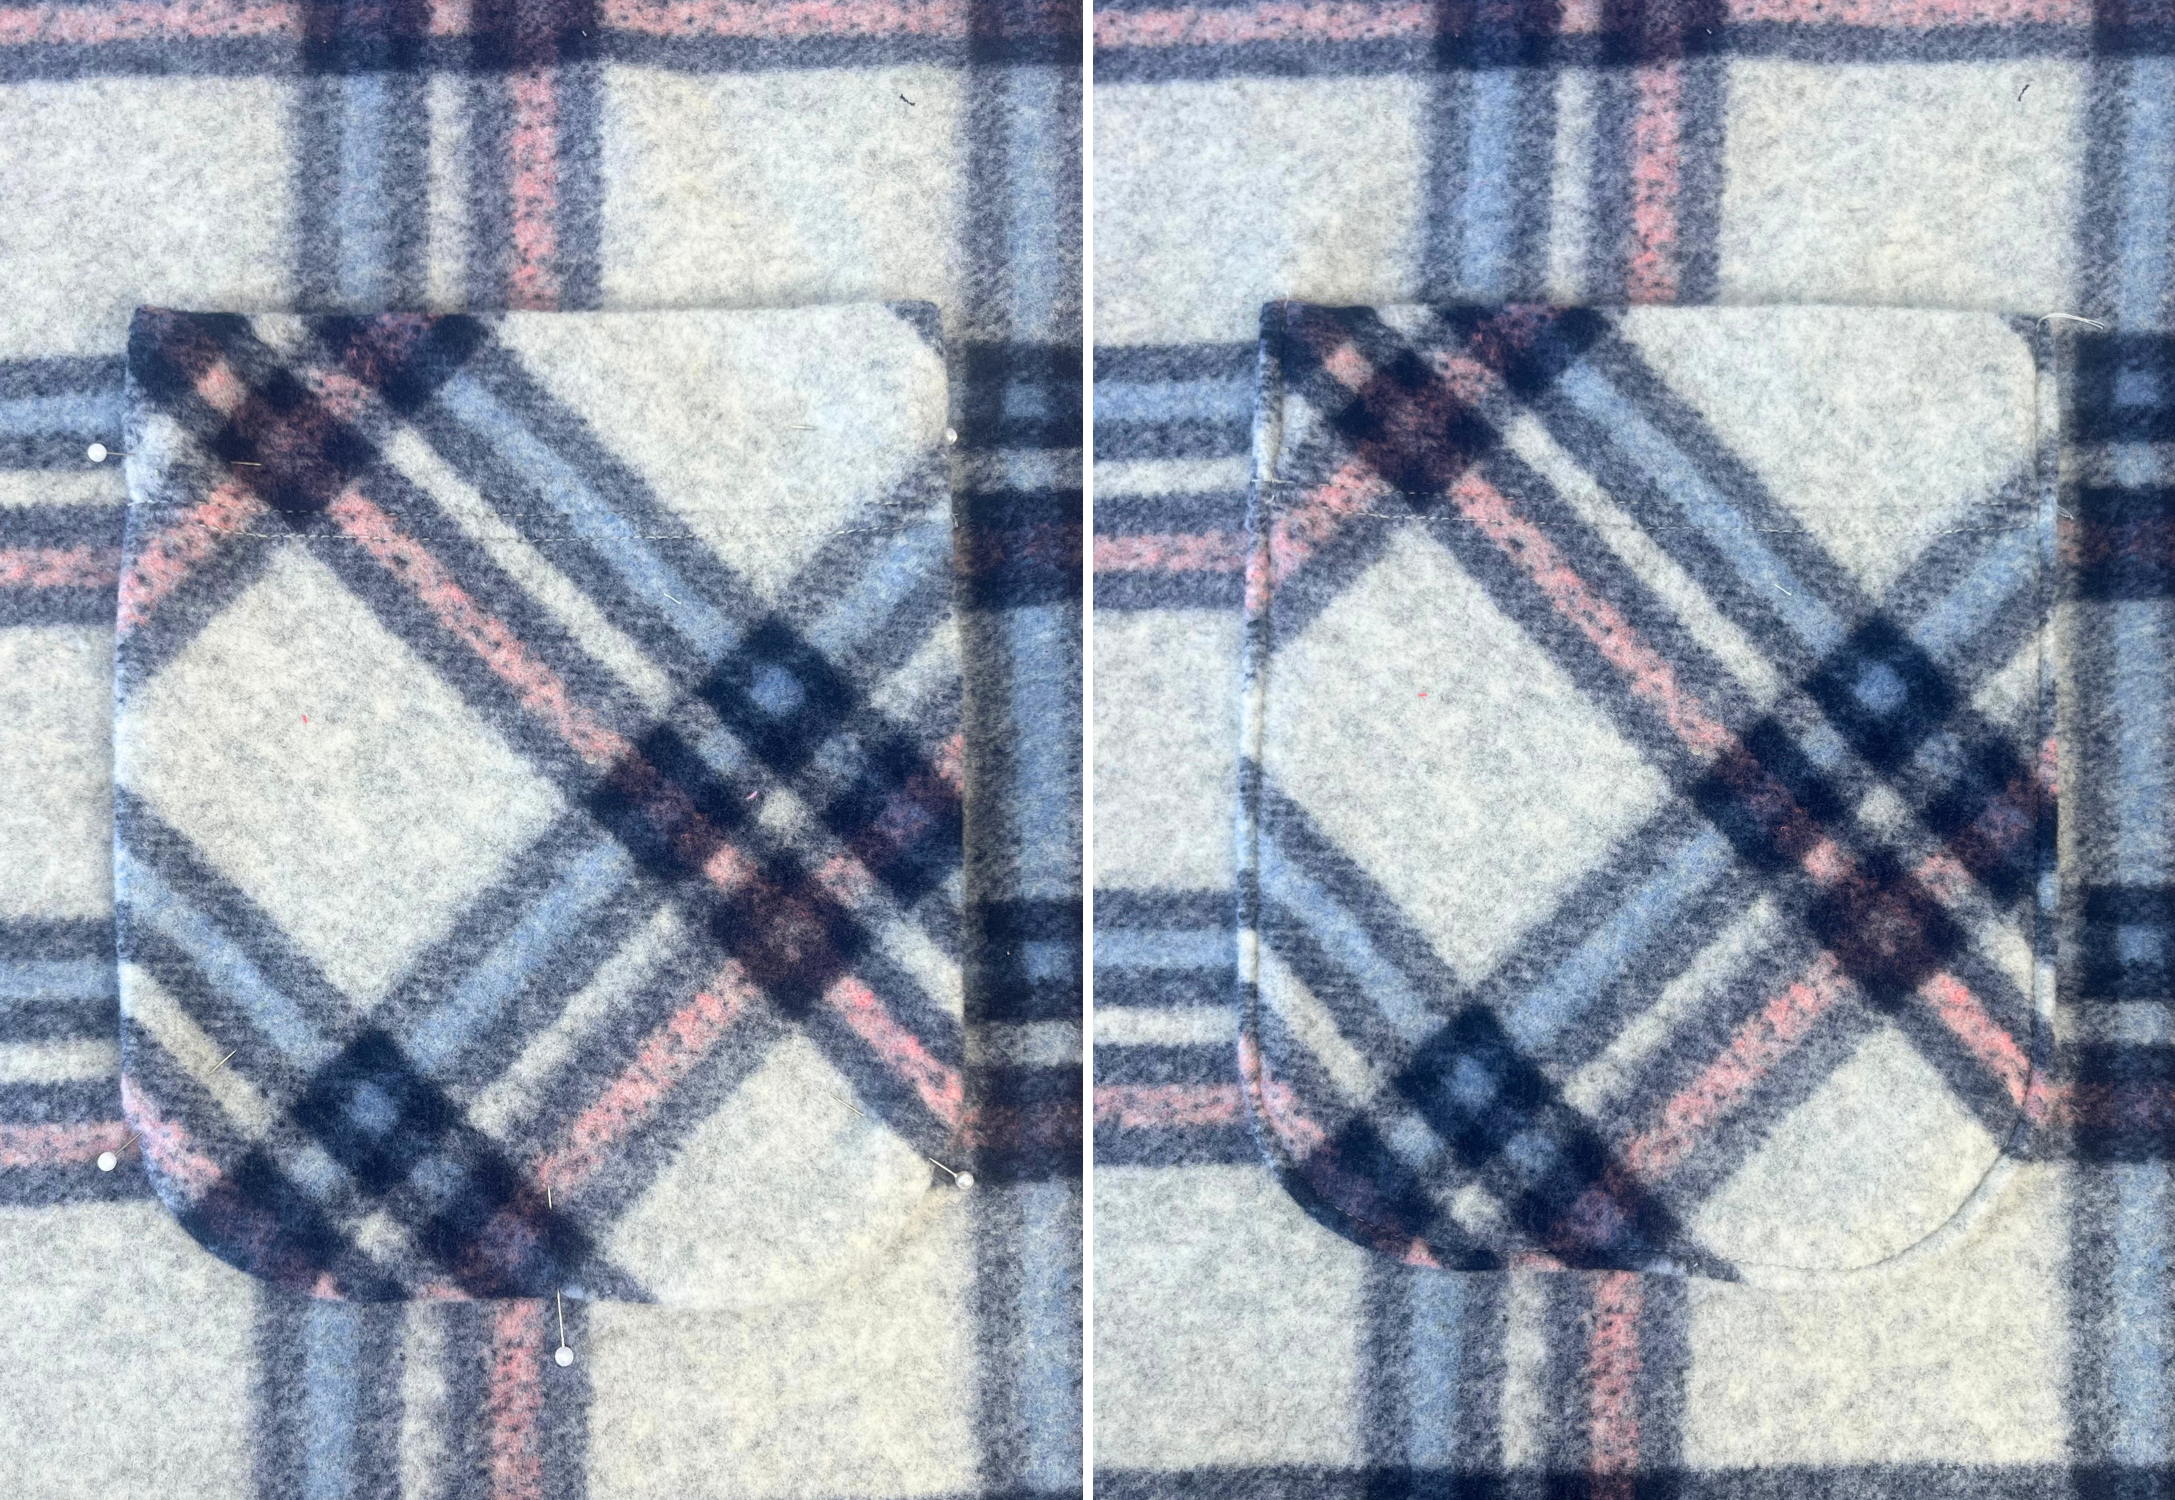
Pin the pocket to the front of the jacket following the guides on the pattern. Top stitch the pocket into place.
OPTIONAL BELT AND BELT LOOPS:
With RST, sew the Belt (10) pieces together at the centre back. Press open.
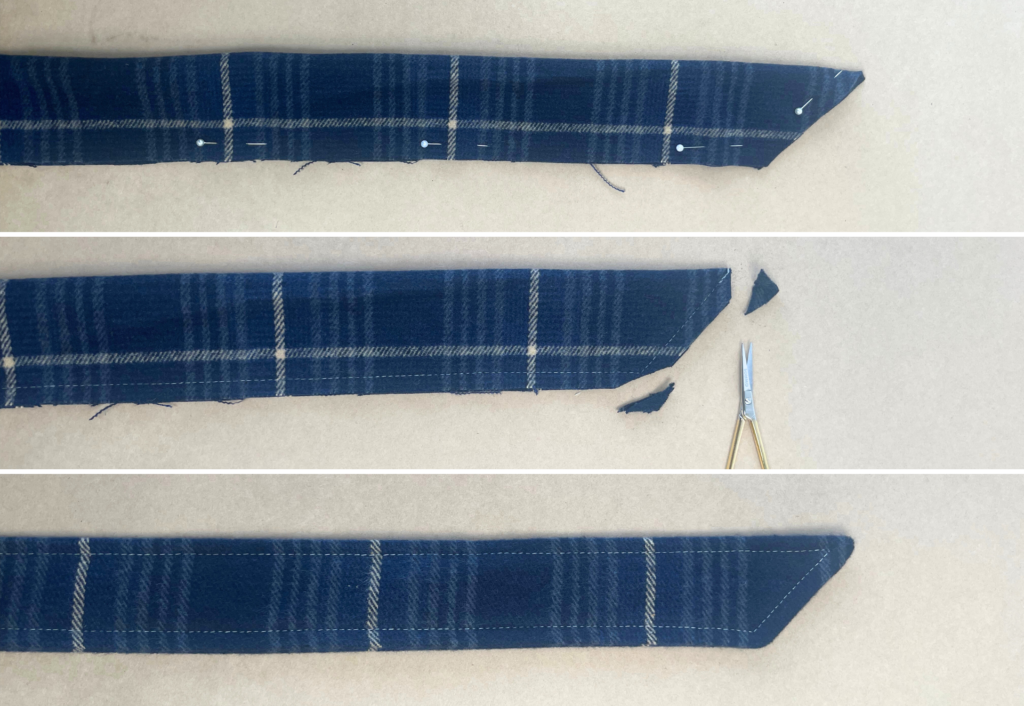
With RST fold the tie in half lengthways and sew the short, angled ends and along the length, leaving a gap for turning out as shown on the pattern.
Clip the corners and turn out.
Press then sew a 1cm top stitch around the outer edges, closing the gap used to turn out as you sew.
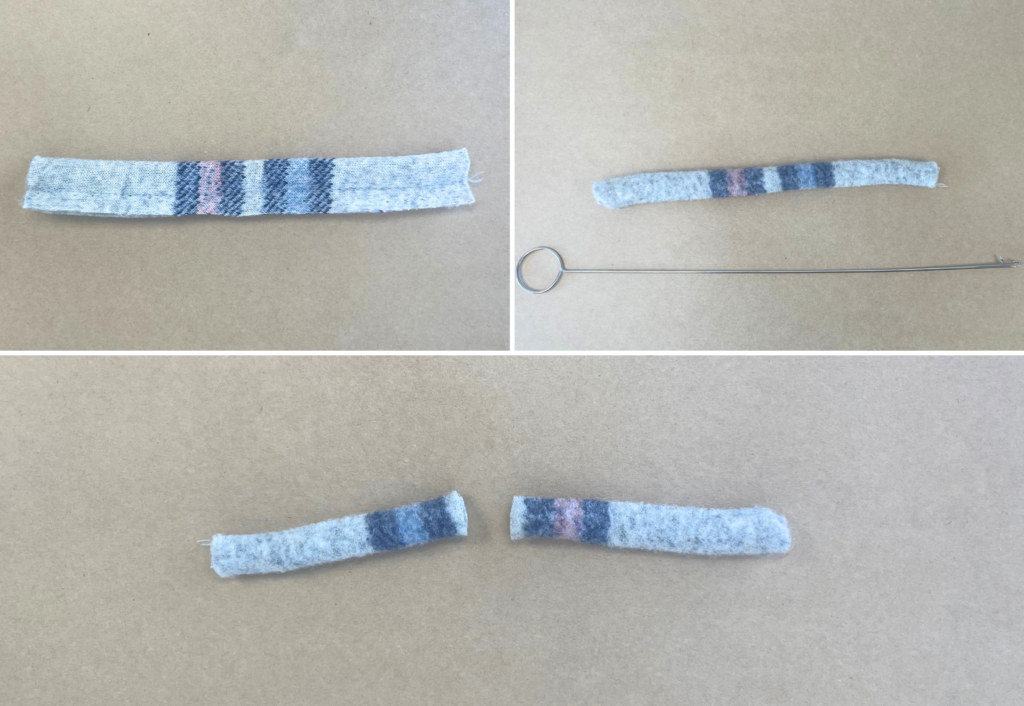
With RST, fold the Belt Loops (11) in half lengthways with RST and sew the long edge.
Turn out to the right side and press. Cut in two and put aside.
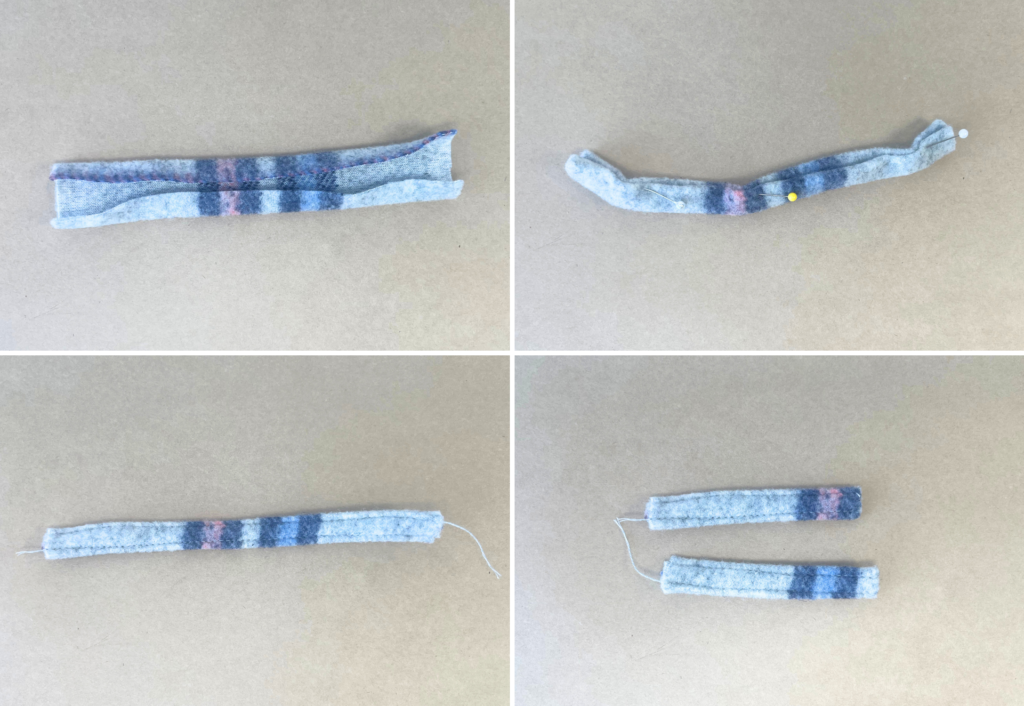
If you have thick fabric you may prefer to fold each long edge of the loop to the inside 1cm (3/8”), press, fold in half lengthways with WST and edge stitch along each long edge.
Cut in two and set aside.
MAIN BODY:
* If using inseam pockets, refer to our Inseam Pockets tutorial on the Style Arc website and complete before sewing the side seams.
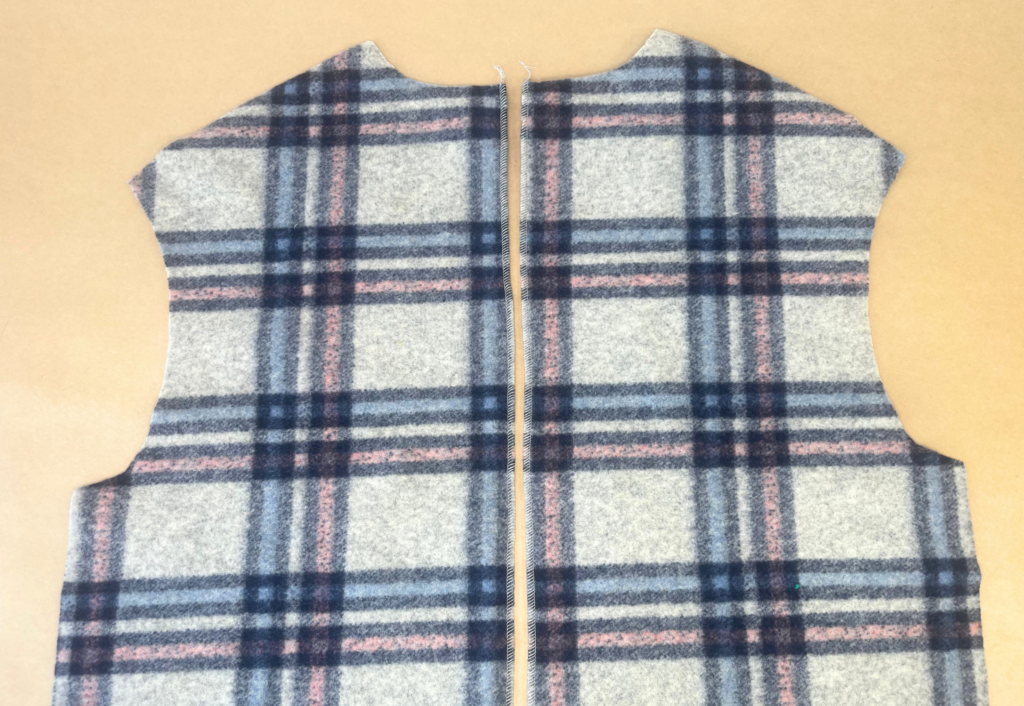
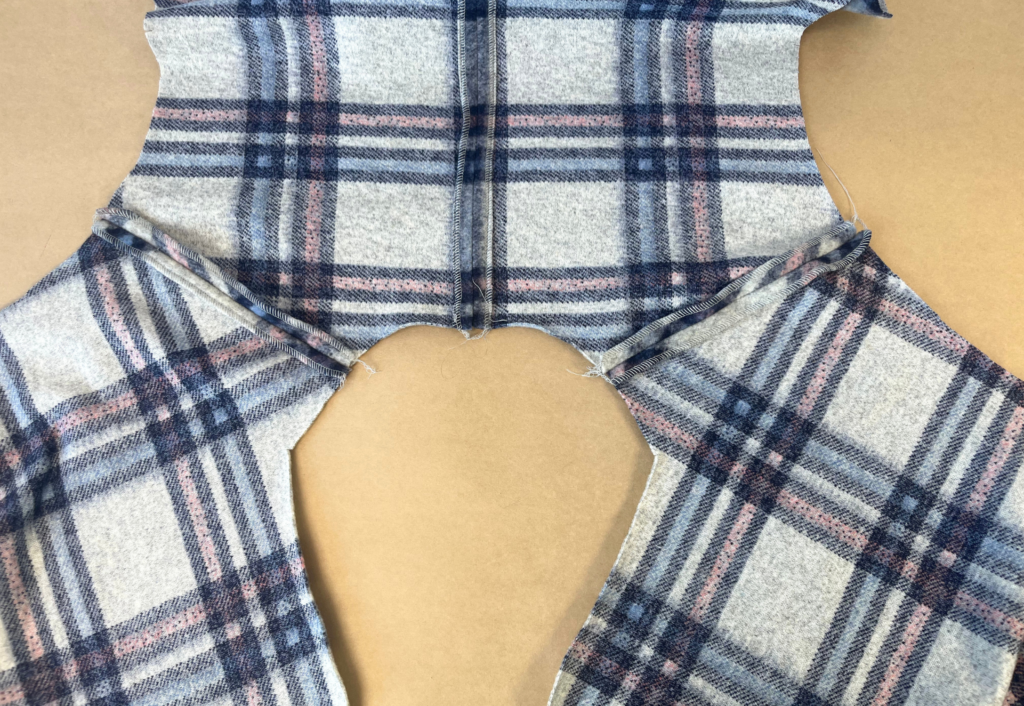
Neaten the centre Back (3) seams separately using an overlocker/serger.
With RST, sew the centre back seam from the neck opening to the split notch as shown on the pattern using a 1.5cm (3/4”) seam. Press open and press the split turnback, 1.5cm (3/4”).
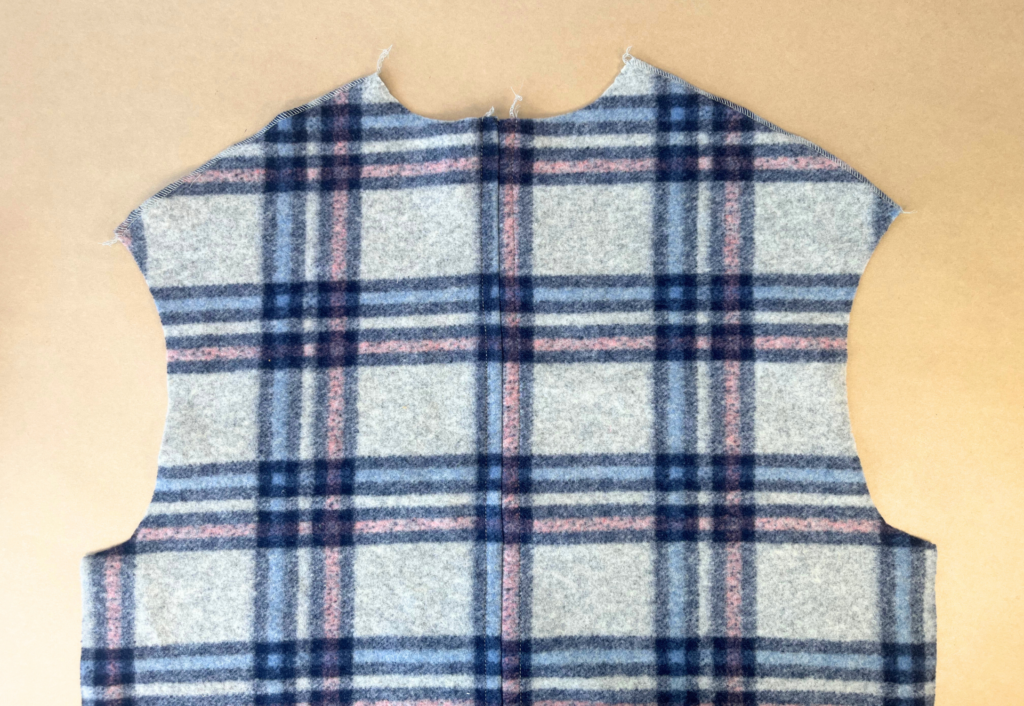
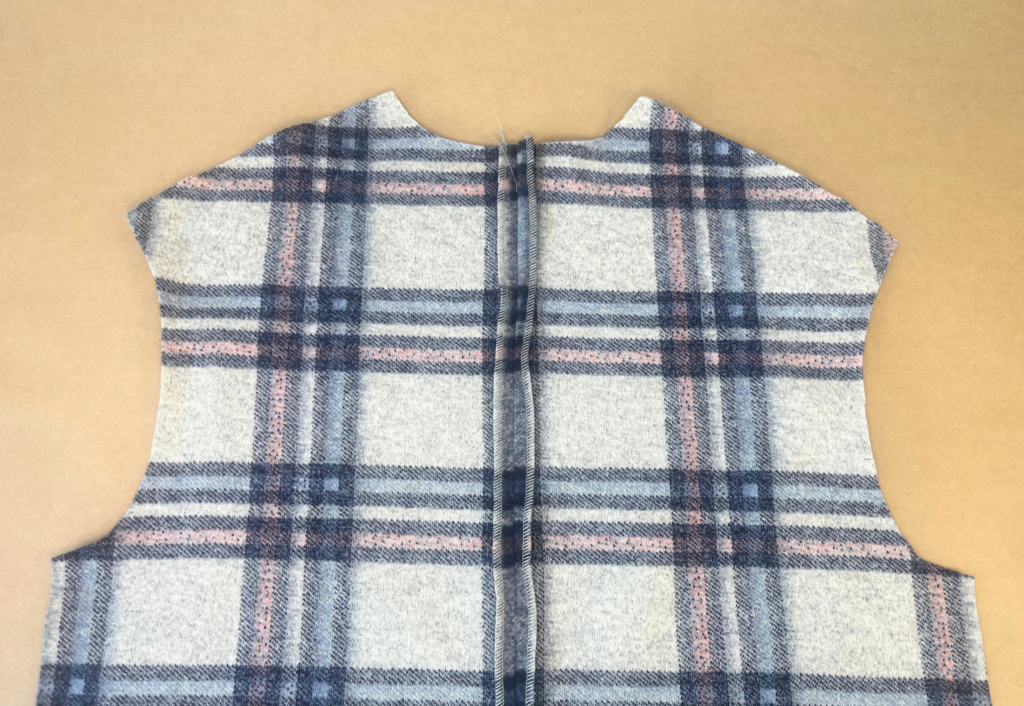
Neaten the edges of the front and back shoulders separately using an overlocker/serger.
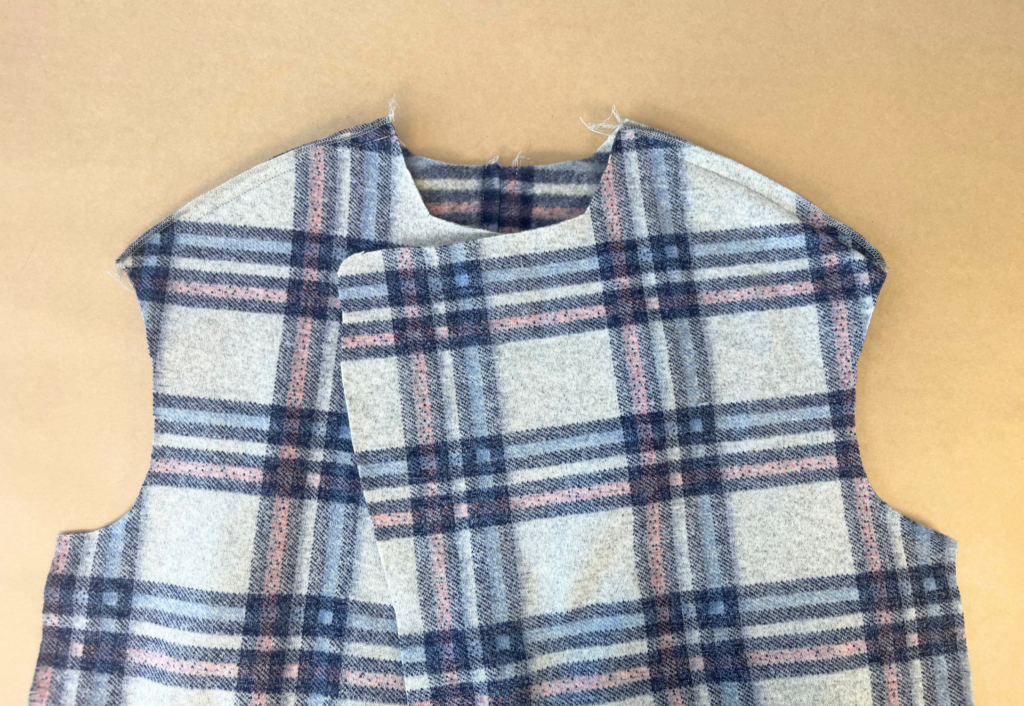
With RST, sew the front to back at the shoulders, using a 1.5cm (3/4”) seam. Press open.
Sew a stay stitch to the neckline to prevent stretching.
Neaten the Back and Front (1 OR 12) side seams separately using an overlocker/serger.
With RST sew the front to back at the side seams using a 1.5cm (3/4”) seam. Press open.
SLEEVES:
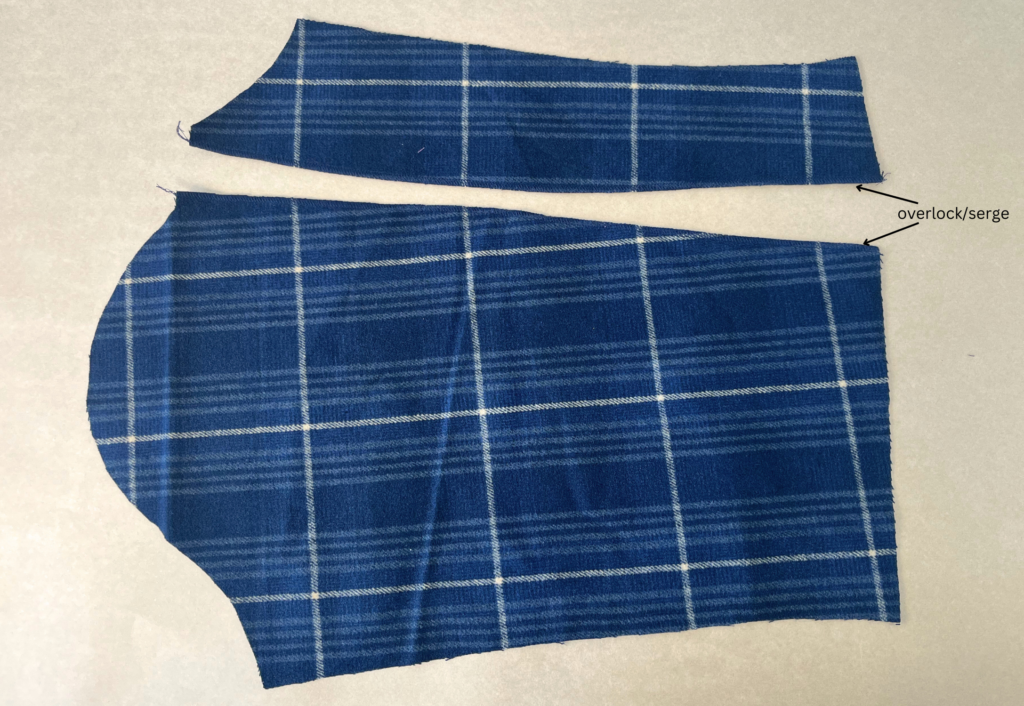
Neaten the notched edges of the Top Sleeve (4) AND the notched edge of the Undersleeve (5) separately using an overlocker/serger.
With RST and notches aligned, sew the top sleeve to the undersleeve along the neatened edges using a 1.5cm (3/4”) seam. Press open.
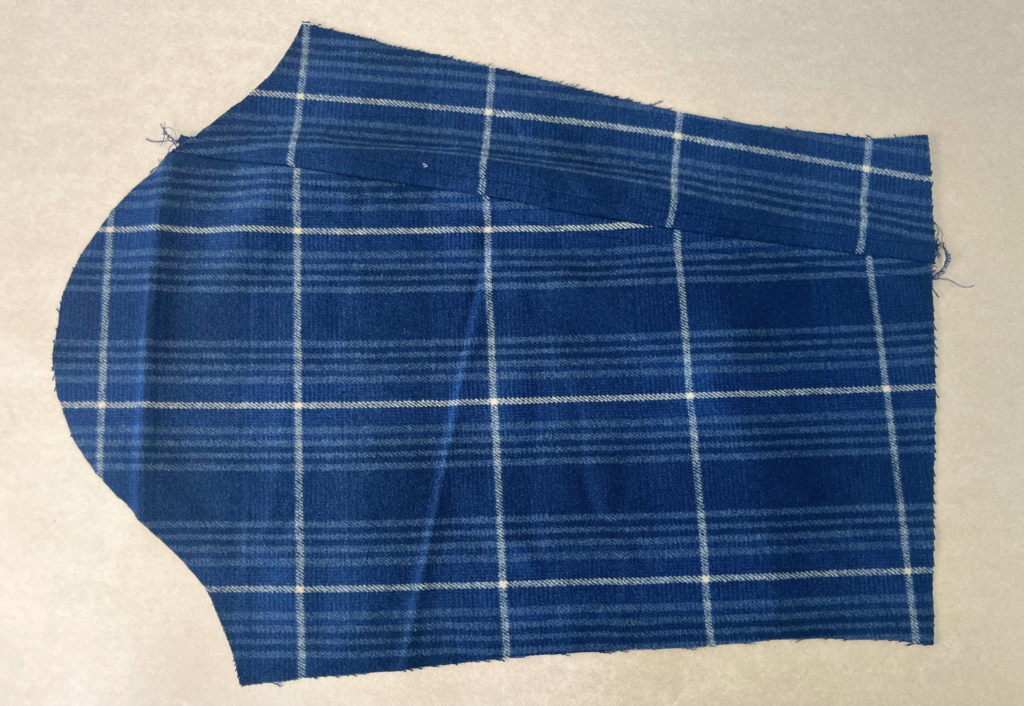
Sew the top sleeve to the undersleeve at the undersleeve seam using a 1cm (3/8”) seam, neaten using an overlocker/serger and press toward the back.
Neaten the sleeve hem using an overlocker/serger. Turn the hem to the inside at the notch and press. Pin the hem into place and topstitch into place.
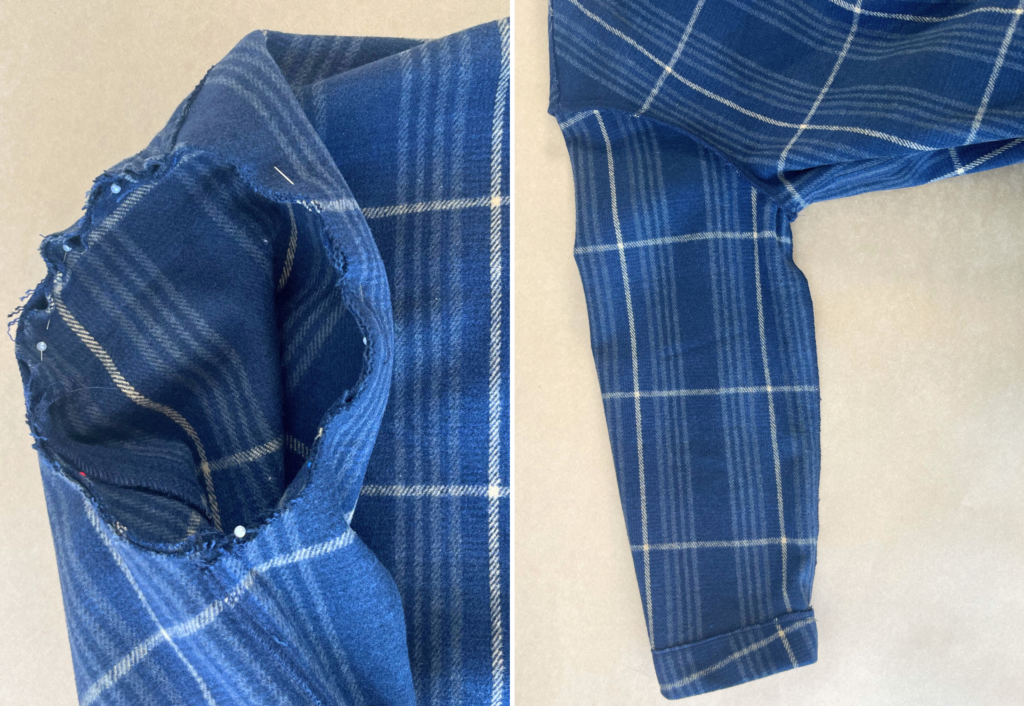
With RST and notches aligned, pin the sleeve into the armhole and sew with a 1cm (3/8”) seam. Neaten the seam using an overlocker/serger and press the seam toward the sleeve.
COLLARS:
High Neck Collar (6)
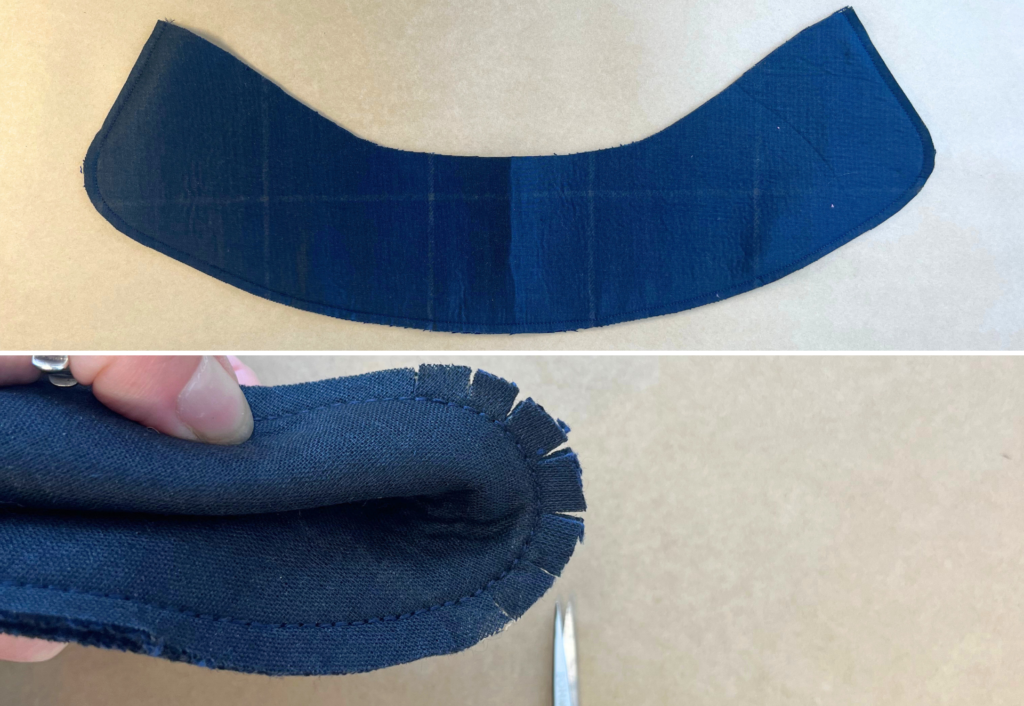
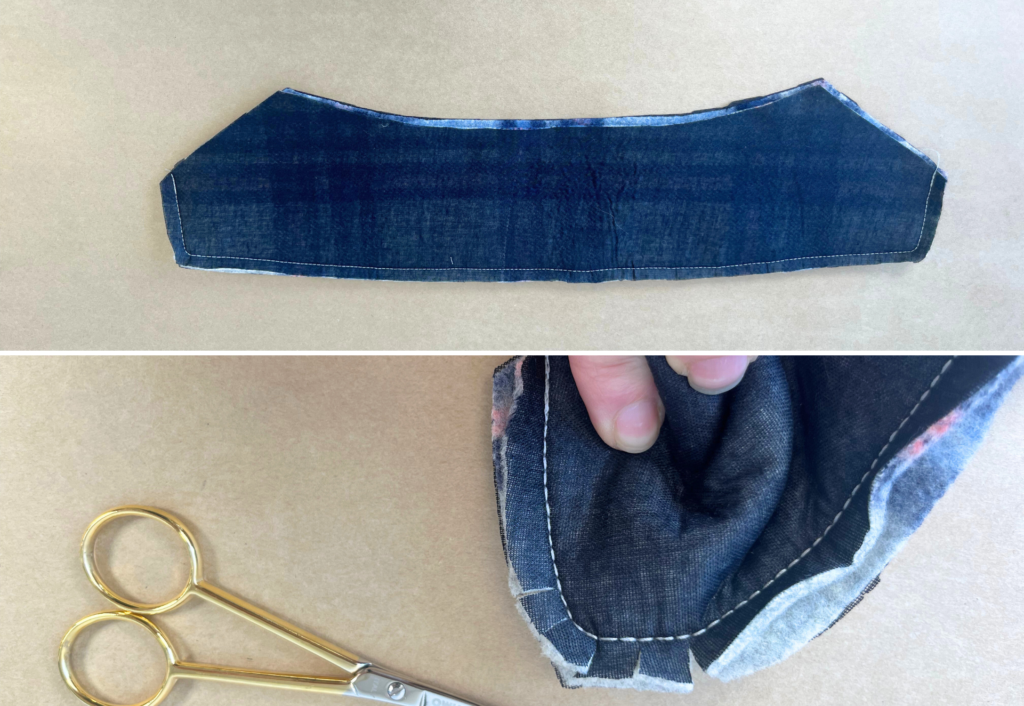
With RST, pin the High Neck Collar (6) pair together at the outer edge and sew using a 1cm (3/8”) seam.
Clip the corners and into the curved seam, turn out to the right side, press.
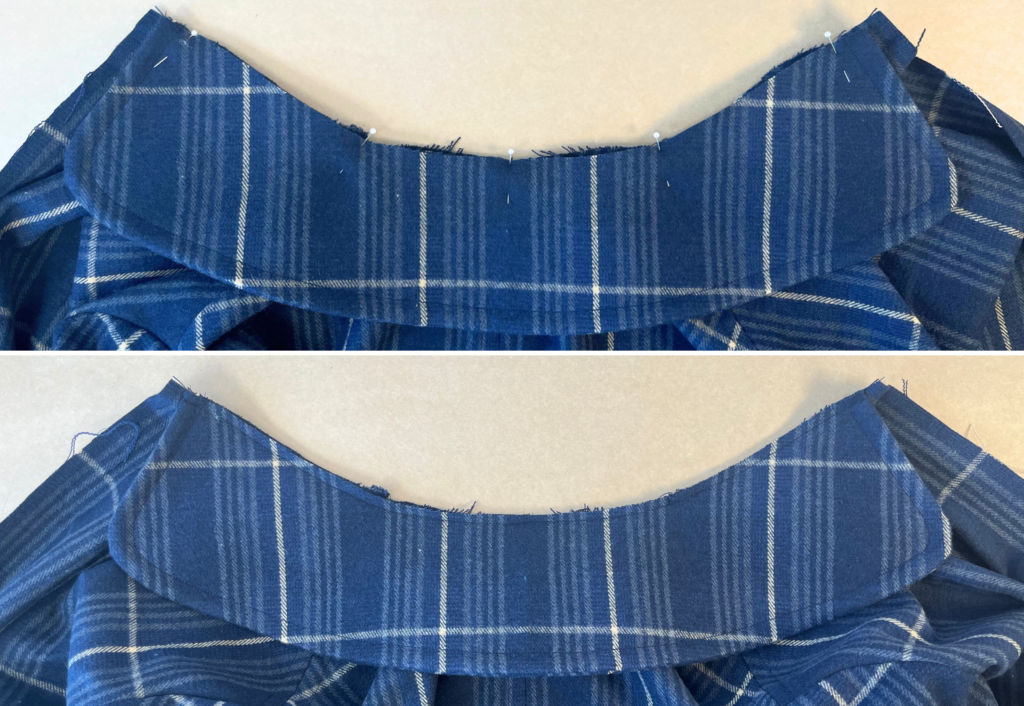
With RST and notches aligned, pin the collar to the neckline and baste into place.
Open Neck Collar (14)
With RST, pin the Open Neck Collar (14) pair together at the outer edge and sew using a 1cm (3/8”) seam.
Clip the corners and into the curved seam, turn out to the right side, press.
With RST and notches aligned, pin the collar to the neckline and baste into place.
FACINGS:
High Neck Facing (2)
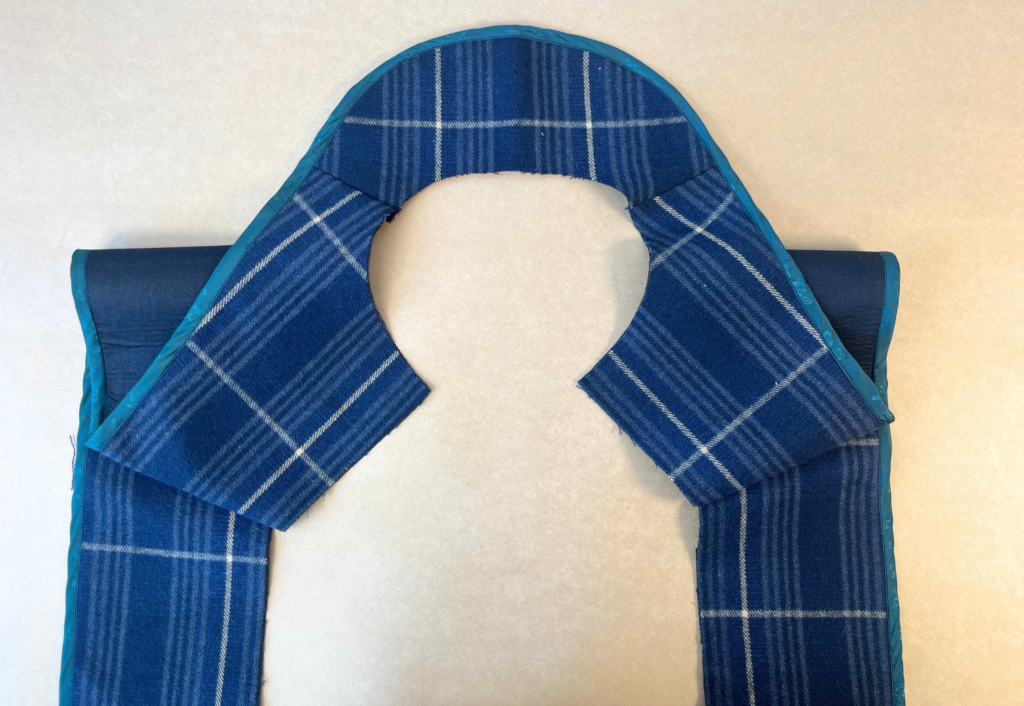
With RST, sew the Front High Neck Facing (2) to Back Neck Facing (7) at the shoulder seams seams using a 1cm (3/8”) seam. Press open.
Neaten the outer edge of the facing using an overlocker/serger. Please note: we have used a bias bound seam finish on our High Neck sample.
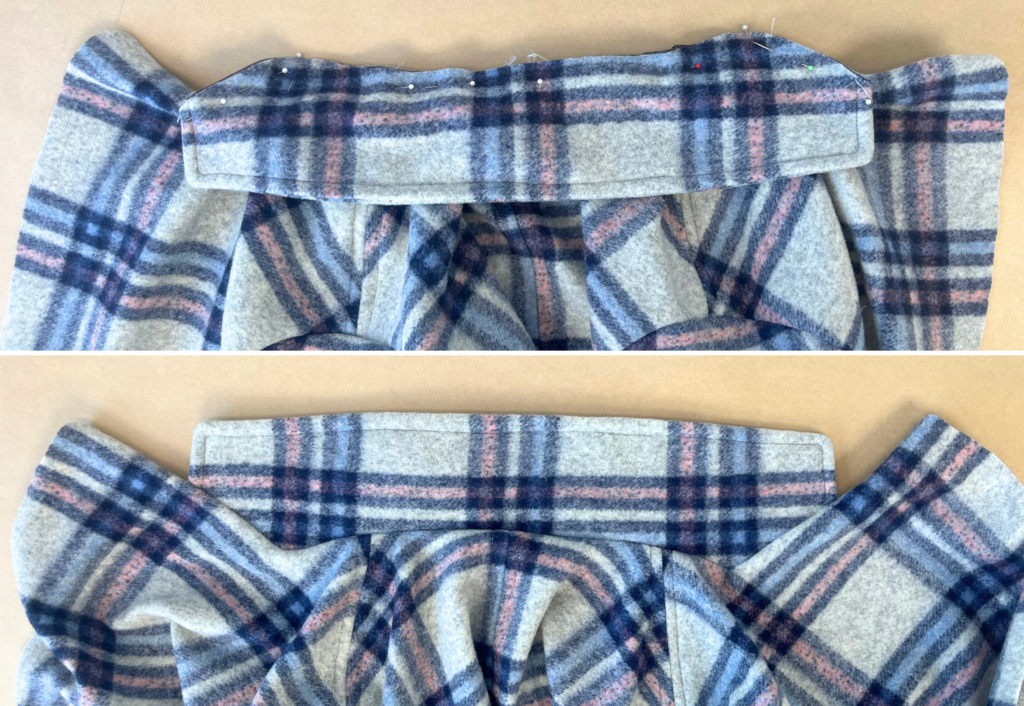
With RST and seams aligned, pin the facings to the front opening and the curved part of the hem, sandwiching the collar. Sew using a 1cm (3/8”) seam.
Clip the corners and into the curved seam at the hem and neckline. Turn out to the right side and press.
Open Neck Facing (13)
With RST, sew the Front Open Neck Facing (13) to Back Neck Facing (7) at the shoulder seams seams using a 1cm (3/8”) seam. Press open.
Neaten the outer edge of the facing using an overlocker/serger.
With RST and seams aligned, pin the facings to the front opening, back neck and the curved part of the hem, sandwiching the collar. Sew using a 1cm (3/8”) seam, keep the needle down and pivot at the corners of the revere.
Clip the corners and into the curved seam at the hem and neckline. Turn to the right side and press.
Sew an understitch to the back neck, between the shoulder notches, on the side of the facing. This is sewn to the seam and the facing, but not the outer fabric, and helps to keep the facing flat.
Sew an understitch to the lower part of the front opening on the side of the facing. This is sewn to the seam and the facing, but not to the outer fabric, and helps to keep the facing from showing on the outside.
Secure the facing to the main body at the shoulder seams and centre back using a small bar tack by hand.
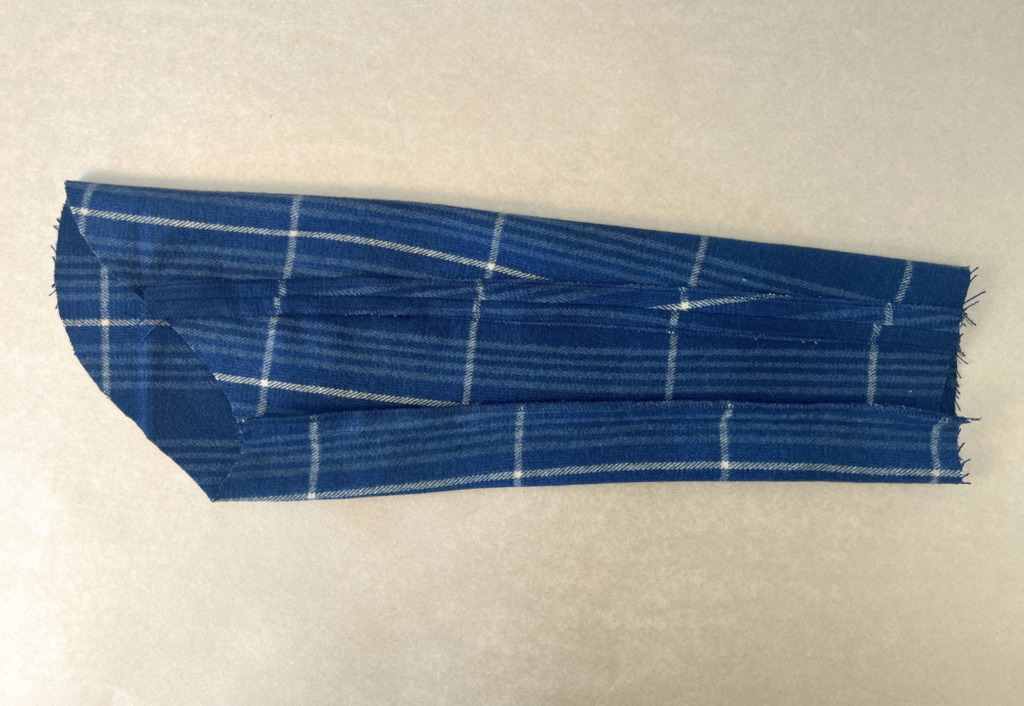
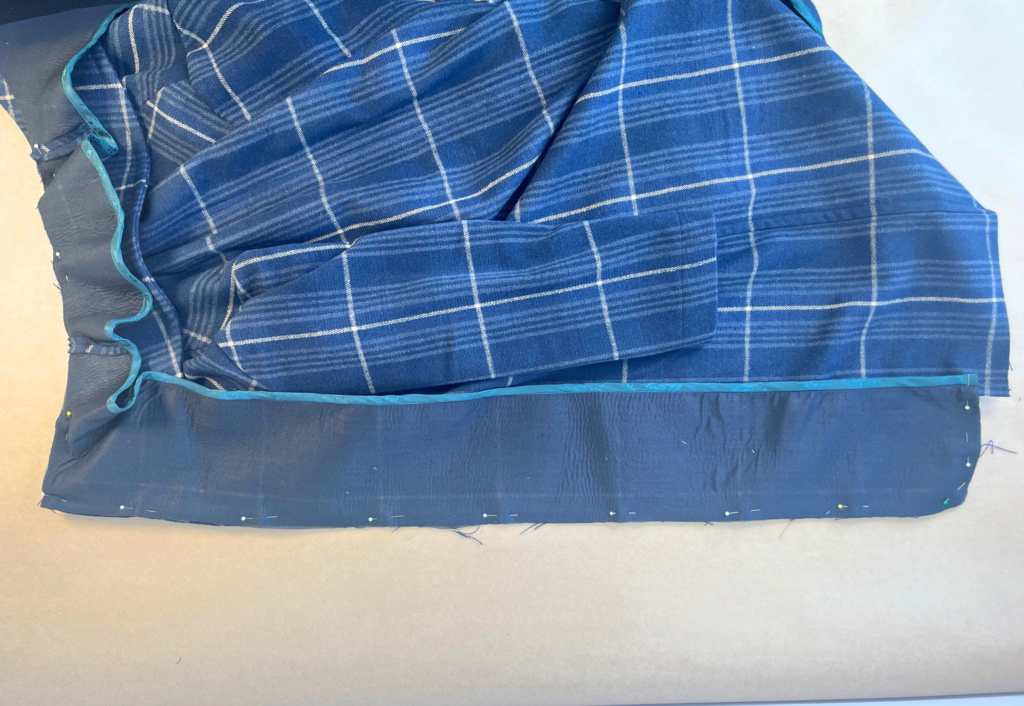
HEM:
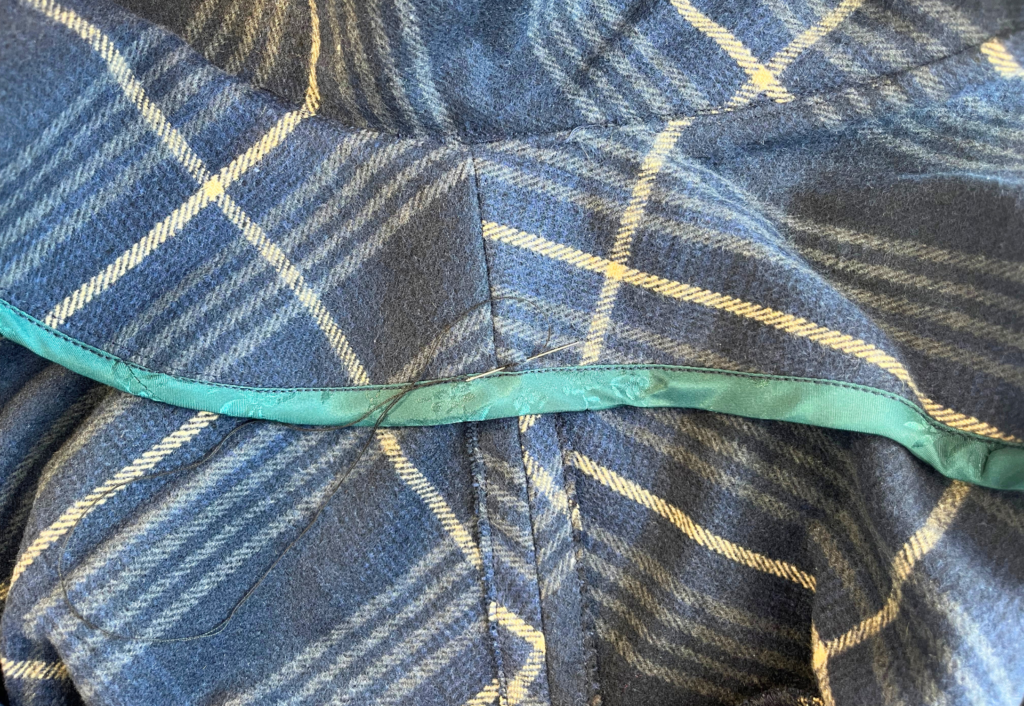
Neaten the hem using an overlocker/serger (or use bias binding if choosing that option).
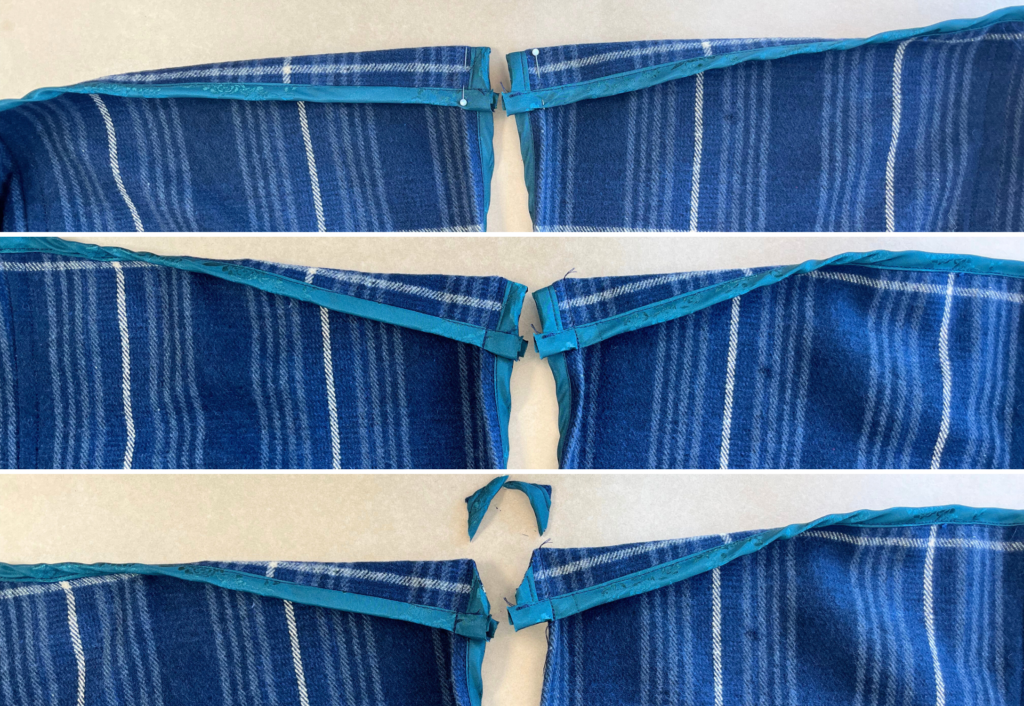
Fold the hem 4cm to the outside with RST at the split, pin and sew the hem turnback in line with the pressed edge of the split.
Clip the corners, turn the hem 4cm (1½”) to the inside and press. The hem will sit under the neatened edge of the facing.

Pin the hem and facing into place.
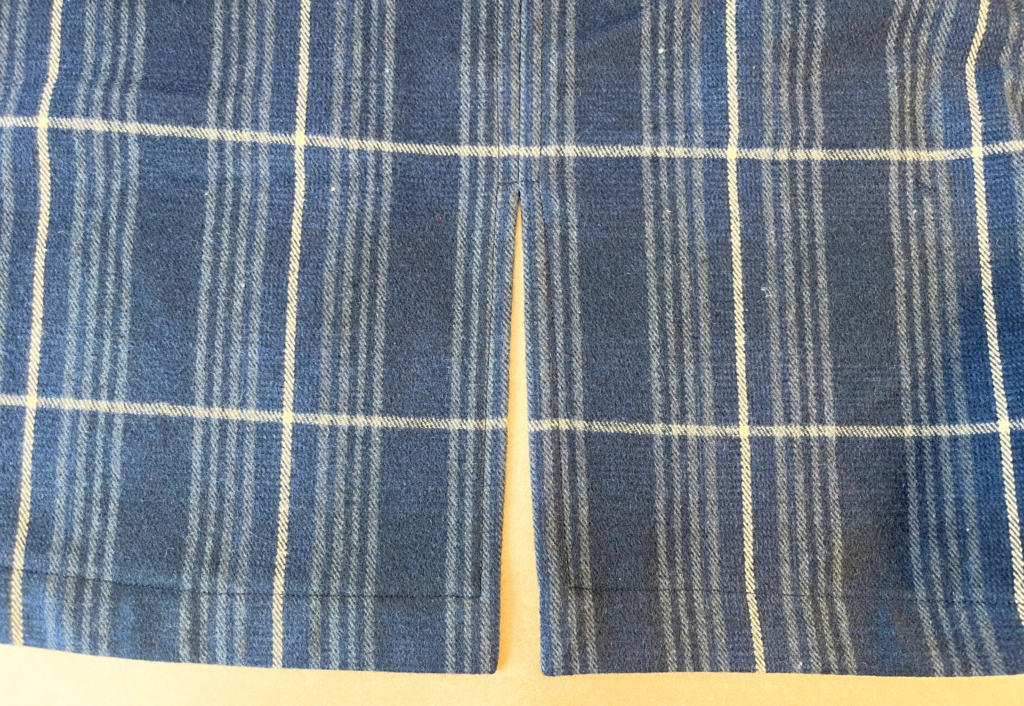
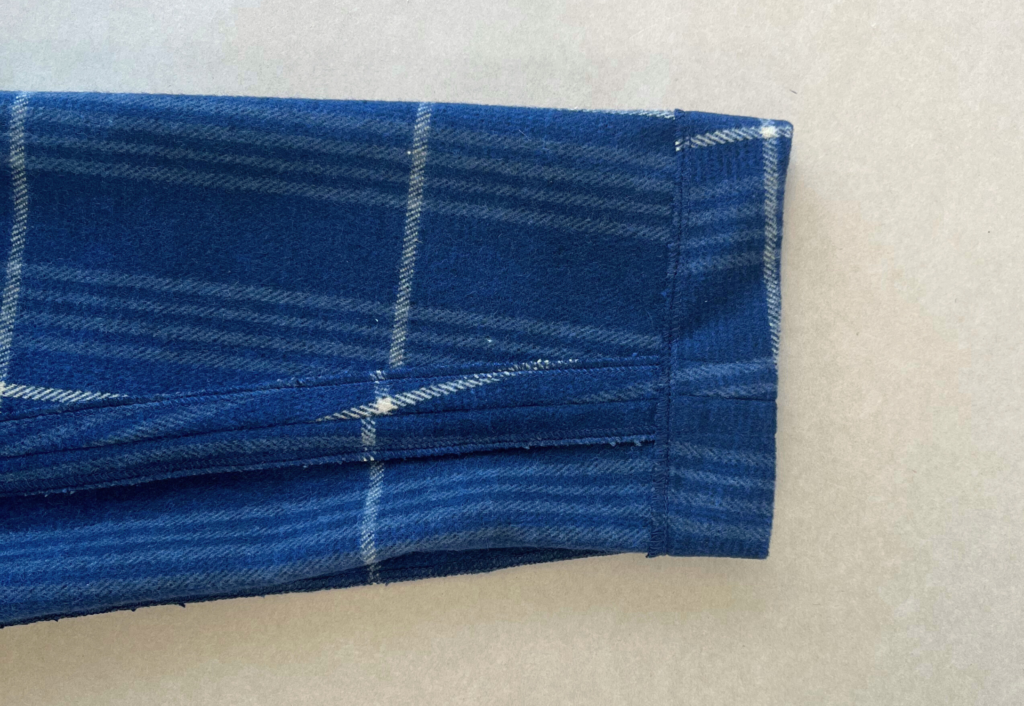
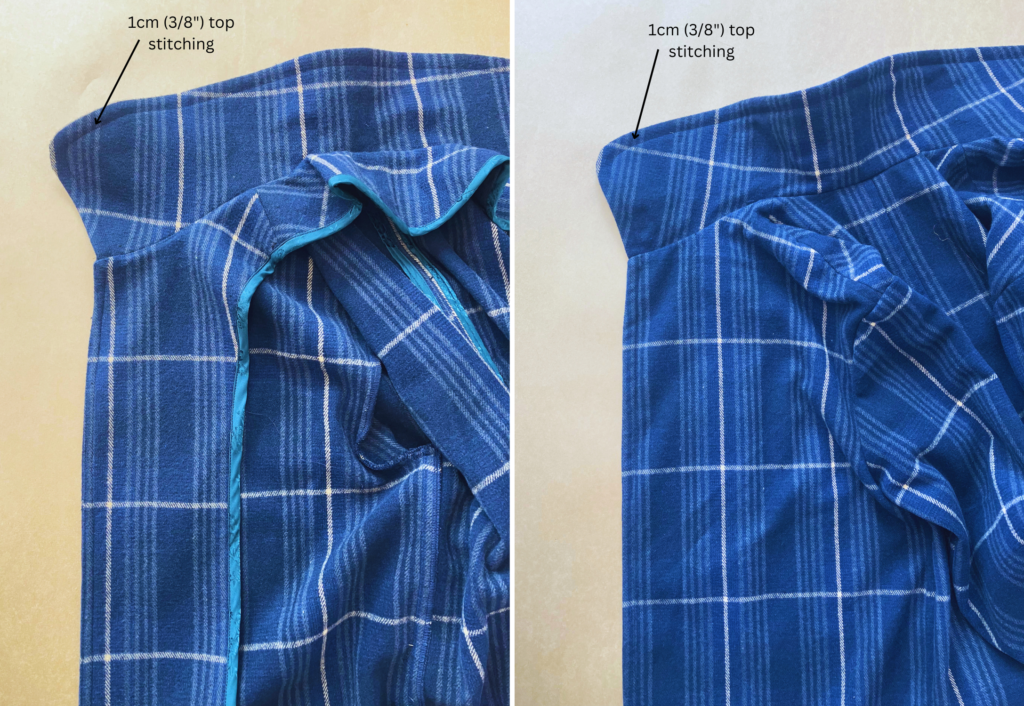
Starting at the back split on the wearer’s right, sew down the open edge of the split using a scant 1cm (3/8”) topstitch. When you reach the top of the hem allowance, leave the needle down, pivot at the corner, and continue stitching to secure the hem in place using a scant 4cm (1 5/8”) top stitch.
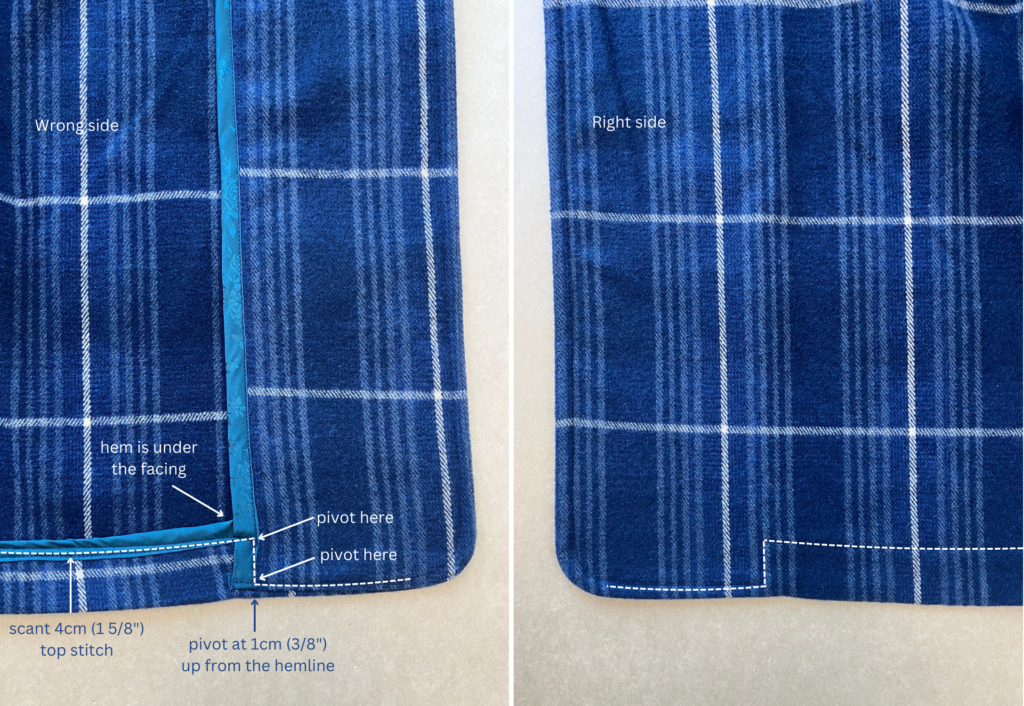
When you reach the facing, leave the needle down, pivot at the corner and continue to sew down to where the hem sits under the facing. This secures both the hem and the facing to the front body. Pivot at the corner and using a 1cm (3/8”) top stitch, sew around the curved part of the hem/facing and continue sewing along the front opening.
If using the Open Collar:
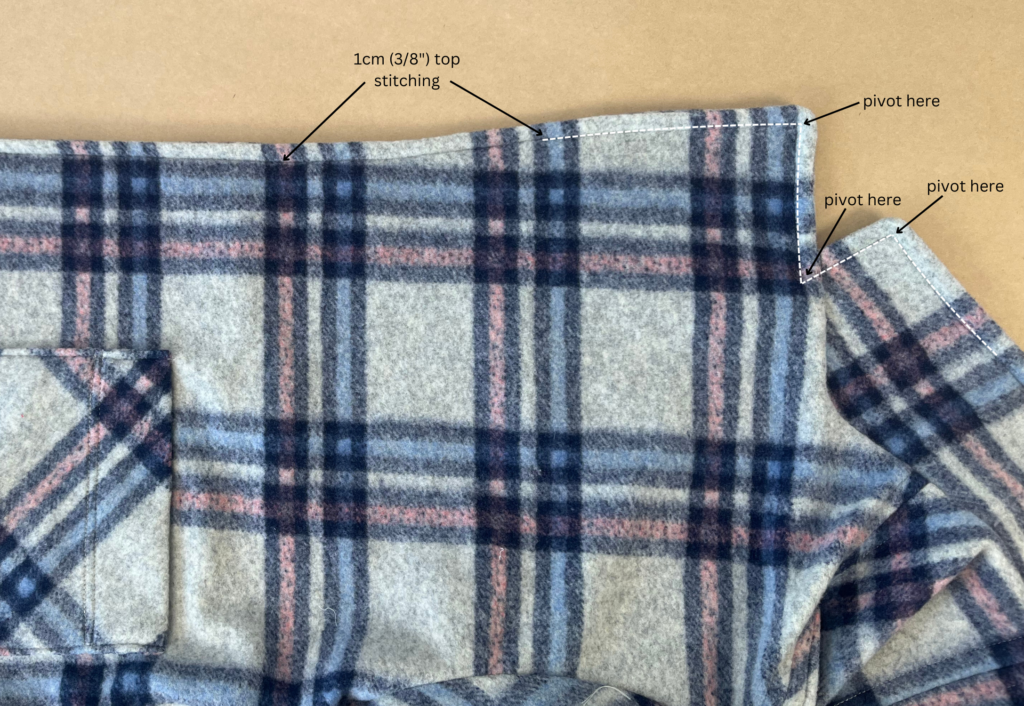
Turn the corner at the point of the revere, along the top of the revere, with the needle down, pivot at the corner and sew over the neck seam and continue sewing around the collar using a 1cm (3/8”) top stitch. Repeat these steps in reverse to arrive at the top of the split on the wearer’s right. Sew a bar tack to the top of the split, by hand or machine. This will add extra strength to the split.
If using the High Neck Collar:
Continue the top stitch over the neck seam and continue sewing around the collar using a 1cm (3/8”) top stitch.
Repeat these steps in reverse to arrive at the top of the split on the wearer’s right.
Sew a bar tack to the top of the split, by hand or machine. This will add extra strength to the split.
COMPLETION:

Fold each short end of the belt loops 1cm (3/8”) to the inside. Pin the belt loops into place over the side seams as shown on the pattern, or to your personal preference. Sew into place using a bar tack by hand or machine.
OPTIONAL – Mark in the buttons and buttonholes placement using the guides on the pattern. It is industry standard to sew the buttonholes to the wearer’s right and the buttons to the left for women’s wear, and the opposite sides for men’s wear. Sew the buttons and buttonholes using your preferred method. You may choose to use hand sewn press studs (snap fasteners), especially if you are using thick fabric.
Trim any loose threads and carefully press your new coat.
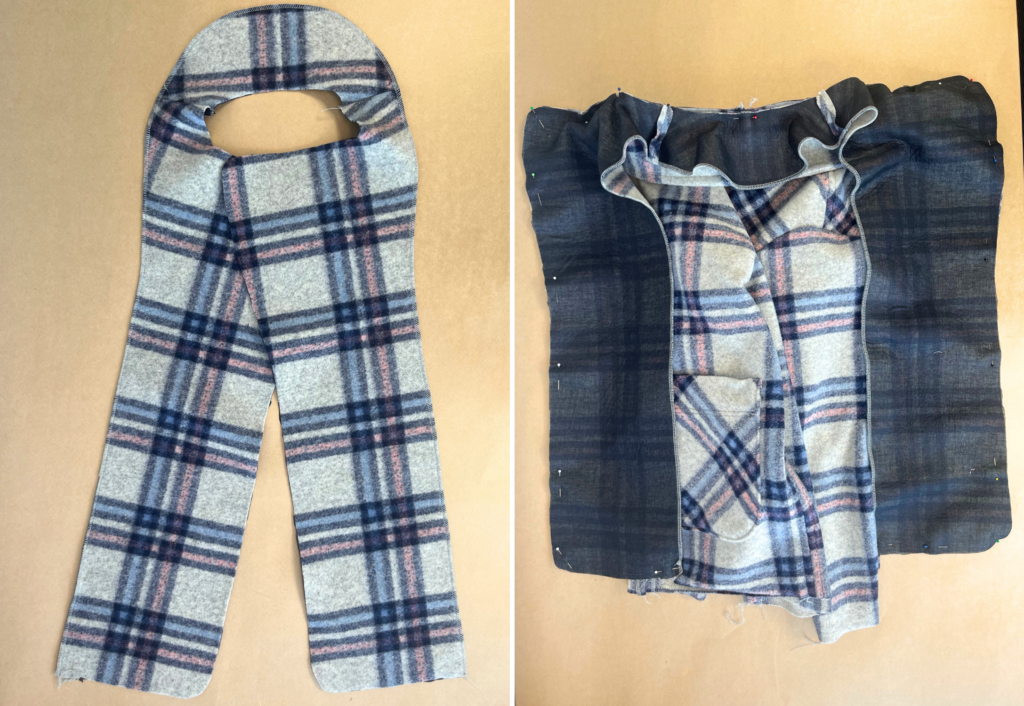
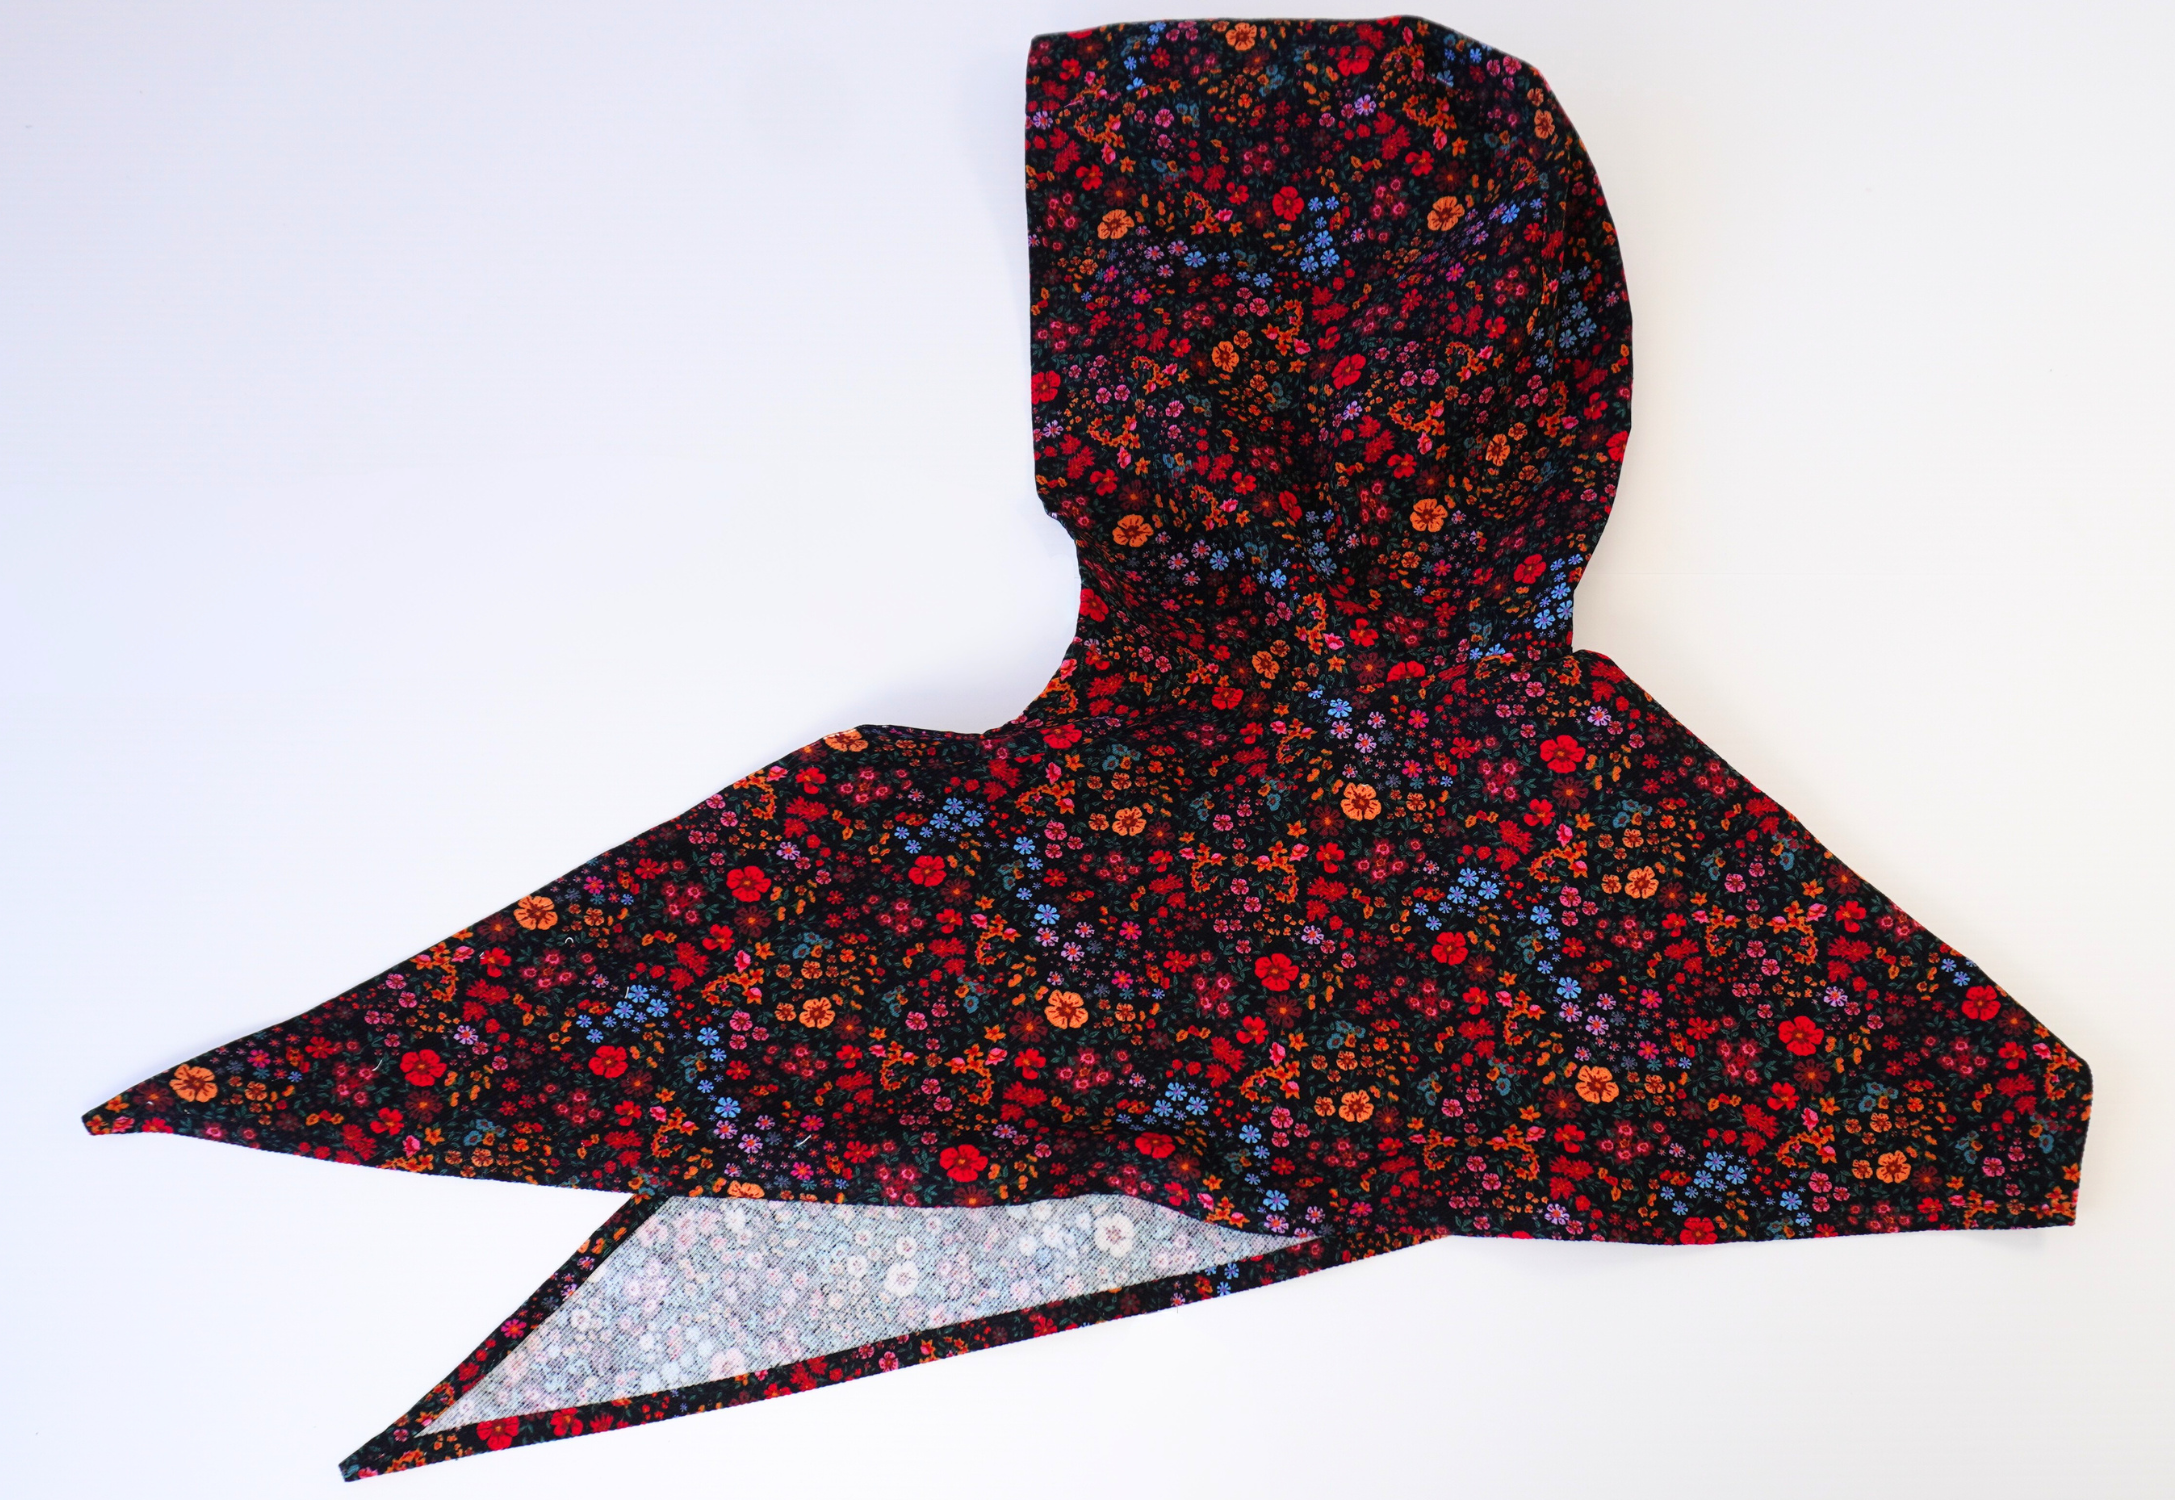
CONSTRUCTION – HEADSCARF:
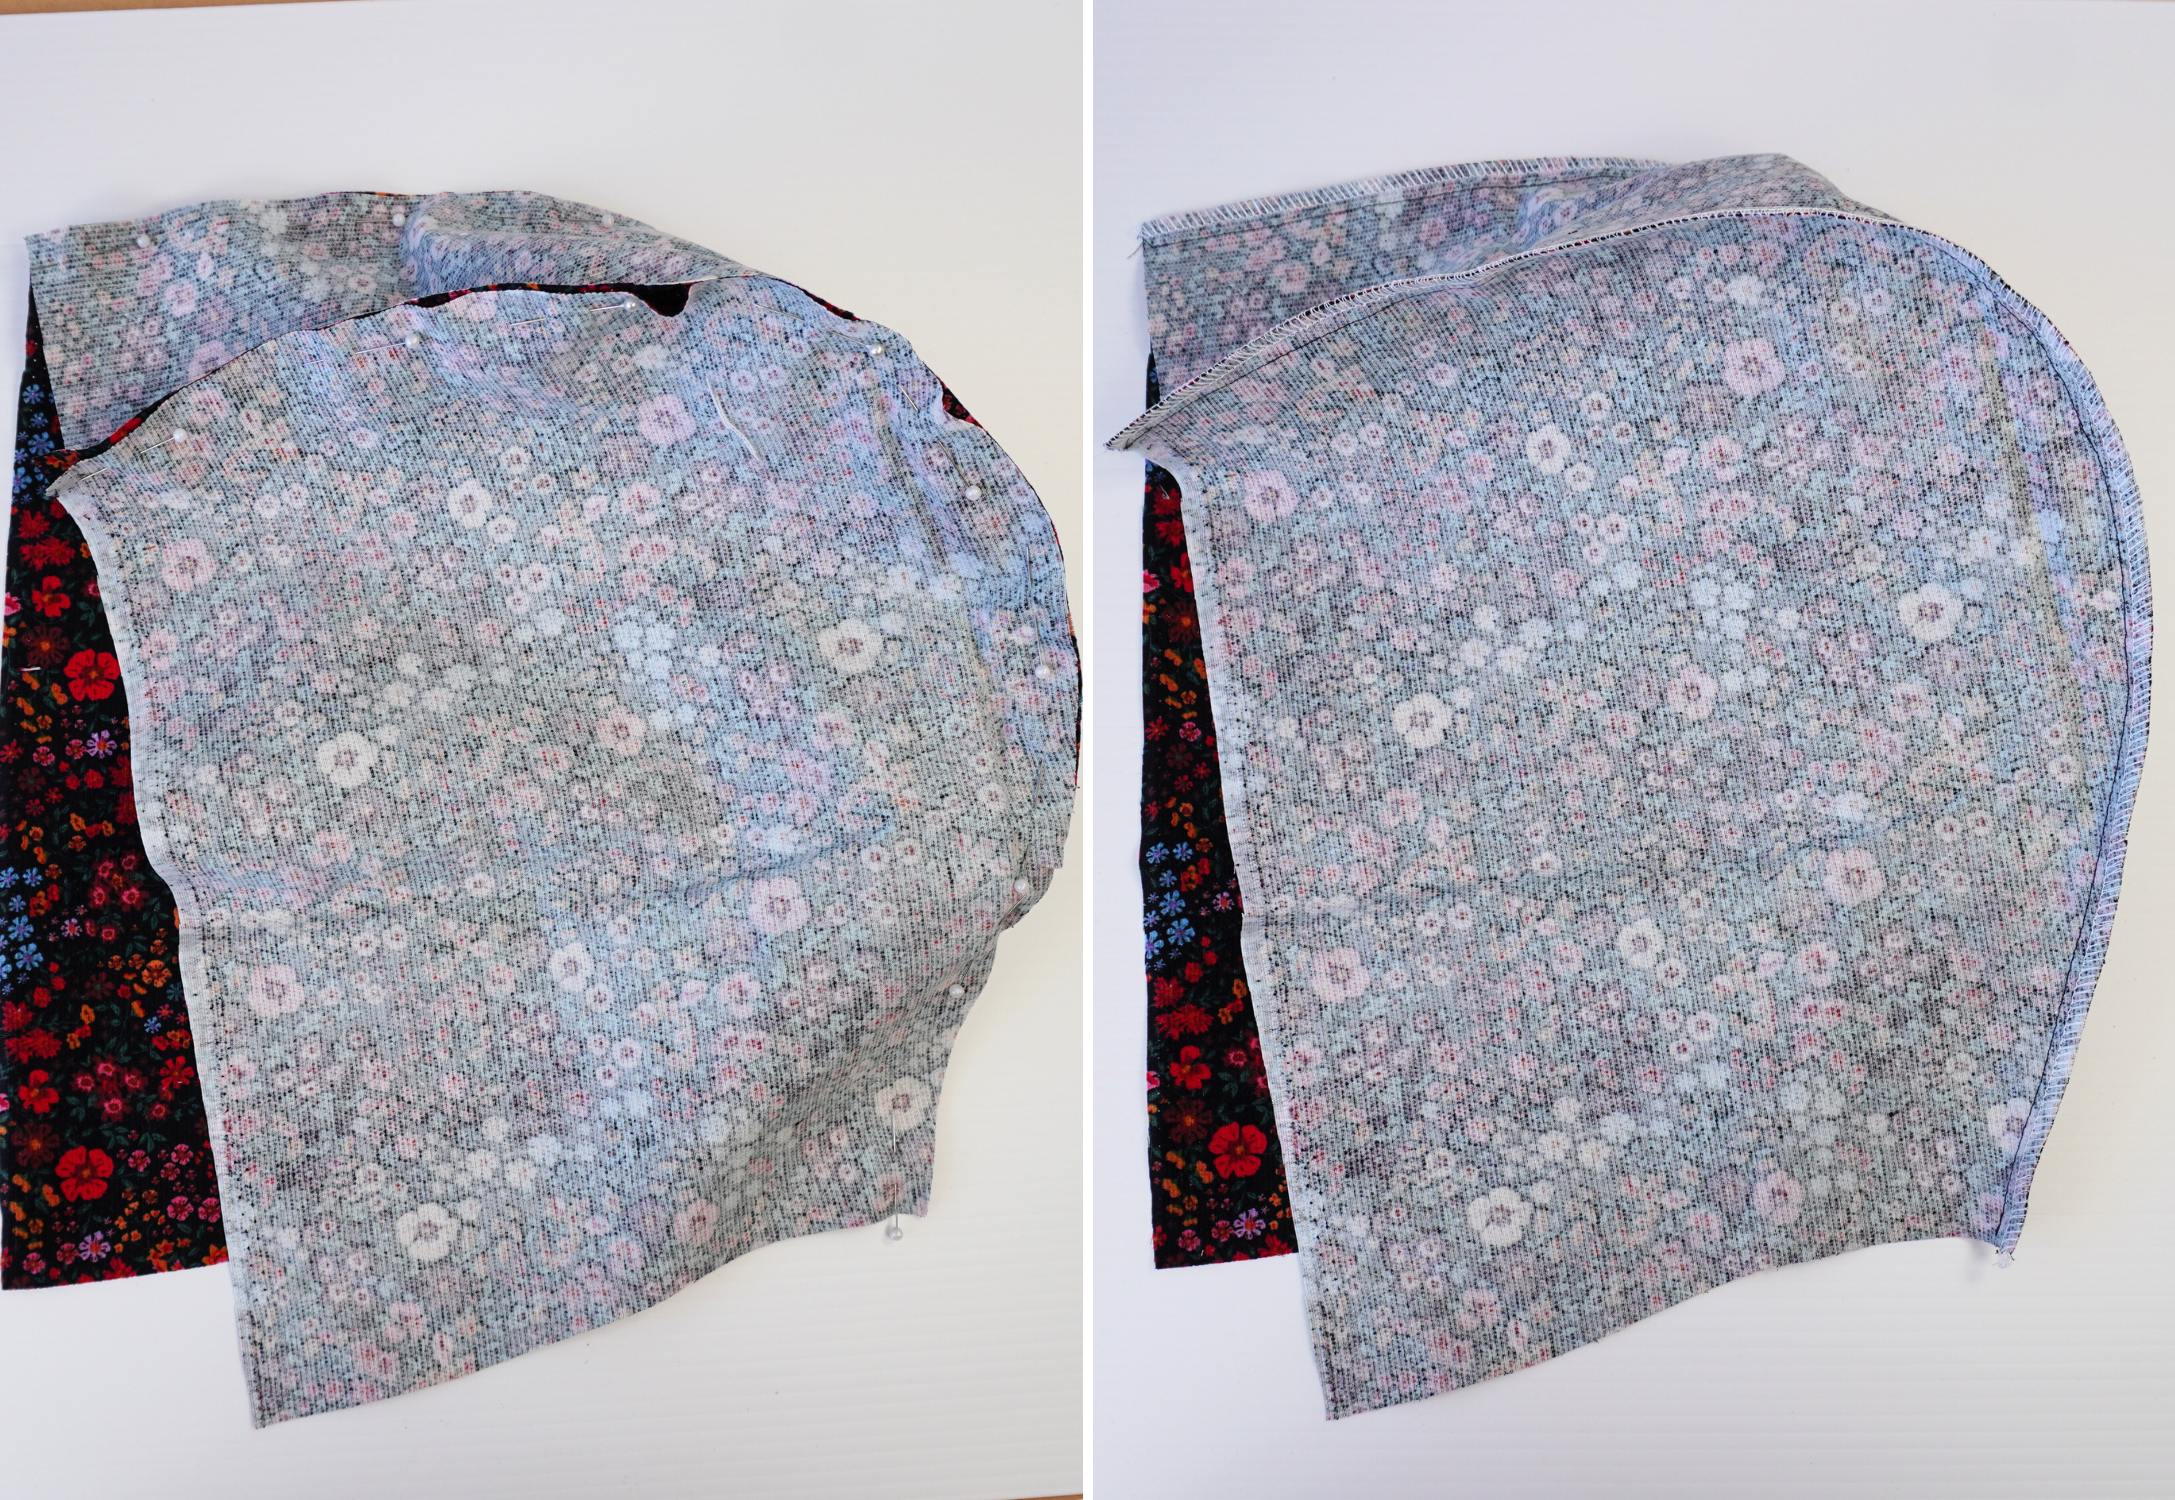
With RST and notches aligned, sew the Side Hood (1) pair to the Centre Hood (2) at the centre back seams. Neaten using an overlocker/serger and press toward the centre.
Sew a 1cm (3/8”) top stitch to the seams on the side of the centre hood.
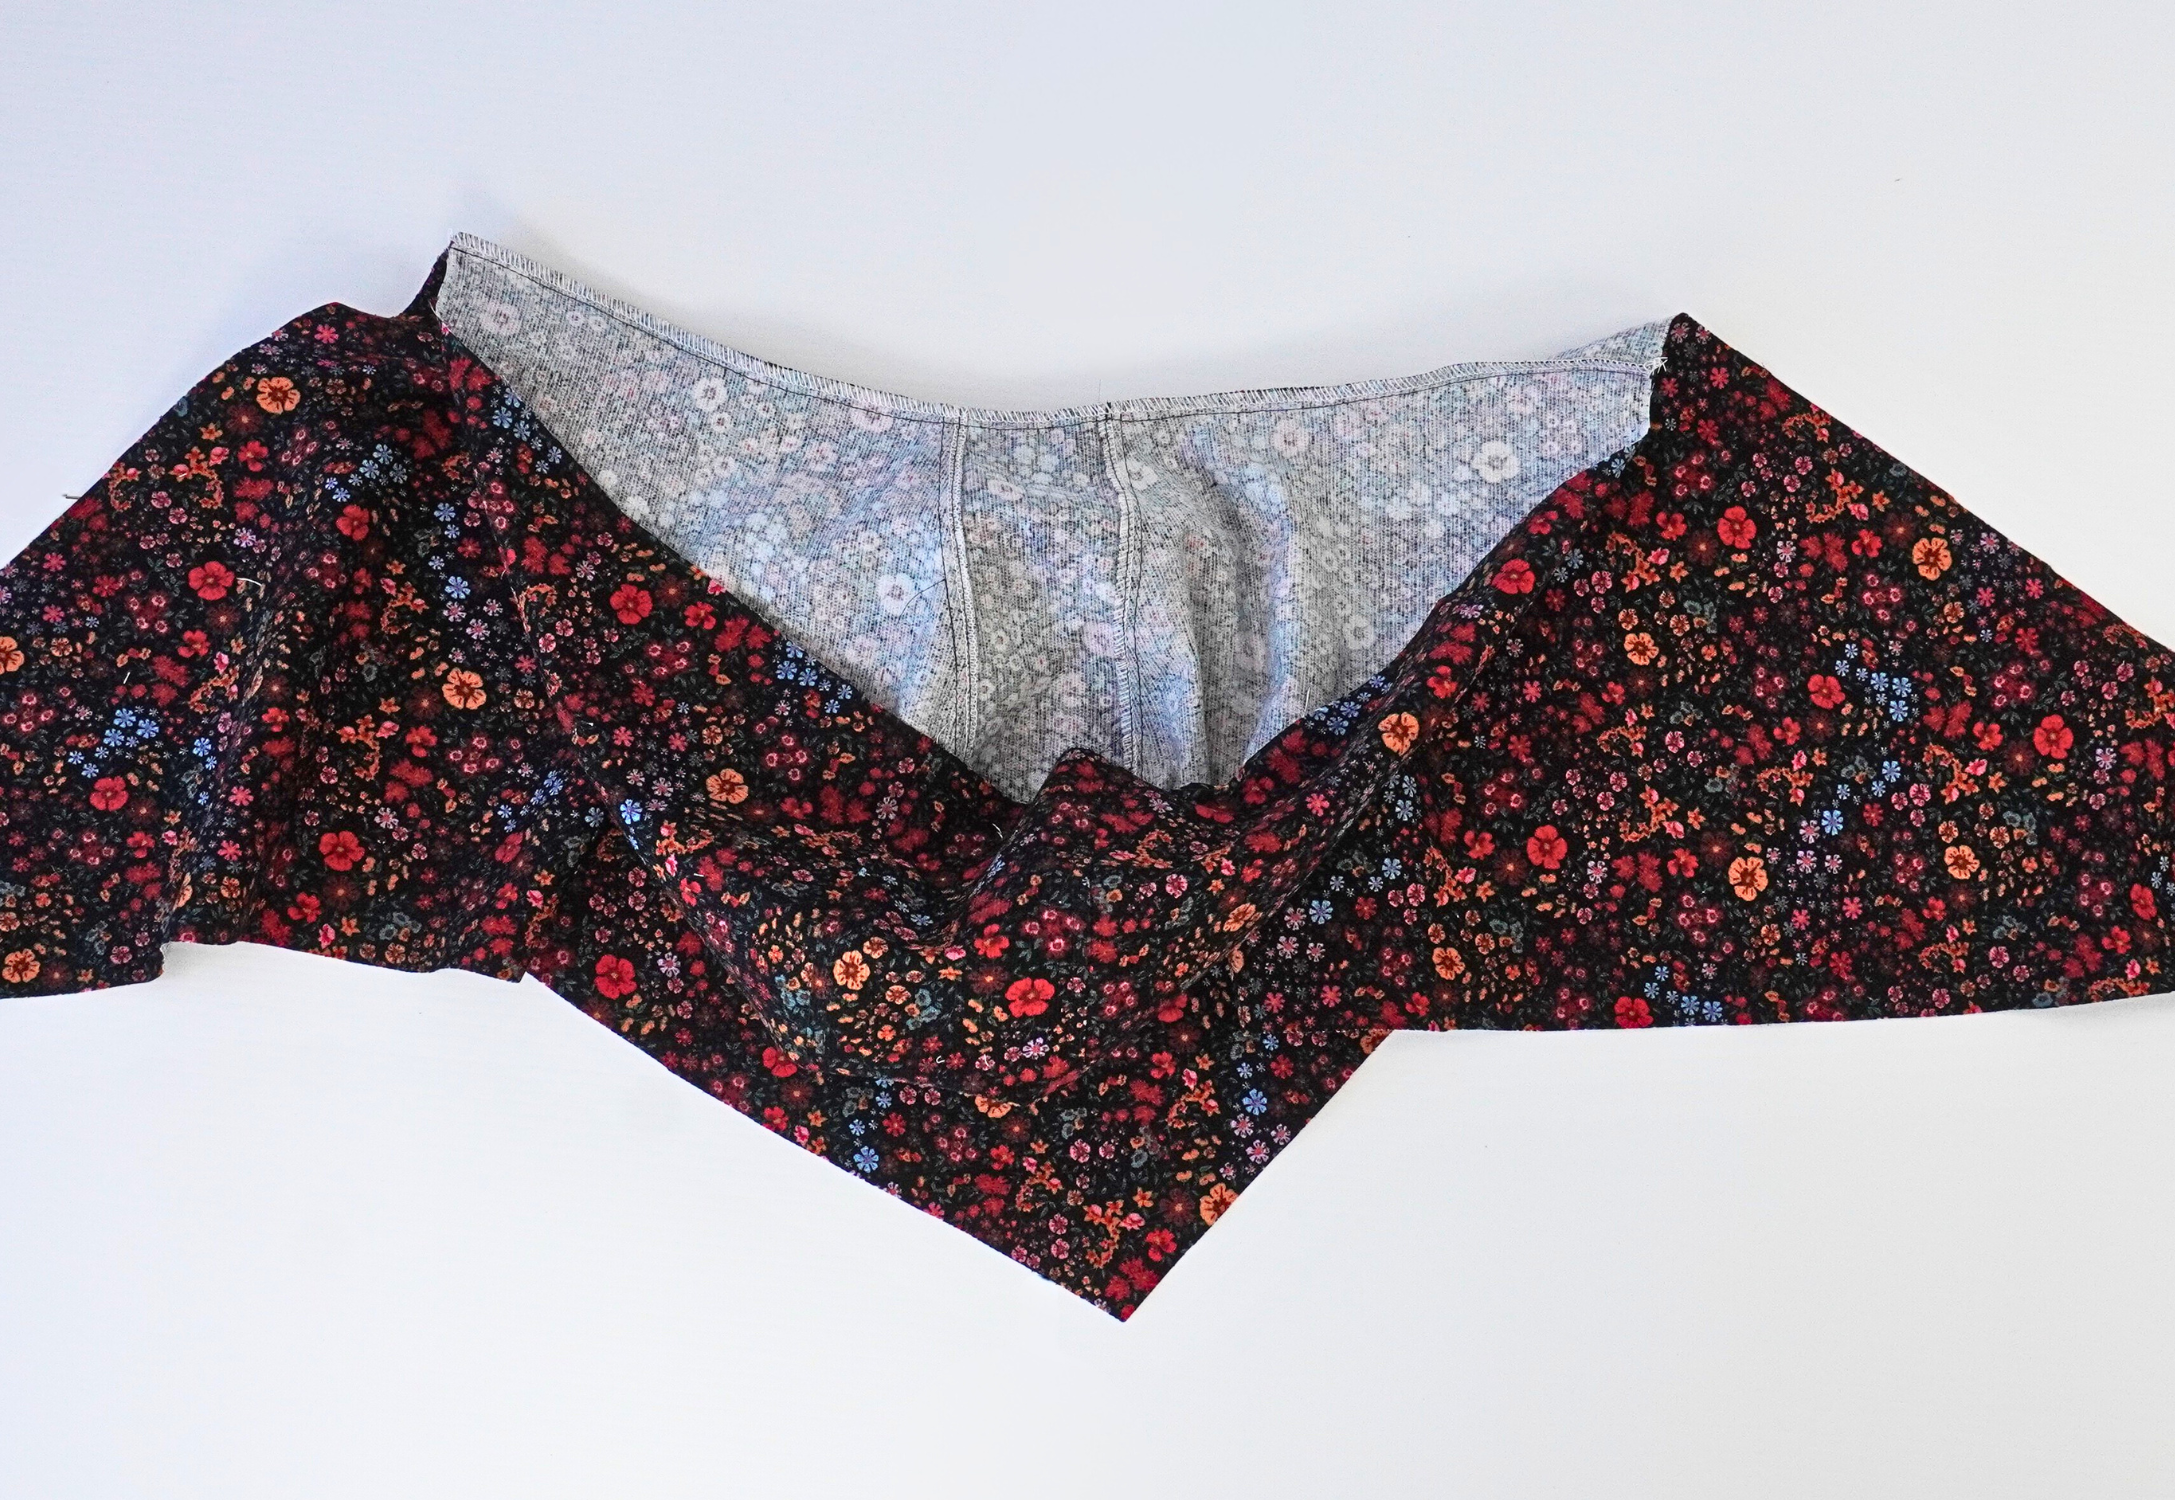
With RST and notches aligned, sew the hood to the Scarf (3). Neaten using an overlocker/serger and press toward the hood.
Sew a 1cm (3/8”) top stitch to the seam on the side of the hood.
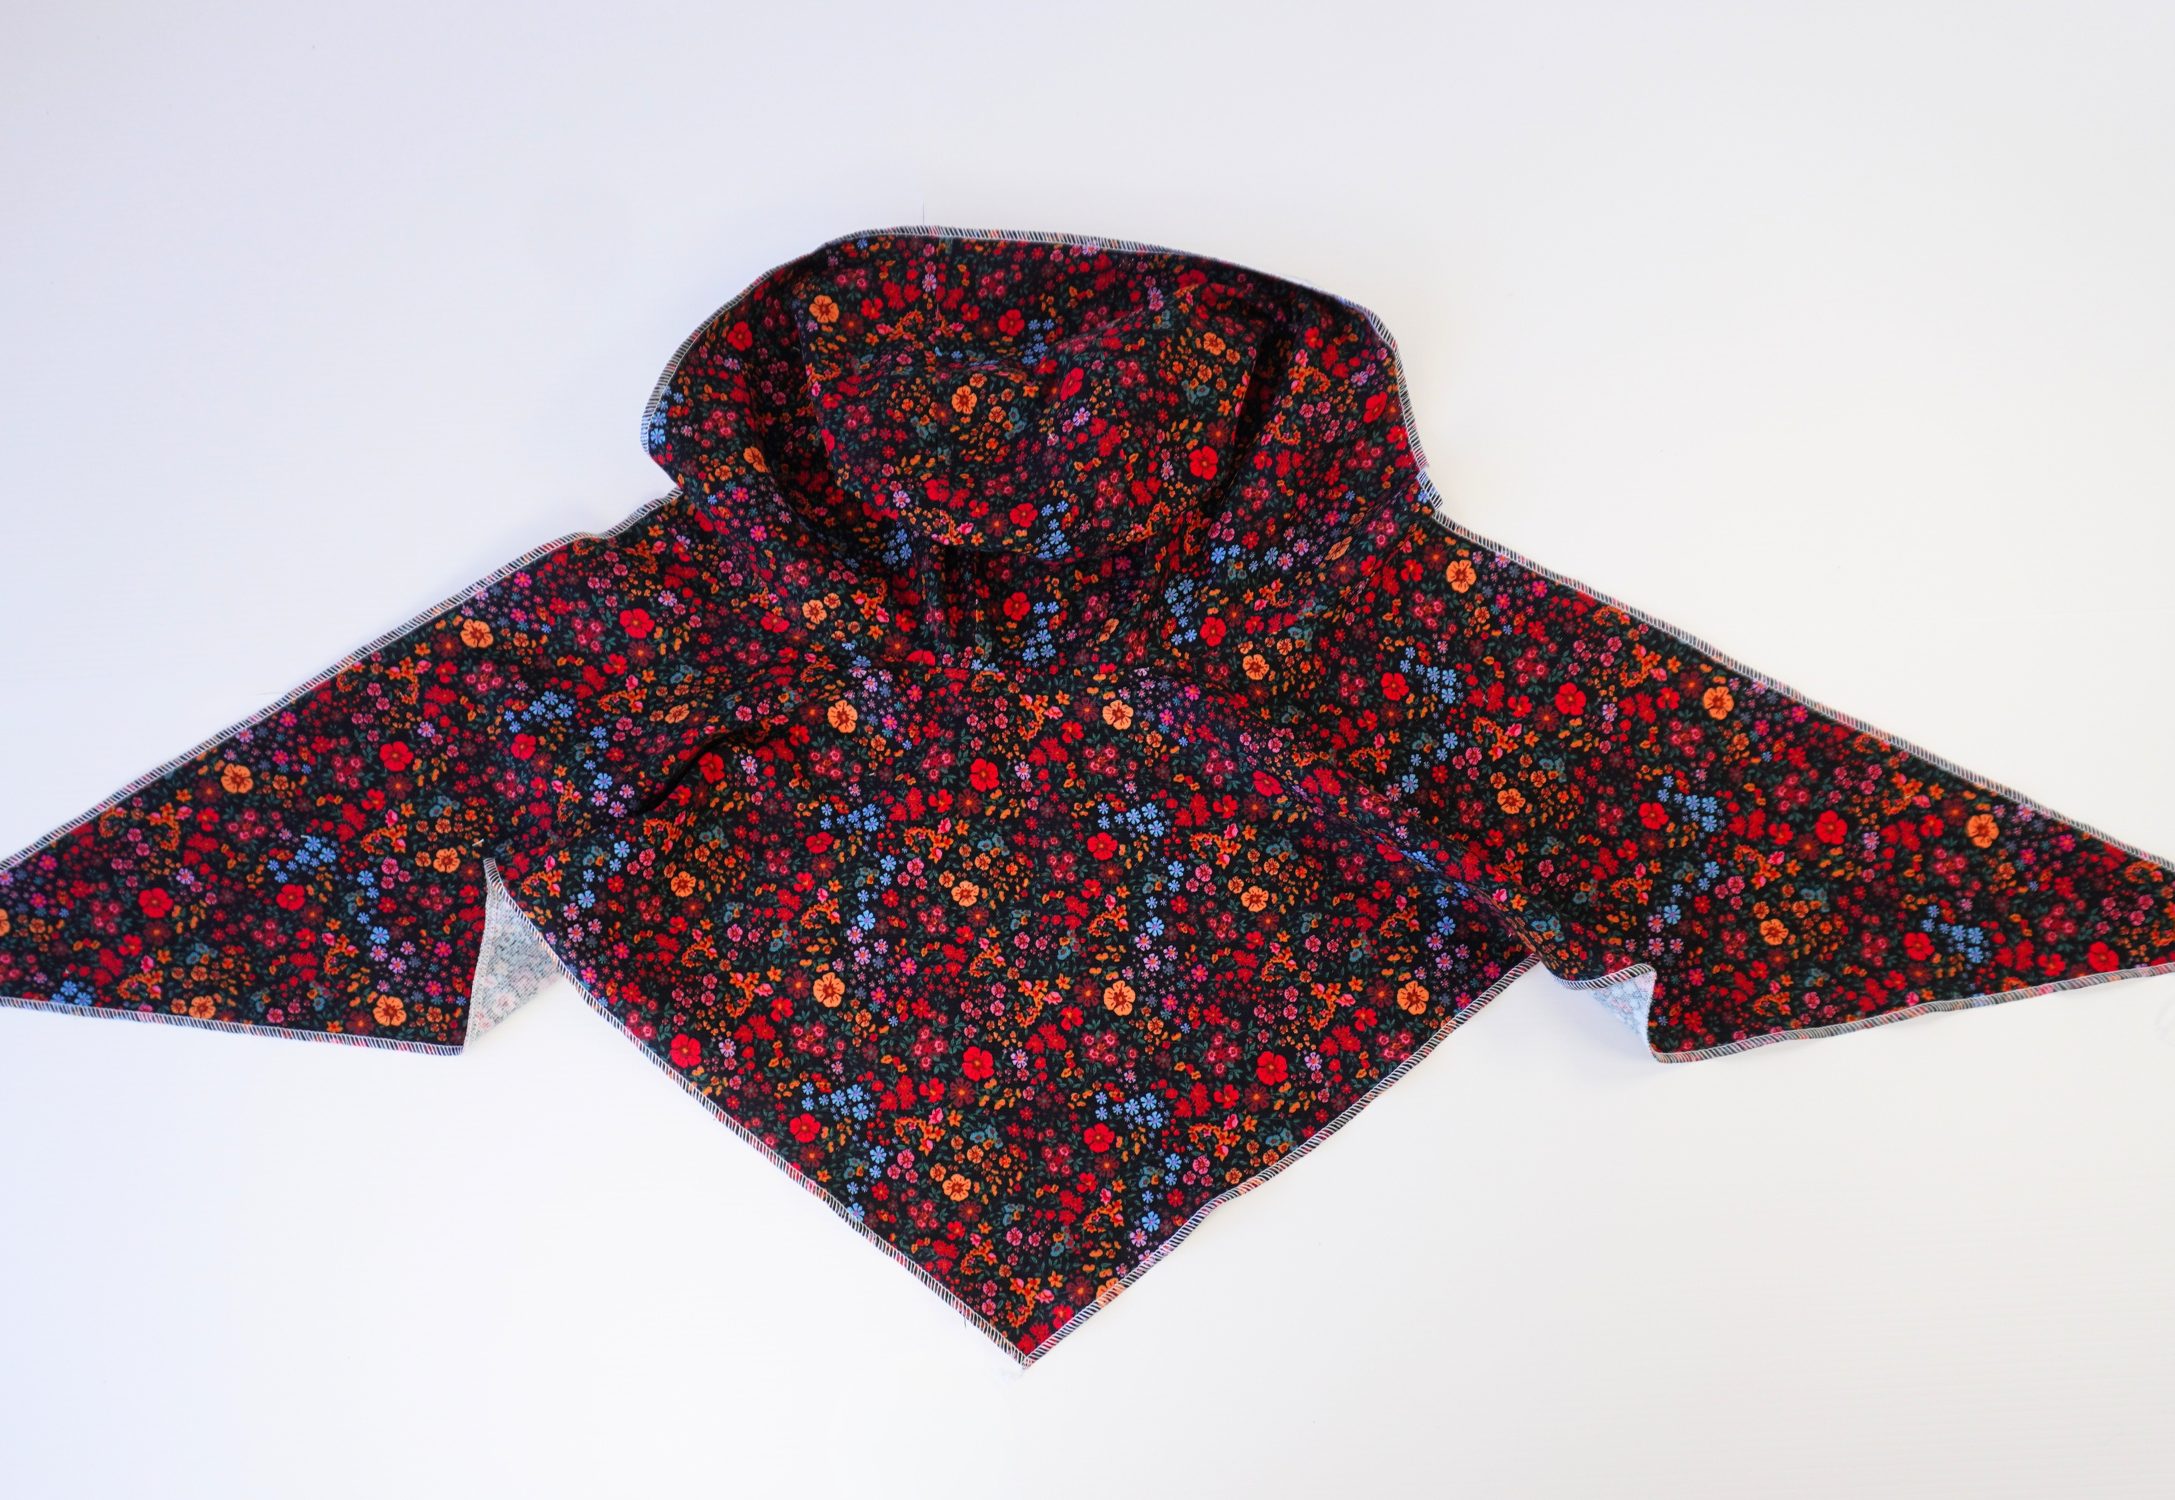
Neaten the outer edge of the headscarf using an overlocker/serger.

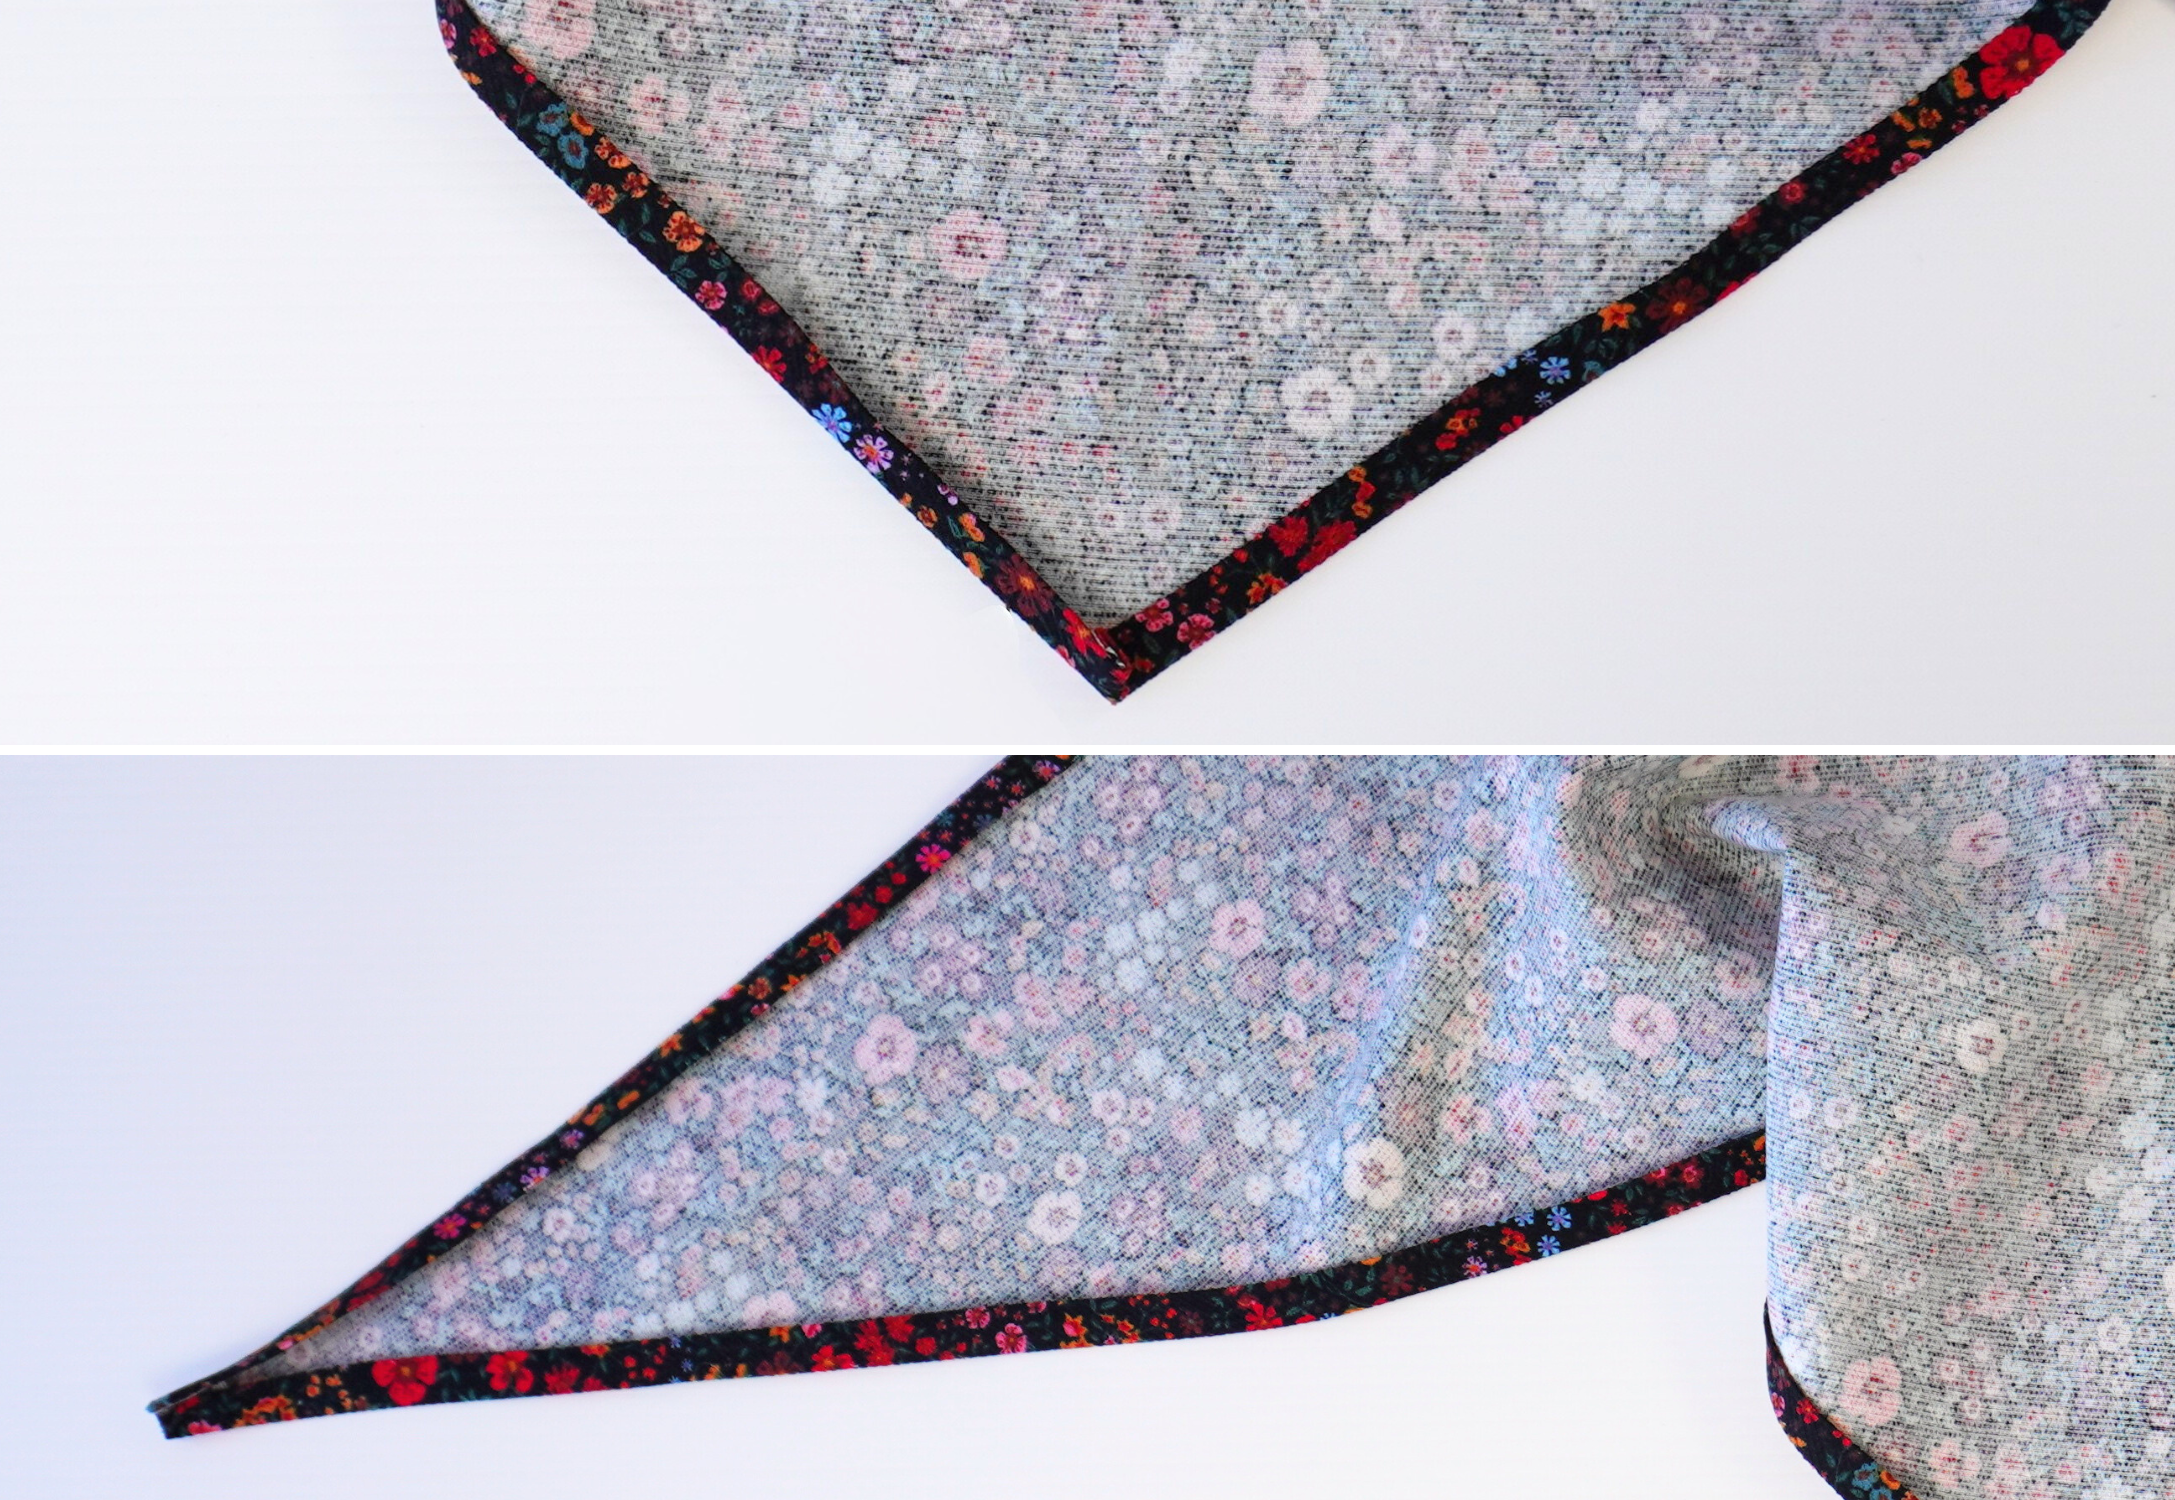
Double turn the outer edge to the inside, tucking the corners in neatly and pin into place.
Top stitch the outer edge of the headscarf into place.
Trim any loose threads and lightly press your new headscarf.