Step-By-Step Tutorial
#SAHarlowKidsKnitTop
Tips for working with stretchy fabrics:
– use an overlocker / serger
– use a stretch stitch
– if you want to use a straight stitch, use a stretch thread (Seraflex for example)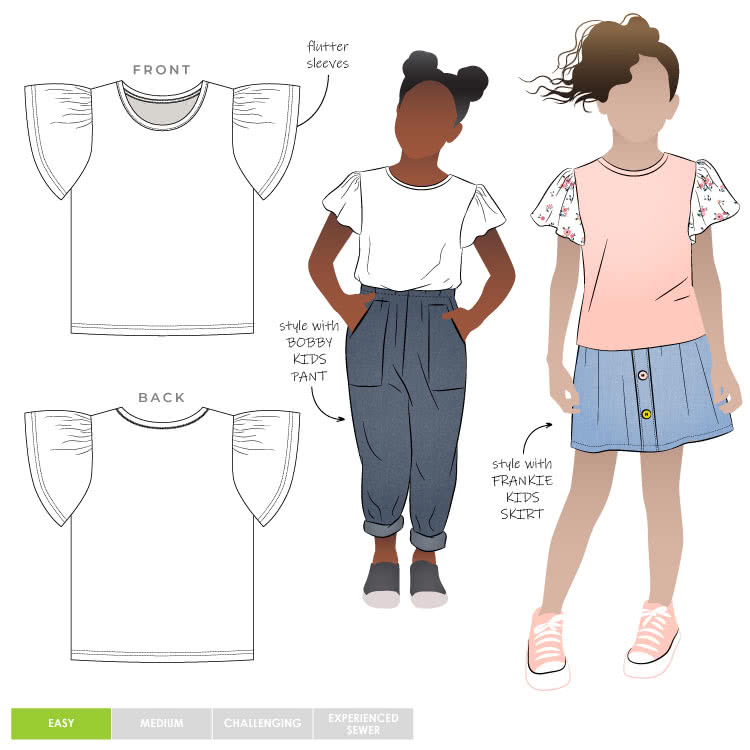 Preparations
– Cut out all the pattern pieces.
– Take notice of the grainline as mentioned on the pattern pieces and the pattern pieces that need to be cut on the fold.
– Mark the notches.
– When finished, you should have 5 fabric pieces (4 pattern pieces).

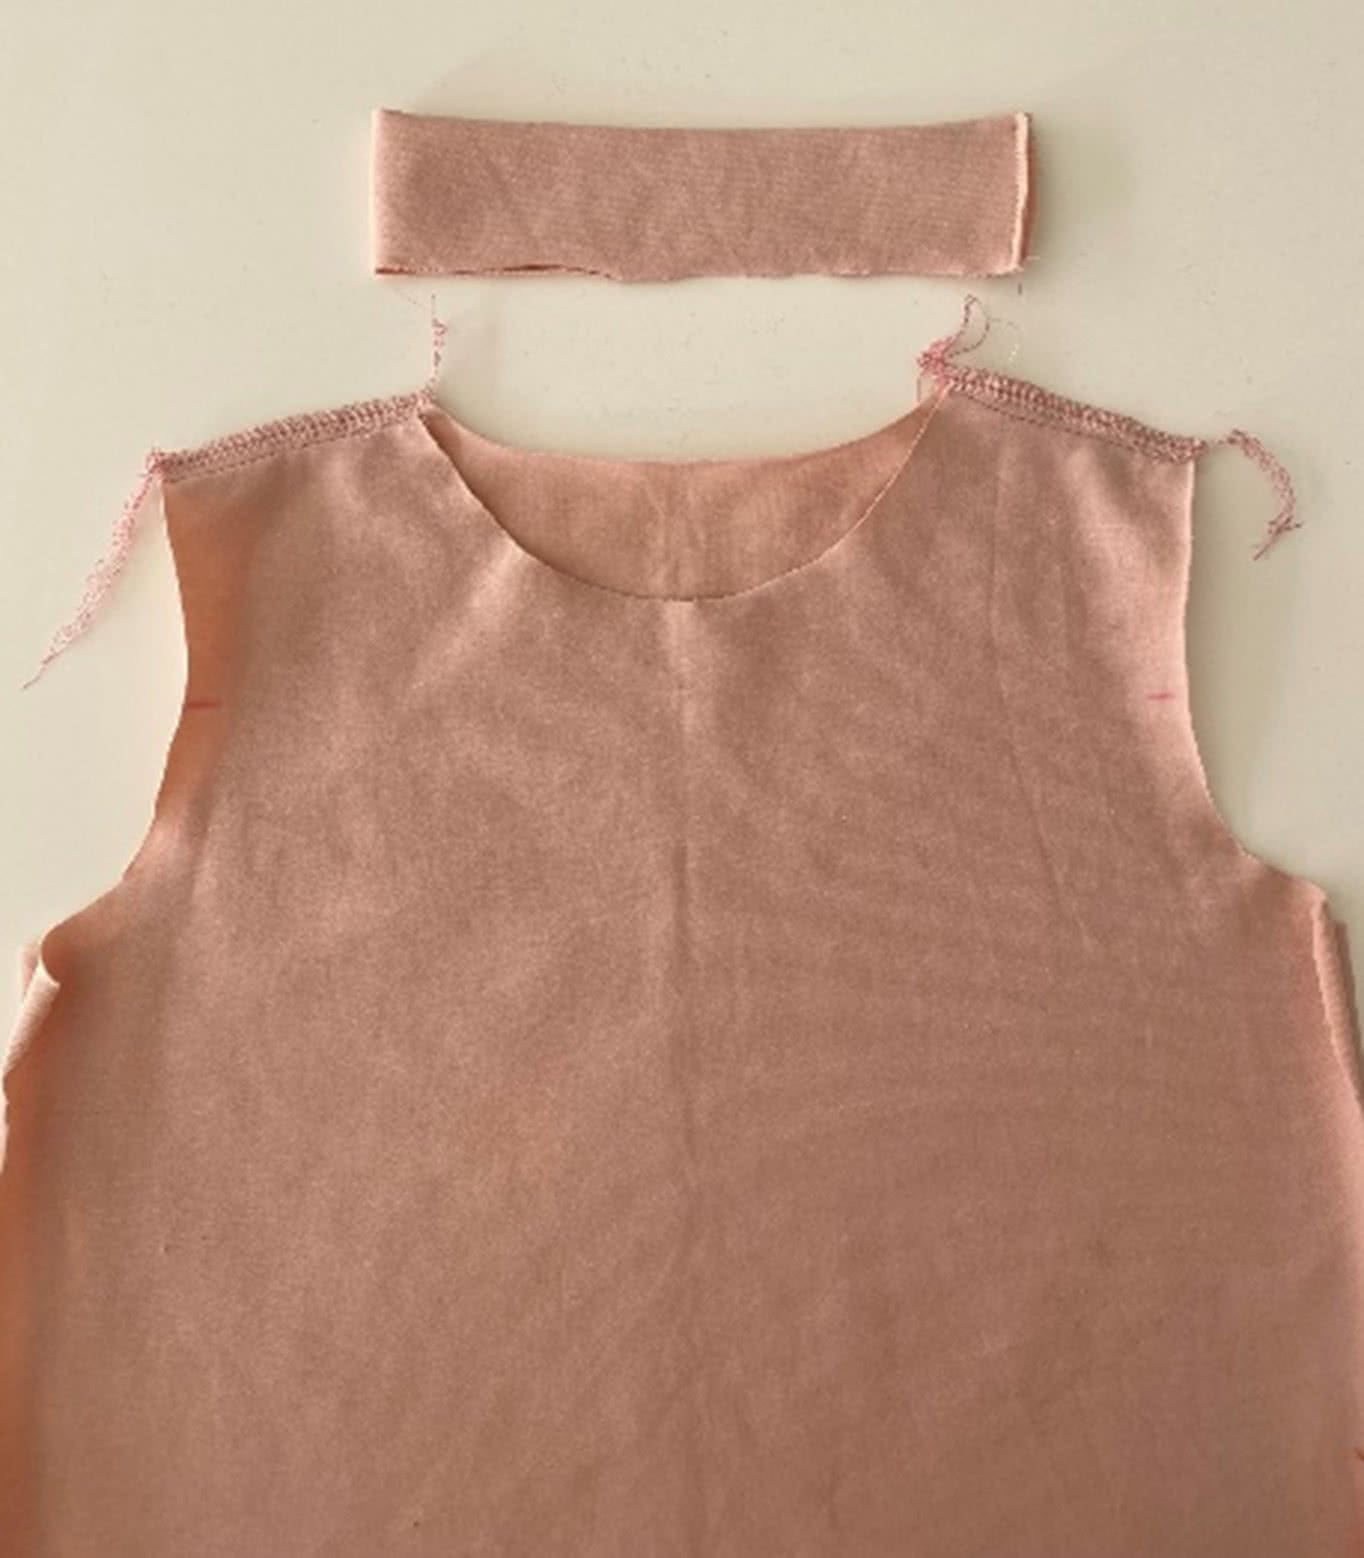
Sewing the neck band and shoulder seams
– Fold the neckband and sew the short ends together
– Lay the front and back on top of each other, right sides facing and sew the shoulder seams together.
Sewing the neckband with a cover strip on the inside
Step 1
If you wish to sew the neckband without a cover strip, you can still follow these steps but let out the cover strip.
– Measure the back of the neck, from shoulder to shoulder. Add 2 cm to this length.
– Cut a piece of knit fabric (leftovers are great for this), length as just measured, width about 4 cm. This is your cover strip.
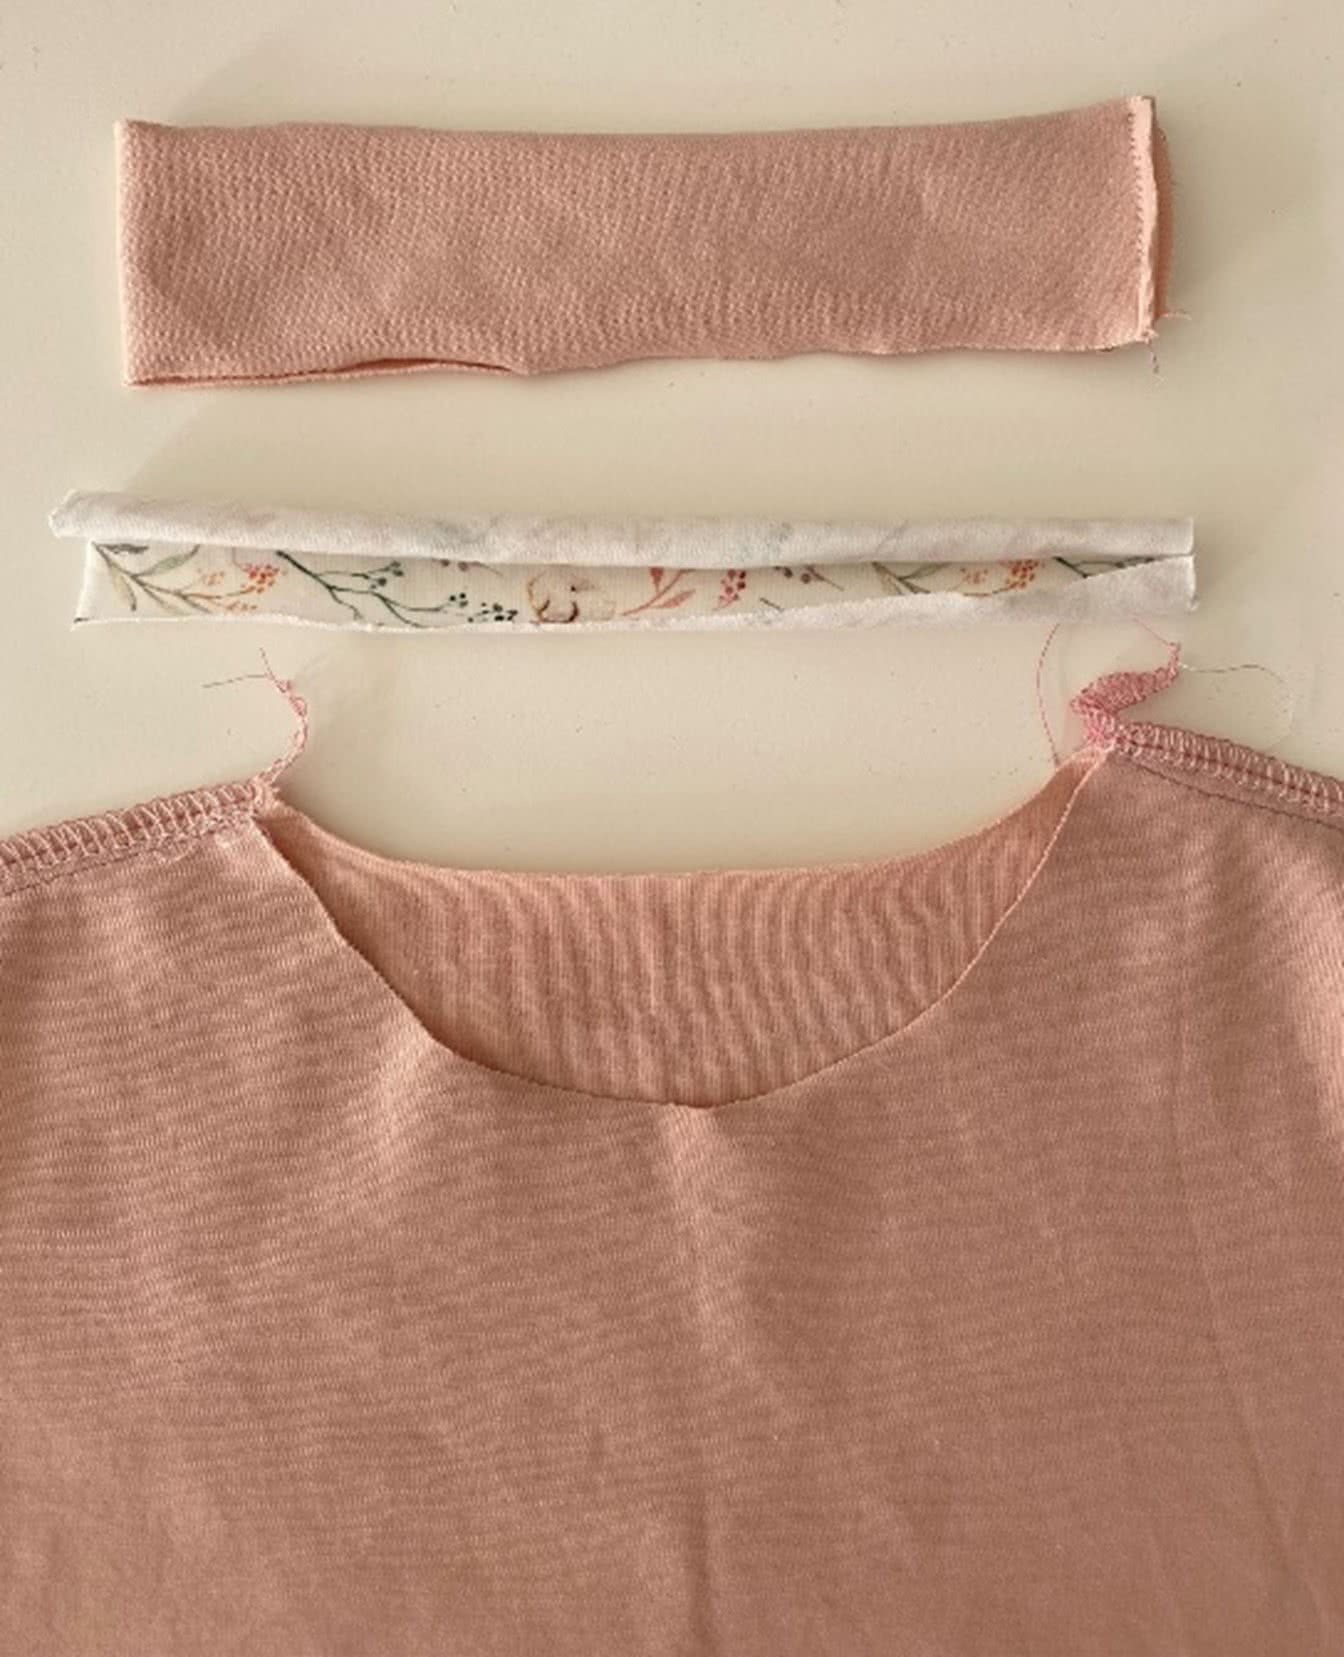
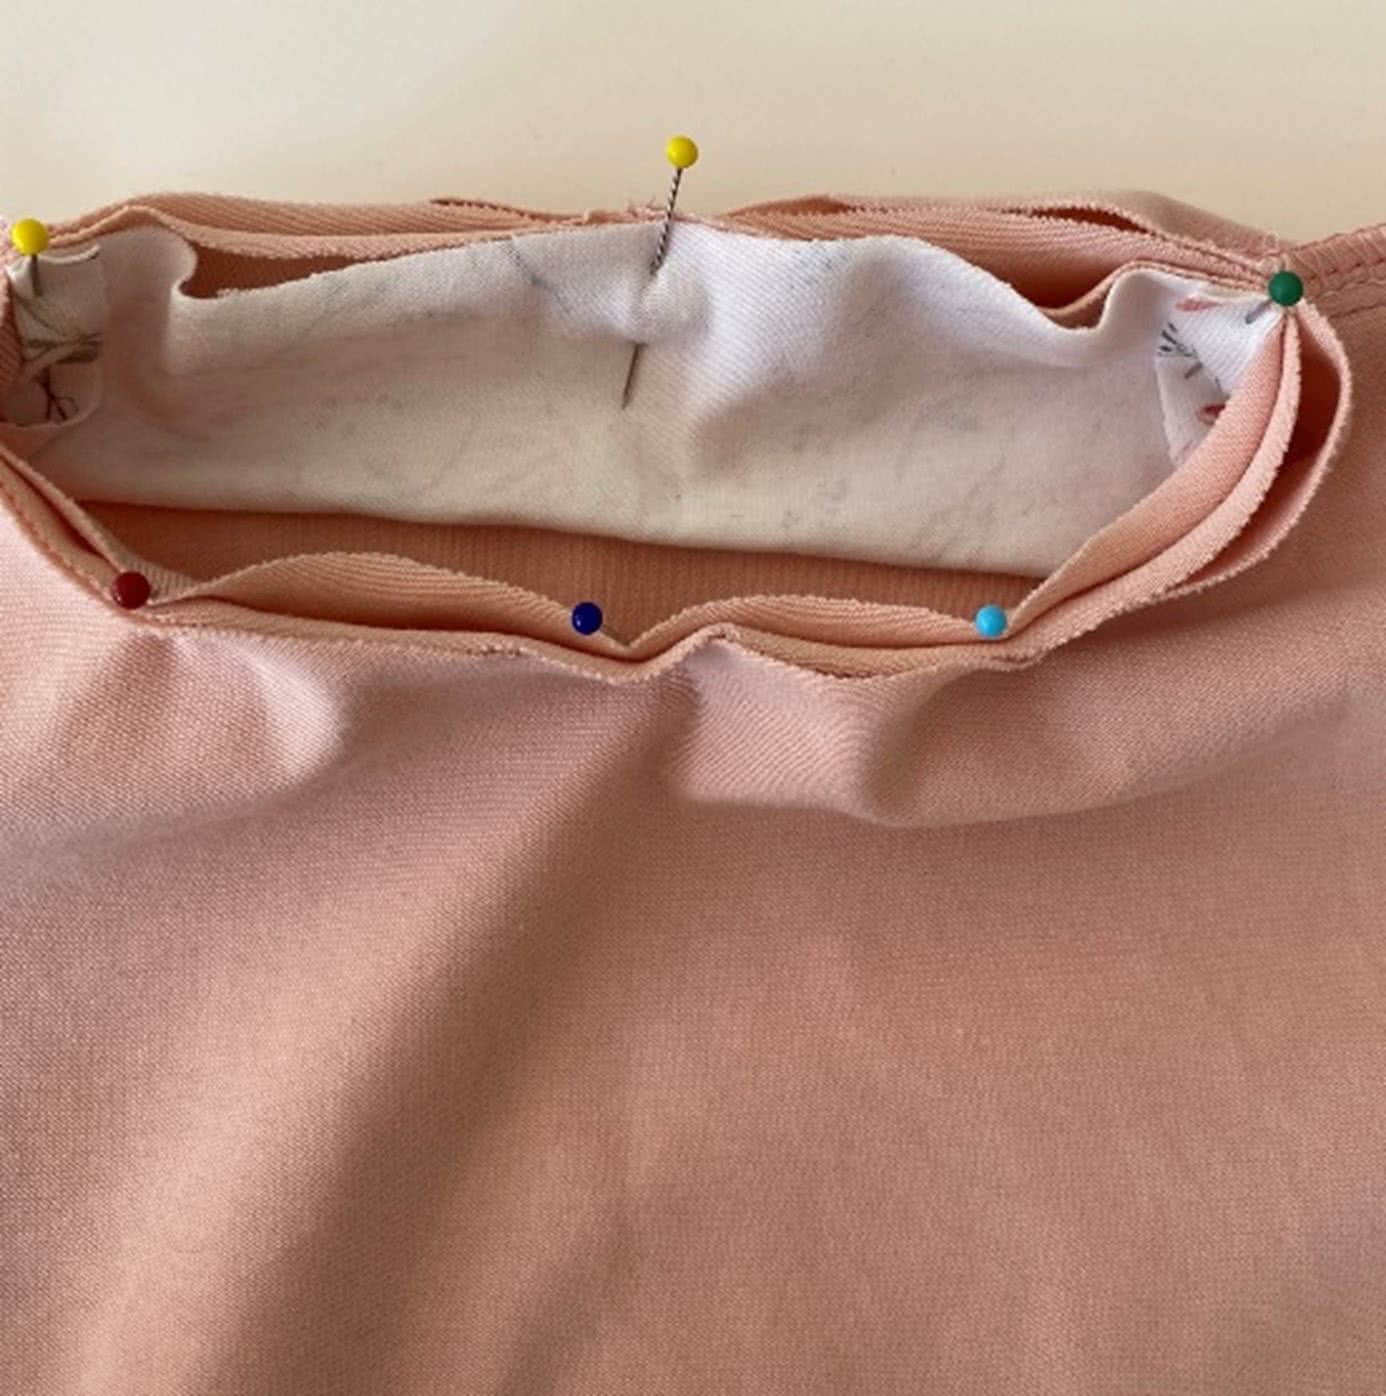
Step 2: Pin the neckband and cover strip
– Pin the neckband on the neckline, stretching out the neckband and nicely dividing it over the width of the neckline.
– Take the cover strip and pin it on top of the neckband, right side facing the right side of the back of the top.
– Fold both ends of the cover strip 1 cm to the middle, so they start and end evenly with the shoulder seams.
Step 3: Sew the neckband
– Sew the neckband and the cover strip together to the neckline. The cover strip is now secured with one long edge.

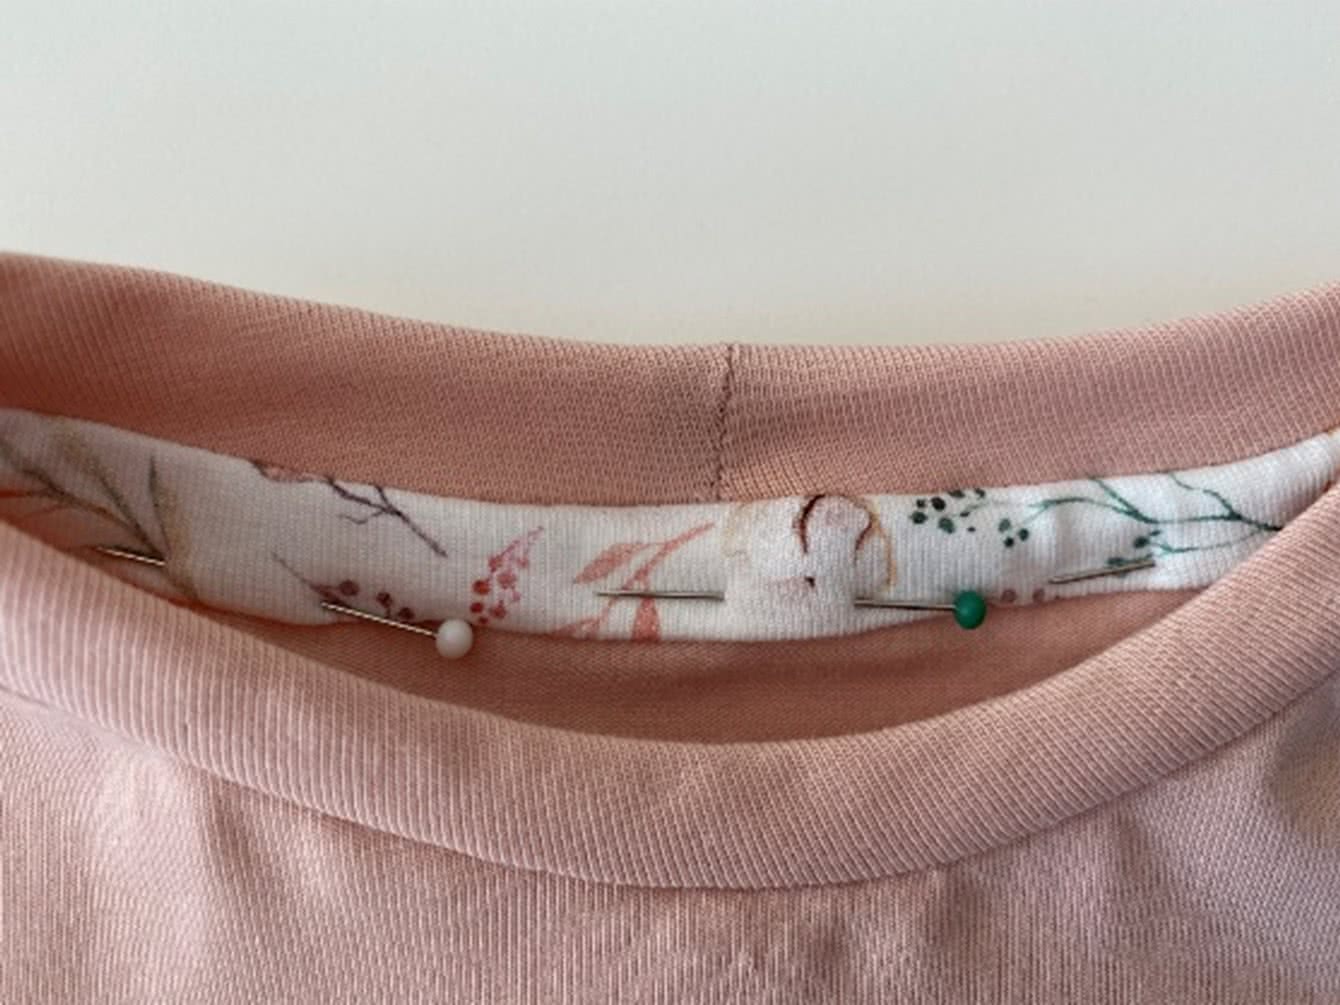
Step 4: Finish the cover strip
– Fold the cover strip 2 times, covering the seam of the neckband and pin in place.
– Sew the cover strip, using a small stitch length.
– Start and end at the shoulder seams.
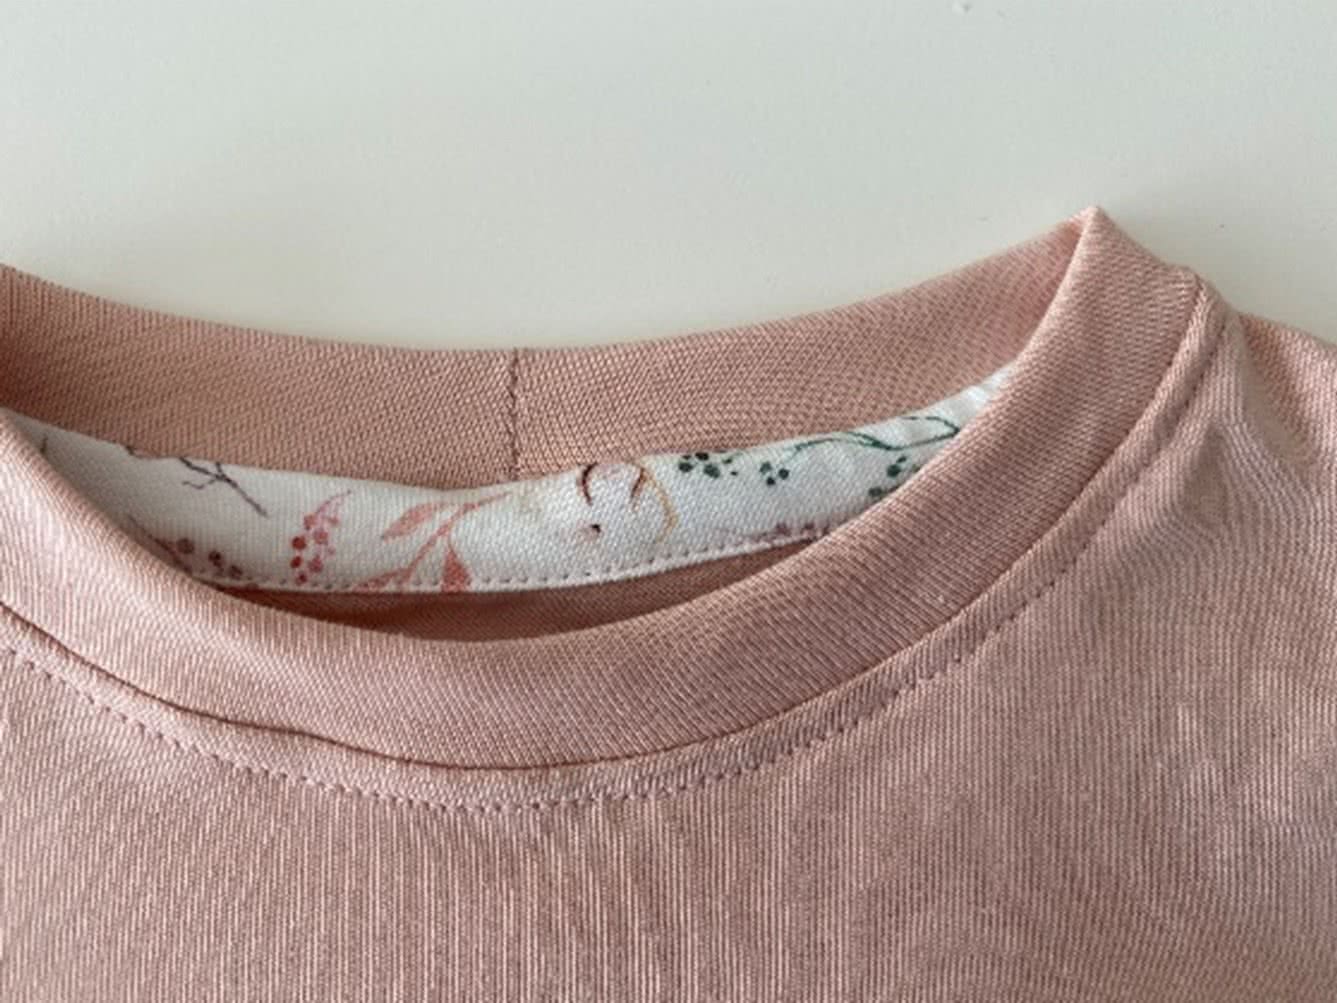
– Your cover strip is finished!
– I topstitched the front of the neckline to finish the neckband .
Sewing the body
– Sew the side seams of the front and the back.
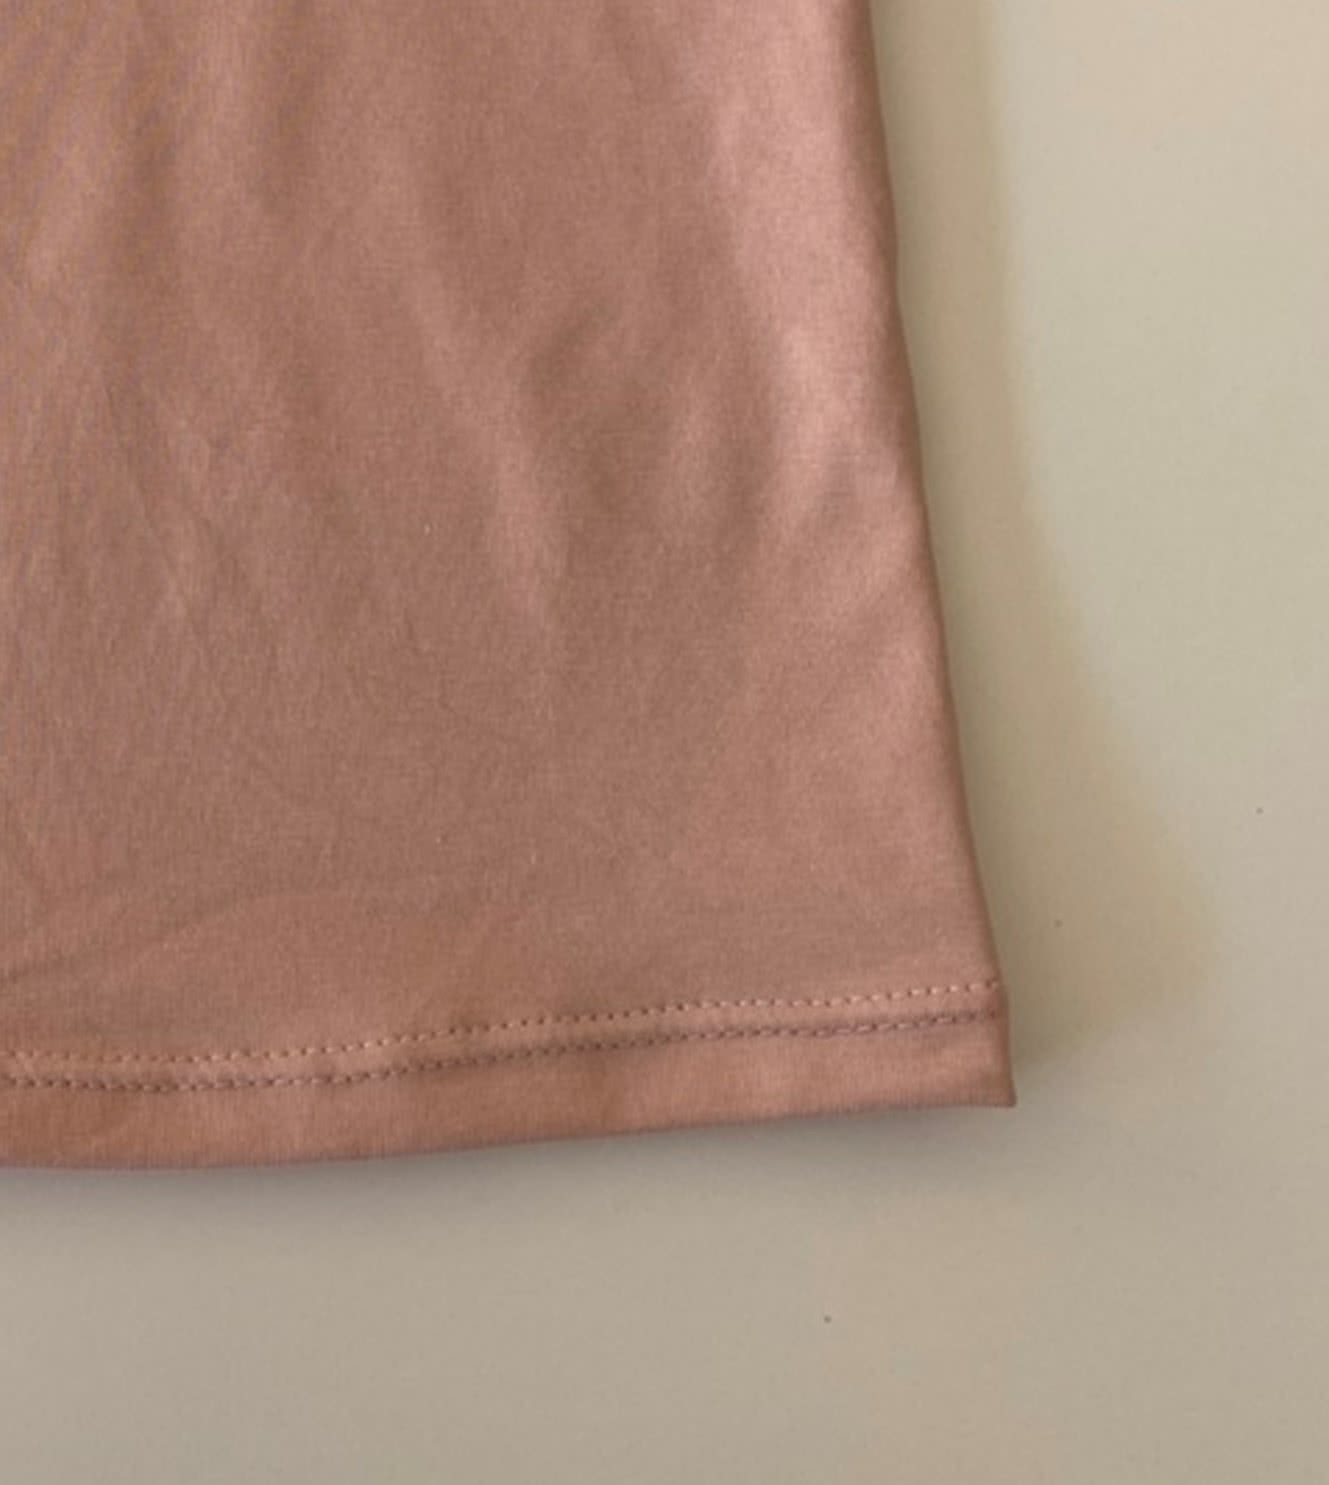
Finishing the bottom hem
– Finish the bottom of the top the way you wish.
I used my serger and finished the hem with a twin needle.
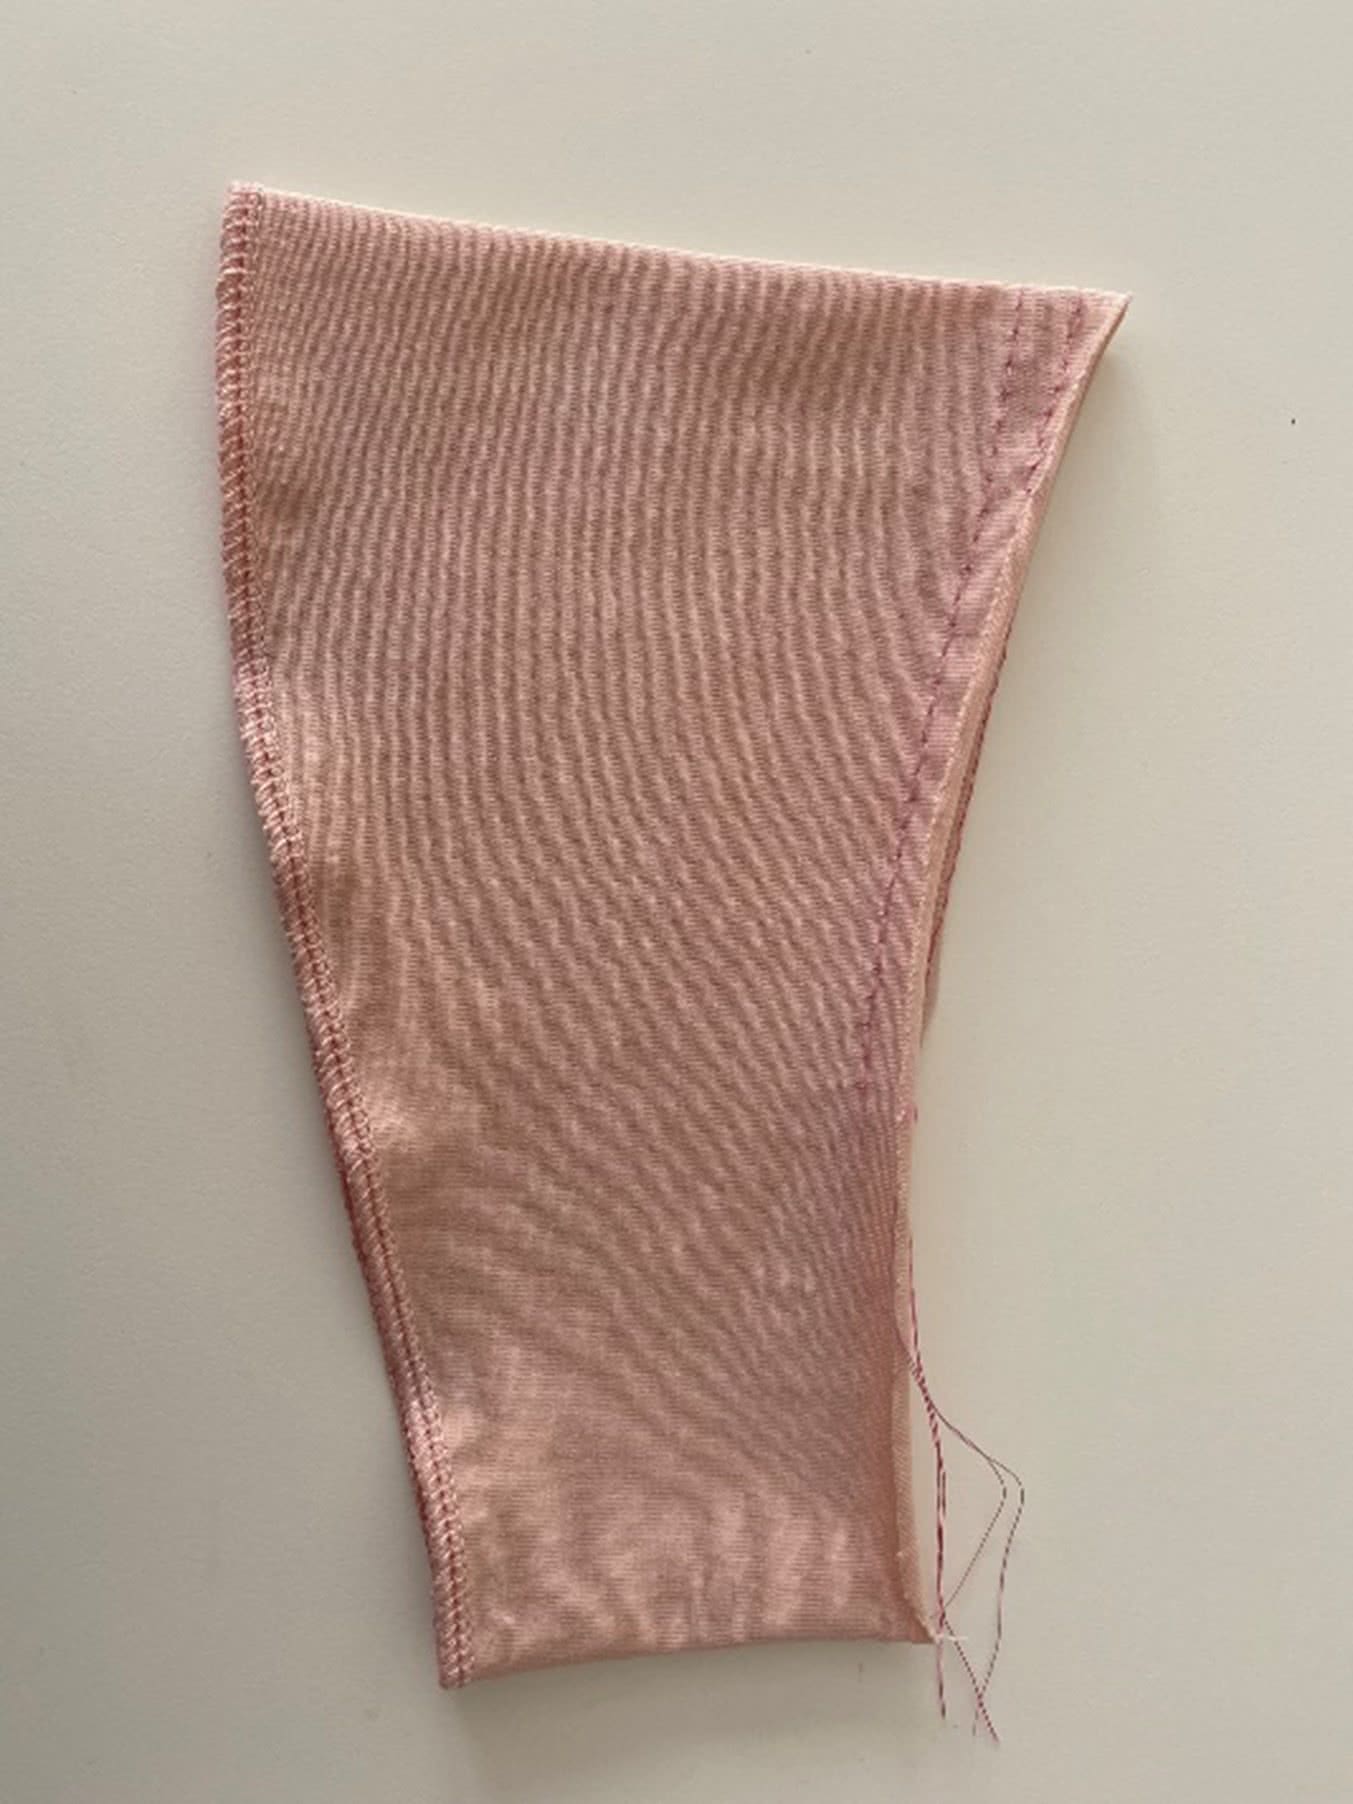
Sewing the sleeves: Step 1
– Sew 2 gathering stitches to the head of the sleeve. I used a different colour thread so the gathering is easy to see and to remove afterwards.
– Start and finish at the notched you marked on your sleeve
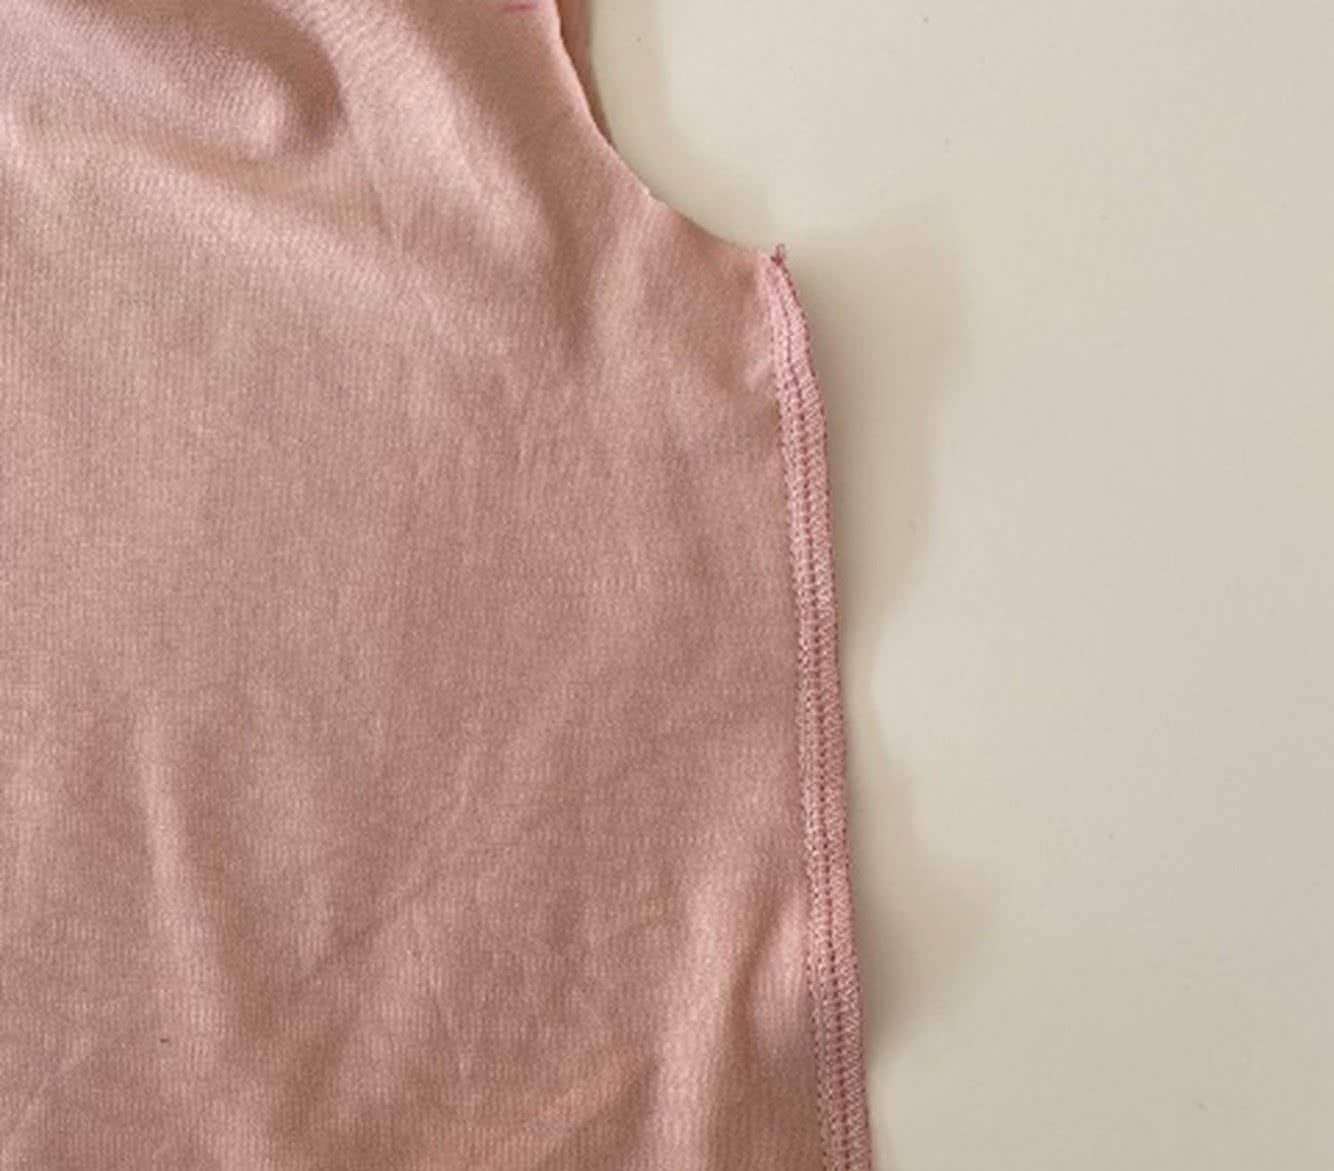
– Sew the underarm sleeve seams together.
– Finish the sleeve seam the way you like. In this example I used a rolled hem, made with my serger
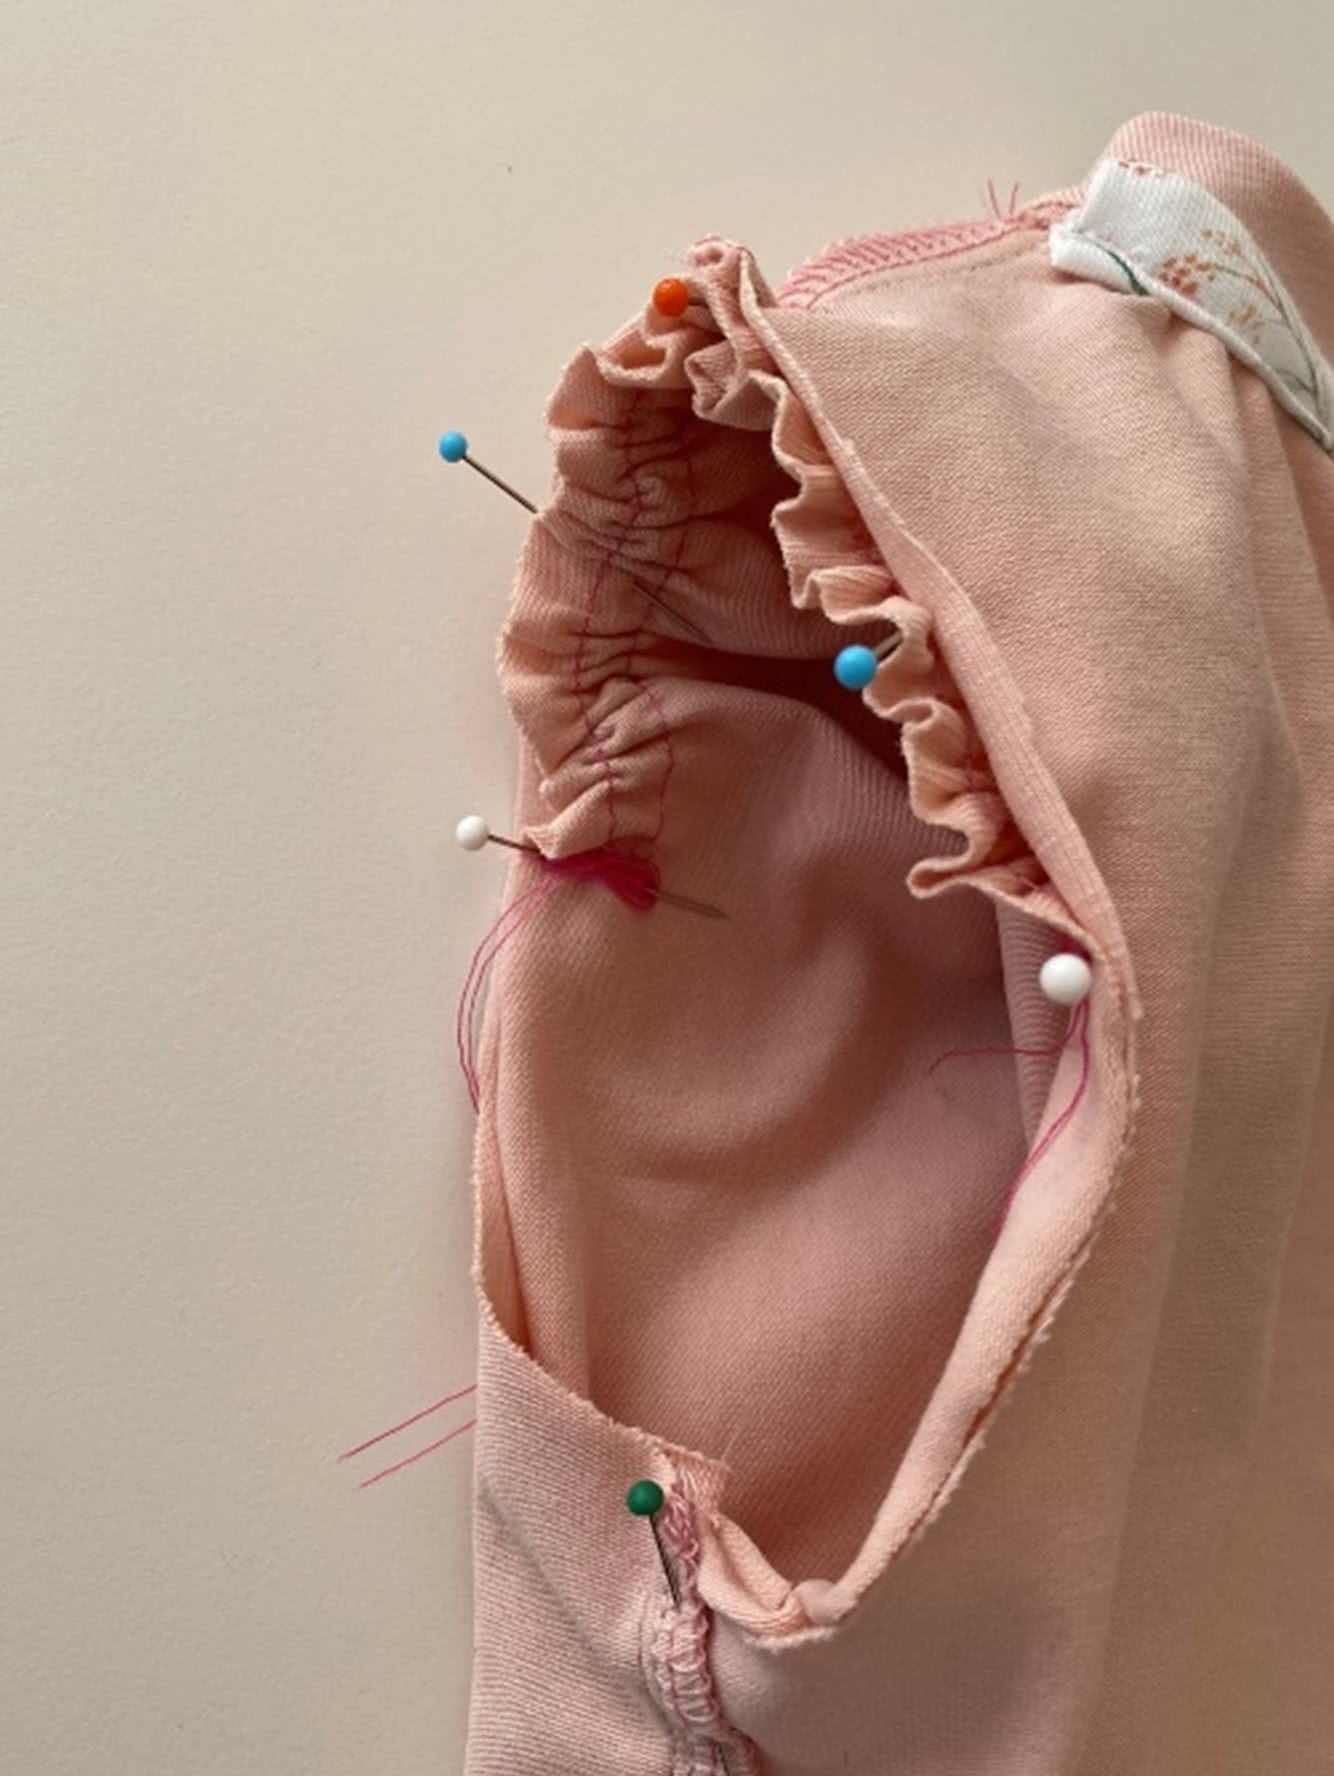
Sewing the sleeves: Step 2
– Pull your gathering threads and evenly divide your ruffle in between the notches.
– Secure your gathering thread and pin the sleeve in the armhole opening, matching the notches as you stitch.
– Sew the sleeves in the armhole opening.
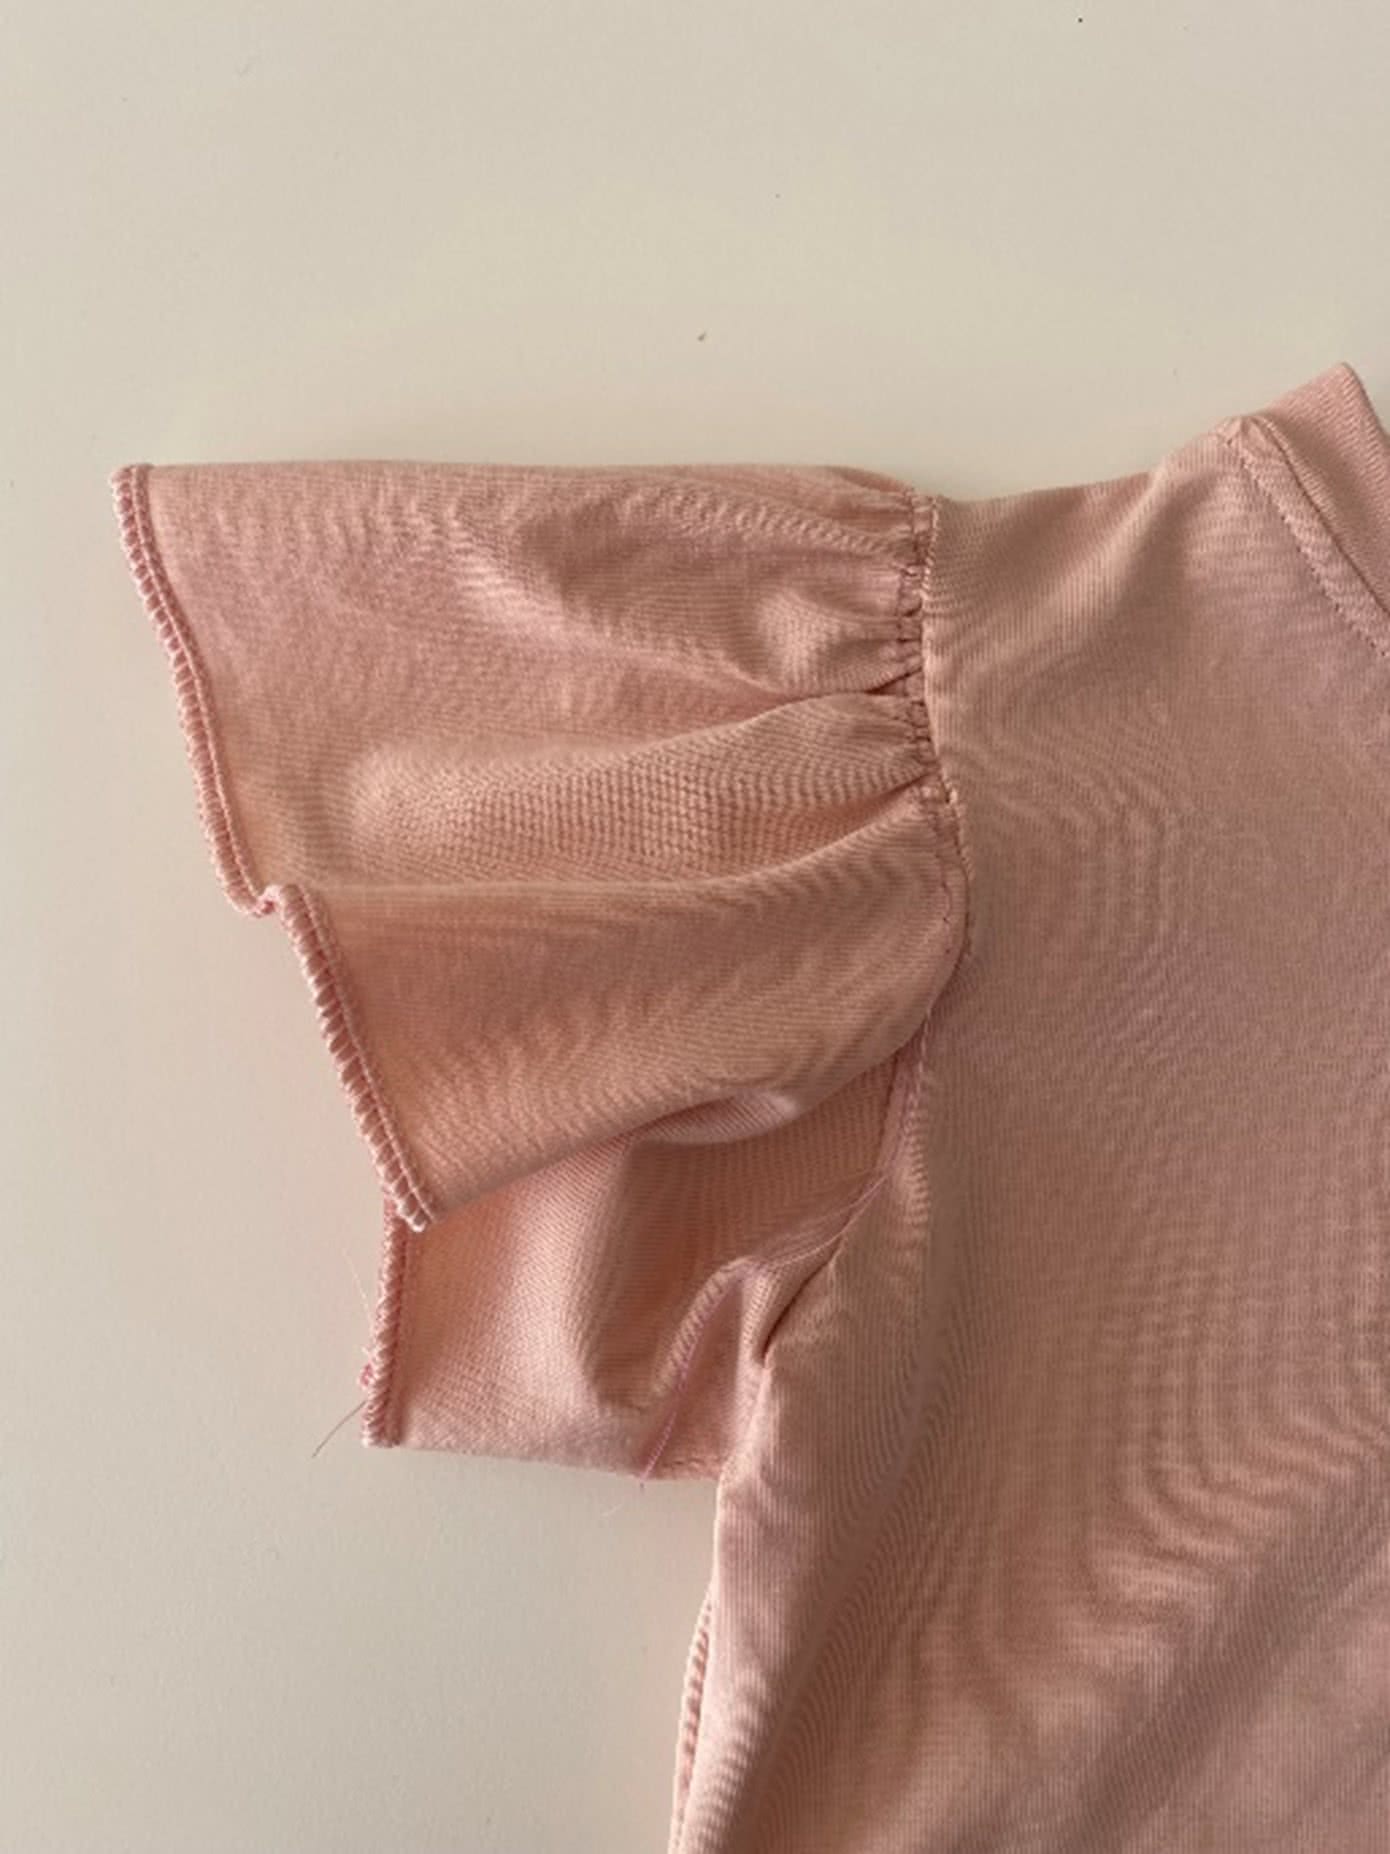
– Turn the sleeve to the right side and repeat these steps on the other sleeve.
– This is what the sleeve looks like from the right side.
– Press the top lightly.
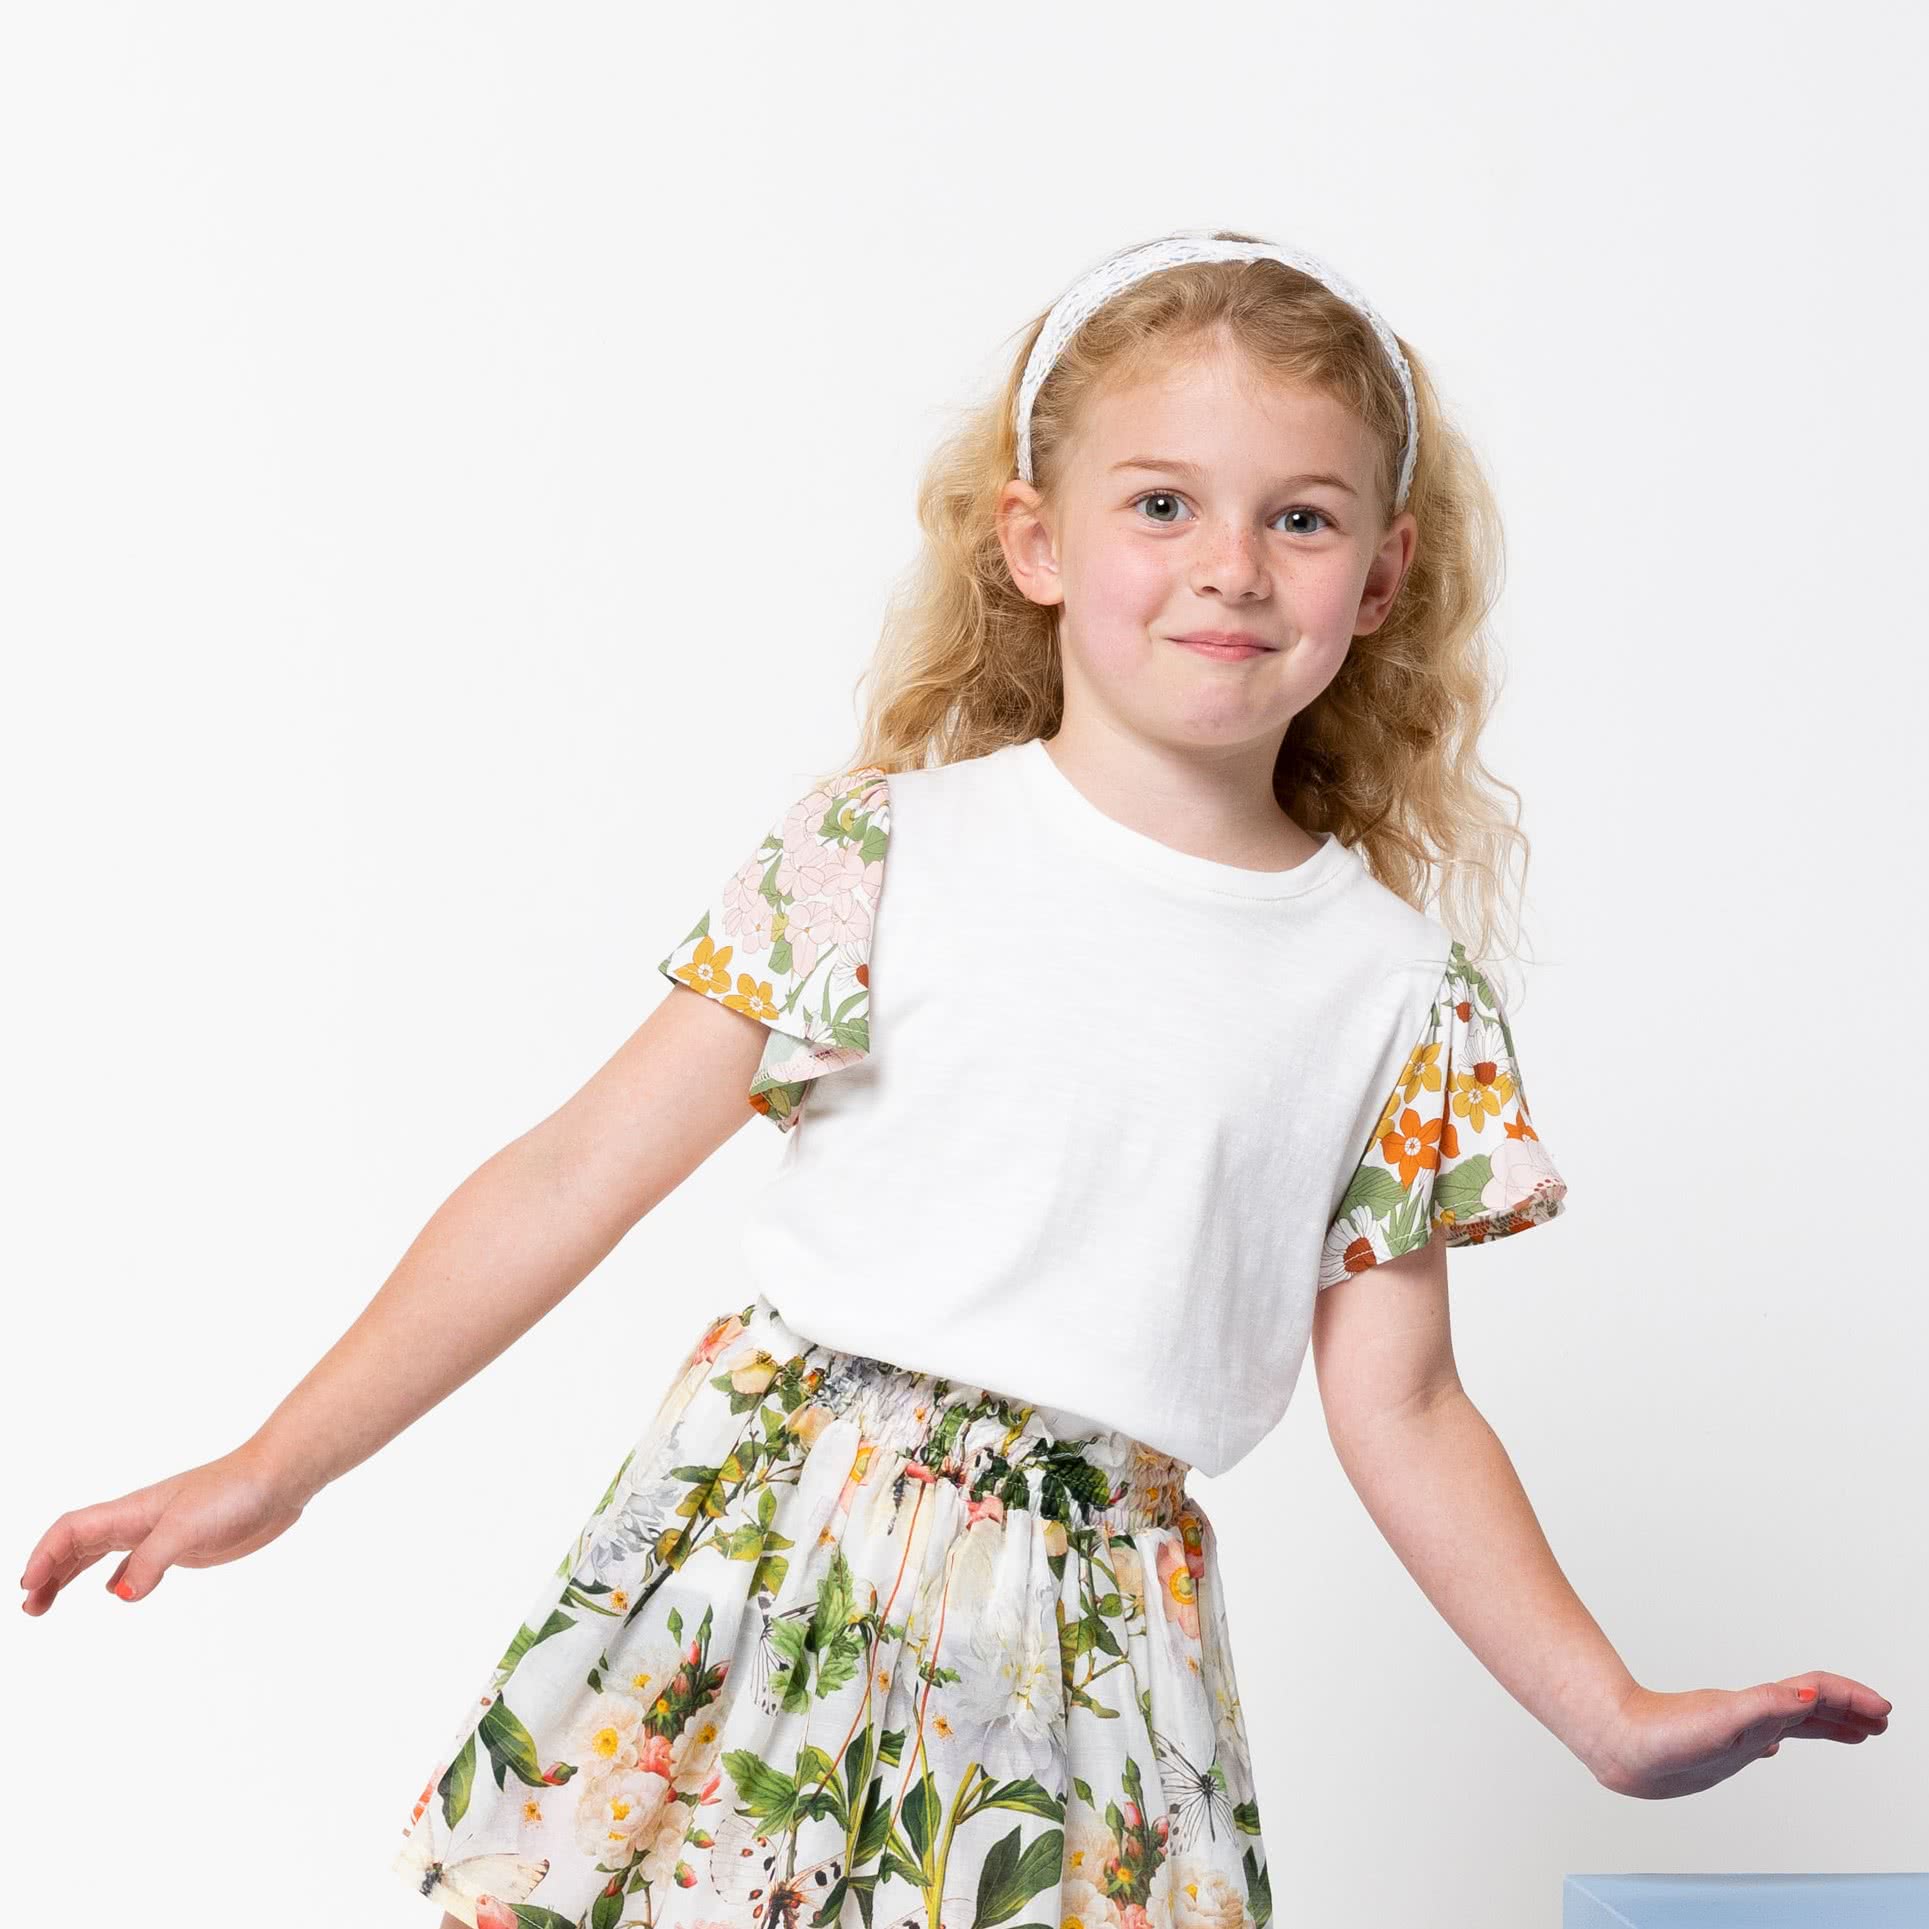
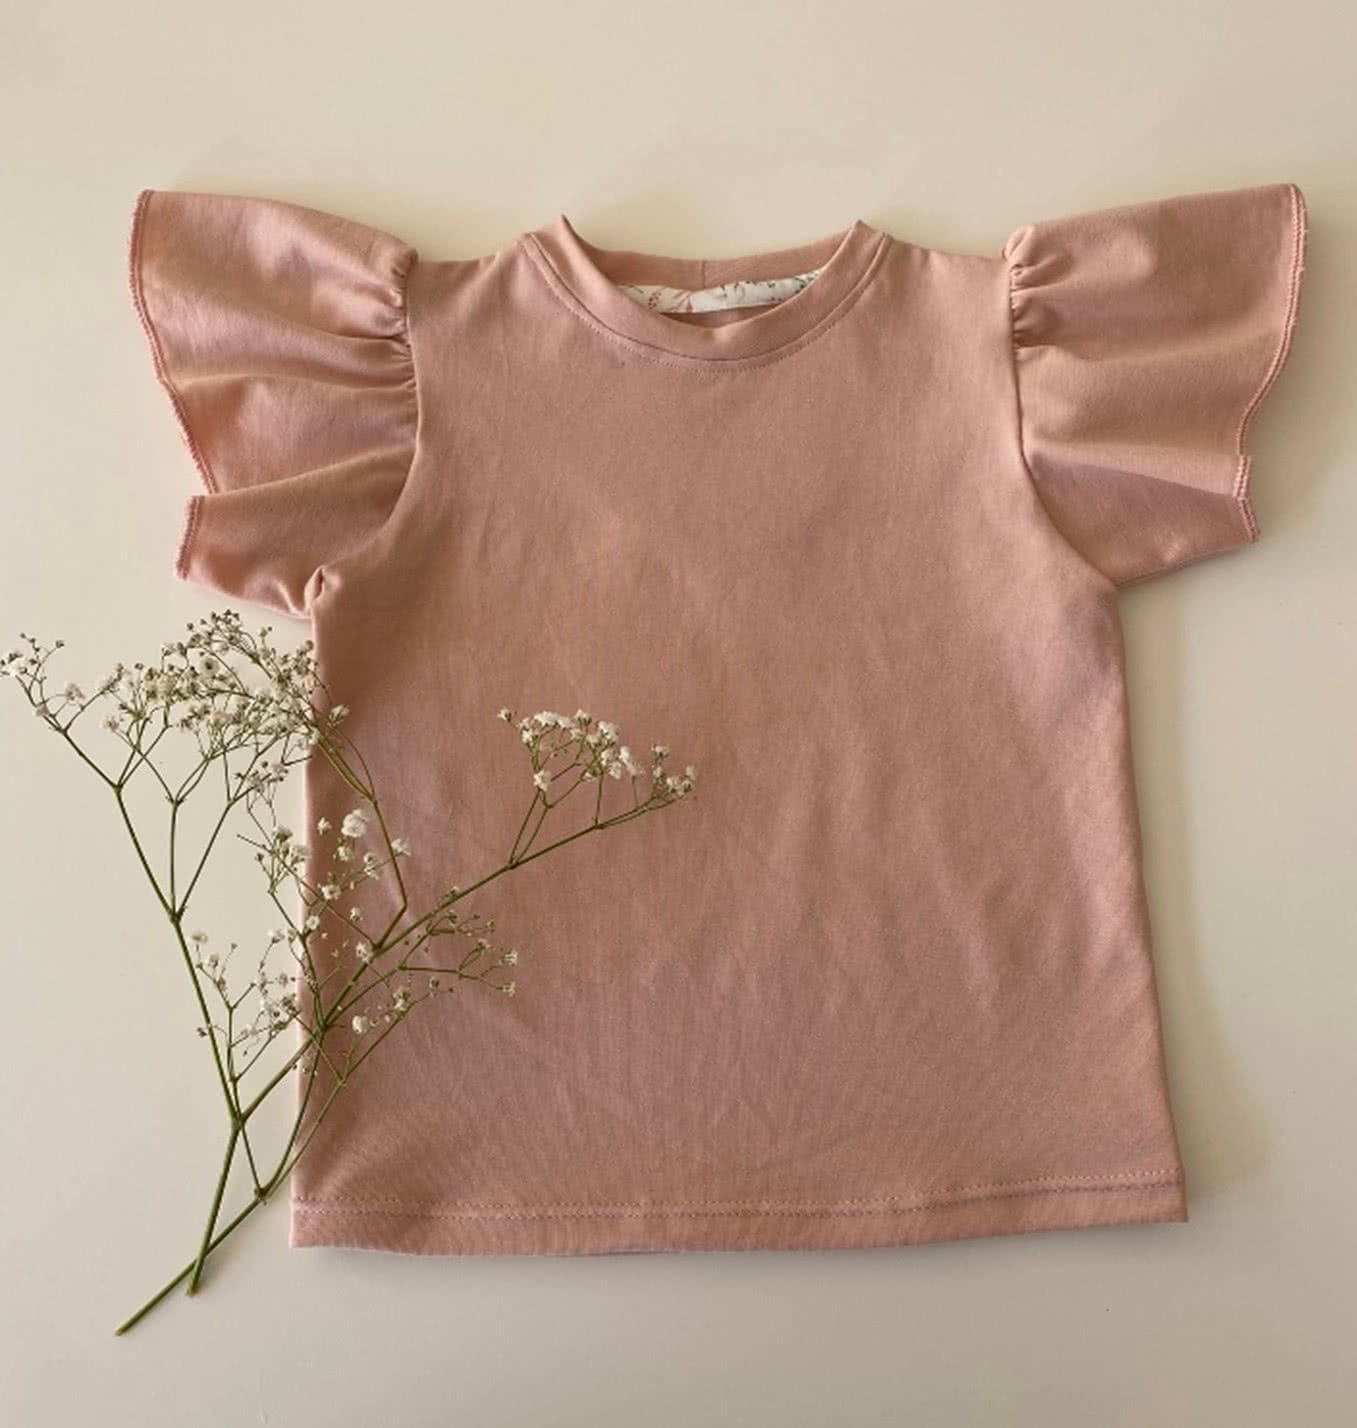
Congratulations, your Harlow kids knit top is finished!
Have fun wearing it and don’t forget to share your version of the top using the hashtag #saharlowkidsknittop
Tutorial by the lovely @nic_combi_naait