Click here to watch a video sewing tutorial on our YouTube channel
CONSTRUCTION
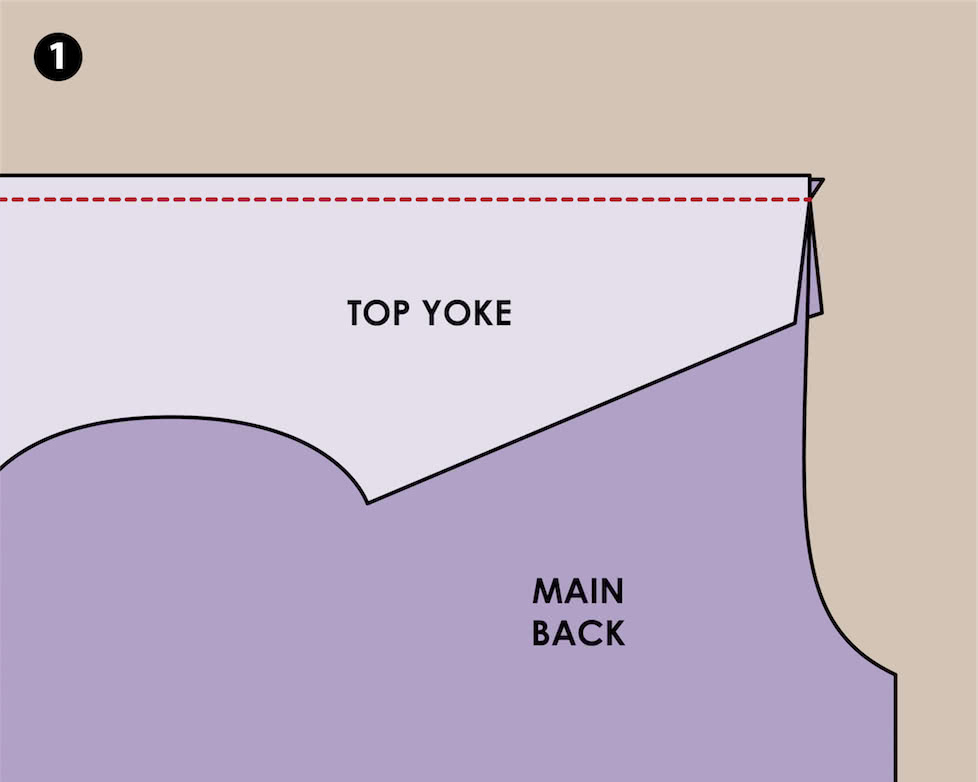
Step 1
Sandwich the back bodice between the two yokes, sew and press. Top-stitch the seam if required.
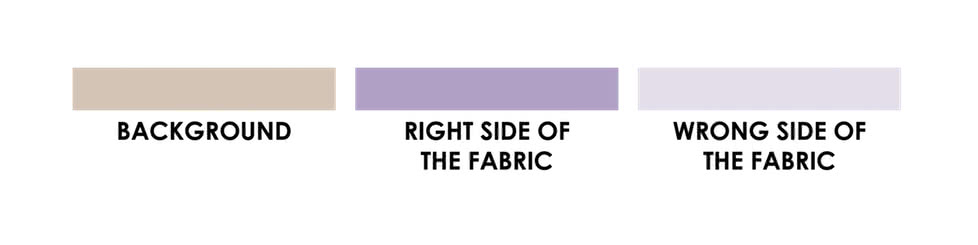
Step 2
Roll the whole back body up with the right side on the inside then pin to keep it out of the way.
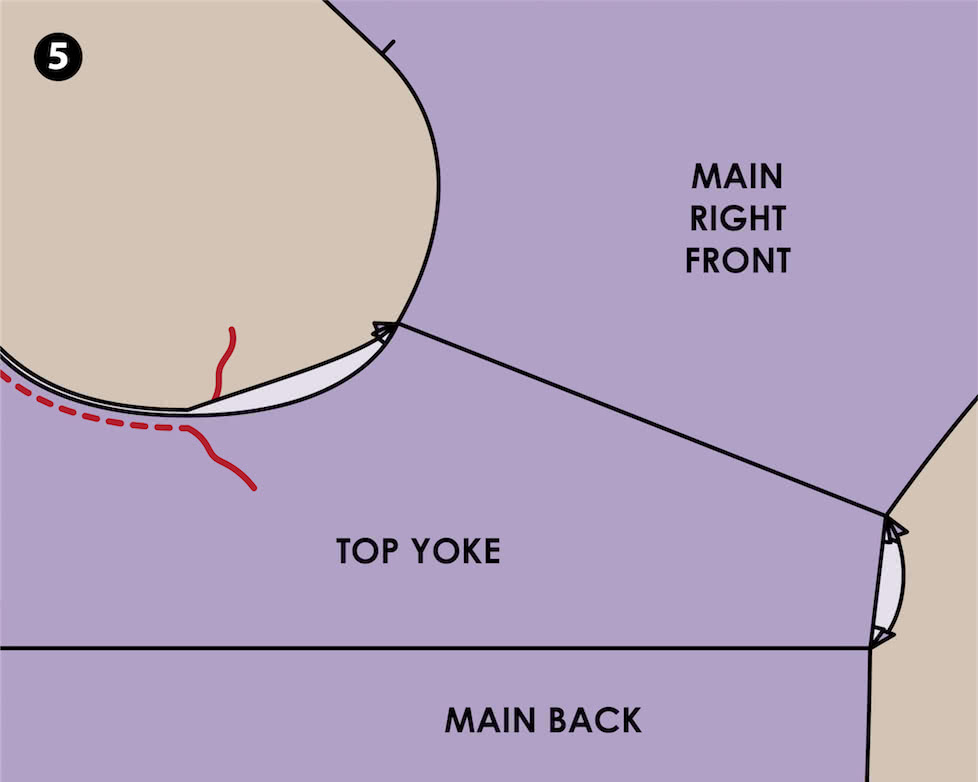
Step 3
Open out the yokes so that the internal yoke is facing down. With right sides facing, pin the shoulders of the external yoke to the shoulders of the front/fronts and stitch. Roll fronts up with the wrong side on the inside and pin to keep out of the way.
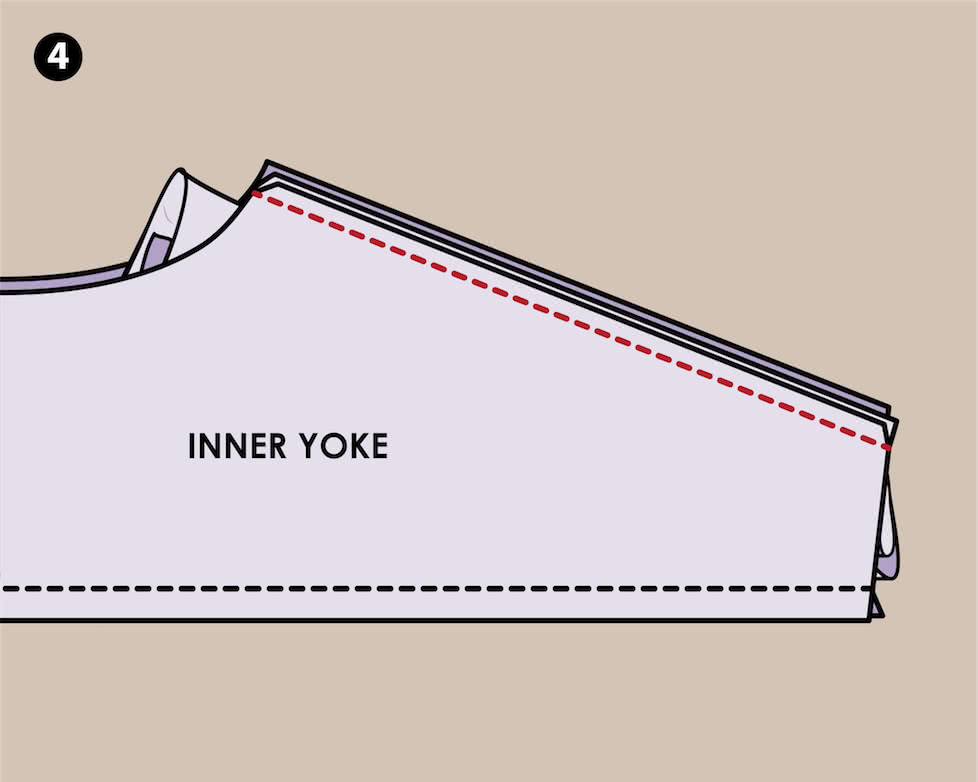
Step 4
Now bring the internal yoke yp to the external yoke with right sides facing and pin at the shoulder seams (the rolled pieces should now be enclosed inside the 2 yokes). Sew the shoulder seams.
Step 5
Gently pull the body of the garment through the neckline and turn out to the right side. Remove pins, press and topstitch the seam if required. Stay-stitch the two yokes together around the neckline to prevent stretching.