You can use this technique for sewing sleeve split tabs, neckline opening or stylised hem splits. This method is easy & will make your split neatly finished.
Step 1
Sewing tabs is 80% preparation & pressing & 20% stitching.
Step 2
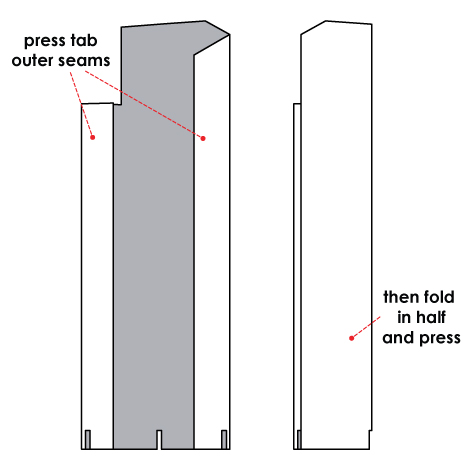
Press outer seams of tabs.
Step 3
Then fold in half & press. Make lower part about 2mm wider then upper.
Step 4
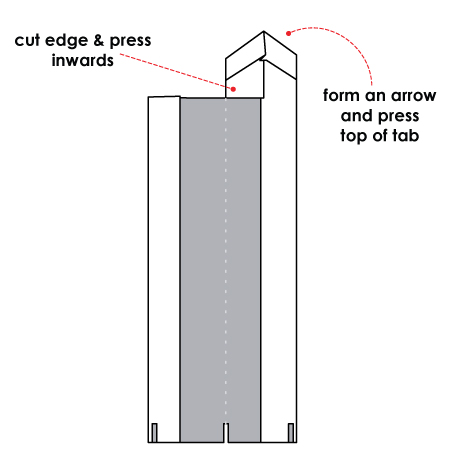
Open the tab & cut edge upto fold (leave approx. 2mm allowance). Then fold & press.
Step 5
Then form an arrow (or any other desired shape) at the top of tab & press in place.
Step 6
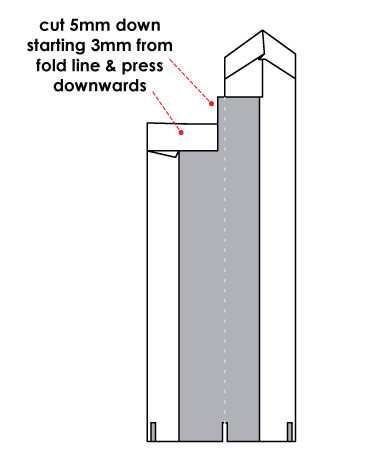
Cut 5cm down (starting 2-3mm from fold line) & fold at the top lower part of tab creating finished edge. This edge will be visible from the inside of the sleeve.
Step 7
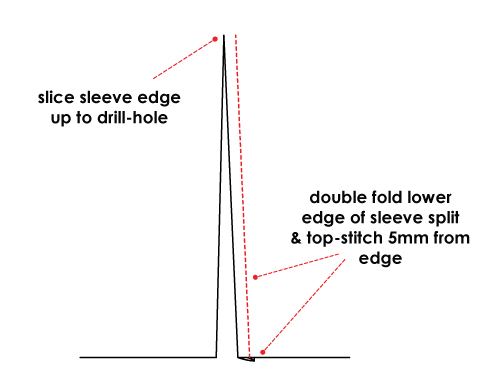
Now it’s time to prepare the opposite side of split. Take sleeve & cut split from hem upto drill hole marked on pattern piece. Then double fold the opposite edge of split making seam allowances as short as possible & top-stitch 3-5mm from the edge to create neat split edge. For neater look you can bind the edge.
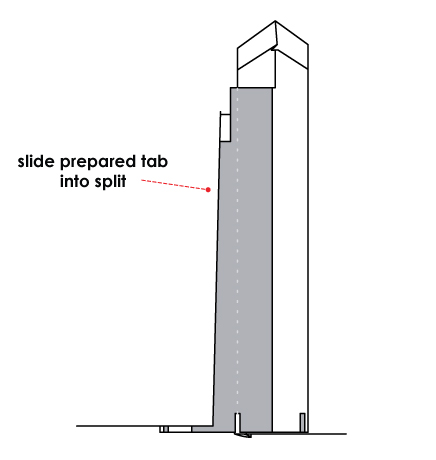
Step 8
Slide prepared tab into split & fold over. Make sure tab in covering the opposite edge of split & is sitting straight.
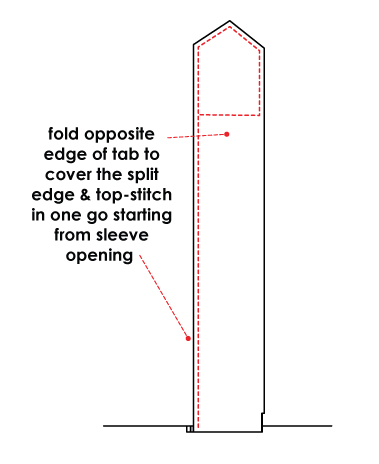
Step 9
Finally fold tab to cover the split edge & top-stitch from hemline up, around top corner & across (to catch the lower parts in seam) in one go.
Step 10
Press finished sleeve tab neatly.