 Press back the center front piece along the foldline.
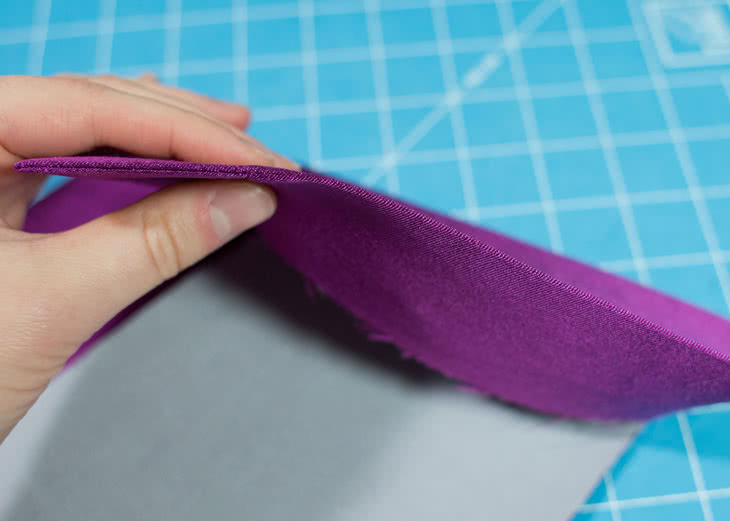
  Press the collar and hem edges along their foldline.
 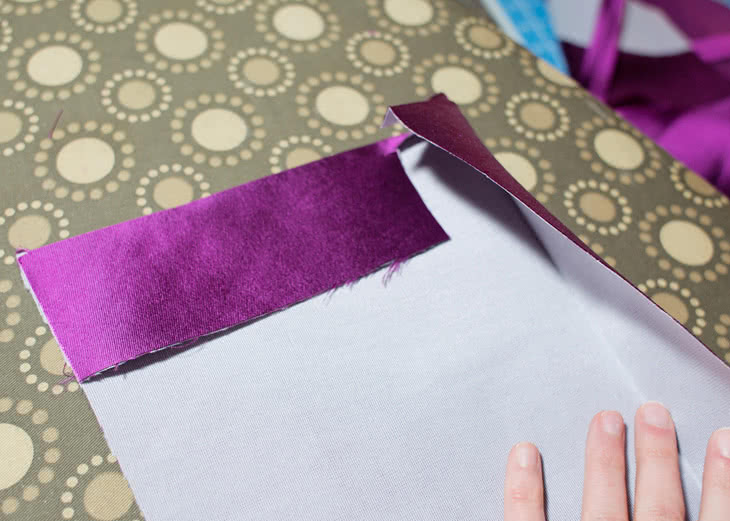 Now fold the long edge so right sides are together.
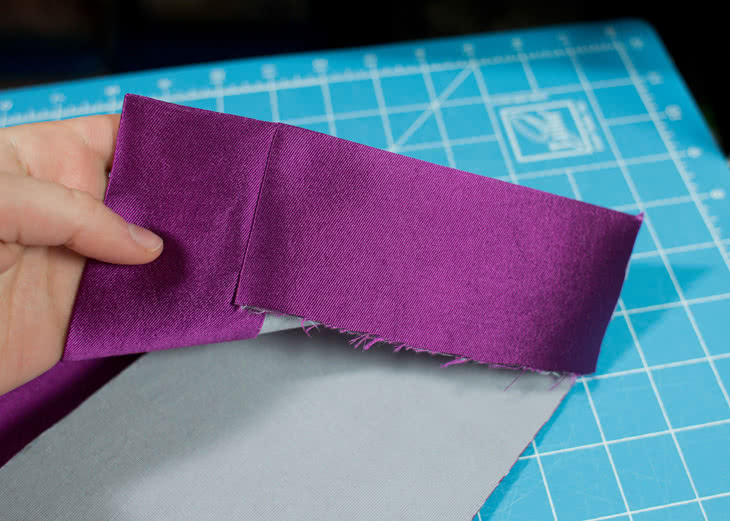
 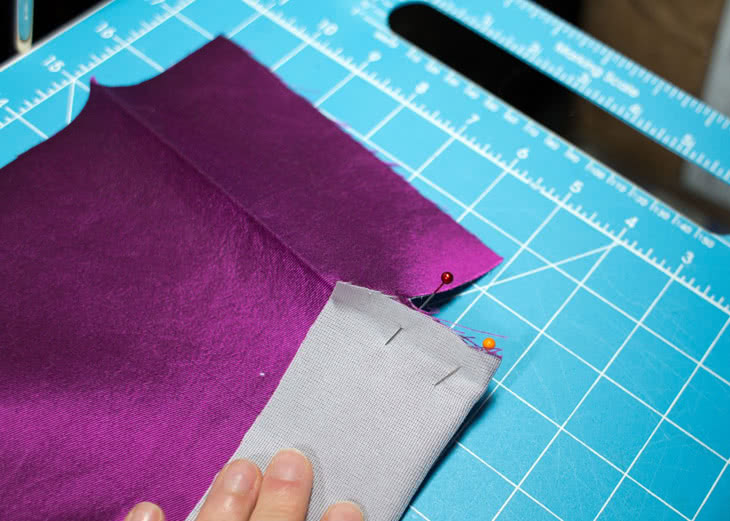 Mark the pivot point, which is 3/8?from the horizontal cut edge shown below.
 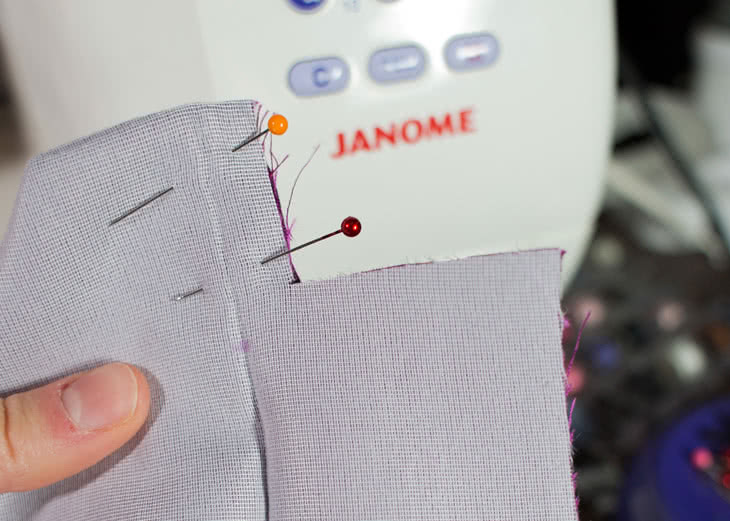 Begin sewing, starting from the foldline of the long folded edge.
 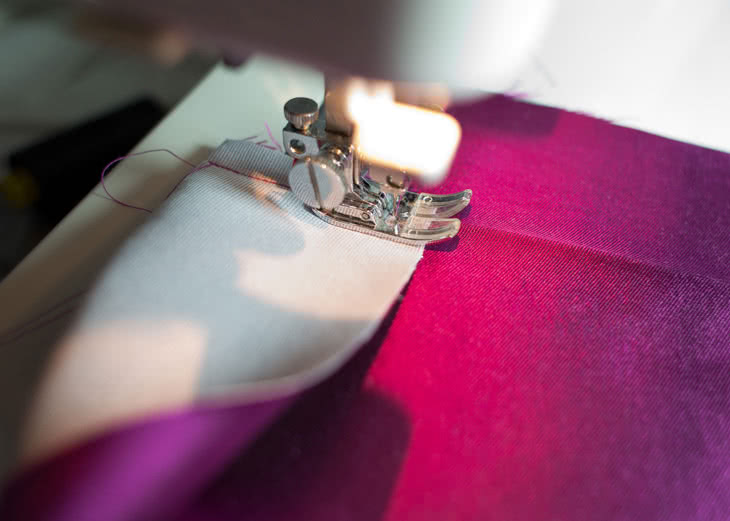 Reduce your stitch length when you get to about 1/2?(1.5cm) before the pivot point. Stop sewing as soon as you get to the pivot point. Make sure you leave your needle down.
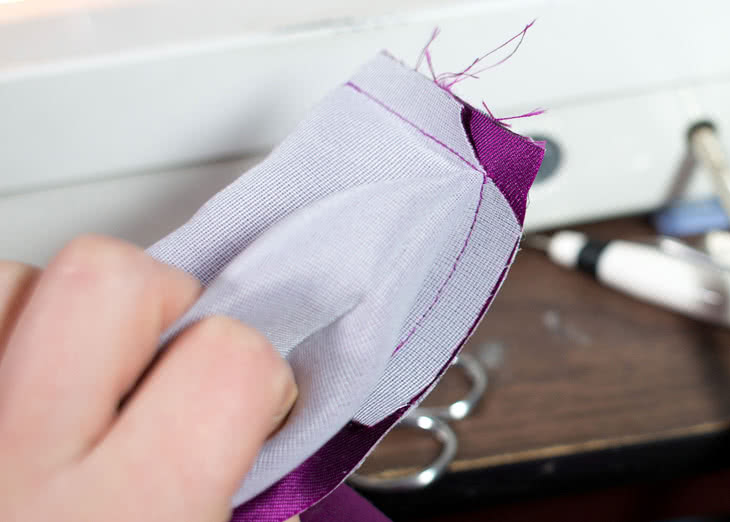
 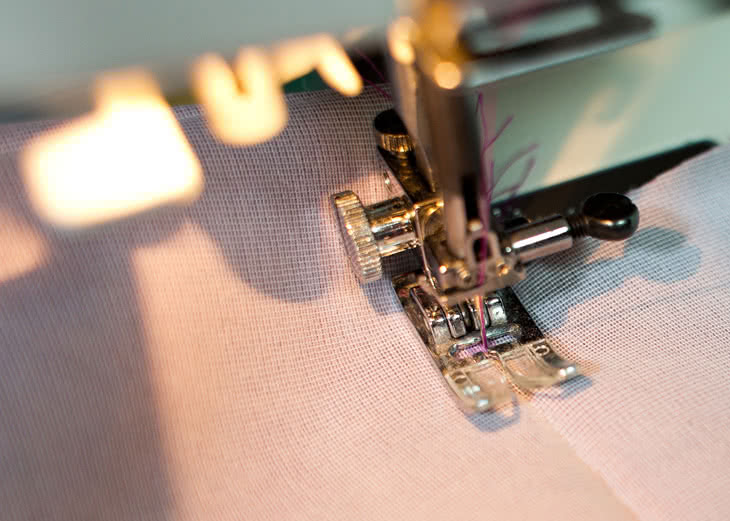 Now lift your presser foot up, take some sharp, small scissors, and make a snip into the corner at a 45º angle. Just like with a welt pocket you want clip right into that corner!
 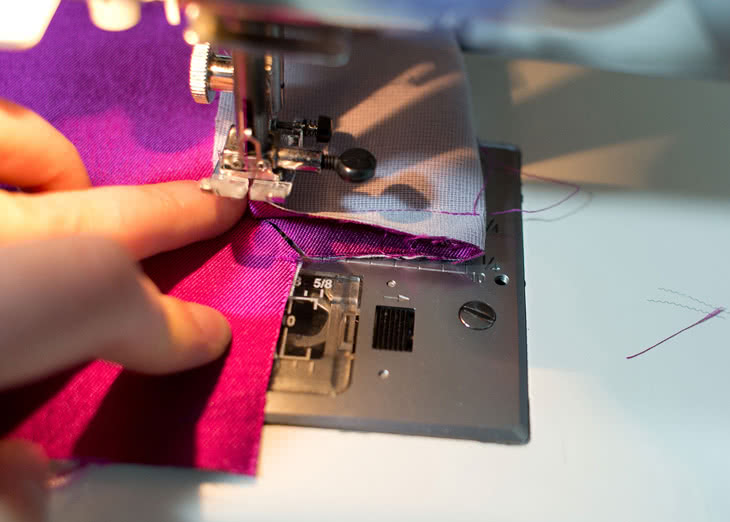 Now you’re going to take the folded edge of the fabric and pivot it out of the way to the left while keeping the bottom layer of fabric in place. Your goal is to get the raw edge of the long folded edge of the fabric aligned with that bottom layer. There will be a little tiny fold you’ll have to sew over, but if you cut the corner enough it will be minimal.
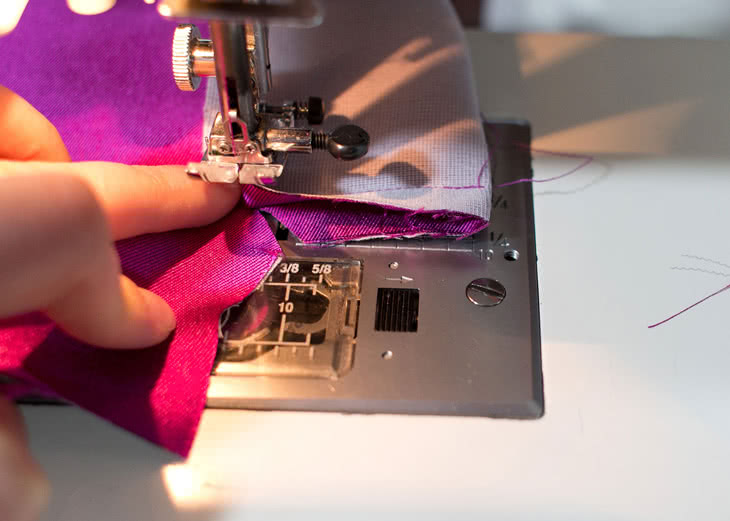
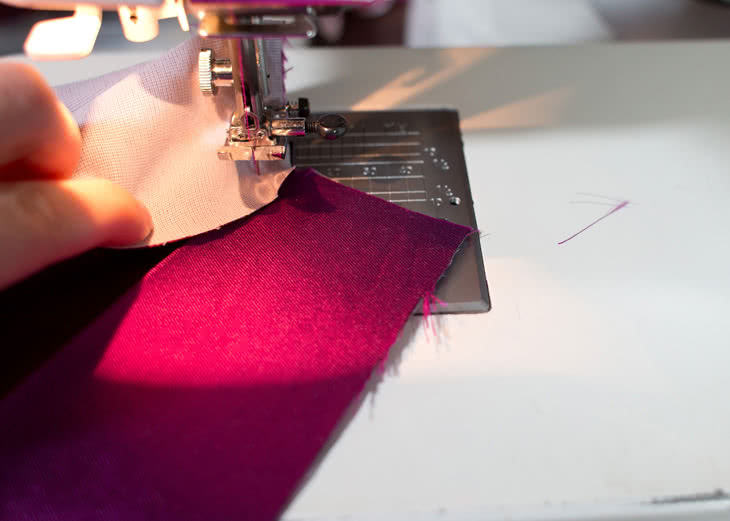
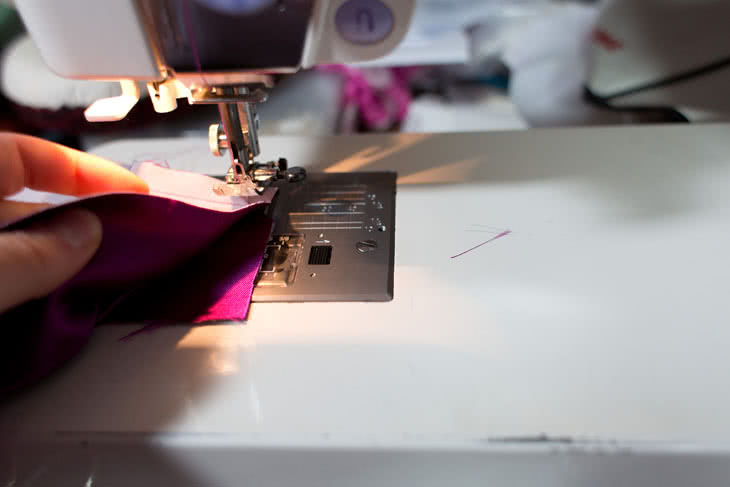

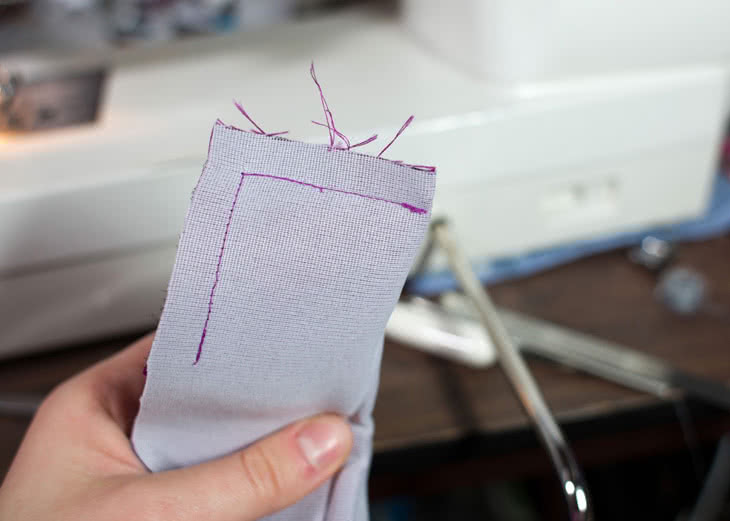
 Now sew that edge in place. To make things easier when you have to insert the lining, make sure you stop 3/8? before the end of the bottom layer (this is marked with a notch on the pattern.) You’ll end up with this when you’re done.
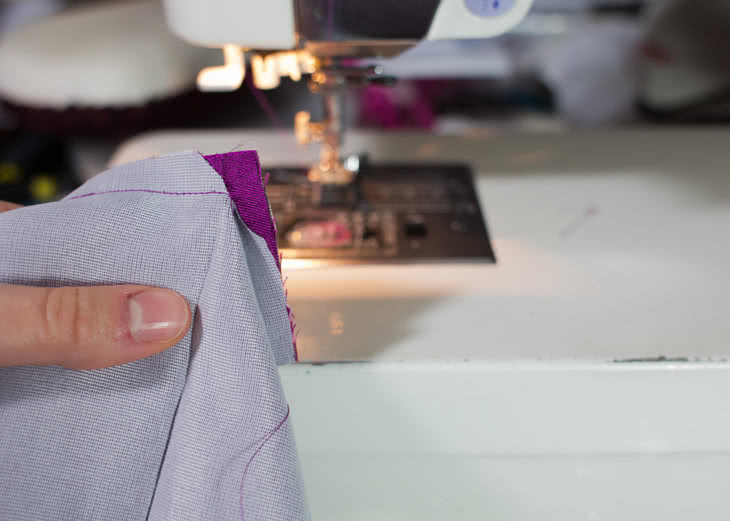
 Trim the corner and turn it inside out. This is what the edge looks like unpressed:
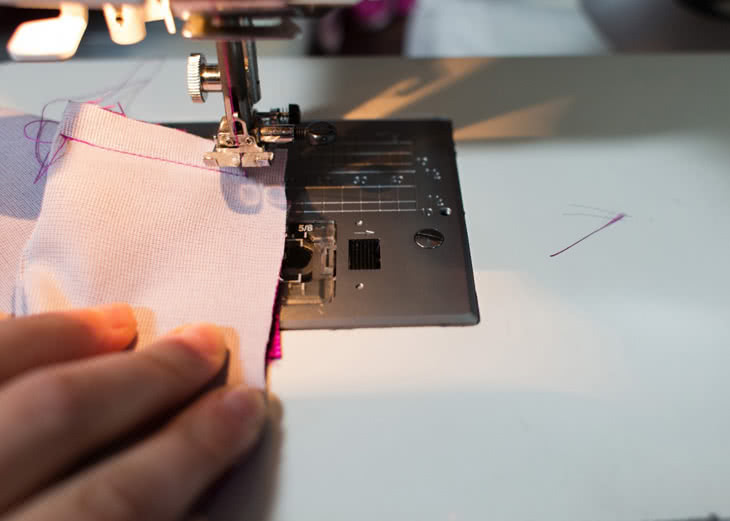
 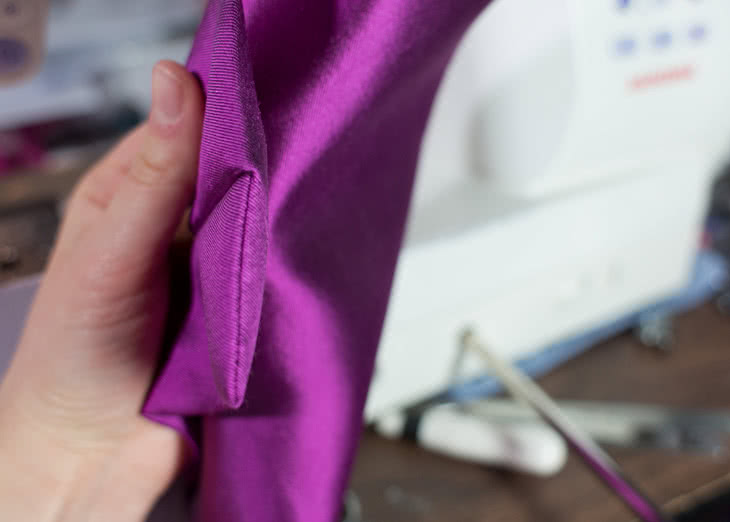 and pressed: