CONSTRUCTION
EPAULETTE (6)/BACK BELT (18), BELT (19), BELT LOOPS (20)
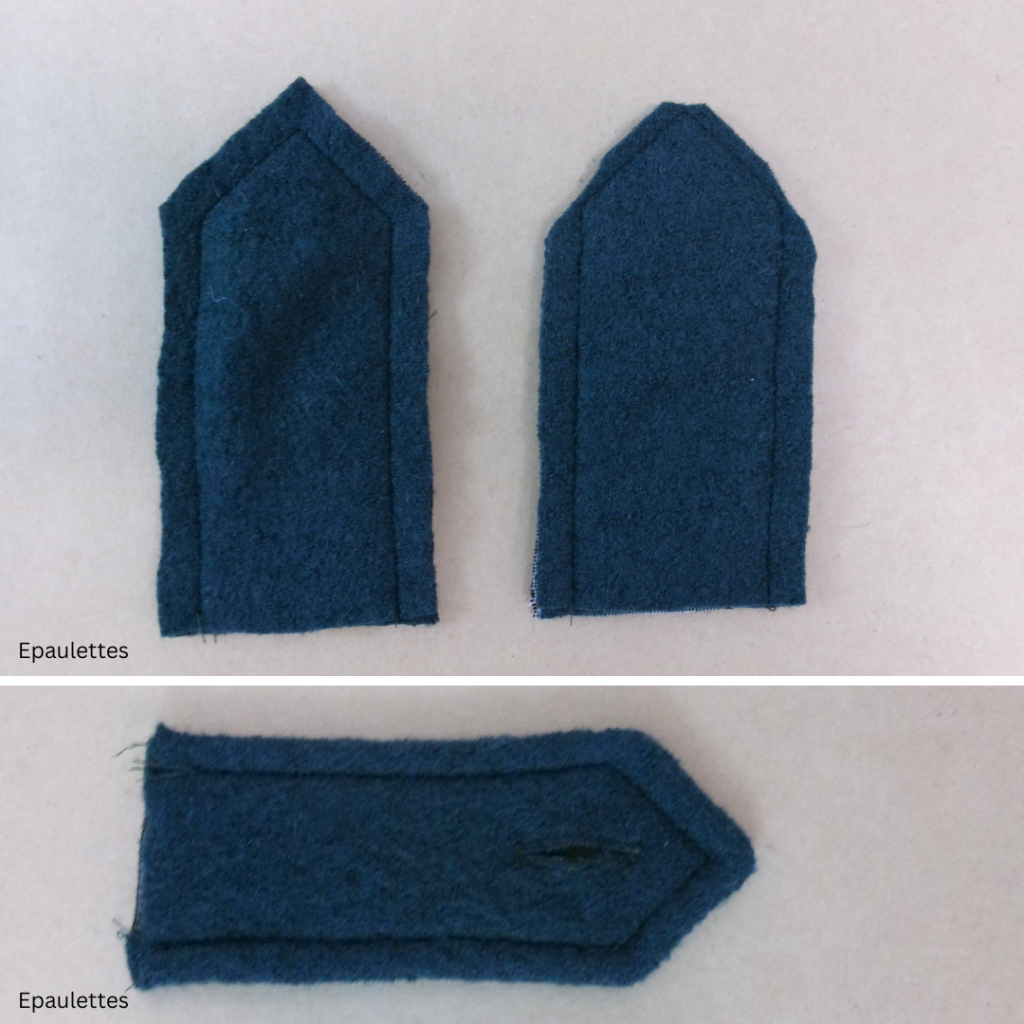
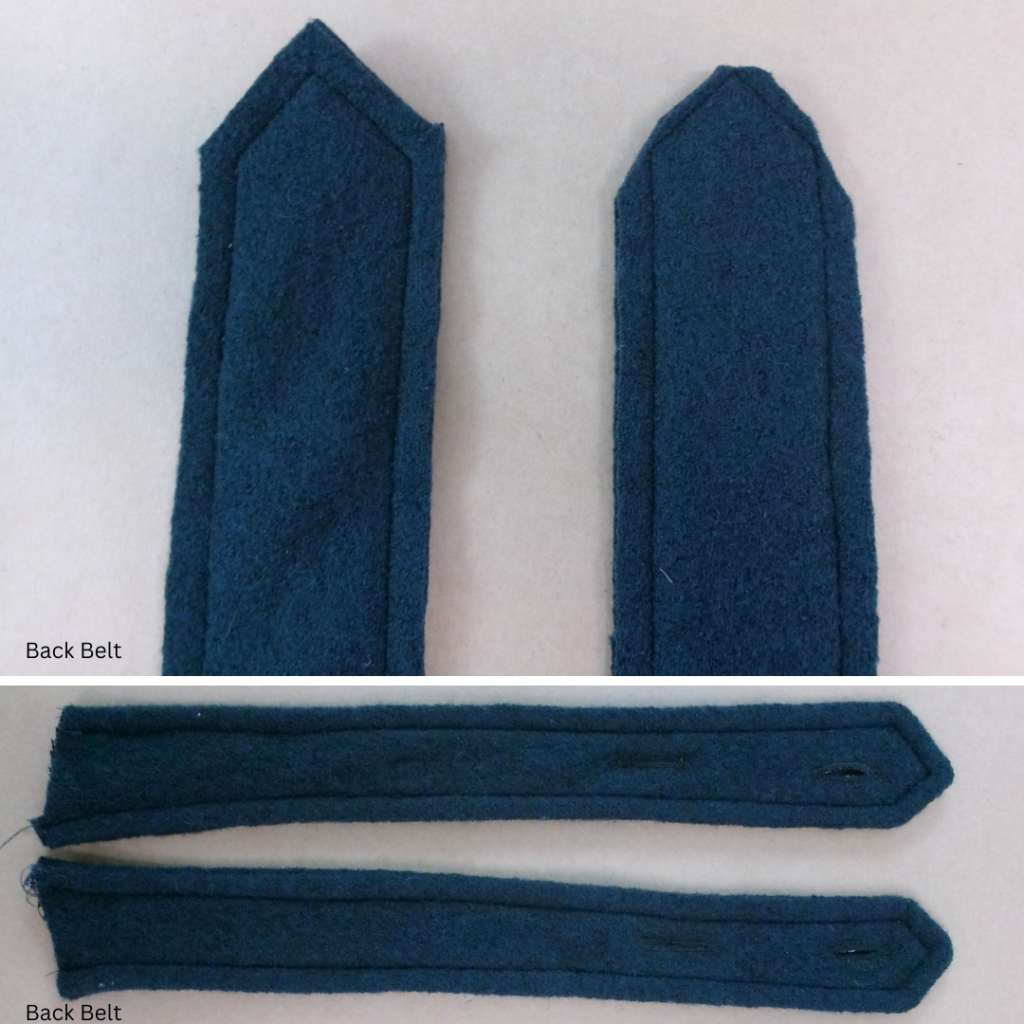
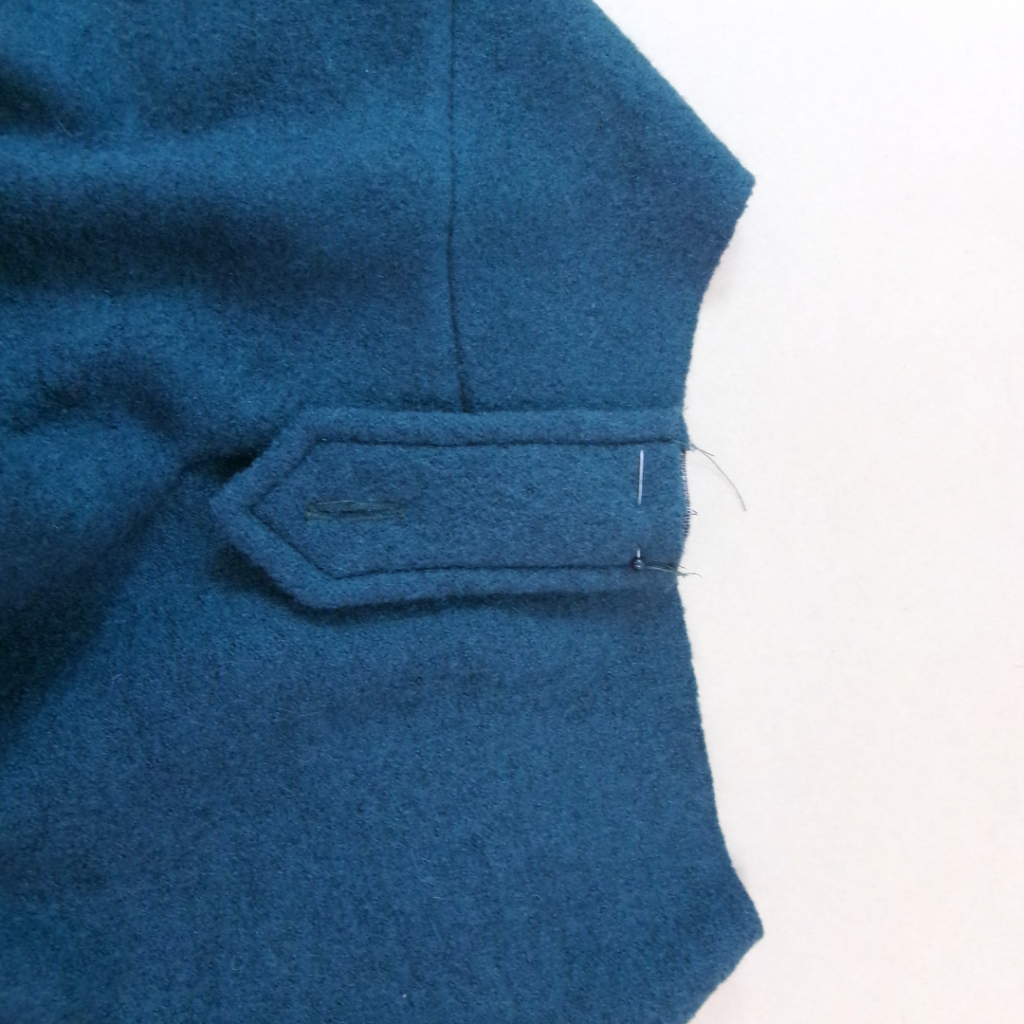
EPAULETTE/BACK BELT: With RST, sew a pair of Epaulette (6)/Back Belt (18) together, leaving the short end open for turning out. Clip the corners, turn out and press. Top stitch around the edges. Mark the buttonhole position as shown on the pattern, and sew the buttonhole using your preferred method. Put aside.
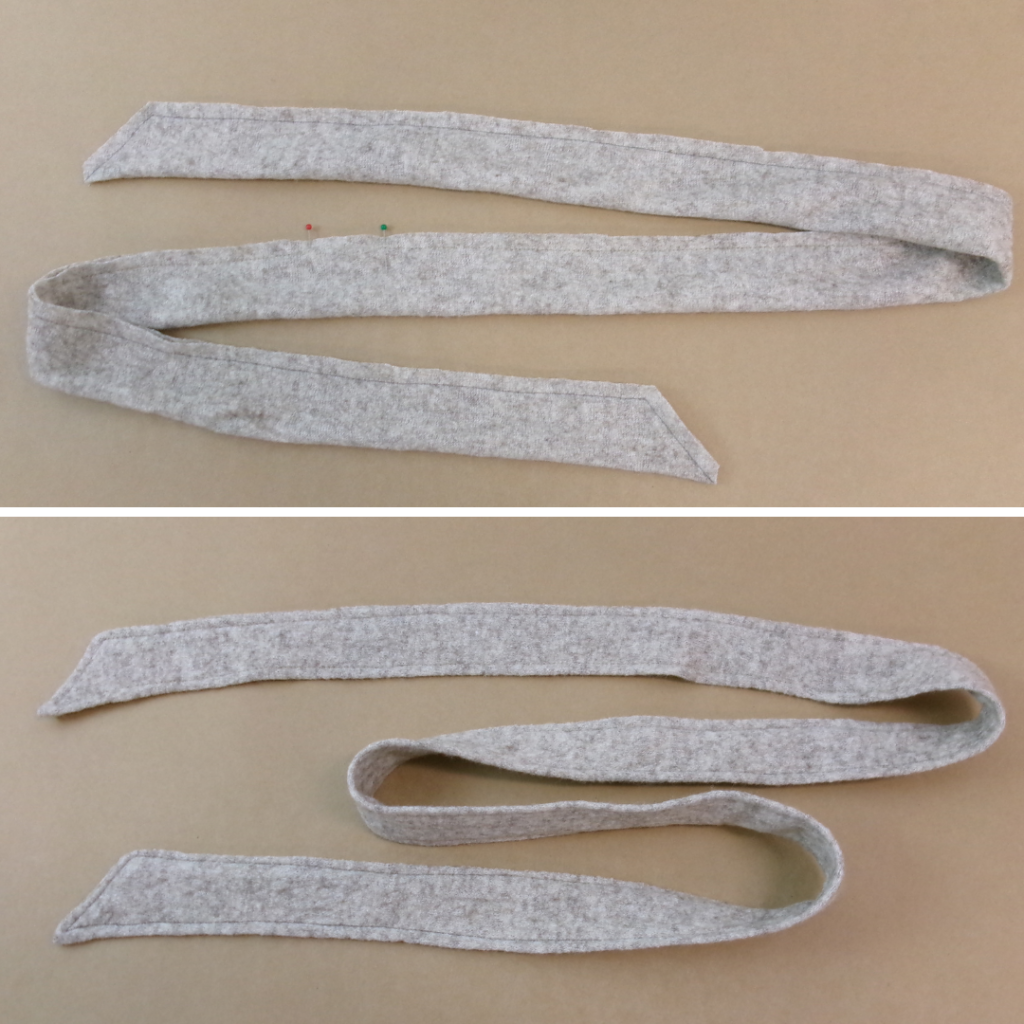
BELT: With RST, fold the Belt in half lengthways, pin and sew around the outer edge, leaving a gap of 5cm (2”) in the middle for turning out. Clip the corners and turn to the right side using a loop turner or chopstick. Press then top stitch the outer edges, closing the gap as you sew.

BELT LOOPS: Fold the two long edges to the inside 1cm (3/4”) and press. Fold again lengthways, press, then edge stitch the two outer edges. Put aside until later.
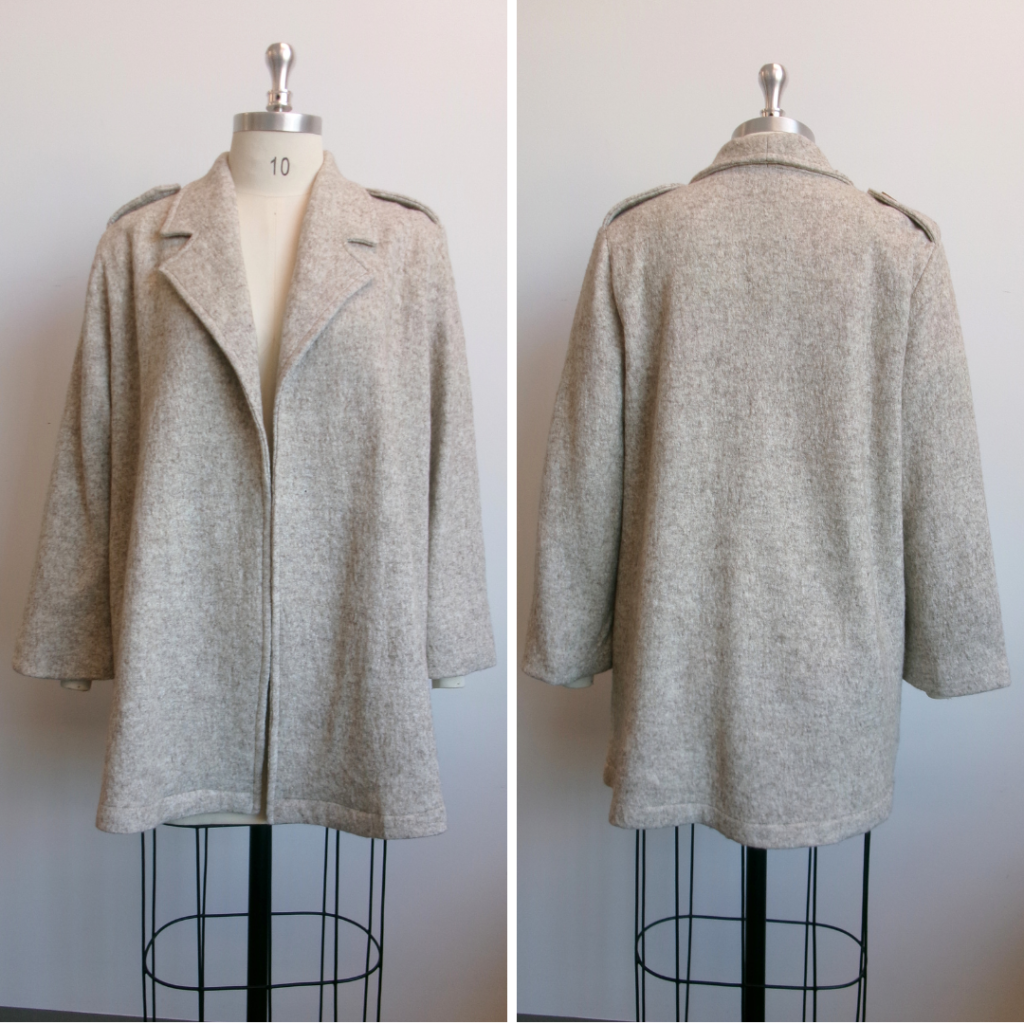
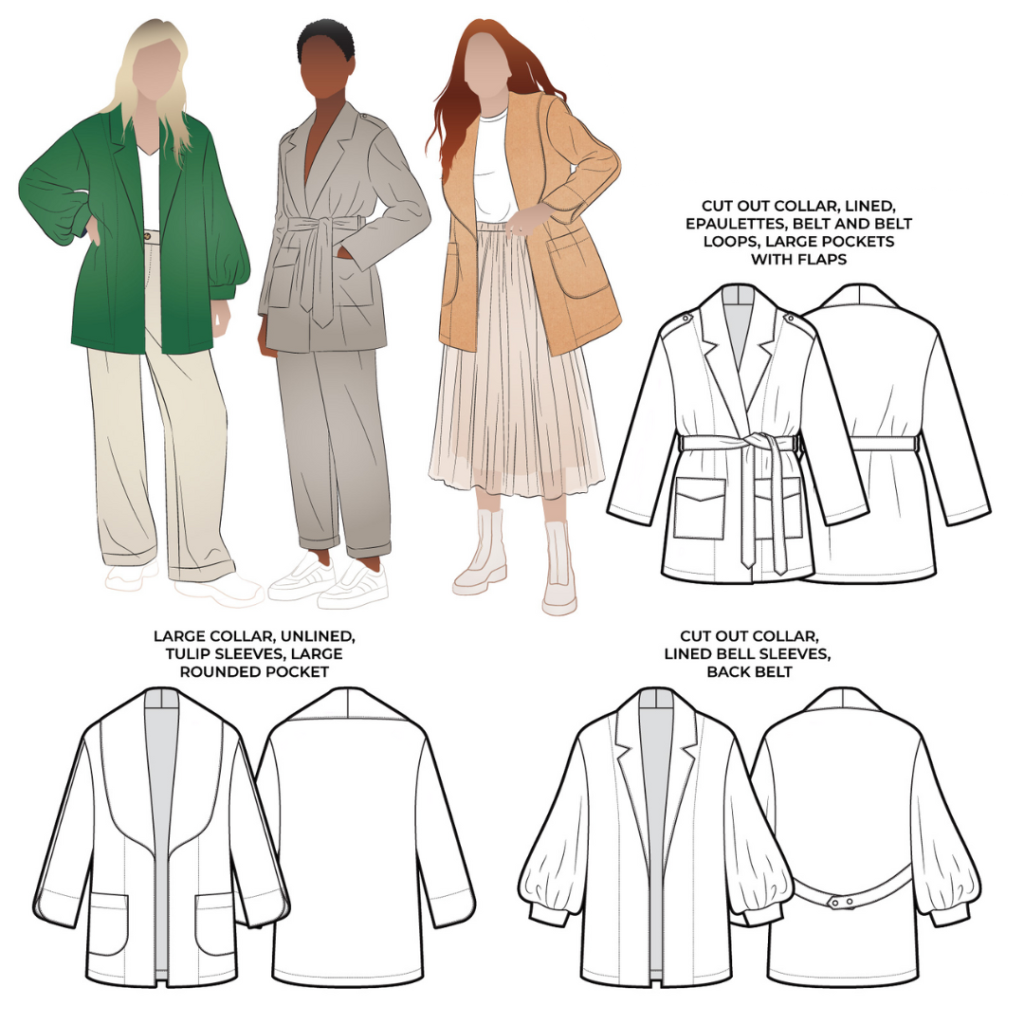
LARGE AND NOTCHED COLLAR AND FACING, WITHOUT LINING:
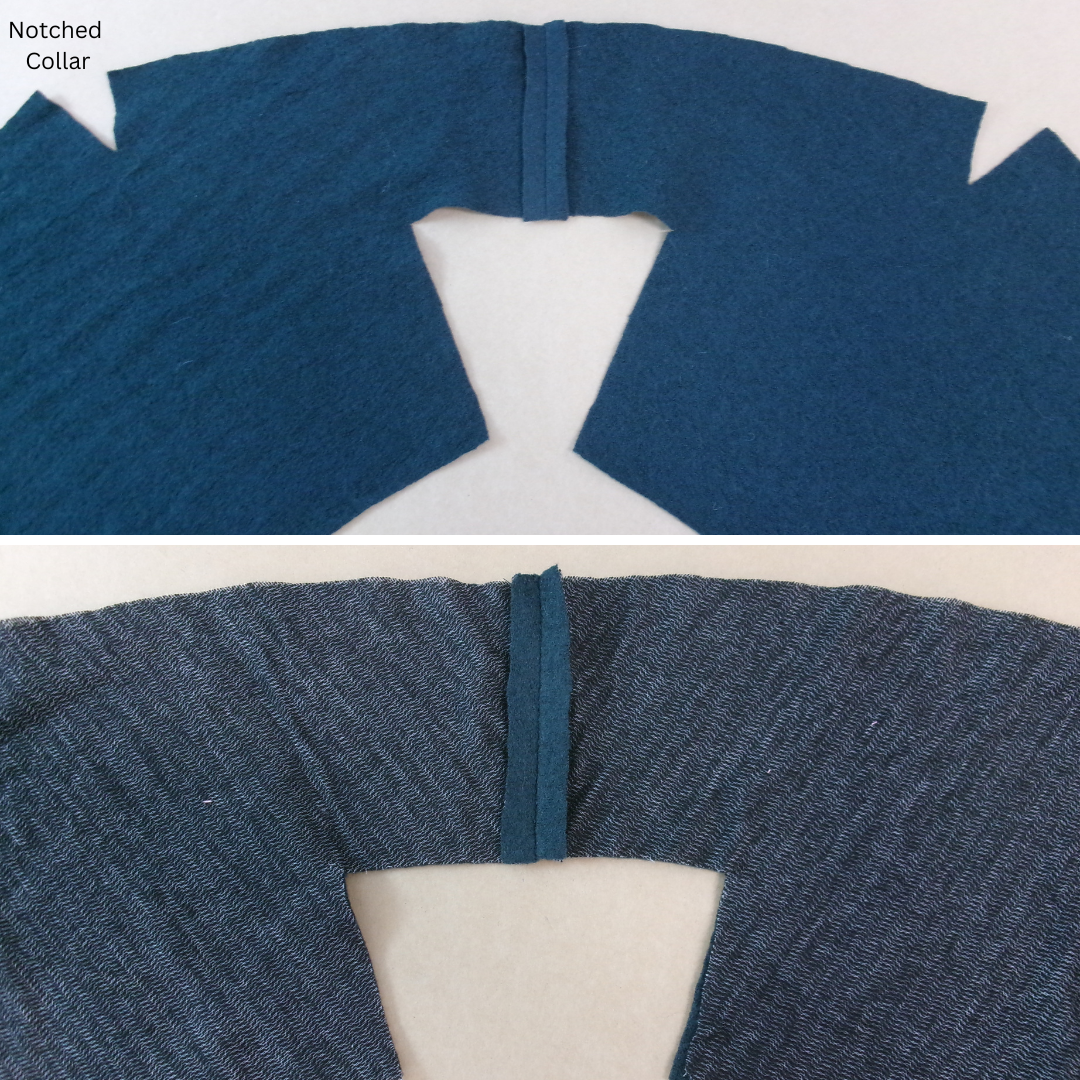
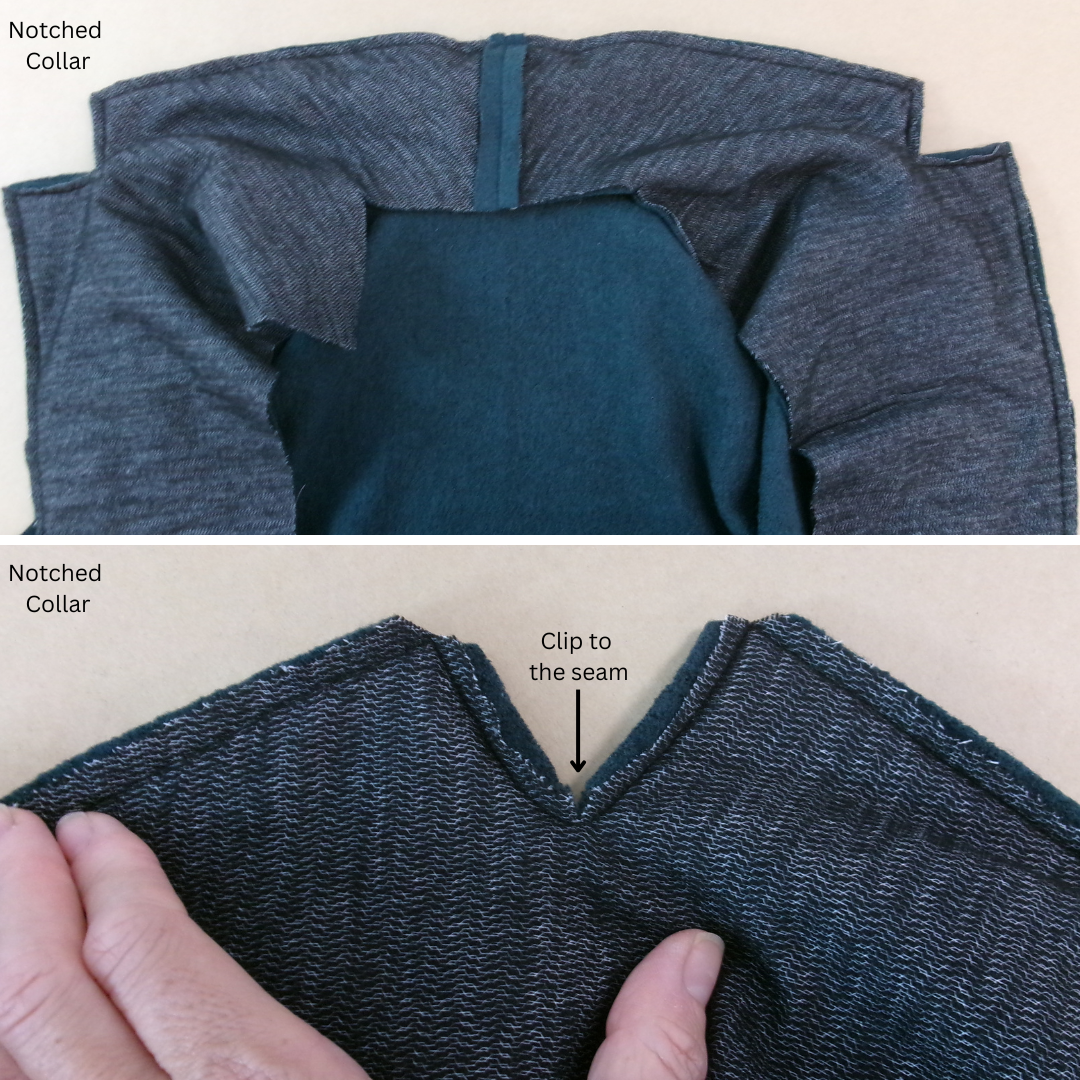
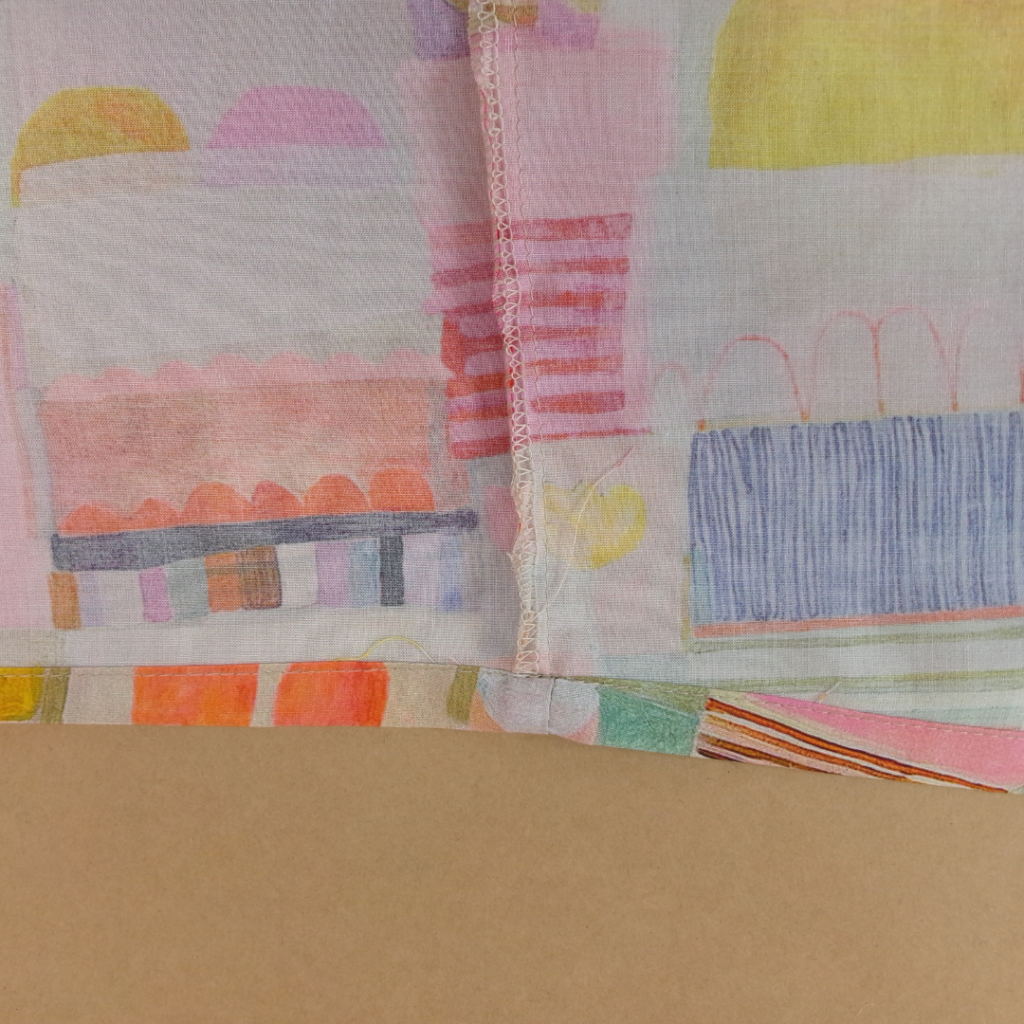
With RST, sew the Large Collar (2) together at the centre back. Press open. With RST, sew the Large Collar Facing (1) together at the centre back. Press open.
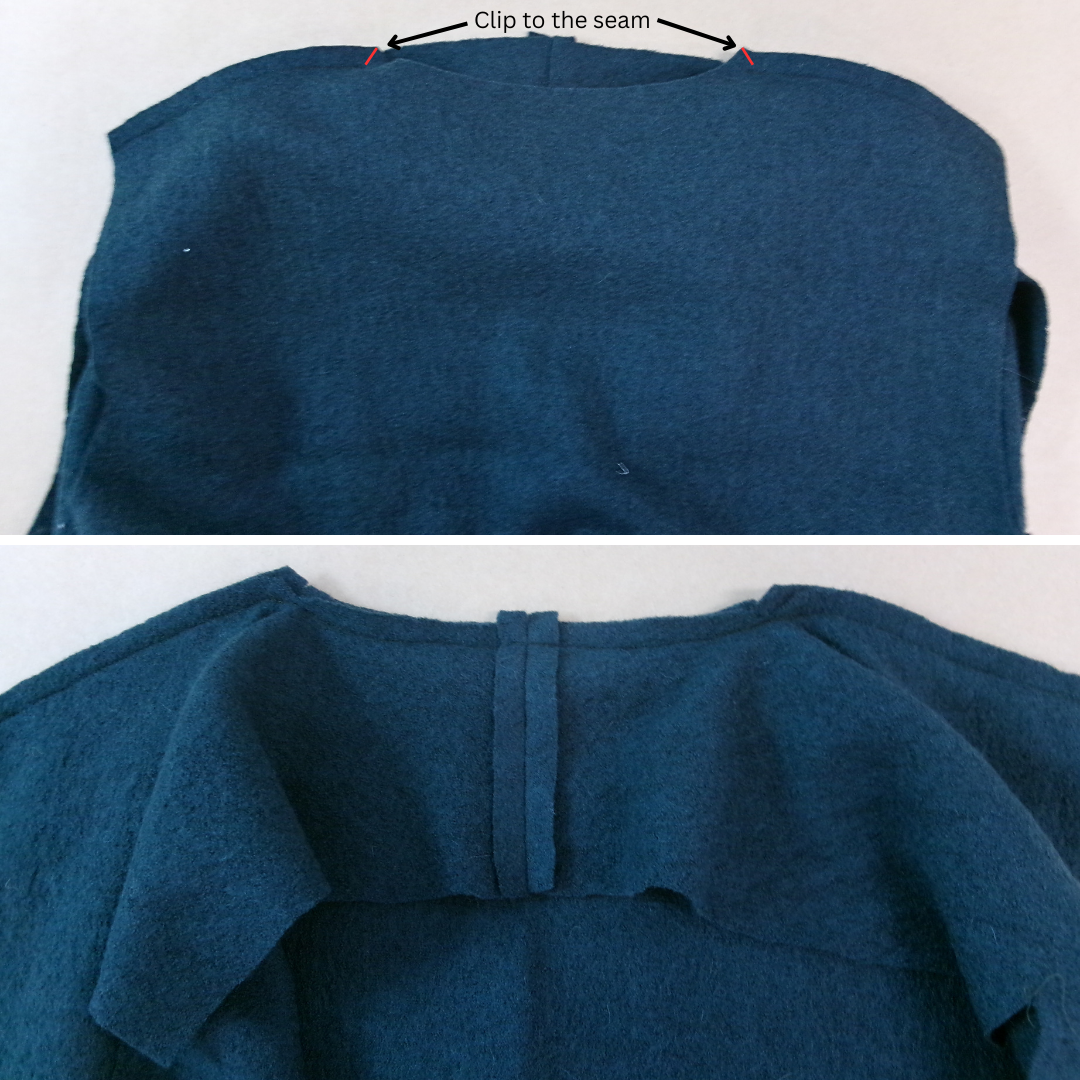
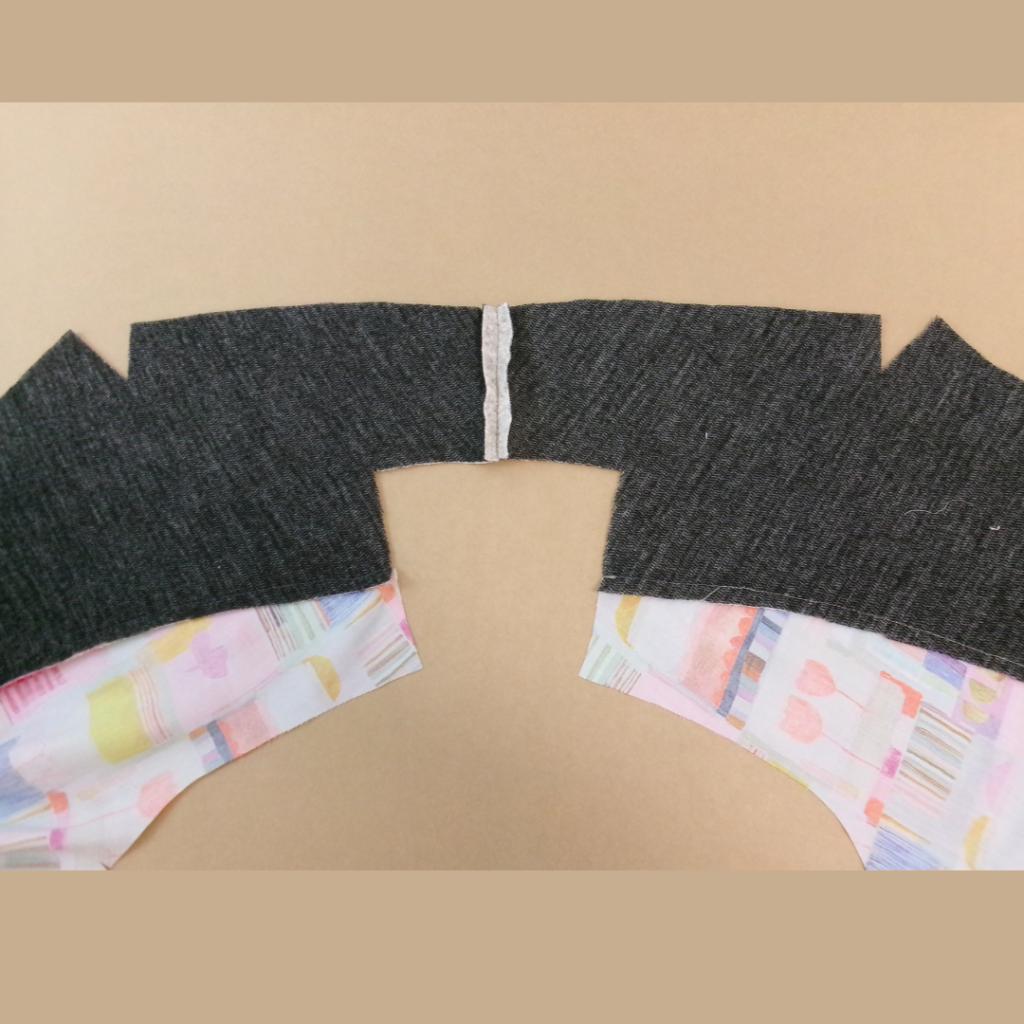
With RST, sew the main large collar to the original Loren Jacket Back (3) at the shoulder seams. Clip to the seam (be careful not to clip through the stitching).
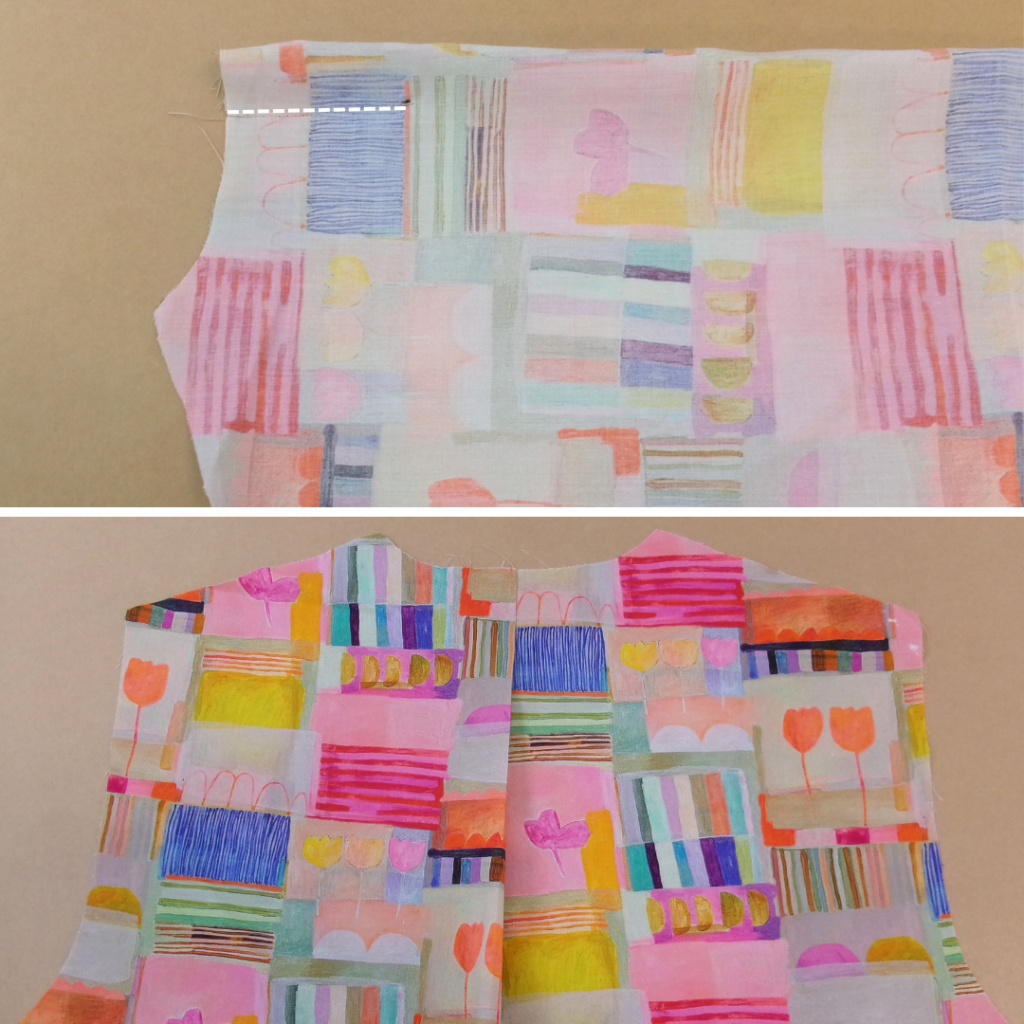
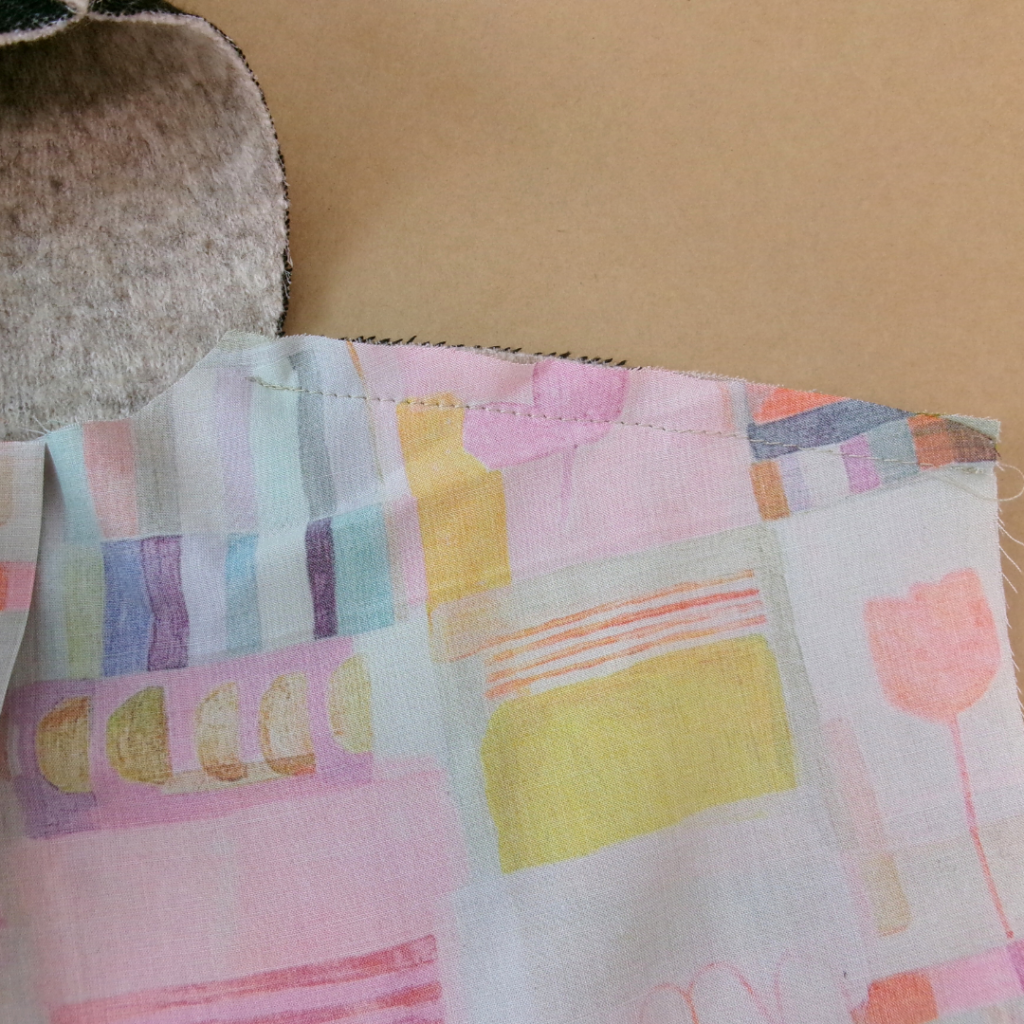
With RST, sew the Front to the Back at the neckline using a 6mm (1/4”) seam.
With RST and notches aligned, sew the front facing to the large/notched collar at the centre front. Start sewing at the hem on one side, continue along the seam and finish at the hem on the opposite side. Clip the curves/corners and into the lapel ‘v’ if making the notched collar. Turn out and press.

Turn the inside edge of the facing under 1cm (3/8”) and press.
For thick fabric you may choose to follow step 10 in your Loren jacket constructions to finish the back neckline instead of the ‘burrito method’ shown below.
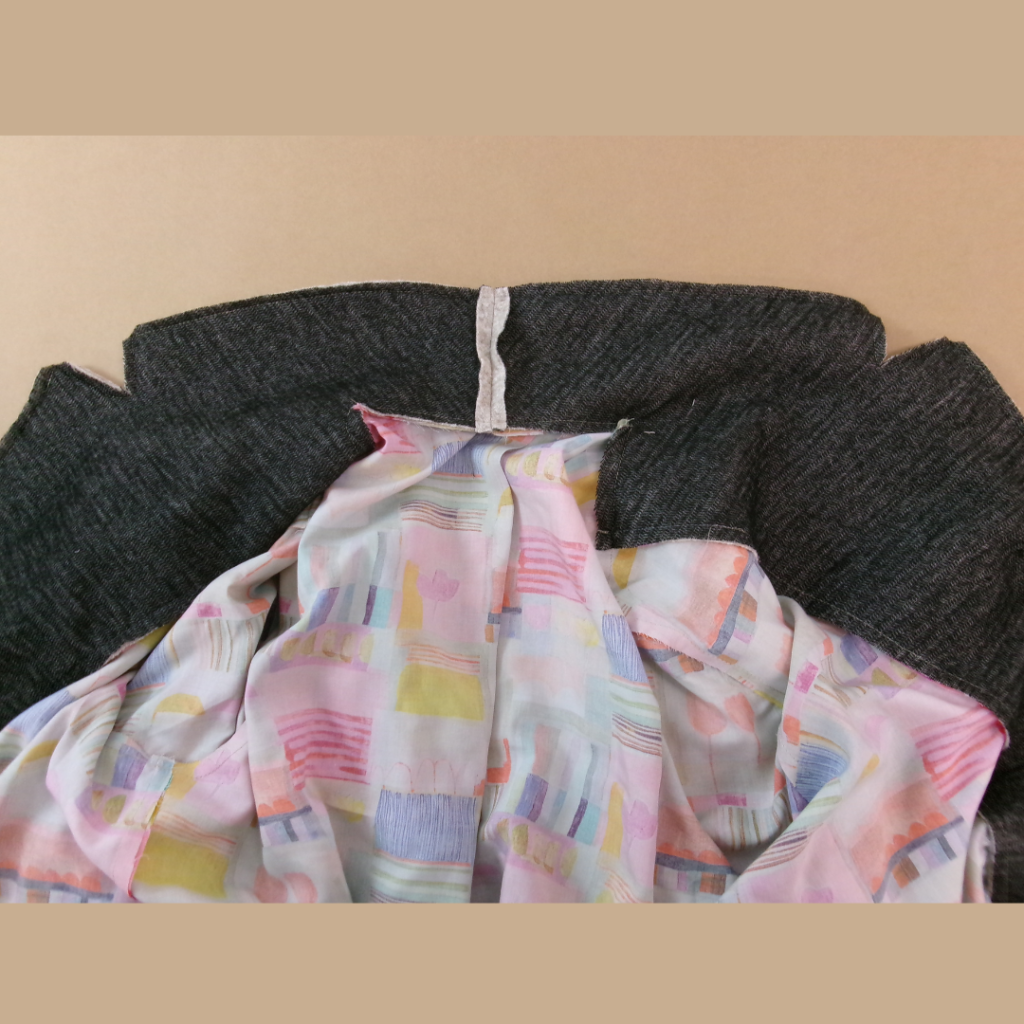
BURRITO METHOD:
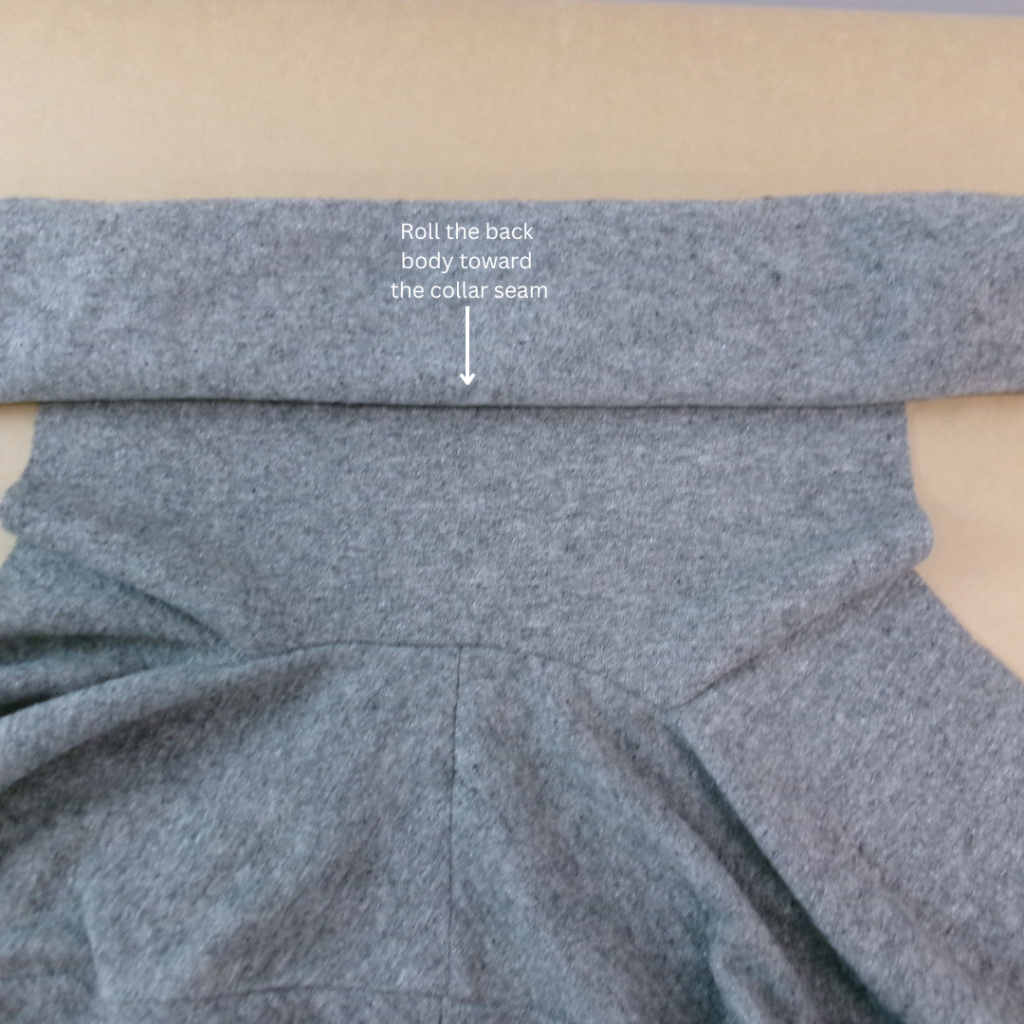
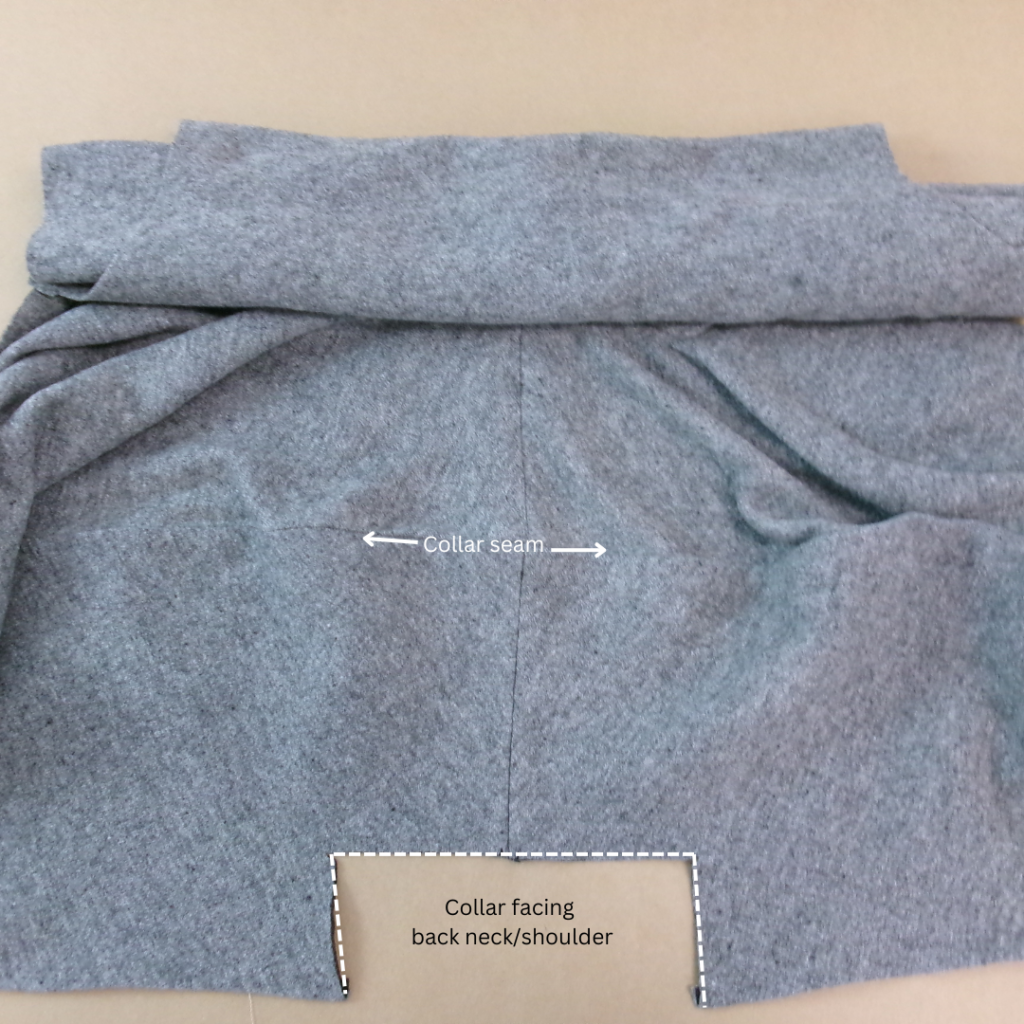
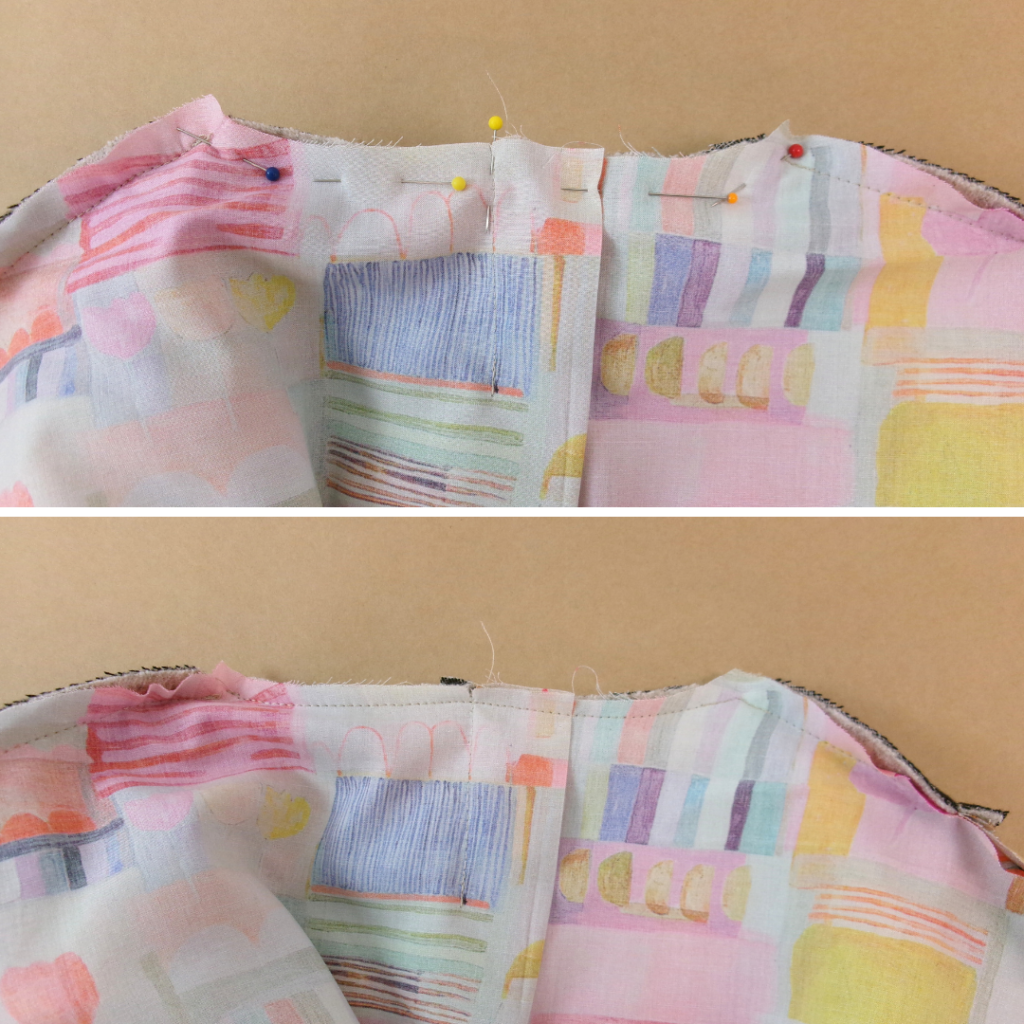
Roll up the back body so it sits atop the collar seam. Fold the collar facing so it is RST and notches aligned with the front collar.
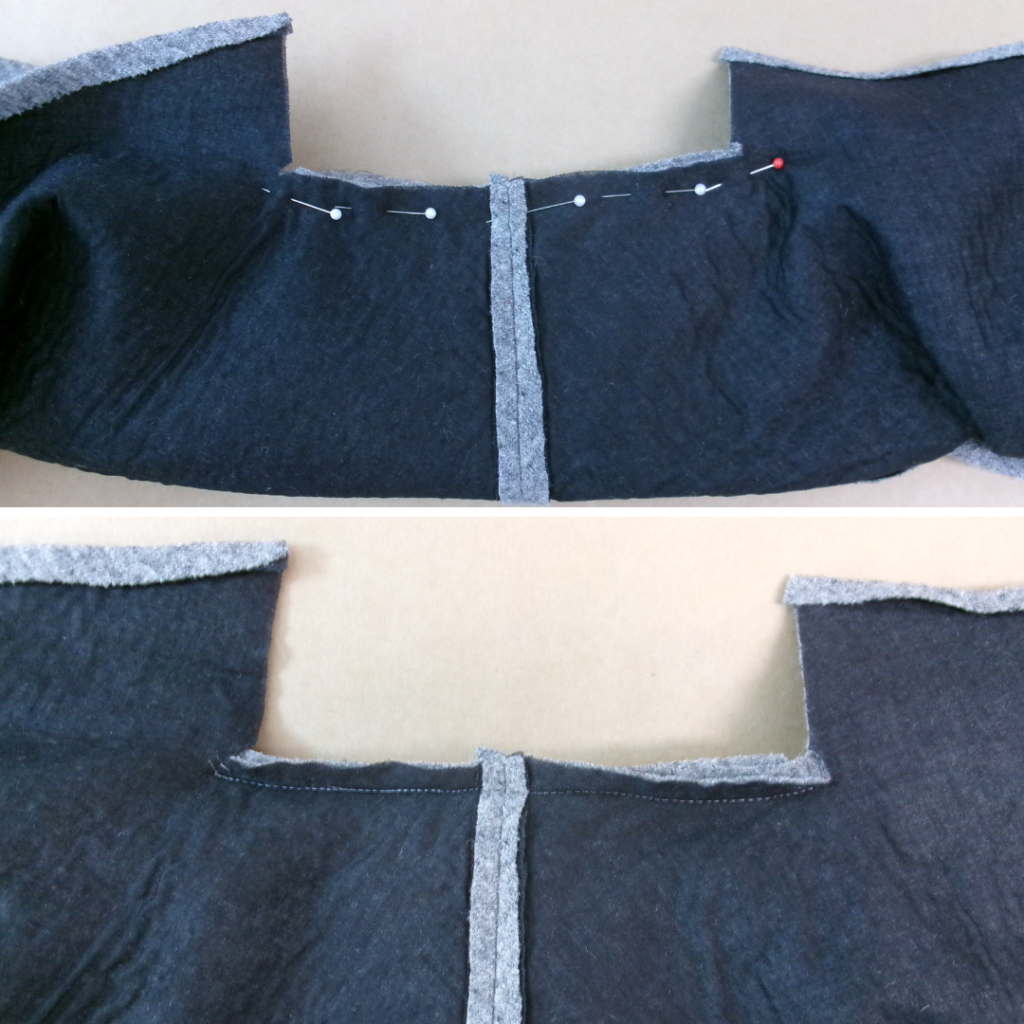
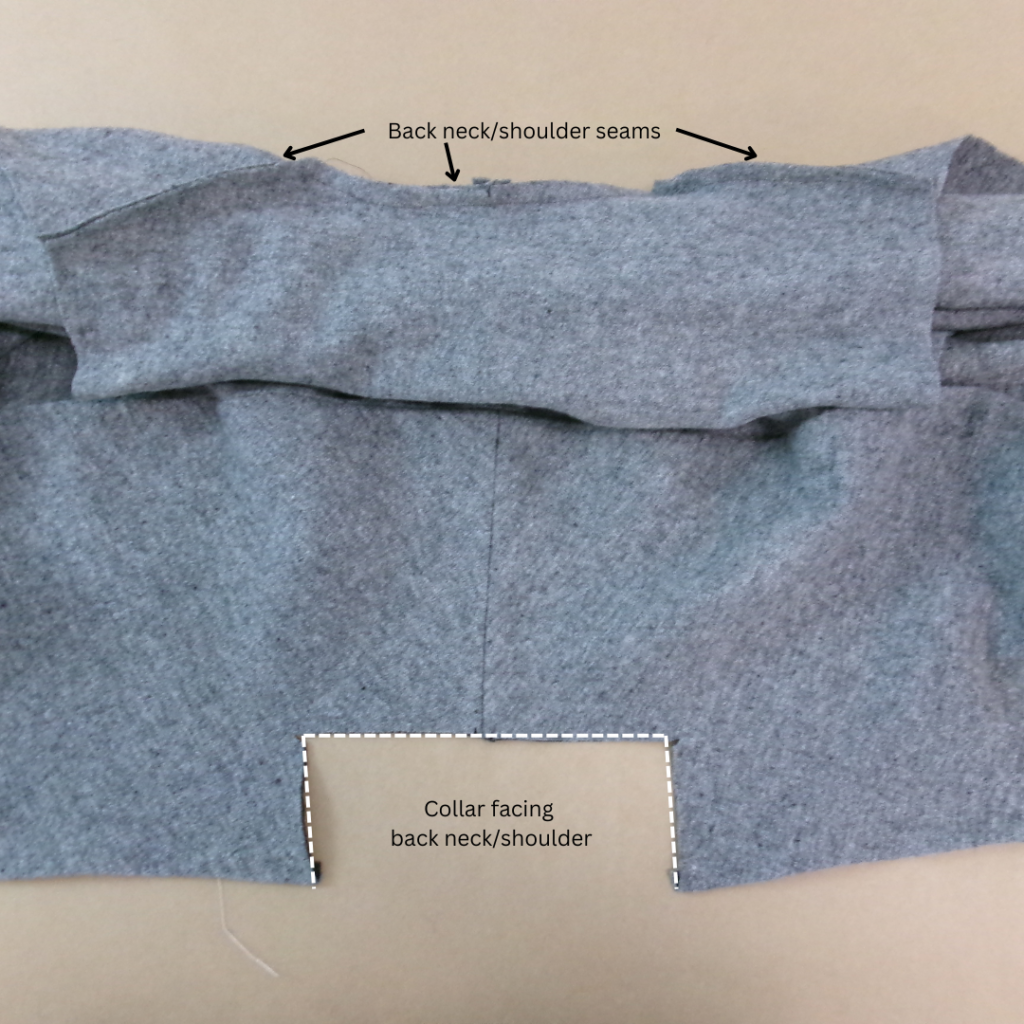
Pin the back neck of the facing to the neck of the front collar. Sew using a 6mm (1/4”) seam, then clip into the corners.
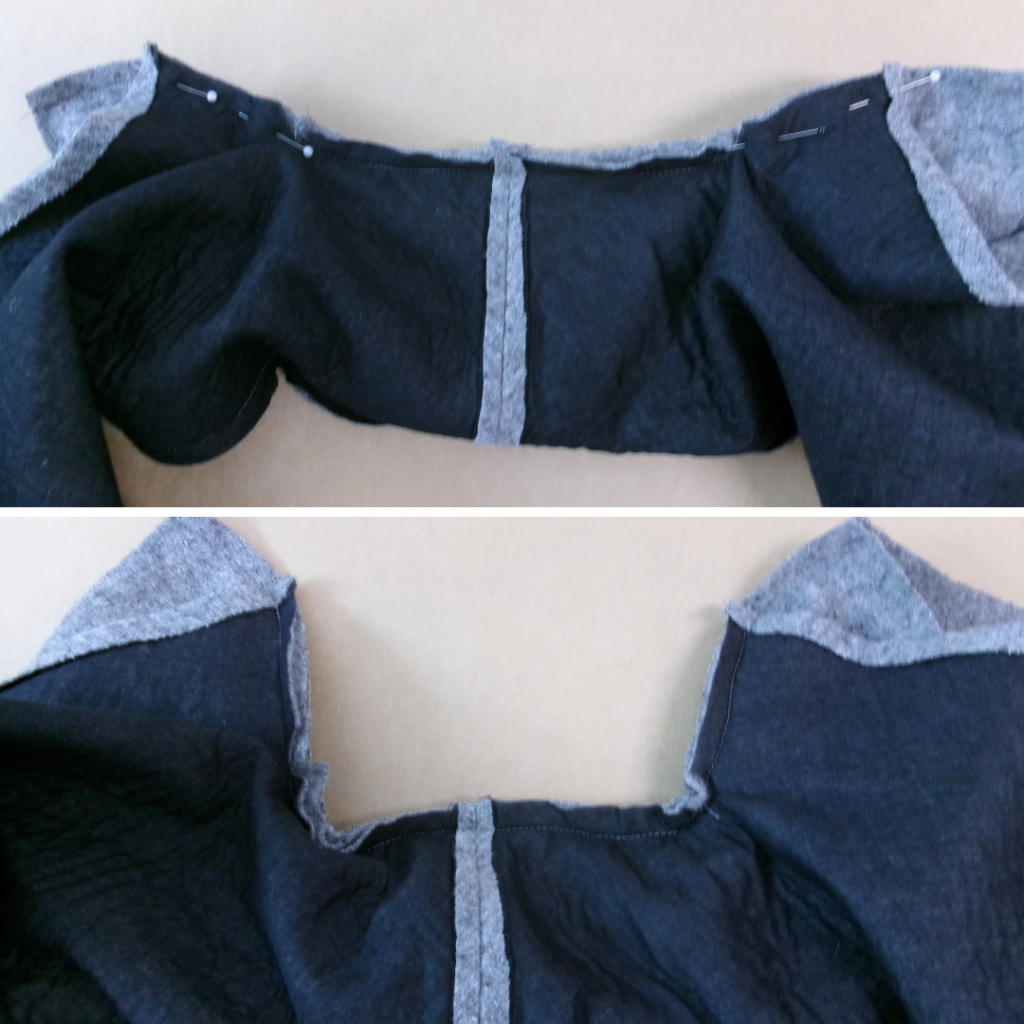
Pin the facing to the front collar at the shoulders, sew.

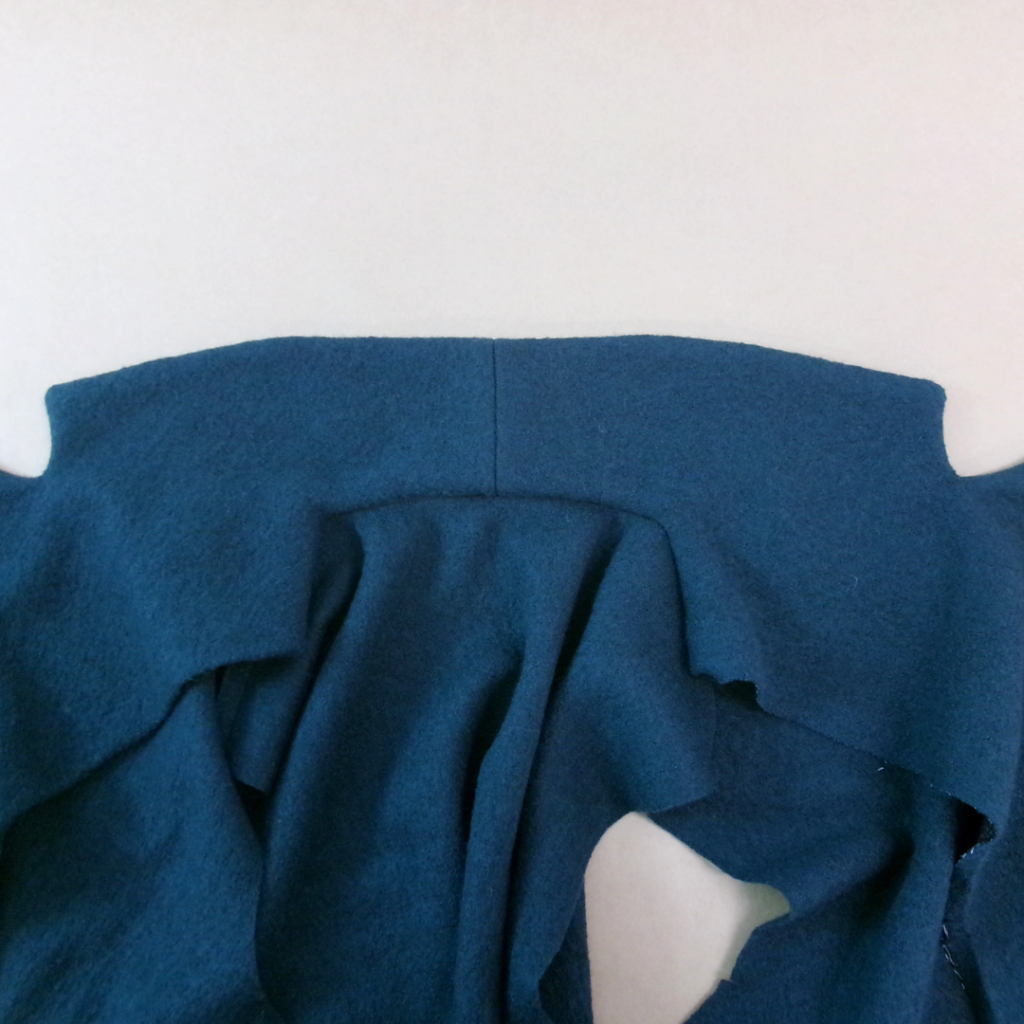
Carefully pull the collar through, press.
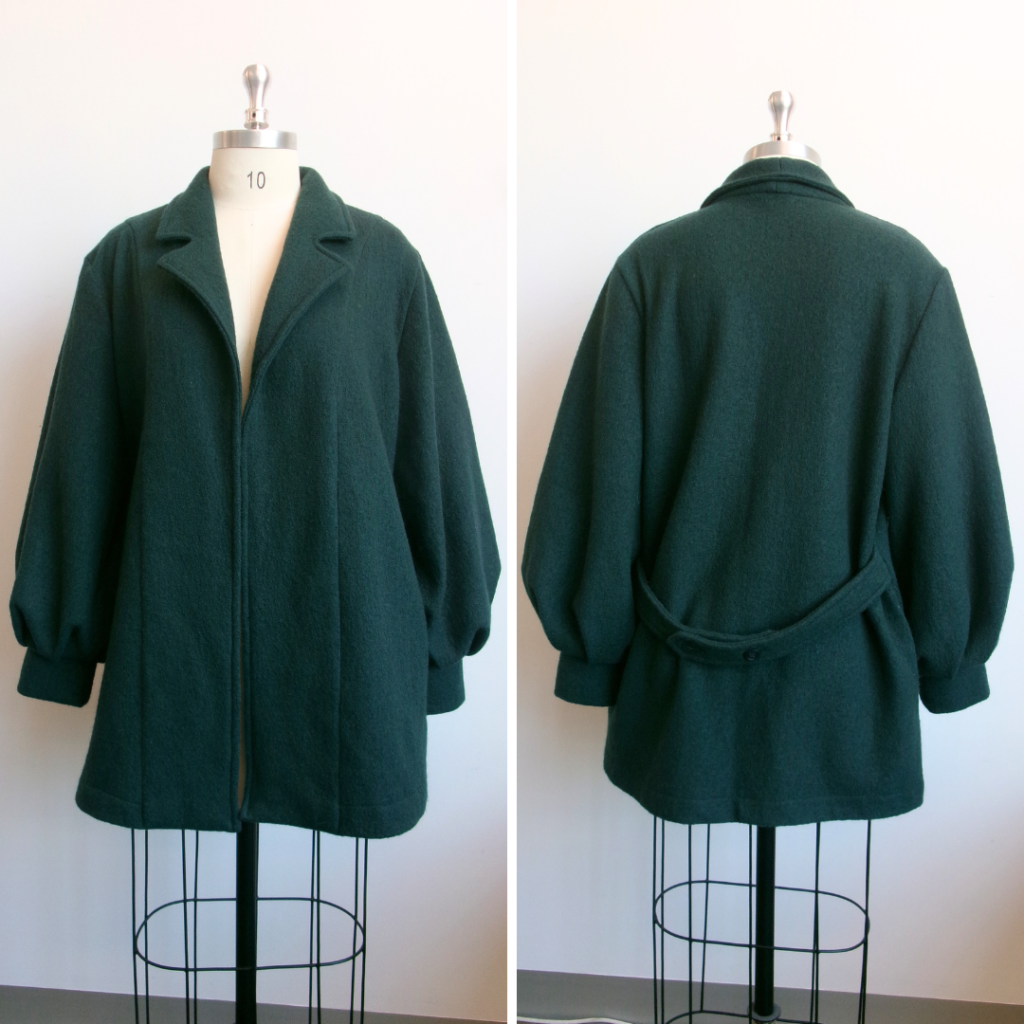
LARGE OR NOTCHED COLLAR AND FACING, WITH LINING:
With RST, fold the Back Lining (14) in half and create the pleat by sewing a 2.5cm (1”) seam from the back neck down 12cm (5”) as shown on the pattern. Press to one side.
With RST, sew the Front Lining (15) to the Back Lining (14) at the side seams. Neaten using an overlocker/serger and press towards the back. Double turn the hem to the inside, pin and sew. Press.
With RST and notches aligned, sew the Front Facing (1) to the Front Lining along the vertical seam. The hem of the lining will finish shorter than the facing, as shown on the pattern.
With RST, sew the Front collar (2) together at the centre back. Press open. With RST, sew the Front Facing collar (1) together at the centre back. Press open.
With RST, sew the Front collar (2) to the Back of your original Loren Jacket (3) at the shoulder seams. Neaten and press towards the front. Clip the corners.
With RST, sew the Front collar to the Back of your original Loren Jacket at the back neck seam using a 6mm (1/4”) seam.
With RST, sew the front facing/lining to the back lining at the shoulder seams. Neaten using an overlocker/serger and press towards the front. Clip the corners.
With RST, sew the facing to the lining at the neckline using a 6mm (1/4”) seam.
With RST and notches aligned, starting at the hem on one side, sew the Front facing to the front of the Large/Notched collar, and finish at the hem on the other side. Clip the corners (if using the notched collar) and into the seam, turn out and press.
BODY:
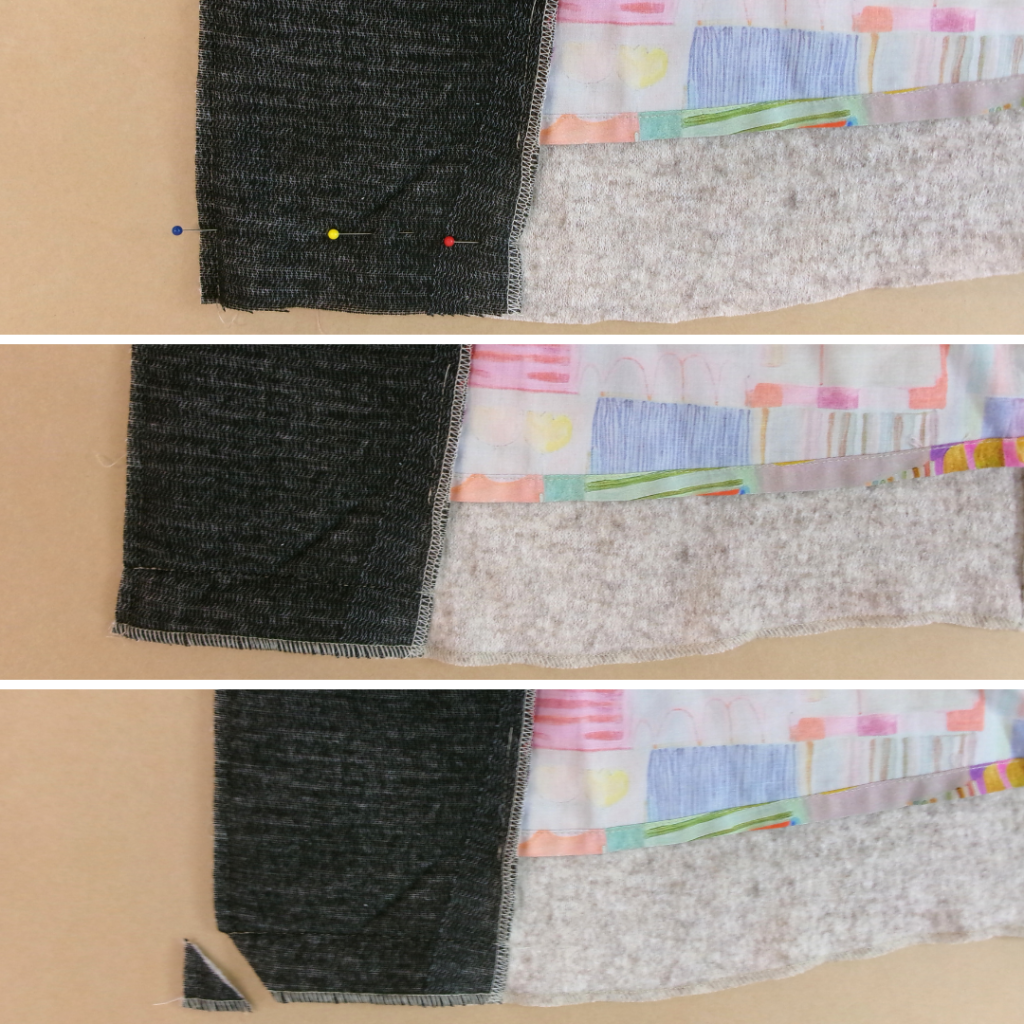
Fold back the Facing so it is RST with the Front and sew the bottom edge in line with the notch 3cm (1 1/4”) up from the raw edge. Neaten the hem using an overlocker/serger. Clip the corners and turn out.
Turn the hem to the inside, pin into place and topstitch. Starting at one hem, top stitch around the front and collar, 1cm (3/8”) from the edge. Pin the facing to the front and top stitch between the shoulder and hem.
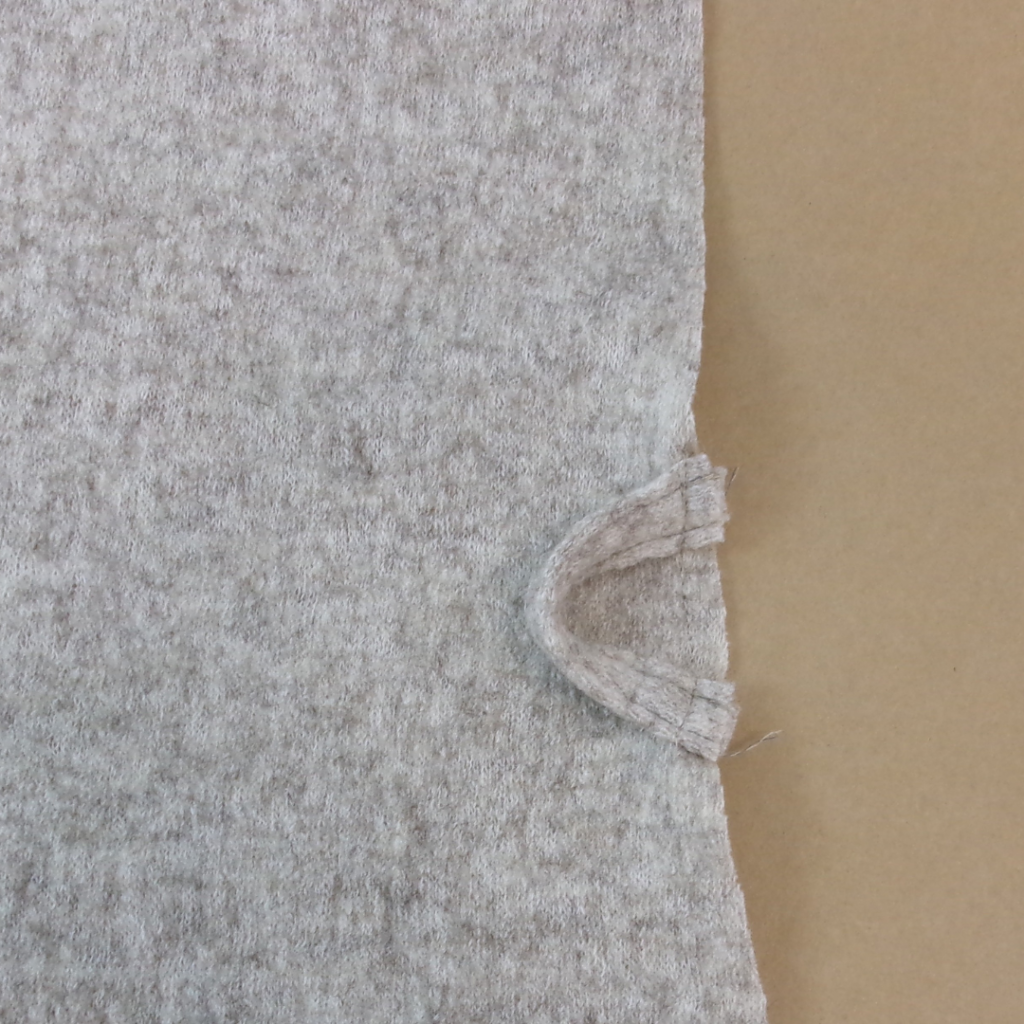
If using the Back Belt or Belt Loops: Baste your optional Back Belt or Belt Loops into place as shown on the pattern, the loop will face inward; when the side seam is complete, the loop will be facing outward.
Sew the front to back at the side seams following steps 5 and 6 in the original Loren Jacket construction.
POCKETS:
PATCH POCKET AND REGULAR POCKET FLAP (7); LARGE POCKET (8) AND LARGE POCKET FLAP (9)
Follow the steps for the Patch Pocket in your original Loren Jacket. Follow these steps for the Large Pocket (8) also.
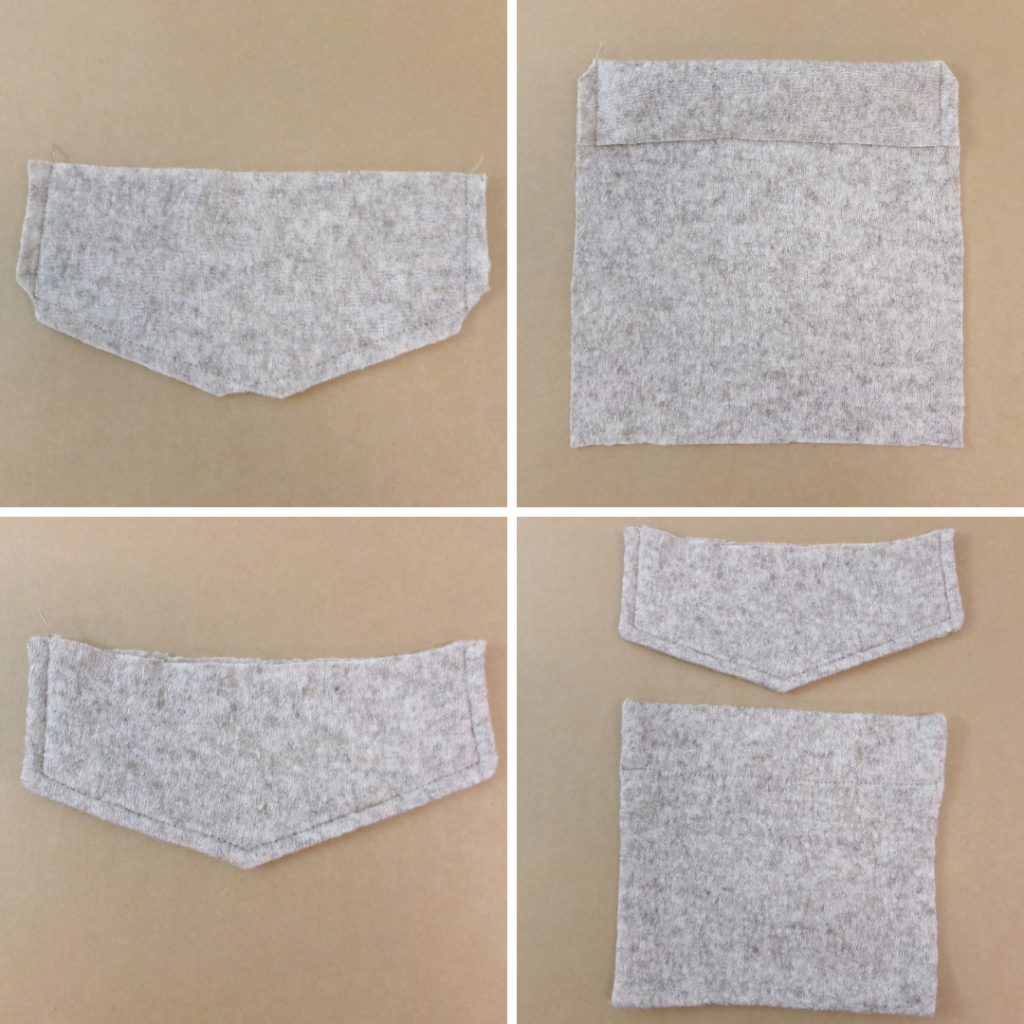
With RST, sew a pair of Regular Pocket Flap (7) together, leaving the top edge open. Clip the corners, turn to the right side and press. Top stitch the seams.
Pin the pocket flap above the pocket, facing upwards. Sew, then fold down and top stitch so the flap covers the opening of the pocket.
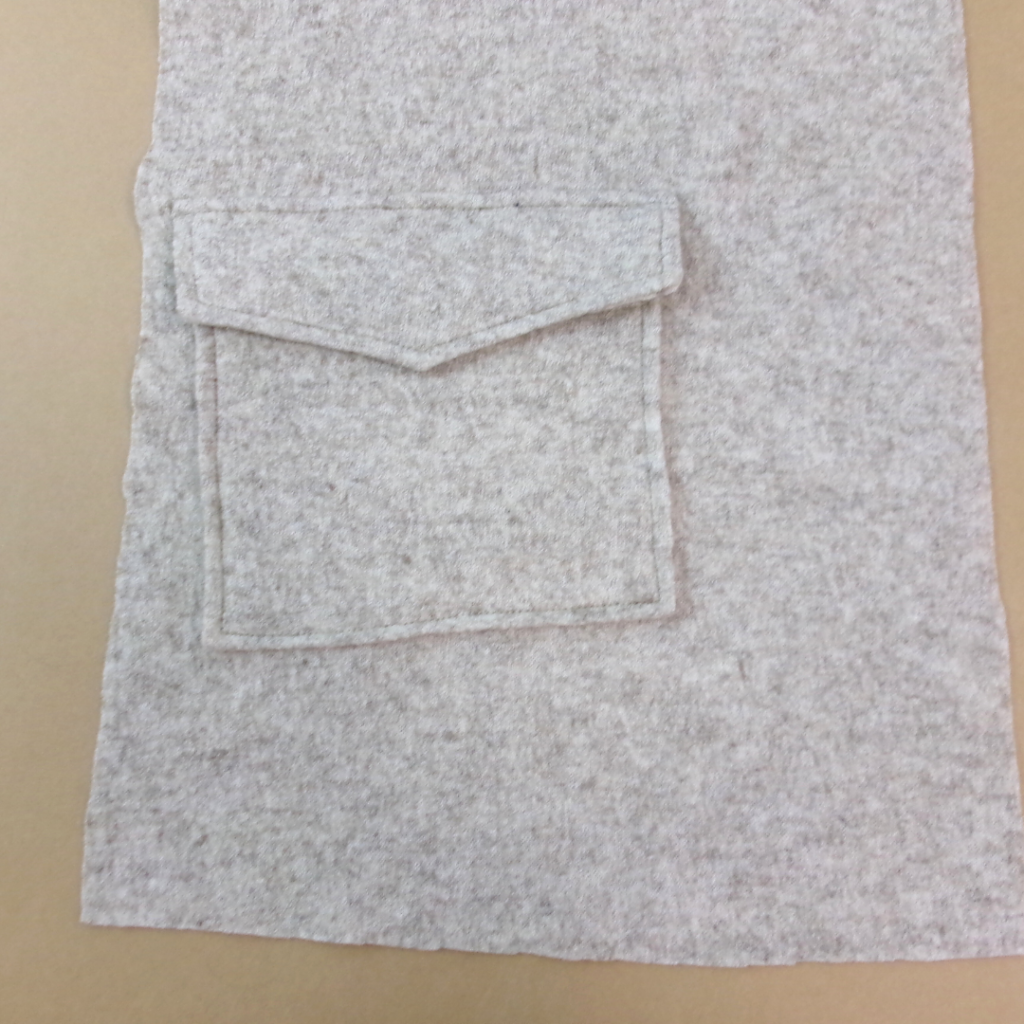
LARGE ROUNDED POCKET (10) AND LARGE ROUNDED POCKET FLAP (11)
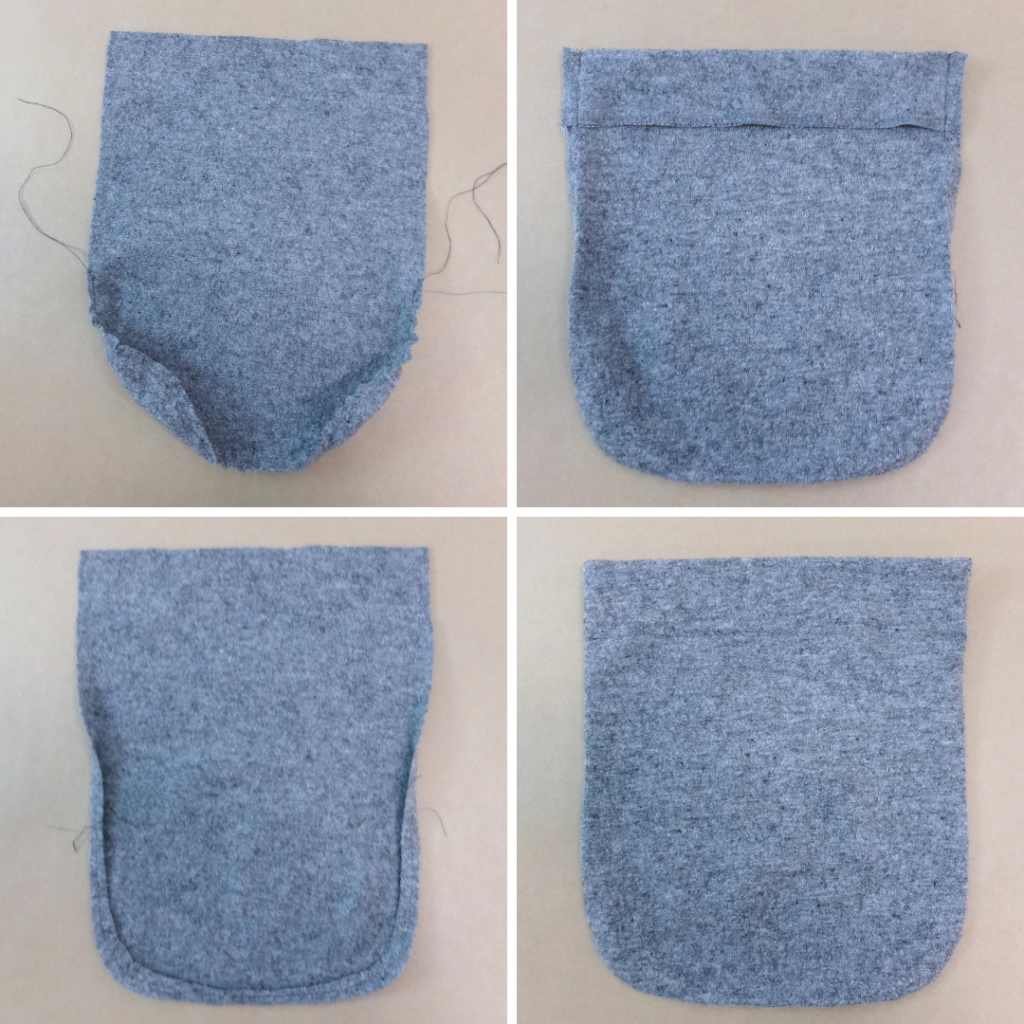
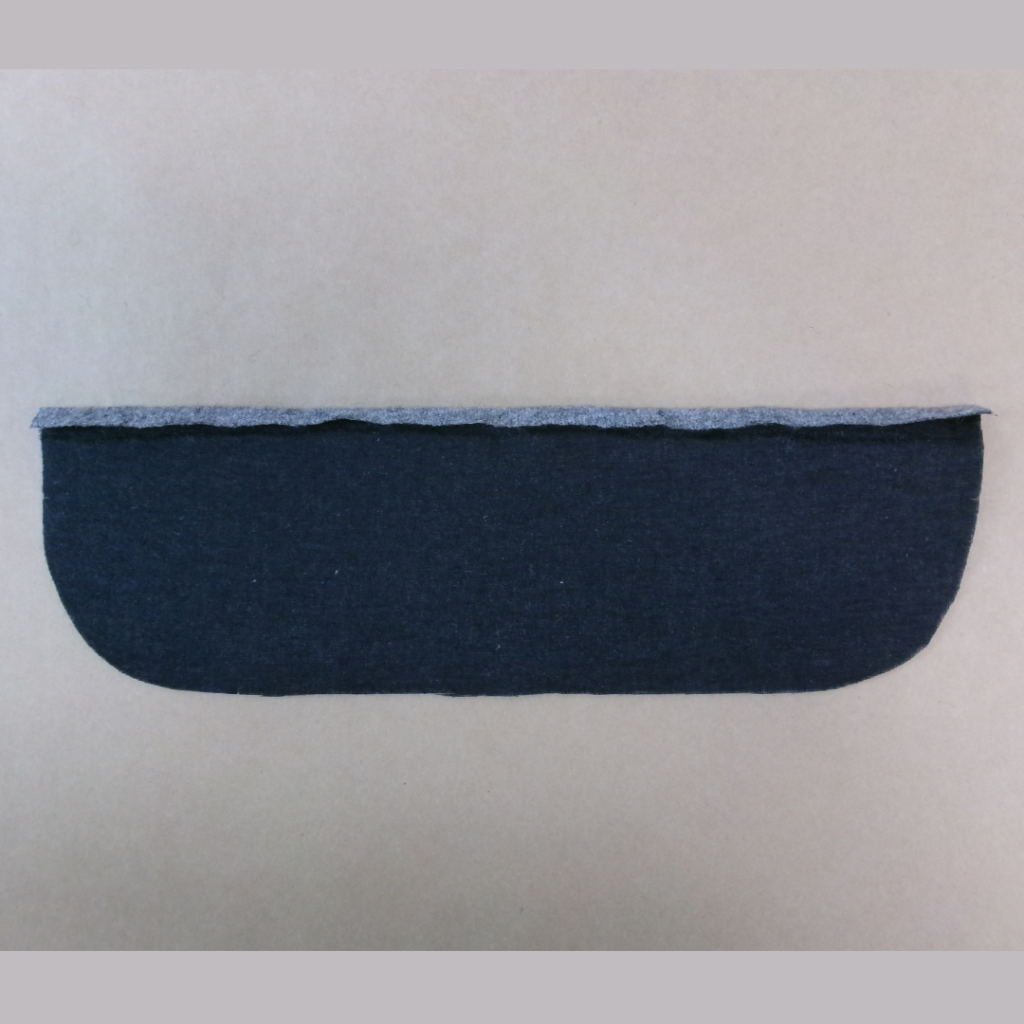
Sew a large ease stitch to the bottom half of the Large Rounded Pocket (10). Draw in slightly so the edges curl to the inside. With RST, fold the top edge of the pocket over. Sew down each side of the turnover, clip the corners and turn the pocket to the right side. Press. Top stitch the turnover. Fold the outer edges to the inside and press. You should have a nice rounded pocket.
With RST, sew a pair of Large Rounded Pocket Flaps (11) together, leaving the top edge open. Clip into the seam, turn to the right side and press. Top stitch the seams. Pin the pocket to the front of the jacket following the guides on the pattern. Top stitch the pocket into place. Pin the pocket flap above the pocket, facing upwards. Sew, then fold down and top stitch so the flap covers the opening of the pocket.
TULIP SLEEVE (3, 4, 5 AND 17 (OPTIONAL)):
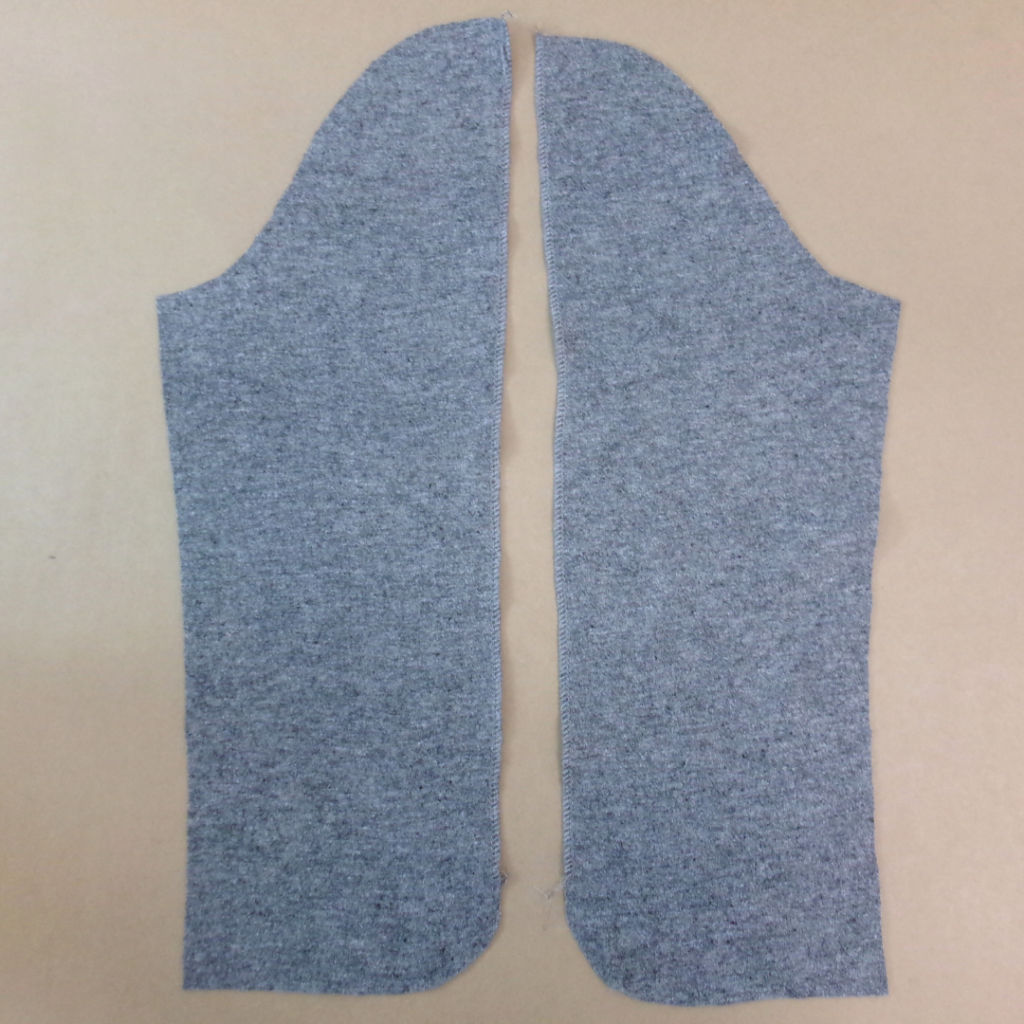
Using an overlocker/serger, neaten the top sleeve edges of the Back Tulip Sleeve (3) and Front Tulip Sleeve (4) separately – start at the shoulder and finish at the second notch.

With RST and notches aligned, starting at the sleeve head, sew the Back Tulip Sleeve to Front Tulip Sleeve at the centre seam, finishing at the first notch. Press open.
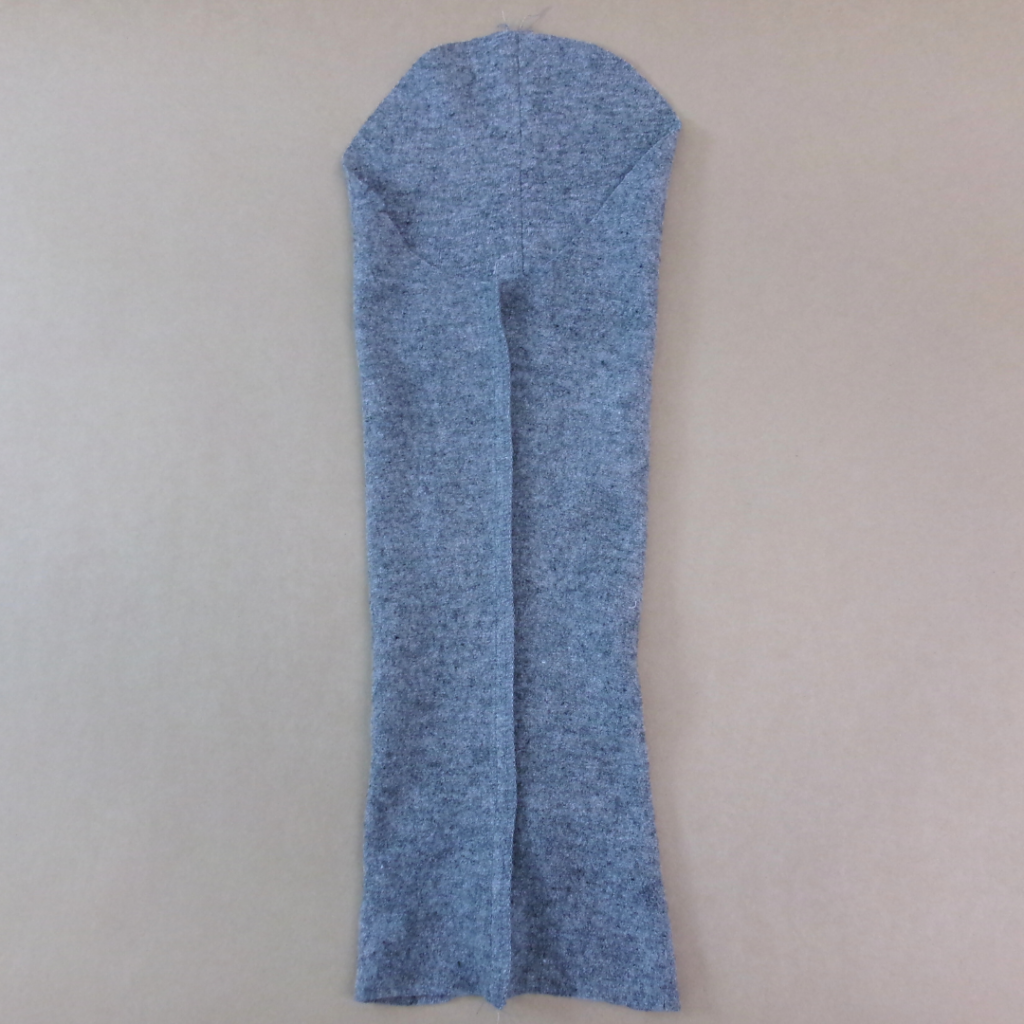
With RST and notches aligned, sew the back to front at the under sleeve. Neaten using an overlocker/serger, and press towards the back.
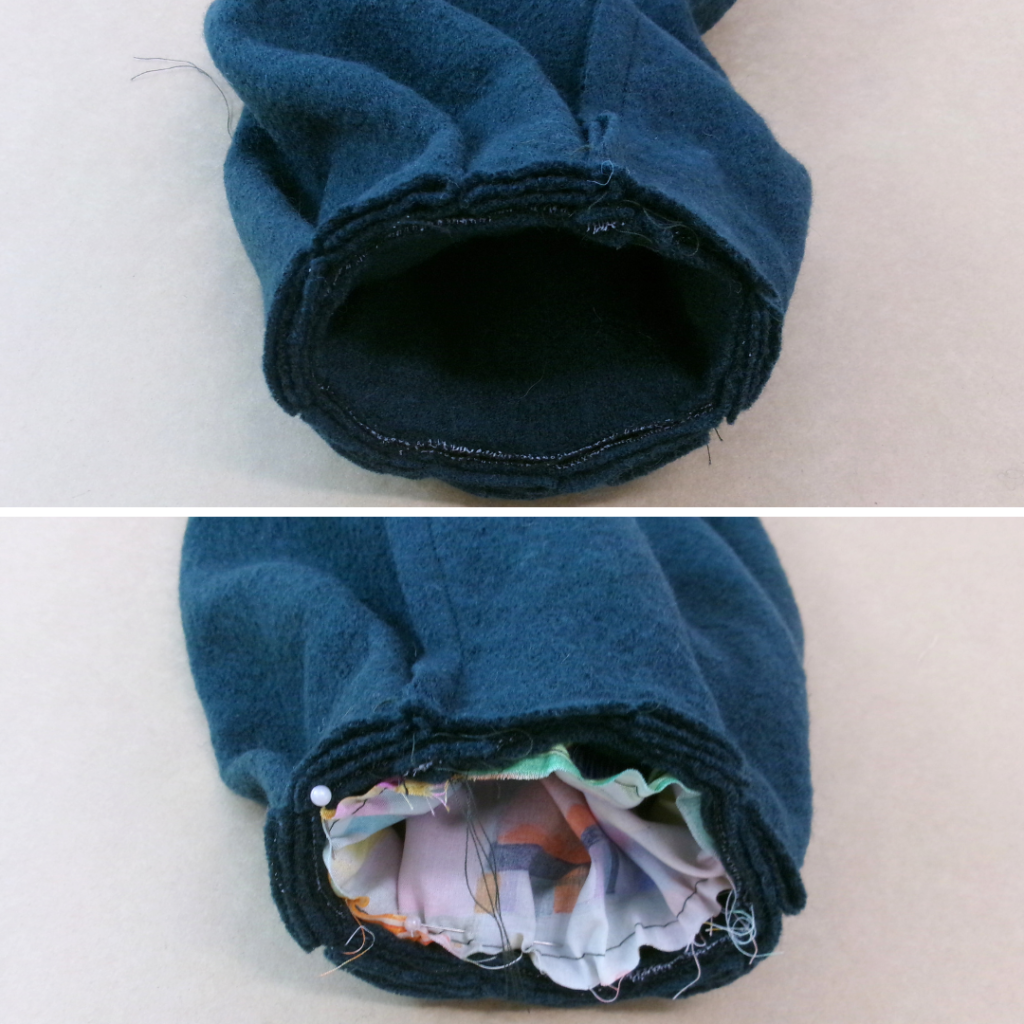
With RST, fold the Tulip Sleeve Facing (5) in half creating a cuff, and sew a small seam from the top edge, as far as the notch. Press open.
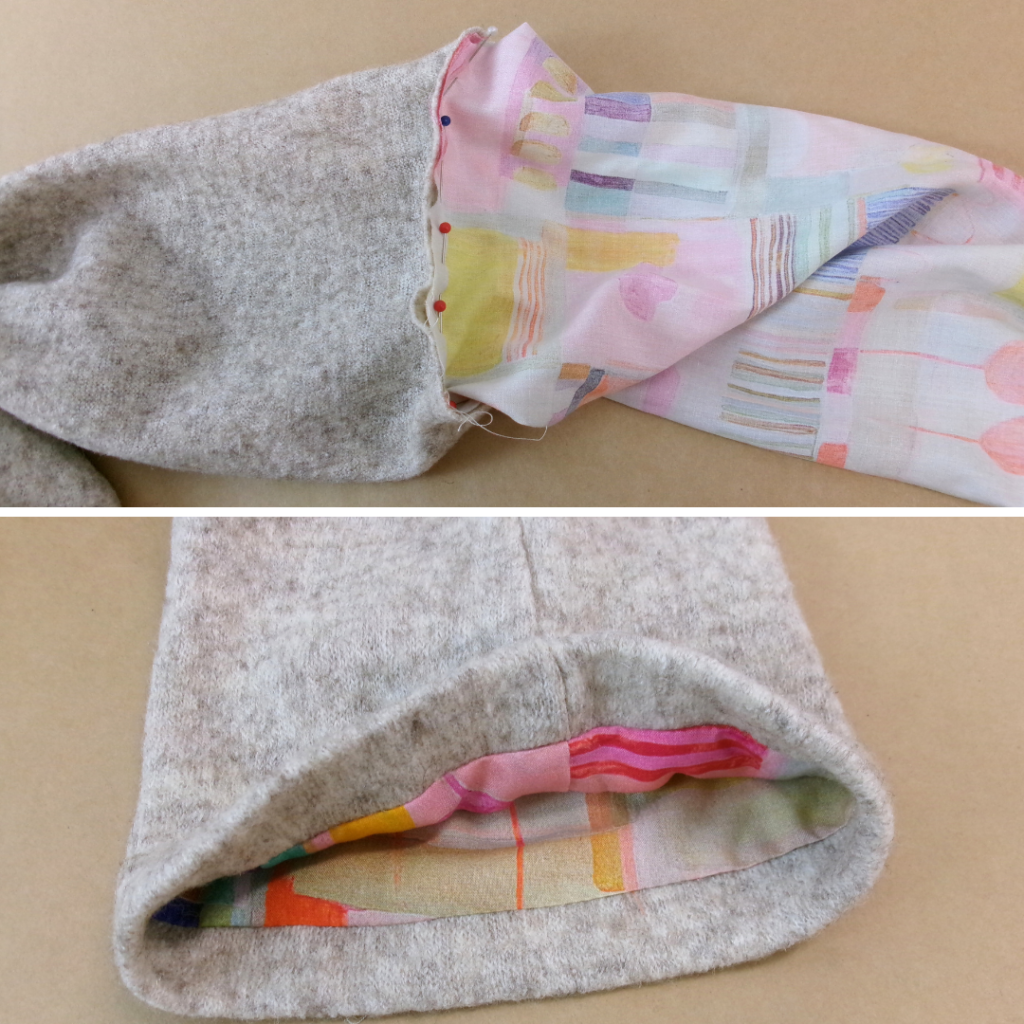
Lining option: With RST, sew the Sleeve Lining (17) under sleeve seam. Neaten using an overlocker/serger and press towards the back. With RST and aligning the seams, pin the lining to the sleeve facing and sew into place. Press towards the lining.
Option without lining: Turn the top edge of the cuff to the inside 1cm (3/8”) and press.

With the sleeve turned out to the wrong side, place the facing inside the sleeve opening with RST. Align the notches and pin into place. Starting at the notch, sew the facing to the sleeve and finish at the notch on the other side. Clip the seams, turn to the right side and press.

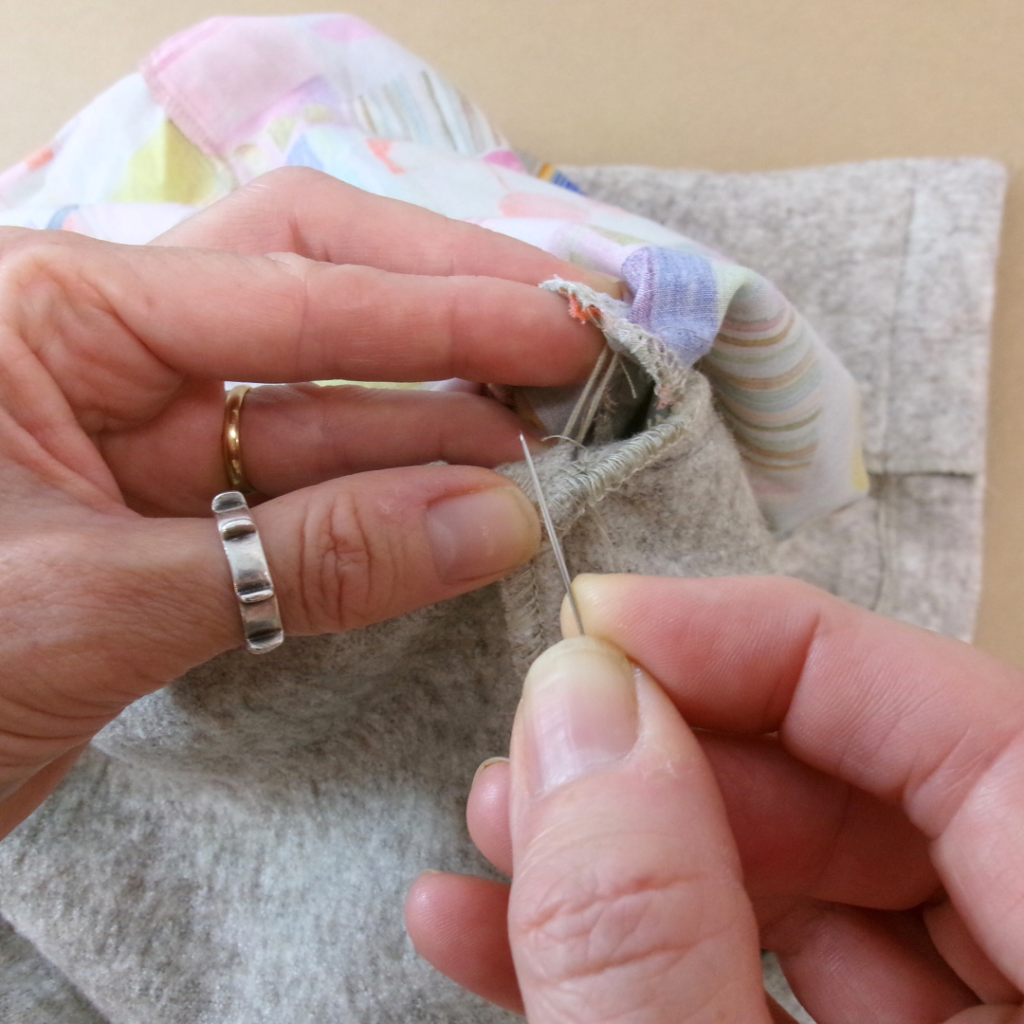
Top stitch around the cuff opening. If you are not using the lining, pin the top edge of the cuff into place, and edge stitch.
If using the Epaulette: Baste the edge of the epaulette to the shoulder seam, facing inward. With RST and notches aligned, pin the sleeve to the arm opening of the main body. Sew, then neaten using an overlocker/serger. Press towards the sleeve.
If using lining: With RST and notches aligned, pin the sleeve lining to the arm opening of the main body lining. Sew, then press towards the sleeve.
BELL SLEEVE (12, 13 AND 17)
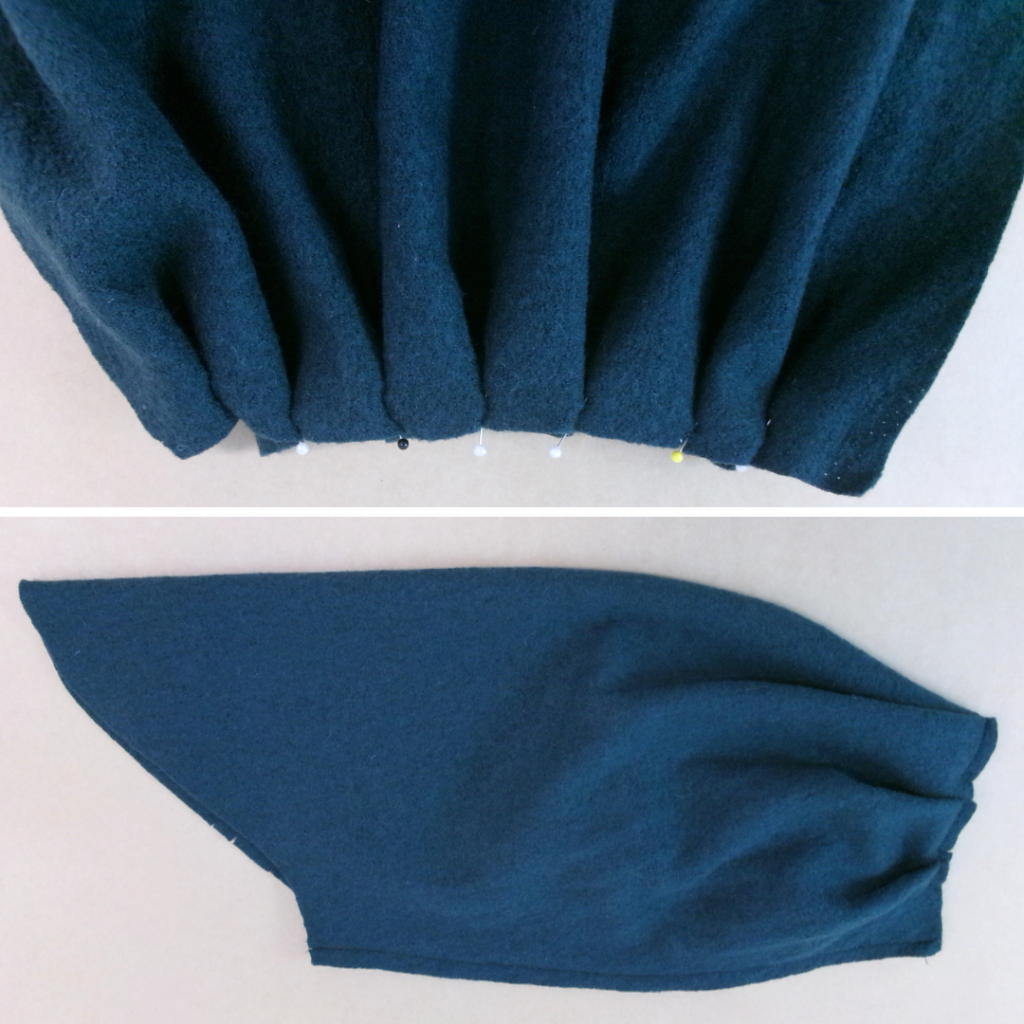
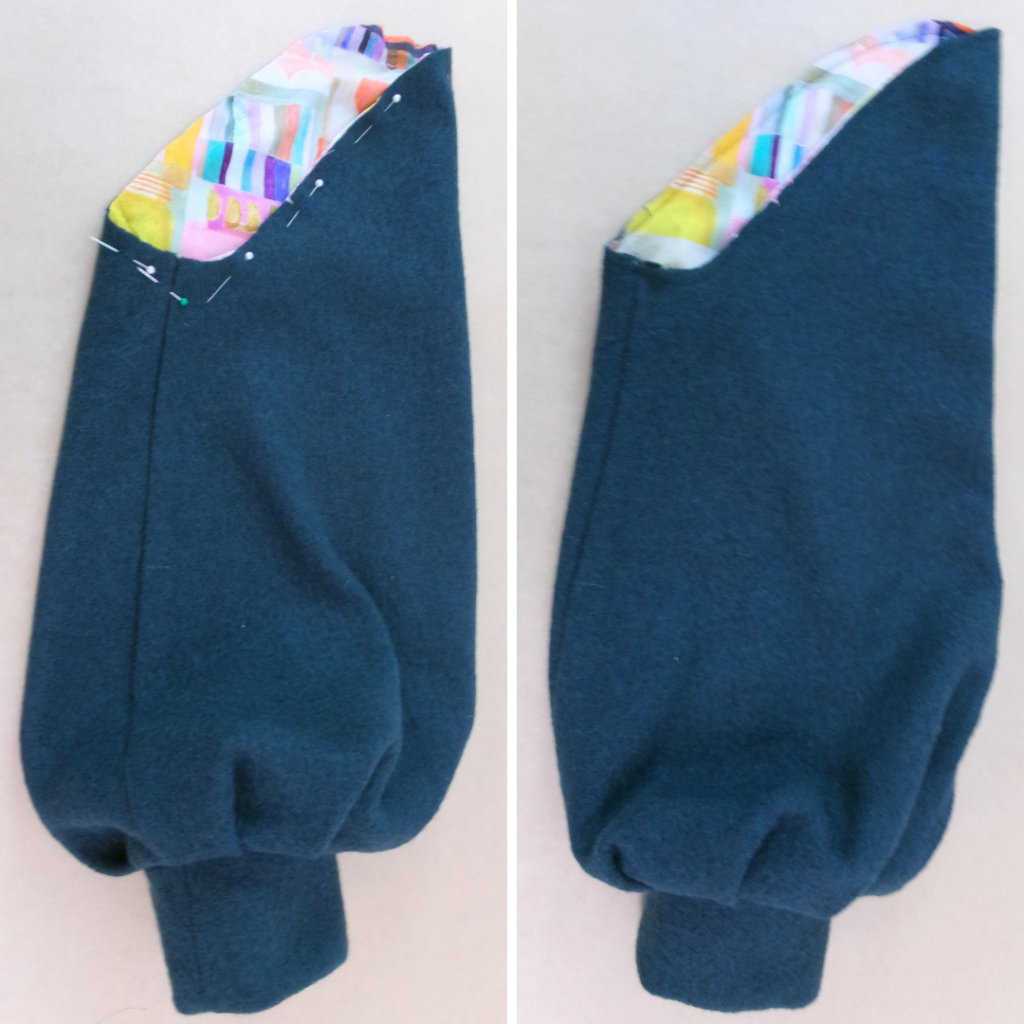
With the right side up, create the Bell Sleeve (12) tucks by aligning the notches together as shown on the pattern. Pin into place and baste, taking care that the tucks are facing in the direction as shown on the pattern. With RST, sew the undersleeve seam. Press open.
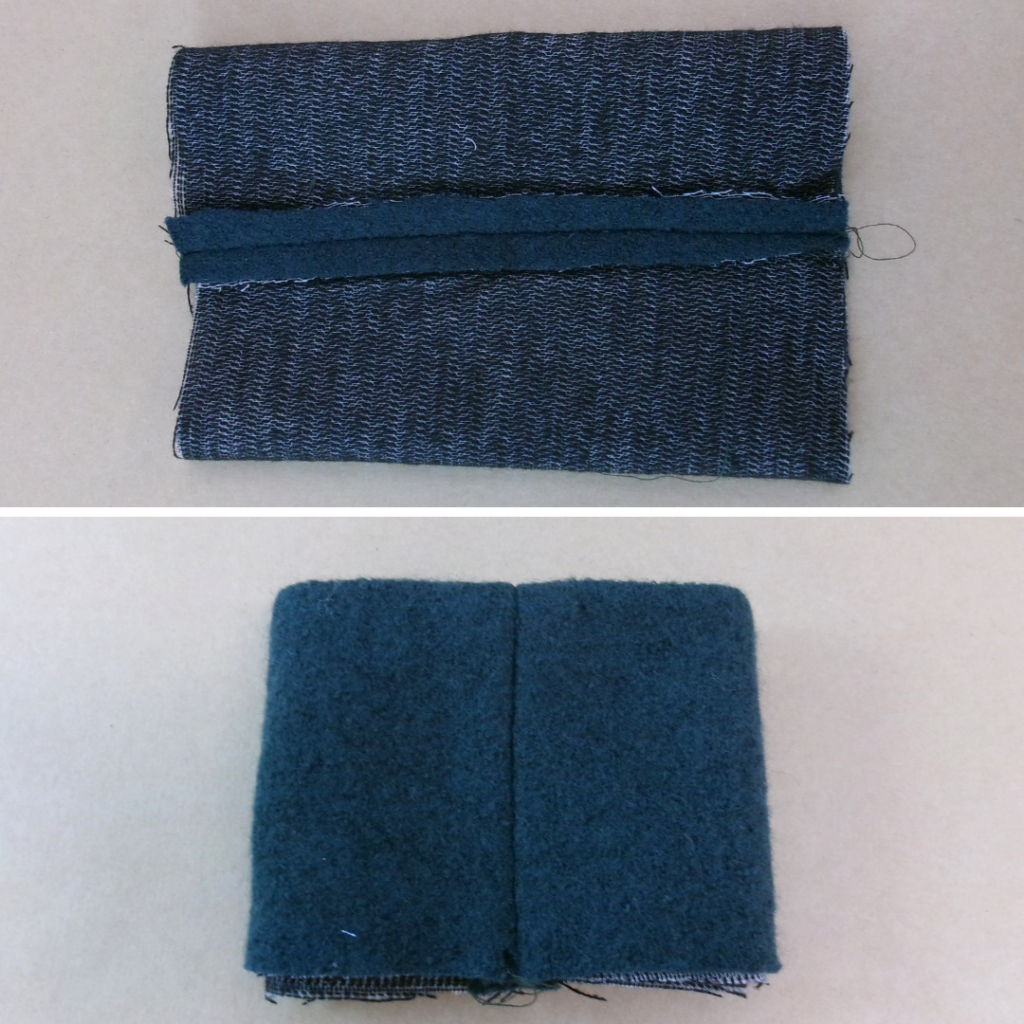
With RST, fold the Bell Sleeve Cuff (13) in half lengthways and sew the long edges together. Fold the cuff in half with WST, press. Baste the raw edges together.
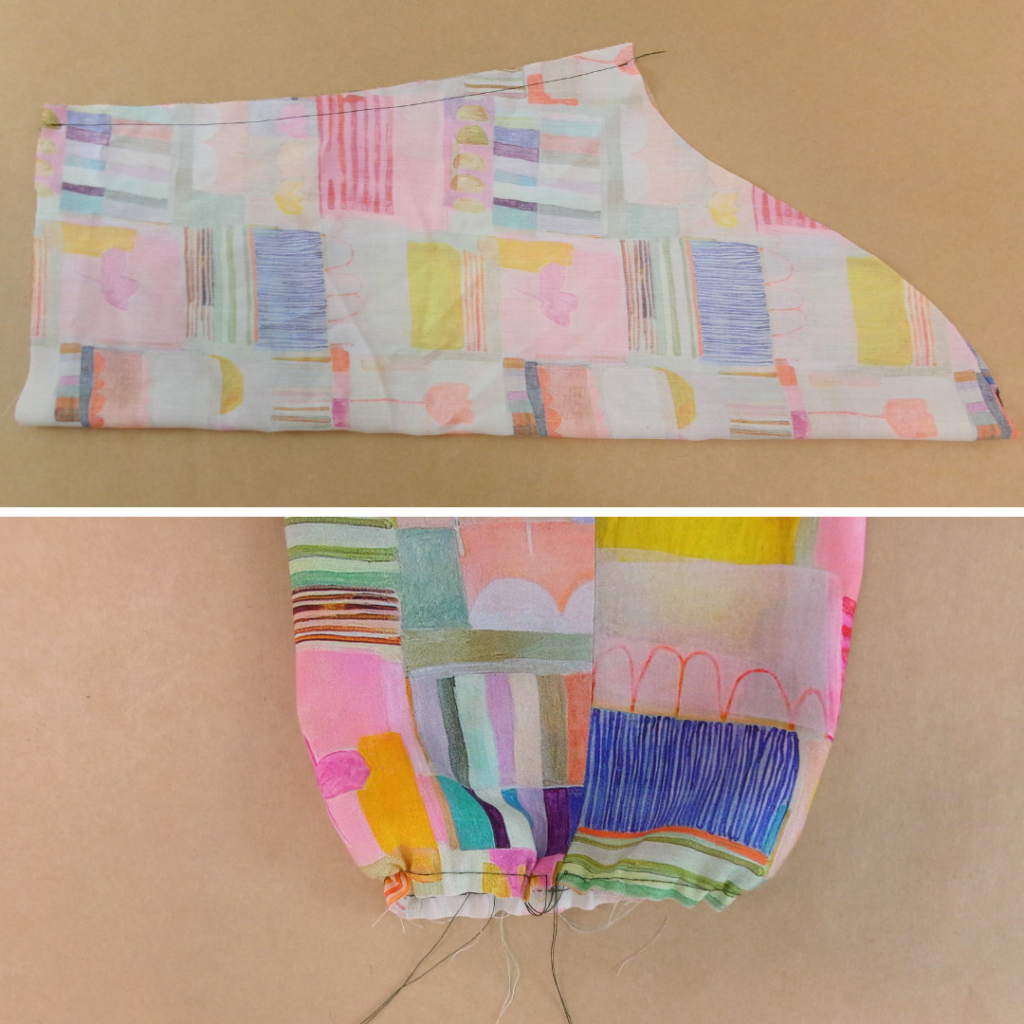
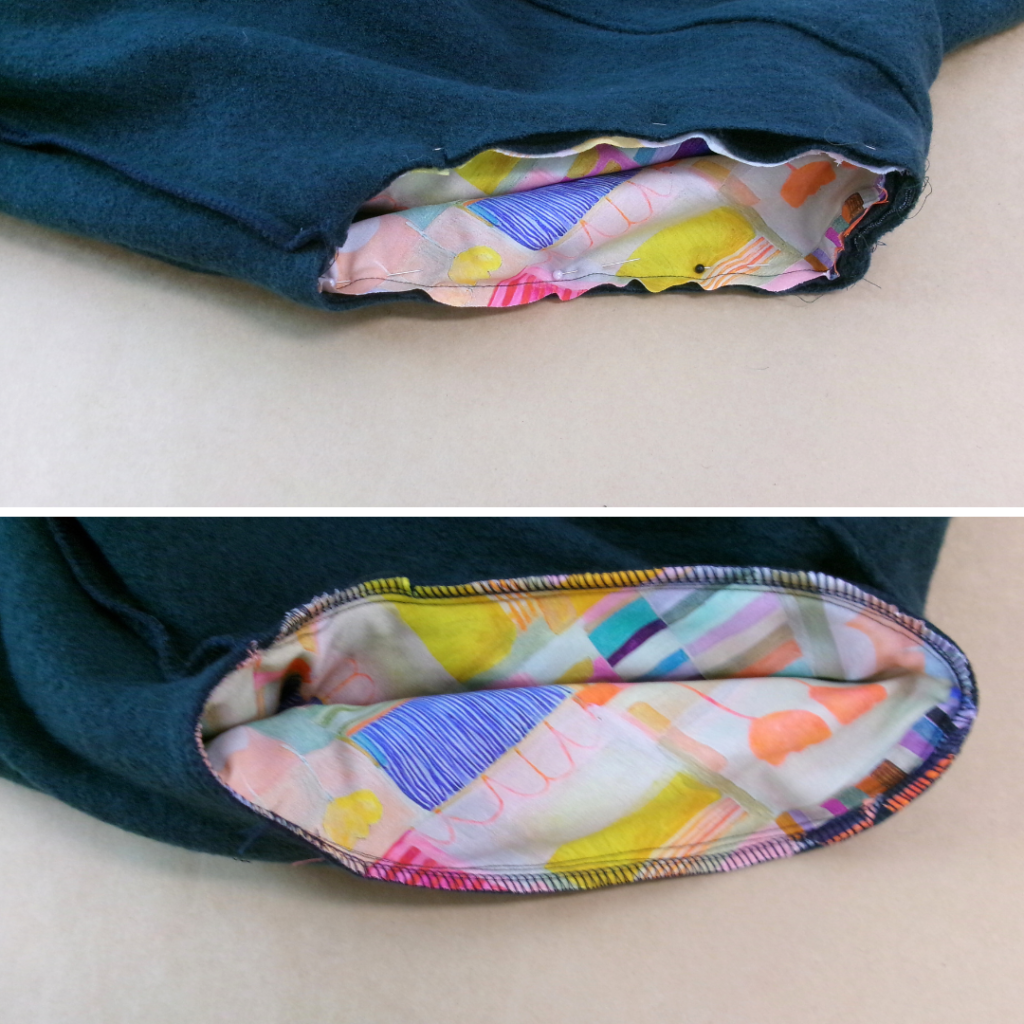
With RST, sew the undersleeve of the Bell Sleeve Lining (17). Press to one side. Sew a long gather stitch to the sleeve opening and gather in to match the circumference of the cuff.
With RST, and aligning the seams, pin the cuff to the main sleeve opening. Sew. With RST and aligning the seams, pin the sleeve lining to the main sleeve opening, sandwiching the cuff in between. Sew.
If using the Epaulette: Baste the edge of the epaulette to the shoulder seam, facing inward.
Sew a large ease stitch to the head of the sleeve and draw in slightly. This will make it easier to set the sleeve into the arm opening. With RST and notches aligned, pin the sleeve to the arm opening of the main body. Sew, then neaten using an overlocker/serger. Press towards the sleeve.
If you choose to not use the lining in the body of the jacket (sample shown here), baste the sleeve lining to the main fabric at the armhole opening and treat them as one fabric. Neaten seam with an overlocker/serger and press toward the sleeve. Skip the next step.
With RST and notches aligned, pin the sleeve lining to the armhole of the main body lining. Sew, then press toward the sleeve.
ORIGINAL LOREN JACKET SLEEVE WITH ORIGINAL SLEEVE LINING (16)
Follow the steps for the sleeve in the original Loren Jacket constructions.
With RST, sew the Original Sleeve Lining (16) at the under sleeve. Neaten using an overlocker/serger. Press toward the back.
With RST and notches aligned, sew the lining to the main fabric at the sleeve hem.
Sew a large ease stitch to the head o f the sleeve lining and draw in slightly.Turn the lining to the inside of the sleeve, and with RST and notches aligned, pin the sleeve lining to the main body lining at the armhole.
Slip your arm inside to ensure the lining is sitting correctly, then sew. Neaten using an overlocker/serger and press toward the sleeve. Carefully press the sleeve opening; the lining finishes shorter than the main fabric on the inside, creating a professional finish.
COMPLETION
Sew your buttons into place if using the back belt and/or epaulettes.
If using lining, sew a French tack to the underarm seams in the lining and main fabric, and at the hem side seam in the lining and main fabric. This will ensure the lining stays in place but allows for some movement.
Trim any loose threads and carefully press your new jacket!