Please see our YouTube video for the Rumi Woven Top sew-a-long.

CONSTRUCTION
BODY:
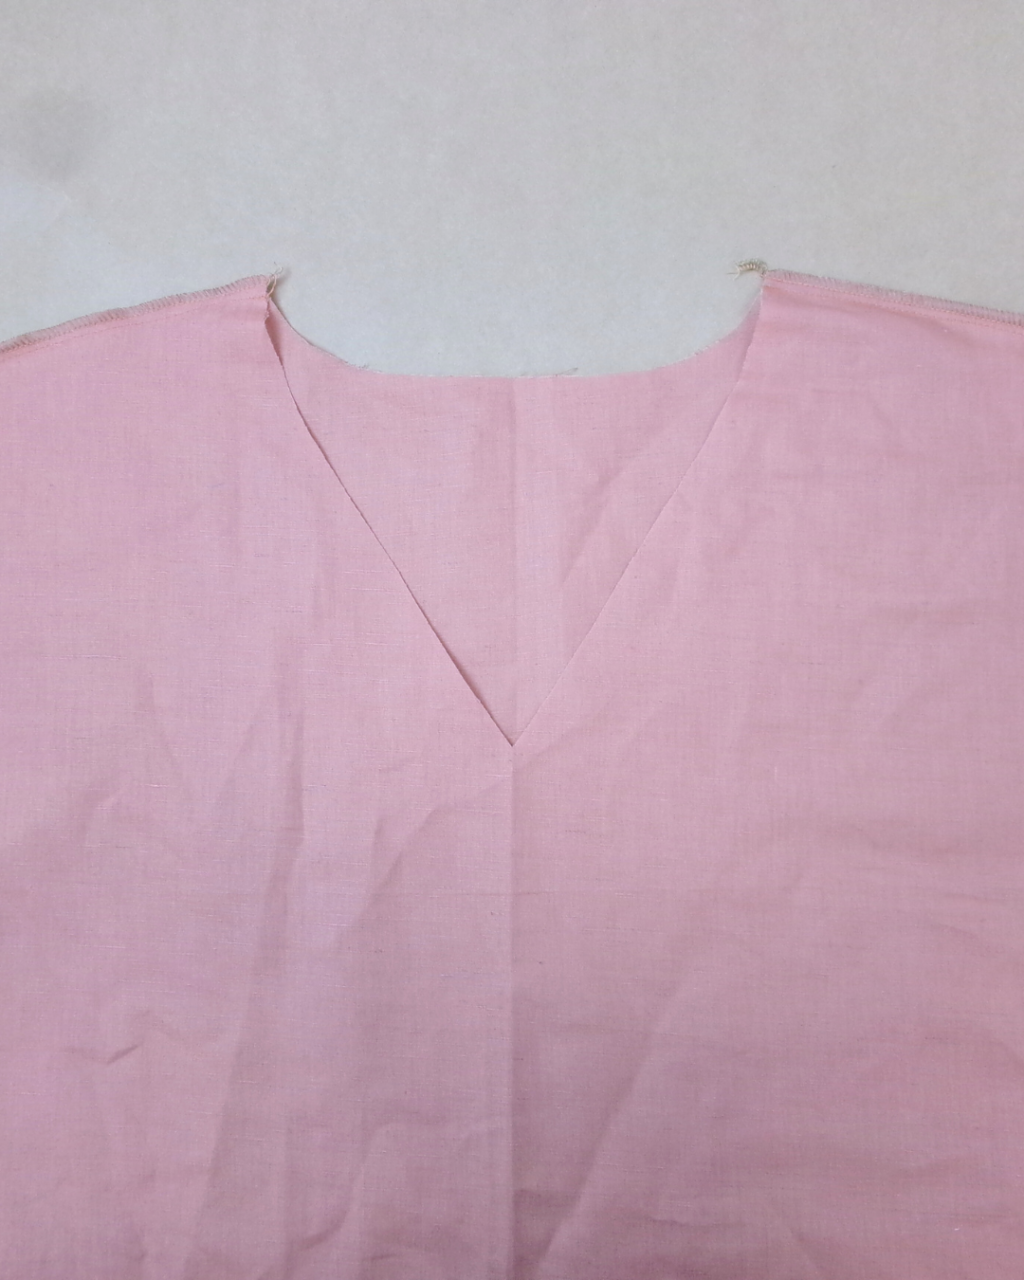
With RST, sew the Front (2) to Back (1) at the shoulder seams. Neaten using an overlocker/serger and press toward the back. Sew a stay stitch to the neckline to prevent stretching.
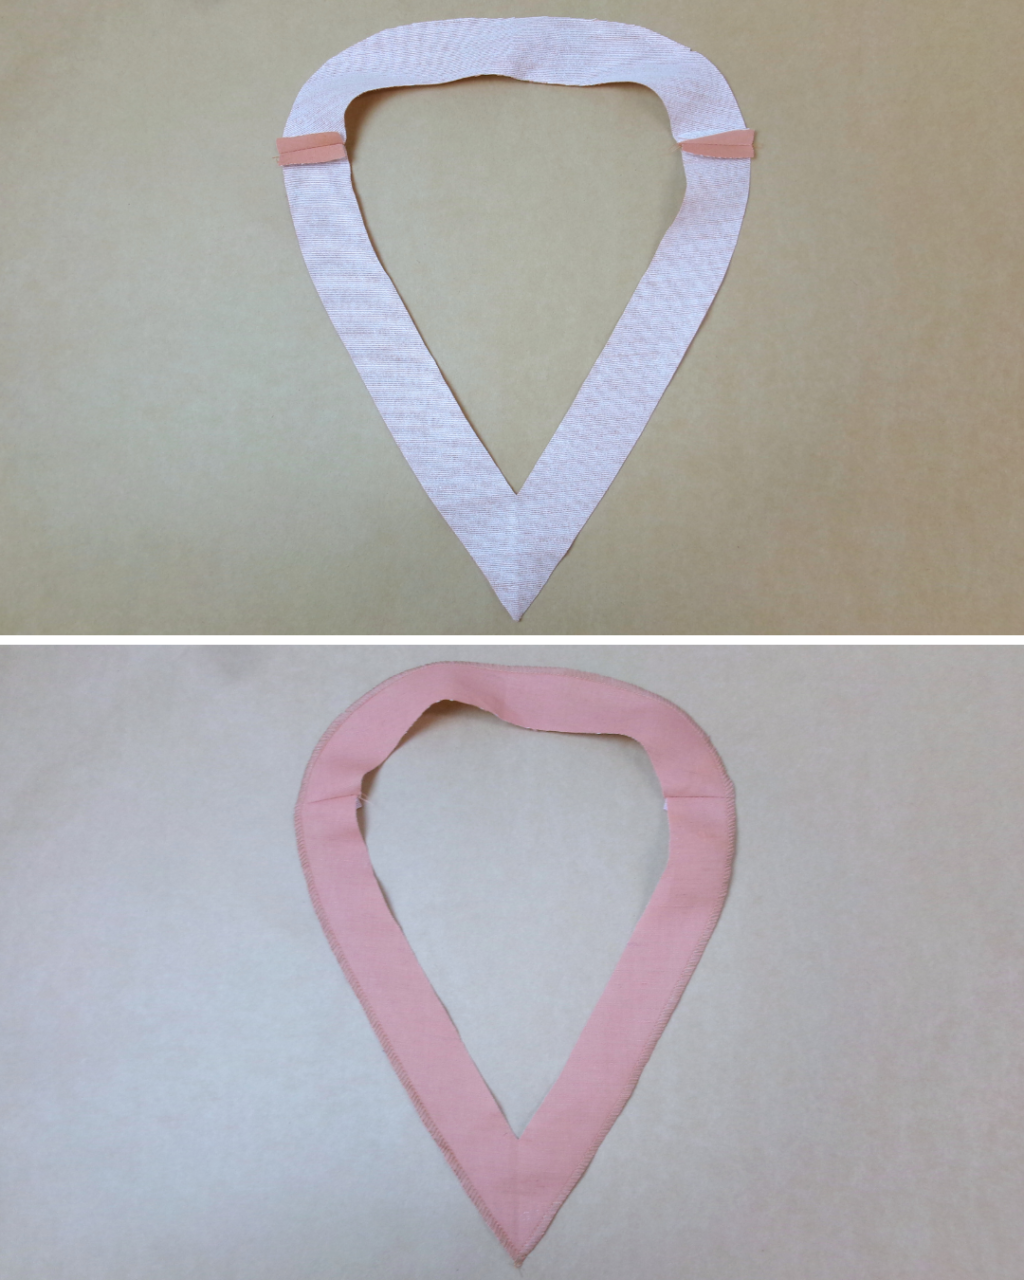
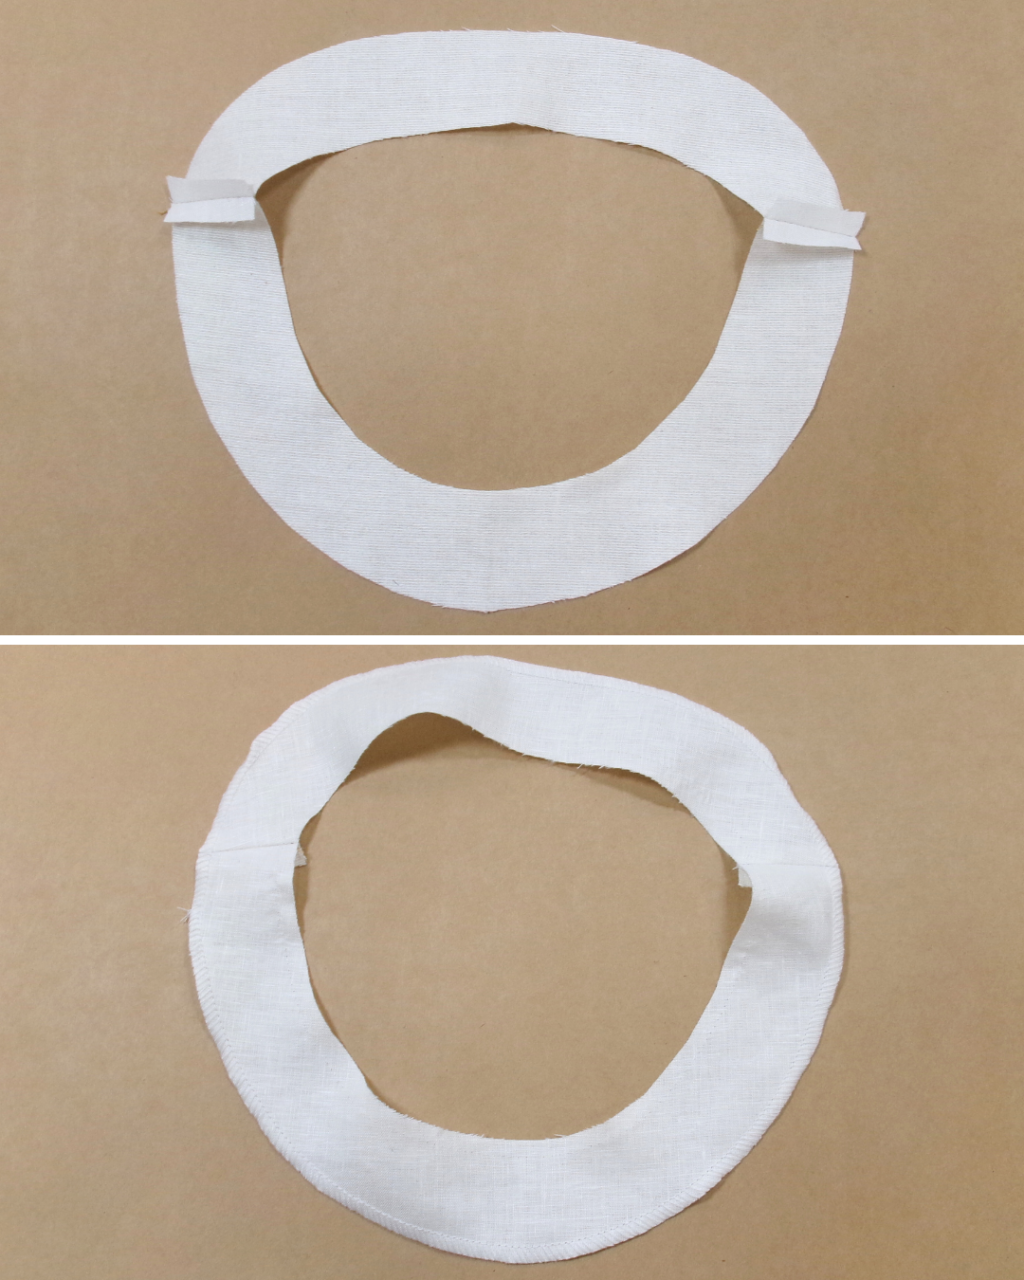
With RST, sew the Back Neck Facing (4) to the Round Neck Facing (5) OR V Neck Facing (6) at the shoulder seams. Press the seams open and neaten the outside edge of the facing with an overlocker/serger.
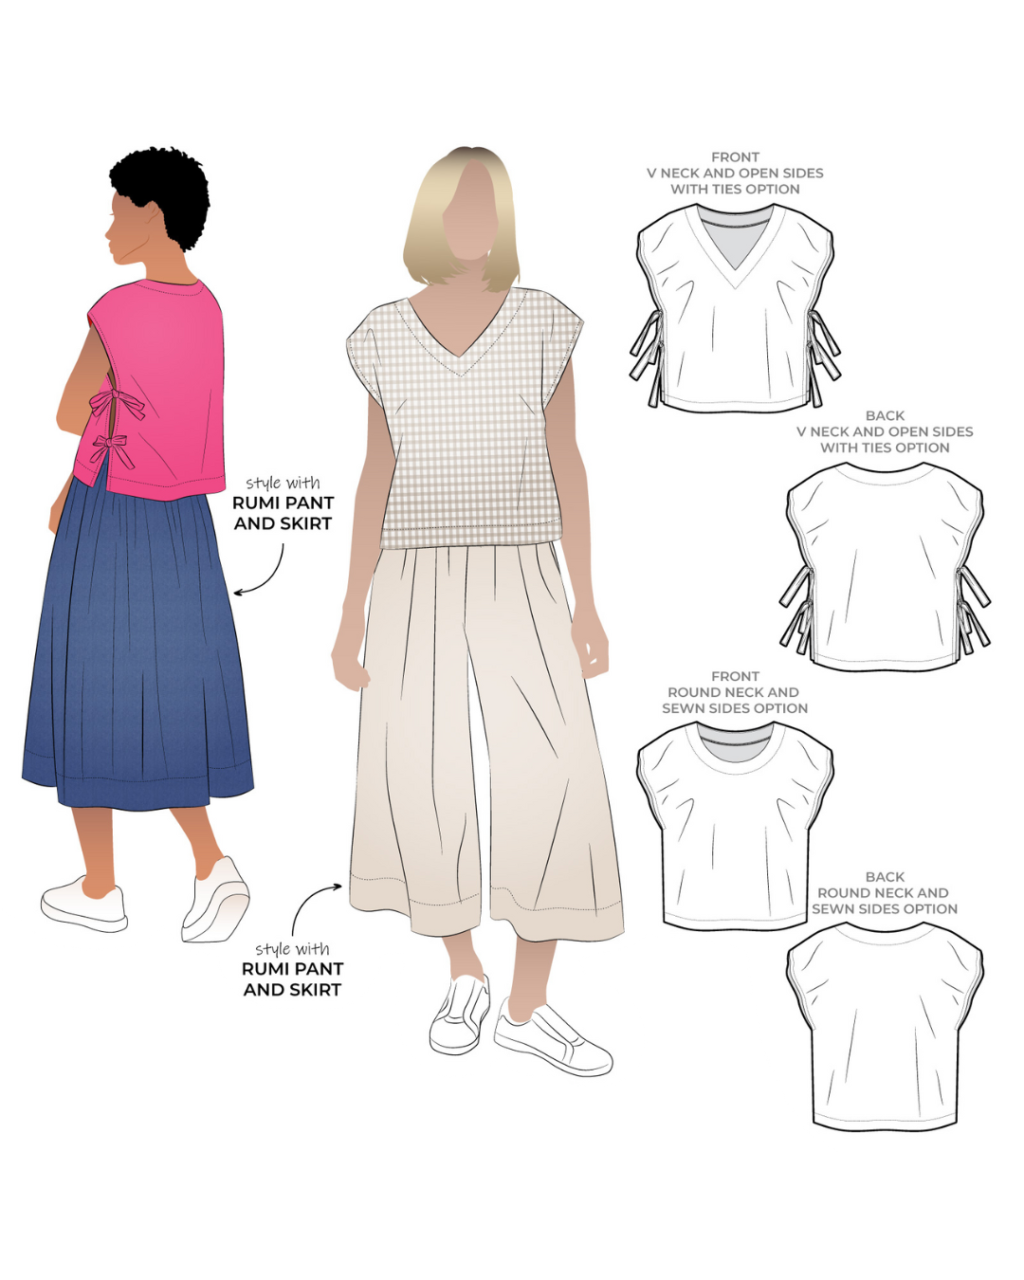
V NECK OPTION:
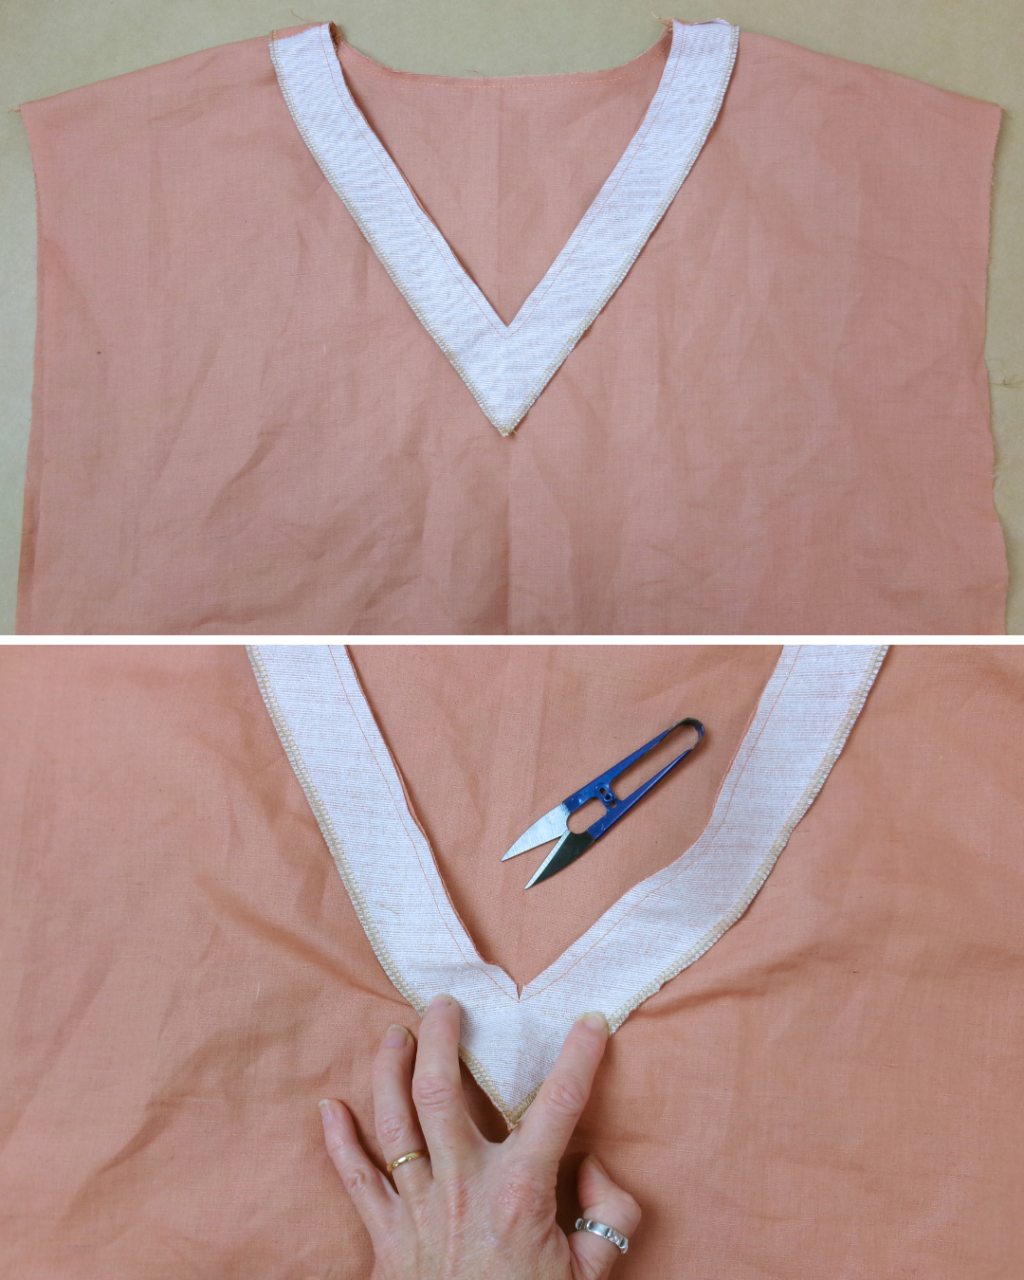
With RST and notches aligned, pin the neck facing to the neckline, then sew using a 6mm (1/4”) seam. When arriving at the V, keep the needle down, turn and continue to sew along the remainder of the neckline.
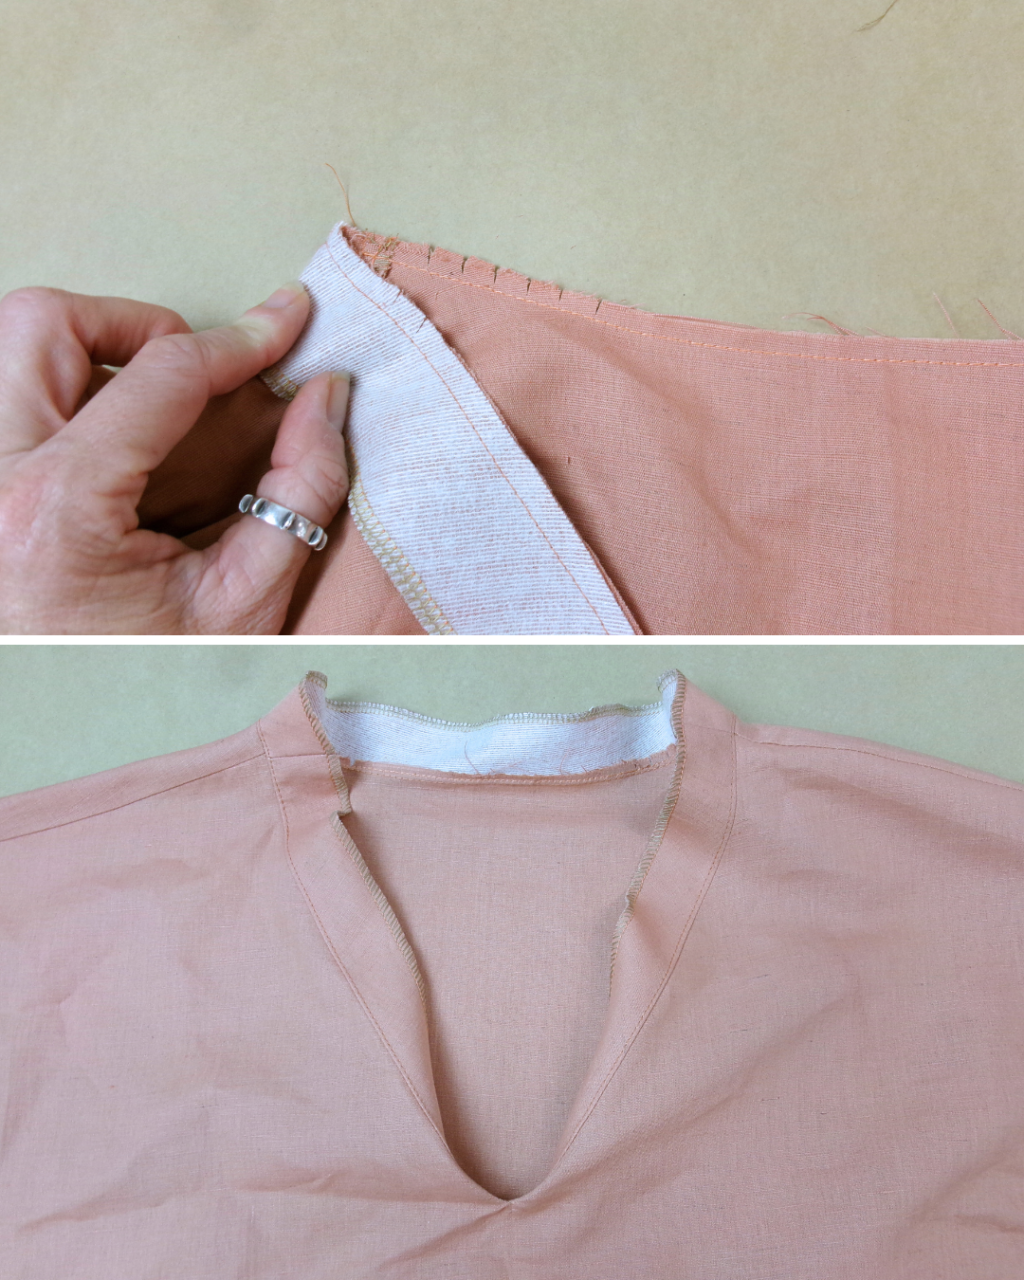
Clip into the seam at the V and the curved sections of the neckline, to release the fabric. Press the seam toward the facing and sew an under stitch on the side of the facing.
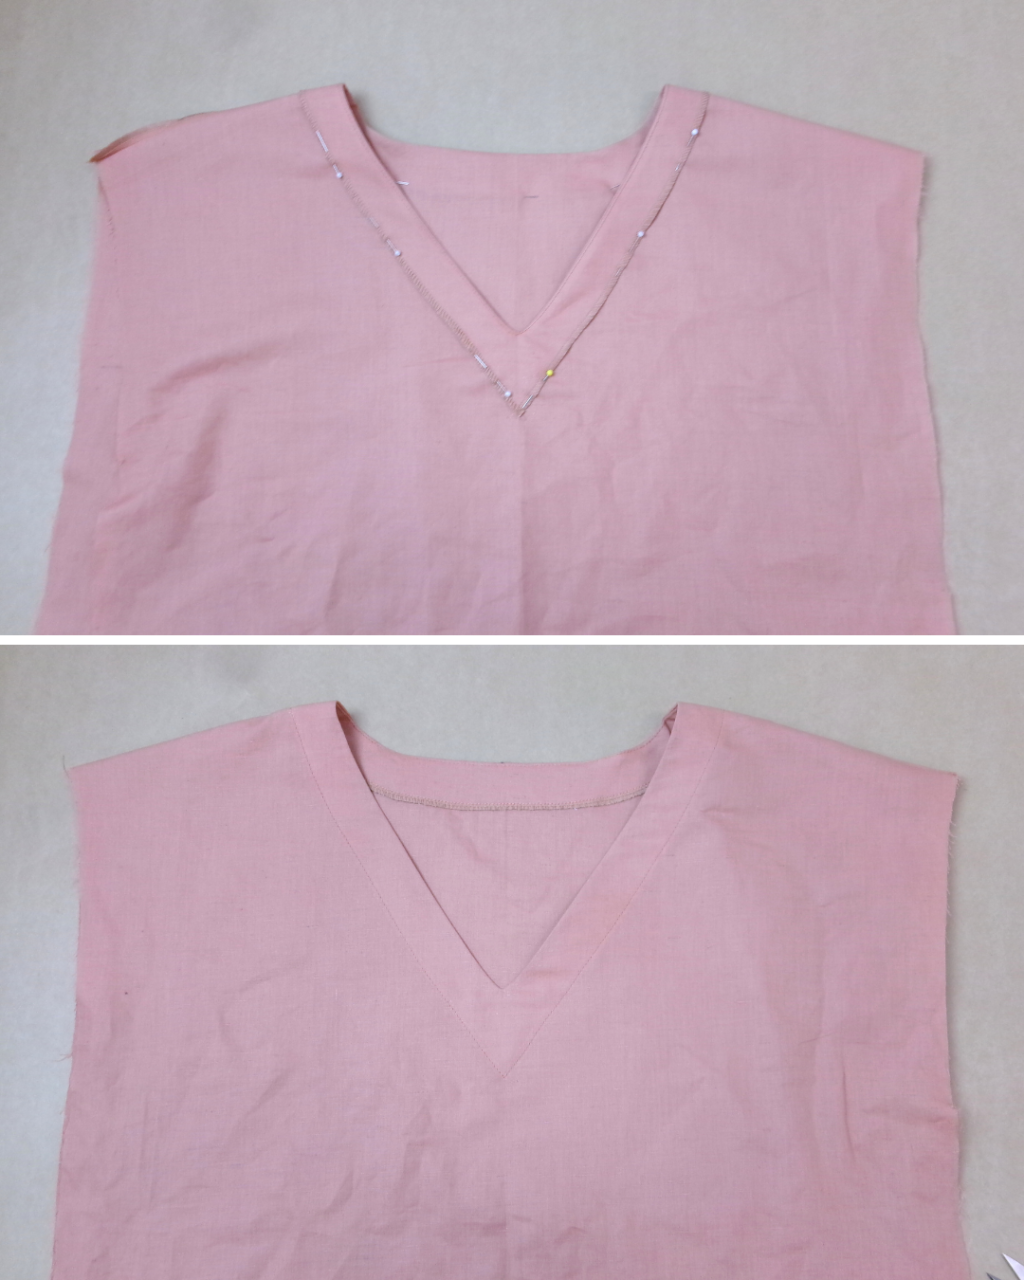
Carefully pin the facing to the body and starting at a shoulder seam, top stitch on top of the neatened edge, taking care at the centre front to ensure you have a nice V.
ROUND NECK OPTION:
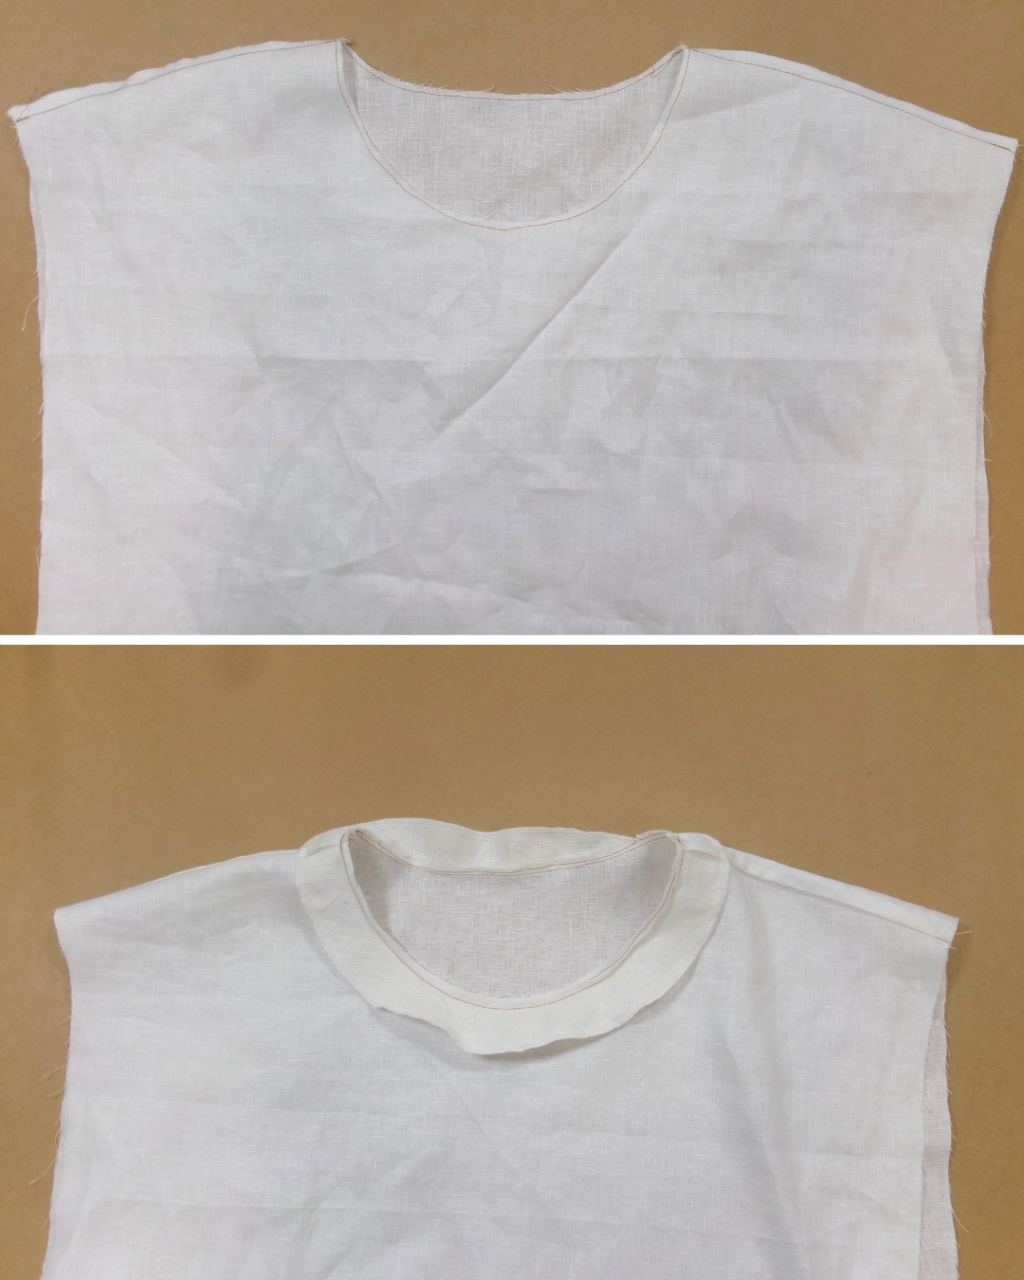
With RST and notches aligned, pin the neck facing to the neckline then sew using a 6mm (1/4”) seam.

Clip into the seam at the curved sections of the neckline, to release the fabric. Press the seam toward the facing and sew an understitch on the side of the facing.
Carefully pin the facing to the body and starting at a shoulder seam, top stitch on top of the neatened edge.
MAKING TIES (OPTIONAL):
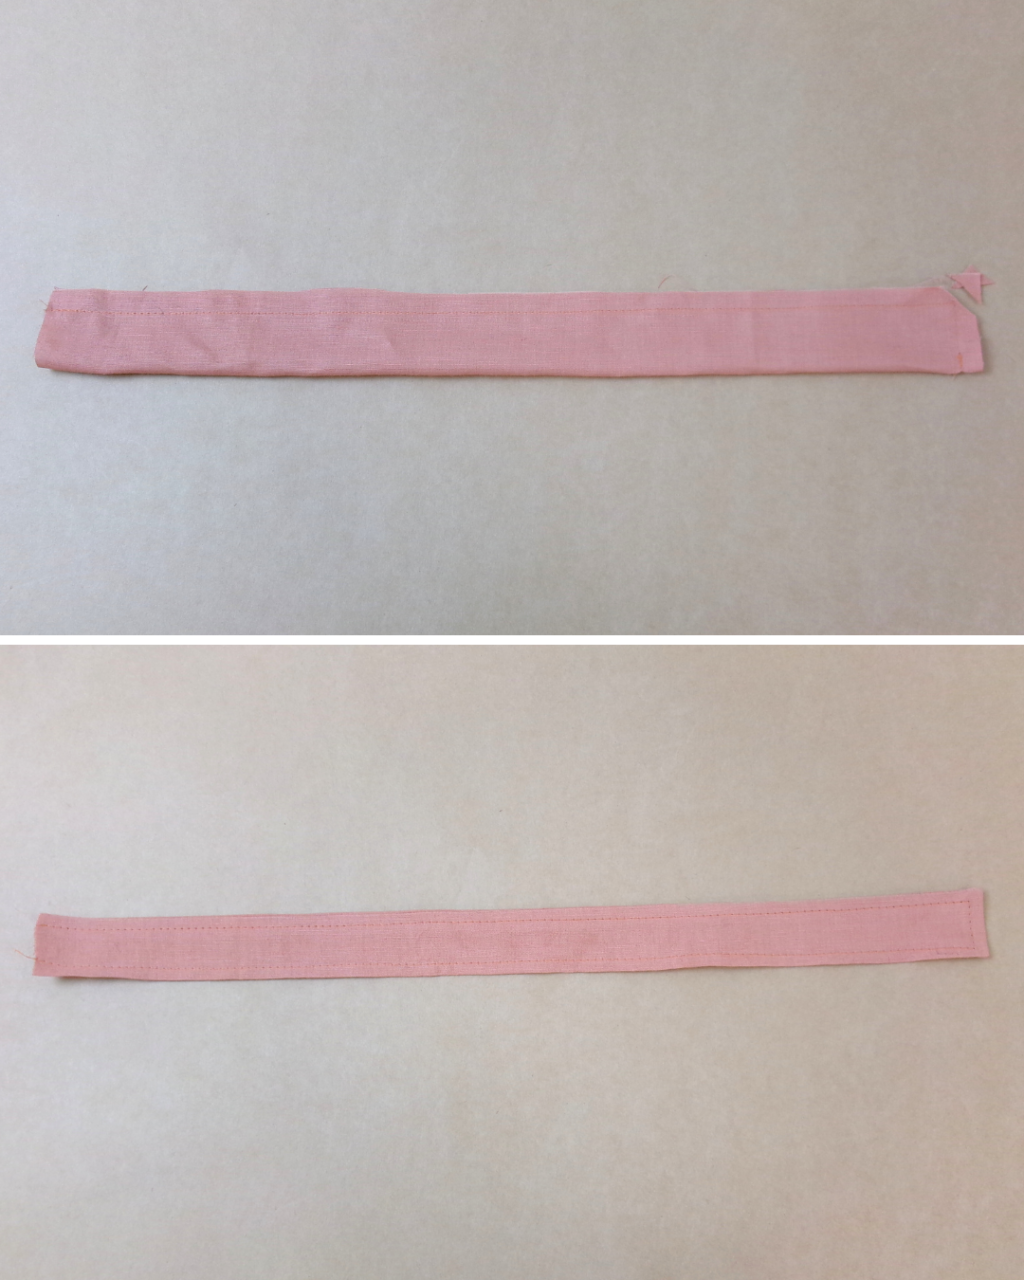
With RST, fold the tie in half lengthways and sew the long side and one of the short ends, and clip the corners.
Turn the tie to the right side and press. Sew a 6mm (1/4”) top stitch around the three sides (optional).
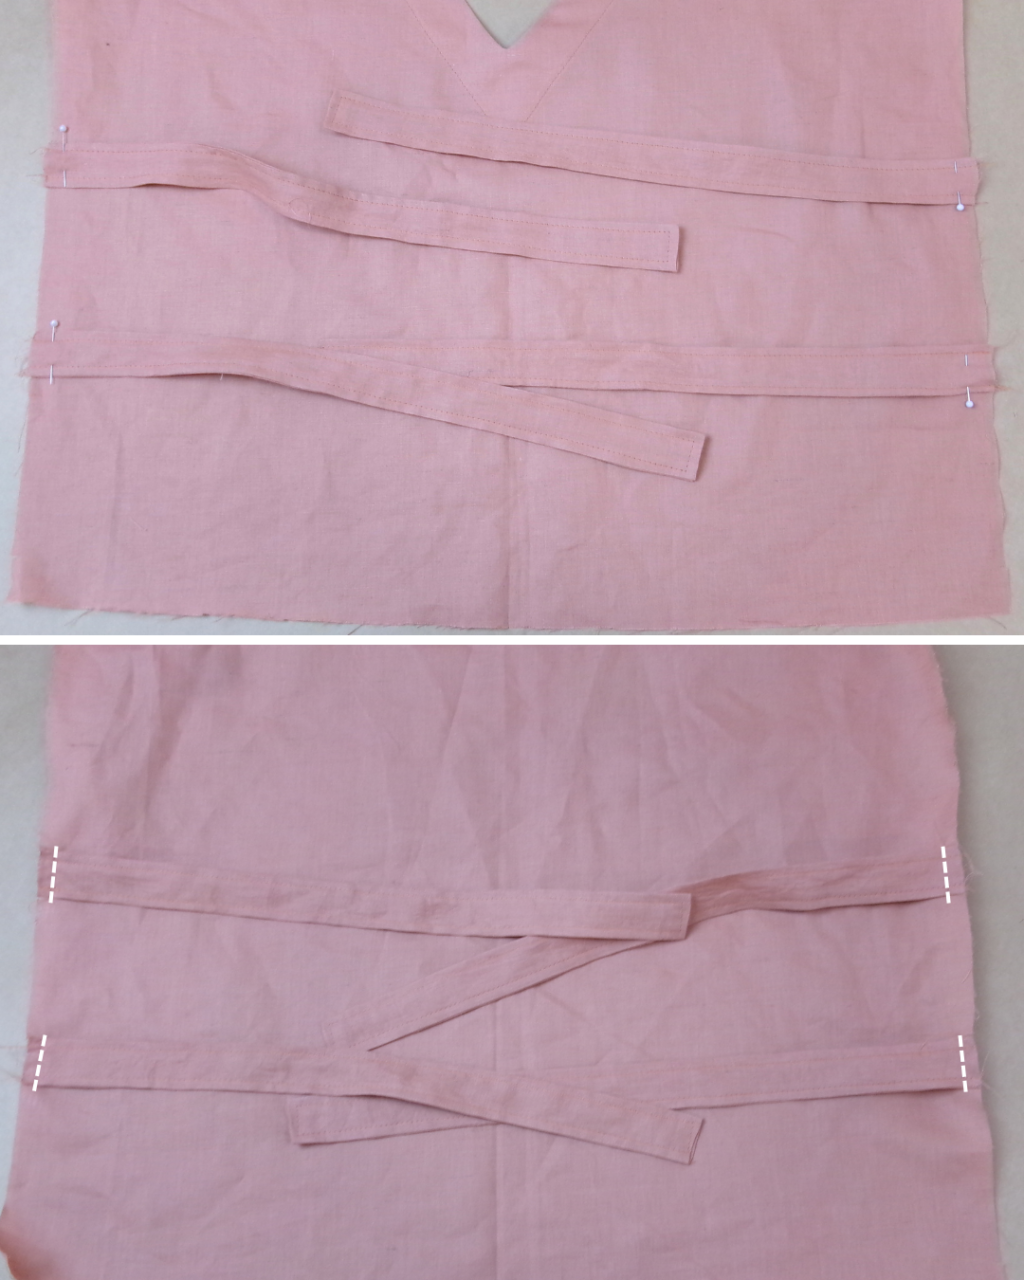
Pin the raw edge ends of the ties to the right side of the front and back side seams as marked on the pattern. The ties will face inward; when the seam is complete, the ties will be facing outward. Sew the ties into place using a 1cm (3/8”) seam allowance.
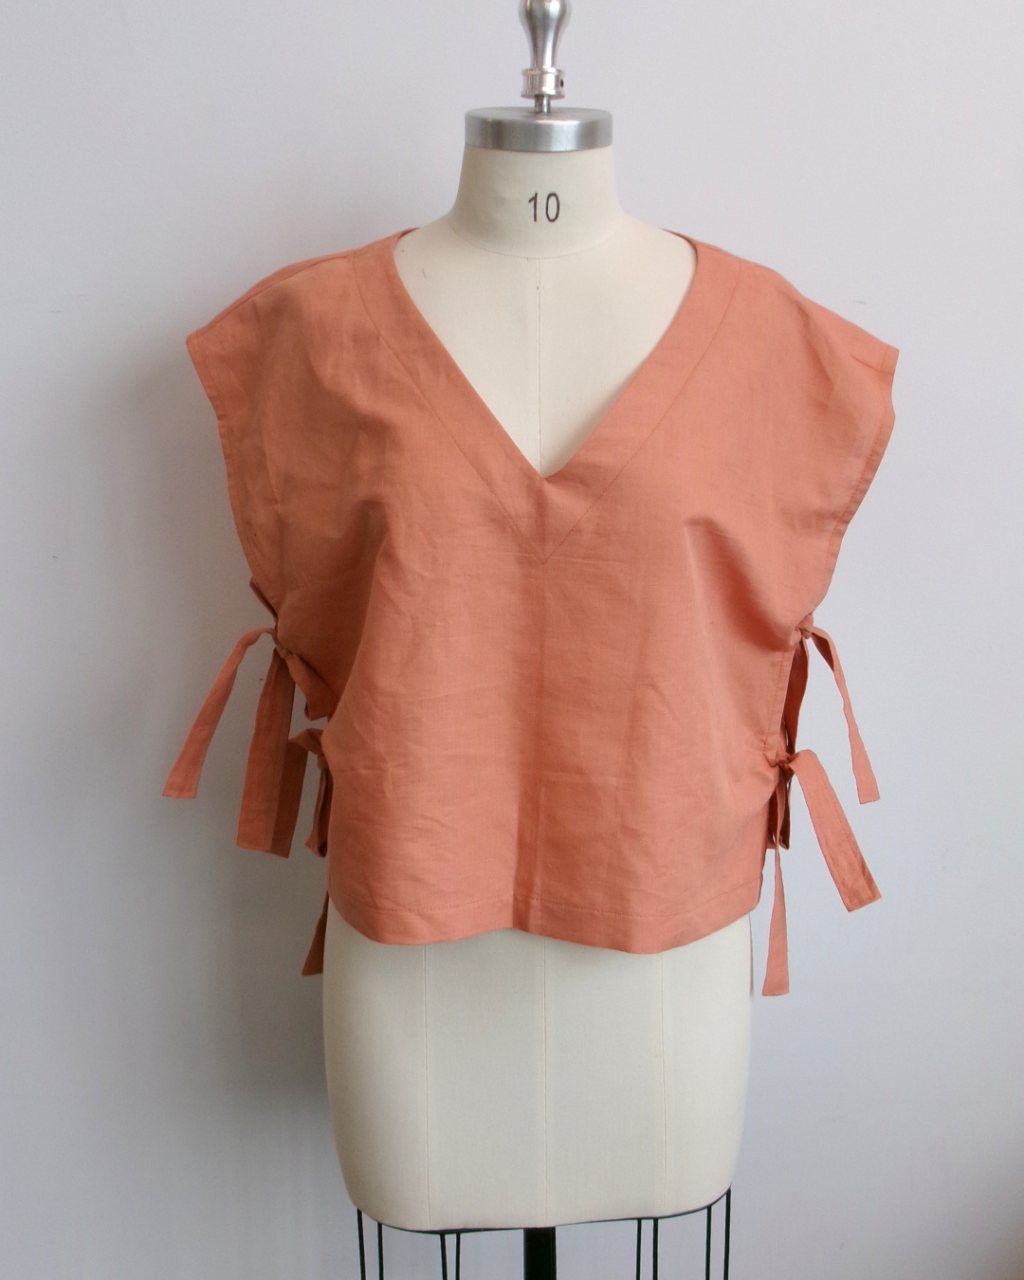
OPEN SIDE SEAMS WITH TIES OPTION:
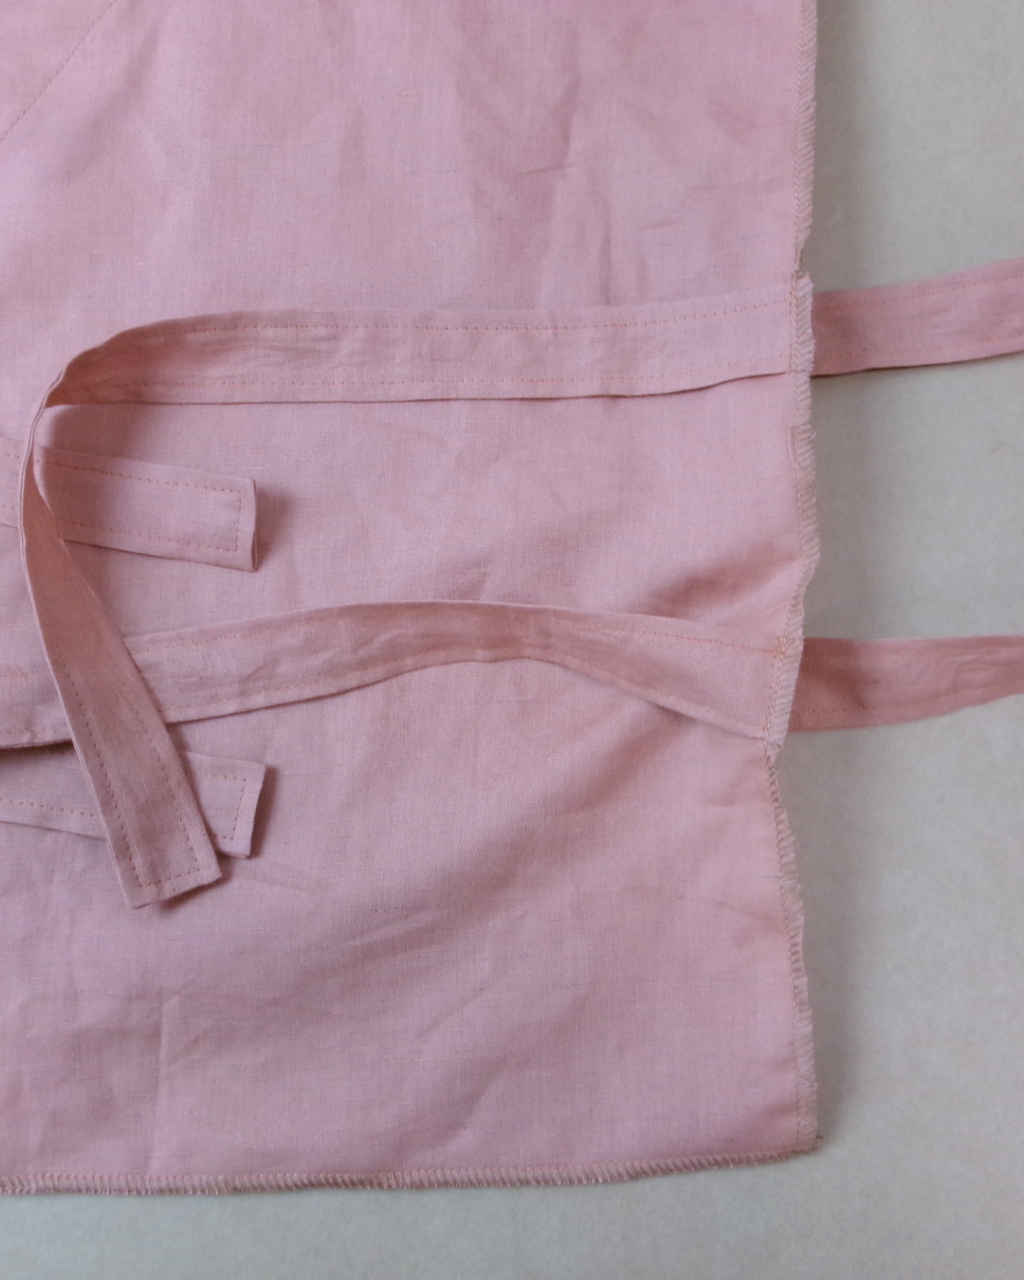
Neaten the side seams/armhole and hems using an overlocker/serger.
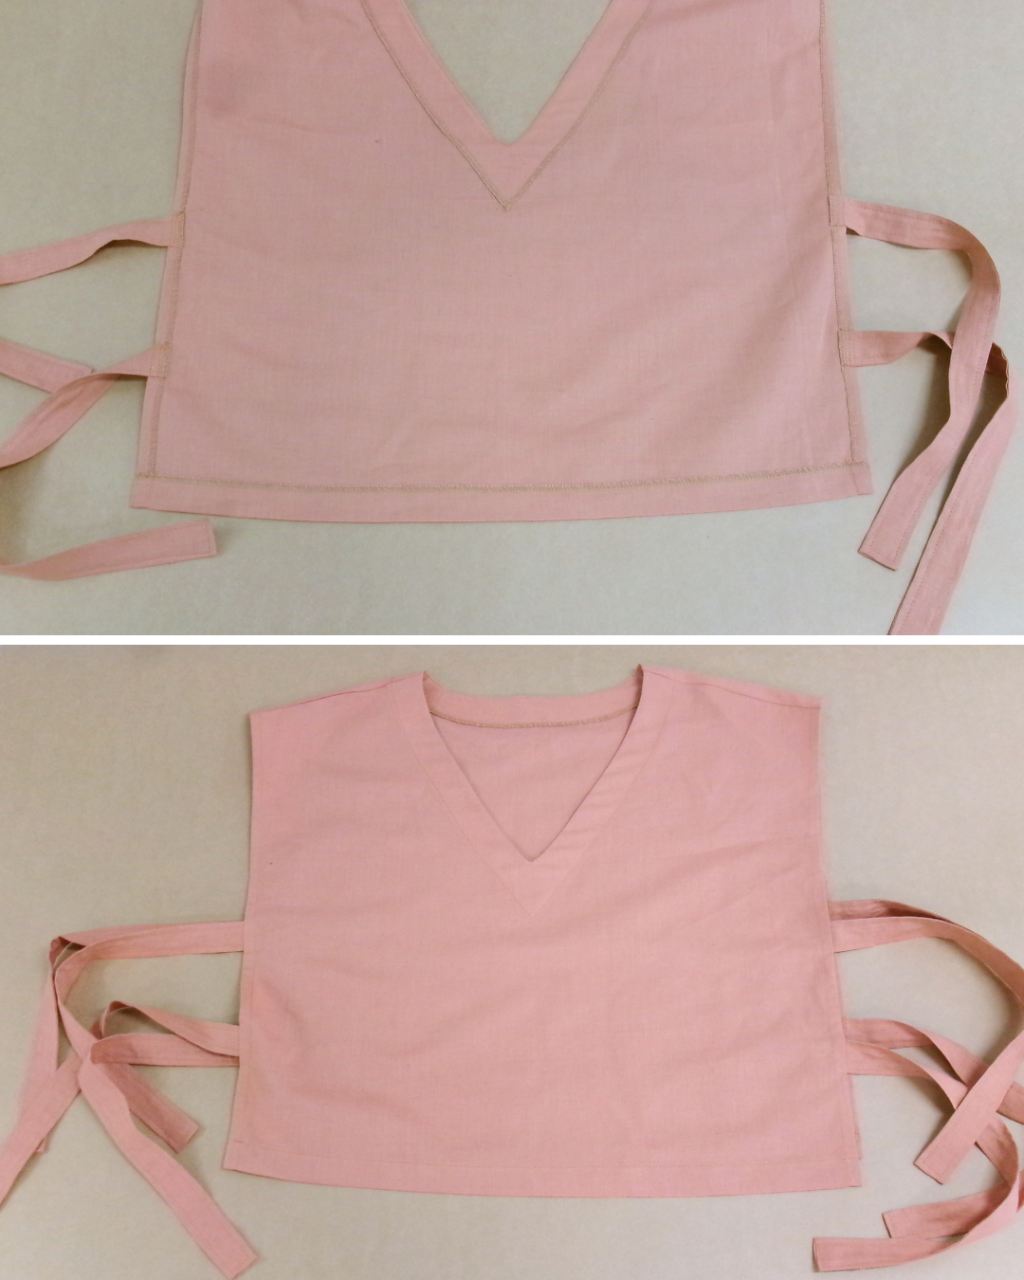
Turn the side seams/armholes 1cm (3/8”) to the inside and press. Top stitch into place.
Turn the front and back hems 2.5cm (1”) to the inside, press and top stitch. Trim any loose threads and carefully press your new top.
SEWN-UP SIDE SEAMS WITH OR WITHOUT TIES OPTION:
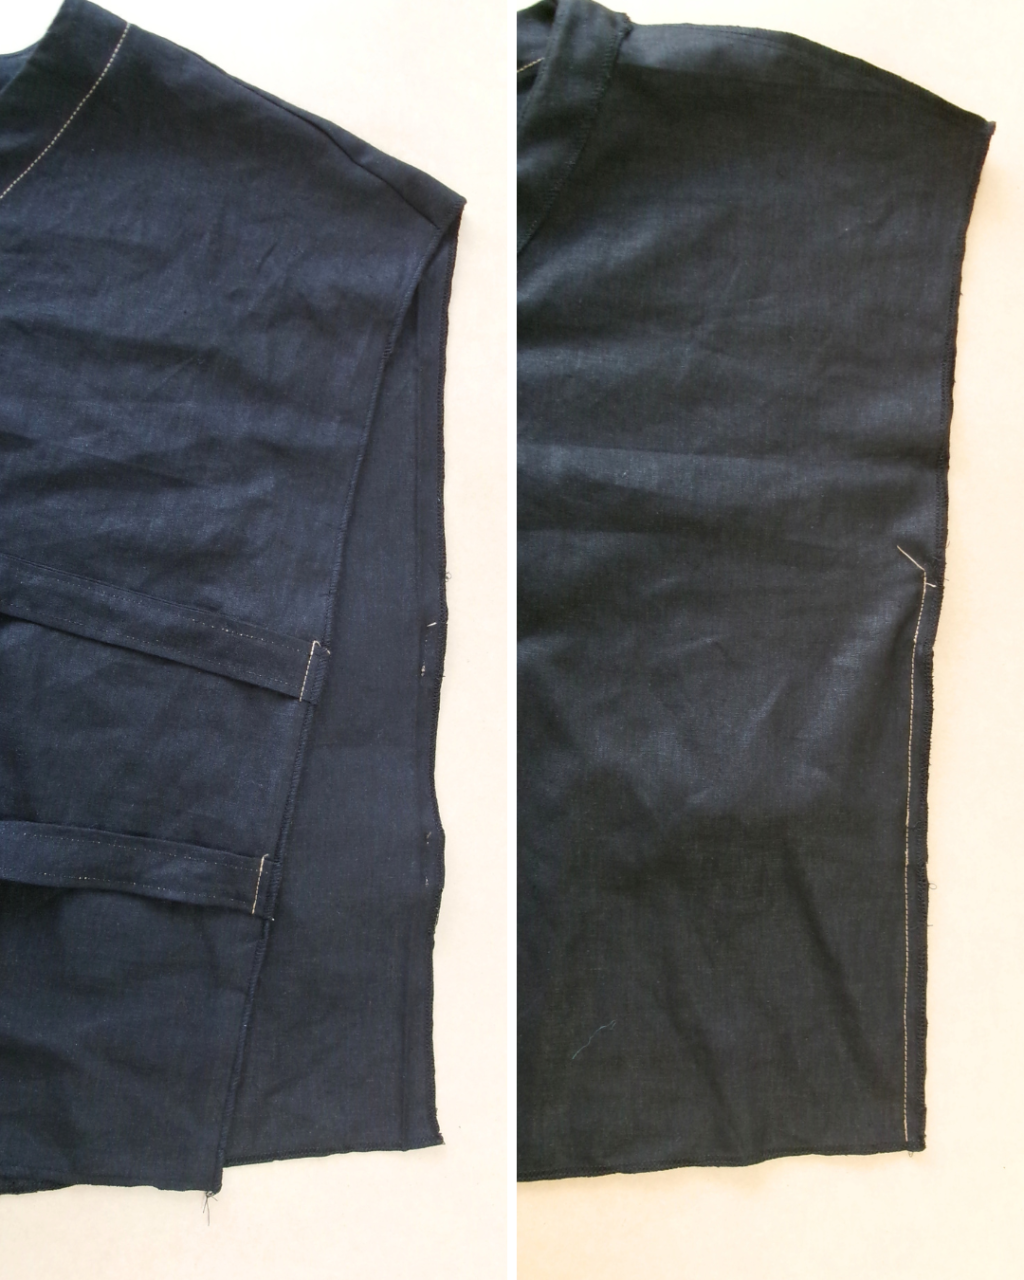
Neaten the hems, side seams/armholes using an overlocker/serger.
With RST and notches aligned, pin, then sew the side seams, starting at the hem and finishing at the notch indicating the armhole. Press the seam open.
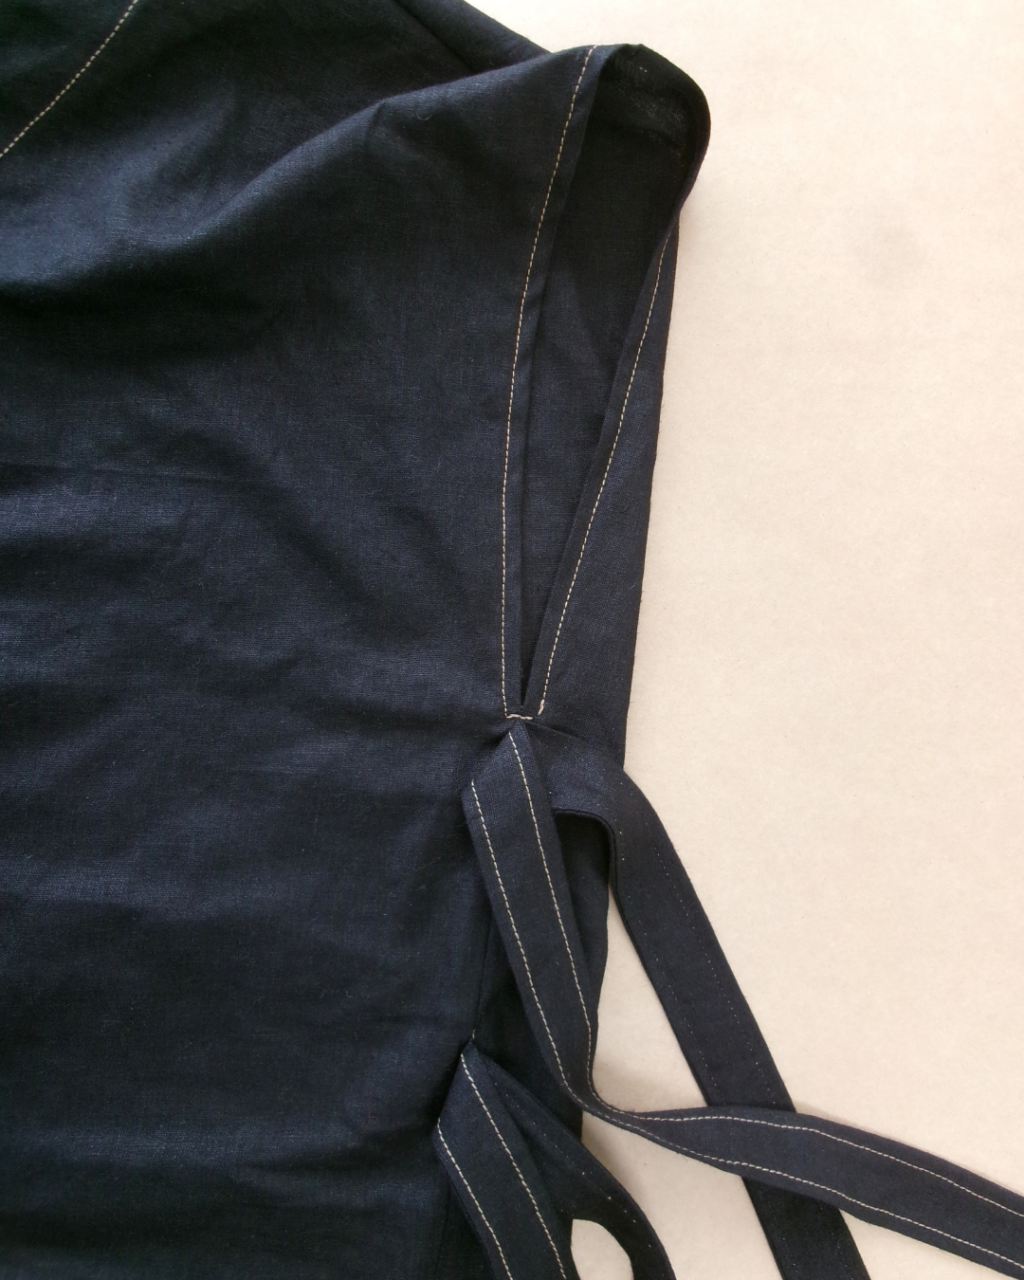
Turn the armhole seam allowance 1cm (3/8”) to the inside and top stitch into place. Top stitch the armholes. Make a small bar tack to the seam at the underarm.
Turn the hem 2.5cm (1”) to the inside, press and top stitch. Trim any loose threads and carefully press your new top.