Shop the Sid Bomber Jacket
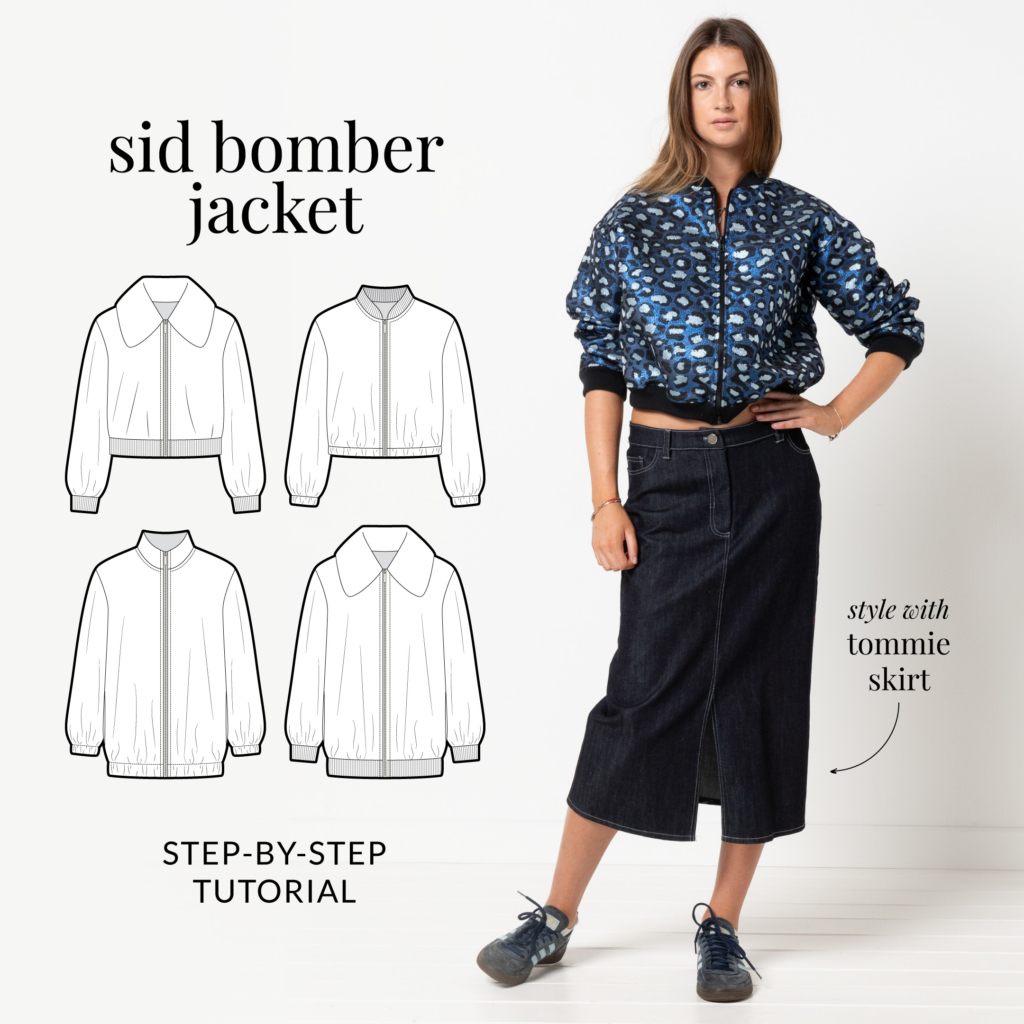
Click below to watch a sew along on YouTube of the short version with rib collar, cuffs and hem.

CONSTRUCTION
HIGH COLLAR:
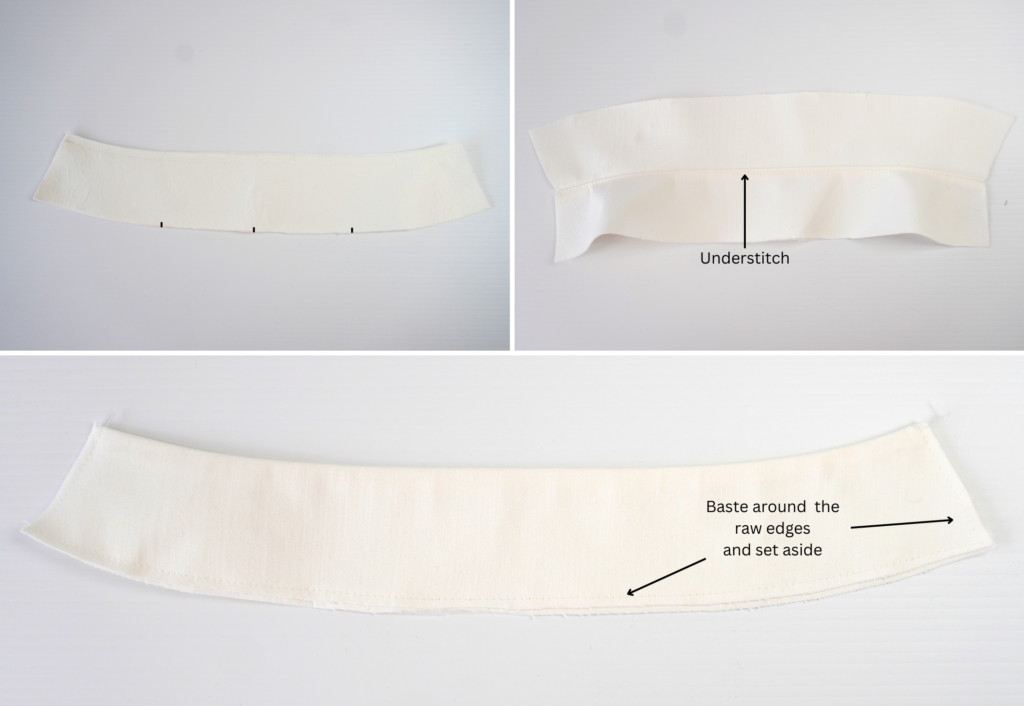
With RST, sew the pair of fused High Collars (5) together at the top (unnotched) edge using a 1 cm (3/8”) seam. Press to one side and sew an understitch on the side of the inner collar.
Fold the collar in half lengthways with WST and press. Baste the raw edges together. Set aside till step 36.
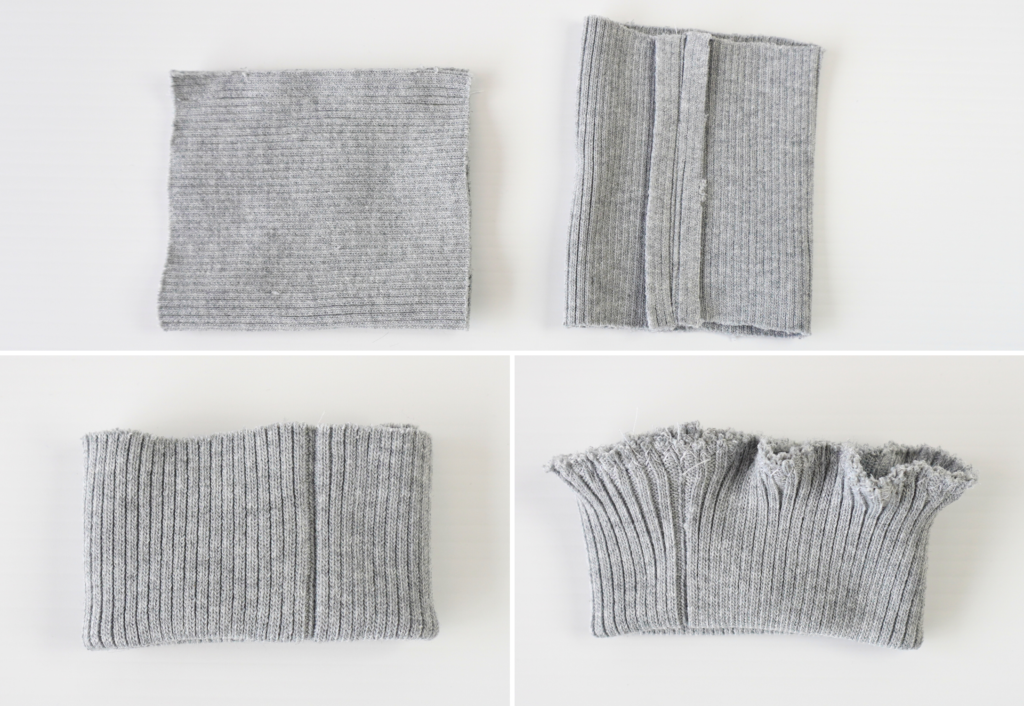
RIB NECKBAND:

With WST, fold the Rib Neckband (11) together lengthways and press.
Baste the raw edges together using a zig zag/ stretch stitch. Set aside till step 36.
FLAT COLLAR:
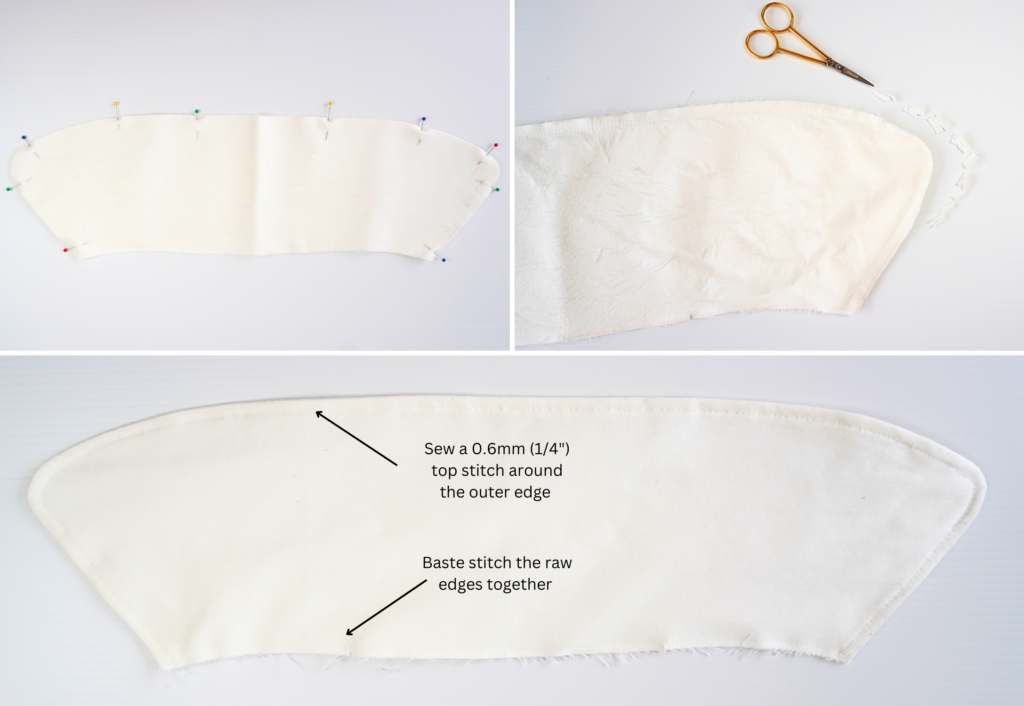
With RST, pin the pair of Flat Collars (12) together around the outer edge. Sew using a 1cm (3/8”) seam. Clip into the curved seam. Trim excess fabric from the curve.
Turn to the right side and press. Sew a 6mm (¼”) top stitch to the outer edge.
Baste the raw edges together. Set aside till step 36.
RIB CUFF:
With RST, fold each Rib Cuff (6) in half with the short ends together, creating a loop. Pin then sew the short ends together using a 1cm (3/8”) seam. Press open.
With WST, fold the cuff in half lengthways and press. Baste the raw edges together using a zig zag or stretch stitch. Set aside till step 32.
ELASTIC CUFF:
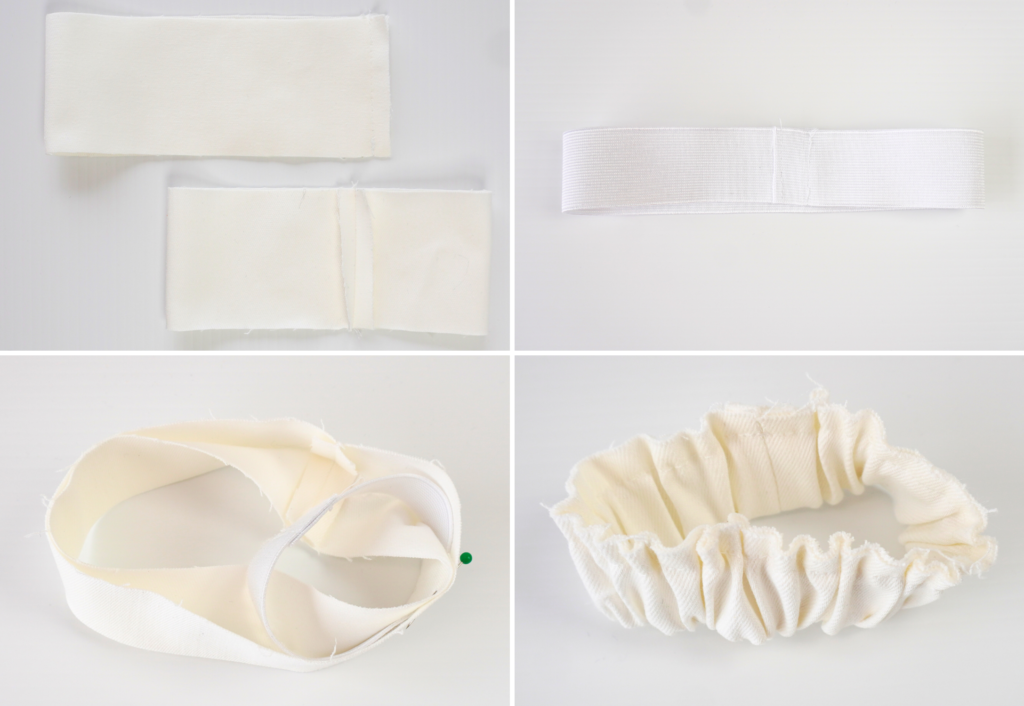
With RST, fold each Elastic Cuff (15) in half with the short ends together, creating a loop. Pin then sew the short ends together using a 1cm (3/8”) seam. Press open.
With WST, fold the cuff in half lengthways and press.
Cut the elastic to your preferred personal length (or refer to the measurement chart). Overlap the cut ends by 2cm (3/4”) and securely stitch together, creating a loop.
Sandwich the elastic inside the folded waistband, pin and baste the cut edges of the folded waistband together. Set aside till step 32.
FRONT SHORT RIB HEM (7) AND BACK SHORT RIB HEM (8) OR FRONT LONG RIB HEM (9) AND BACK LONG RIB HEM (10):
With RST, pin the Front Rib Hems to the Back Rib Hem at the short ends, positioning the back hem between the front hems. Sew using a 1cm (3/8”) seam. You will have one long length of rib. Press the seams open.
With WST, fold the hem in half lengthways and press. Baste the raw edges together using a zig zag/stretch stitch. Set aside till step 33.
FRONT ELASTIC CASING (13) AND BACK ELASTIC CASING (14):
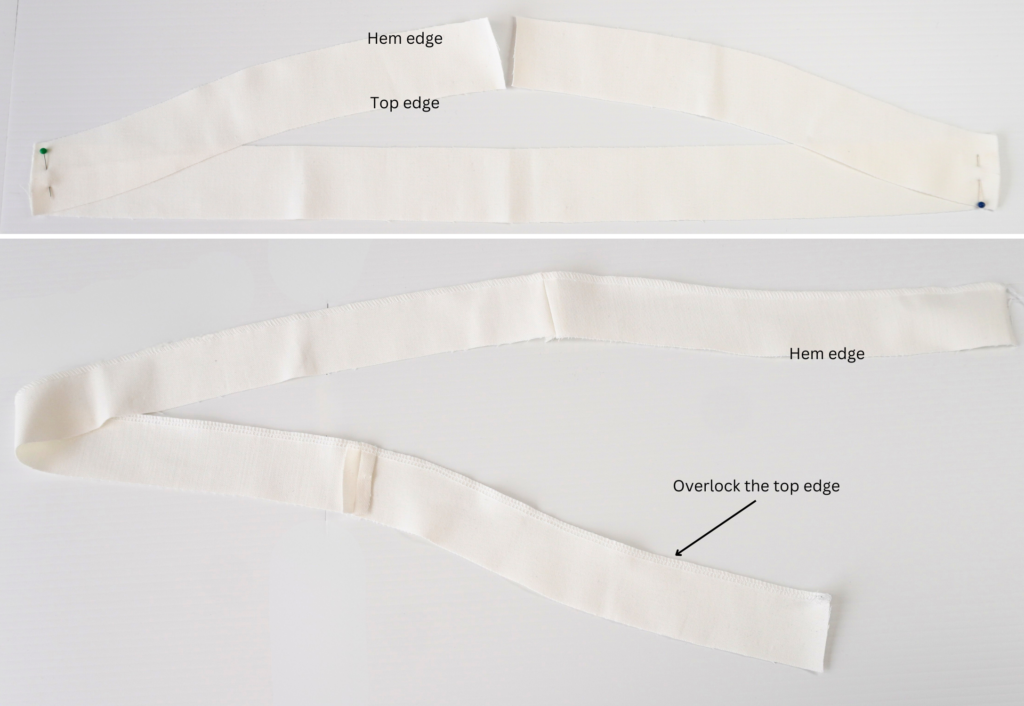
With RST, pin the Front Elastic Casings (13) to the Back Elastic Casing (14) at the short ends, positioning the back casing between the front casings. Sew using a 1cm (3/8”) seam. You will have one long length of fabric for the casing. Press the seams open and then overlock the top edge (the cut edge that does not attach to the hem of the body).
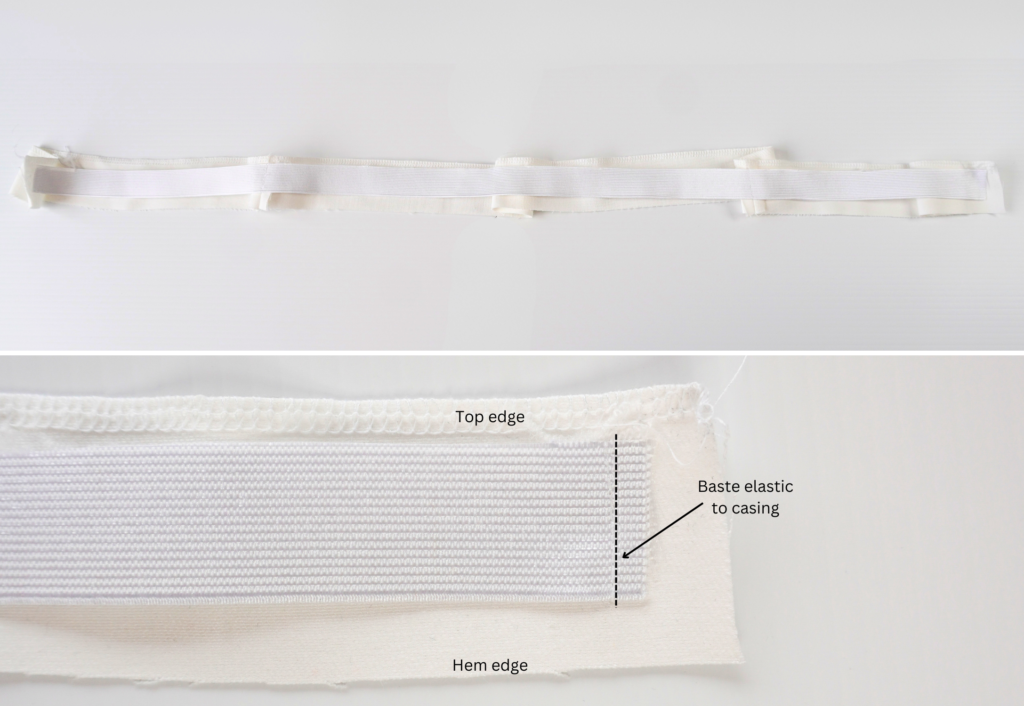
Mark the halfway point on the wrong side of the casing using tailors’ chalk.
Cut the elastic to your preferred personal length (or refer to the measurement chart). Mark the halfway point to the elastic with chalk.
Working from the wrong side, pin each end of the elastic to each end of the casing, between the notches, and baste into place. Align the chalk inner waistband. Align the chalk marks on the elastic and casing, pin and baste into place with a vertical stitch. Set aside till step 34.
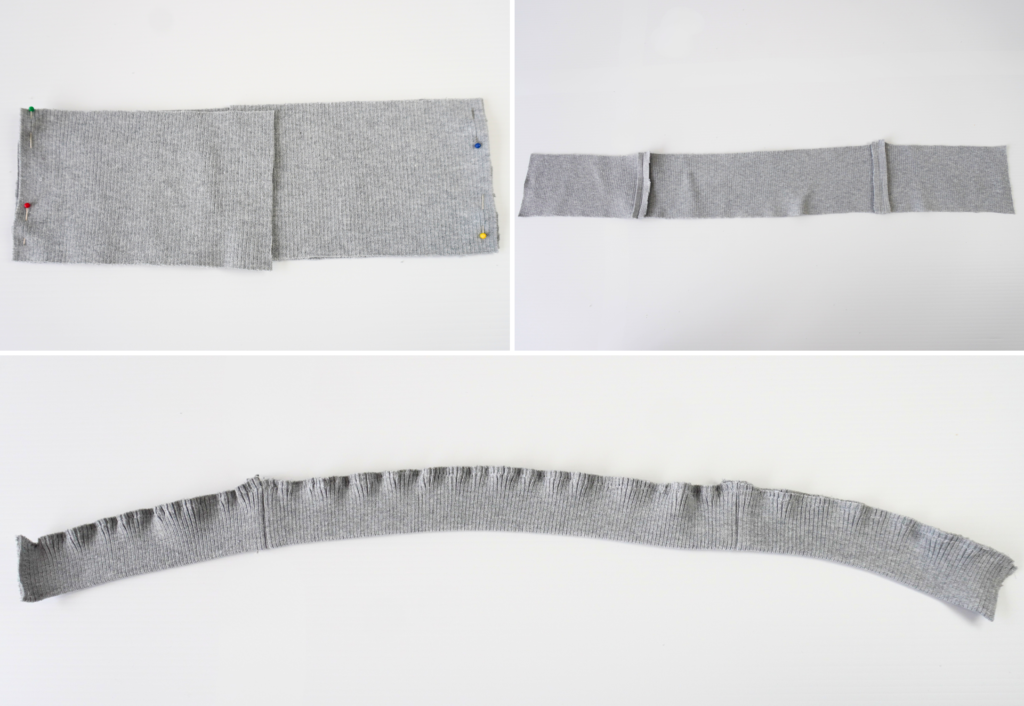
LONG FRONT ELASTIC HEM BAND (16) AND LONG BACK ELASTIC HEM BAND (17):
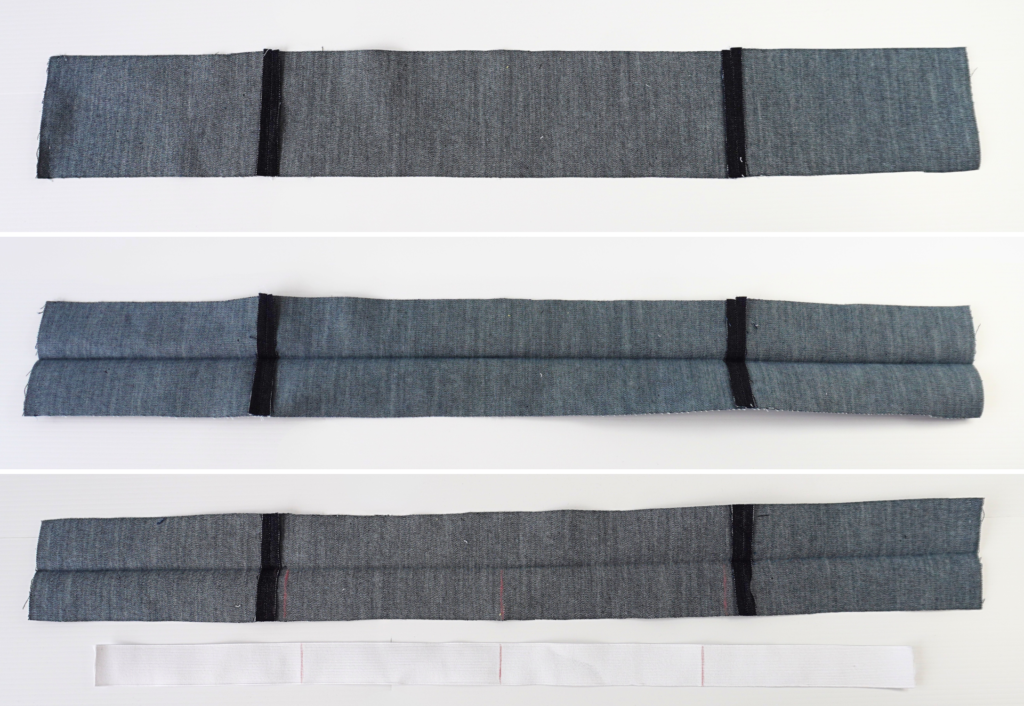
With RST, pin the Front Elastic Hem Band (16) to the Long Back Elastic Hem Band (17) at the short ends, positioning the back band between the front bands. Sew using a 1cm (3/8”) seam. You will have one long hem band. Press the seams open.
With WST, fold the band in half lengthways and press.
Mark the halfway point on the wrong side of the band using tailors’ chalk.
Cut the elastic to your preferred personal length (or refer to the measurement chart). Mark the halfway point to the elastic with chalk.
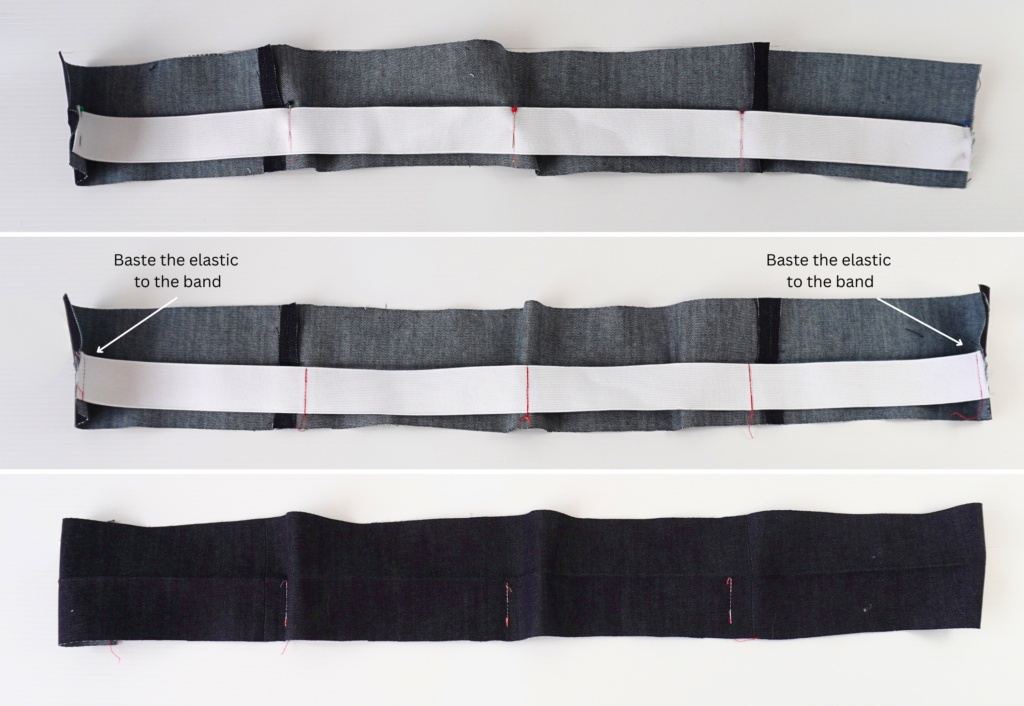
Working from the wrong side, pin each end of the elastic to each end of the casing, to one side of the pre-pressed line, and baste into place.
Align the chalk marks on the elastic and casing, pin to one side of the pressed line and baste into place with a vertical stitch. Note, this side of the pressed line is the inner hem band.
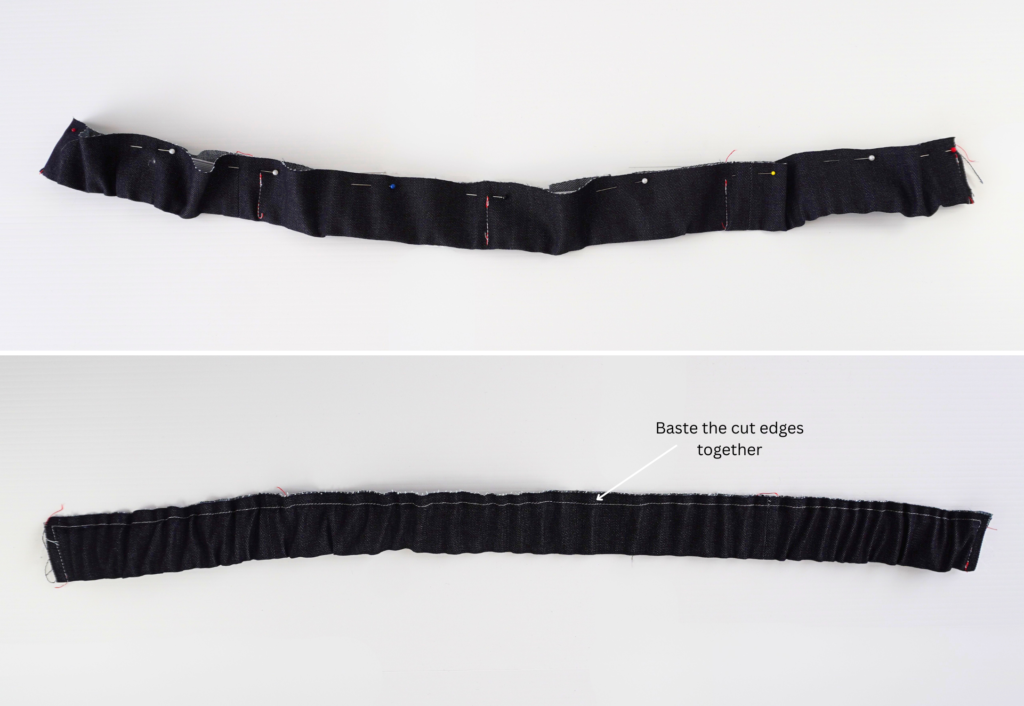
Fold the casing with the raw edges together and the elastic inside.
Pin and then baste the raw edges together. Set aside till step 33.
OPTIONAL INSEAM POCKETS (4) – LONG VERSION ONLY:
With RST and notches aligned, sew one set of Pockets (4) to the Front (1) at the side seam (seamline marked ‘A’ on the pattern). Stitch only between the notches. Clip the seam at the notches and sew an understitch on the side of the pocket bag. Turn to the inside, press and sew a 6mm (1/4”) topstitch around each end and the length of the pocket opening. This is pocket bag 1.
With RST, lay pocket bag 2 on top of pocket bag 1, align and sew both pocket bags together (seamline ‘B’ on the pattern). Note that the straight edge of pocket bag 2 is left free to sew to the back side seam. Neaten around the pockets using an overlocker/serger. Secure stitch each end of the pocket opening. Note: the pocket will be completed in Step 31.
MAIN BODY:
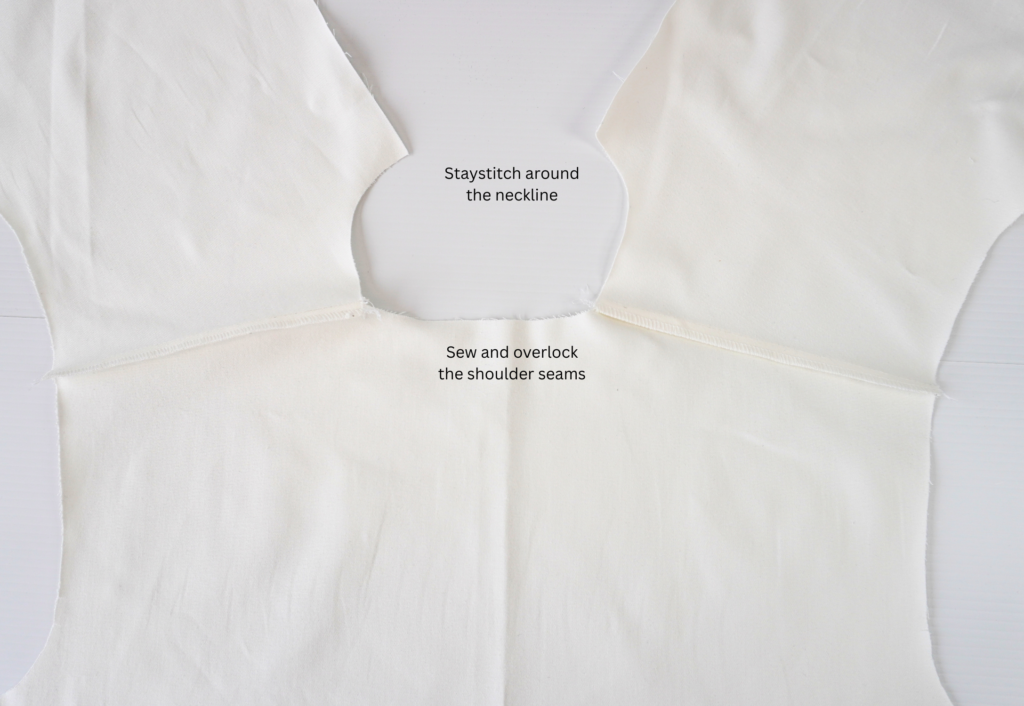
With RST, sew the front to Back (2) at the shoulder seams. Neaten using an overlocker/serger and press toward the back. Sew a staystitch to the neckline to prevent stretching.
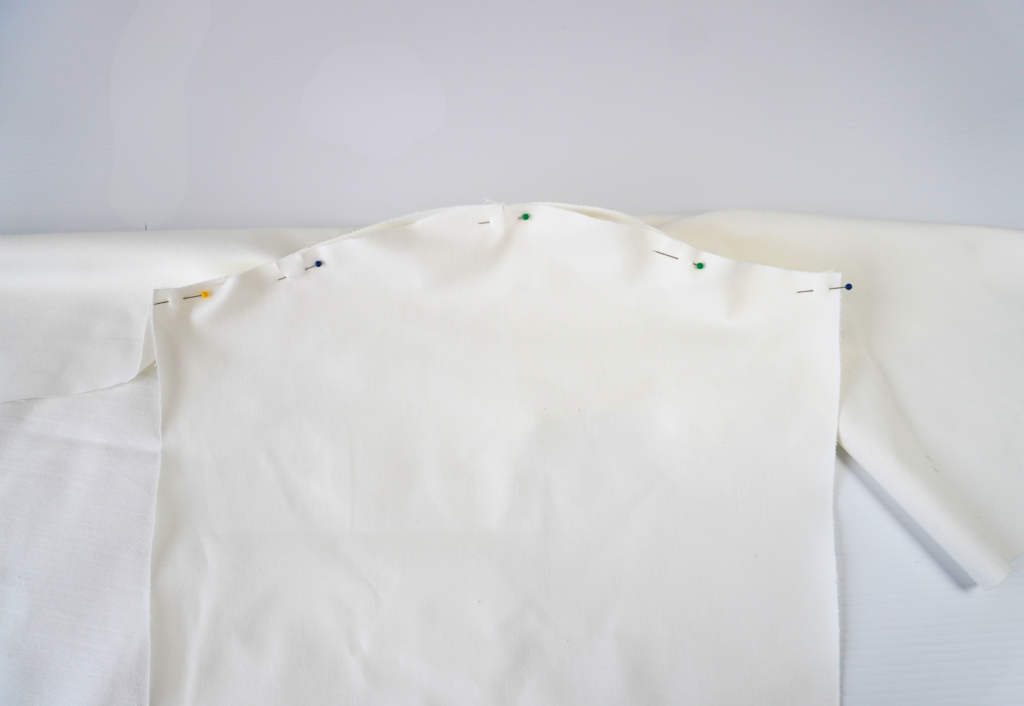
With RST and notches aligned, pin the Sleeve (3) to the arm opening. Sew, then neaten using an overlocker/serger and press toward the sleeve.
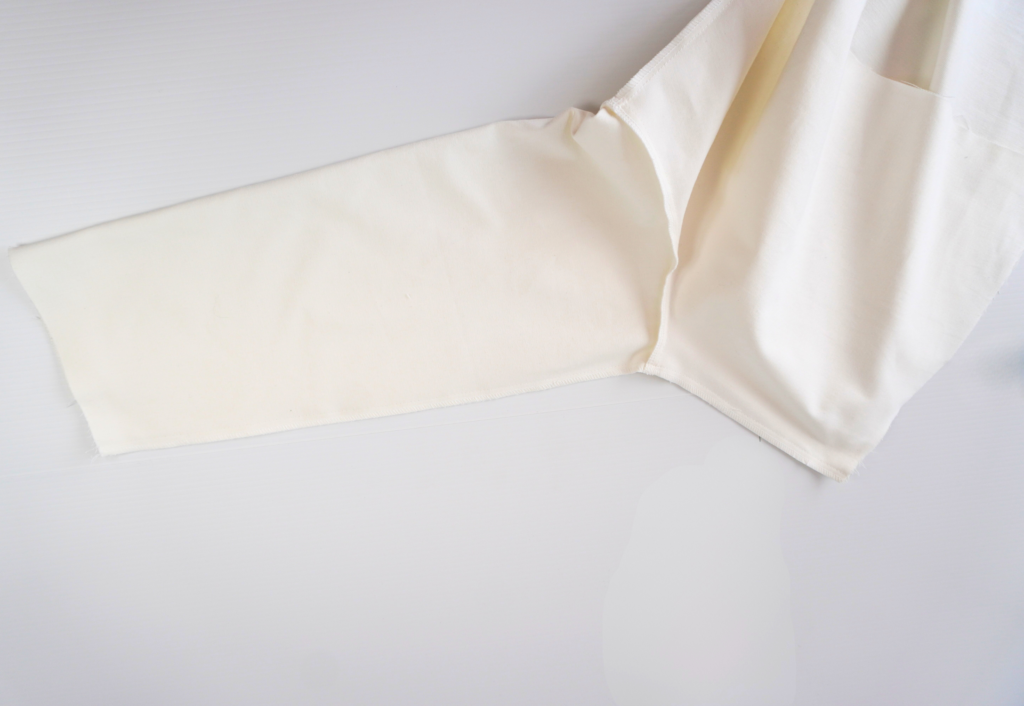
With RST, and notches and underarm seams aligned, pin the front to back at the side seam and the under-sleeve seam.
Starting at the hem, sew the side seam and under-sleeve seam, taking care not to catch the front of the pocket opening (if using) as you sew. Neaten using an overlocker/serger and press toward the back.
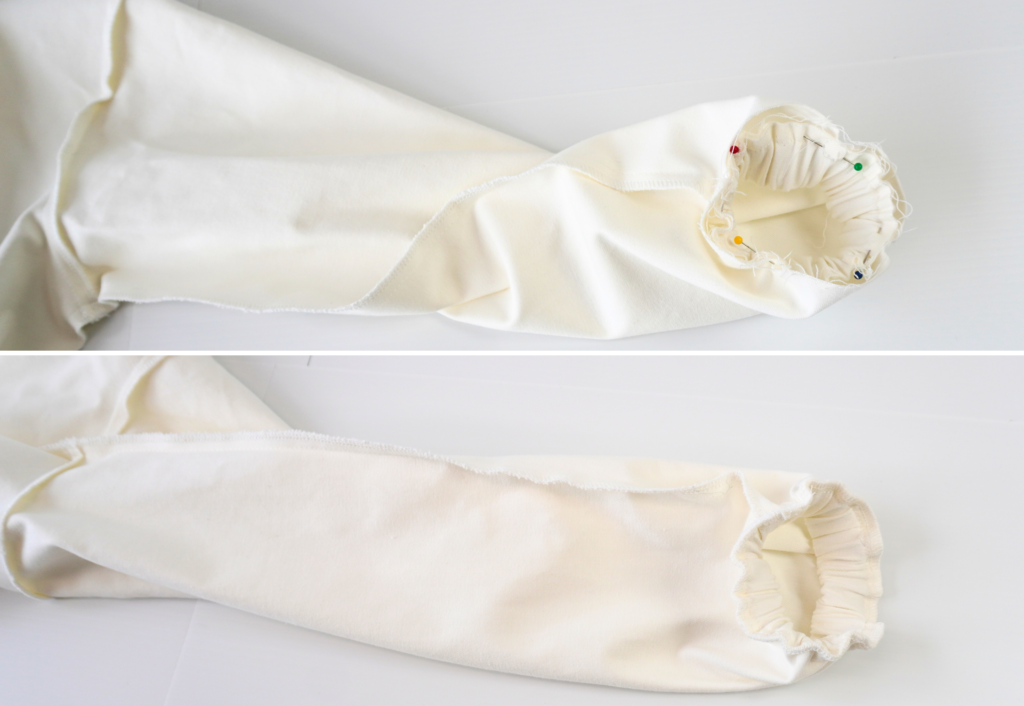
With the sleeve turned out to the wrong side, place the elastic cuff OR rib cuff inside the sleeve with RST and the raw edges together. Pin into place then sew, stretching the cuff as you sew. Neaten using an overlocker/serger and press the seam toward the sleeve.
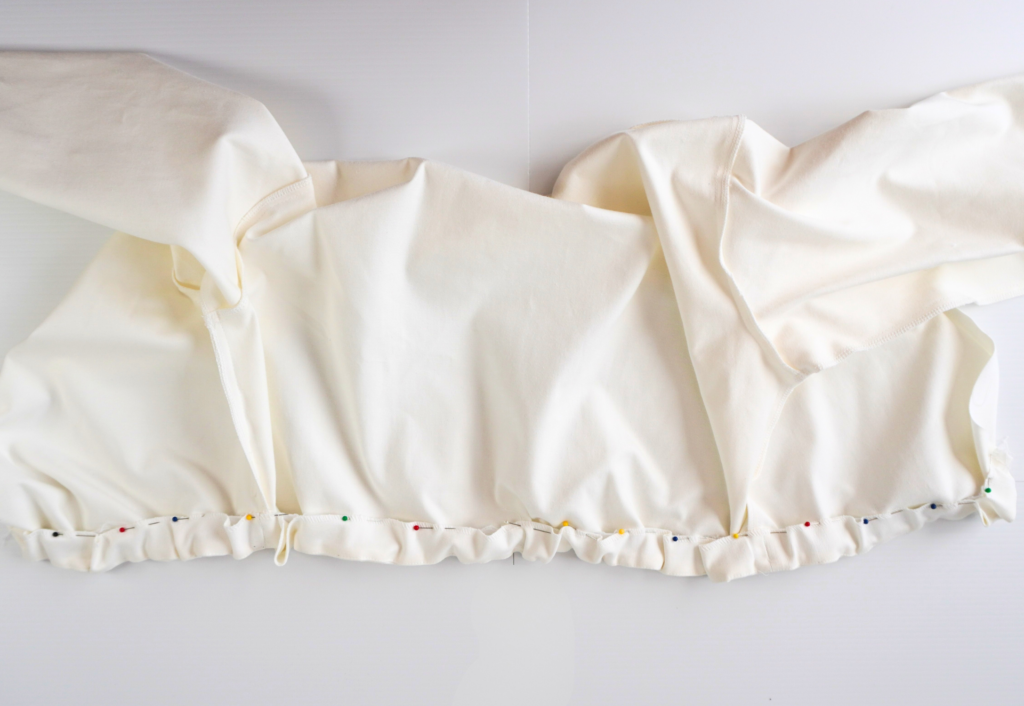
HEM – RIB OR ELASTIC HEM BAND:
With RST and notches aligned, pin the Rib Hem OR Elastic Hem Band to the hem of the main body. If using the elasticated hem, ensure the inner hem is folded to the inside when finished so the basting stitches are not visible.
Sew, stretching the rib (if using) as you sew, then neaten using an overlocker/serger. Press the seam toward the body.
HEM – ELASTIC CASING:
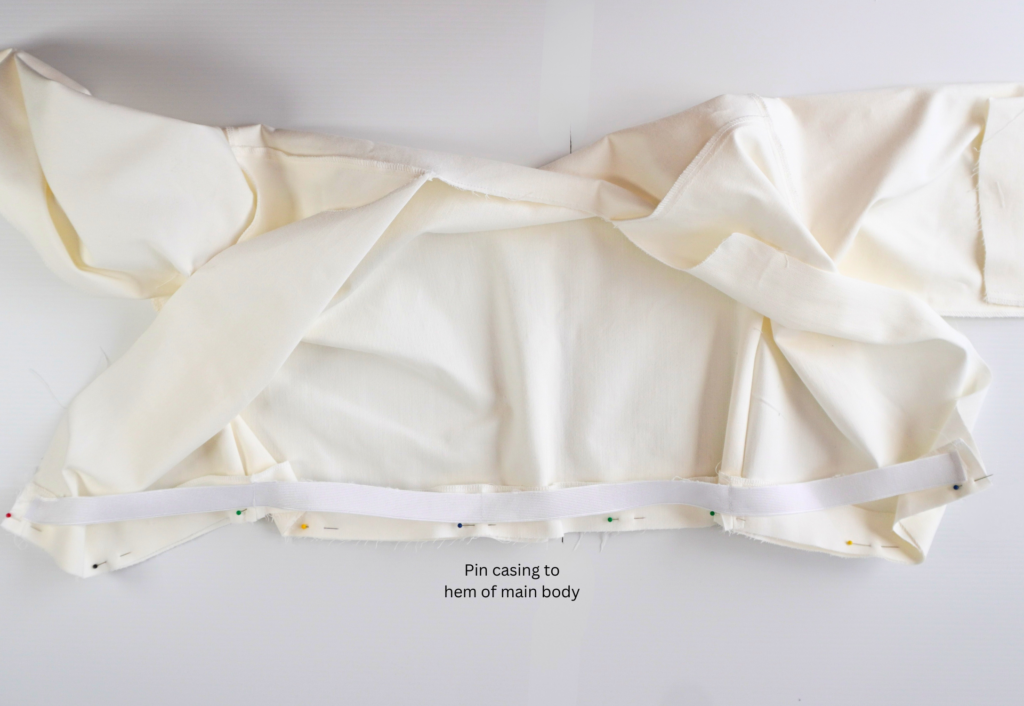
With RST and notches aligned, pin the Elastic Casing to the hem of the main body.
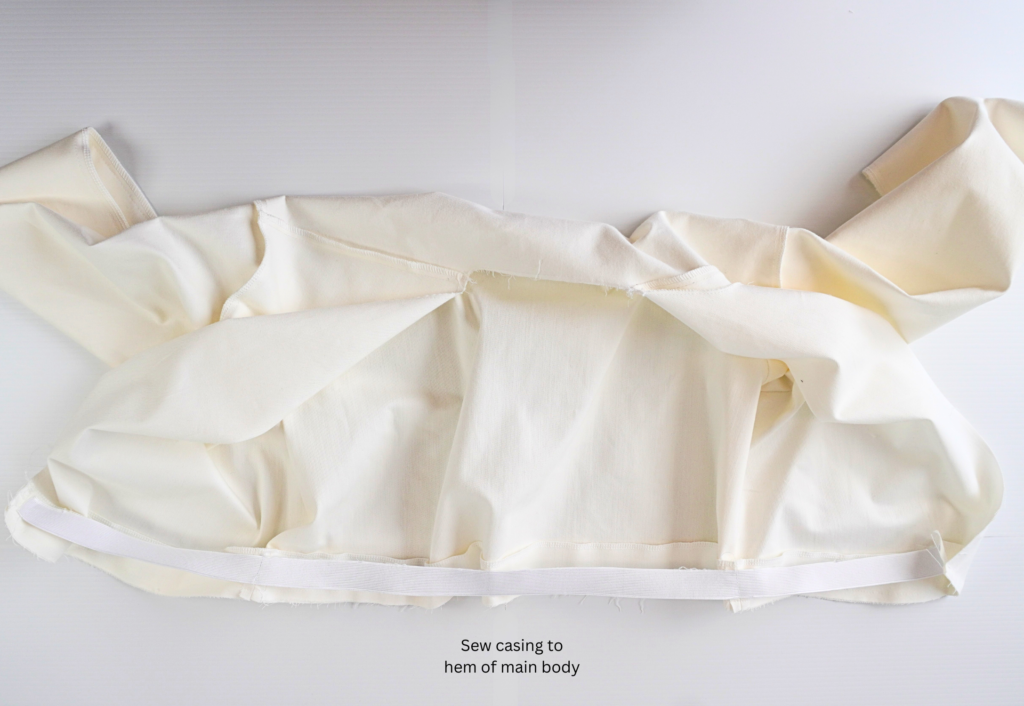
Sew, then press the seam toward the casing.
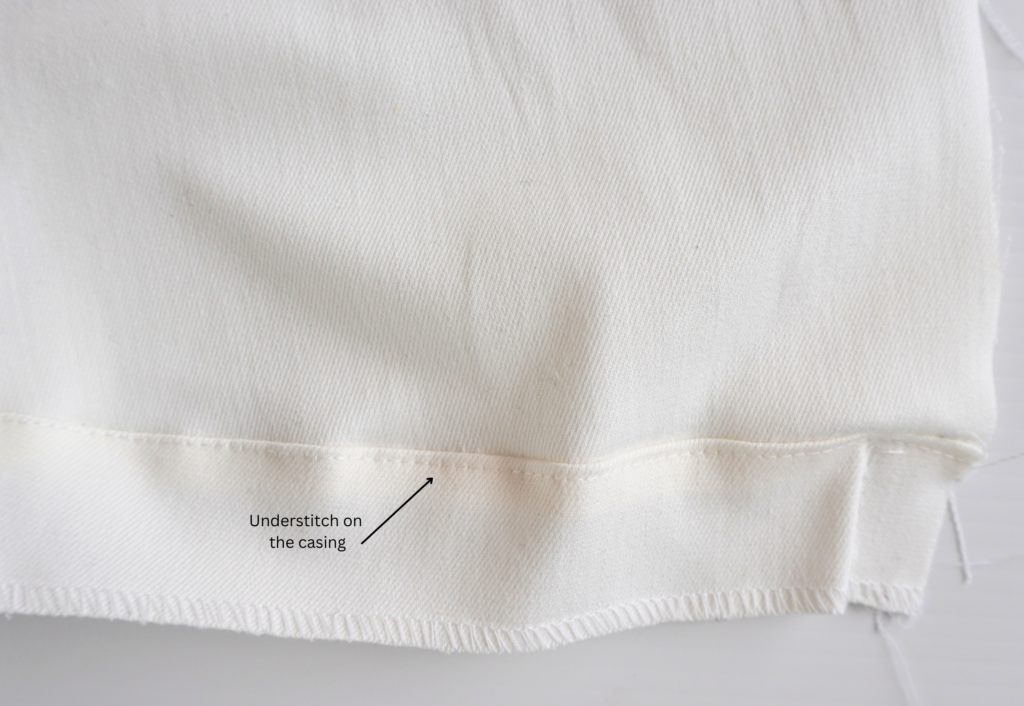
Sew an understitch to the seam on the side of the casing.
Turn the casing to the inside and pin into place. Top stitch into place and baste the casing to the body at the centre front.
COLLARS:
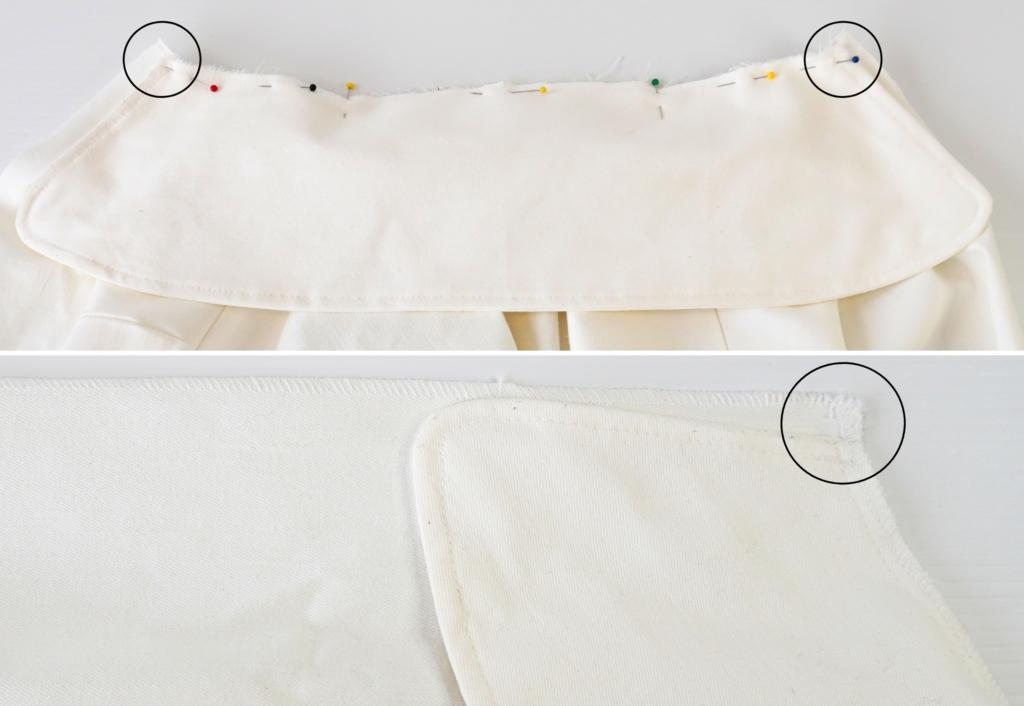
With RST and notches aligned, pin the collar to the neck opening of the body between the centre front notches. This will leave 1 cm (3/8”) at either end of the collar for sewing to the zip. Sew, then neaten using an overlocker/serger and press toward the body. Neaten along the centre front openings (including the high collar/rib band/casing) using an overlocker/serger.
ZIP AND COMPLETION:
Using chalk, mark the quarter way points to the wrong side of the zip tape (three marks). Mark the quarter way points to the right side of the front opening on the main body. Be sure to include the high collar and waistband in this measurement if using.
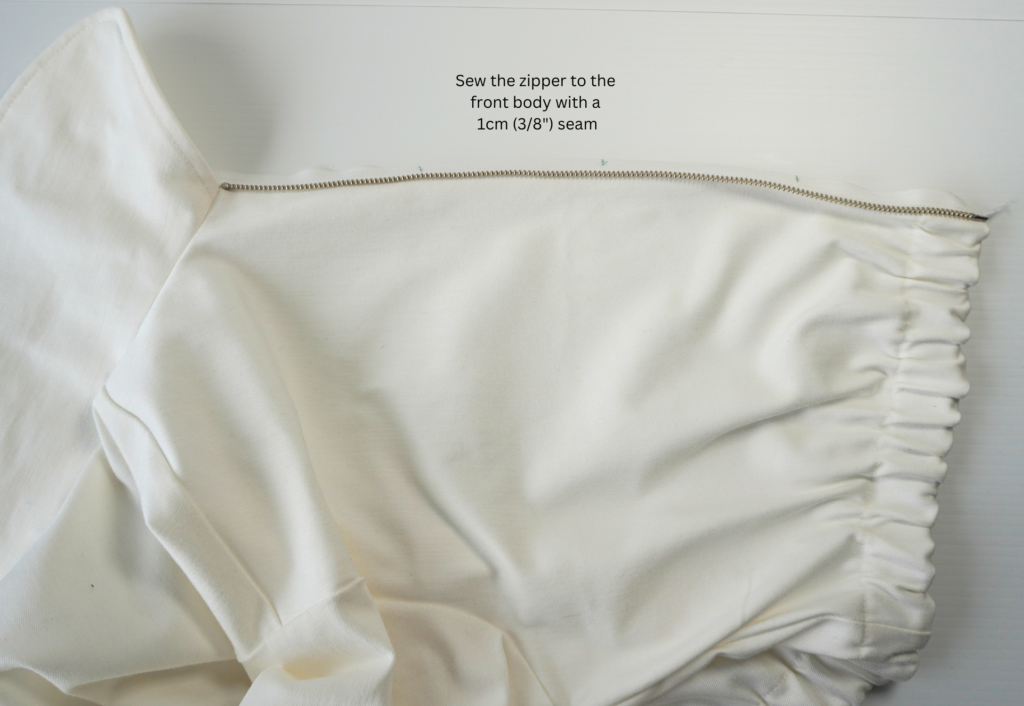
With the right side of the zipper tape to the right side of the front opening, align the chalk marks and pin the zip into place.
Change to a zipper foot and carefully sew the zip into place using a 1cm (3/8″) seam. Change back to the regular presser foot.
With the zipper tape toward the body and the zipper teeth showing on the right side, lightly press the zip and pin into place, ready for top stitching.
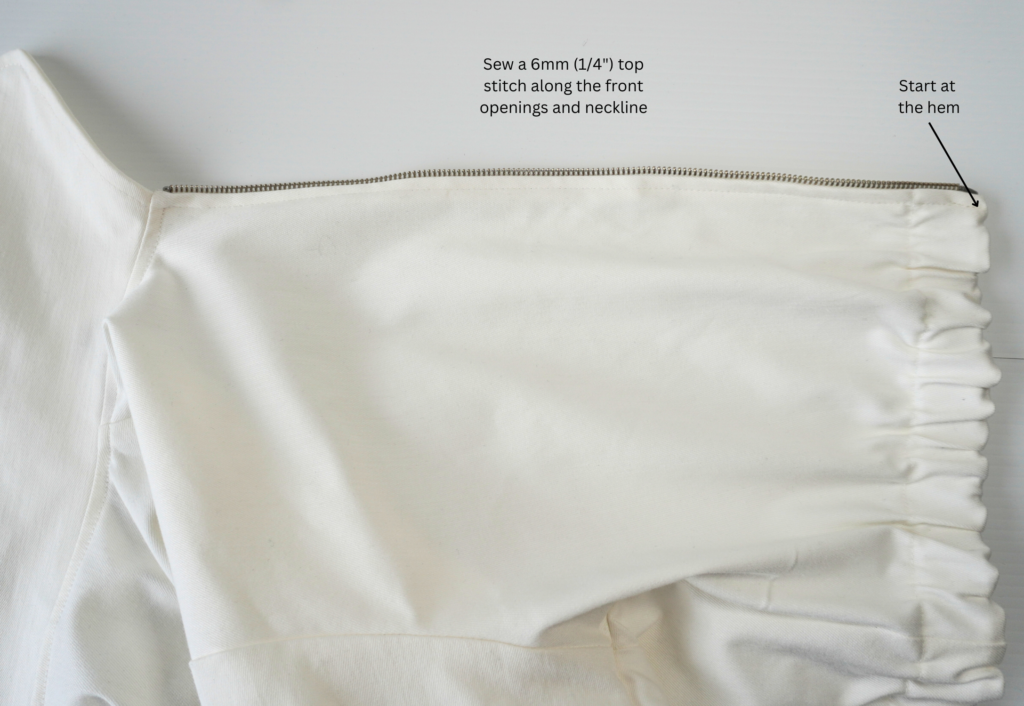
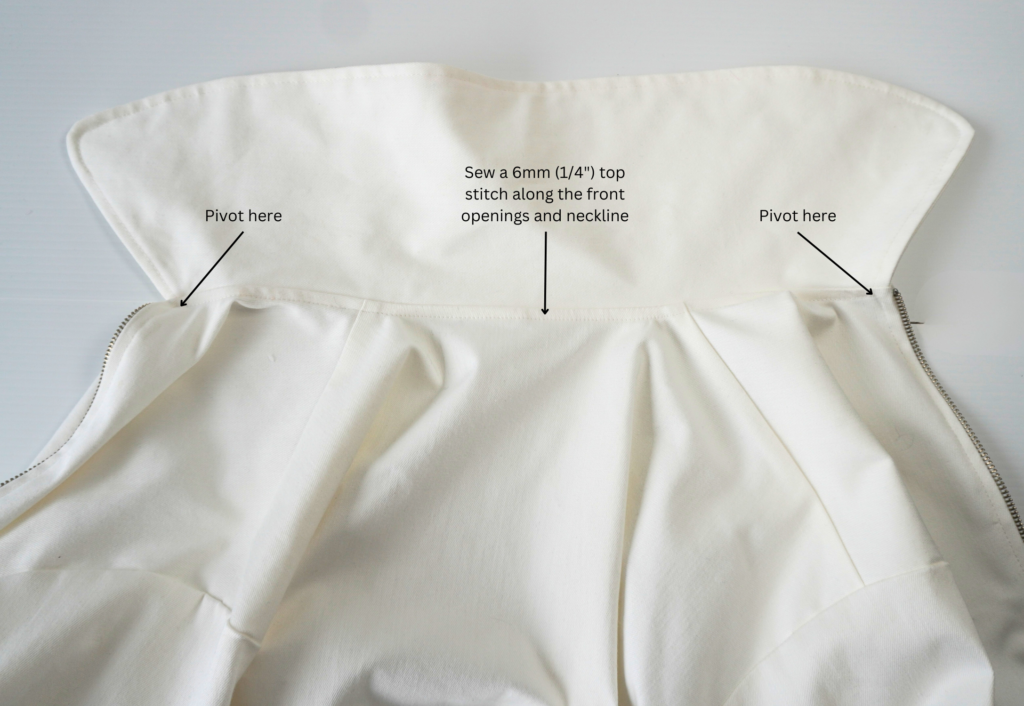

Starting at the hem, sew a 6mm (1/4″) top stitch along the front opening. When you reach the collar, leave the needle down and pivot at the corner, and then continue top stitching around the neckline. Pivot again at the collar corner, and continue sewing along the opposite front opening, finishing at the hem.
Trim any loose threads and lightly press your new jacket!