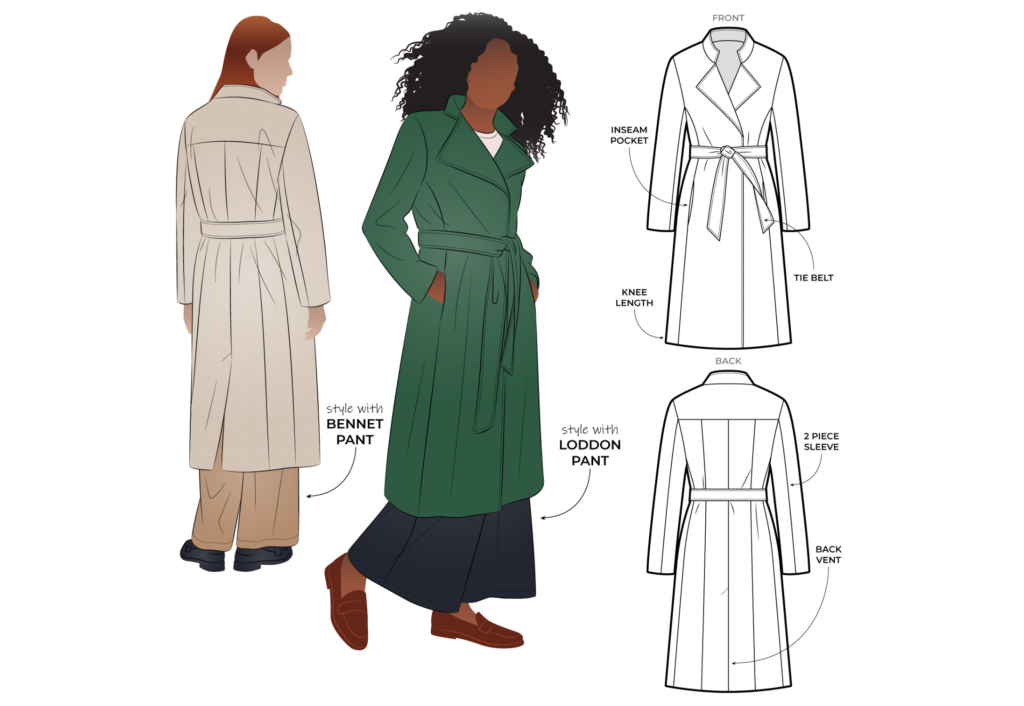
CONSTRUCTION:
COLLAR, TIES & BELT LOOPS:
With right sides facing sew the collar pieces together along the top edge. Press and understitch on the inside layer.
Turn the collar right sides together and sew down the short sides. Clip the corners, turn out to the right side and press.
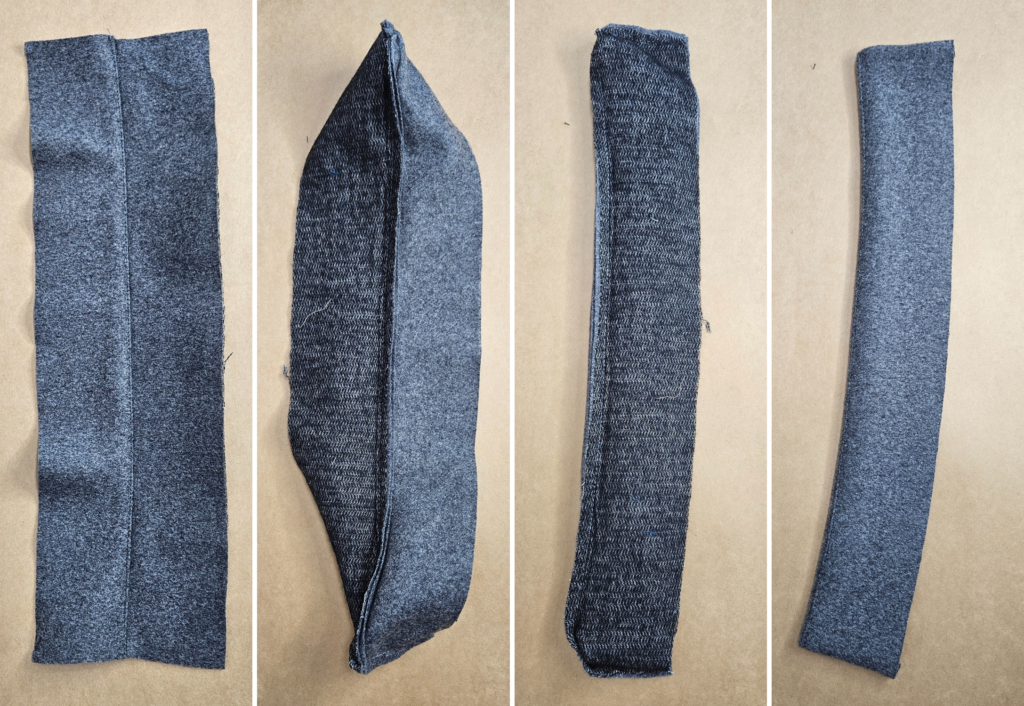
Neaten one long side of the belt loops with an overlocker/serger. Fold the raw edge, then the overlocked edge and stitch down each side of the belt loop strip. Cut the strip into two 8cm (3 ¼”) length and put aside (there will be extra length left over once the two pieces are cut).
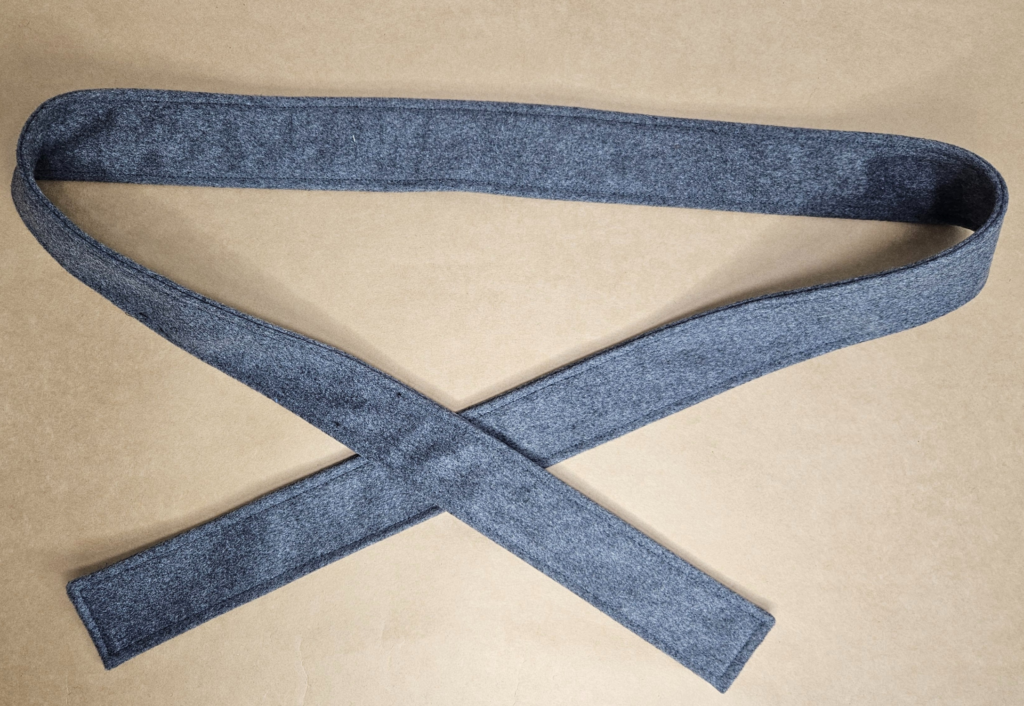
With right sides facing, fold and press the tie belt together lengthwise. Sew the outer edges of the ties together leaving a small opening in the middle to turn through.
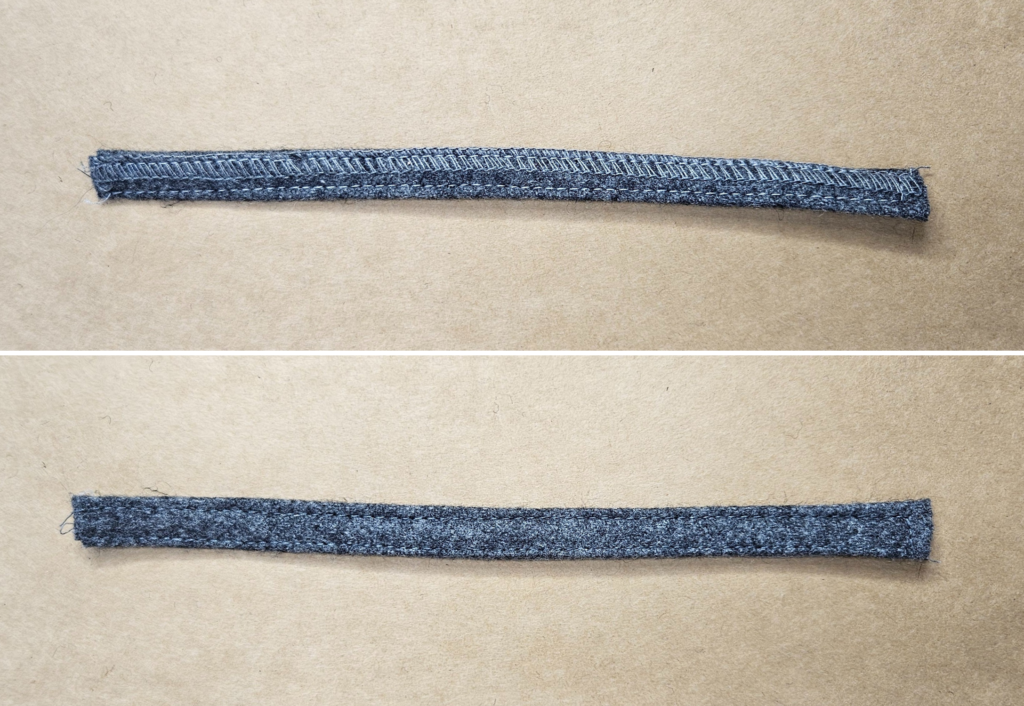
Turn the tie through to the correct side, press the seam allowance of the opening to the inside and topstitch 6mm (¼”) all the way around the tie.
BODY & POCKETS:
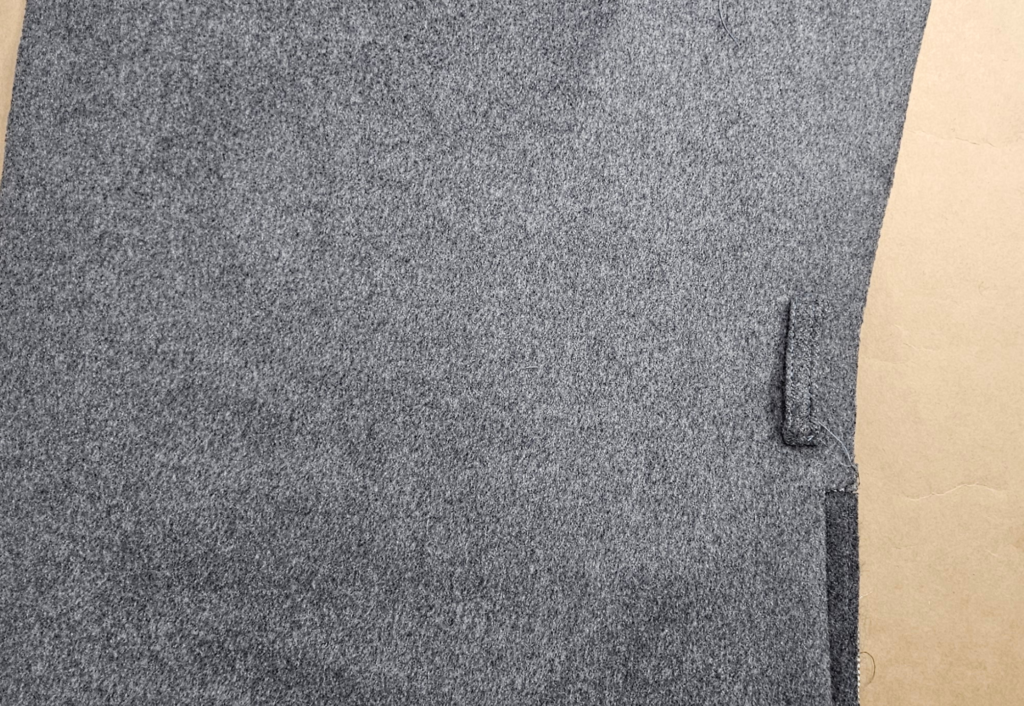
Following the markings on pattern, stitch the belt loops to the front panel close to the side seams above the pockets as marked on the pattern.
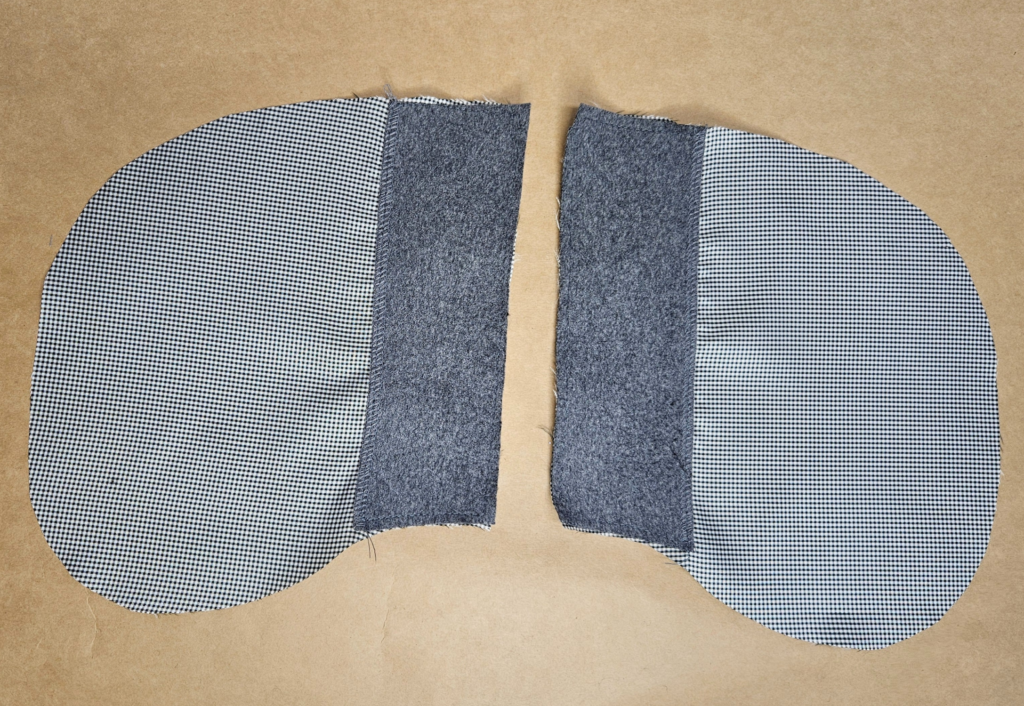
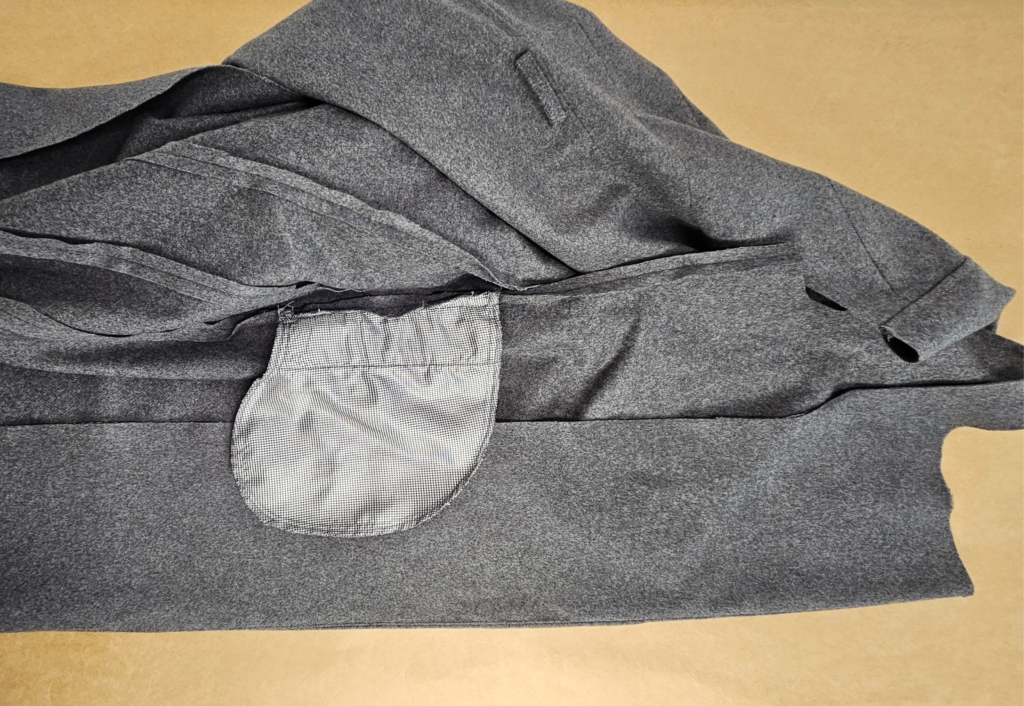
Neaten the long edges of the pocket facings with an overlocker/serger. Lay the pocket facings on top of one pair of the pocket bags along the straight edge and stitch around all edges of the facing. This will become the under pocket that joins the side back panel seam.
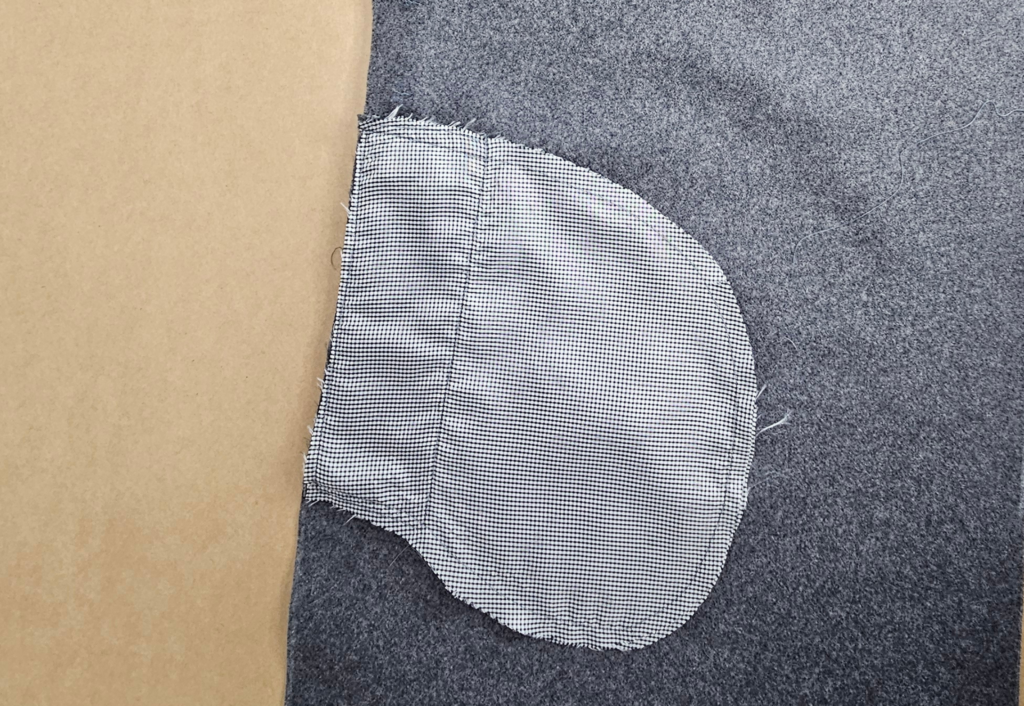
With the right sides facing sew one straight pocket edge (without the facing) to the front body pieces where noted on the pattern (A). Clip at the notches and press the seam towards the pocket bag. From the right side topstitch across the top, base and along the opening on the right side.
With right sides facing sew the remaining pair of pockets (the set with the facing sewn to it) to the pockets already attached to the garment, follow (B,B) marked on the pattern. Note that the straight edge of the under pocket is left free to sew to the side back panel seam.

Sew the neck darts on the front panels and press towards the shoulder.
With right sides facing sew the side back body pieces to the mid side body pieces. Press seams open.
With right sides facing sew the mid side body pieces to the back body pieces. Press seams open.
With right sides facing sew the centre back body seam stopping at the vent opening and press the seam open.
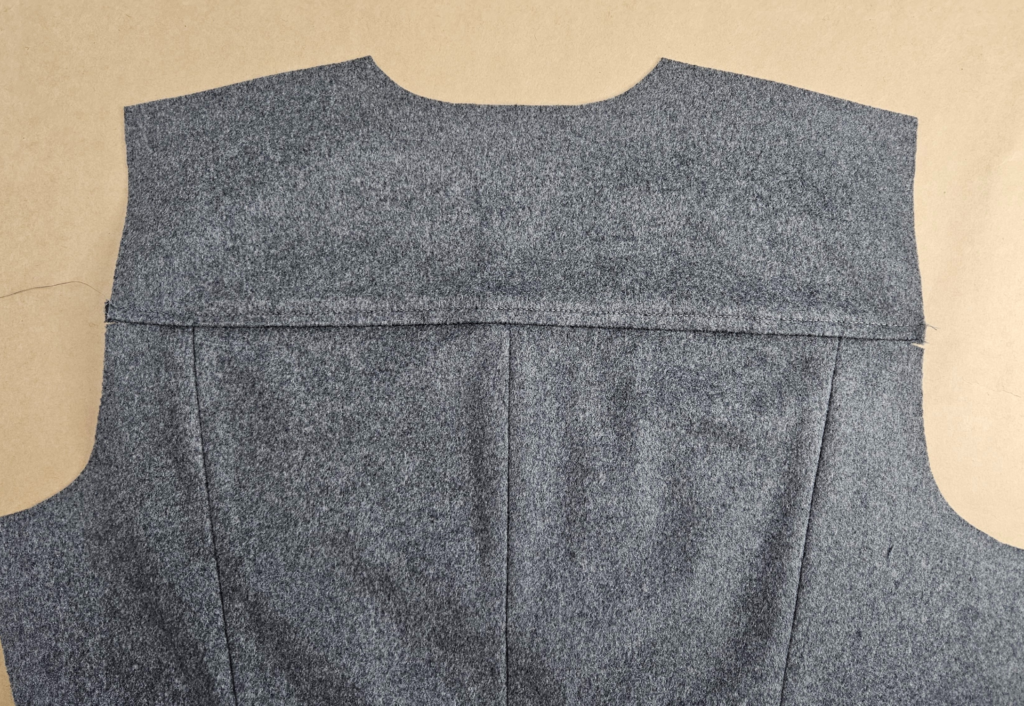
With right sides facing sew the back yoke to the top of the completed back body panels, matching notches as you sew. Press the seams up and sew a 6mm (¼”) topstitch on the side of the yoke.
With right sides facing sew the front facing to the front body, starting at the base of the hem. Sew to the front edge of the coat stopping at the neckline, press the seam and understitch close to the seam on the side of the facing stopping at the notch indicating the break line.
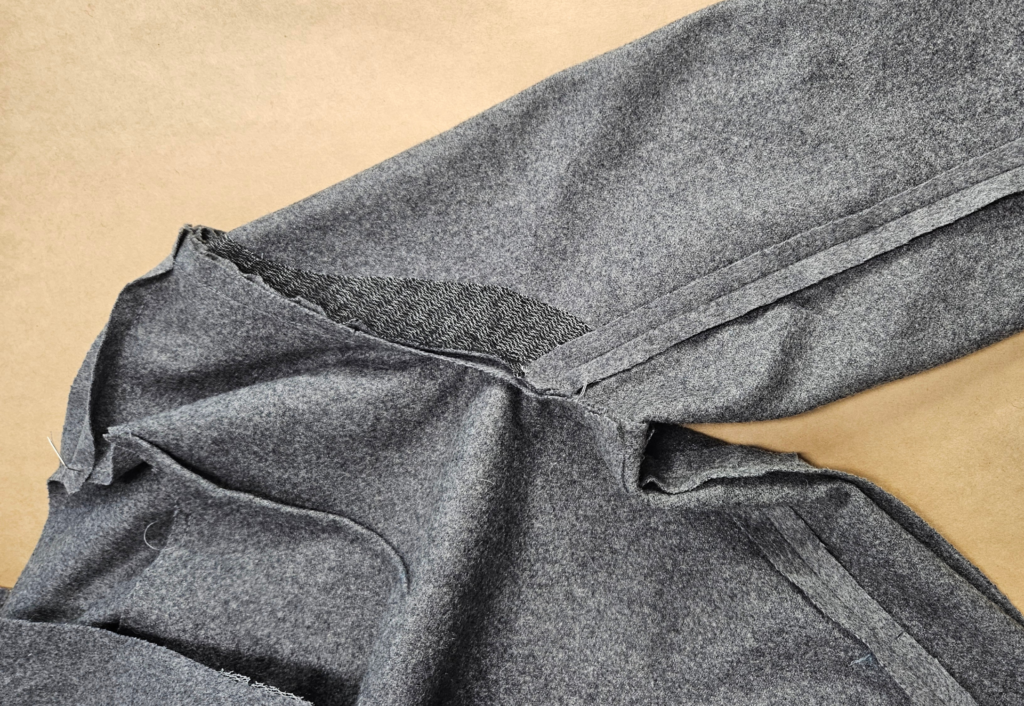
With right sides facing sew the front body pieces to the side back body pieces, ensuring not to catch the pocket as you sew the side seam. Press seams open.
With right sides together sew the outer front and back shoulder seams together. Press seams open.
SLEEVES:
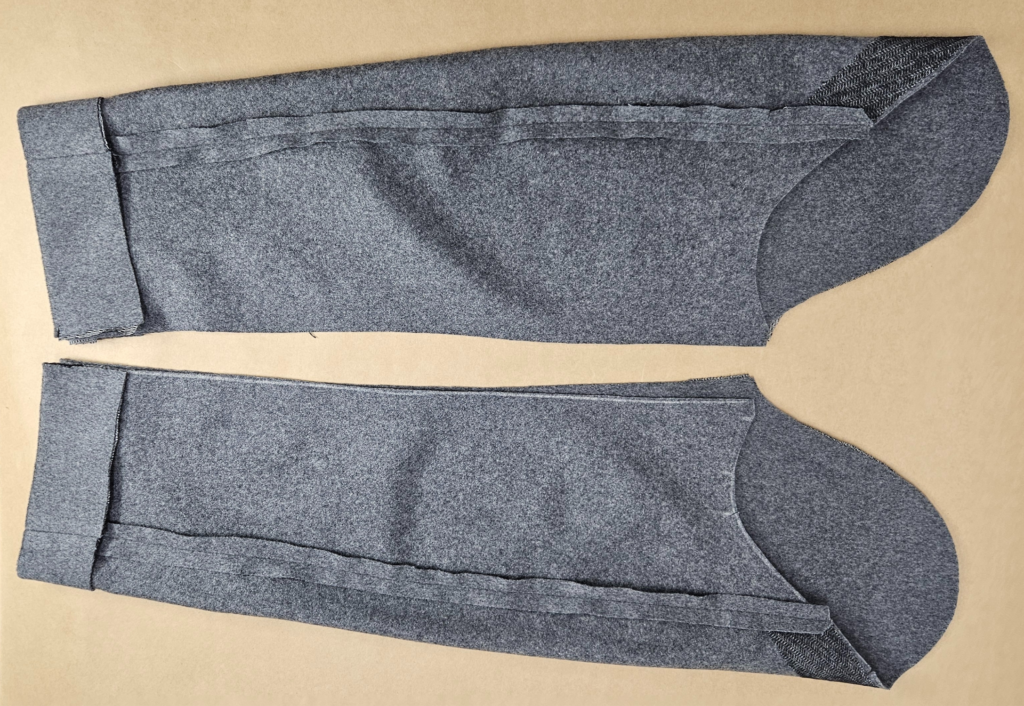
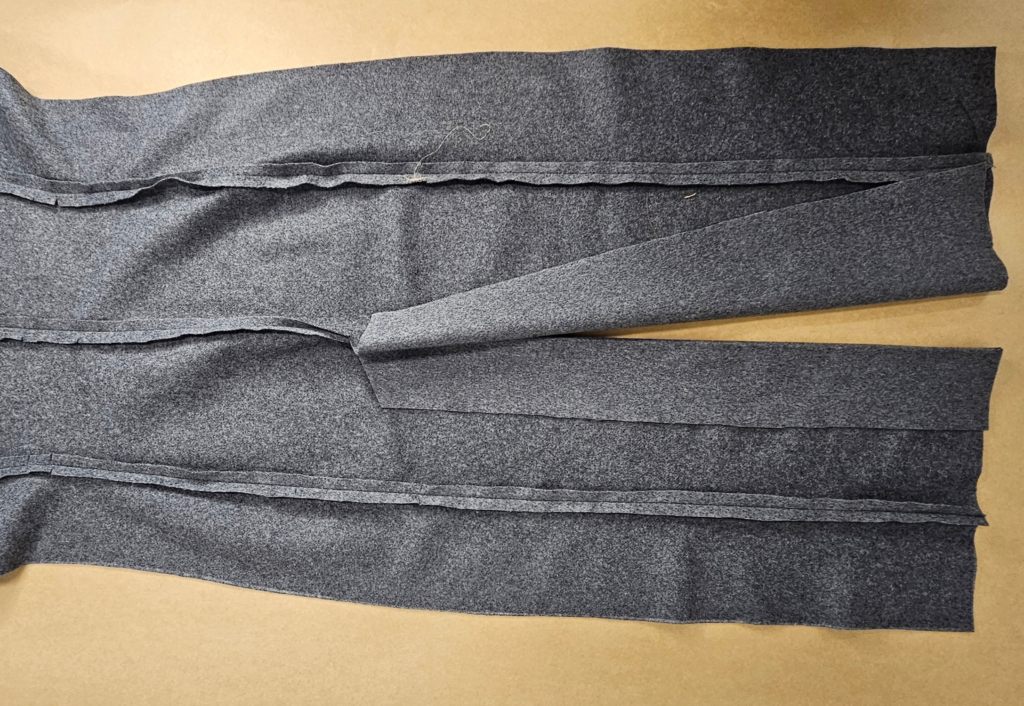
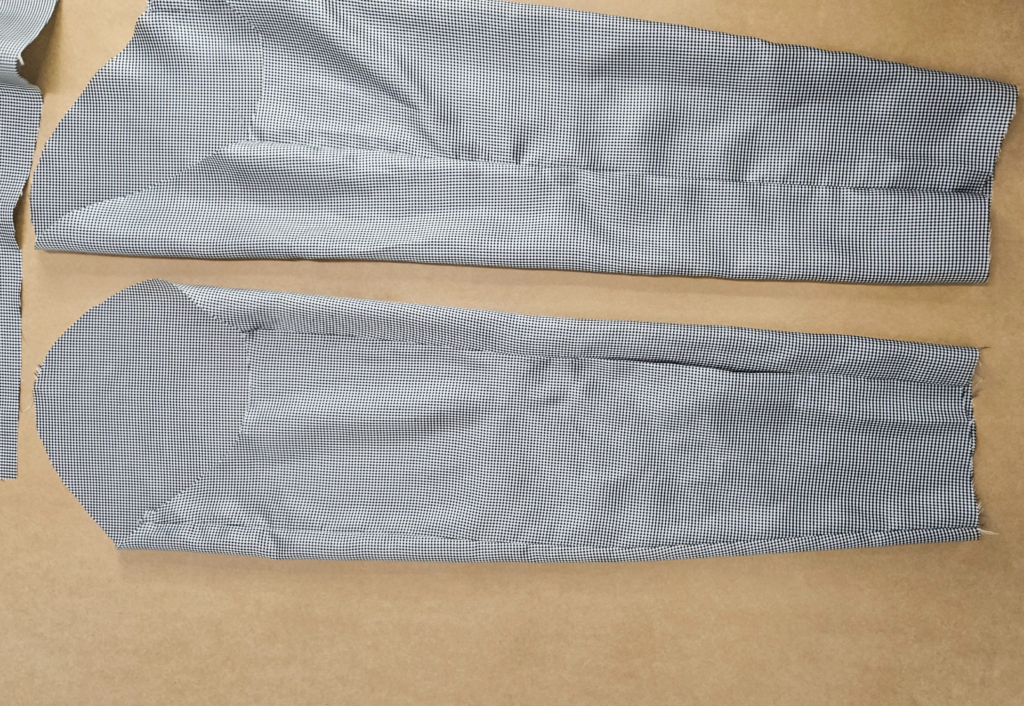
With right sides facing sew the main top sleeves to the under sleeves. Press seams open. See diagram.
On the top sleeves make two rows of long gathering stitching around the cap of the sleeve. Ensure the stitching is inside the seam allowance.
Pin the sleeves to the armhole with right sides facing, matching the notches and “C”, “D” markings on the pattern underarm. Start pulling the threads to ease in the sleeve cap, until the ease is distributed evenly and all notches
match. Add more pins if needed and sew sleeve to armhole, ensuring no pleats or tucks. Finally remove gathering threads completely.
LINING & COLLAR:
With right sides together, sew the front lining to the facing edge. Sew three quarters of the way down from shoulder as we will finish the lower section and hem later.
With right sides facing sew the front lining shoulder seams to the back facing shoulder seams. Press seams open.
Keeping the outer body and facings separate sew a stay stitch around the necklines to prevent stretching. Then turn the coat inside out and with right sides together sandwich the collar between the outer and facing necklines. Pin the collar matching the notches. Stitch from CF corner to 1cm (1/2”) past the shoulder seam catching the collar as you go. Repeat for the other side.
Now sew the remaining back neck sections (main and facing) to each side of the collar, this is to reduce bulk
Sew the back tuck on the back lining piece, as marked on the pattern.
Press and stitch across the top to secure.
With right sides facing sew the back lining piece to the front lining pieces. Press seam open.
With right sides facing sew back yoke facing to the back lining. Press seam down, towards back lining.
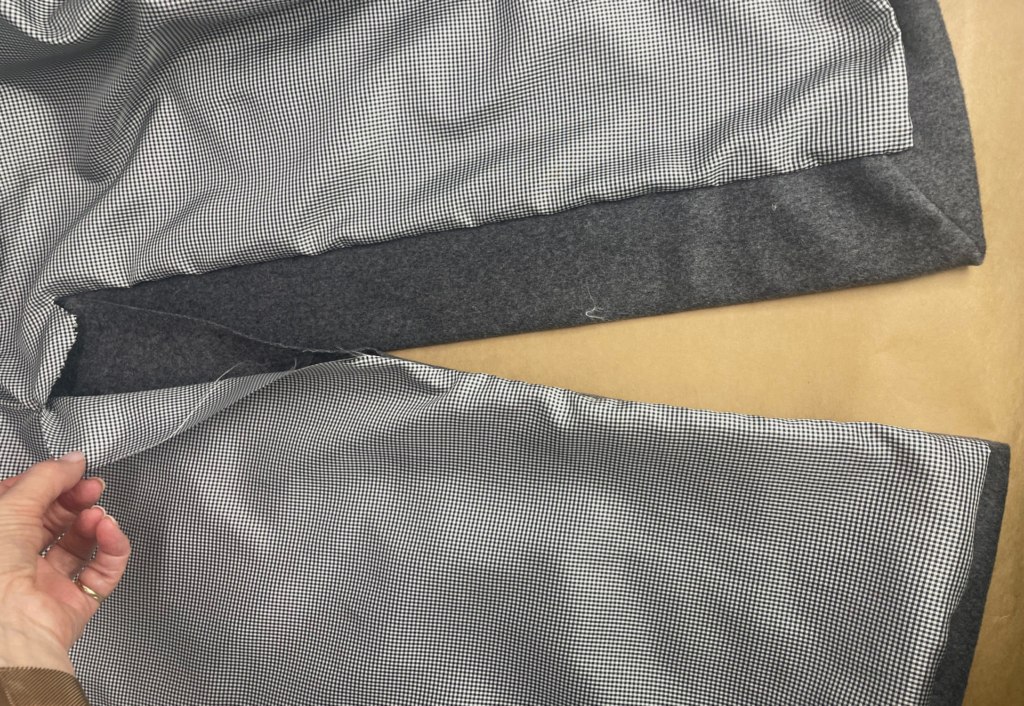
With right sides facing sew the top sleeve linings to the undersleeve linings. Press seams open. Note, leave an opening in the left under sleeve seam where marked on the pattern to enable the jacket to be turned out once finished.
On the top sleeve only, make two rows of loose stitching on the cap of the sleeve. Ensure loose stitching is inside the seam allowance.
Pin the sleeve to the armhole with right sides facing, matching notches. Start pulling the threads to gather the sleeve cap, until the ease is distributed evenly and all the notches match. Add more pins if needed and sew sleeve to armhole, ensuring no pleats or tucks. Stitch together, once completed, remove gathering threads completely.
BACK VENT & ATTACHING MAIN TO LINING:
With right sides facing fold back and stitch the mitre on the left back vent hem, turn to the right side and press. See the ‘Mitred Corner Tutorial’ if you need instructions for sewing a mitred corner.
With right sides facing stitch and turn out the right hem under vent.
Make small tucks at the base of the lining where the lining joins the vents and front facing. Then from the inside sew the hem of the main to the lower edge of the front facing. With right sides together sew the lining to each side of the vent main fabric, across the hems and up the remaining front facing/lining join.
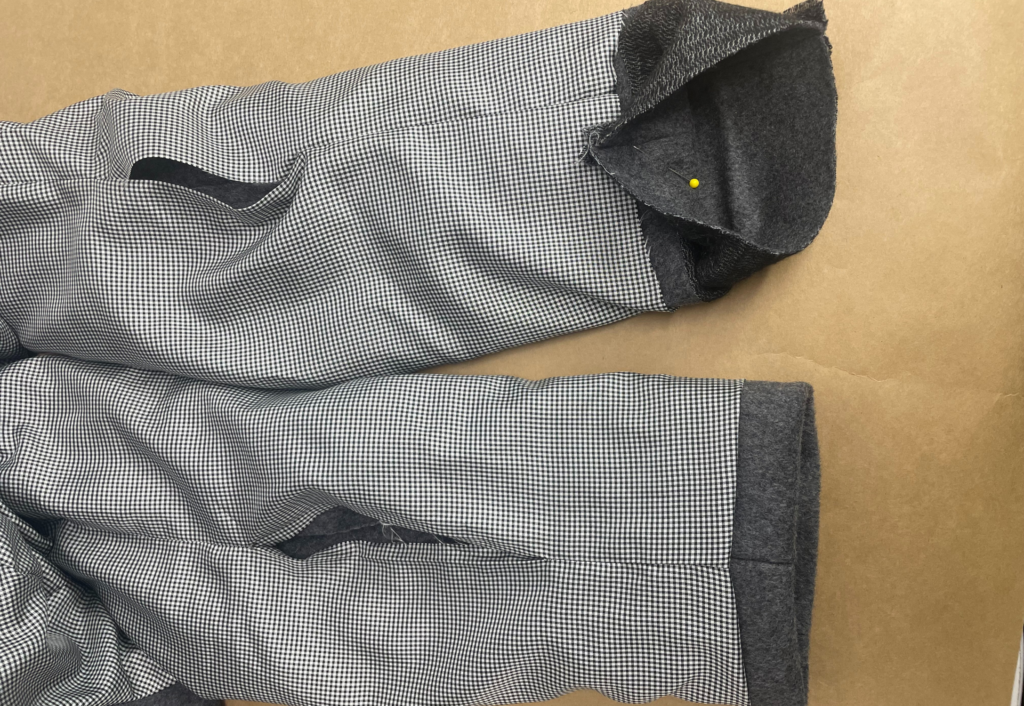
Turn the main coat out to the correct side and push the sleeve linings into the main sleeve. To sew the sleeve hems put your hand in between the main and lining of the body down to the sleeve opening and pull the two pieces back out through the sleeve. Sew the sleeve hems together, right sides facing, matching the seams, be careful that the sleeve isn’t twisting.
Press sleeve hem seams and pull back through to the right side.
Pull the coat out to the right side using the opening in the left sleeve lining. Once turned out to the correct side stitch up the opening in the sleeve lining.
Press your finished coat.