Shop the Flossy Woven Scrubs Set

Click here to watch a step by step sew along on YouTube:

CONSTRUCTION – TOP
For the Darted Front (17) option – with RST, align the bust dart notches and pin the dart. Sew, then press the dart downwards.
POCKETS:
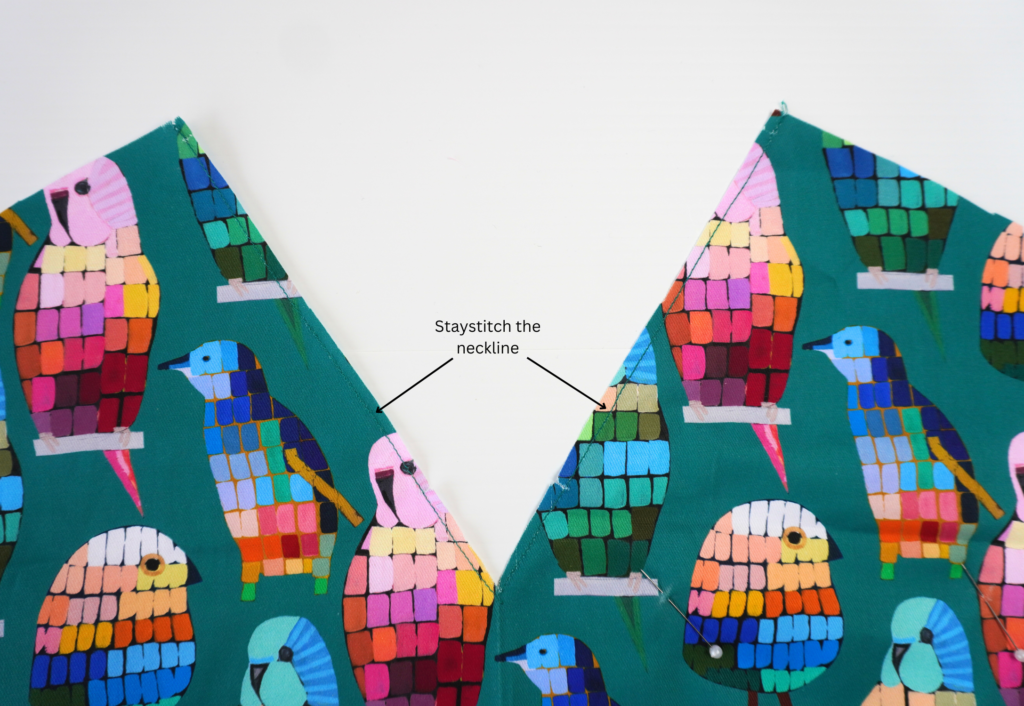
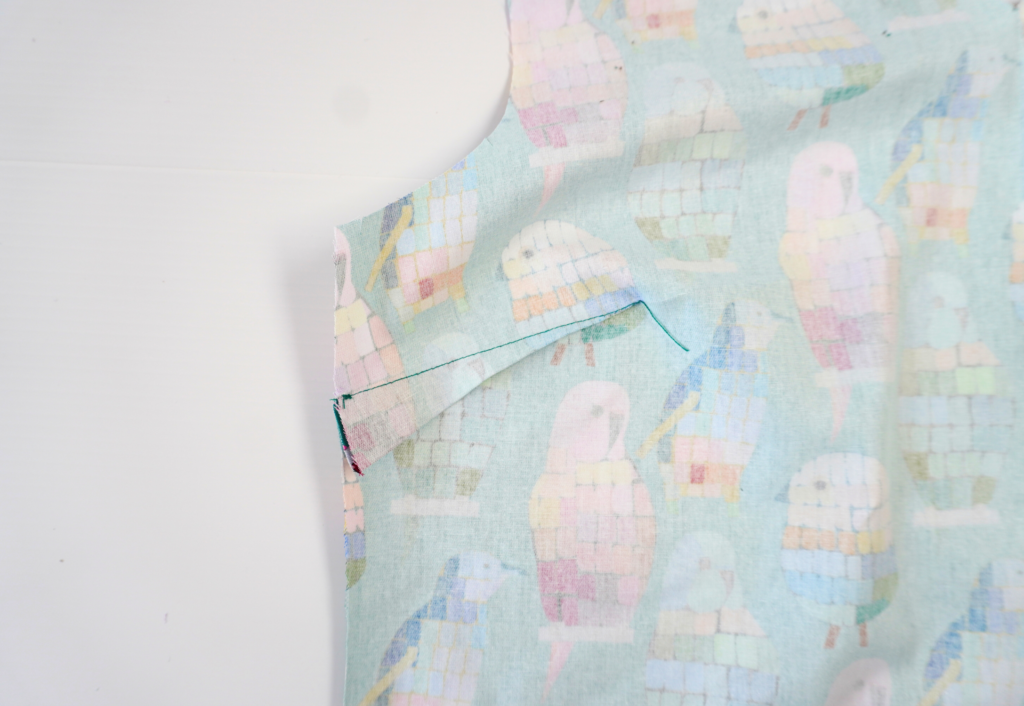
Sew a staystitch to the Regular Front (3) OR Darted Front (17) neck opening to prevent stretching.
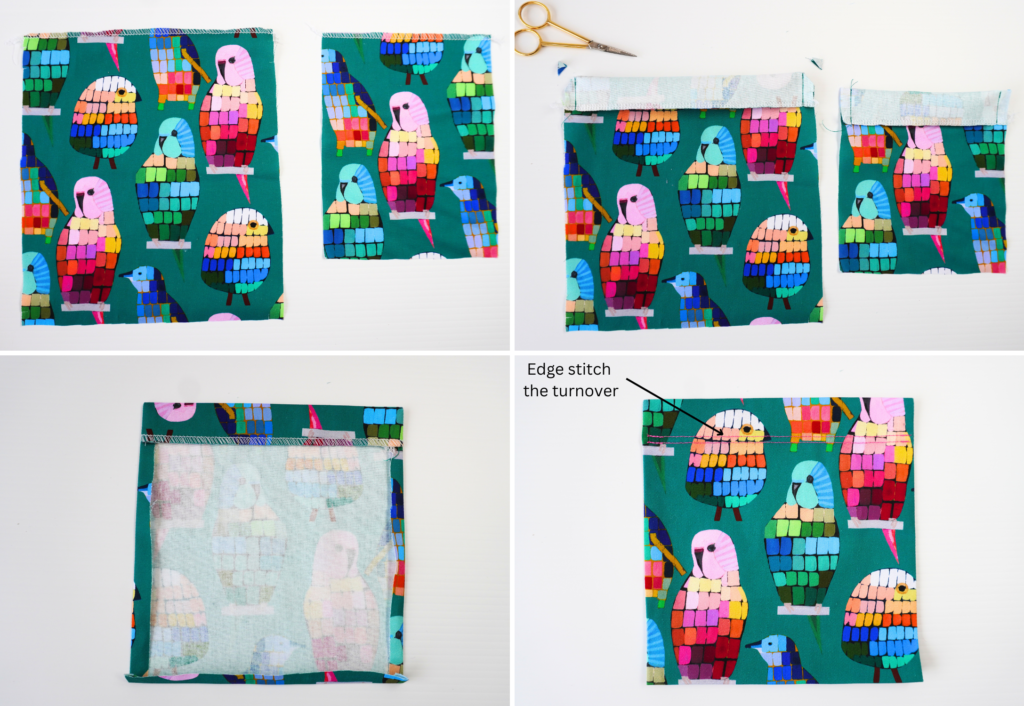
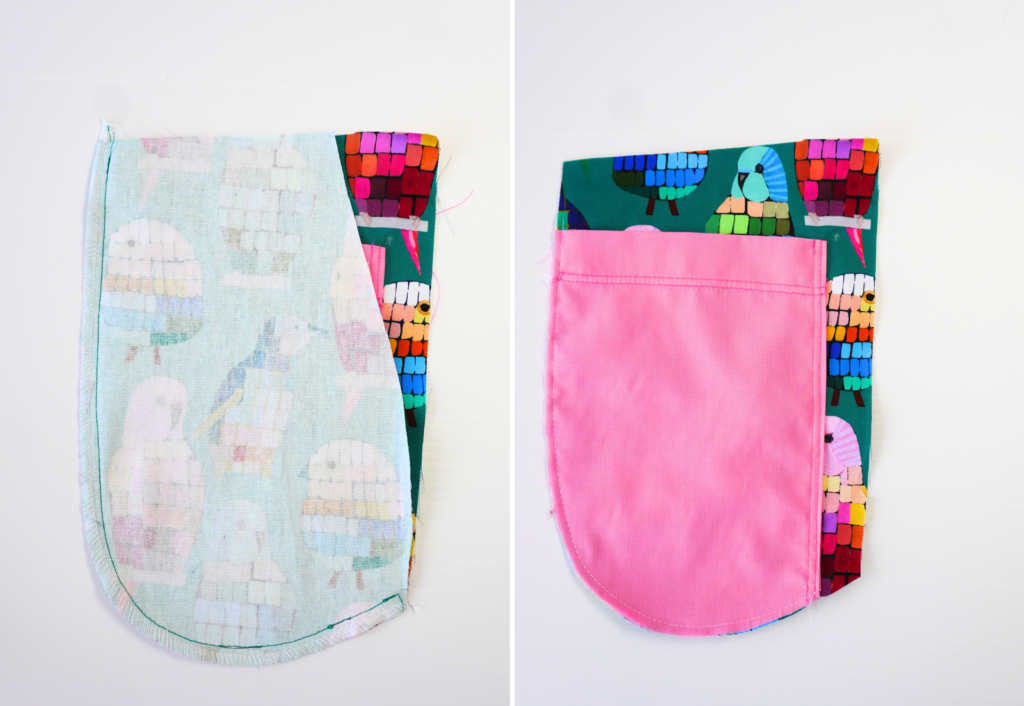
Neaten the top edge of the Chest Pocket (6) and two Large Pockets (7) using an overlocker/serger.
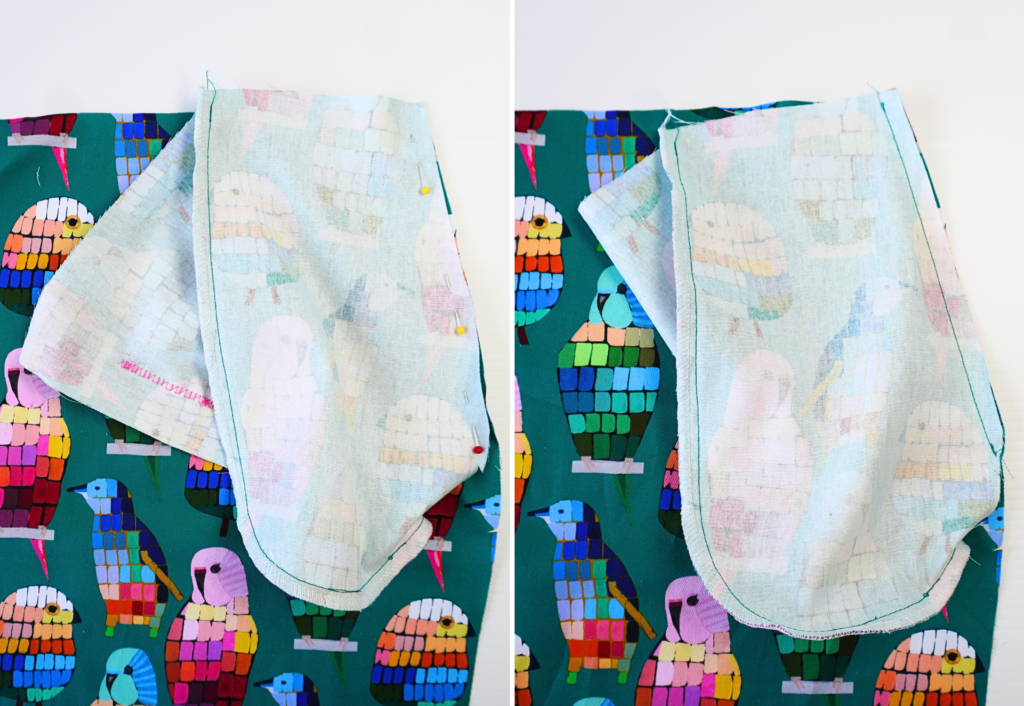
At the fold line shown on the pattern, fold the top edge of each pocket over
so the right sides are facing.
Sew along each side of the turnover, clip the corners and turn the pocket out to the right side. Press.
Fold the remaining outer edges of the pocket 1cm (3/8”) to the inside (wrong side) and press.
Edge stitch along the inner folded edge to hold the turnback in place
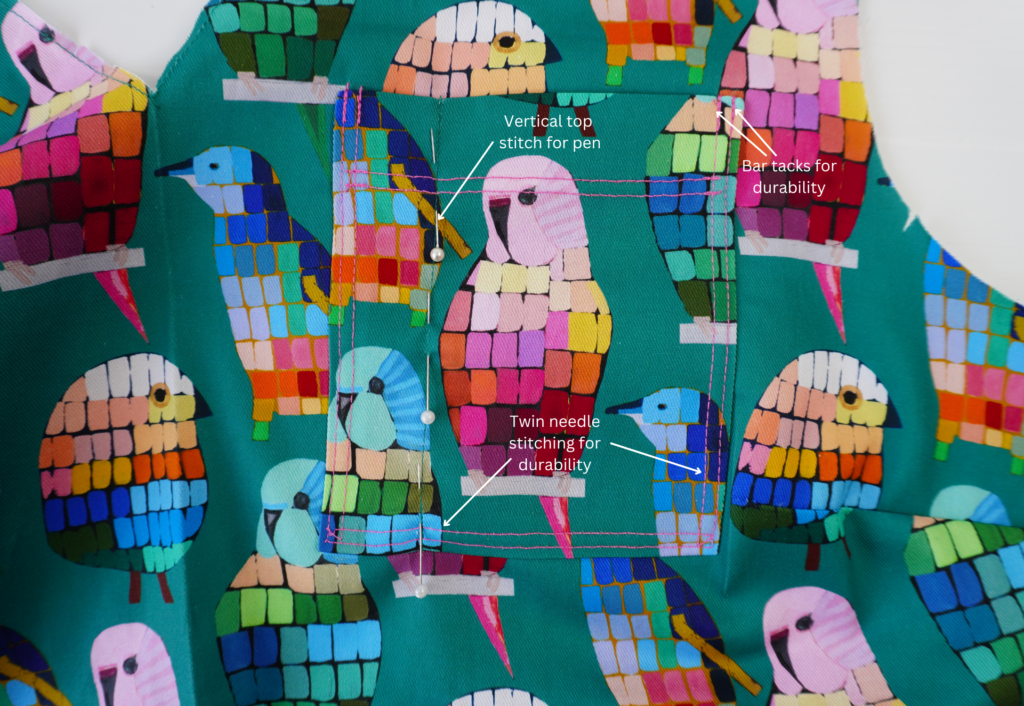
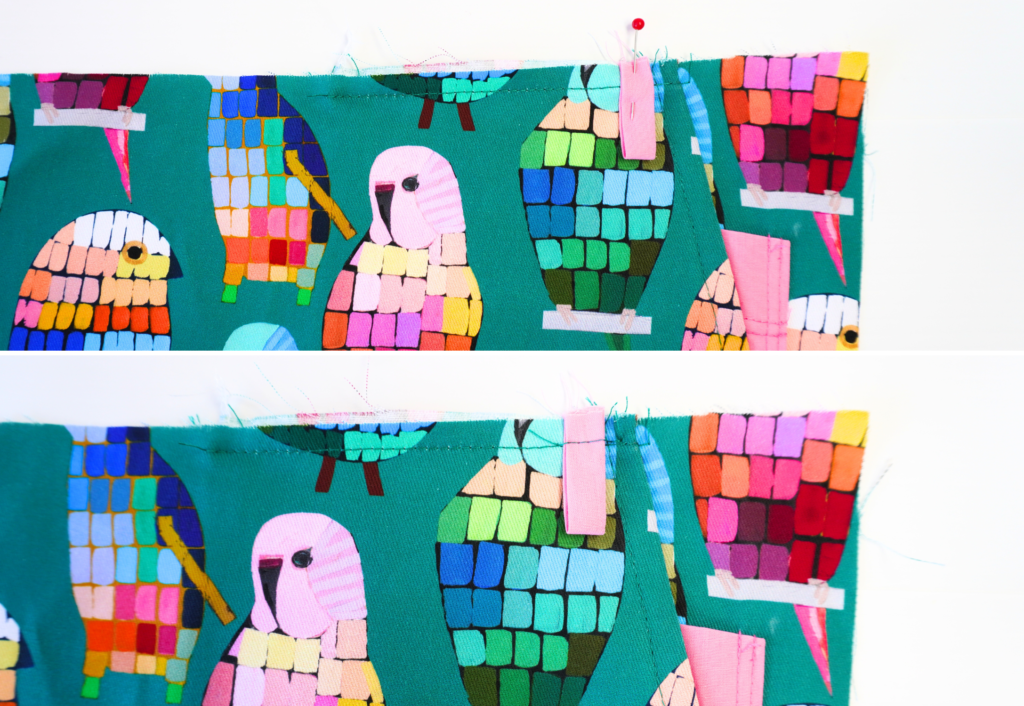
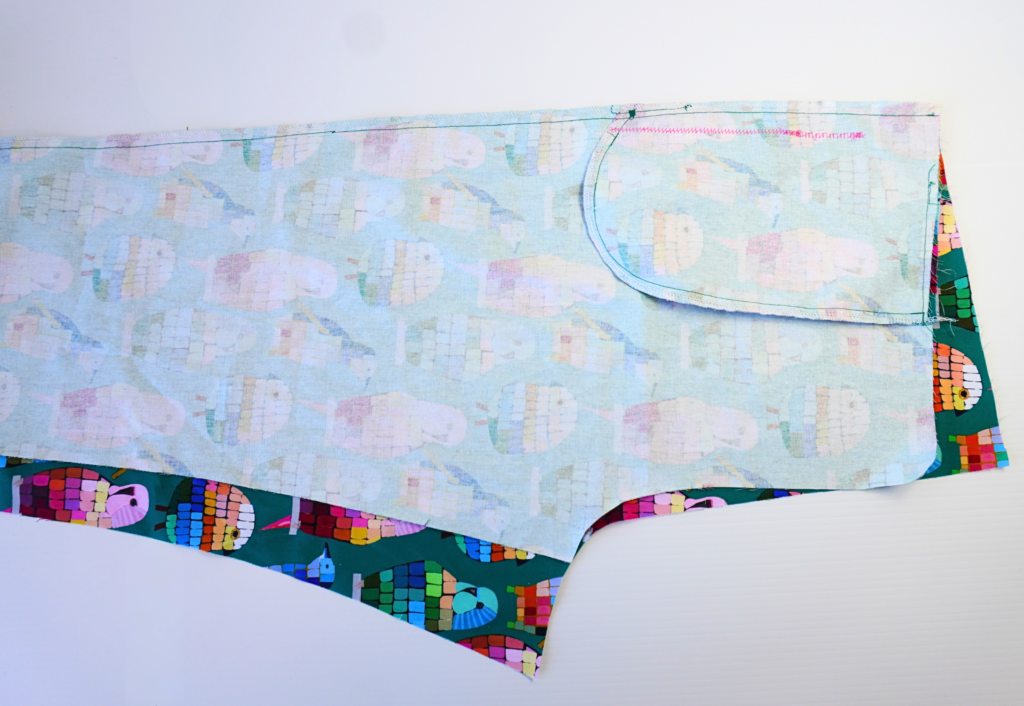
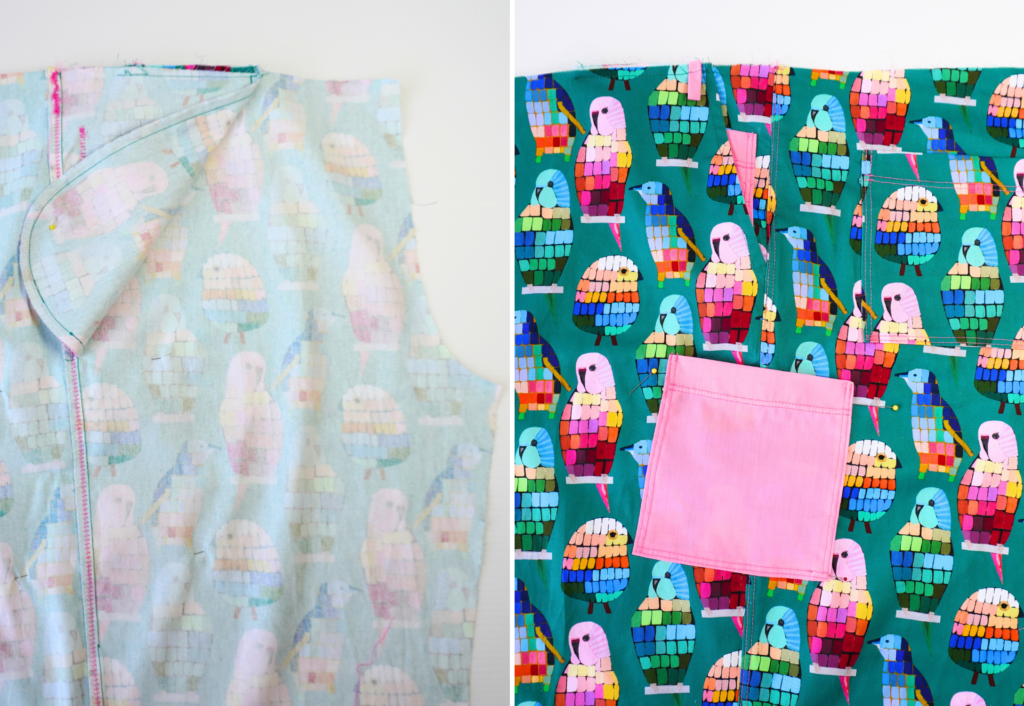
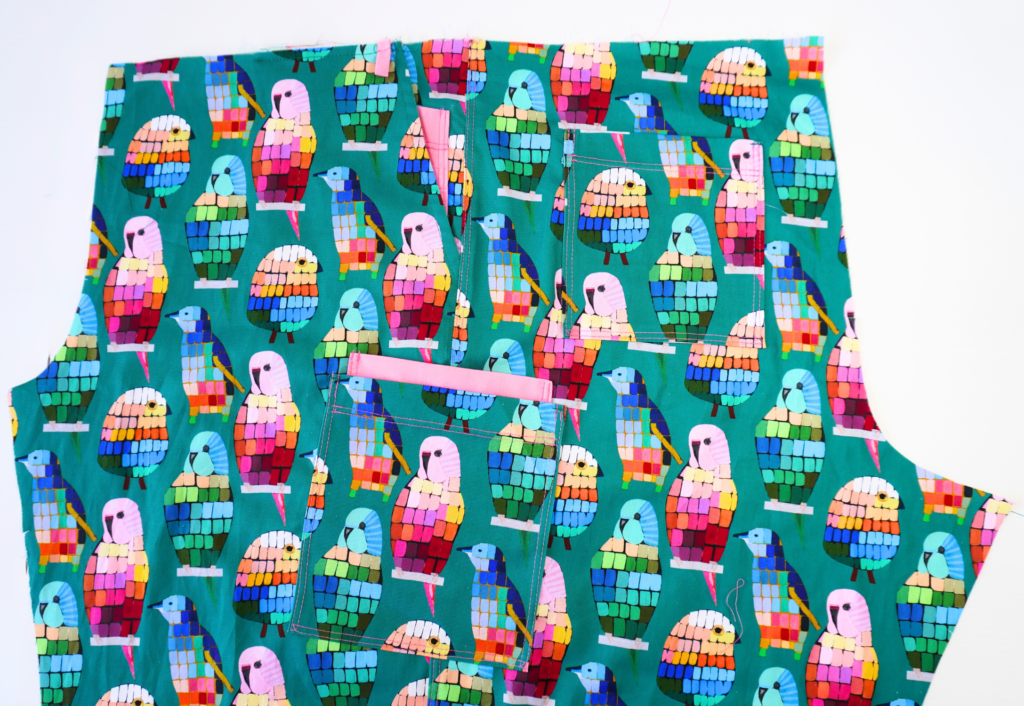
Pin the chest pocket to the front left side, and the two large pockets into position as shown on the pattern. Once in place stitch the pocket into place with an edge stitch, securing the top corners with a reinforcing stitch. You may choose to use a twin needle for extra durability.
Sew a vertical top stitch to the left or right side of the chest pocket for a pen – see pattern.
YOKE:
Back (2) box pleat – fold the pleats in the direction indicated by the arrows and notches on the pattern. Pin the pleats into place with the pin vertical to the seam, and press the box pleat into place. Baste the top of the pleat.
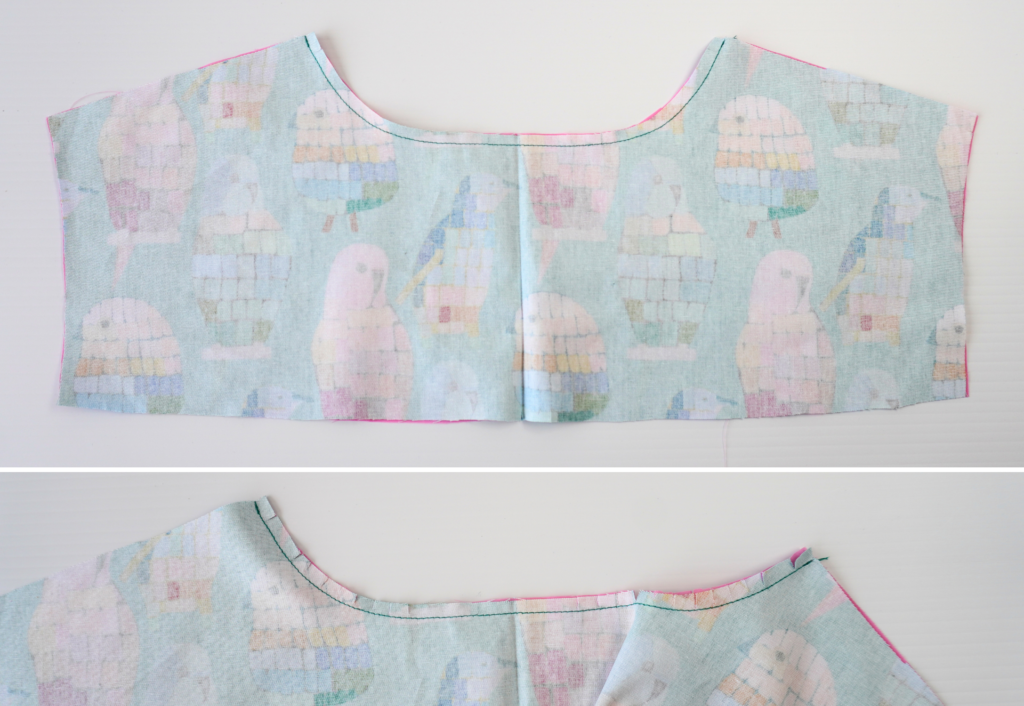
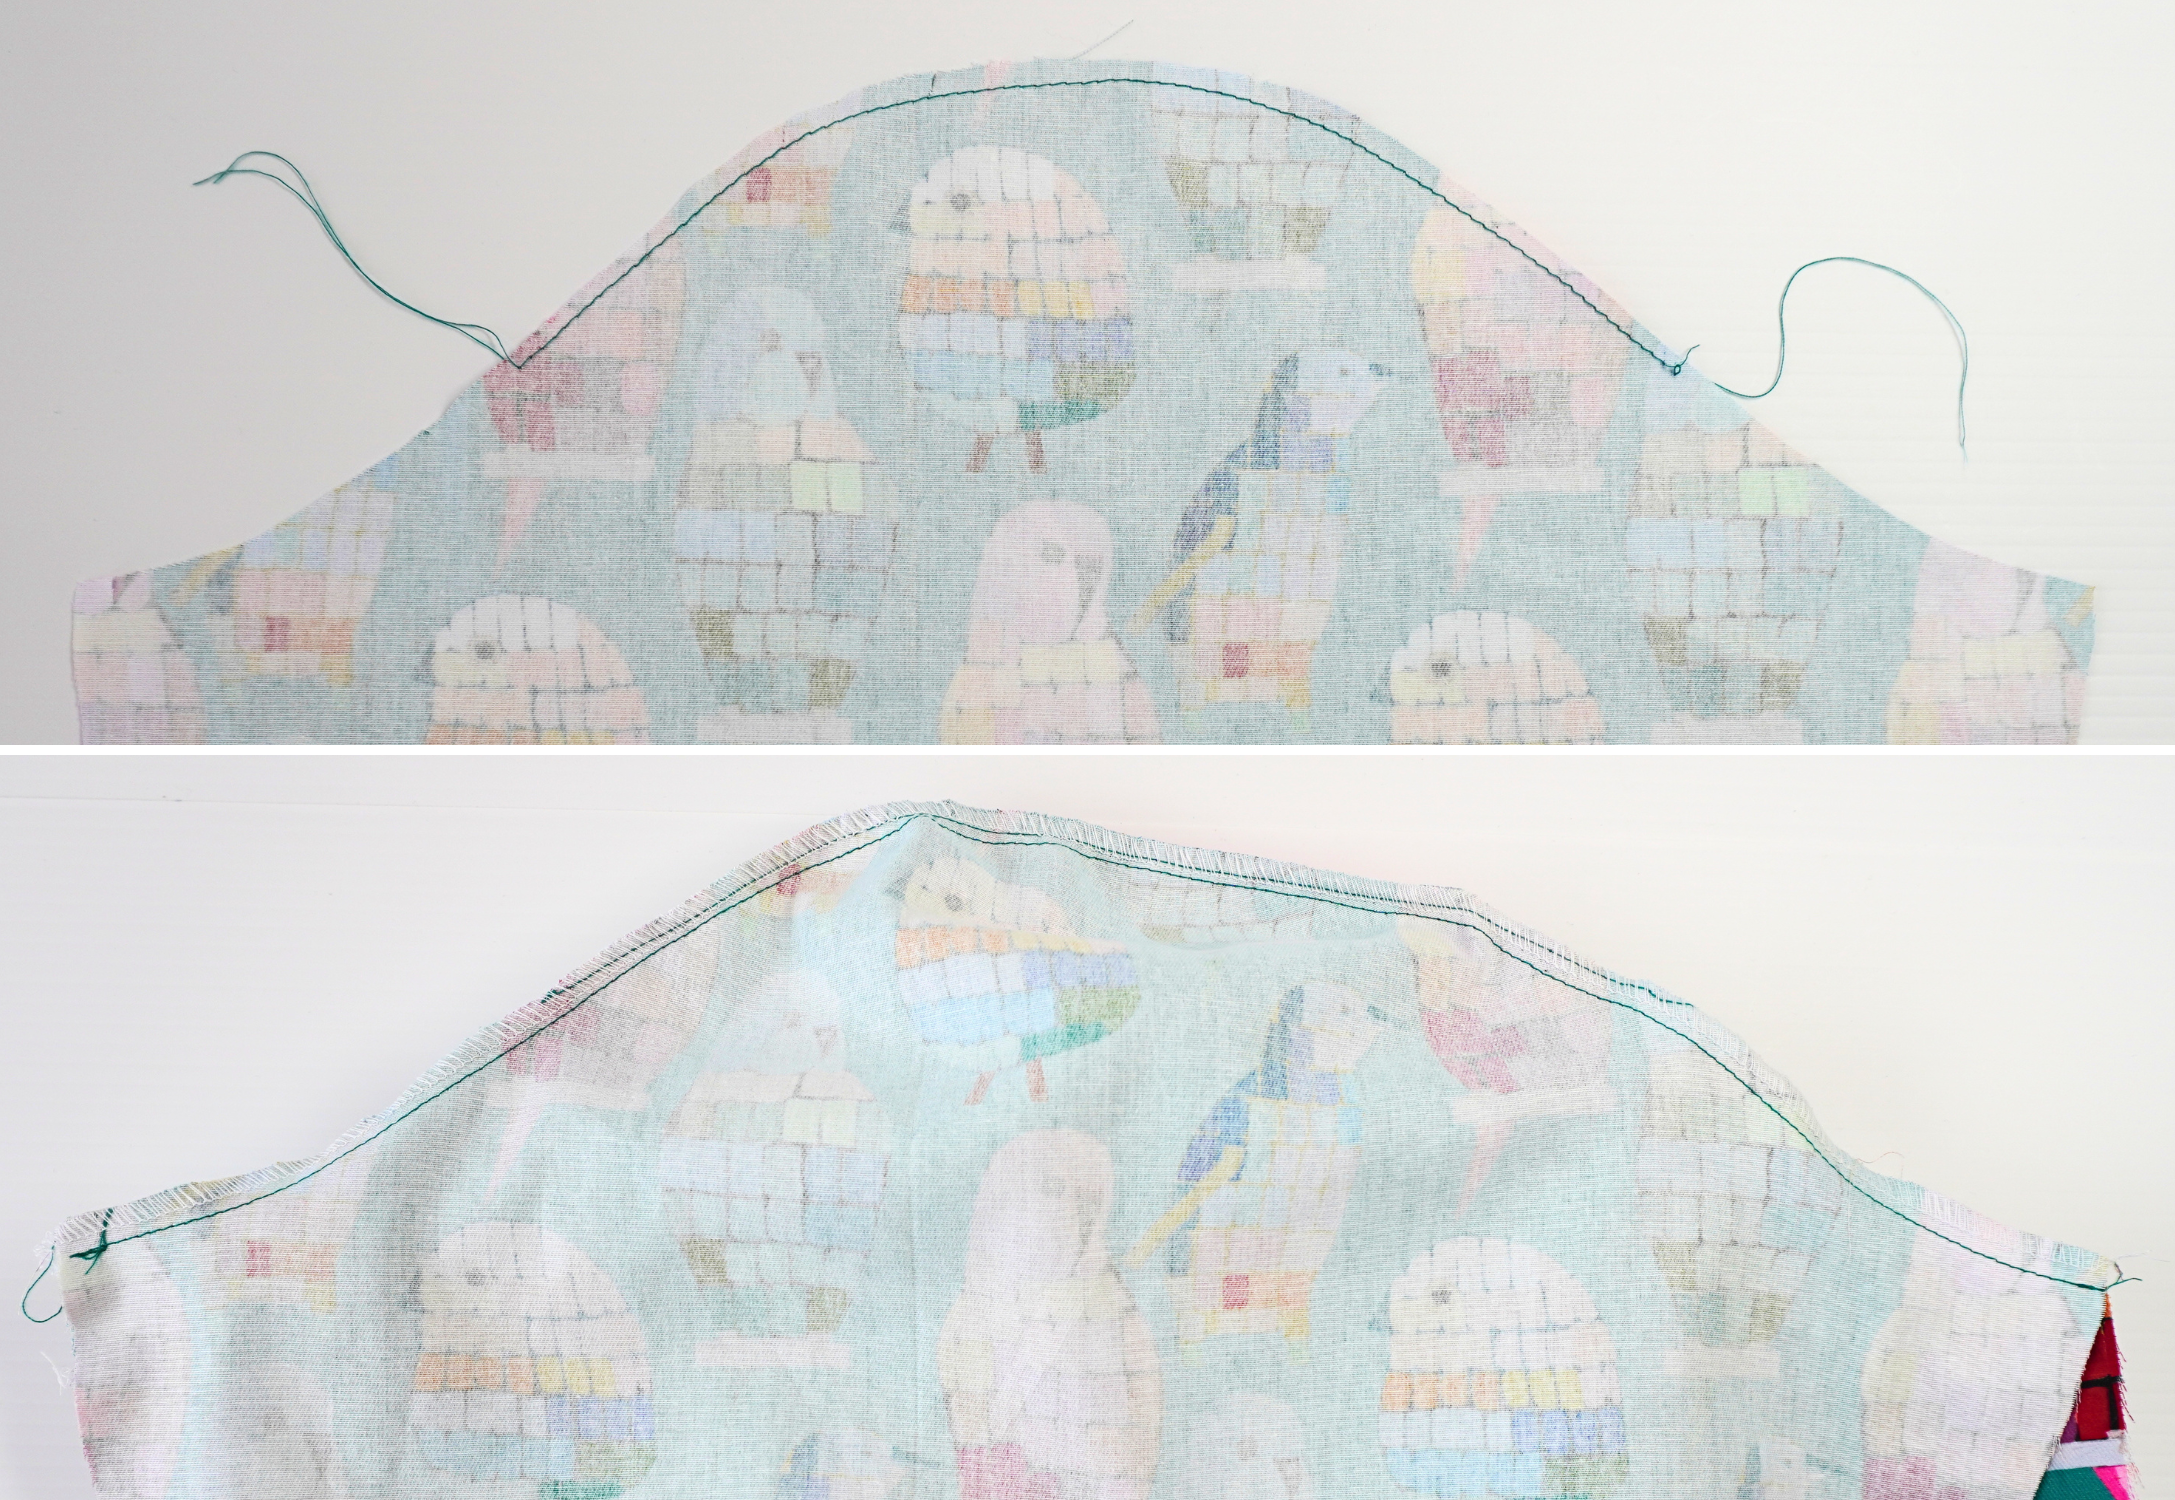
With RST, sew the Back Yoke (1) pair together at the neck opening using a 6mm (1/4”) seam.
Clip into the curved seam to release the fabric, then press the seam toward the inner yoke.
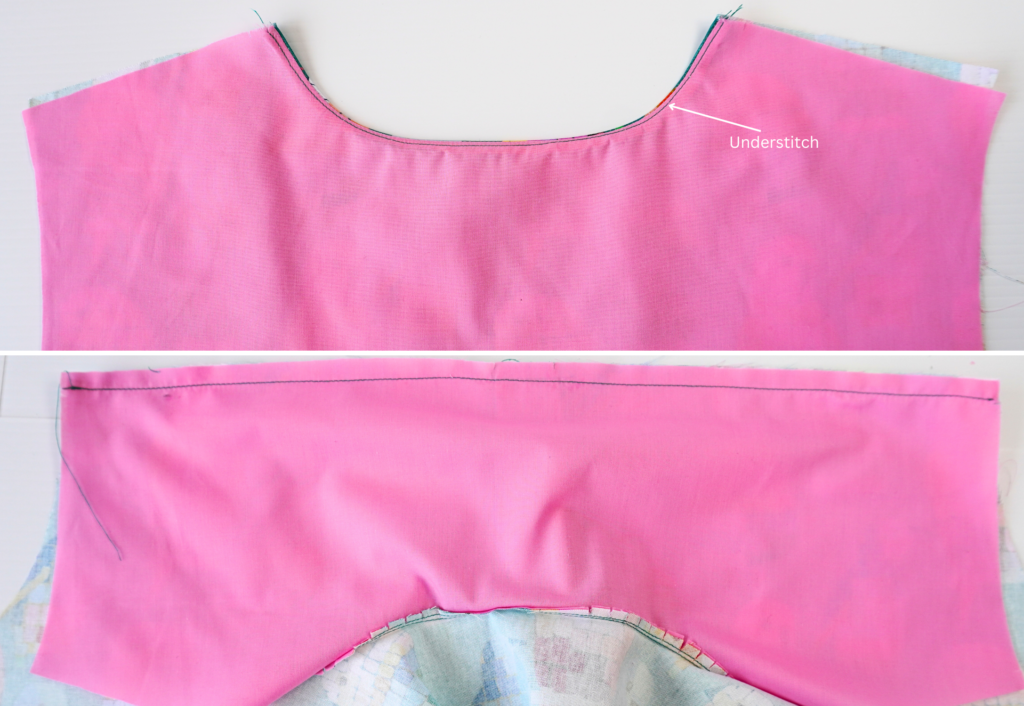
Sew an understitch on the side of the inner yoke. Press the lower seam allowance of the outer yoke 1cm (3/8”) to the inside.
Pin the lower edge of the right side of the inner yoke to the wrong side of Back (2) and sew.
Press the seam toward the yoke, then pin the pre-pressed outer yoke seam to the right side of the back and edge stitch into place. Then sew a second row of top stitching (6mm/¼”) . You can also use the ‘burrito’ method, see our tutorial How To Sew a Neat Shirt Yoke.
NECKBAND:
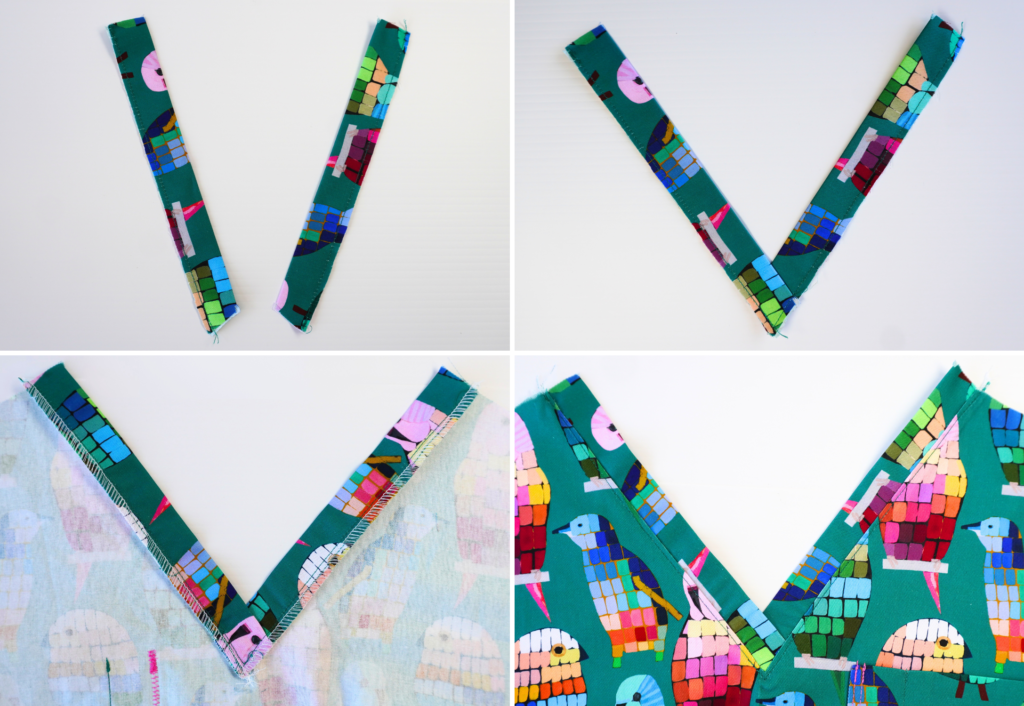
With WST press the Front Neck (5) pair in half lengthways and baste the raw edges together to hold in place.
Lay the ends of the front neck on top of each other crossing – right over left for women’s, left over right for men’s (this is the traditional way – feel free to sew it whichever way you prefer).
Baste the V of the neckband together.
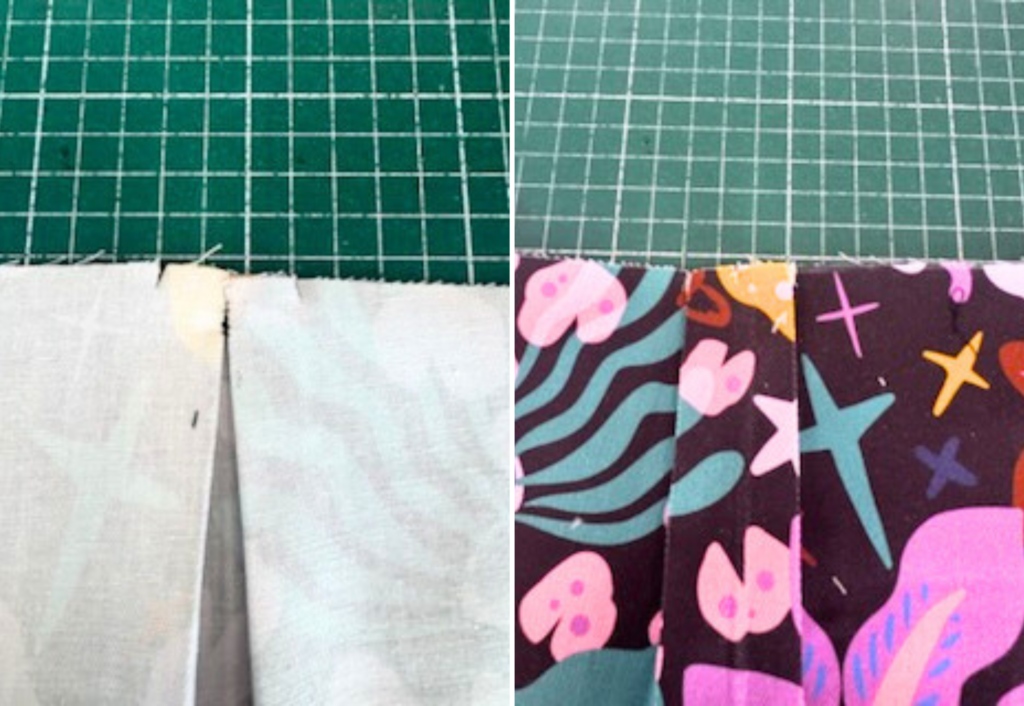
Carefully clip into the seam at the V at the centre front of the body (see diagram), then with RST, pin the neckband to the neck of the front body, matching the centre front V neck to the pointed cross over section of the neckband. Sew using a 6mm (1/4”) seam, then neaten with an overlocker/serger and press toward the body.
Sew an edge stitch close to the seam around the neck on the side of the body.
MAIN BODY:

With RST, fold the Loops (15) in half lengthways and sew along the long edge using a 6mm (1/4”) seam.
Turn out to the right side and press.
Cut into four pieces and set two aside for the pant.
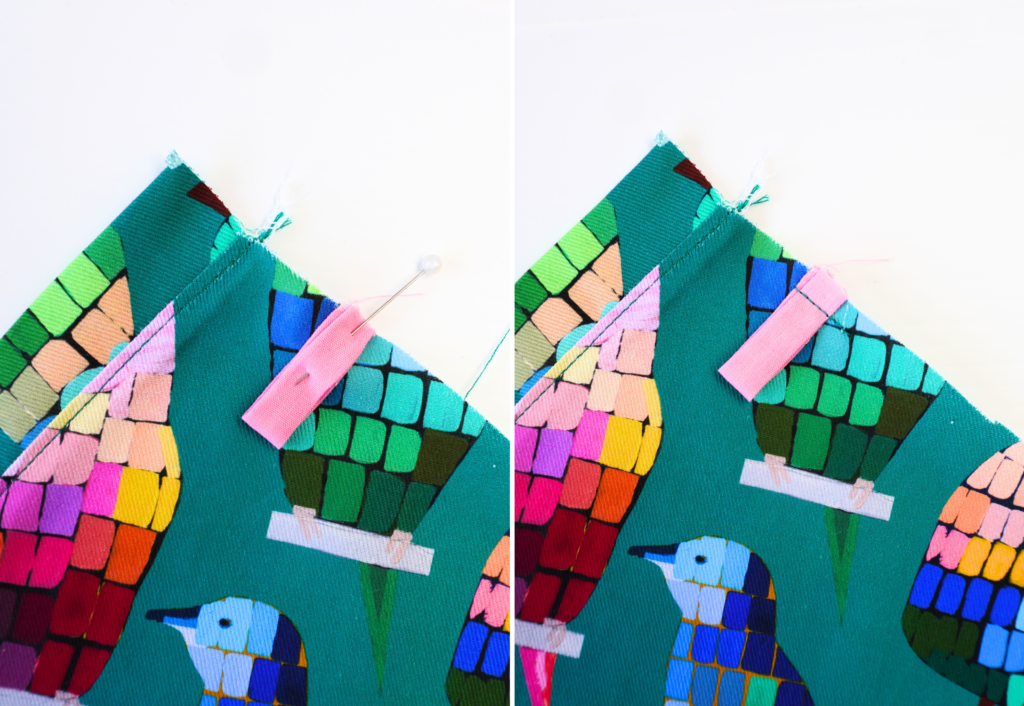
Fold two of the loops in half, and pin to the front shoulder seams at the notches. Baste into place.
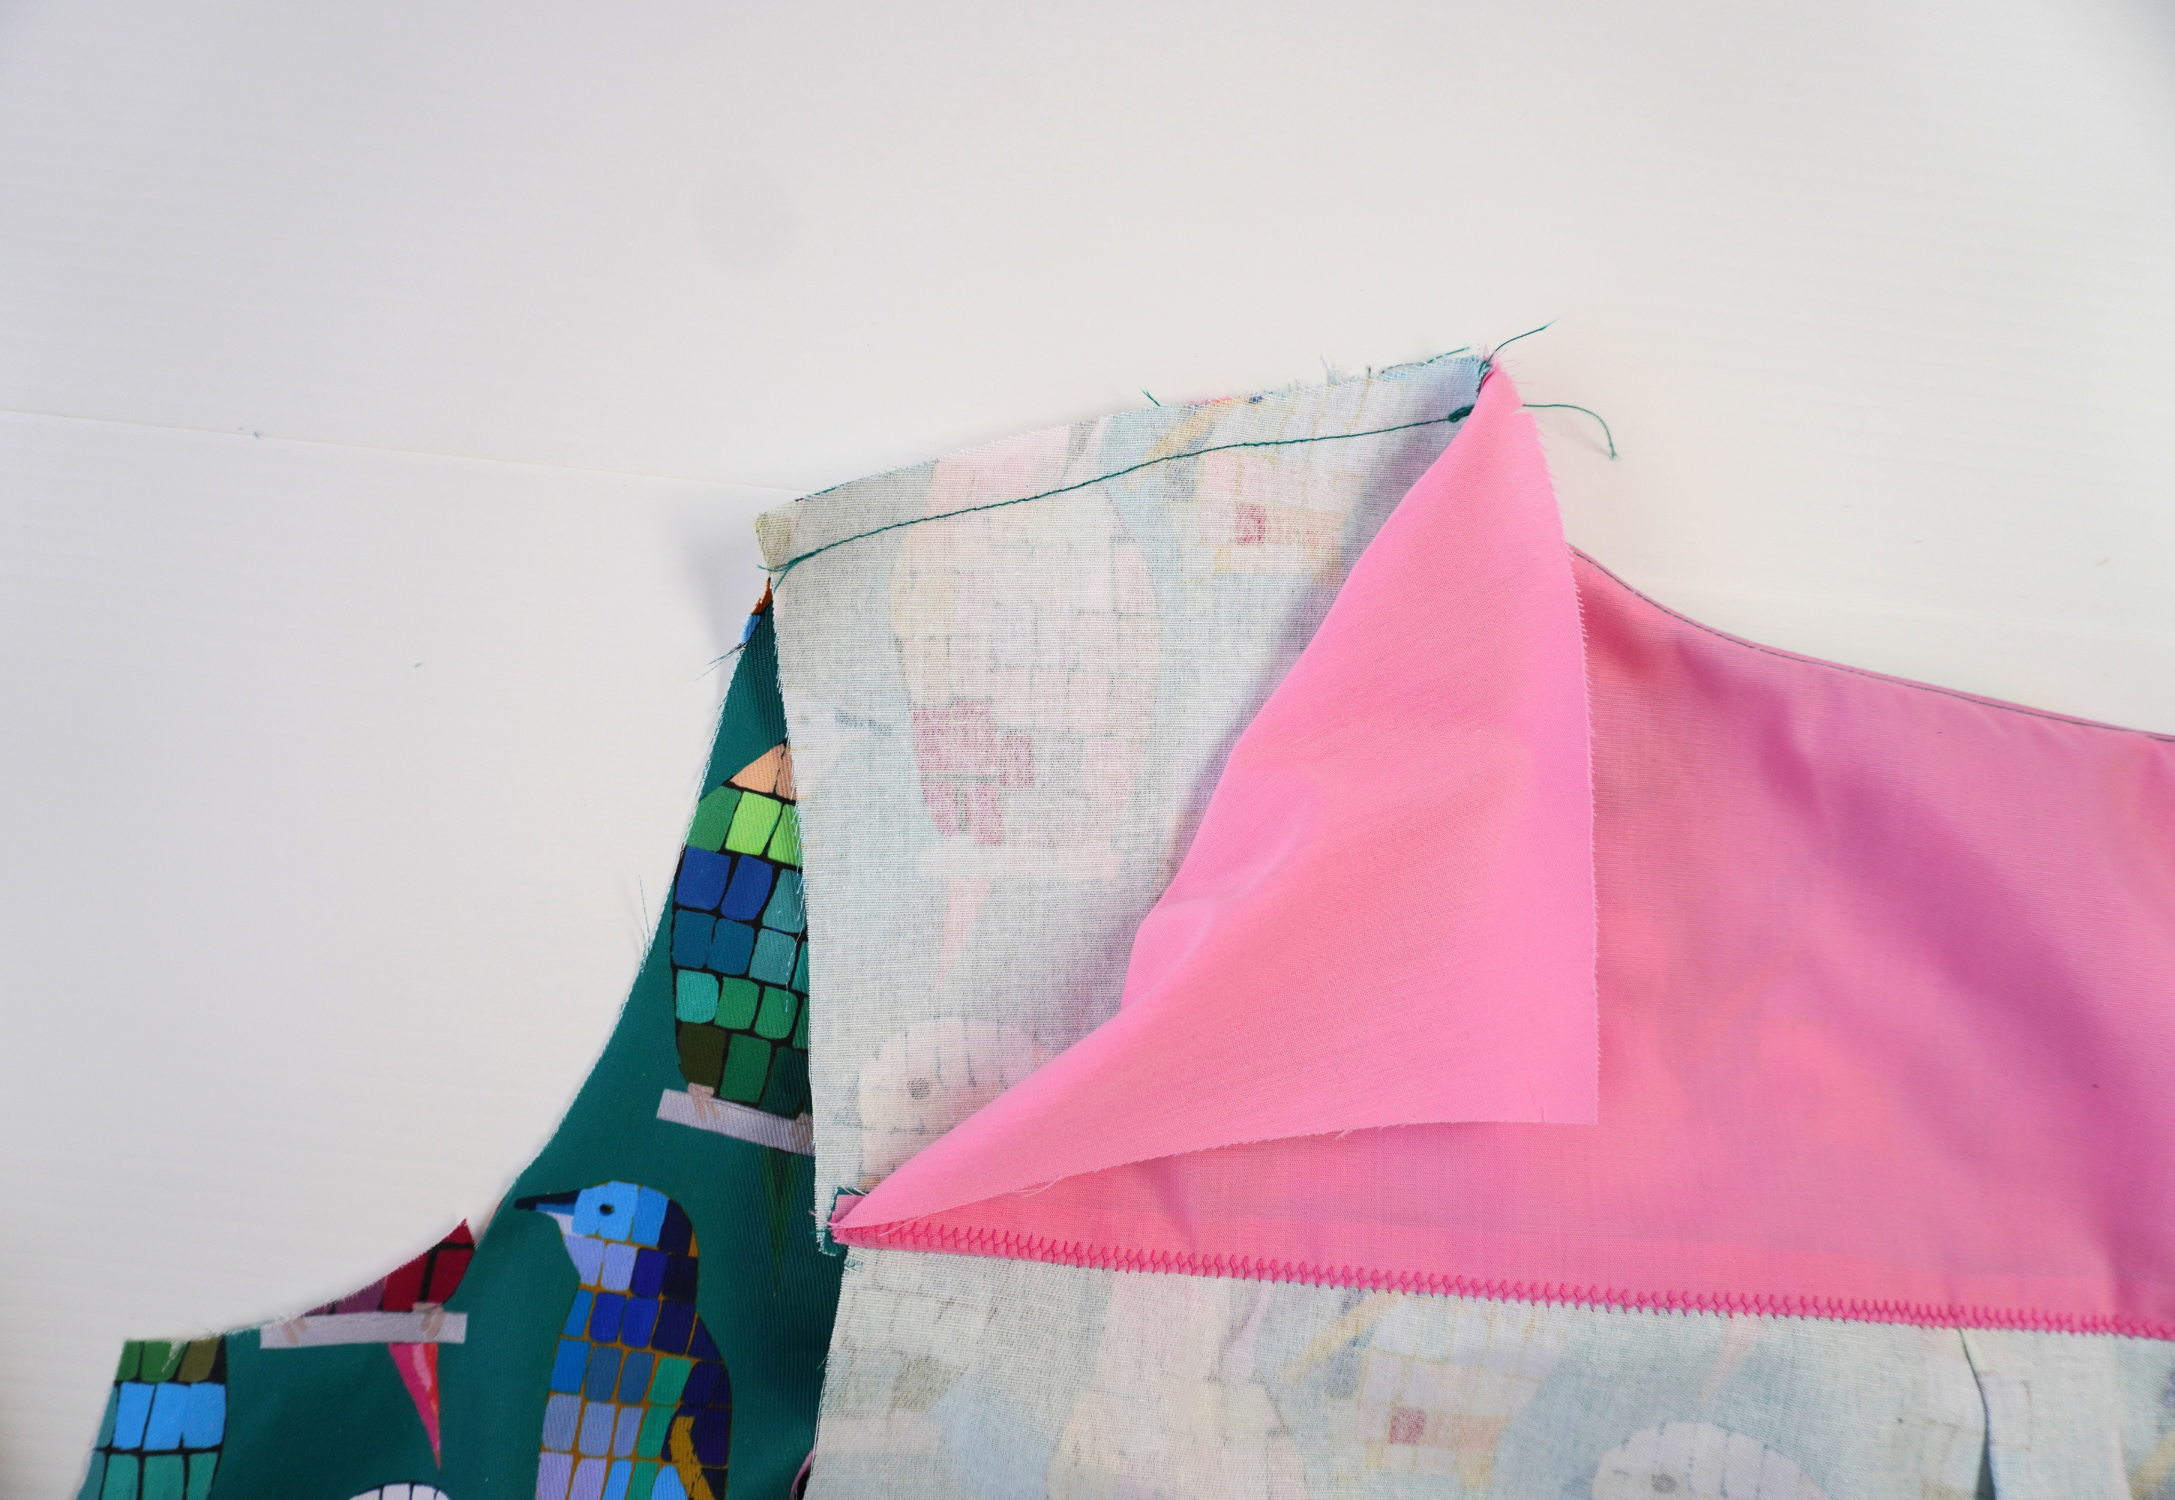
Separate the back yokes at the shoulders. With RST pin the front to back at the shoulders, outer fabric only (the inner yoke is left out of this step), and sew.
Turn the inner yoke shoulder seam 1cm (3/8”) to the inside and press.
Pin the inner yoke into place to the under side of the shoulder seam, and top stitch into place.
Sew a long ease stitch to the head of the sleeve and draw in slightly. This will make it easier to fit the sleeve into the armhole.
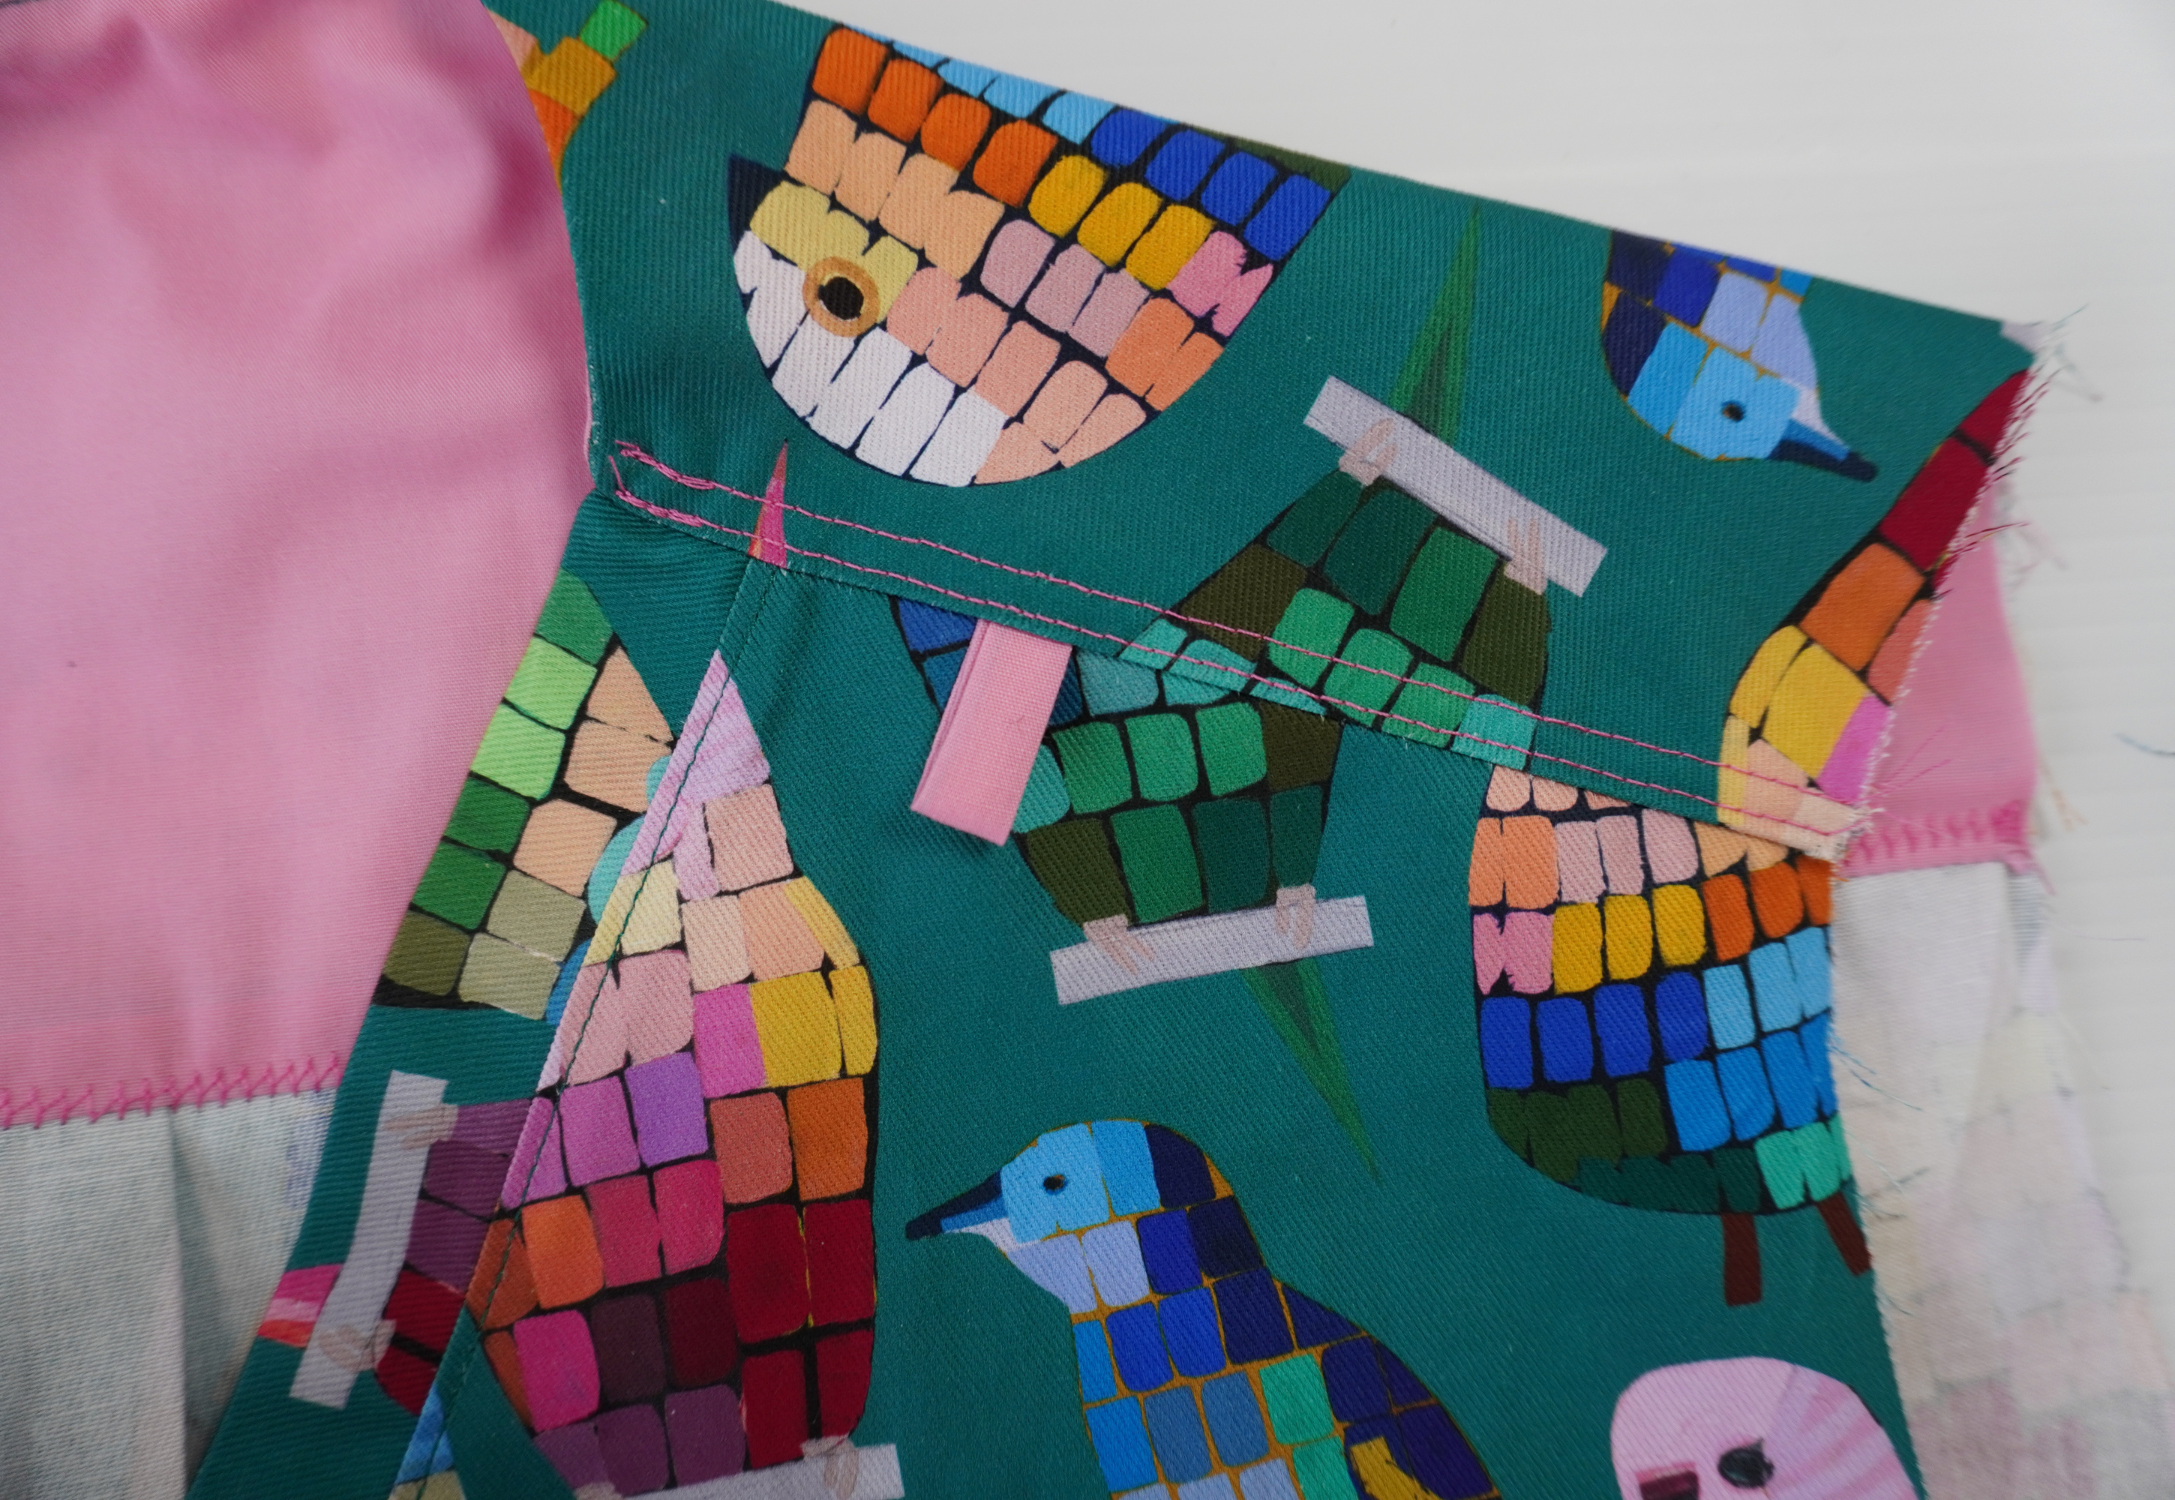
With RST and notches aligned, pin the Sleeve (4) to the armhole. Sew then neaten using an overlocker/serger and press toward the body.

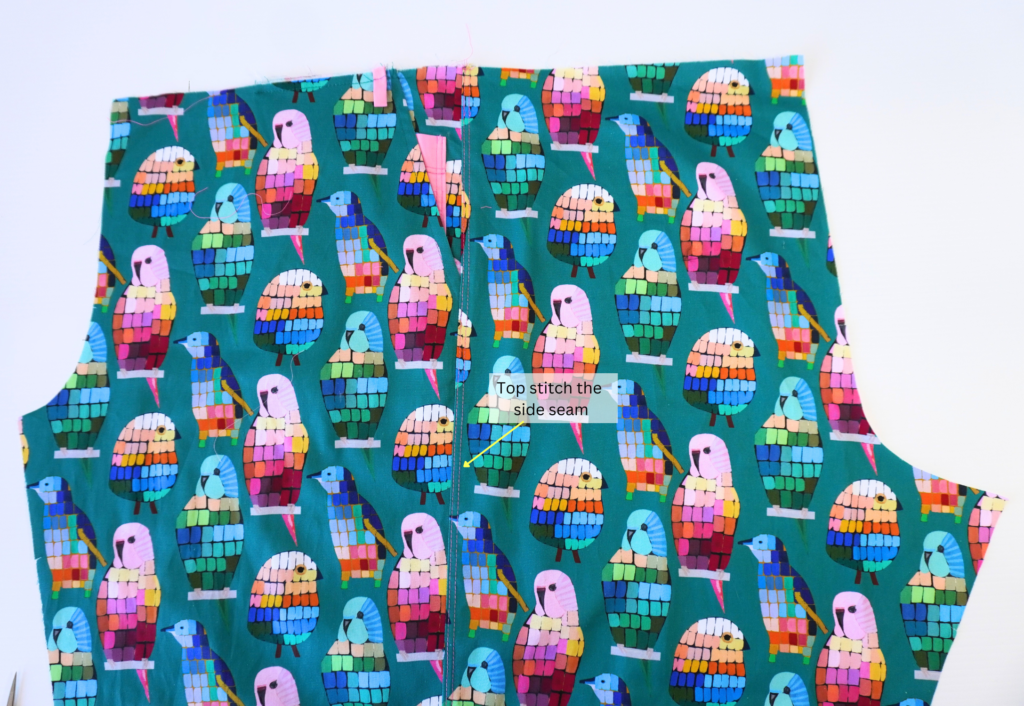
Sew a 6mm (1/4”) top stitch to the seam on the side of the body.
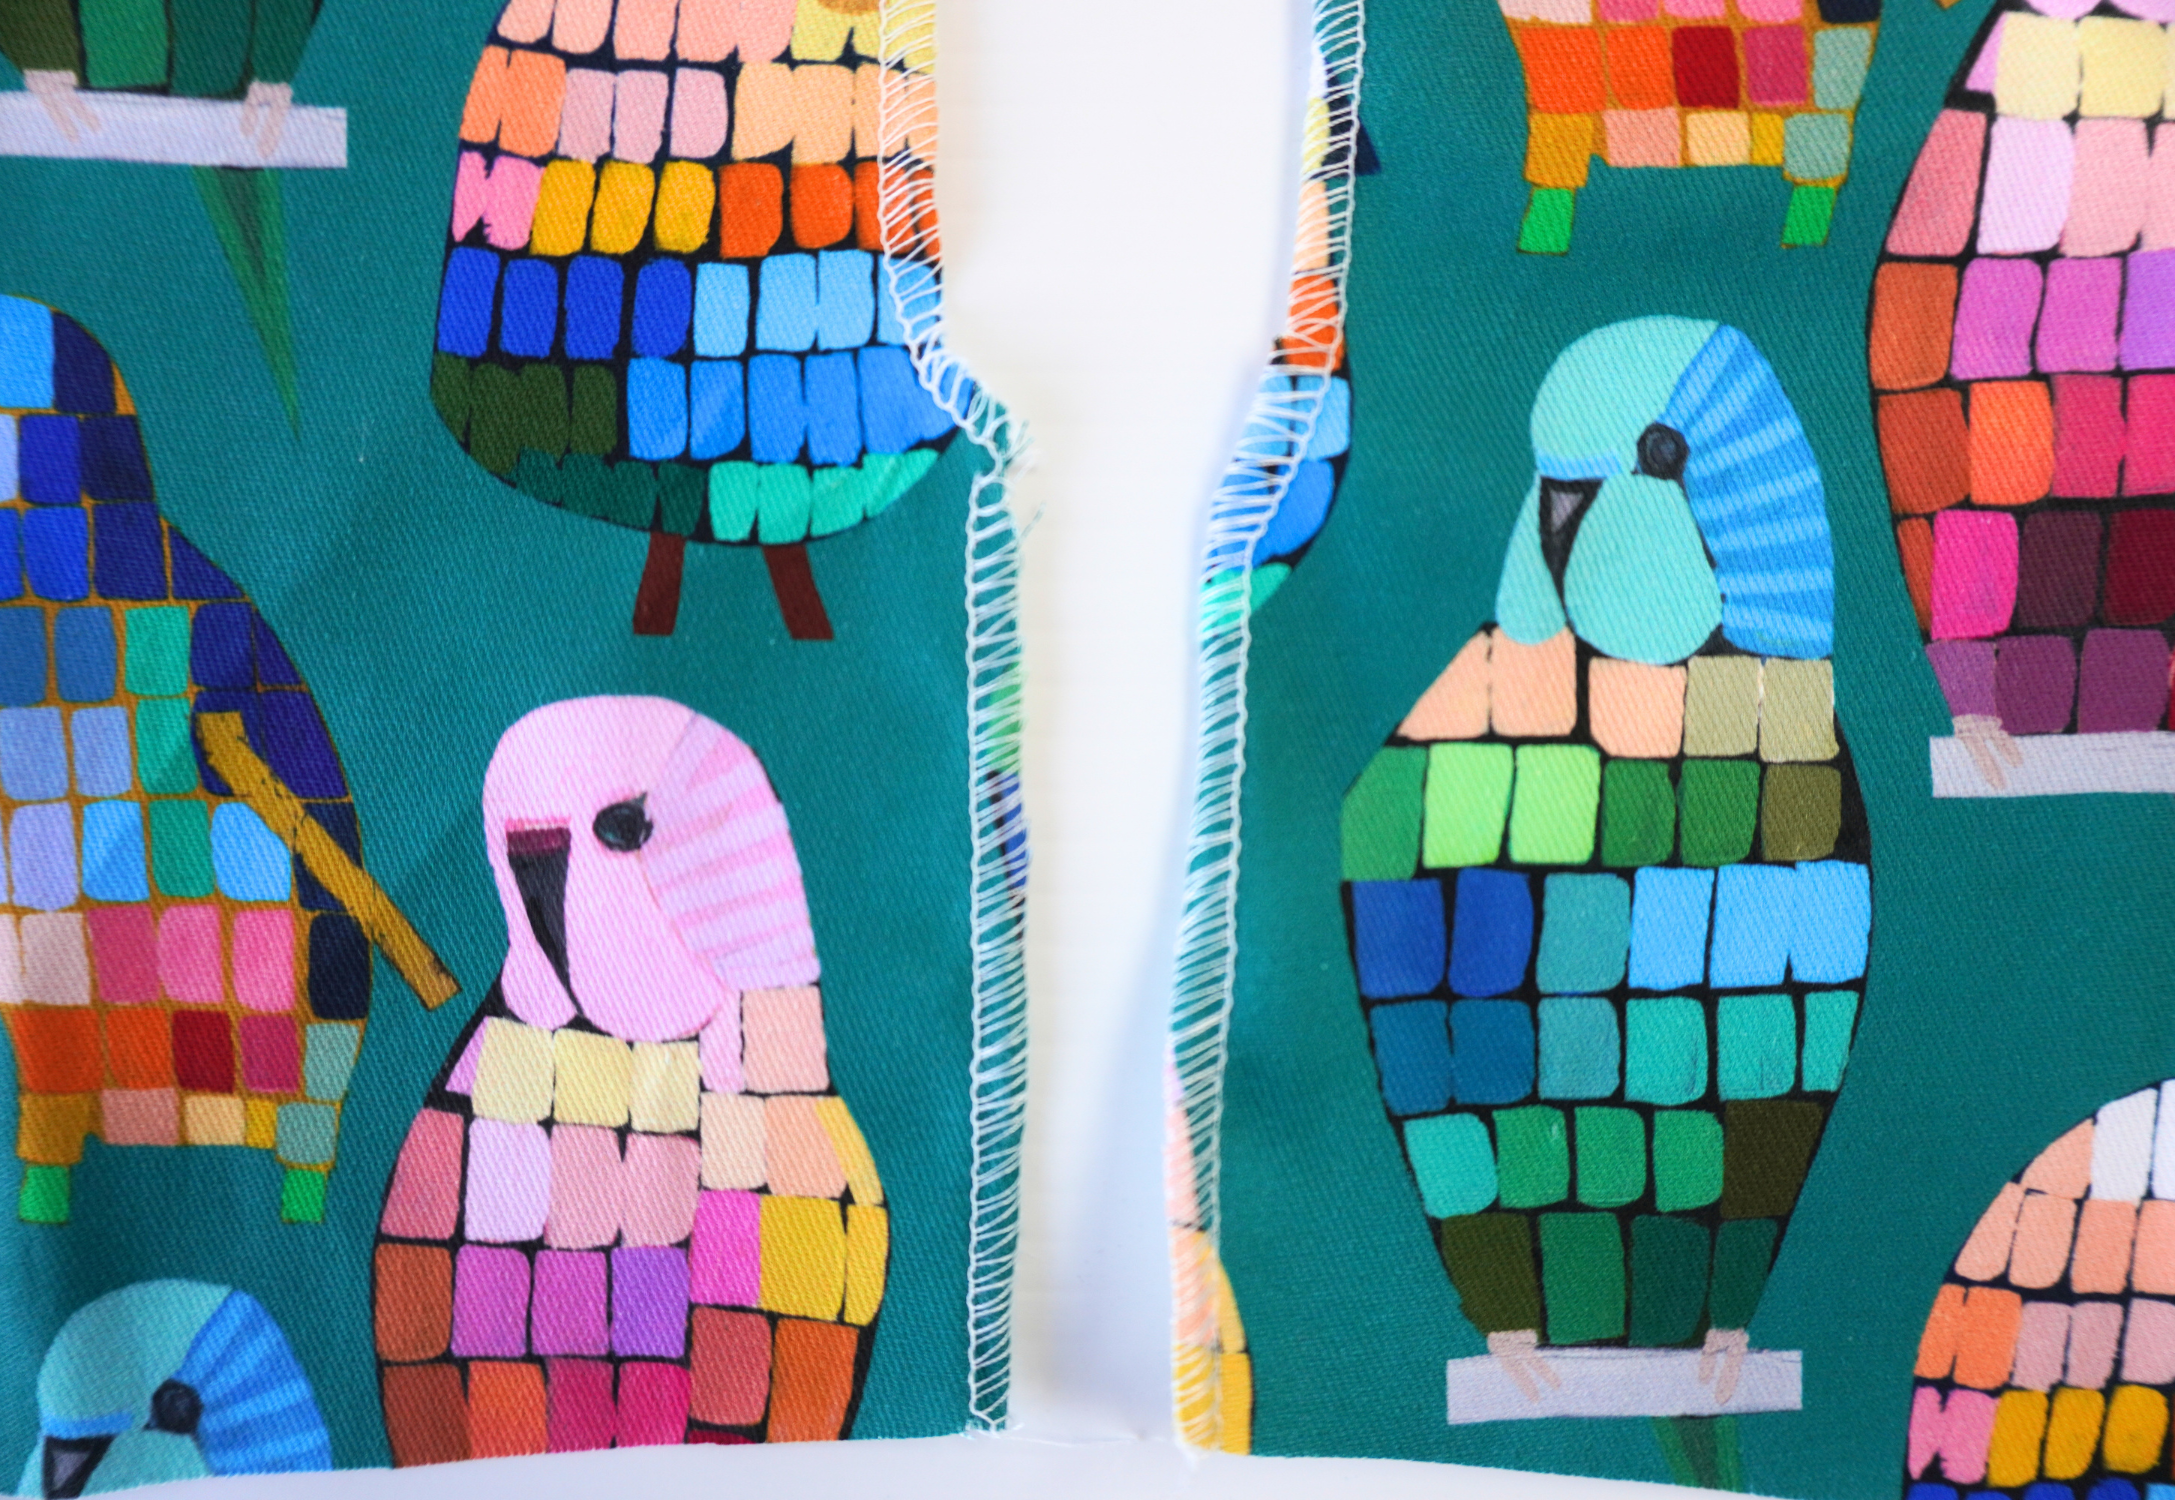
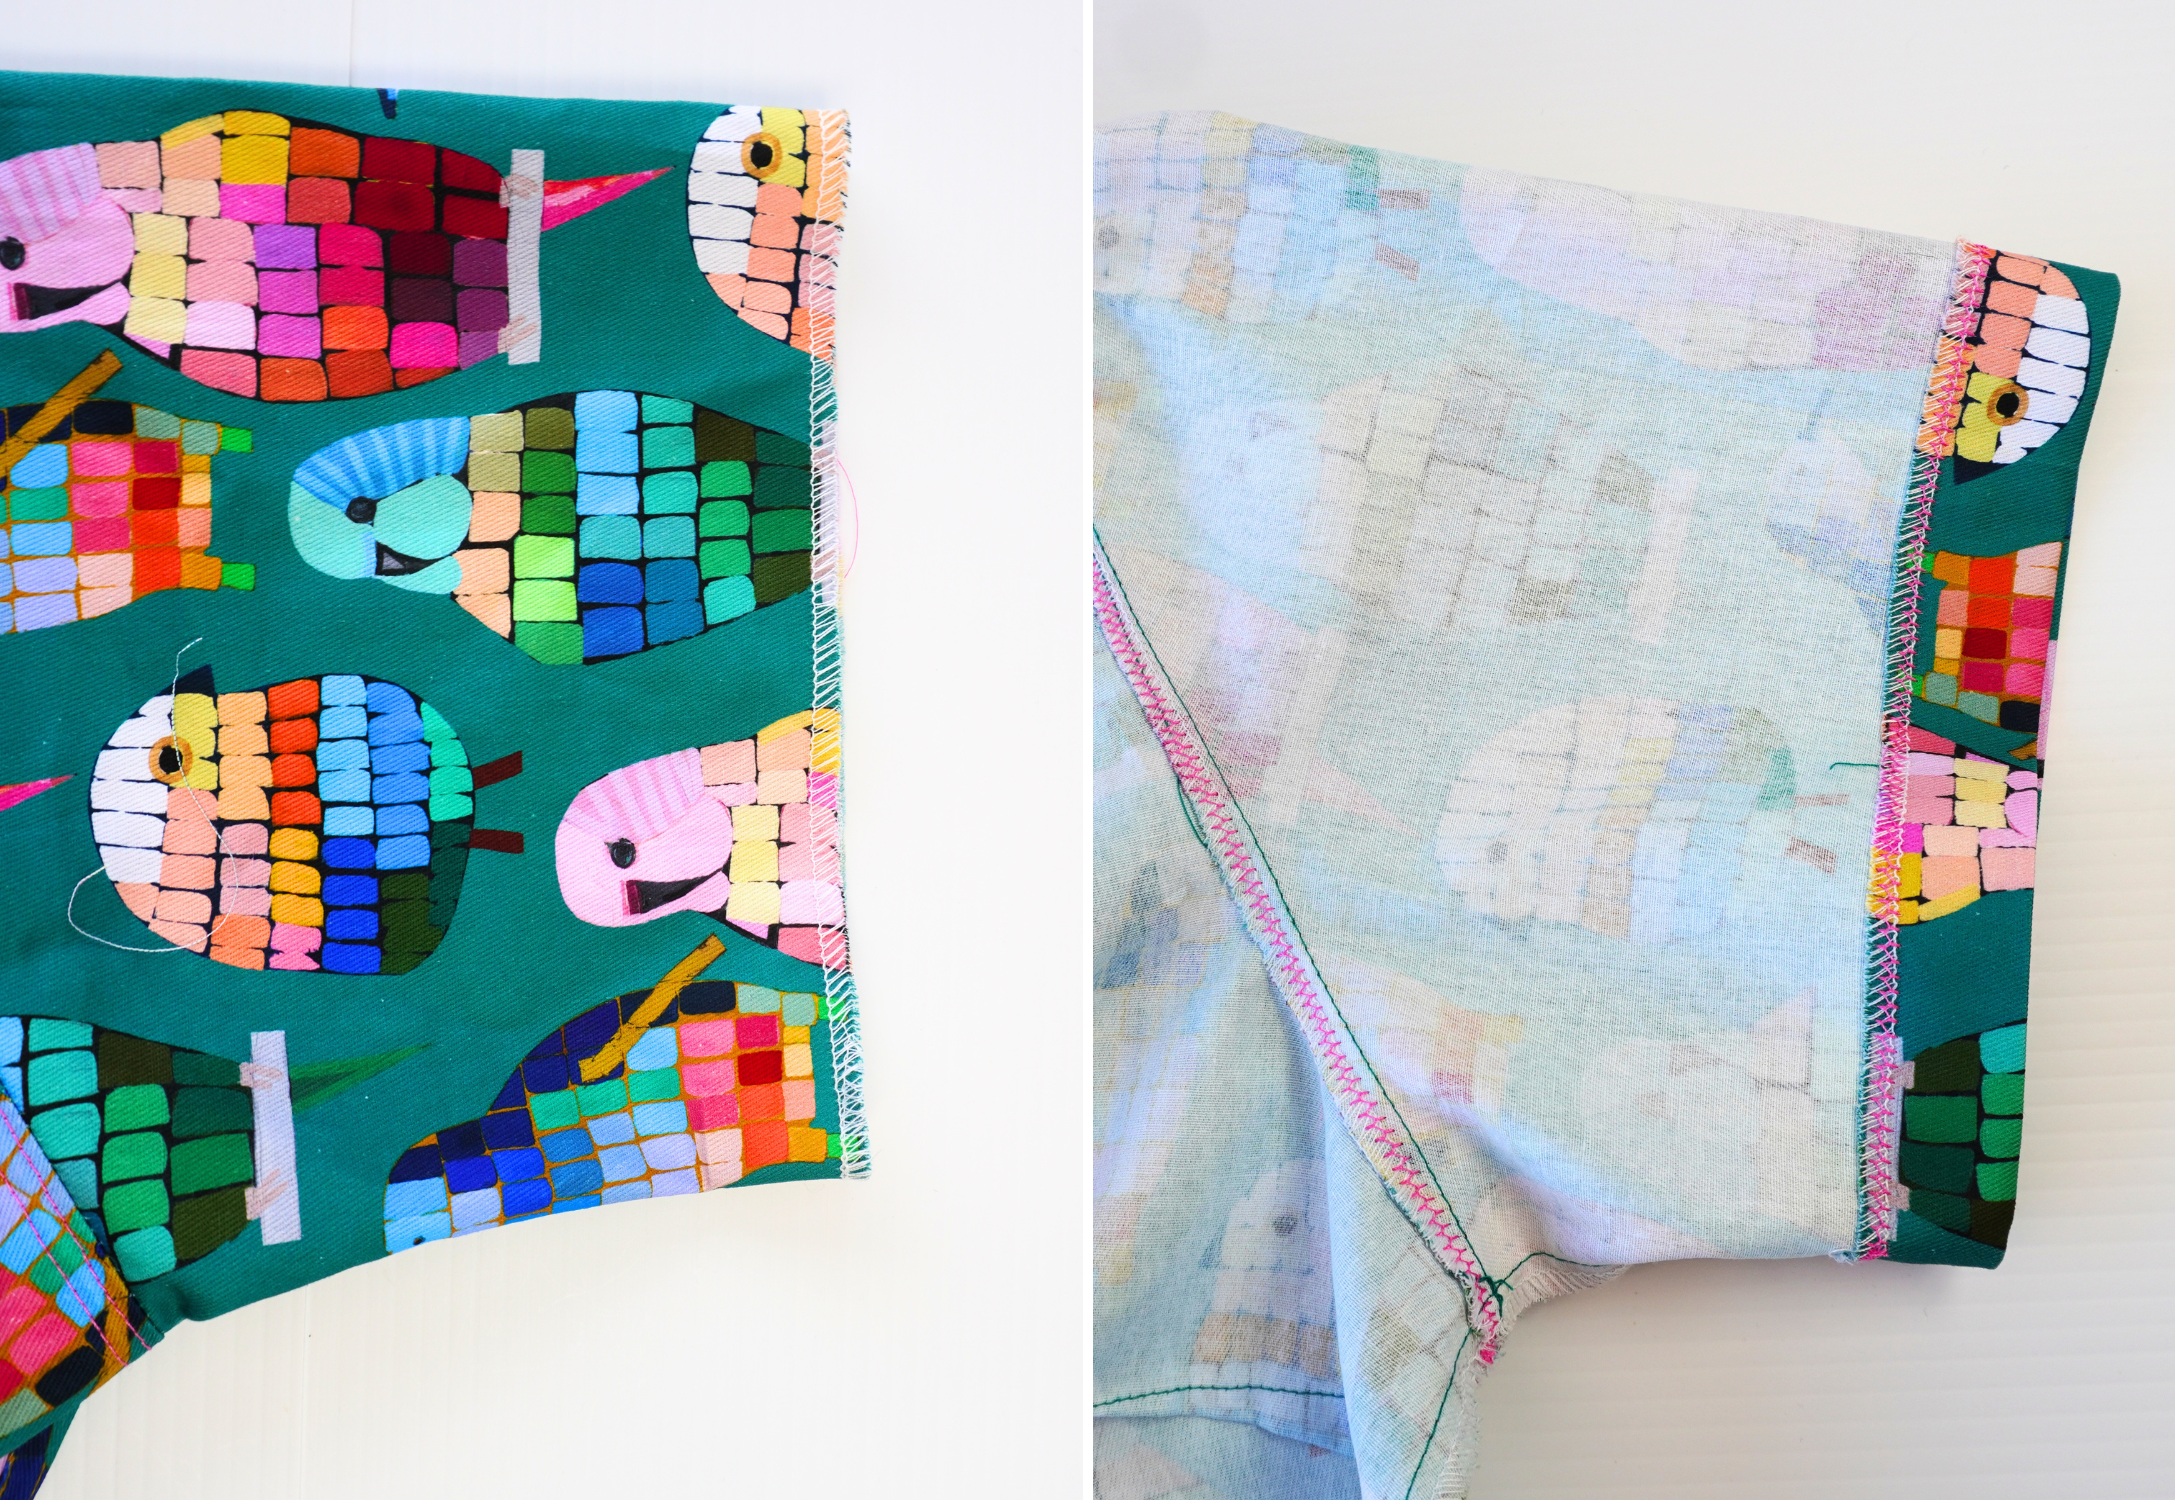
Neaten the lower part of each side seam separately (from the hem to approximately 2.5 cm (1”) above the split notch) using an overlocker/serger.
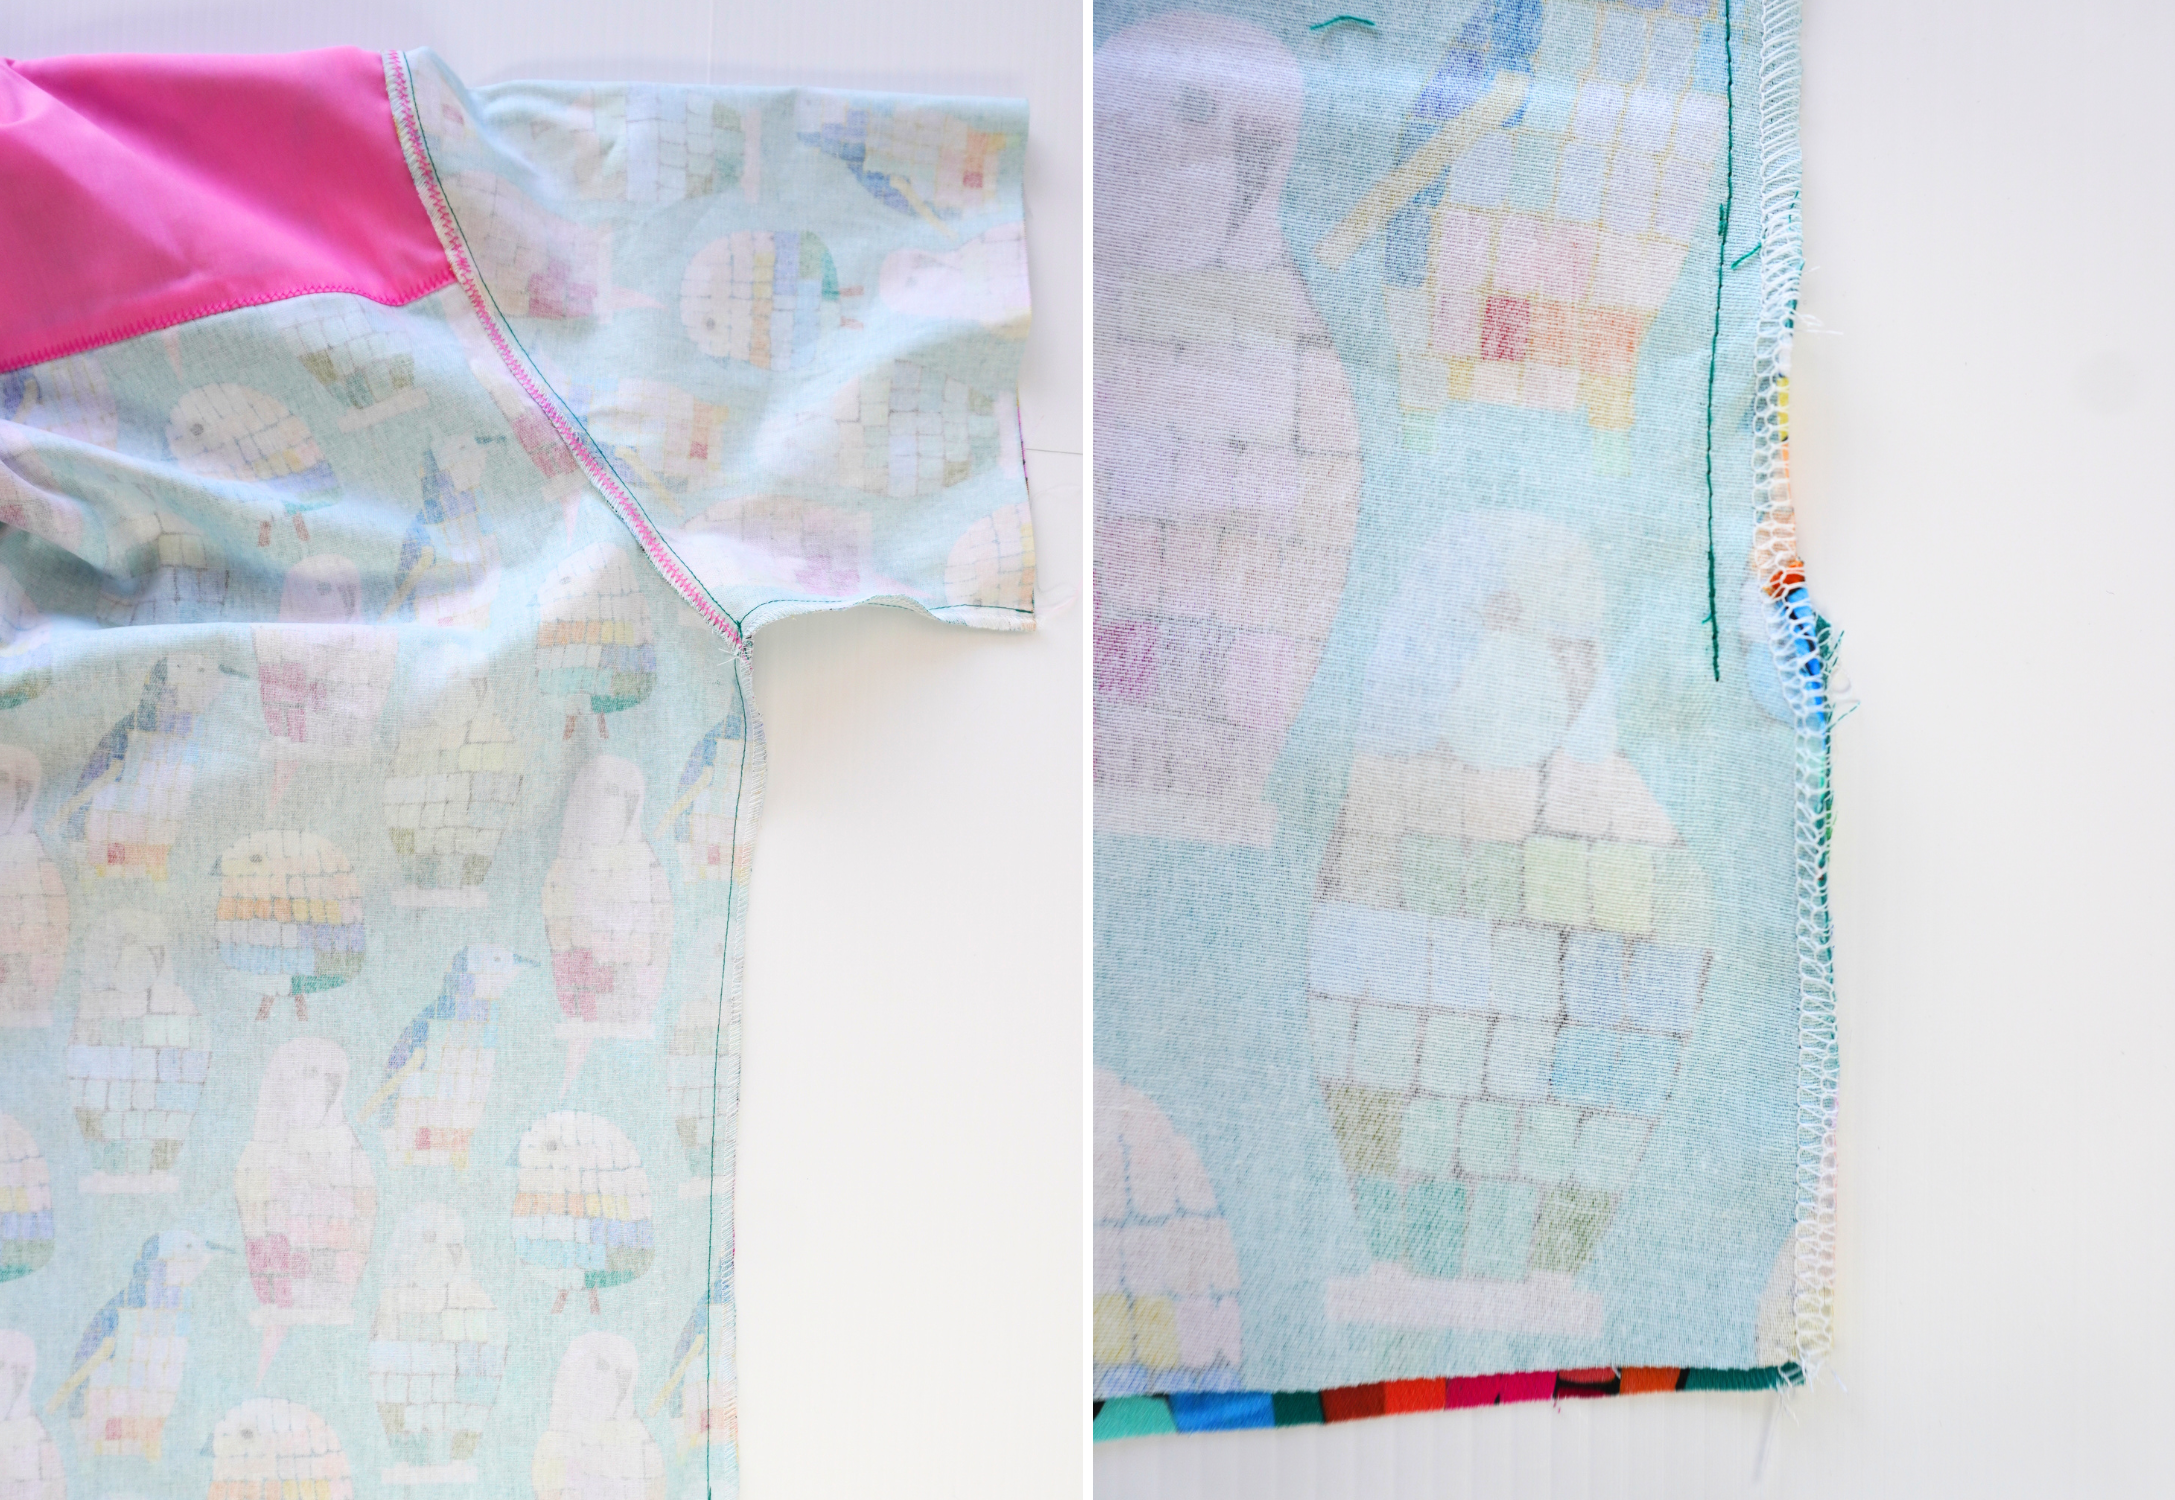
Pin the back to front at the side seam and under sleeve seam. Starting at the sleeve hem, sew the under sleeve and side seam, finishing at the notch indicating the split. Neaten using an overlocker/serger, as far as the previously neatened edges. Press toward the back.
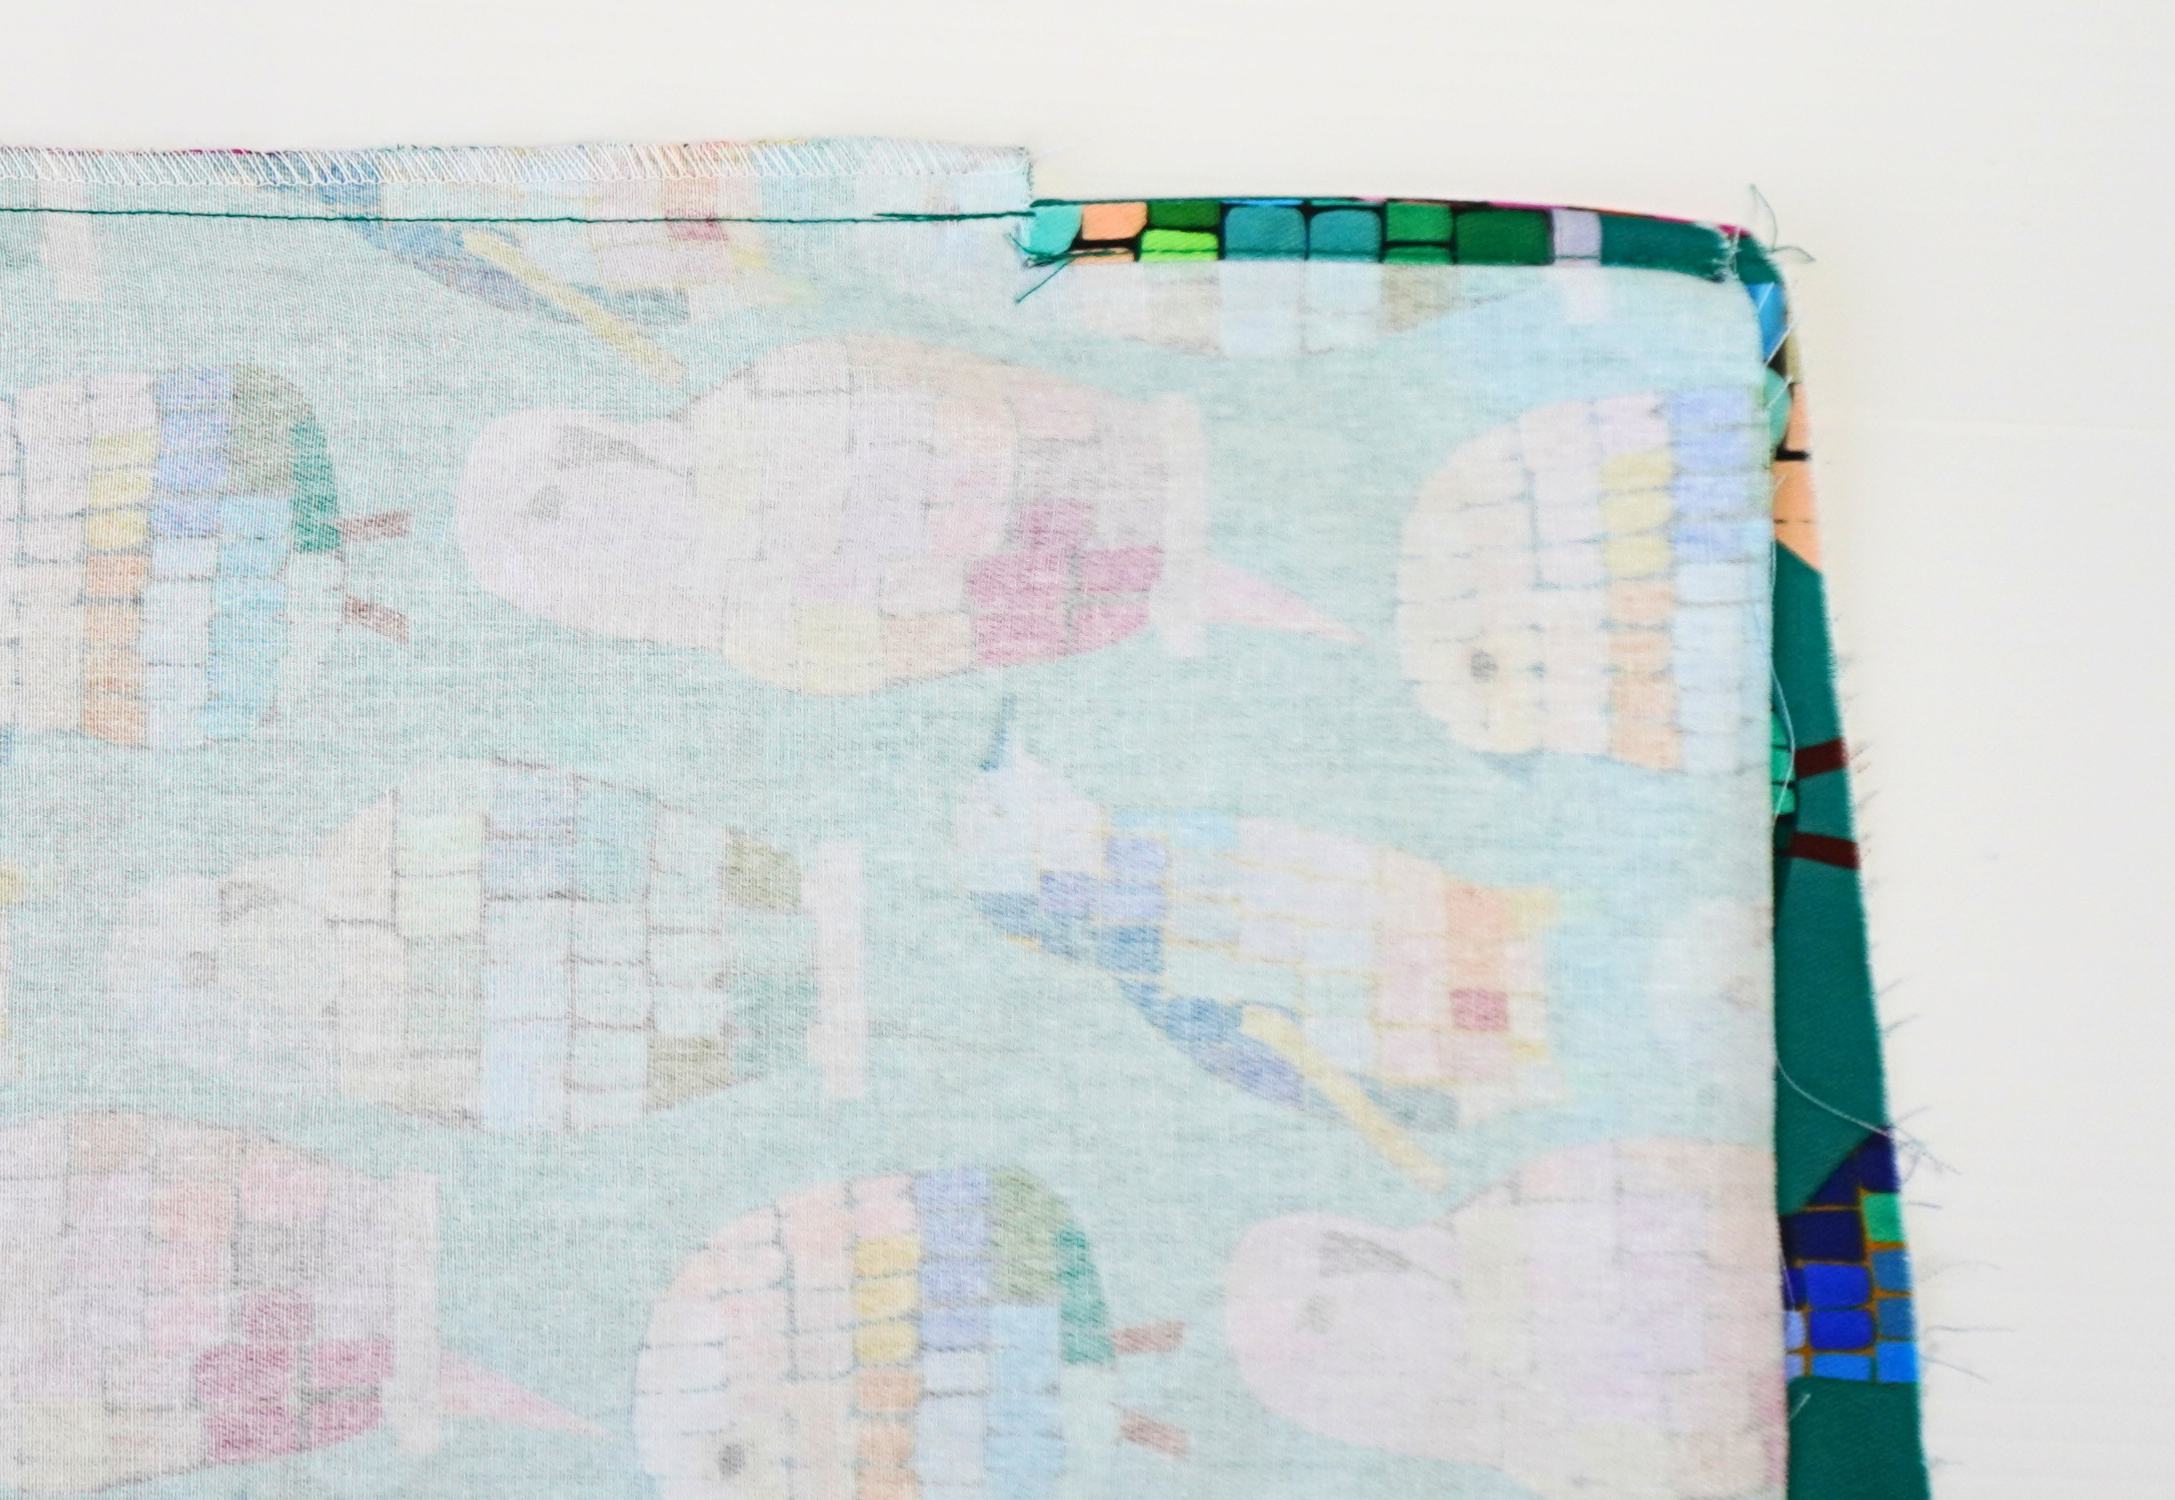
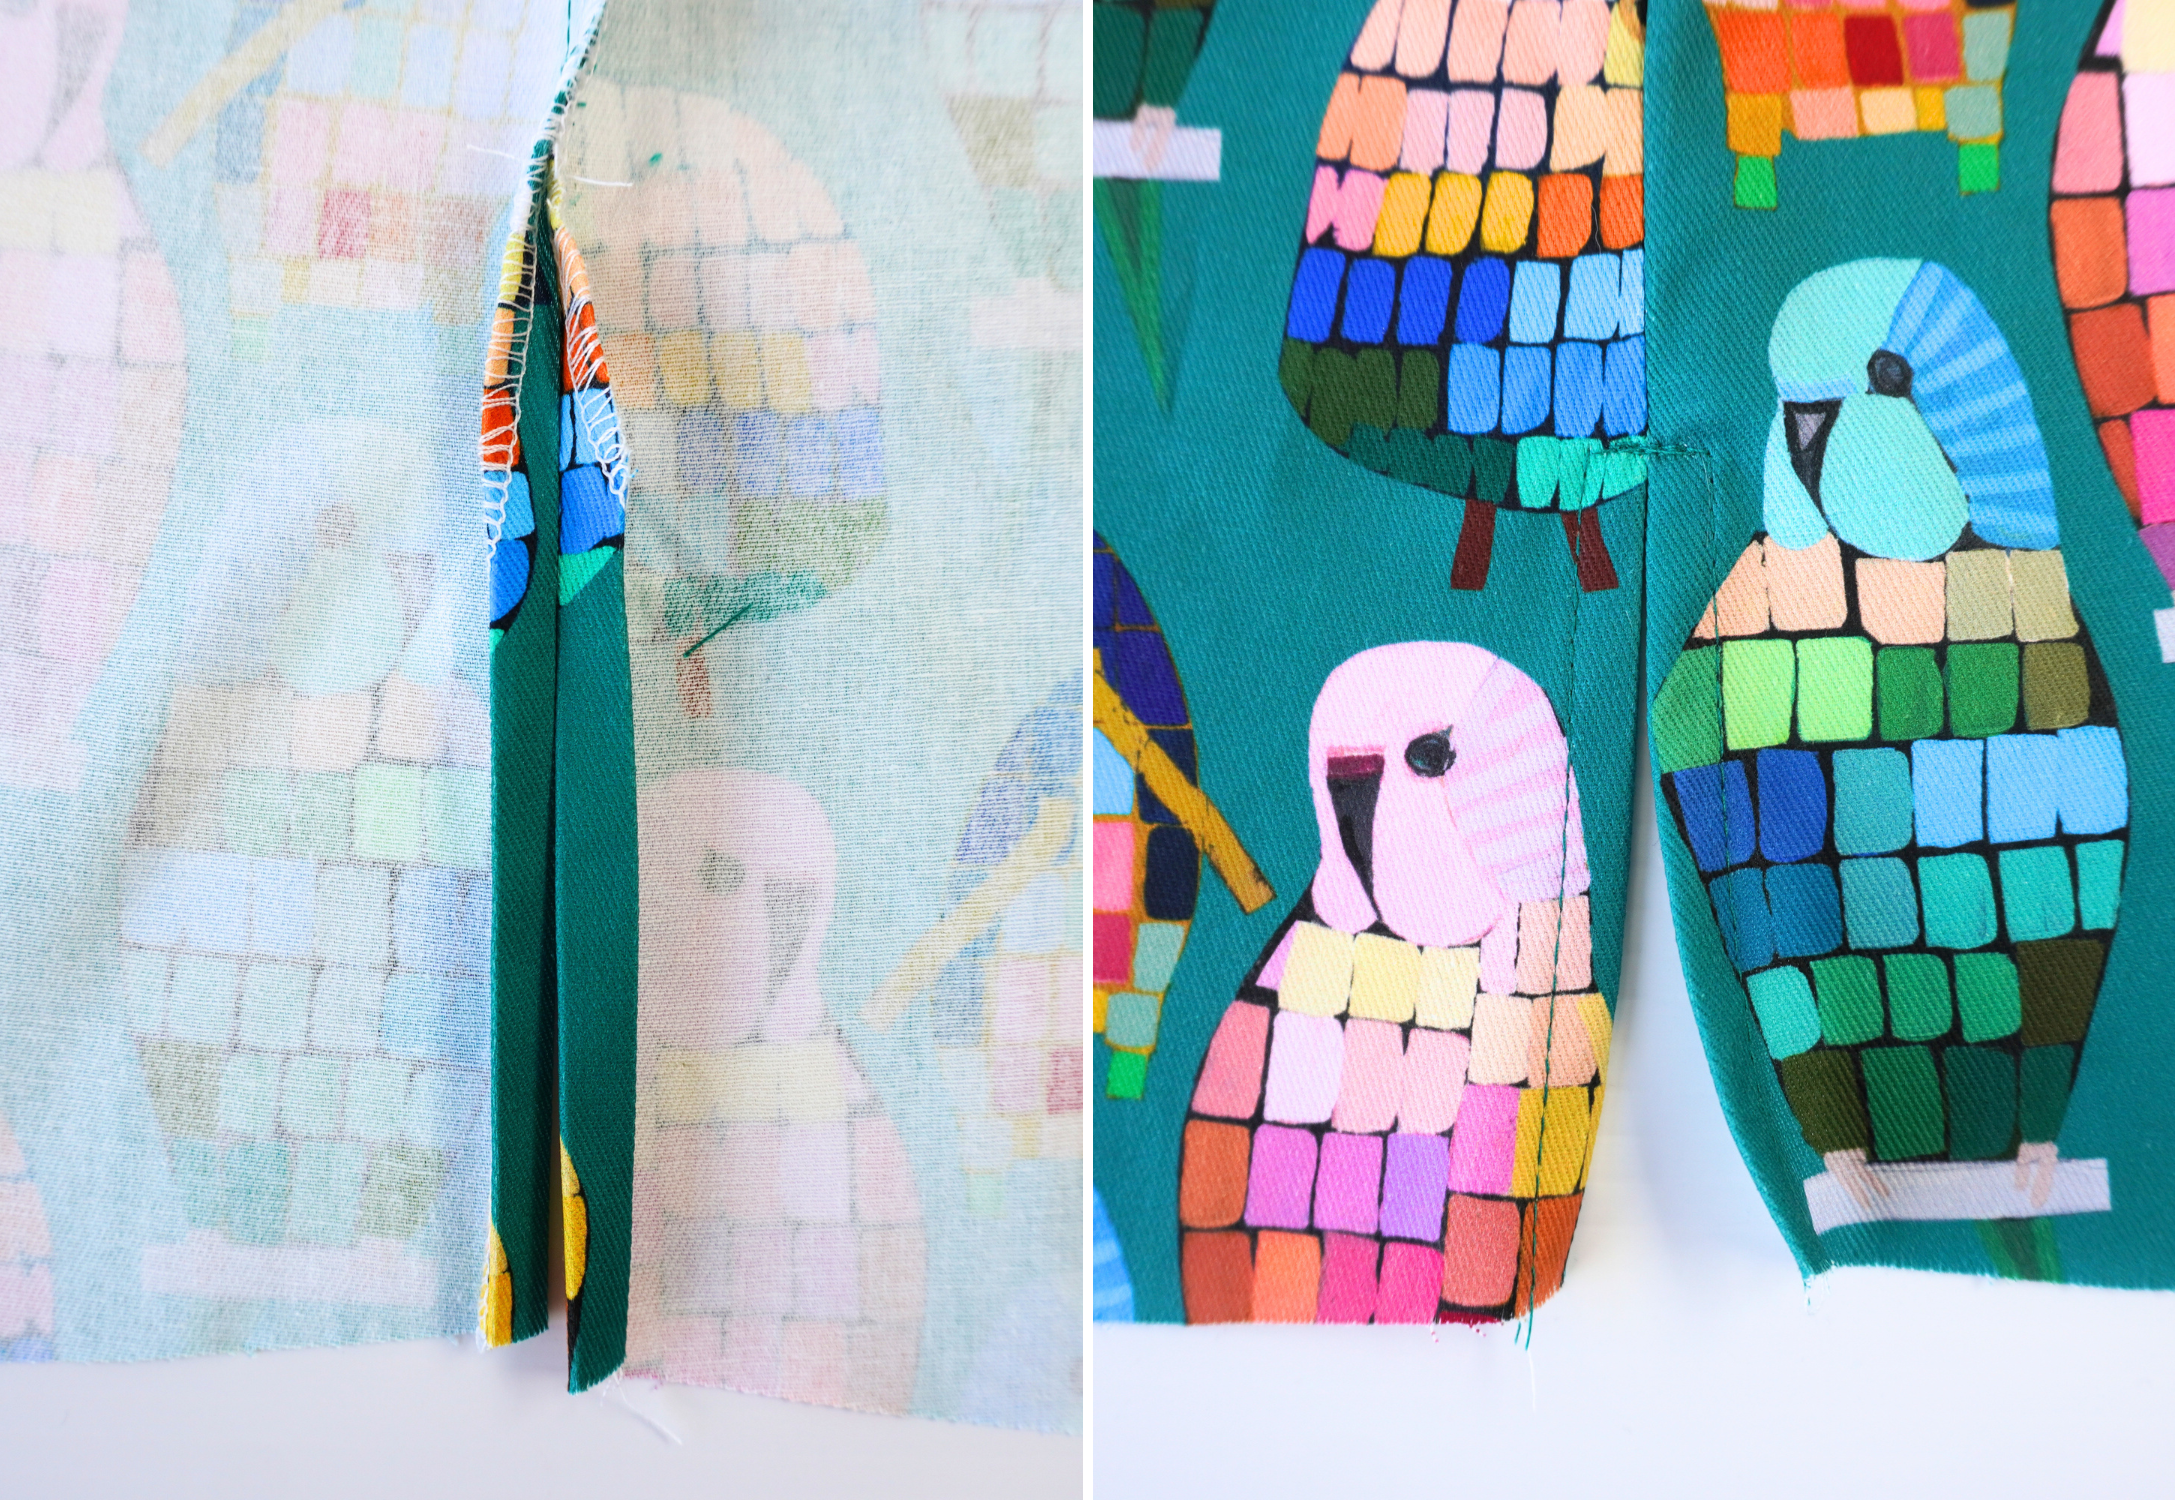
Double turn the seam allowance of the splits to the inside at the notches and press. Top stitch the splits into place and make a bar tack at the top of the split to add strength to this high impact area.
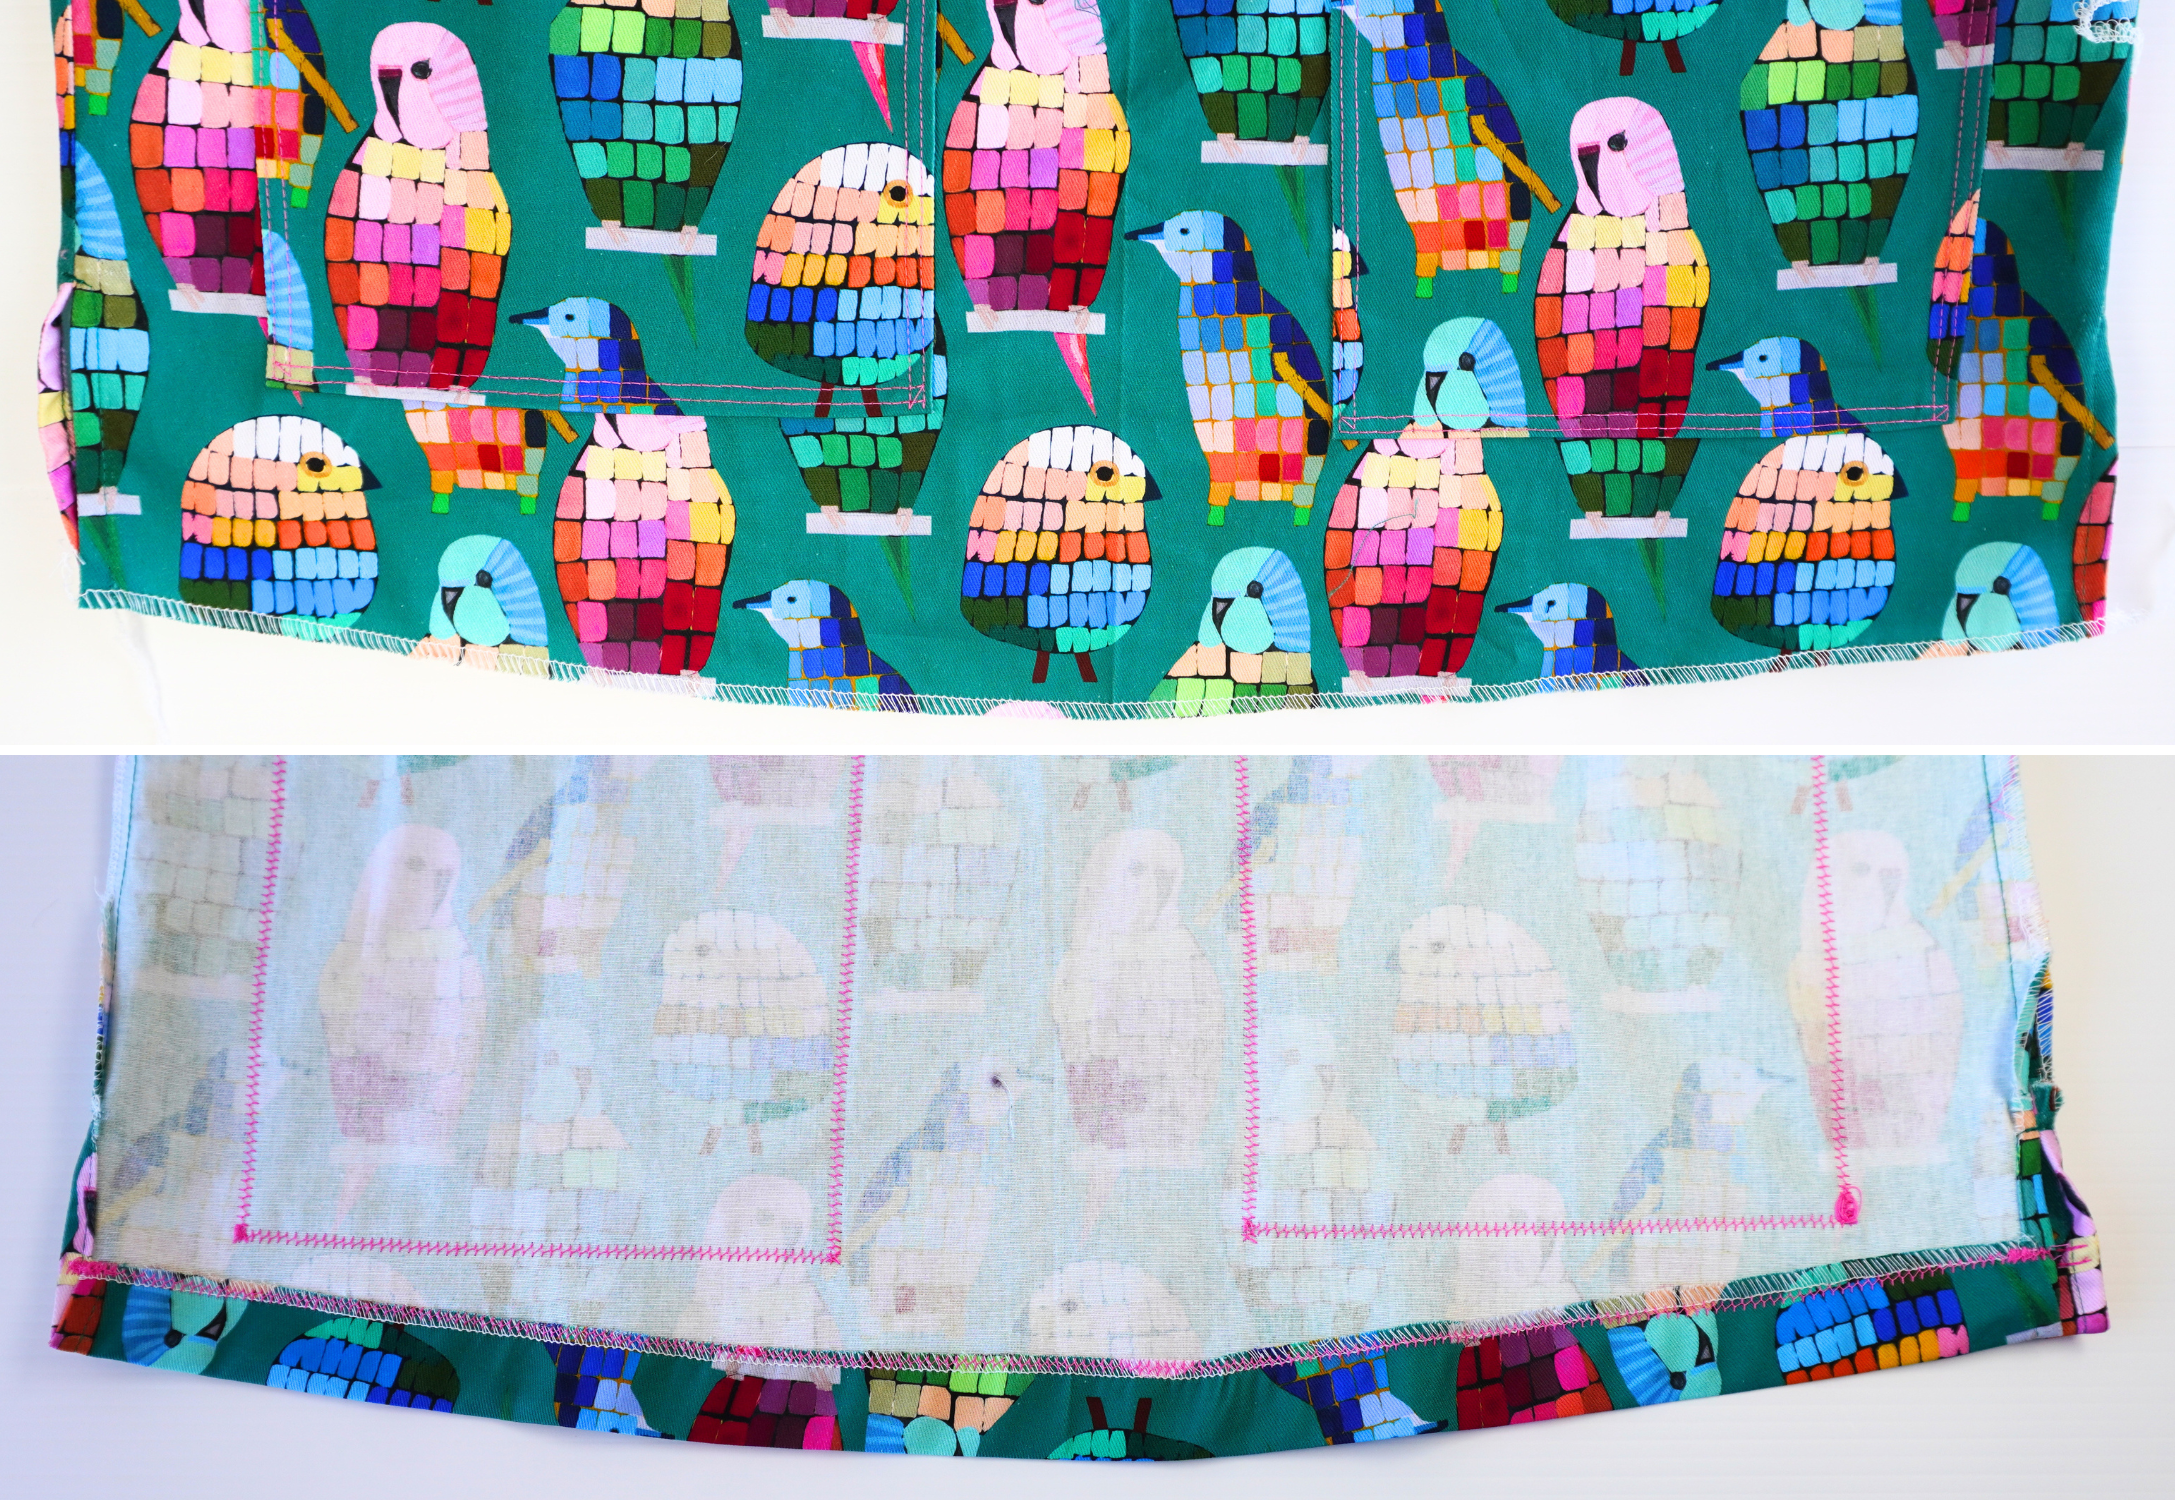
Neaten the back and front hems separately using an overlocker/serger. Turn to the inside at the 3cm (1 ⅛”) hem notch, press and top stitch.
Neaten the sleeve hems using an overlocker/serger. Turn the hems to the inside 3cm (1 1/8”), press and top stitch.
Trim any loose threads and carefully press your new top!
CONSTRUCTION – PANT
POCKETS:
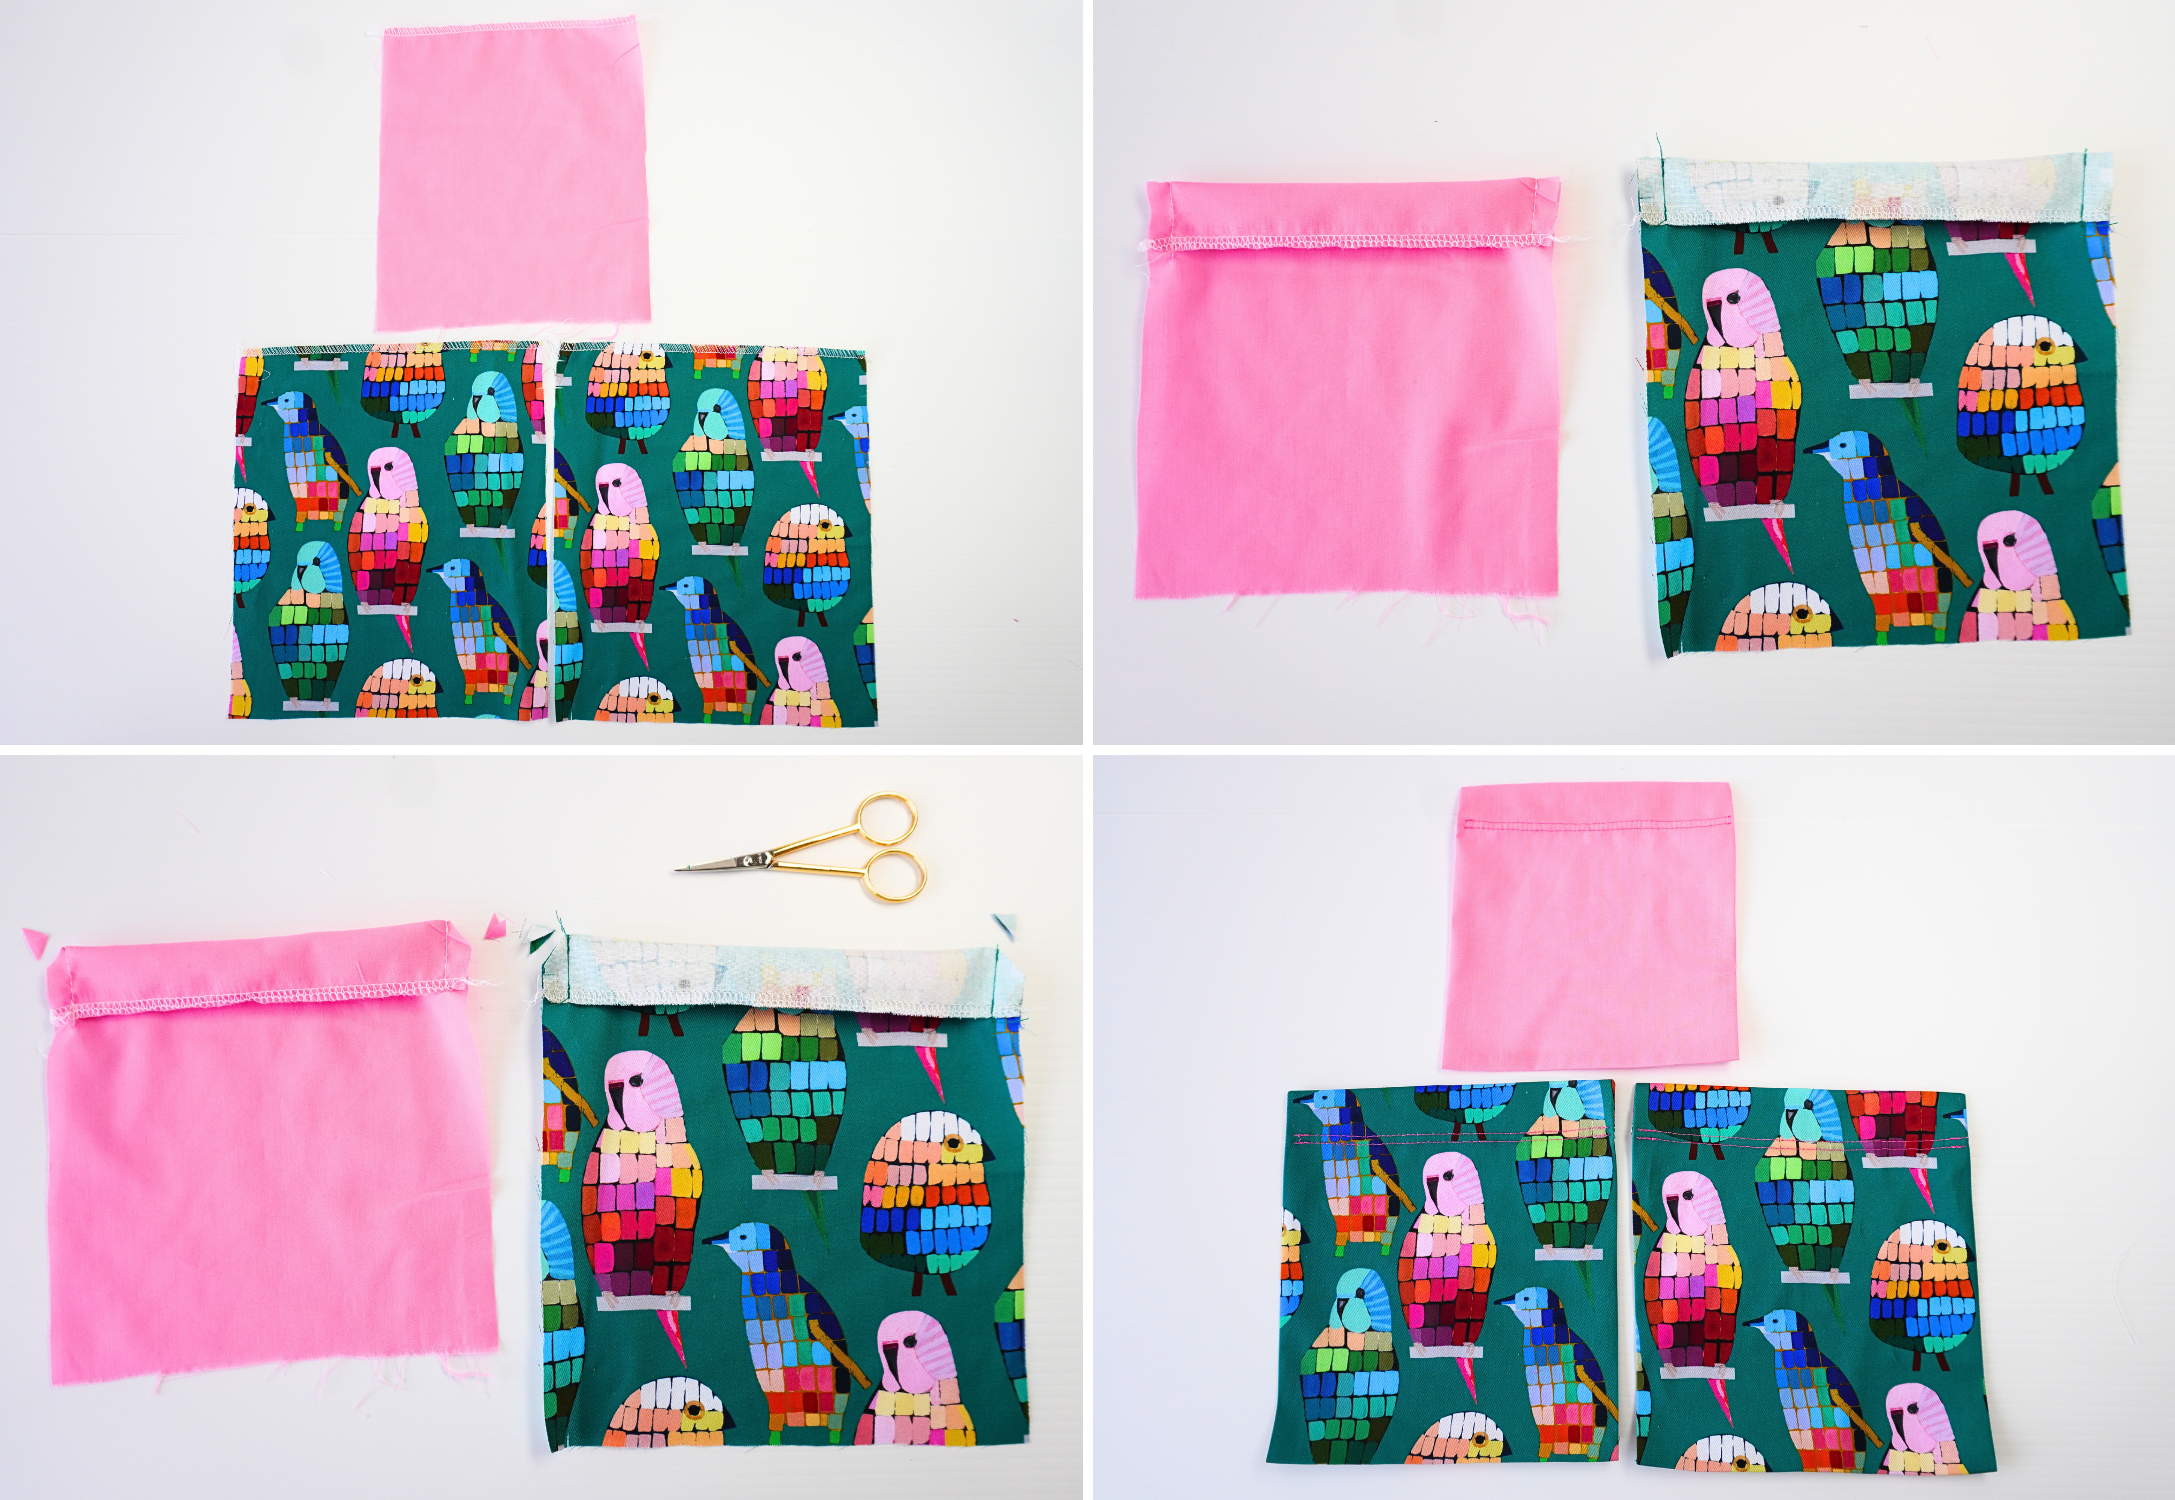
Neaten the top edge of the three Back/inner Side Pant Pockets (8), and two Large Pockets (7) using an overlocker/serger. Five pockets in total.
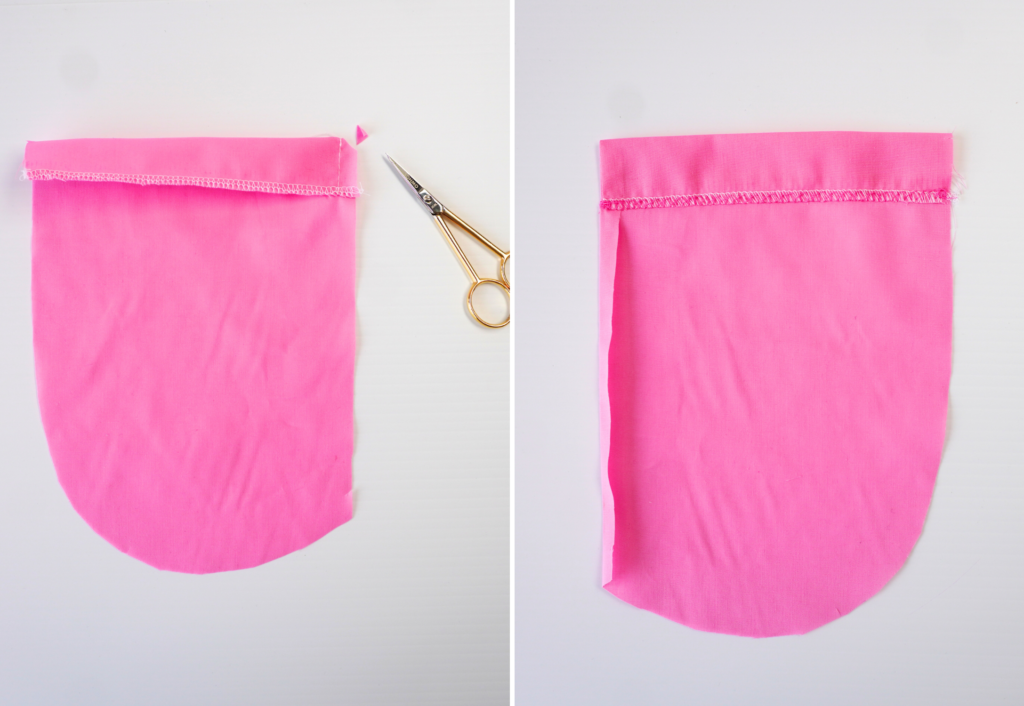
Fold the top edge of each pocket over so the right sides are facing, following the fold line on the pattern. Sew down each side of the turnover, clip the corners and turn the pocket out to the right side and press.
Edge stitch along the inner folded edge to hold the turnback in place.
Fold the remaining outer edges of the pocket 1cm (3/8”) to the inside and press.
Neaten the top edge of the Pant Coin Pocket (13) using an overlocker/serger.
Fold the top edge of the pocket over so the right sides are facing, following the fold line on the pattern.
Sew along the turnover on the outer edge only, clip the corner and turn the pocket to the right side and press.
Edge stitch along the inner folded edge to hold the turn back in place.
Fold the straight edge of the coin pocket to the inside at the notch and press.
With RSU and notches aligned, pin the coin pocket to the Pant Pocket Bearer (11) on the wearer’s left side. Edge stitch the straight edge of the coin pocket into place and baste the raw pocket edges together.
With RST and notches aligned, pin the pocket bearer to the Pant Pocket Bag (12) at the curved seam. Sew then neaten using an overlocker/serger.
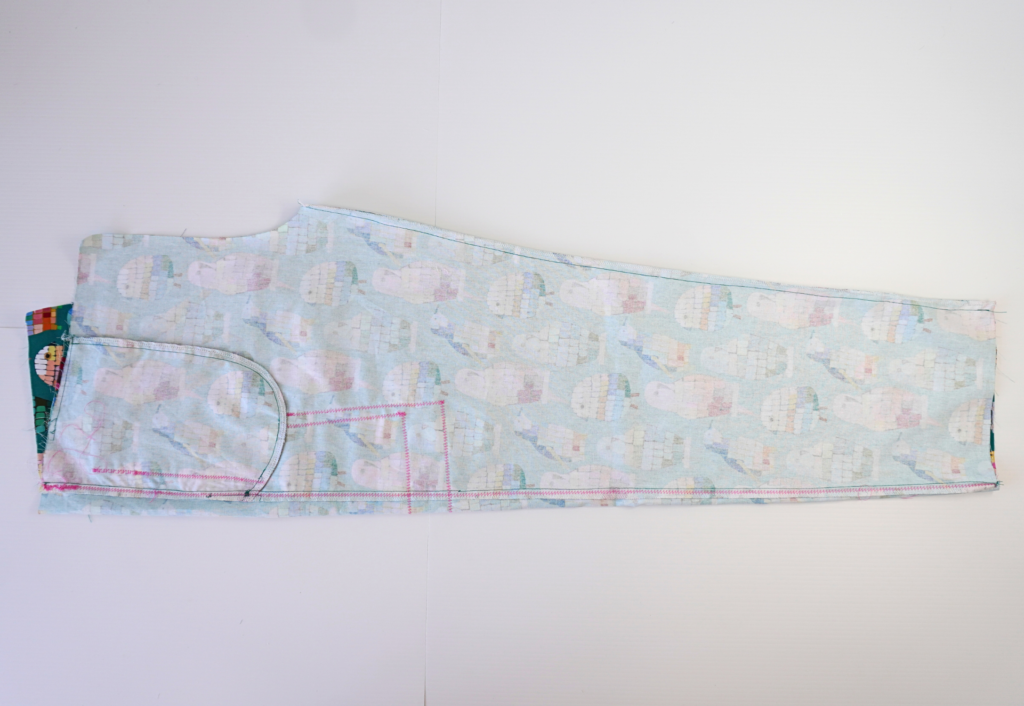
With RST, pin the angled edge of the pocket bag to the angled edge of the pocket opening on the Front Pant (9) and sew.

Fold the pocket bag so it is WST with the front pant and press the seam flat. Sew along the angled seam with a 6mm (¼”) top stitch.
Baste the pocket bag and pocket bearer to the waist seam and side seam of the front pant.
Fold two of the loops in half and pin to the Front Pant at the waist seam at the notches. Baste into place.
With RST, sew the Front Pant (9) to the Back Pant (10) at the side seams. Neaten using an overlocker/serger and press toward the back.
Sew a 6mm (¼”) top stitch to the seam on the side of the back.
Pin the inside pocket bags out of the way, then pin two of the back/inner pockets to the back pant and one over the side seam on the wearer’s left as shown on the pattern.
Once in place sew the three sides of the pockets into place with an edge stitch, then a second 6mm (¼”) top stitch securing the top corners with a reinforcing stitch or bar tack. Take care to not catch the inner pocket bags as you sew.
Pin the large pocket over the side seams and the inner pocket on the left side as shown on the pattern and sew the three sides of the pocket into place with an edge stitch, and again with a 6mm (¼”) top stitch, securing the top corners with a reinforcing stitch or bar tack.
WAISTBAND:
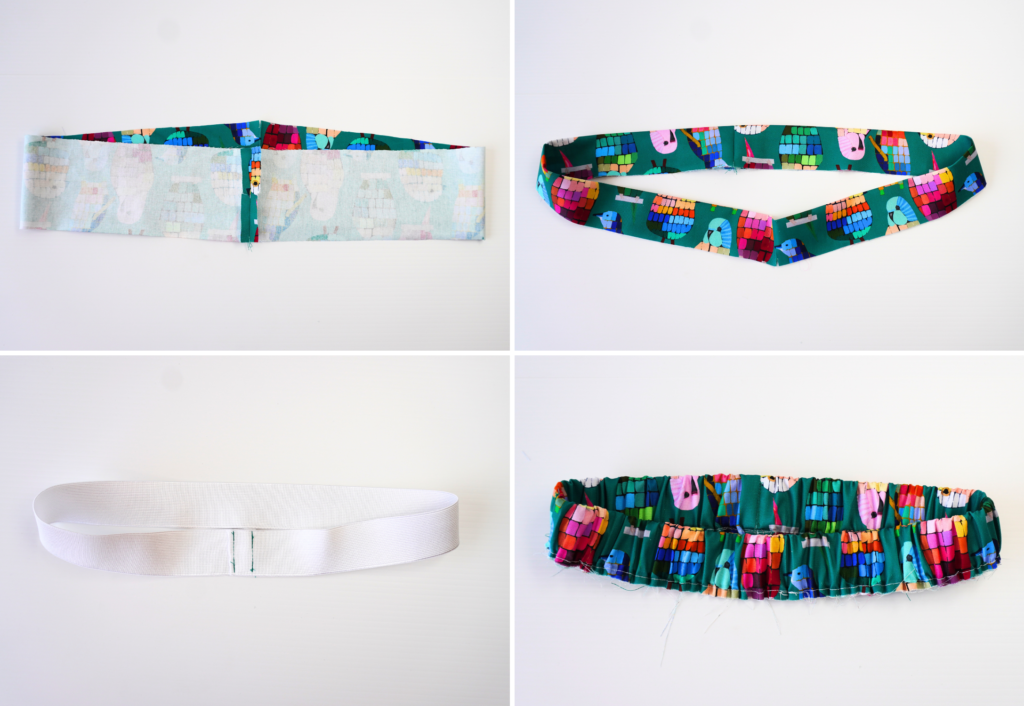
With RST, sew the short ends of Waistband (14) together, creating a loop. Press the seam open.
Fold the waistband in half lengthways and press.
Cut the elastic to your preferred personal length (or refer to the measurement chart for cut length). Overlap the cut ends by 2 cm (¾”) and securely stitch together, creating a loop.
Place the elastic band inside the waistband, pin the raw edges together and baste.
Ensure the elastic is sitting evenly inside the waistband and sew a vertical stitch at the side seams and centre back to prevent rolling. Set aside.
PANT CUFF (OPTIONAL):

With RST, sew the short ends of Pant Cuff (16) together, creating a loop. Press the seam open. Fold the pants cuff in half lengthways and press.
Cut the elastic to your preferred personal length (or refer to the measurement chart for cut length). Overlap the cut ends by 2cm (¾”) and securely stitch together, creating a loop.
Place the elastic band inside the cuff, pin the raw edges together and baste. Set aside.
MAIN BODY:
With RST, sew the front to back at the inleg seam. Neaten using an overlocker/serger and press toward the back.
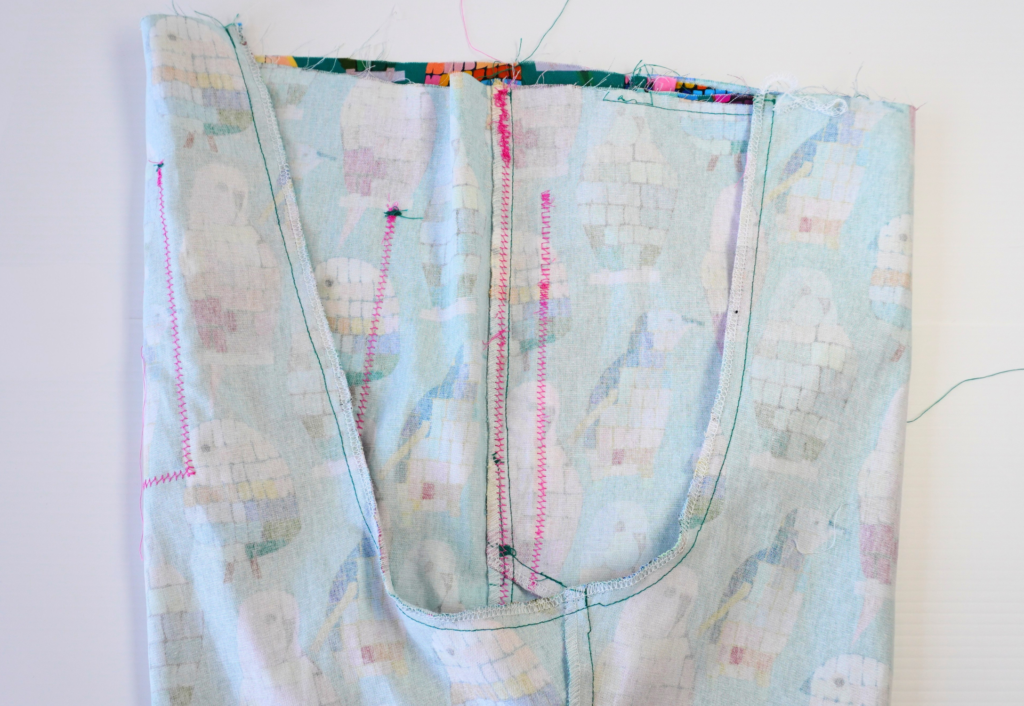
With RST sew the crotch seams together. Start at the front waist, sew down to the base of the crotch then continue sewing up the back crotch finishing at the back waist. Neaten using an overlocker/serger and press to one side. Sew a 6mm (¼”) top stitch to the seam.
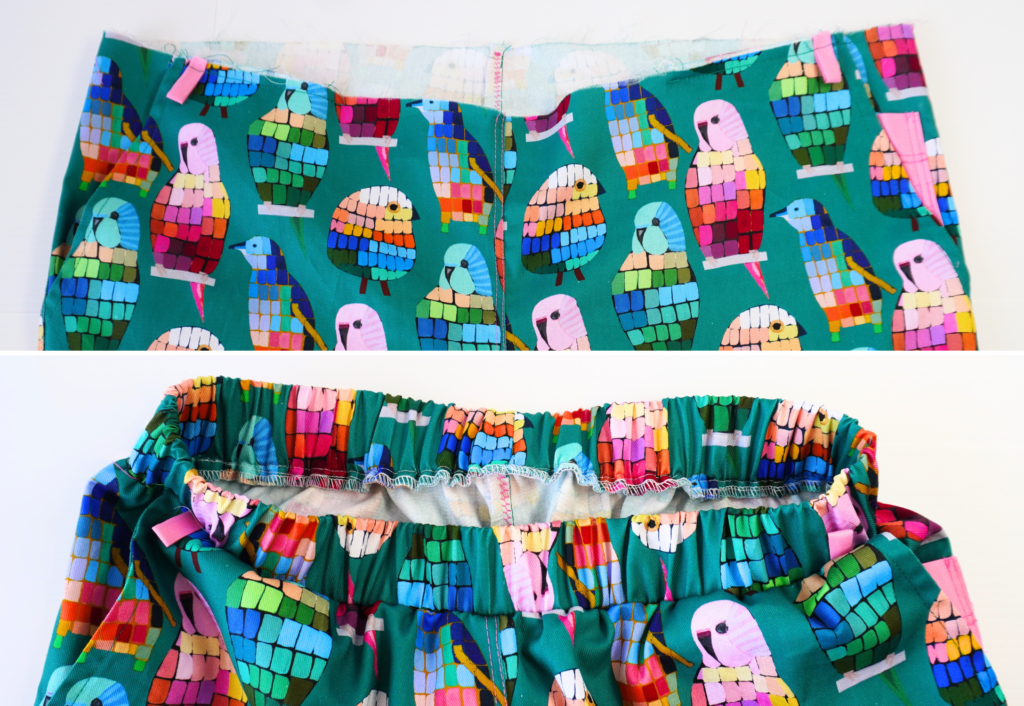
With RST and notches aligned, pin the waistband to the top of the pants. Using a zipper presser foot to sew nice and close to the elastic, sew the waistband into place, then neaten using an overlocker/serger and press down.
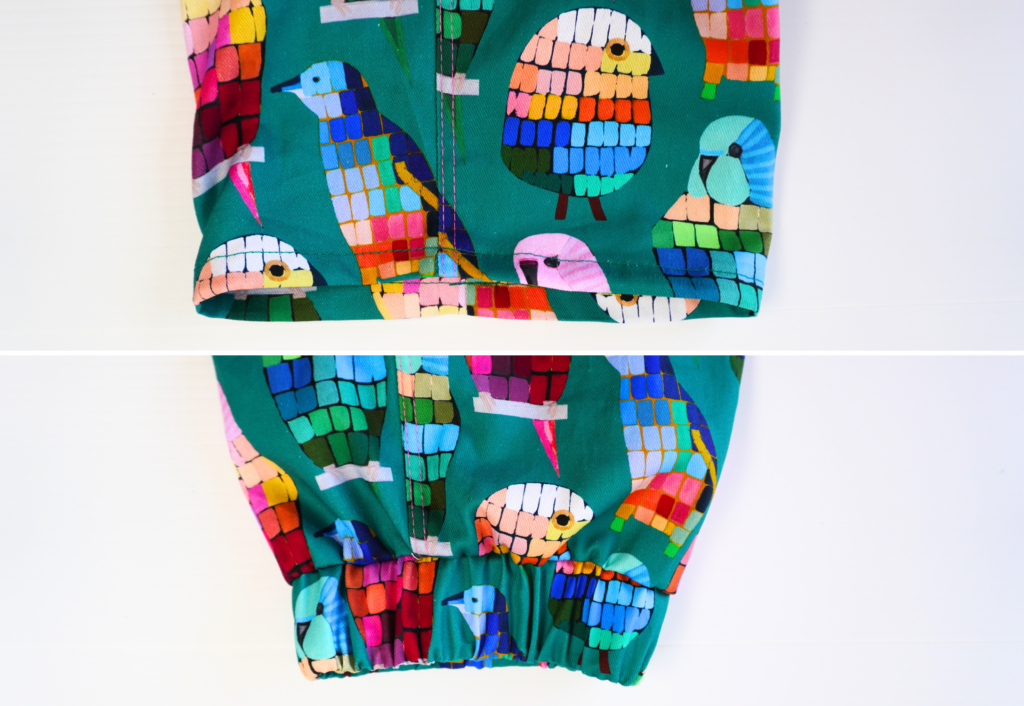
If not using the pant cuff – neaten the hems of the pants using an overlocker/serger. Turn the pants hems to the inside 3cm (1 1/8”), press and top stitch.
If using the pant cuff – with RST and the cuff seam aligned with the inleg seam, pin the cuff to the leg opening. Still using your zipper presser foot, sew the cuff into place, neaten using an overlocker/serger and press up.
Trim any loose threads and carefully press your new pants!
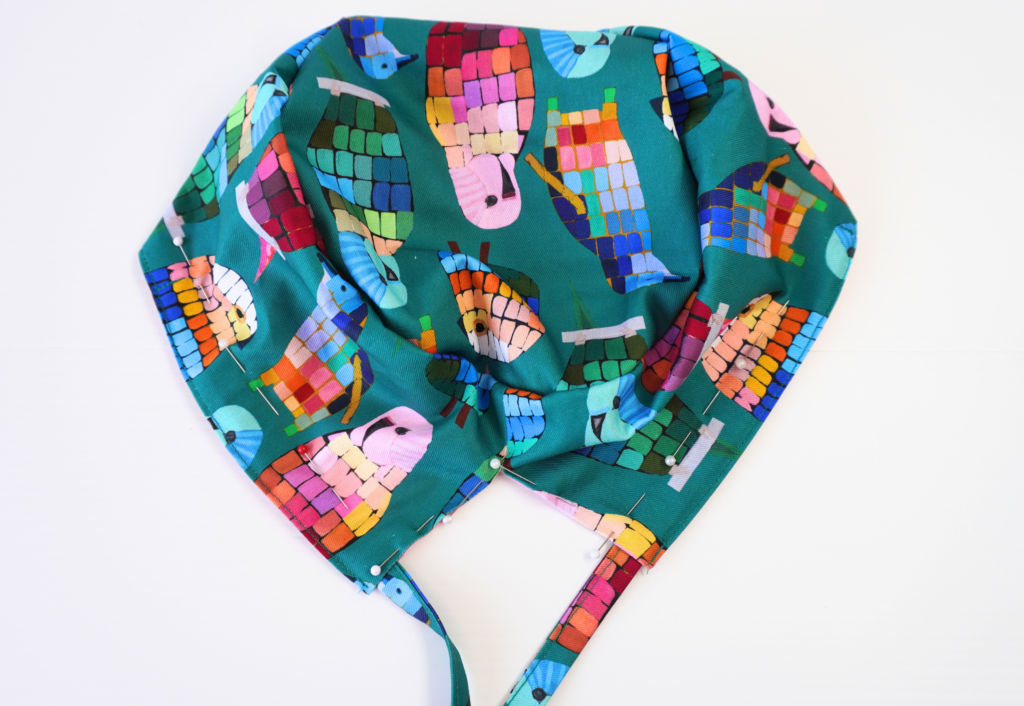
Construction – Hat
Please note – all seams are 1cm (3/8”).
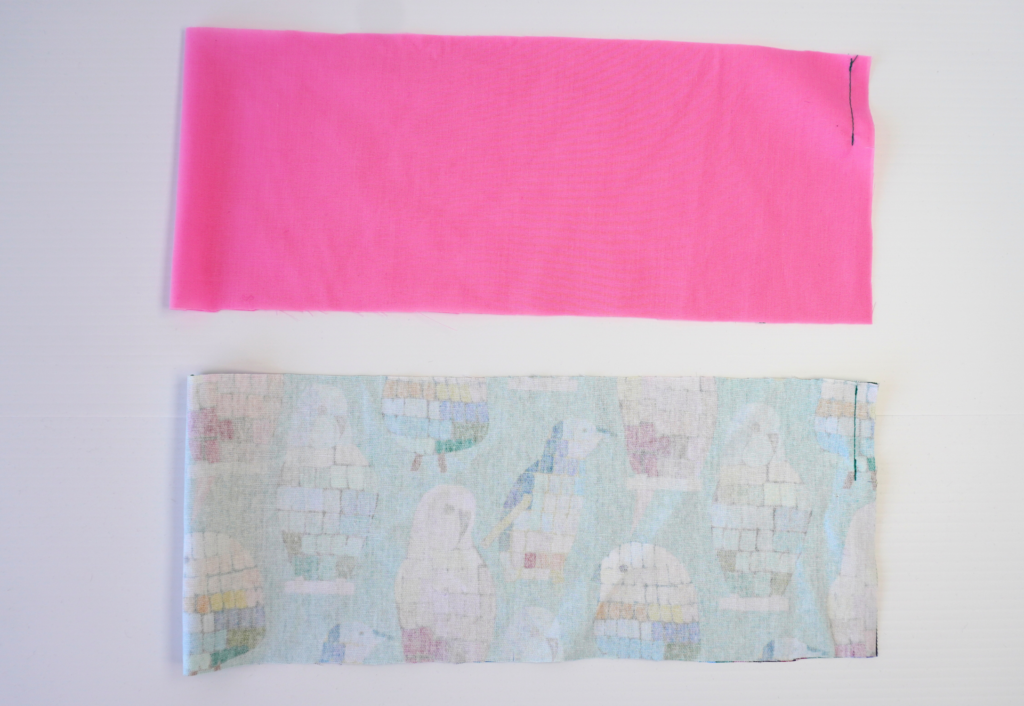
With RST, fold each Base (HAT 1) in half with the short ends together. Pin, then sew the small seam above the top of the split.
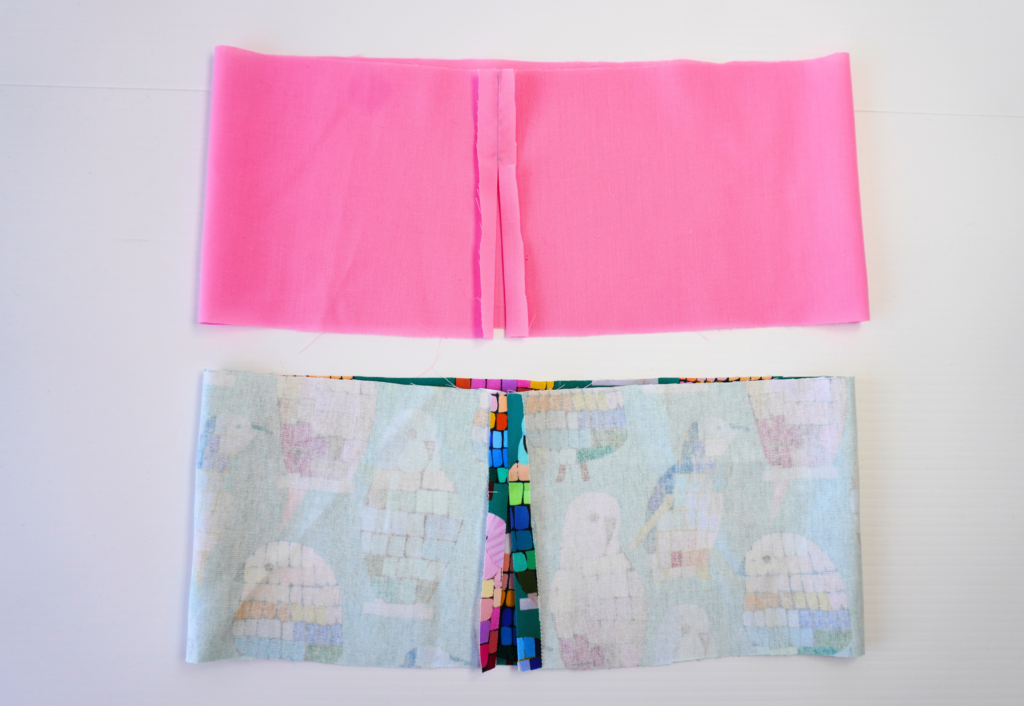
Press the seam open and press the seam allowance of the splits to the inside. Press the hem edges 1cm (3/8”) to the inside.
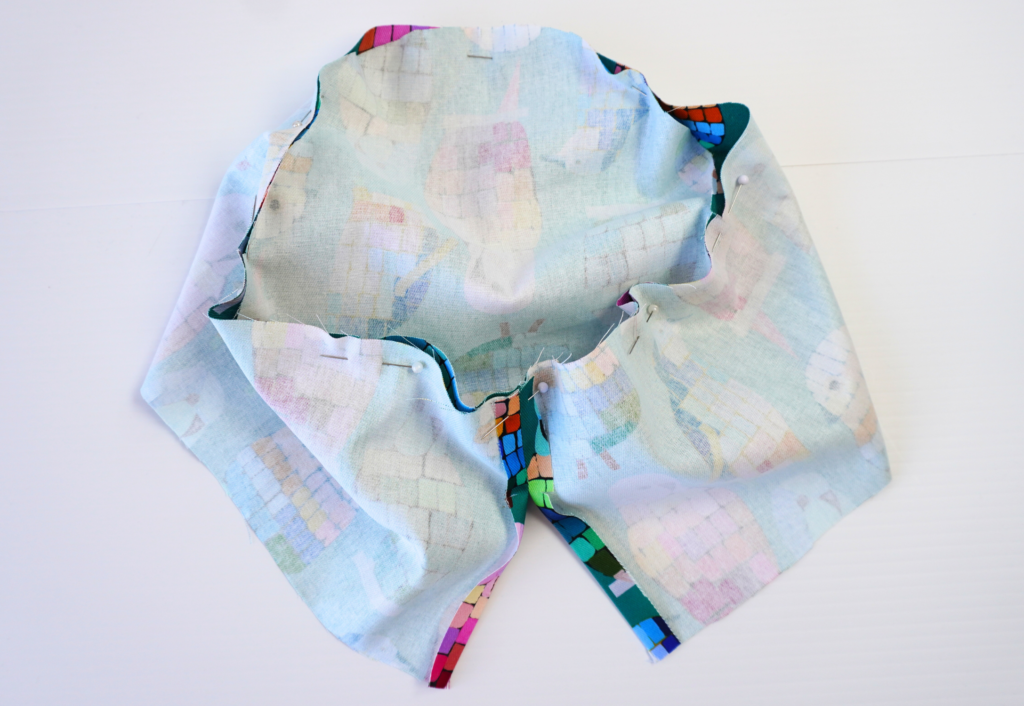
With WST, baste the pair of Crown (HAT 2) together around the outer edge. This will now be one piece. (Please note, in our sample above we have only cut one Crown).
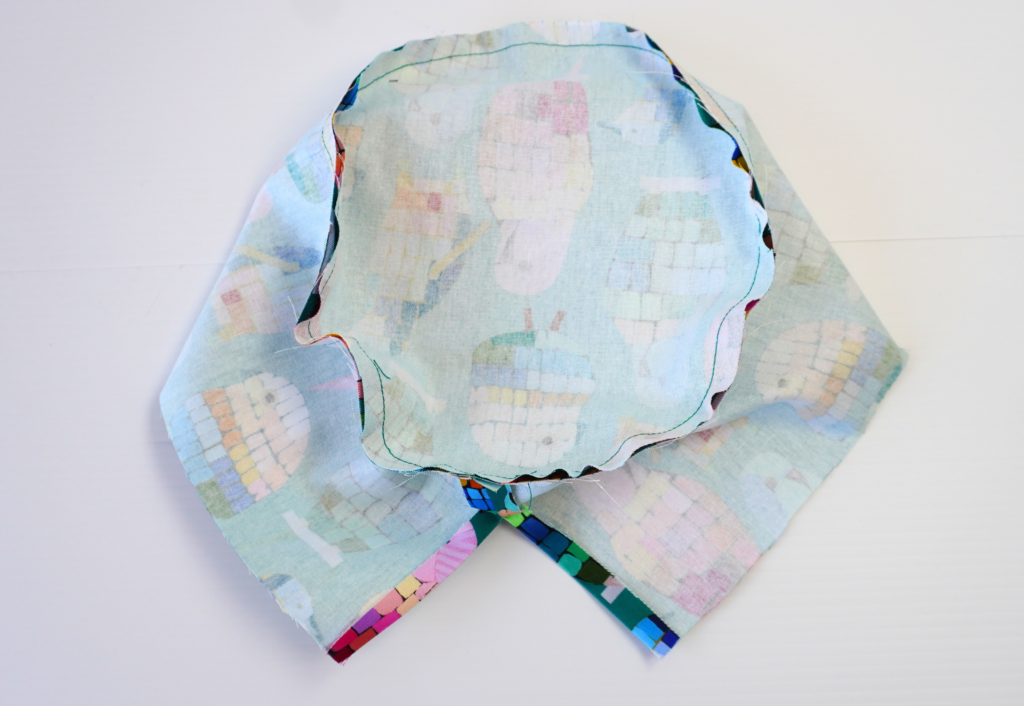
With RST and notches aligned, pin the top edge of one base to the Crown (HAT 2), and sew.
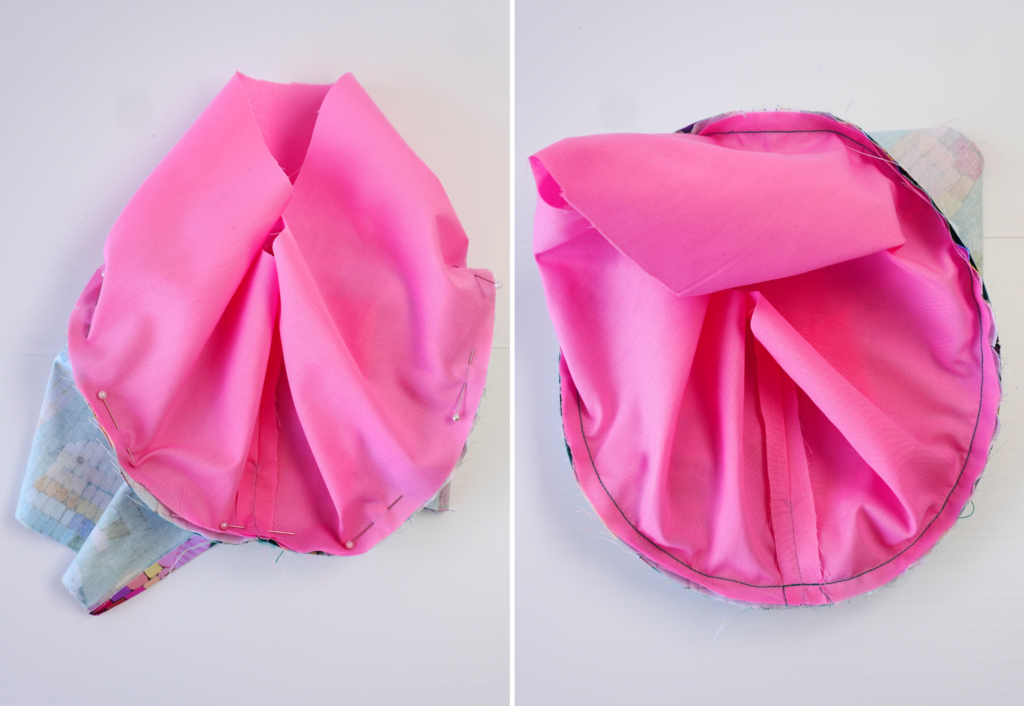
With notches aligned, pin the right side of the other base to the wrong side of the crown and sew, sandwiching the crown.
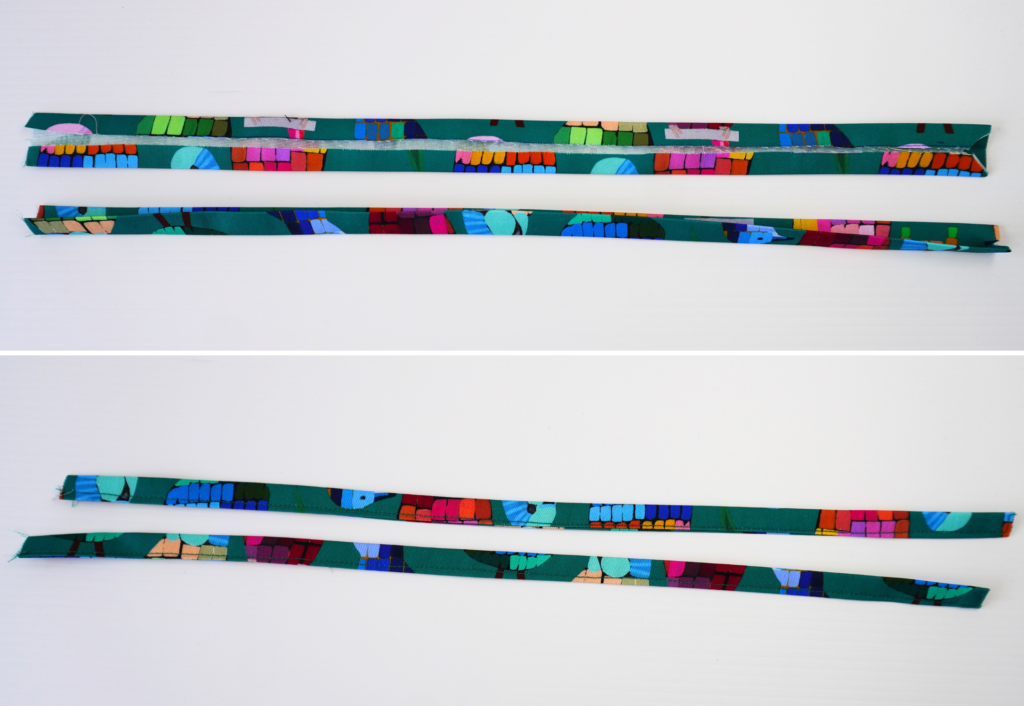
With WST, fold the long edges of each pair of Ties (HAT 3) 1cm (3/8”) to the inside and press. Fold one short end to the inside and press.
Fold each tie in half lengthways, press and edge stitch into place along the outer edges.
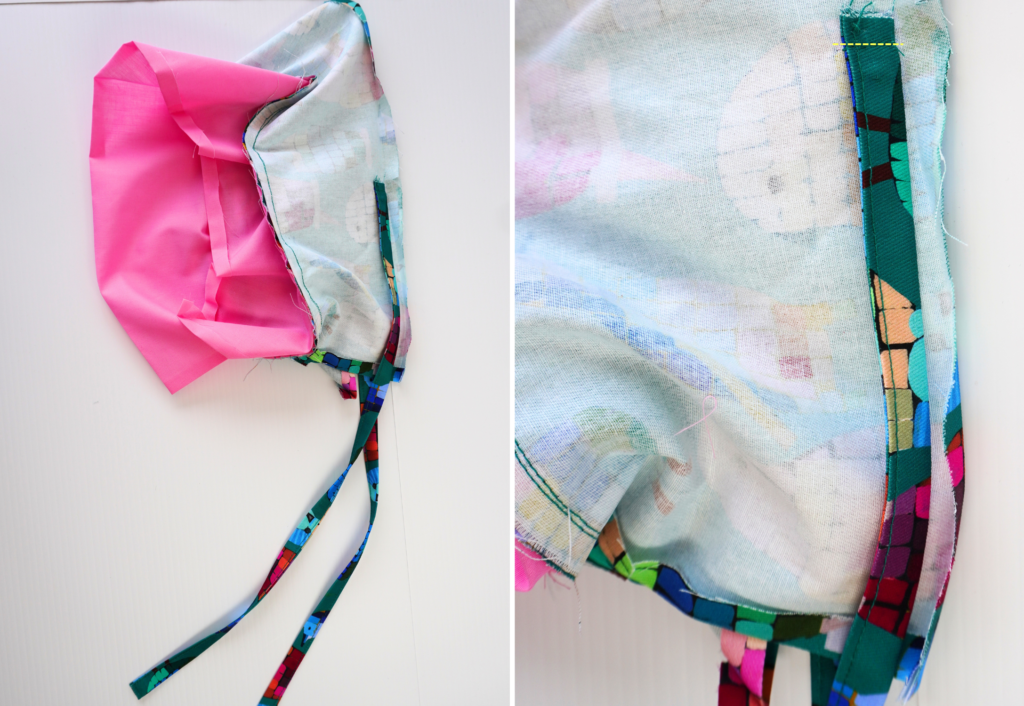
Pin the raw ends to the wrong side of a base, in line with the notch. Sew securely.
Pin the outer and inner bases together at the pre-pressed edges and edge stitch together.
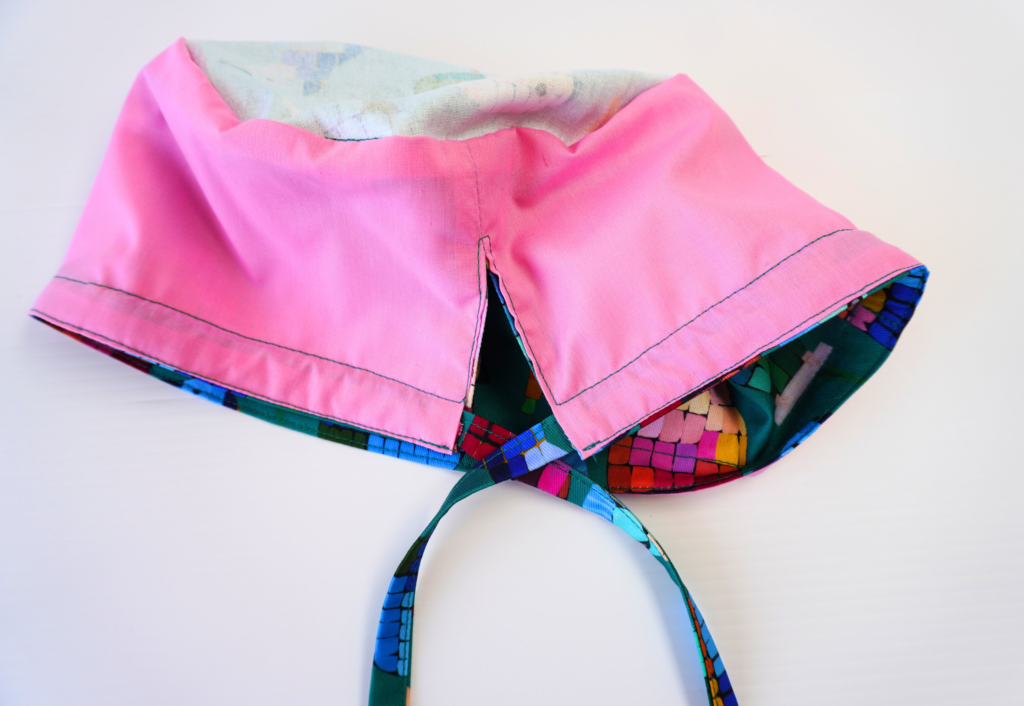
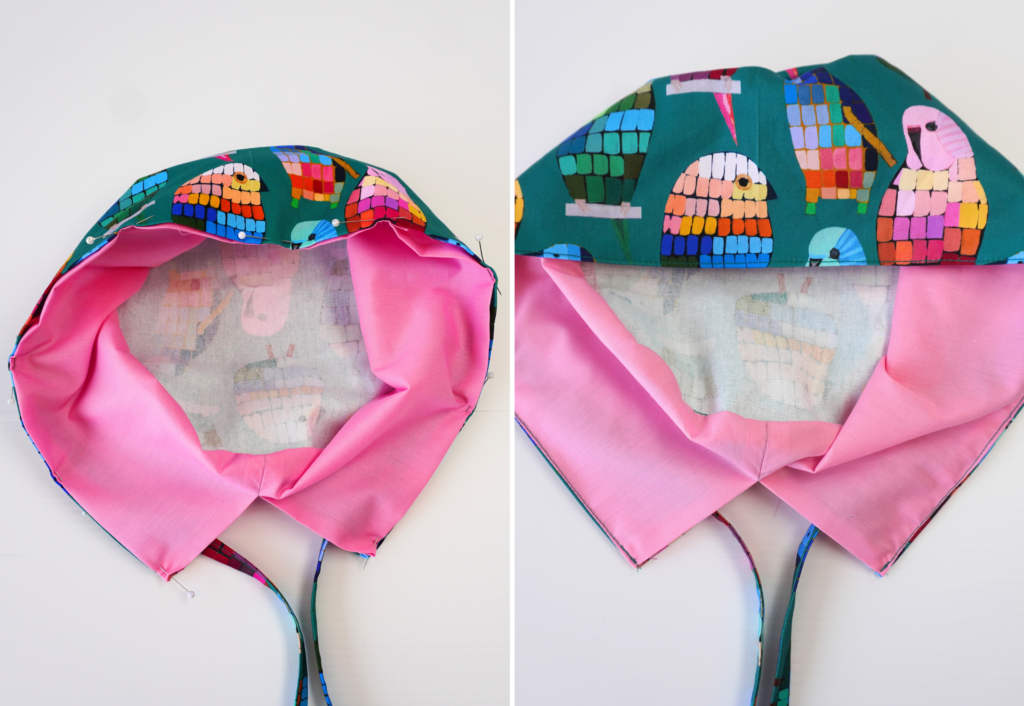
Pin the ties into position, creating a channel that will allow the ties to be tightened. Carefully sew the channel and continue it all around the base of the hat.
When arriving at the other side, sew around the split using an edge stitch.
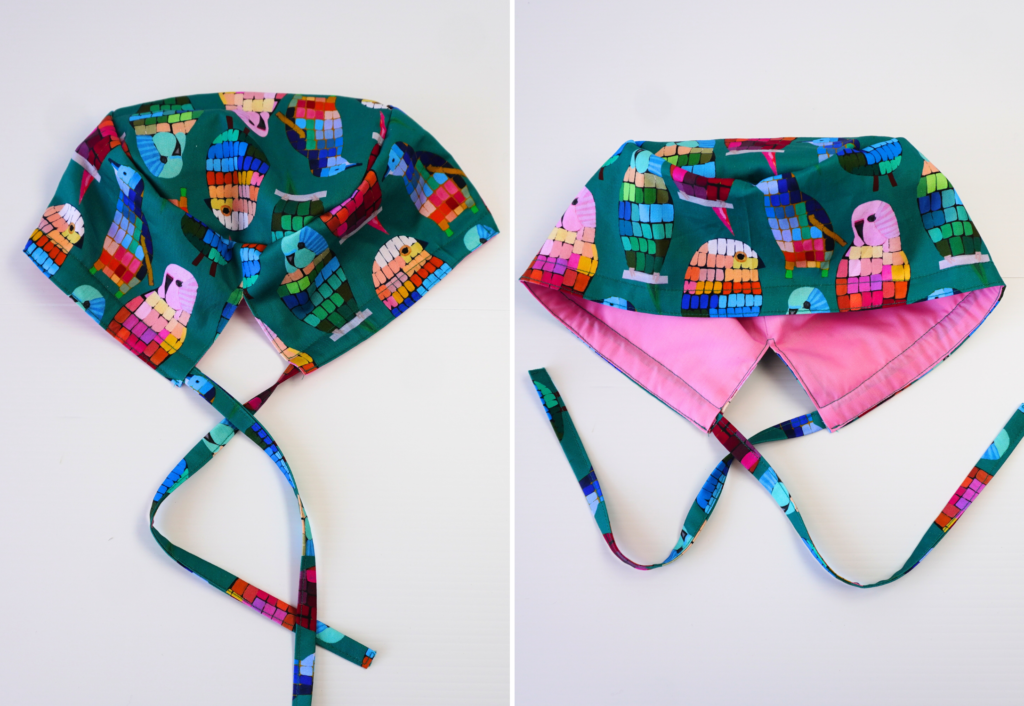
Trim any loose threads and carefully press your new hat!