
Before you start sewing, you might want to rummage through your fabric scraps/stash and plan a colour/print layout for the Esther Woven Dress. Click the link below to download the Esther Woven Dress Colour It Your Way PDF and have some fun!
✏️ Colour It Your Way PDF Download ✏️
CONSTRUCTION:
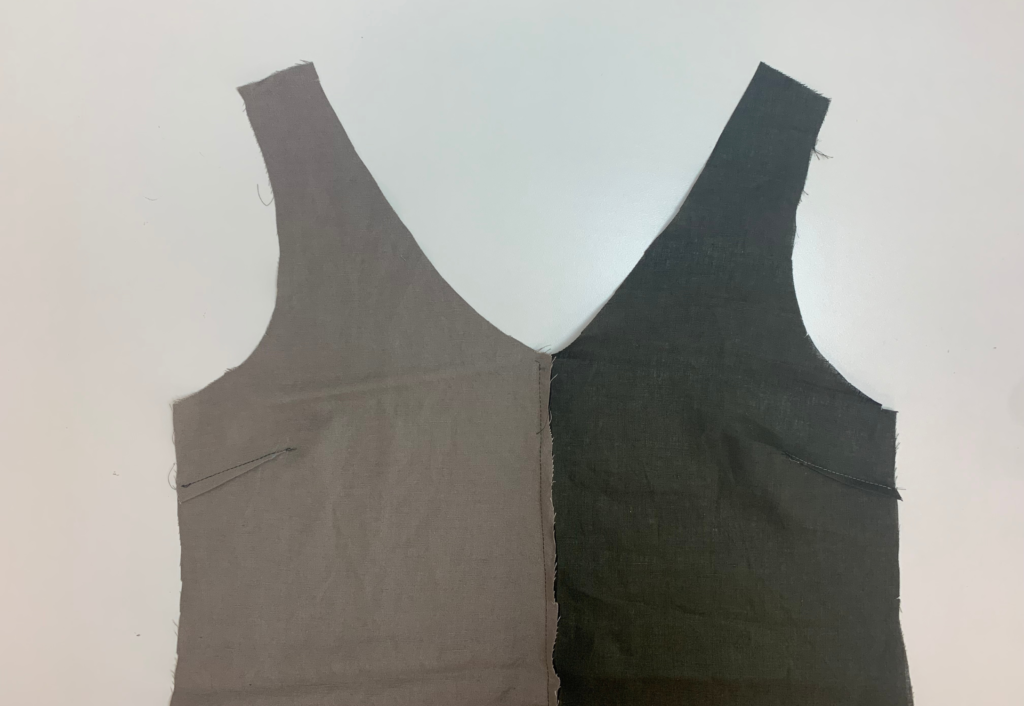
Sew a stay stitch to the Front (2) and Back (1) necklines. Sew the bust darts and press downwards.
Neaten each centre front and centre back seam with an overlocker/serger.
With RST sew the centre front seams together starting at the * noted on the pattern, 6mm (¼”) down from the ‘V’ neck. Press the seam open.
With RST sew the centre back seams together starting at the * noted on the pattern, 6mm (¼”) down from the ‘V’ neck. Press the seam open.
With RST sew the front and back shoulder seams together, and if choosing the sleeveless option, press open. If choosing the sleeved option, neaten the
shoulder seam using an overlocker/serger and press toward the back.
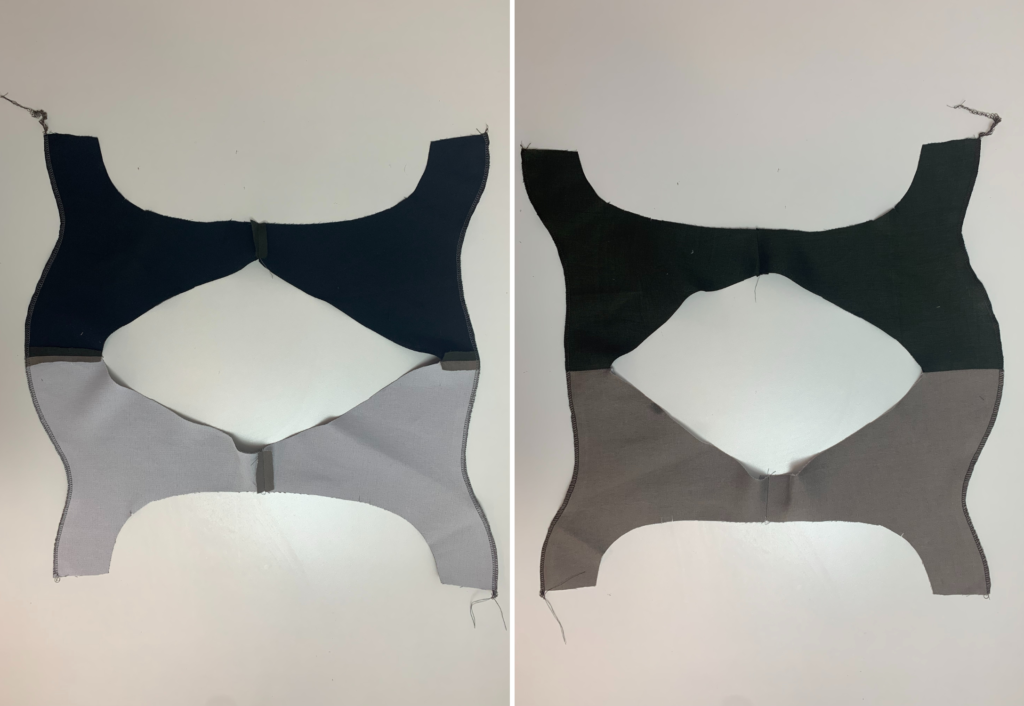
With RST sew the centre front and centre back seams of the neck Facings (3 & 4) together, start sewing at the * noted on the pattern and press the seams open. Neaten around the outside edge using an overlocker/serger.
With RST sew the shoulder seams of the front and back neck facings together and press seams open.
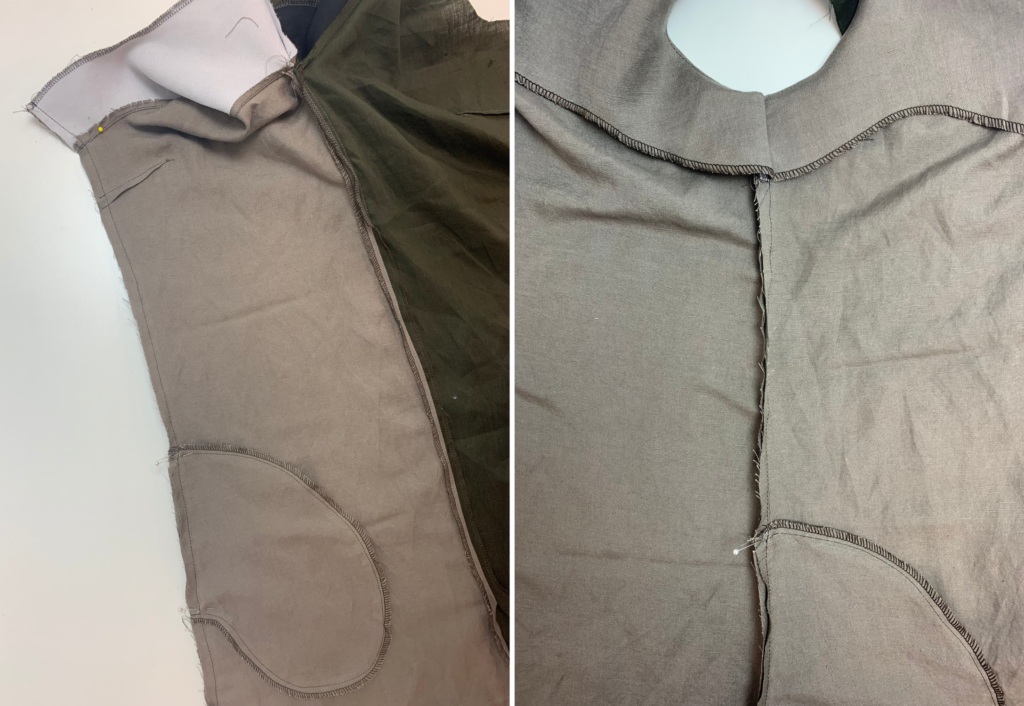
With RST sew the neck facing to the neckline of the body. Turn out to the right
side and understitch on the side of the facing.
ALL IN ONE FACING VIDEO:

SLEEVELESS OPTION:
Use the above previous Steps 1-8 for main body.
You will now have the right sides facing out. From the inside, pinch the raw edges of the front armhole and armhole facing together and pull through so that right sides are together and you can sew from the front underarm side seam up to the shoulder seam. Repeat by sewing from the back side seam up to the shoulder seam. This process must be sewn in two sections, as the armhole facing cannot be attached to the armhole in a single step.
Turn to the right side and understitch on the side of the facing.
COMPLETION OF SLEEVELESS OPTION:
With RST sew the front and back side seams together. Start sewing at the hemline, sewing through the back of the pocket being careful not to catch the front pocket (if using, see further below for pocket construction). Continue sewing up to the armhole and through the side seam of the facing. Neaten with an overlocker/serger and press toward the back. Turn the facing to the
inside of the dress and secure with a sink stitch or hand stitch.
With RST sew the mitre corner of the front hem spilt (see the Mitred Corner tutorial on stylearc.com).
Turn the mitred corner out to the right side and press the split seam and the hem. Topstitch the front split and hemline, starting at the side seam. When you reach a corner, keep the needle down and pivot. Continue sewing along the split and hemline, finishing back at the side seam.
Press your new dress.
CONSTRUCTION FOR SLEEVED DRESS:
If choosing to use the optional pockets/belt loops, see steps at the end of these instructions.
Use previous Steps 1-8 for main body. With RST sew the front and back side seams together, being careful not to catch the front pocket (if using).
Neaten using an overlocker/serger and press toward the back.
Turn the neck facing to the inside of the dress and secure with a hand stitch.
With RST, sew the under-sleeve seam. Neaten using an overlocker/serger and press toward the back.
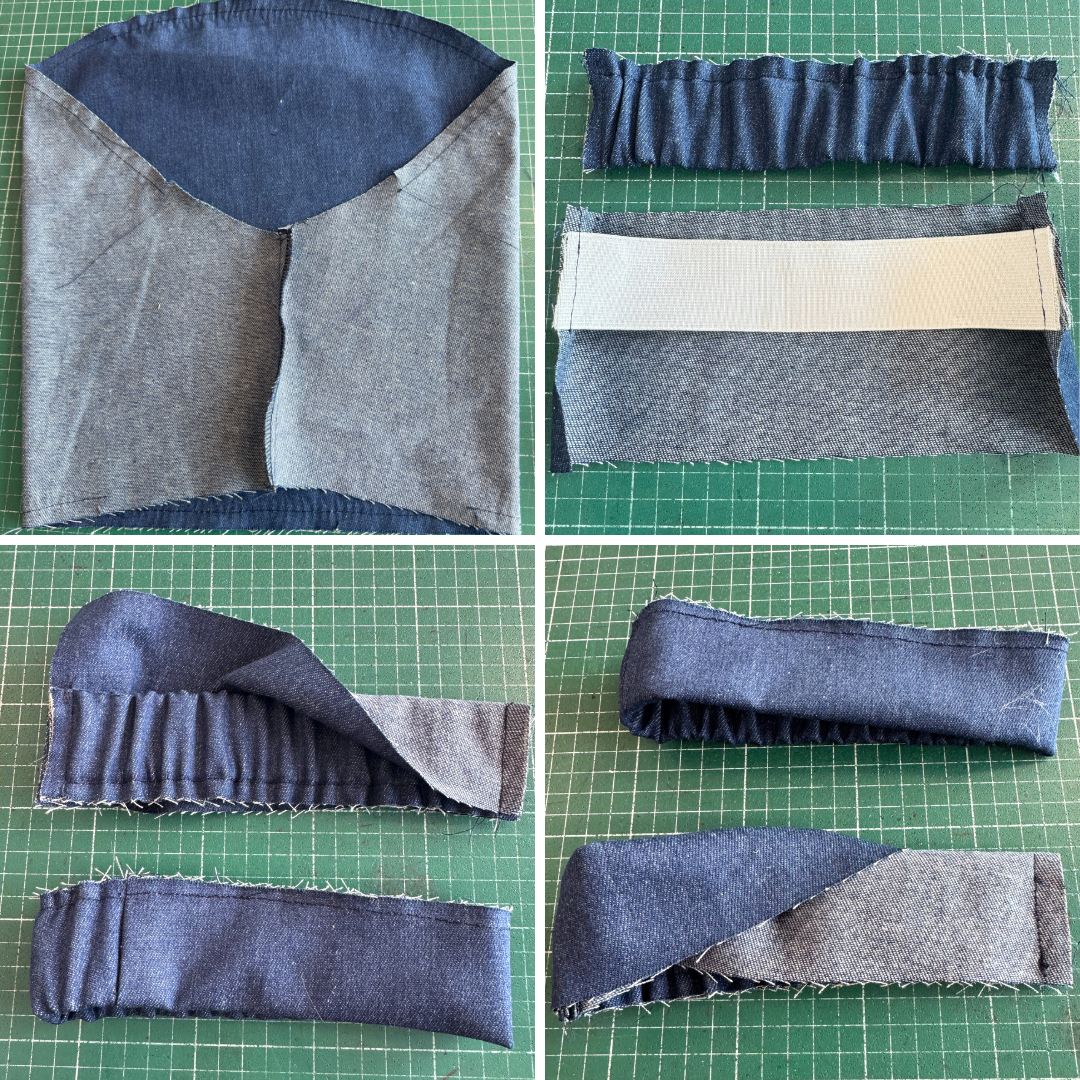
Cut the elastic to your personal length (refer to elastic chart). Sew the elastic to each end of one half of the Under Cuff (10). Fold the other edge of the cuff over the elastic, stitch along the sides and across the base of the under cuff, encasing the elastic.
With RST, pin the Top Cuff (9) to the end of the under cuff and wrap around, sandwiching the under cuff and sew. Repeat with the other side of the cuff, creating a loop. Baste the raw edges of the cuff together.
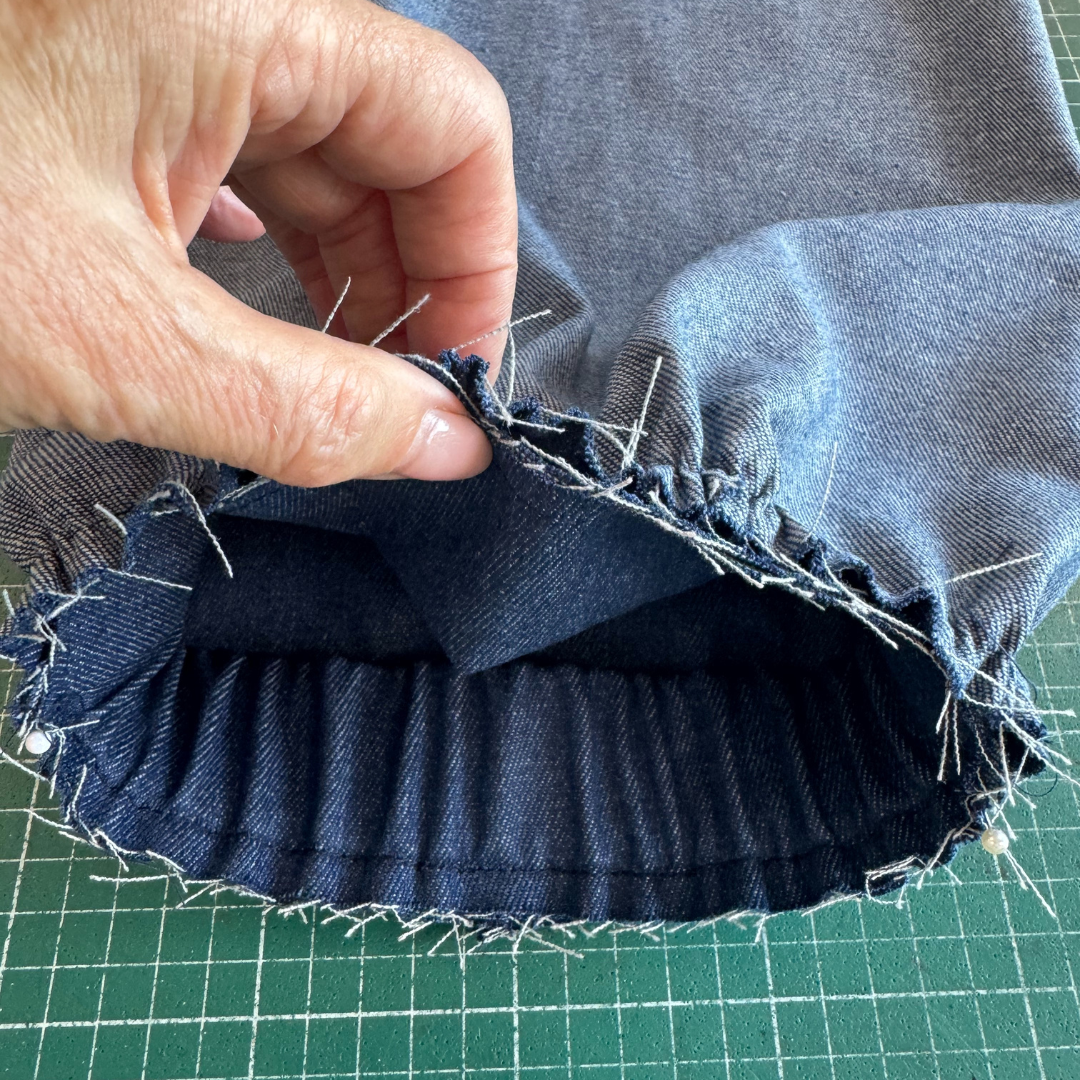
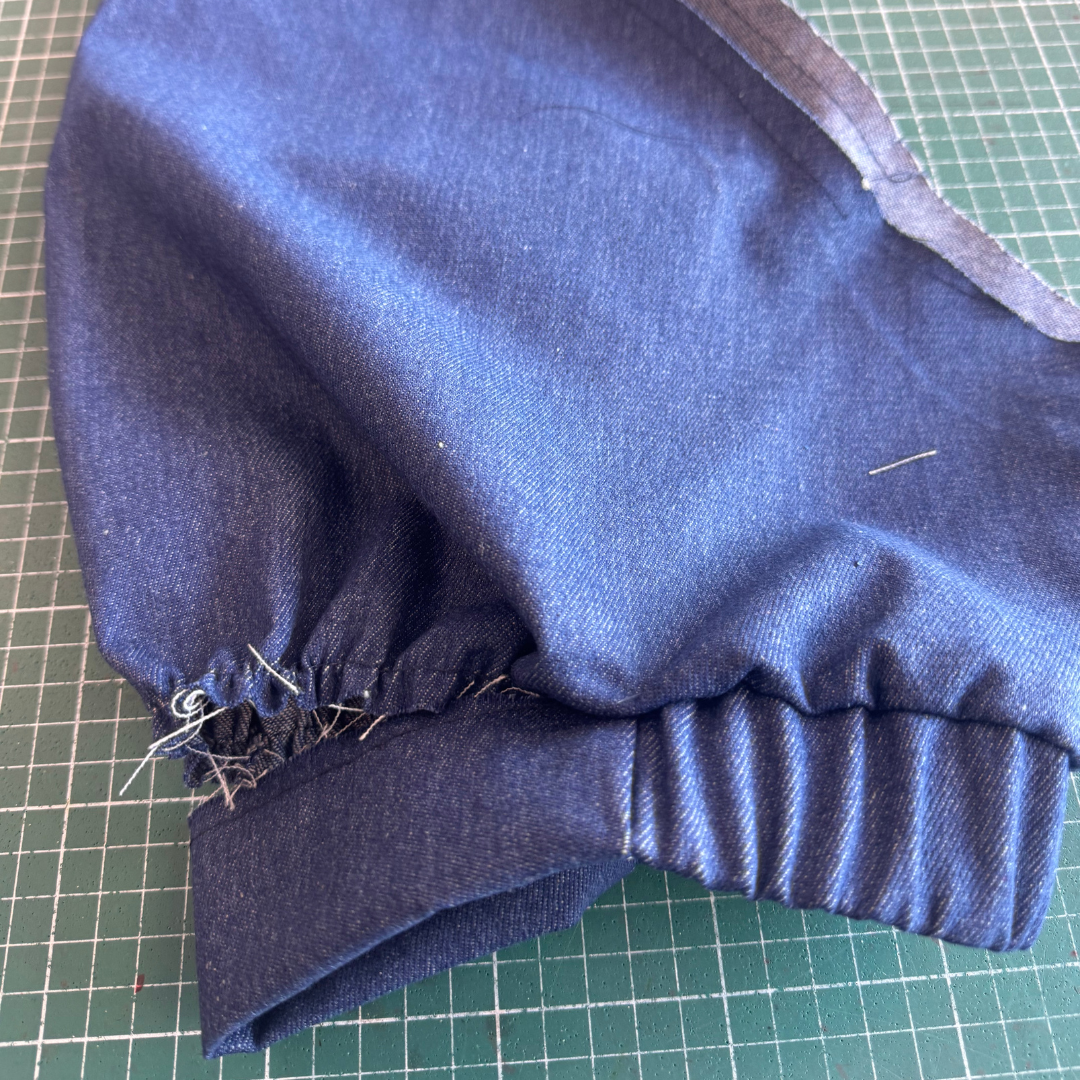
Sew a large gathering stitch to the lower edge of the sleeve between the notches and gather up to align with the seams on the top cuff. Pin the cuff to the sleeve, sew then neaten using an overlocker/serger. Press toward the sleeve.
Sew a large gathering stitch to the head of the sleeve between the notches and gather up to align the notches with the main body.
With RST and aligning notches and under arm seams, pin the sleeve into the arm opening. Sew then neaten using an overlocker/serger and press toward the sleeve.
COMPLETION OF SLEEVED OPTION:
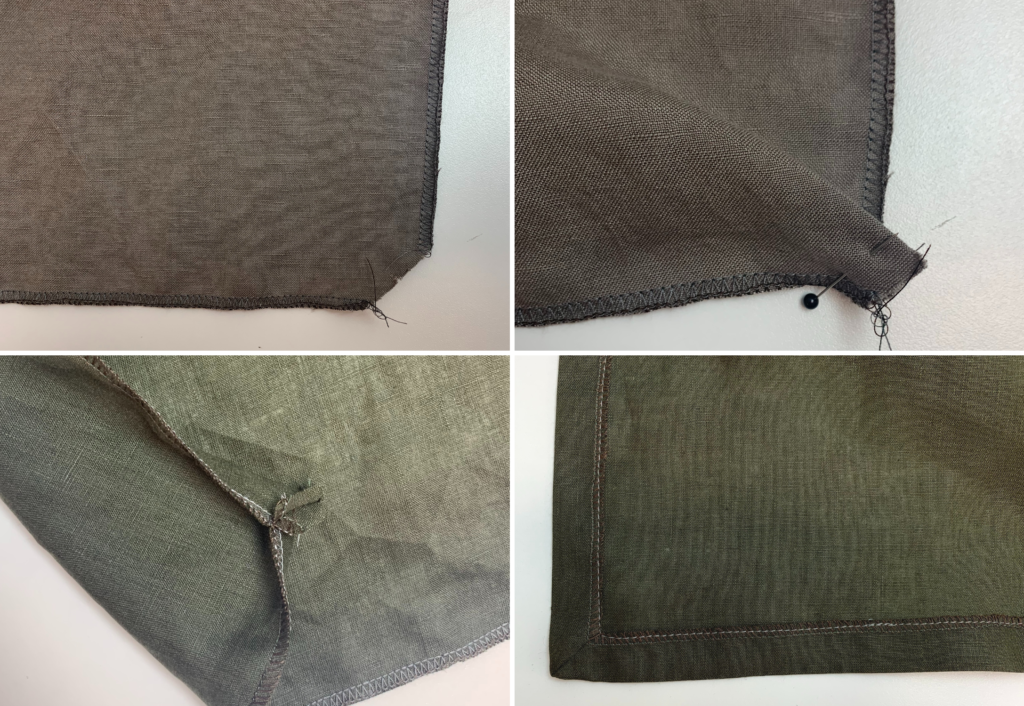
With RST sew the mitre corner of the front hem spilt (see the Mitred Corner tutorial on stylearc.com).
Turn the mitred corner out to the right side and press the split seam and the hem. Topstitch the front split and hemline, starting at the side seam. When you reach a corner keep the needle down, lift the presser foot and pivot. Continue sewing along the split and hemline, finishing back at the side seam.
Press your new dress.
OPTIONAL BELT LOOPS:
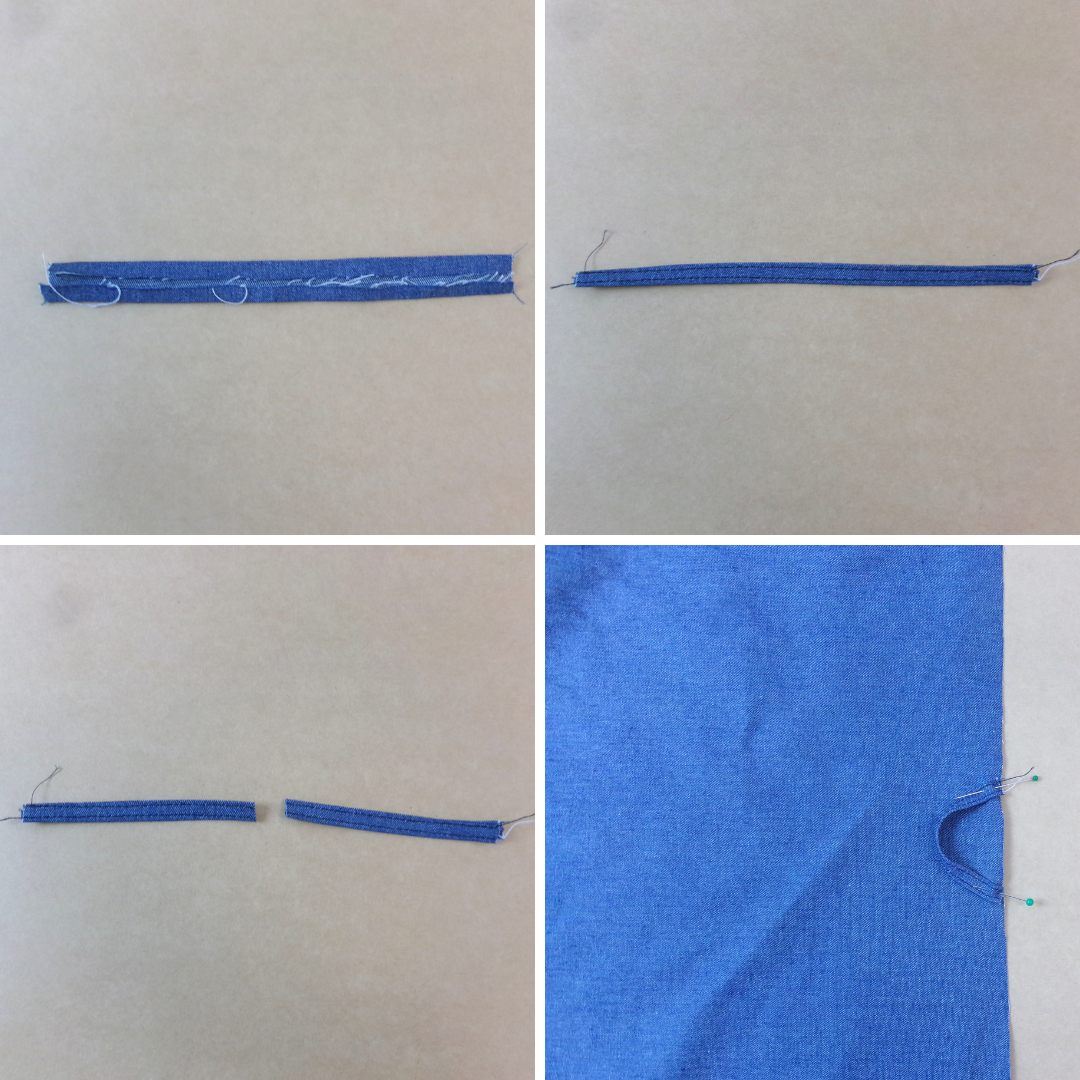
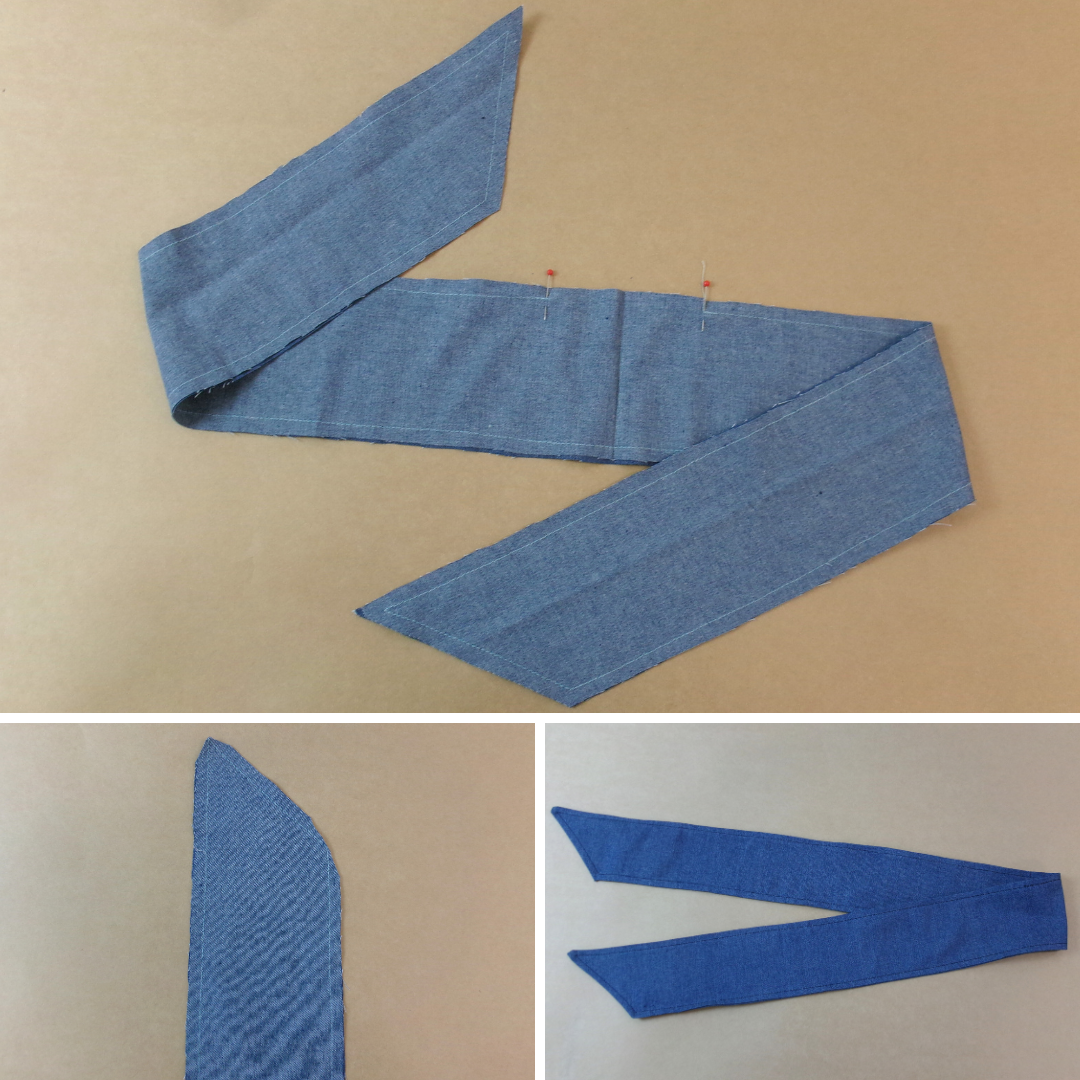
Fold the long edges of the Belt Loop (7) 6mm (1/4”) to the inside and press. Fold the belt loop in half lengthways, press, then edge stitch. Cut the belt loop in half so you have two. With RST, sew the loop ends to the side seam at the positions marked on the pattern. The loop will face inward; when the seam is finished, the loop will be facing outward.
OPTIONAL POCKETS: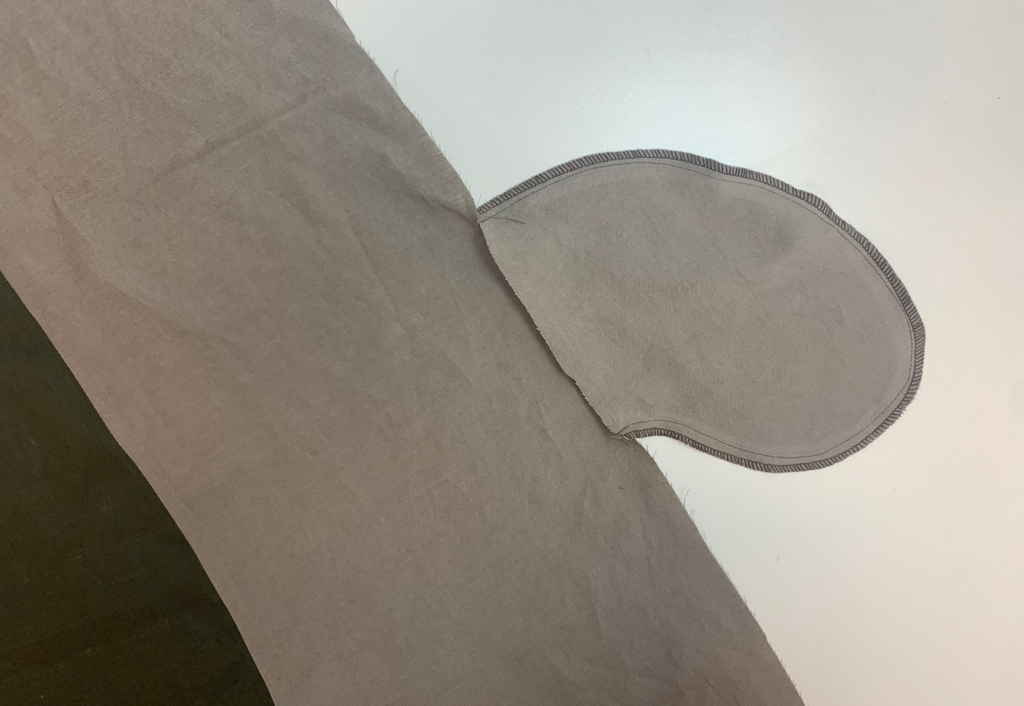
With RST and notches aligned, sew one set of Pockets (5) to the side front at the side seam (seamline ‘A’ on the pattern). Clip the seam at the notches and sew an understitch on the side of the pocket bag. This is pocket bag 1.
With RST, lay pocket bag 2 on top of pocket bag 1, align and sew both pocket bags together (seamline ‘B’ on the pattern). Note that the straight edge of the under pocket is left free to sew to the back leg side seam. Neaten around the pockets using an overlocker/serger. Secure stitch each end of the pocket opening.
OPTIONAL BELT AND SHOULDER TIE:
With RST, sew the pair of Belt (6) or Shoulder Ties (13) around the outer edges, leaving a gap of 10cm (4”) for turning out. Clip the corners and turn to the right side.
Carefully press under the seam allowance in the gap, press the seams. Top stitch.