Before you start sewing you might want to rummage through that fabric stash and plan your colour/print layout for the different panels of the Hendrix Coat, click the link below to download the Hendrix Coat Colour It Your Way PDF and have some fun!
✏️ Colour It Your Way PDF Download ✏️
HELPFUL HINTS:
Hendrix is a complex panelled coat so here are some hints to help you through.
- Refer to the notes written on the pattern pieces and be sure to match the notches as you sew.
- The seam allowances are marked on each pattern piece with a dashed line and are 1cm (3/8”) and 6mm (1/4”).
- Fuse the noted pieces, fusing may be not required for faux fur or a heavy weight fabric.
- Take time in selecting your fabric combination. Hendrix can be made in all self-fabric or a mix of 3 colourways/fabrics. Colourways are marked on the pattern pieces, 1, 2 & 3.
- Cut out the pattern pieces, pin to your fabric, mark with chalk and cut.
- This is an interesting pattern to sew together. We suggest transferring the A, B, C etc. markings on the pattern pieces onto the wrong side of your fabric and then lay the pieces out on a table in position. When you are ready to sew just pick up the pieces matching the markings to avoid confusion.
- Topstitching is optional and not necessary for faux fur. If topstitching faux fur we suggest to sew it from the wrong side and to trim away the bulk of the fur from the sewn seams.
- We bound the neck, hem & sleeves using the binding pattern pieces in a linen fabric for colour 3, if your fabric is thick or heavyweight you may prefer to use a commercial ready-made binding. Alternatively, if you don’t want to use binding, you can turn out the top and base of the front band, neaten the hems and neck with an overlocker/serger, turn in and topstitch.
- The hem binding has a centre back seam due to the length of the binding being cut on the bias grain, however if your fabric is wide enough or if you are using commercial binding no centre back seam is required.
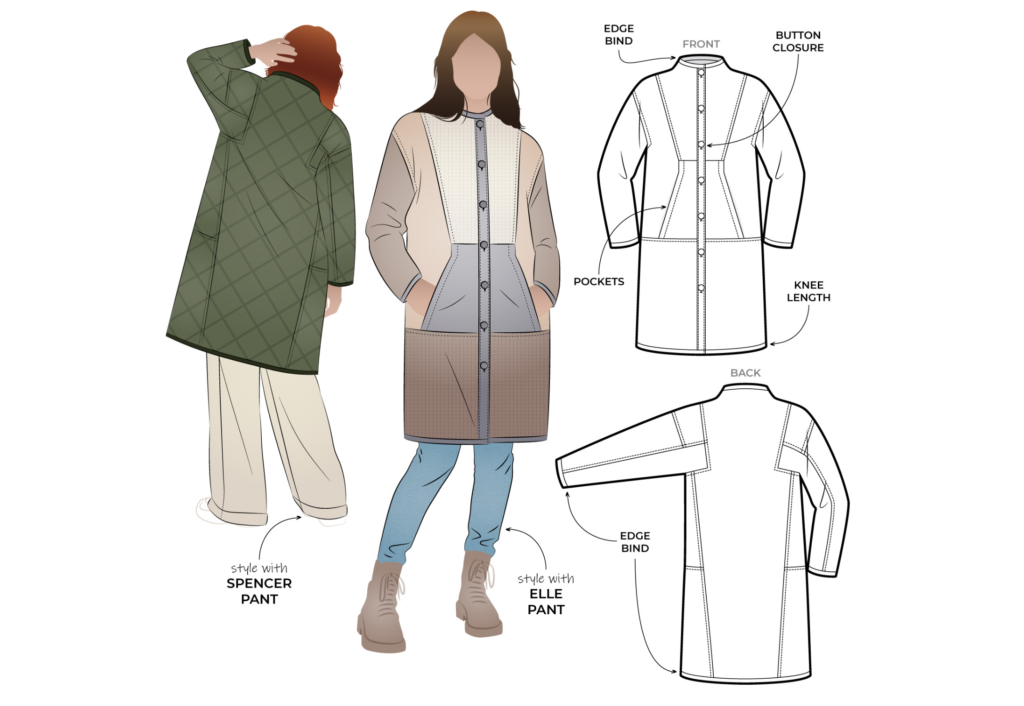
- The front closure can be buttons or snaps.
CONSTRUCTION:
POCKETS:
Neaten the outer edge of the Pocket Facing (10) with an overlocker or serger and with right sides together sew the facing to the angled edge of the pocket opening (9), turn out and sew an understitch close to the seam on the side of the facing. Press the pocket with the facing to the inside of the pocket and pin in place. Sew an edge stitch to the outer opening edge and a topstitch to the inner neatened edge of the pocket facing.
With the wrong side of the Pocket (9) on top of the right side of the Middle Front (4) sew around all the edges to hold in place.
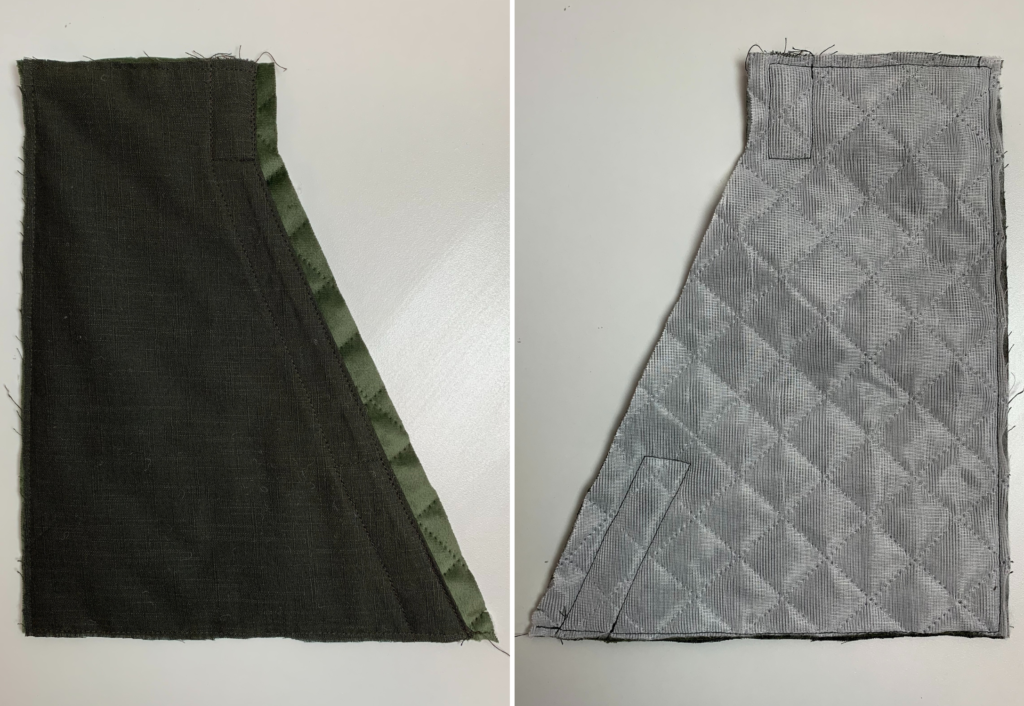
To reduce the pocket opening length sew a 5cm (2”) topstitch to the top and base of the pocket following the edge stitch and the topstitch already sewn to the pocket, this is to reinforce the pocket opening. Refer to the markings on the pattern.
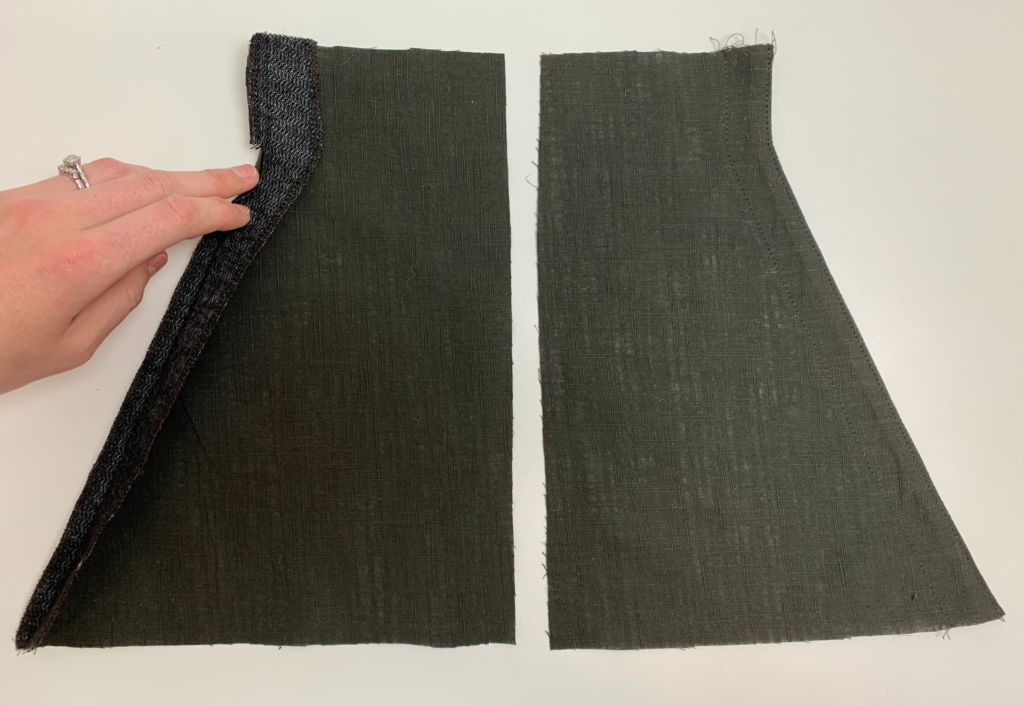
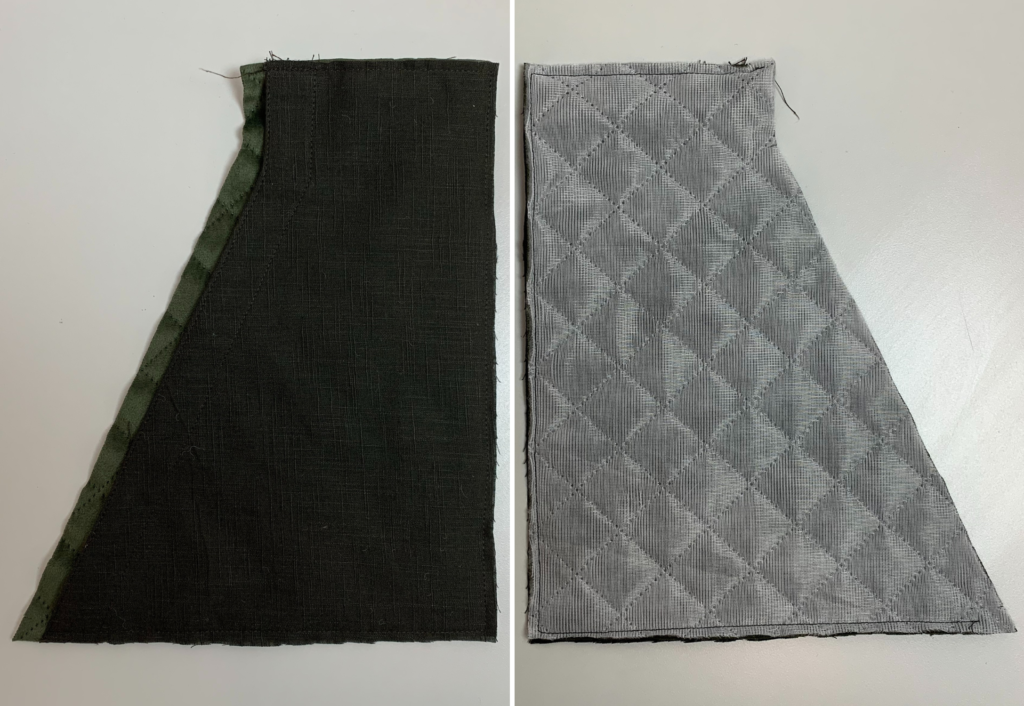
BODY:
With right sides facing sew the Middle Front (4) to the Top Front (2). Neaten with an overlocker/serger and press the seam upwards. Sew a 6mm (¼”) topstitch on top of the seam.
With right sides facing sew the Front and Back shoulder seams together. Neaten with an overlocker/serger and press towards the back. Sew a 6mm (¼”) topstitch on top of the seam.
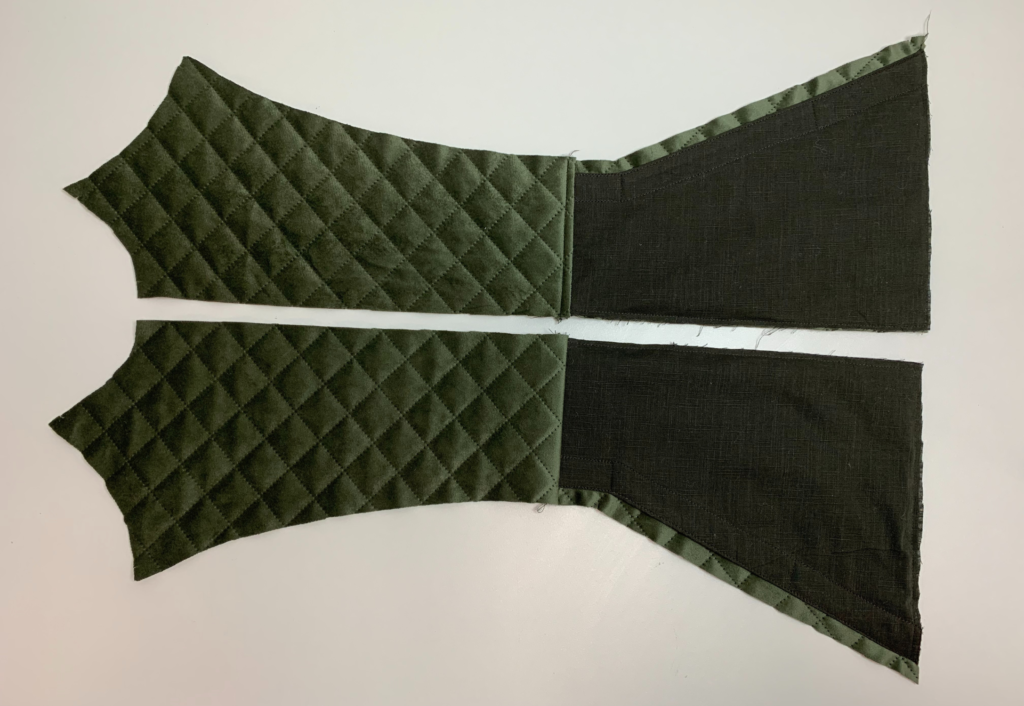
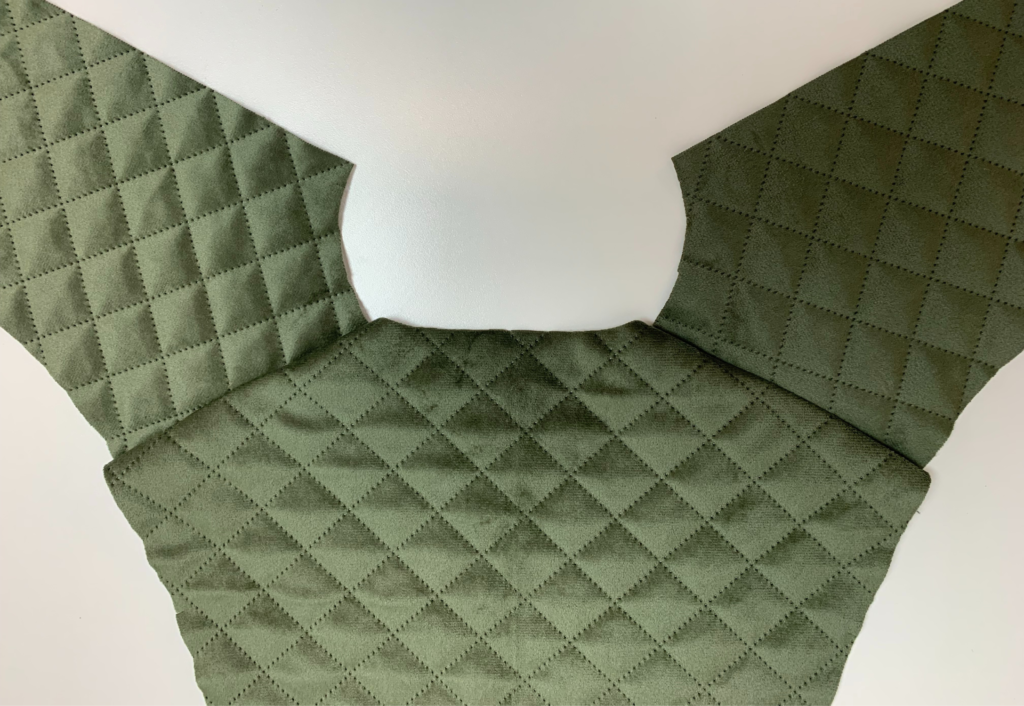
With right sides facing sew the Top Sleeve (5) to the Side Front armhole pattern piece (6) follow A, B & C. Neaten with an overlocker/serger and clip into the curved area. Press the seam towards the body and sew a 6mm (¼”) topstitch on top of the seam.

With right sides facing sew the Top Sleeve (5) to the Side Front armhole pattern piece (6) follow A, B & C. Neaten with an overlocker/serger and clip into the curved area. Press the seam towards the body and sew a 6mm (¼”) topstitch on top of the seam.
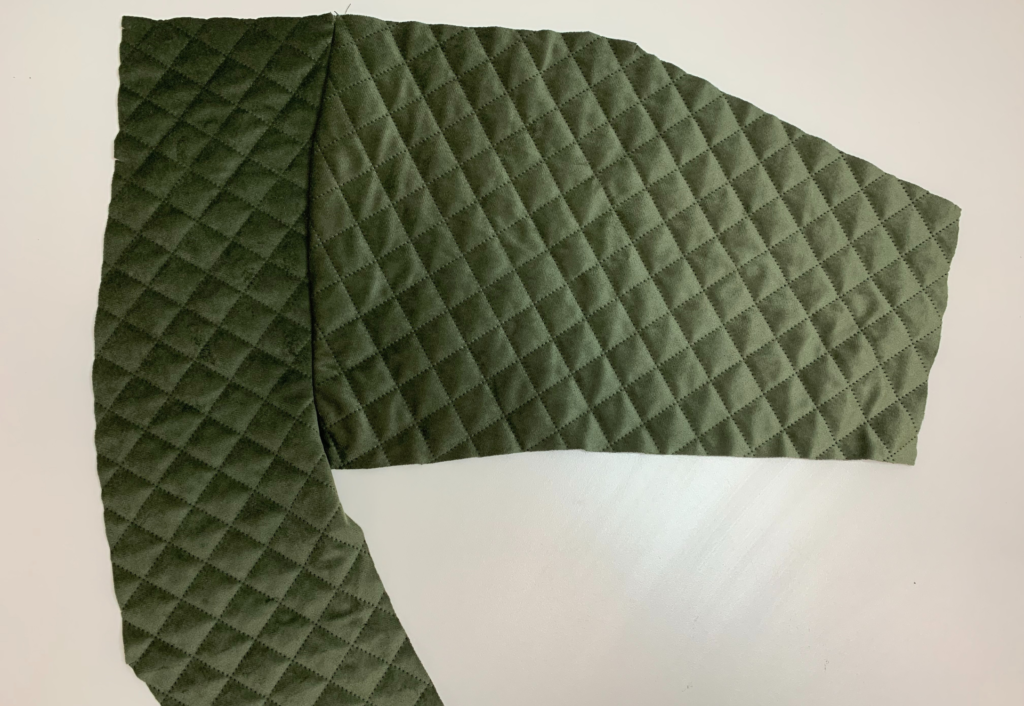
With right sides facing sew the Under Sleeve (7) to the Top Sleeve (5) and the top of the Side front panel (6). Neaten with an overlocker/serger and press towards the Under Sleeve. Sew a 6mm (¼”) topstitch down the sleeve on top of the seam.
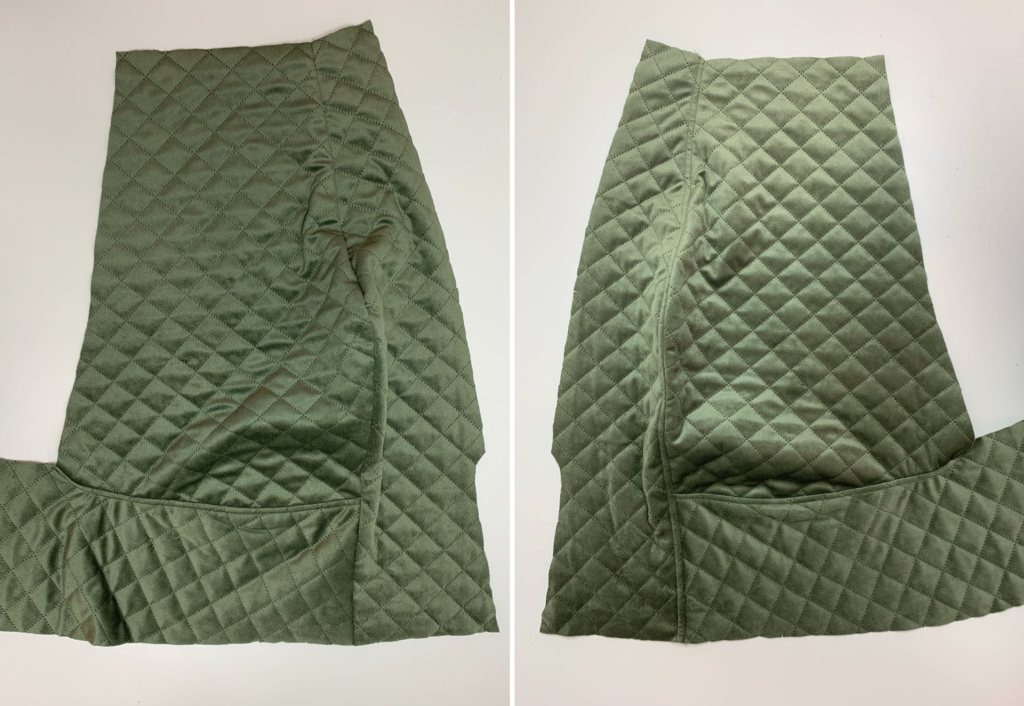
With right sides facing sew the Side Front (6) to the Middle Front (4) and Top Front (2) continue through to the Back Panel (1) matching (E & D) as you sew. When arriving at ‘F’ keep the needle down, clip into the corner, turn and continue sewing towards the side seam ‘C’. Neaten with an overlocker/serger and press towards the body. Starting at the base of the mid front panel (2) sew a 6mm (¼”) topstitch on top of the seam, when arriving at ‘F’ keep the needle down, turn the corner and continue he topstitch towards the side seam ‘C’.
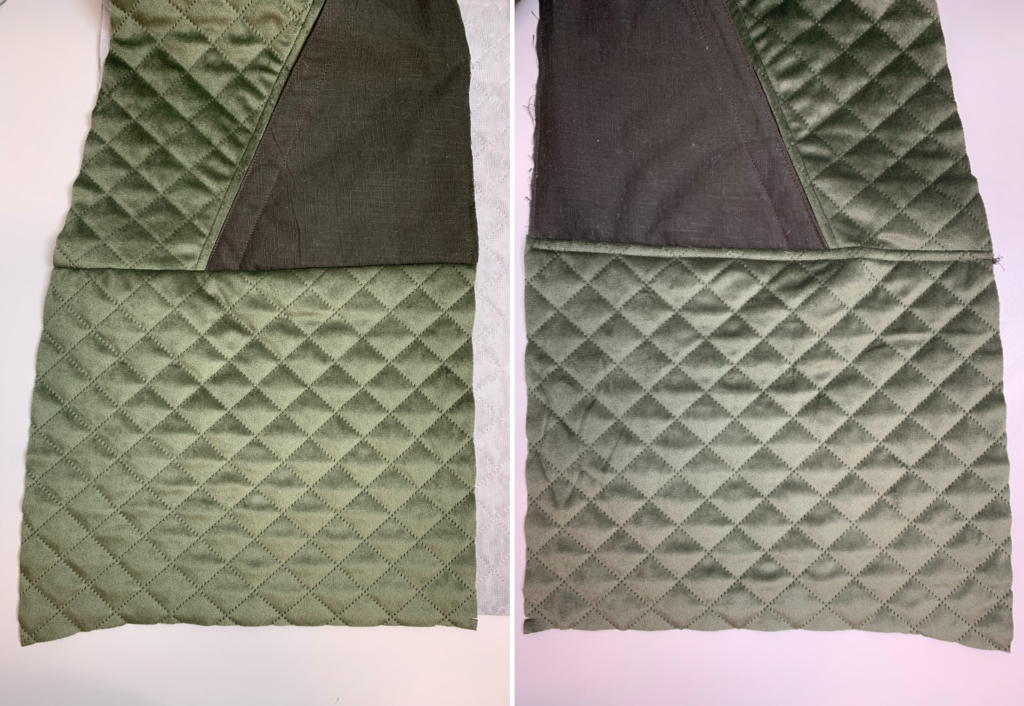
With right sides facing sew Lower Front (3) to Mid Front (4) and Side Front (6). Neaten with an overlocker/serger and press towards the hem. Sew a 6mm (¼”) topstitch on top of the seam.
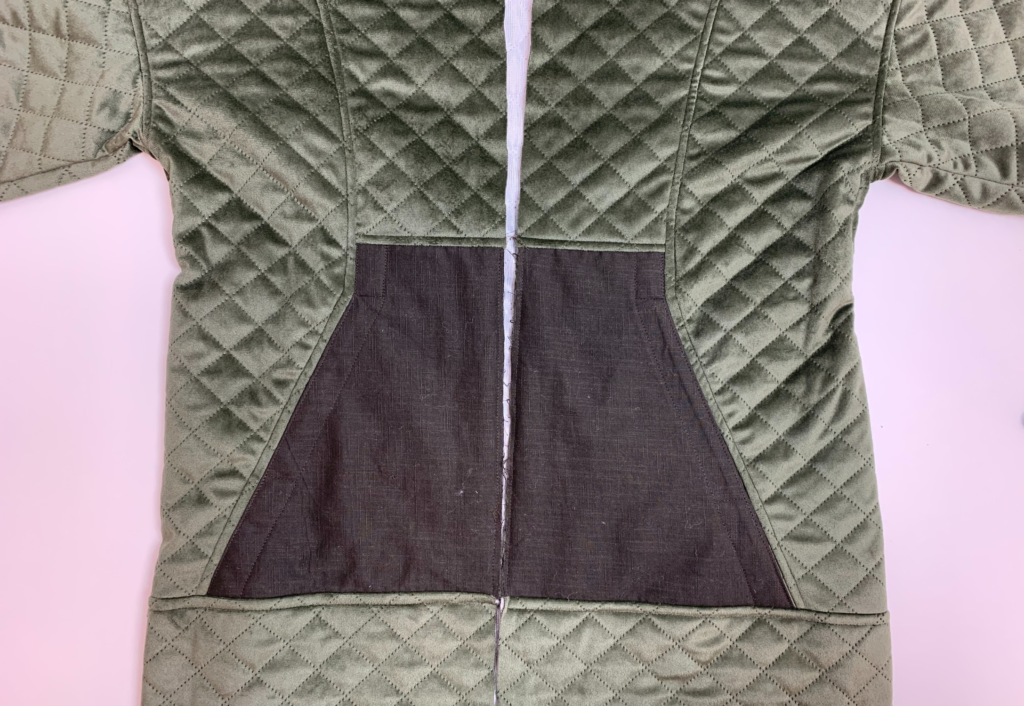
With right sides facing sew the front and back side seams together, start at the sleeve opening, sew along to the underarm (C), clip into the curves and continue sewing down to the hem. Neaten with an overlocker/serger and press towards the back. Sew a 6mm (¼”) topstitch on top of the side seam finishing at the underarm.
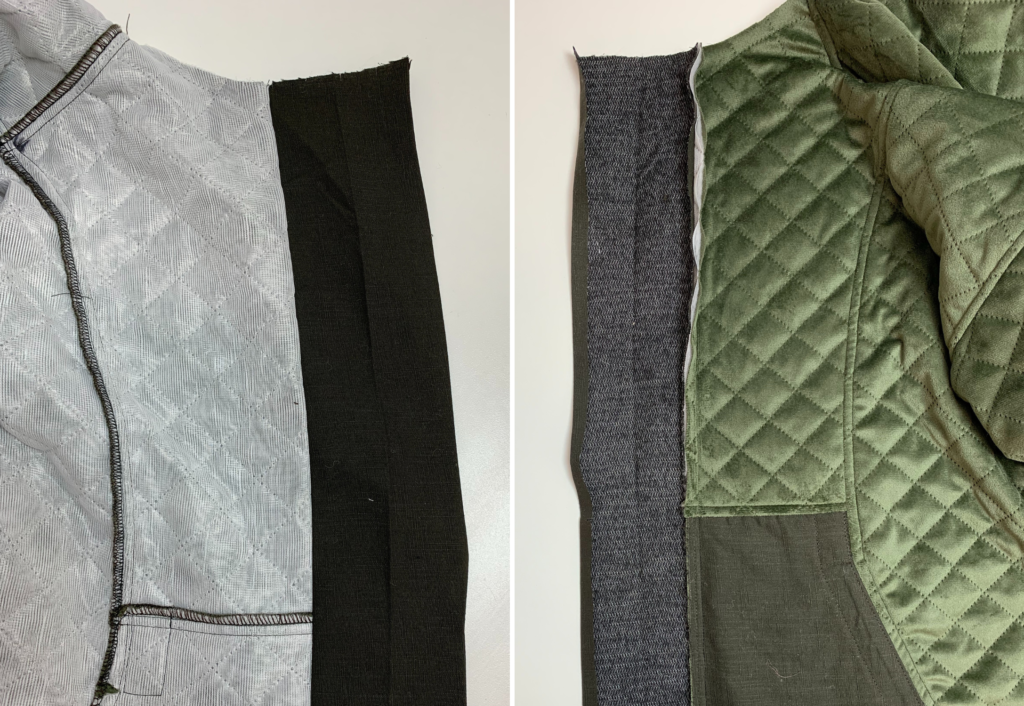
From the inside and with the right side of the Front Band (8) facing the wrong side of the Front Panels (2, 4 & 3) stitch together along the centre front.
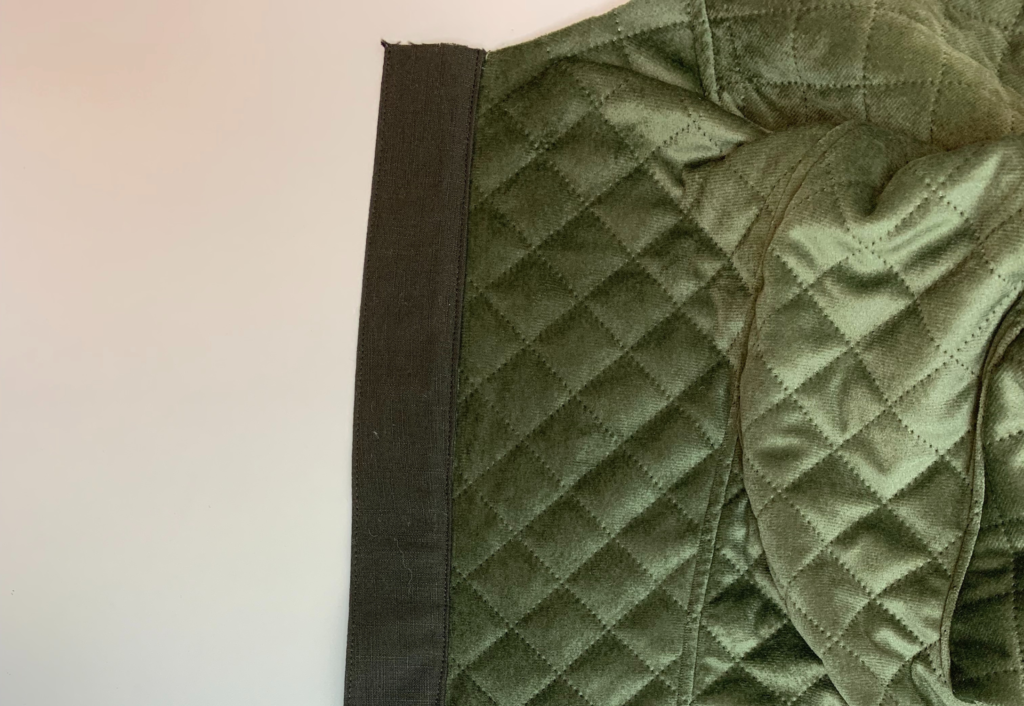
Turn the band over to the right side of the front and with the remaining seam allowance of the band pressed inward, pin the band along the seam, once in place stitch down with an edge stitch.
BINDING:
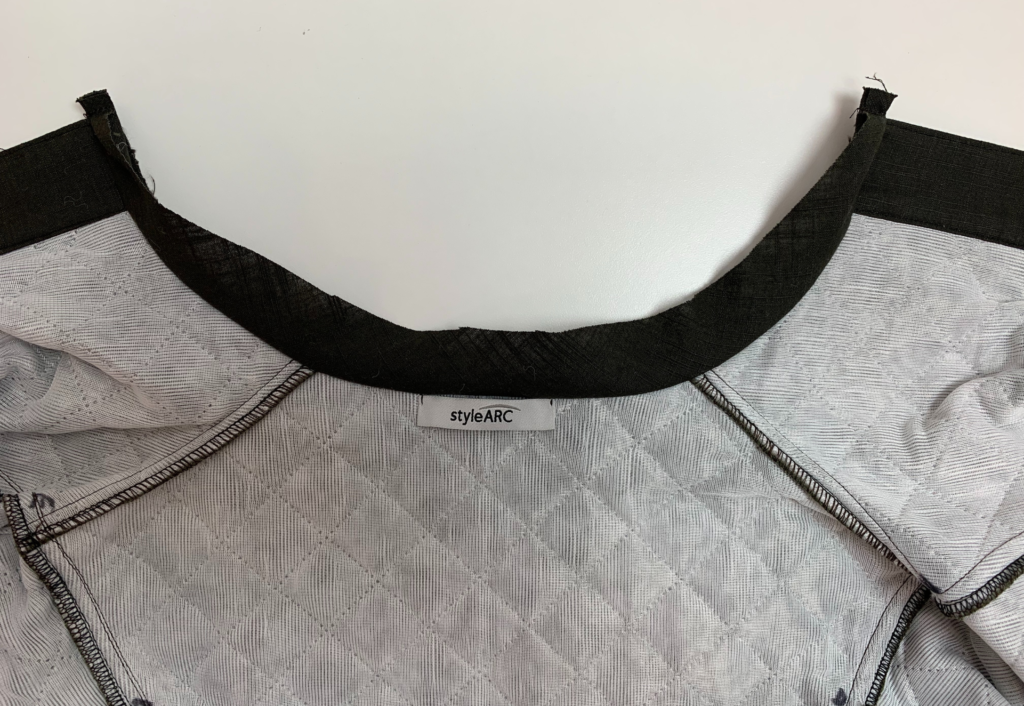
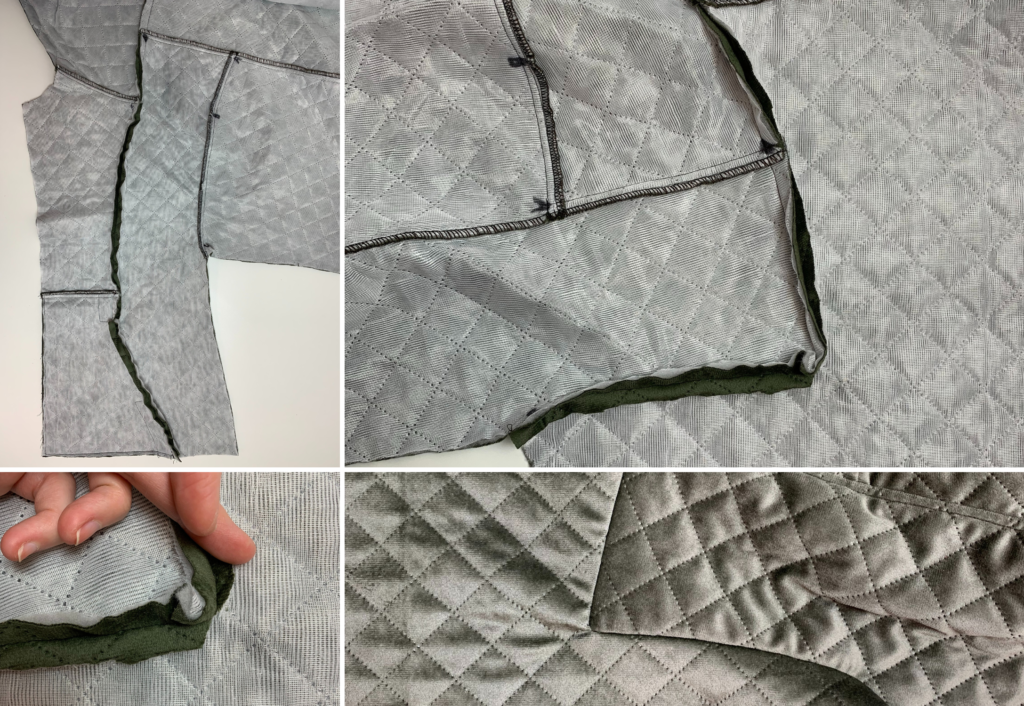
Leaving approx. 1cm (3/8”) overhang on the binding and with the right side of the binding facing the wrong side of the neck, sew the binding to the neckline. Turn the binding over to the right side and with the seam allowance and the ends of the binding pressed inward, edge stitch the binding to the neck.
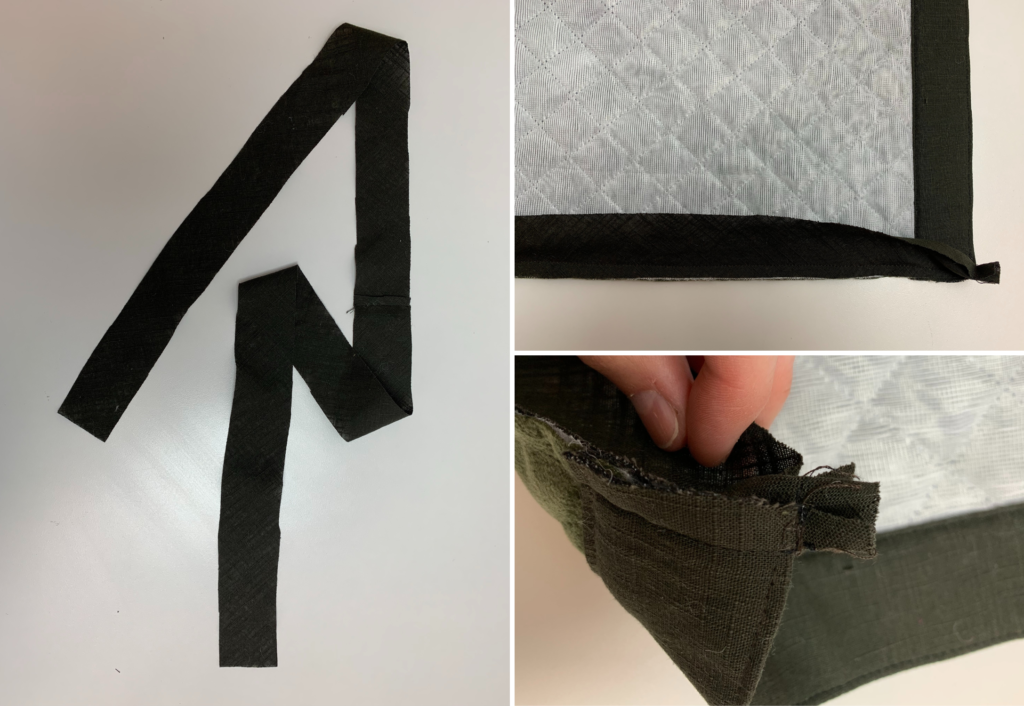
Leaving approx. 1cm (3/8”) overhang on the binding and with the right sides together sew the centre back binding seams together and press open. With the right side of the binding facing the wrong side of the hem, sew the binding to the hemline. Turn the binding over to the right side and with the seam allowance and the ends of the binding pressed inward edge stitch the binding to the hem.
Cheryl’s trick shown in the bottom right photo is to fold the seam allowance in and sew across the end of all layers of the binding so you can trim and then turn out for a neat finish on the end of the binding.
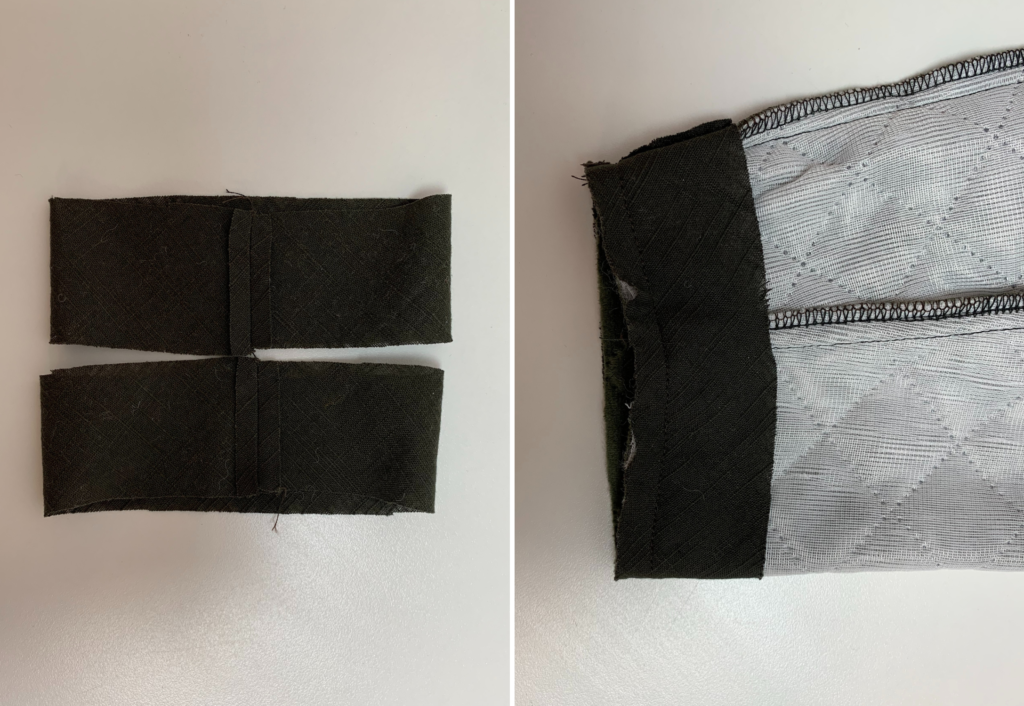
With right sides facing sew the two short ends of each the sleeve binding together, press the seams open. With the right side of the binding facing the wrong side of the sleeve opening, sew the binding to the sleeve opening. Turn the binding over to the right side and with the seam allowance of the binding pressed inward edge stitch the binding to the sleeve opening.
COMPLETION:
Sew the buttonholes/top snaps to the right front band and sew the buttons/under snaps to the left front band to correspond to the right band buttonholes/snaps.
Lightly press your new coat.