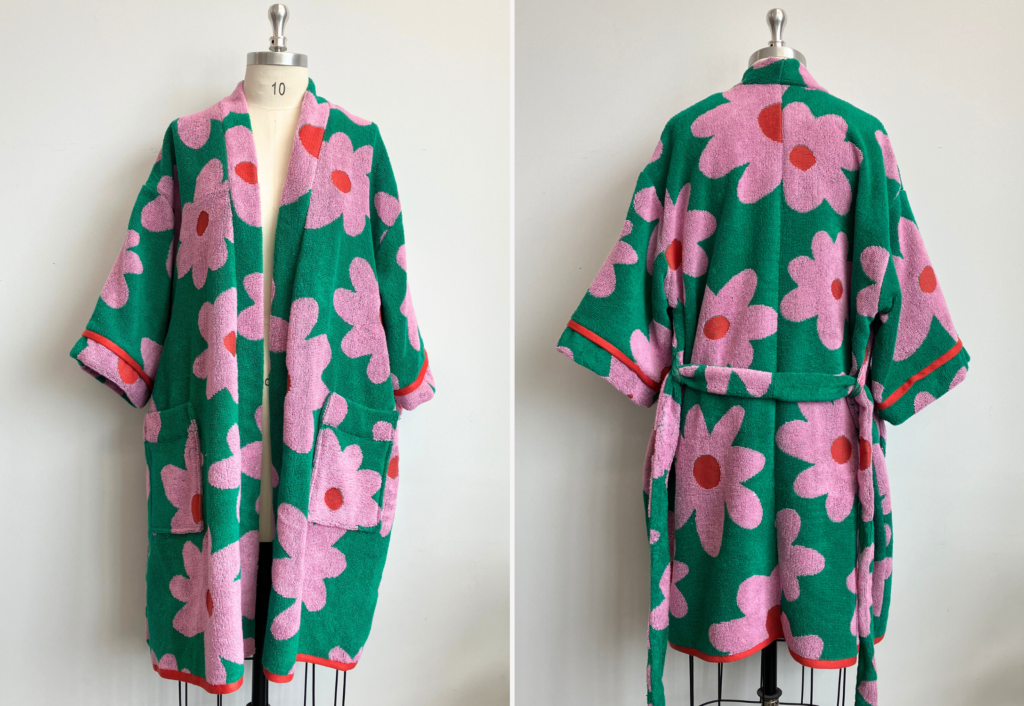
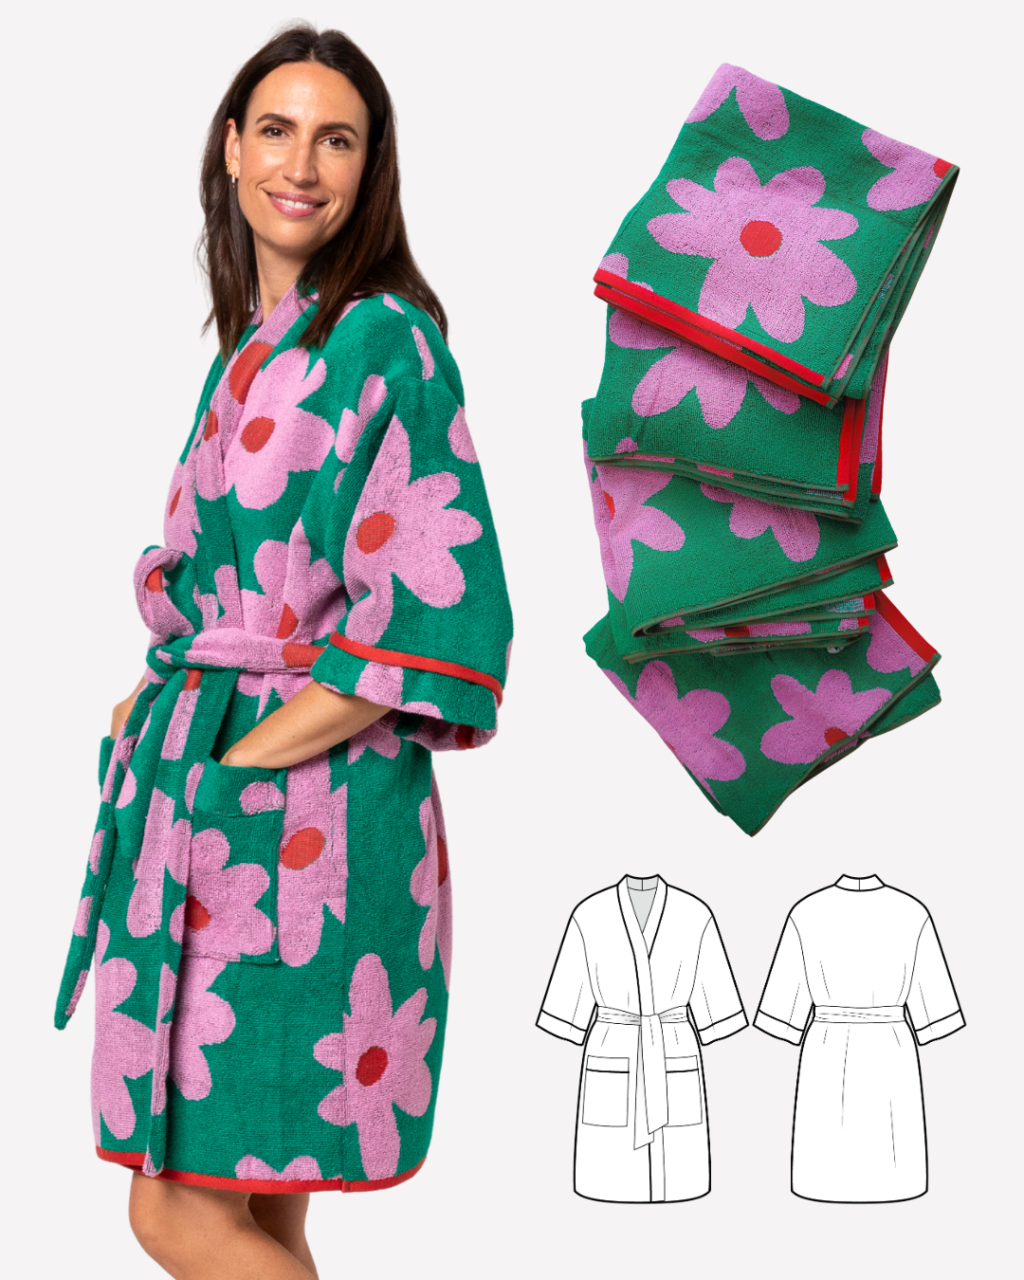
Shop the Loungewear Robe
CONSTRUCTION
HELPFUL HINTS:
- If you have them, use quilters clips instead of pins
- Mark in notches by making small removable stitches using thread in a contrasting colour instead of chalk or snips
- Use a size 100/16 needle and have some spares
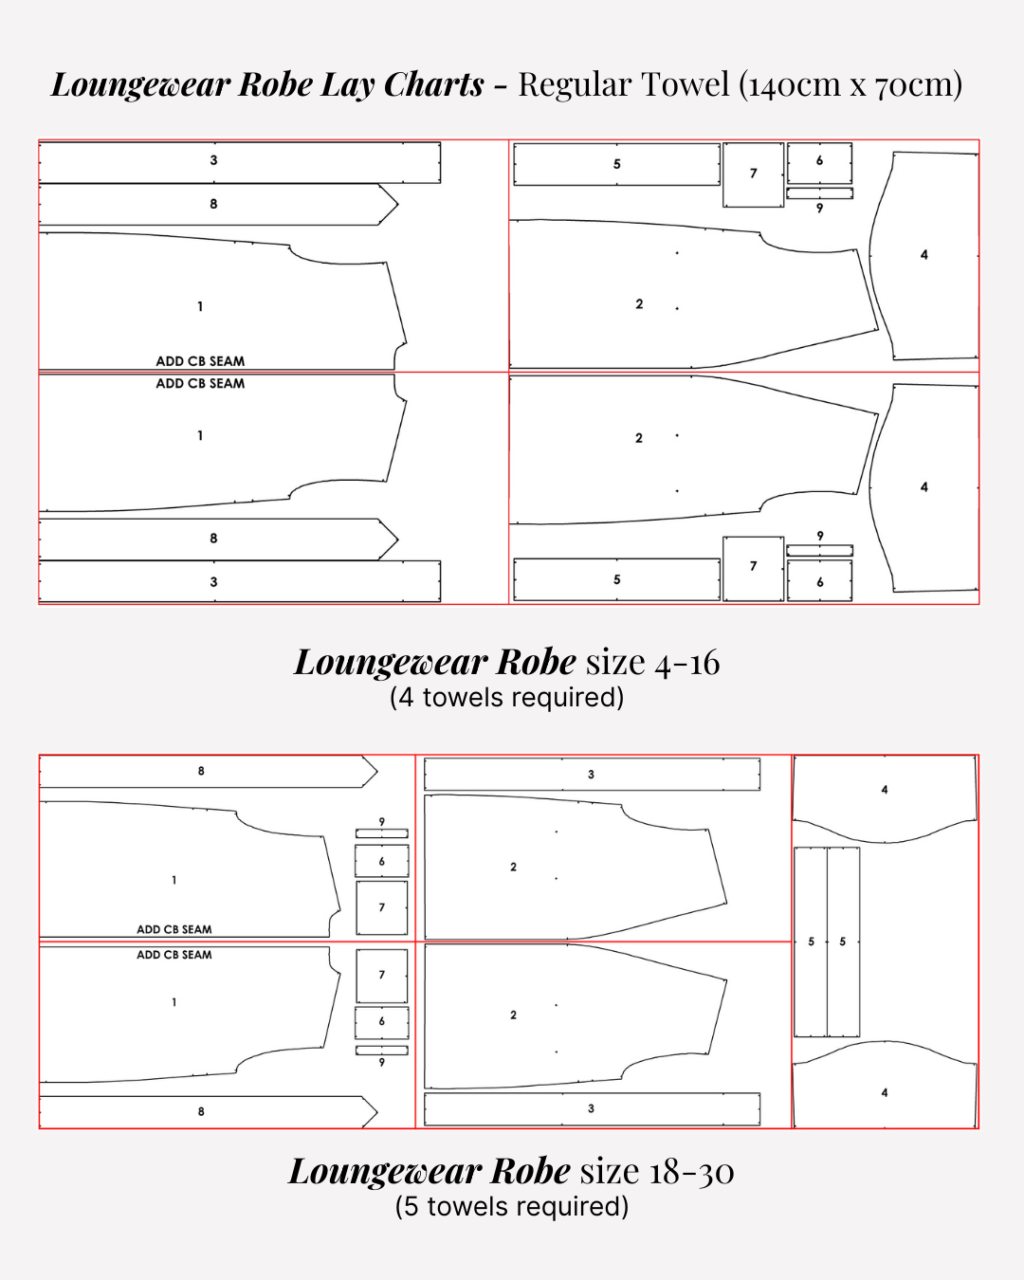
LAY CHARTS AND CUTTING:
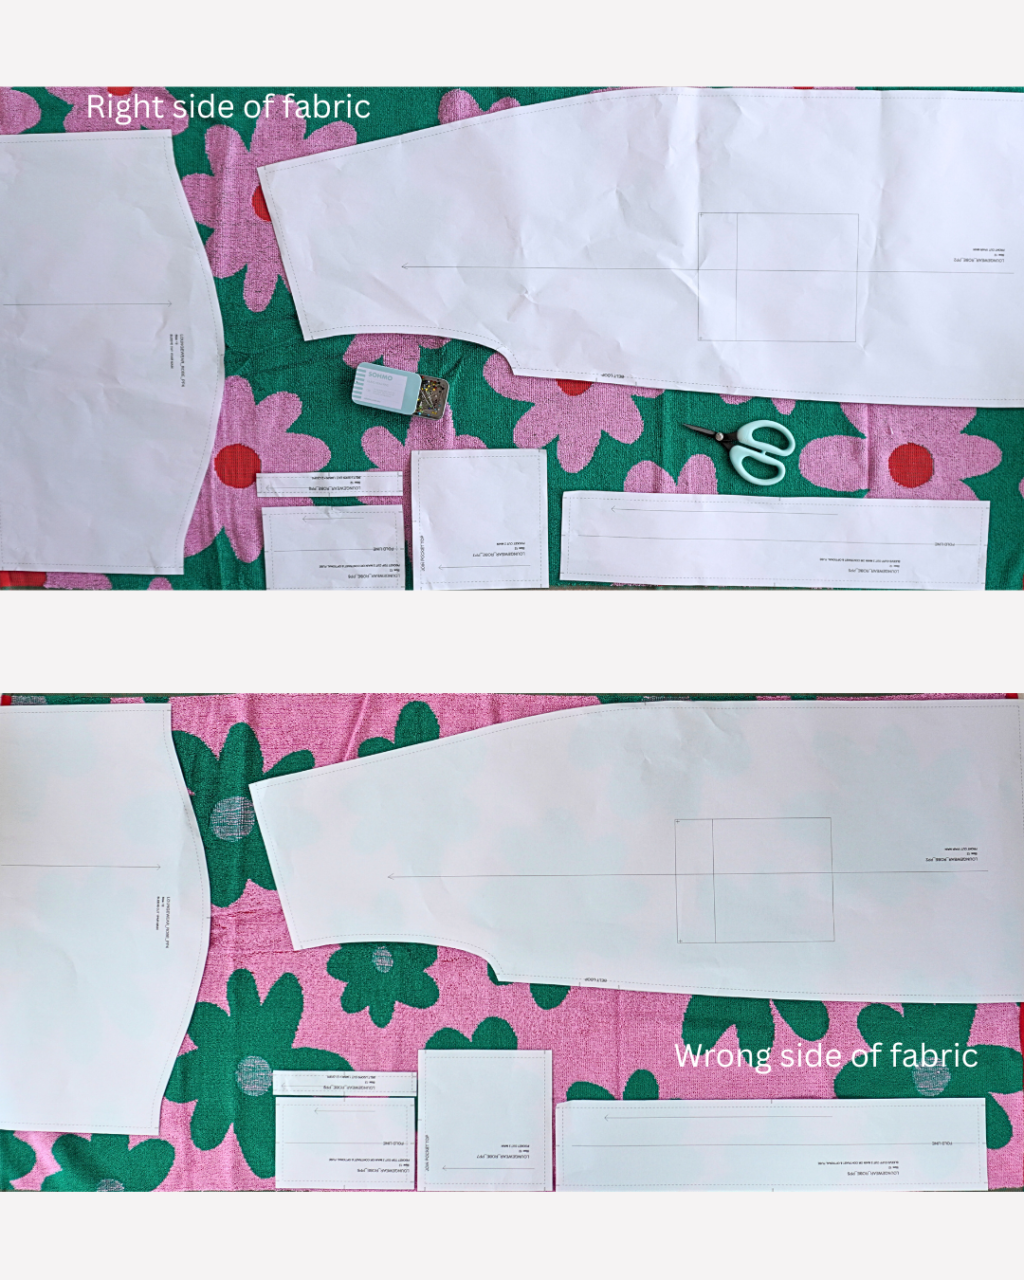
For the Loungewear Robe towel hack please follow the lay charts provided below (these are different to the lay charts provided with the regular construction sheet).
**Please note** the following –
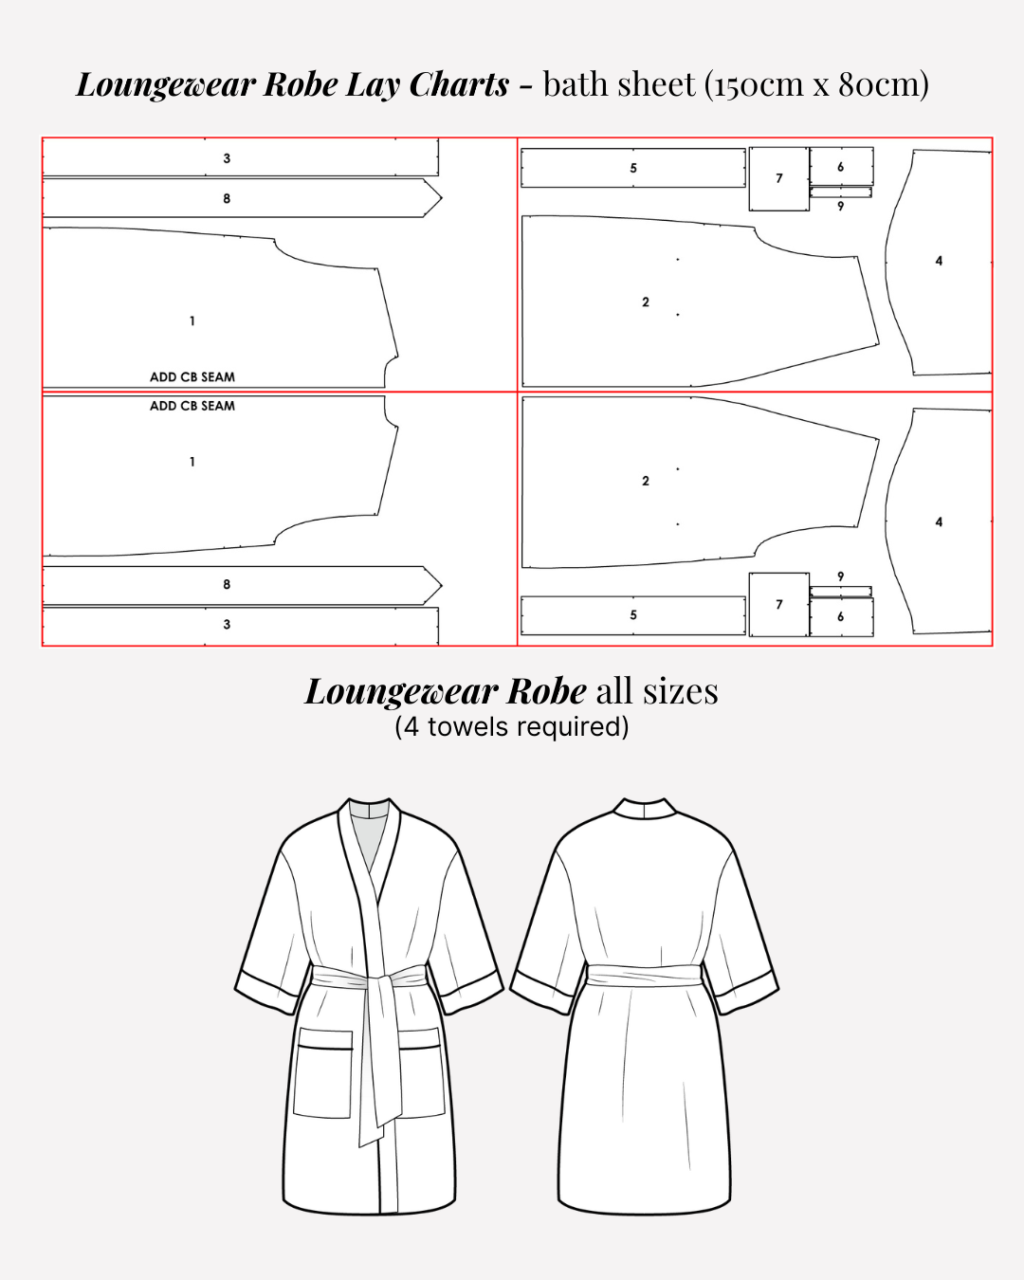
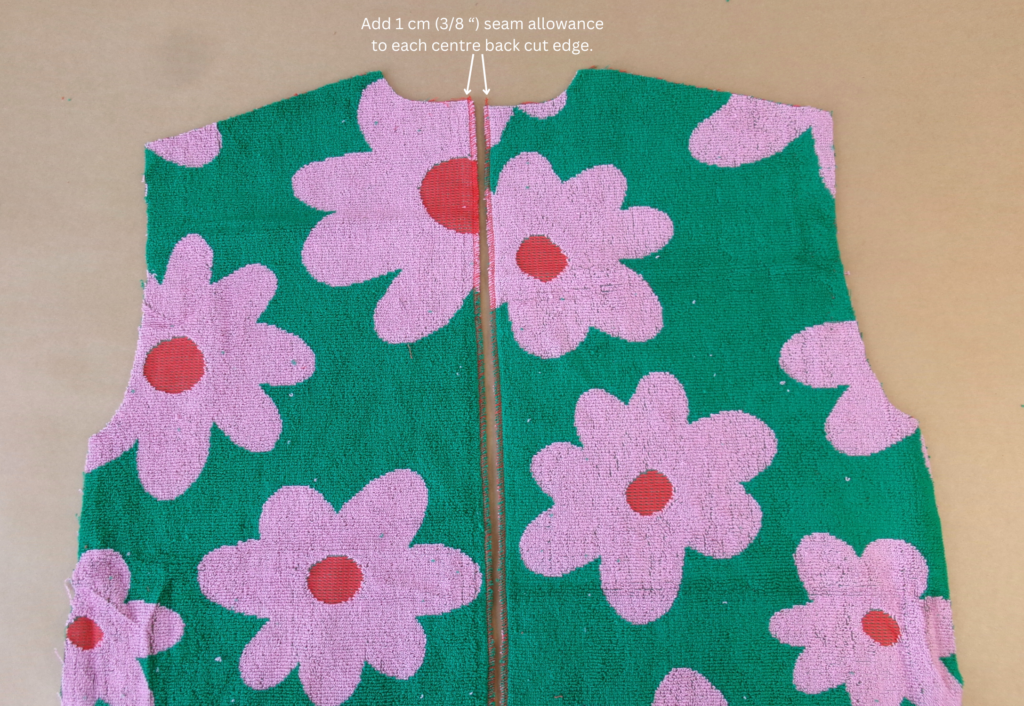
- The Back (1) is to be cut as a pair (instead of on the fold). Before cutting, you will need to add 1 cm (3/8″) seam allowance to each centre back edge.
- We have used the contrast selvedges of the towel at the hem of the robe body and sleeve, so you don’t need to include the hem allowances when cutting. Folding the Front, Back and Sleeve pattern piece hem allowances up at the notches will make aligning the pieces with the selvedge easier.
BODY:
Neaten the centre Back (1) seams with an overlocker/serger.
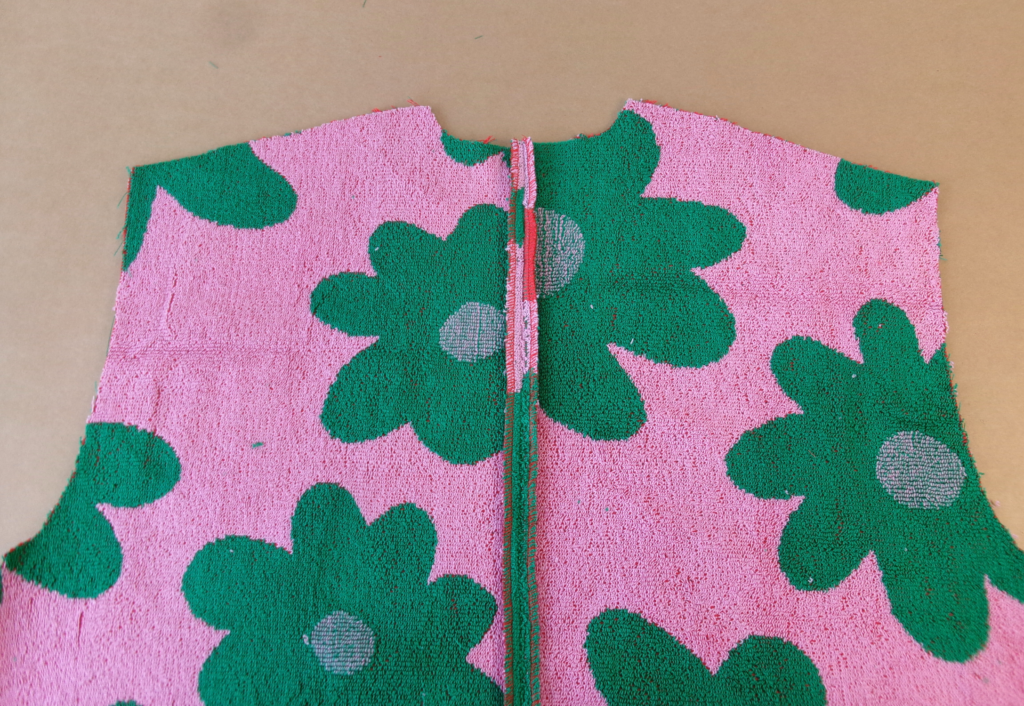
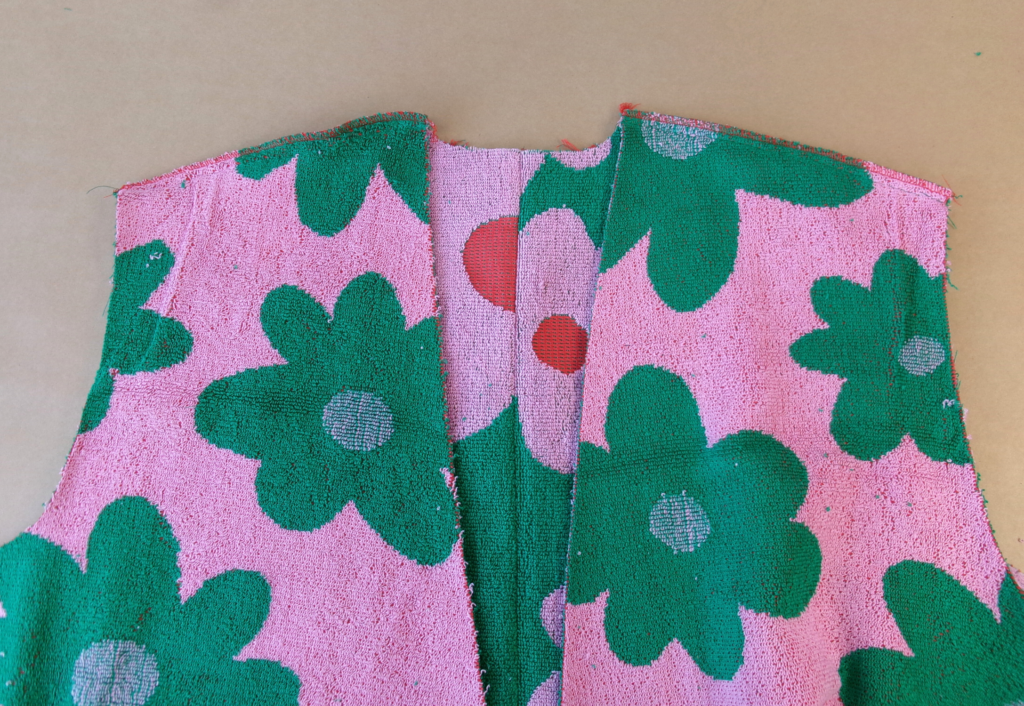
With RST sew the centre back seam together using a 1 cm (3/8 “) seam allowance. Press the seam open.
With RST sew the Front (2) and Back (1) shoulder seams together. Neaten with an overlocker/serger and press the seam toward the back.
With RST and aligning the notches, pin the Sleeves (4) into the armholes. Sew, then neaten with an overlocker/serger. Press the seam toward the sleeve.
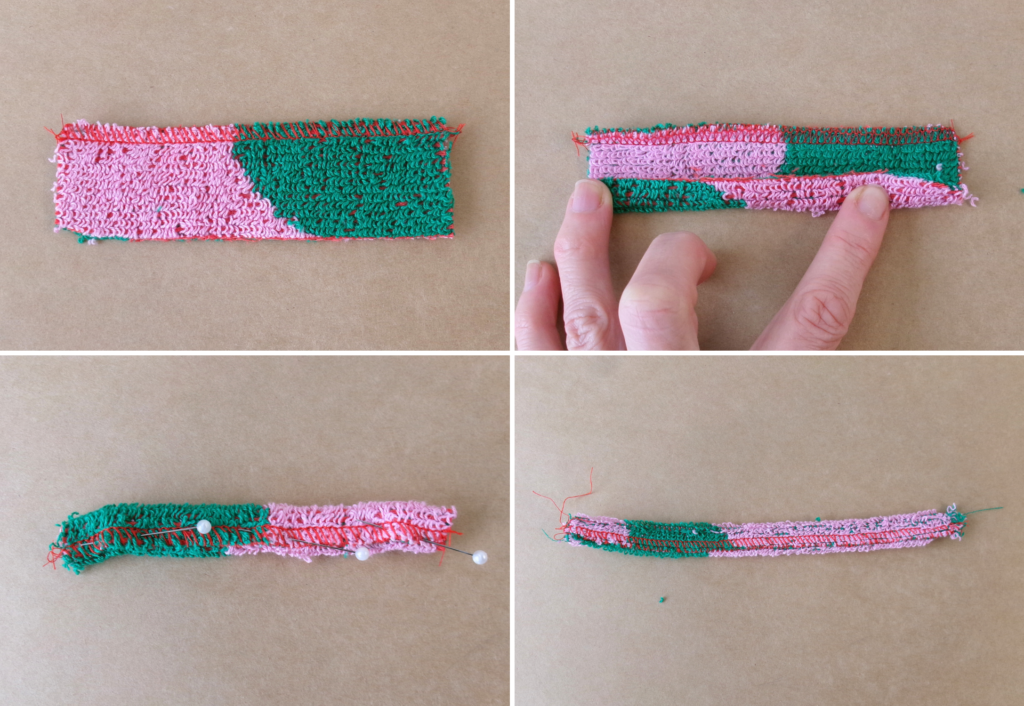
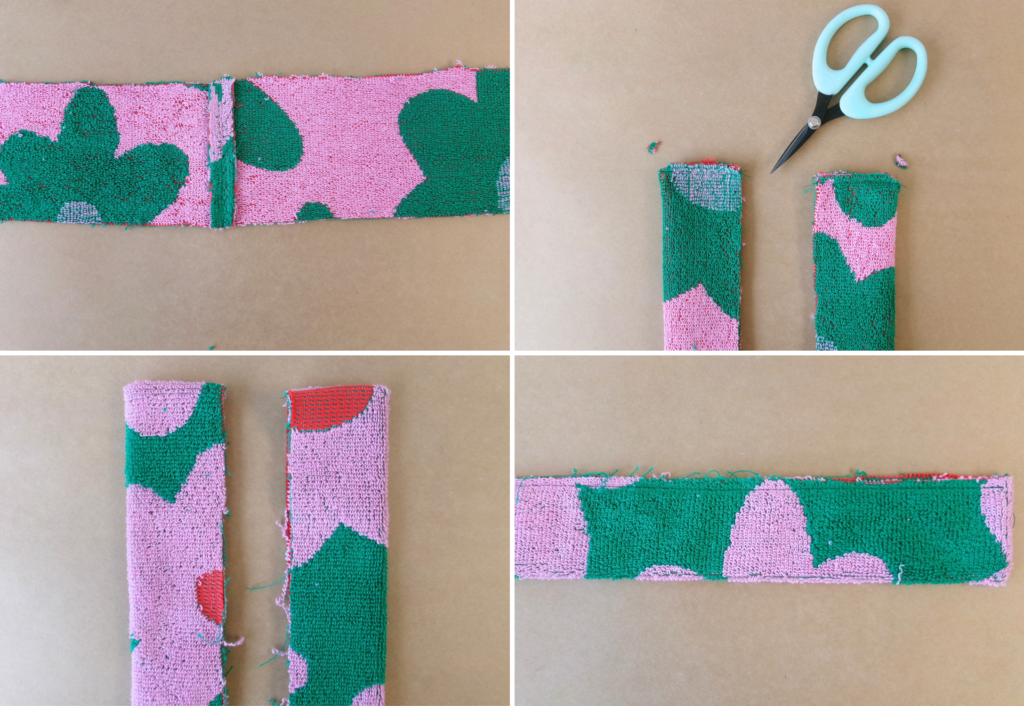
To create the Belt Loops (9), neaten along one long cut edge with an overlocker/serger . Fold the other long cut edge up with WST, to the centre of the width of the loop. Now fold the neatened long edge over to cover the raw edge. Sew an edge stitch along the length of the loop.

Cut the piece in half to create two loops and stitch each loop to the side seam of the front body as marked on the pattern.
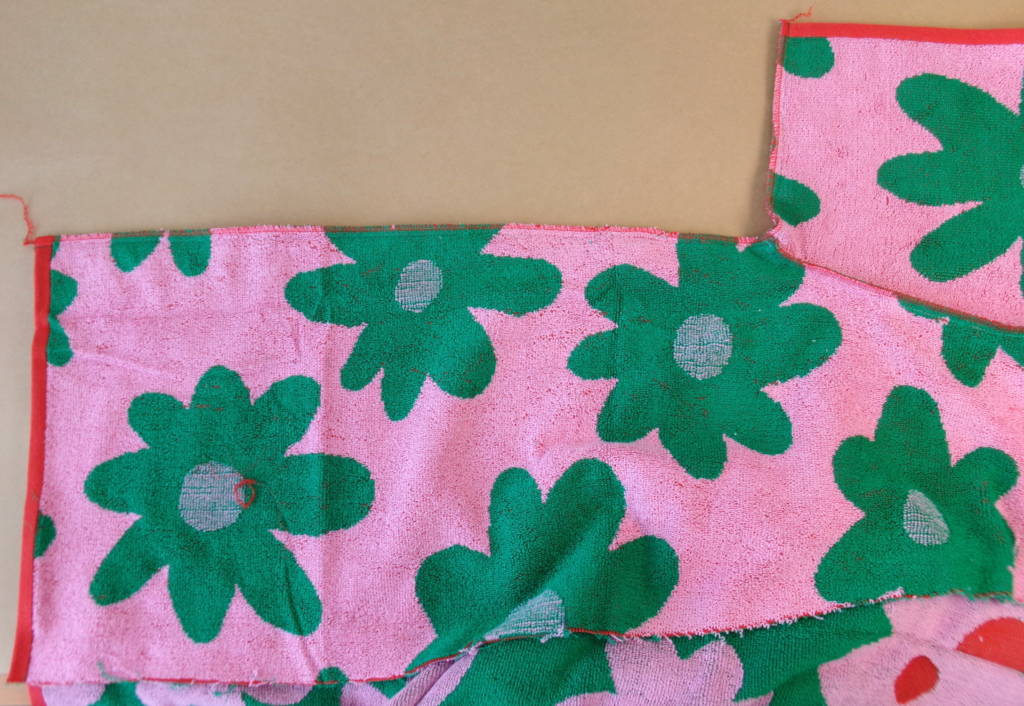
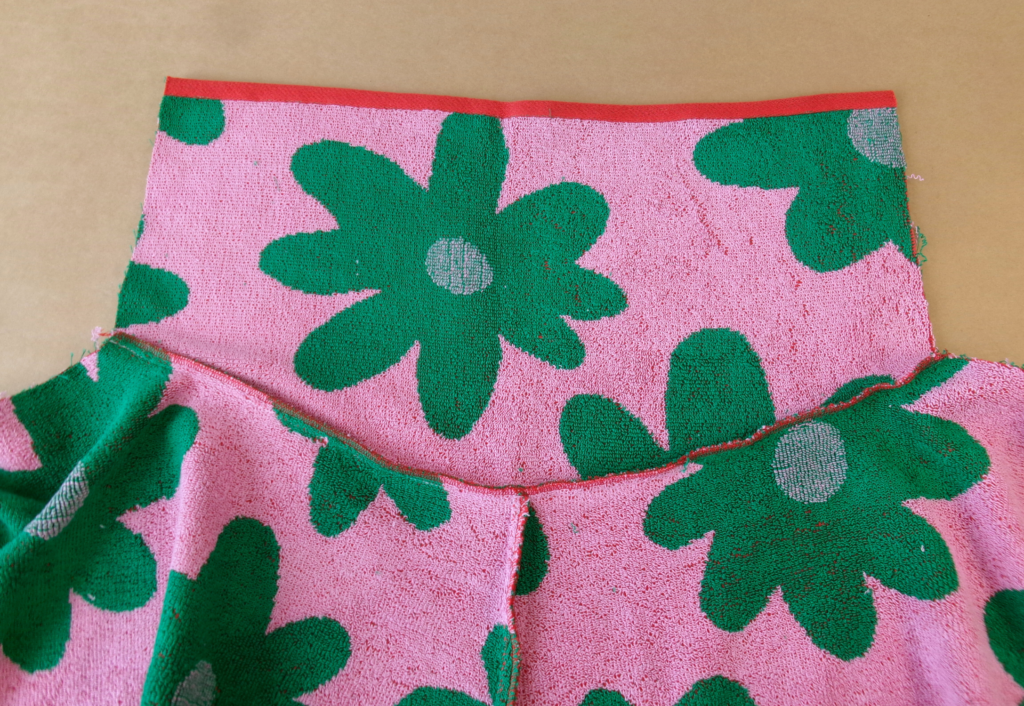
With RST sew the front and back side seams together. Start at the hemline and stitch up to the belt loops ensuring that the loops are sandwiched between both seams; continue sewing to the under arm and along the sleeve seam. Neaten with an overlocker/serger and press the seam toward the back.
BAND:
With RST sew the centre back neck seams of the Front Neck Band (3) together and press open.
With RST fold the neck band in half at the short ends and stitch a 0.6cm (1/4”) seam across the base. Clip the corners and turn the band out to the right side.
With WST press the band in half lengthways and sew a basting stitch along the cut edges.
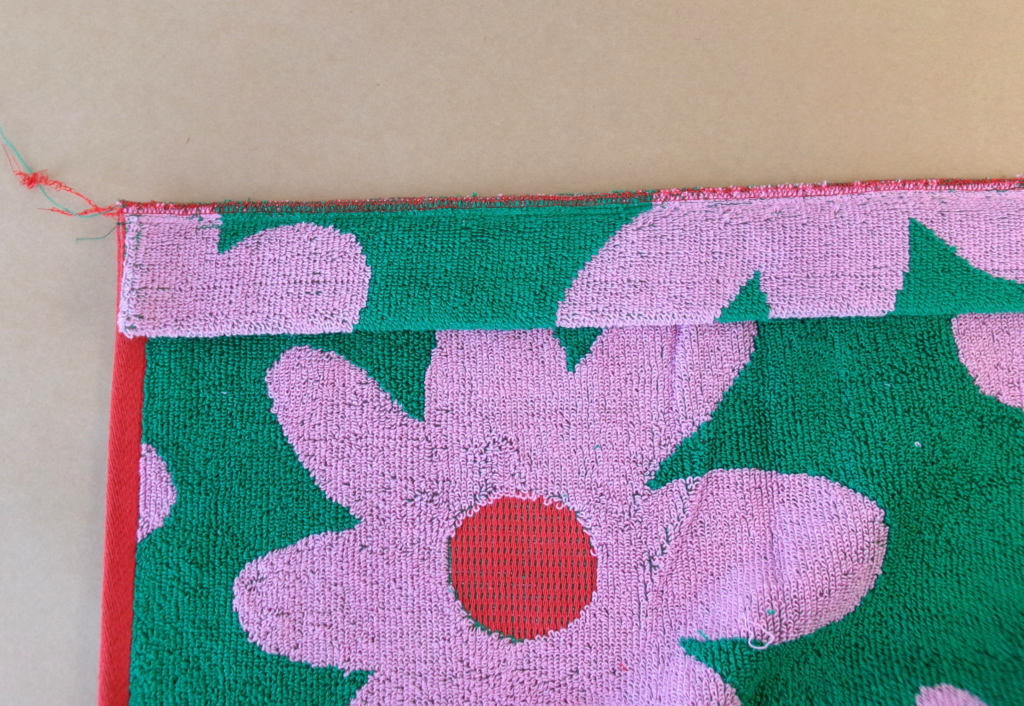
Starting and finishing at the hem, align all notches, pin, and sew the front neck band to the right side of the body, sandwiching the piping (if using) in between. Sew, then neaten with an overlocker/serger.
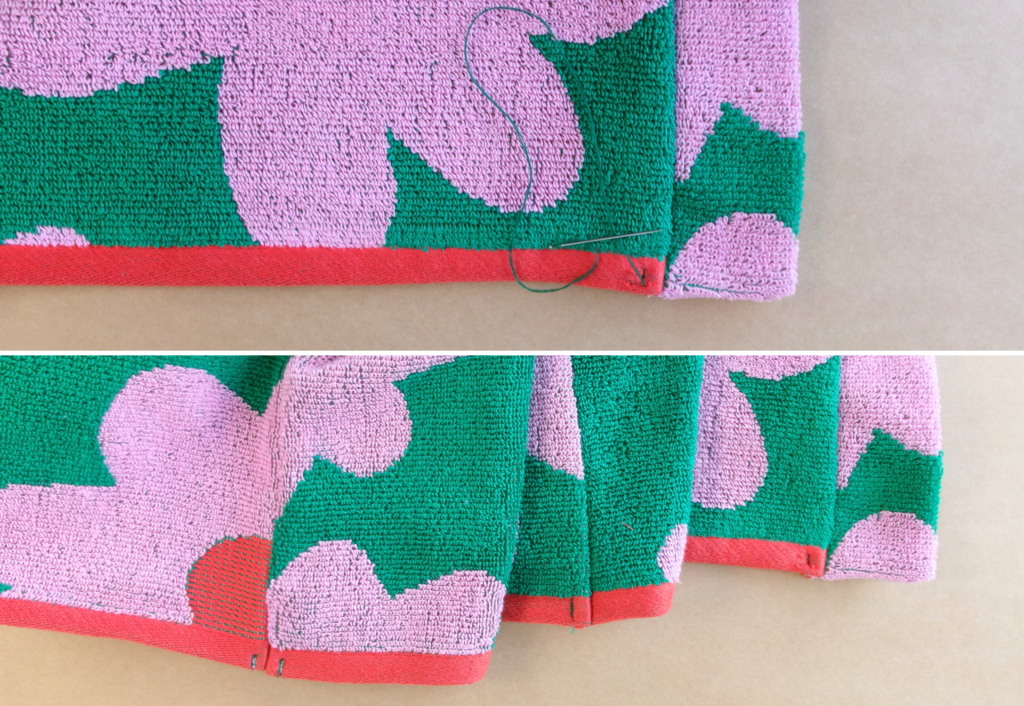
As the seams will be quite thick, we suggest hand tacking seam allowances to the hem (selvedges) of the robe using a matching thread.
SLEEVE & CUFF:
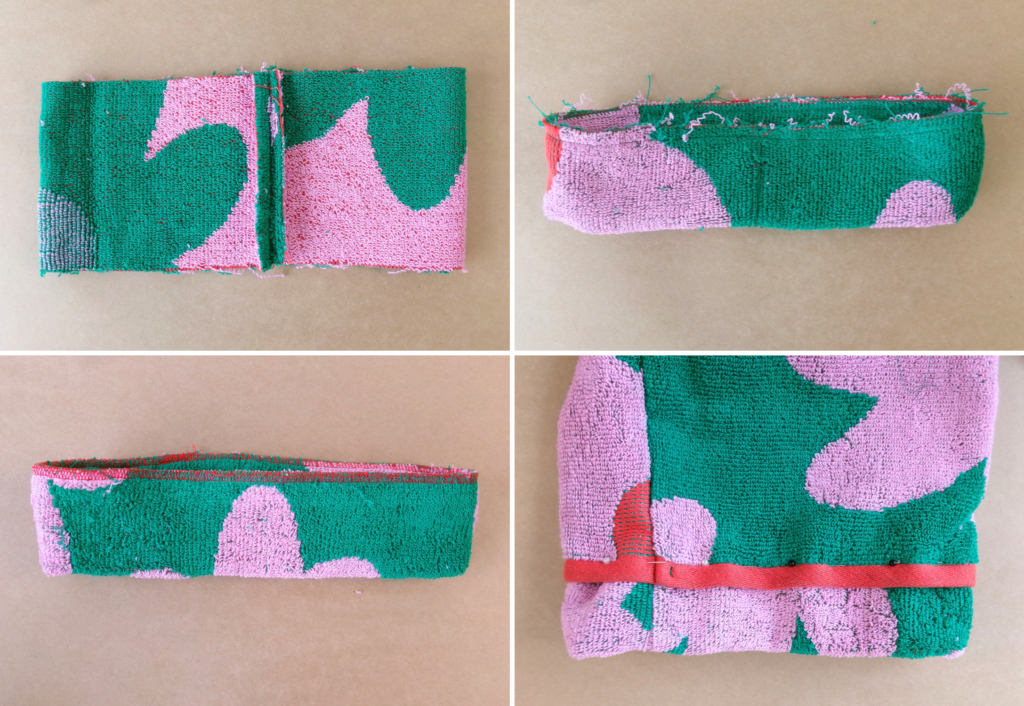
Sew the two short ends of the cuff together, turn out to the right side and press in half.
Baste stitch the cut edges of the cuff together. See diagram A & B.
Pin the cuff to the inside of the Sleeve (4) opening, aligning the overlocked edge of the cuff with the contrast selvedge, so that the selvedge shows on the outside of the cuff. Sew, then press.
POCKETS:
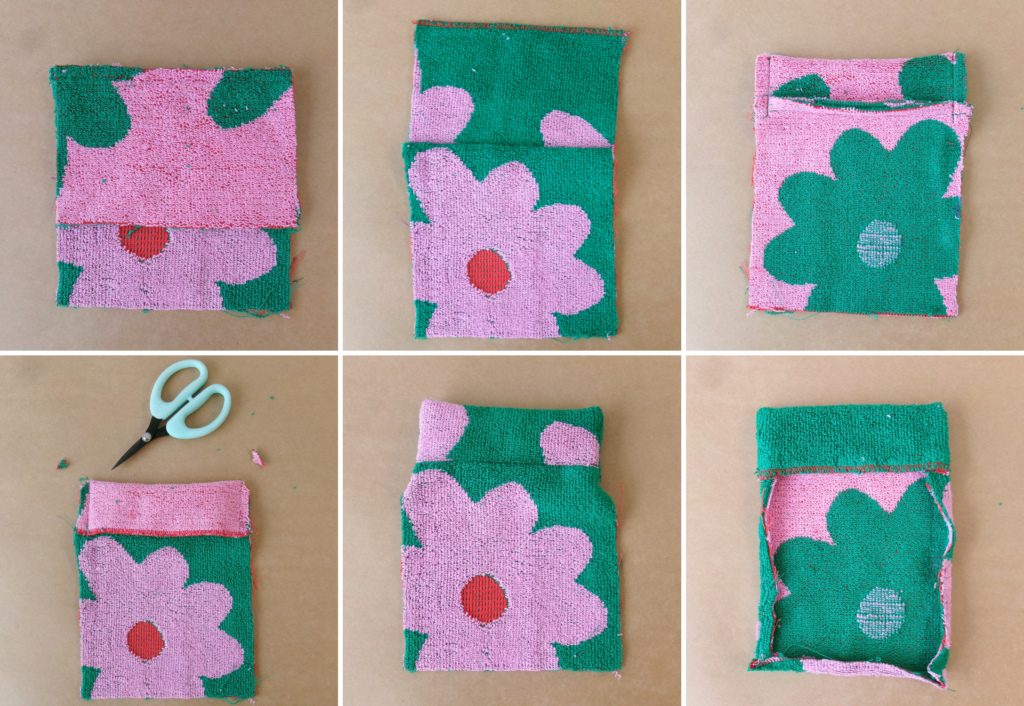
With RST and notches aligned, sew one edge of the Pocket Top (6) to the Pocket (7). Press the seam toward the pocket top.
Neaten the raw edge of the pocket top with an overlocker/serger.
With RST fold the pocket top over at the notch and stitch along both sides (see diagram). Clip the corners and turn the pocket top out to the right side. Press the three pocket seams up 1cm (3/8”) to the wrong side. Sew a sink stitch (stitch in the ditch) to the base of the pocket top to hold the pocket top in place. If not using piping, edge stitch the seam on the side of the pocket.
Pin the pockets to the front body as marked on the pattern and edge stitch into place.
BELT & COMPLETION:
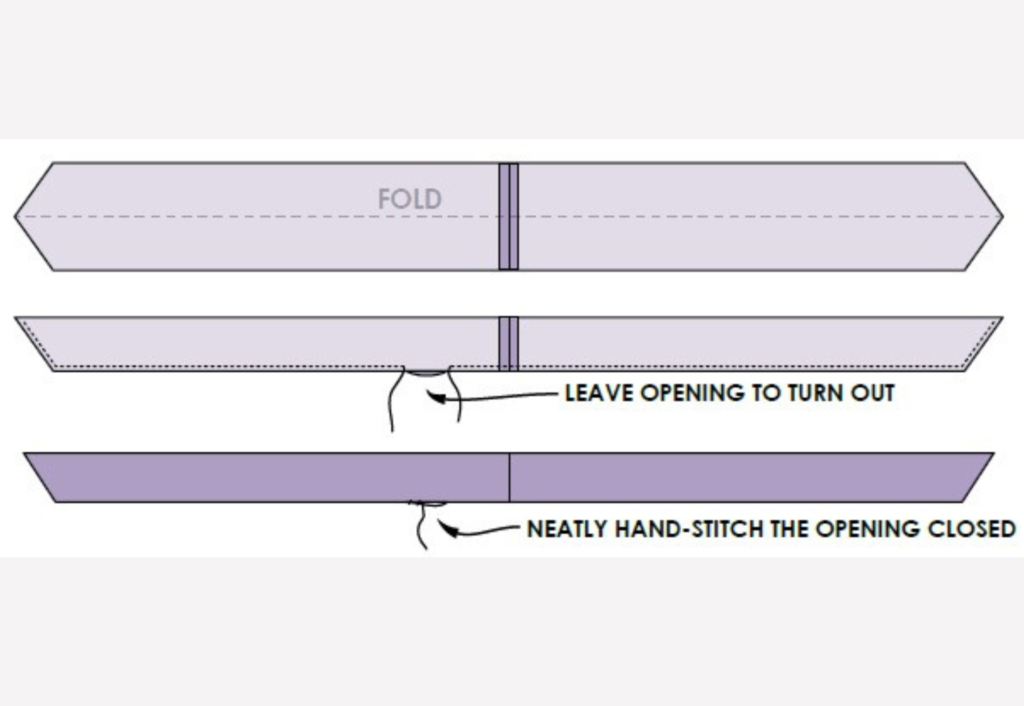
With RST sew the centre back Tie Belt (8) seam together and press open.
With RST fold the belt in half lengthways and sew a 1cm (3/8”) seam around the outer edges, leaving a small opening approx. 5cm (2”) long close to the centre back. Use this opening to turn the belt out to the right side, press the belt and close the opening with a hand stitch. See diagram above.
Press your completed robe.