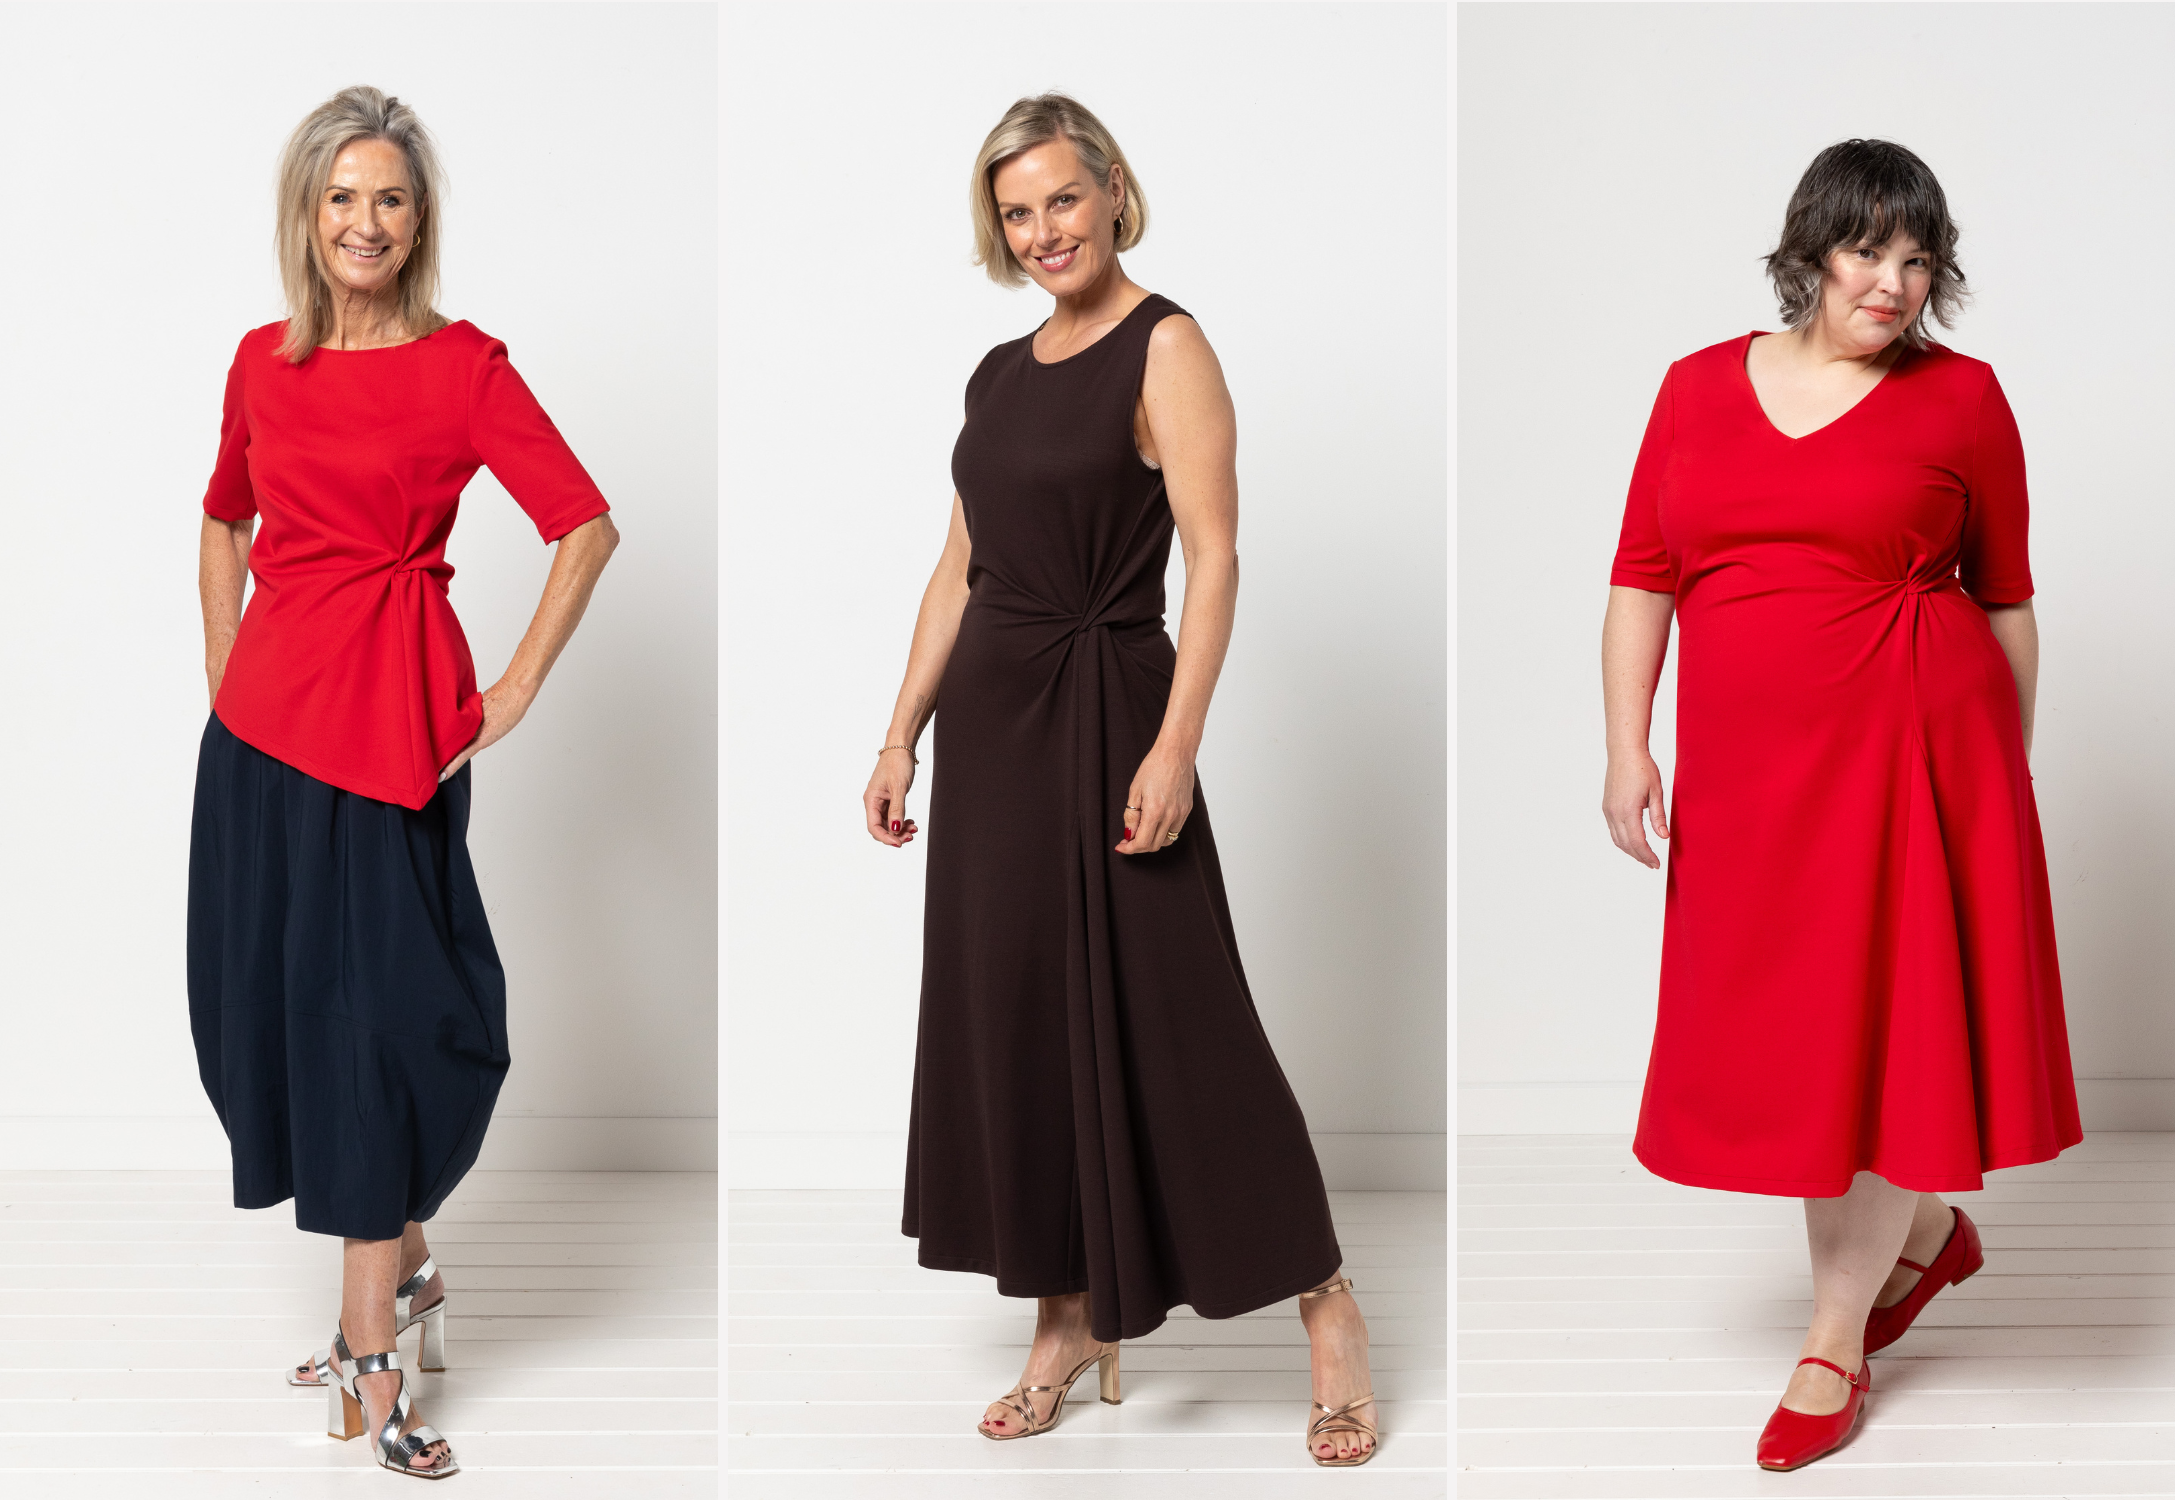
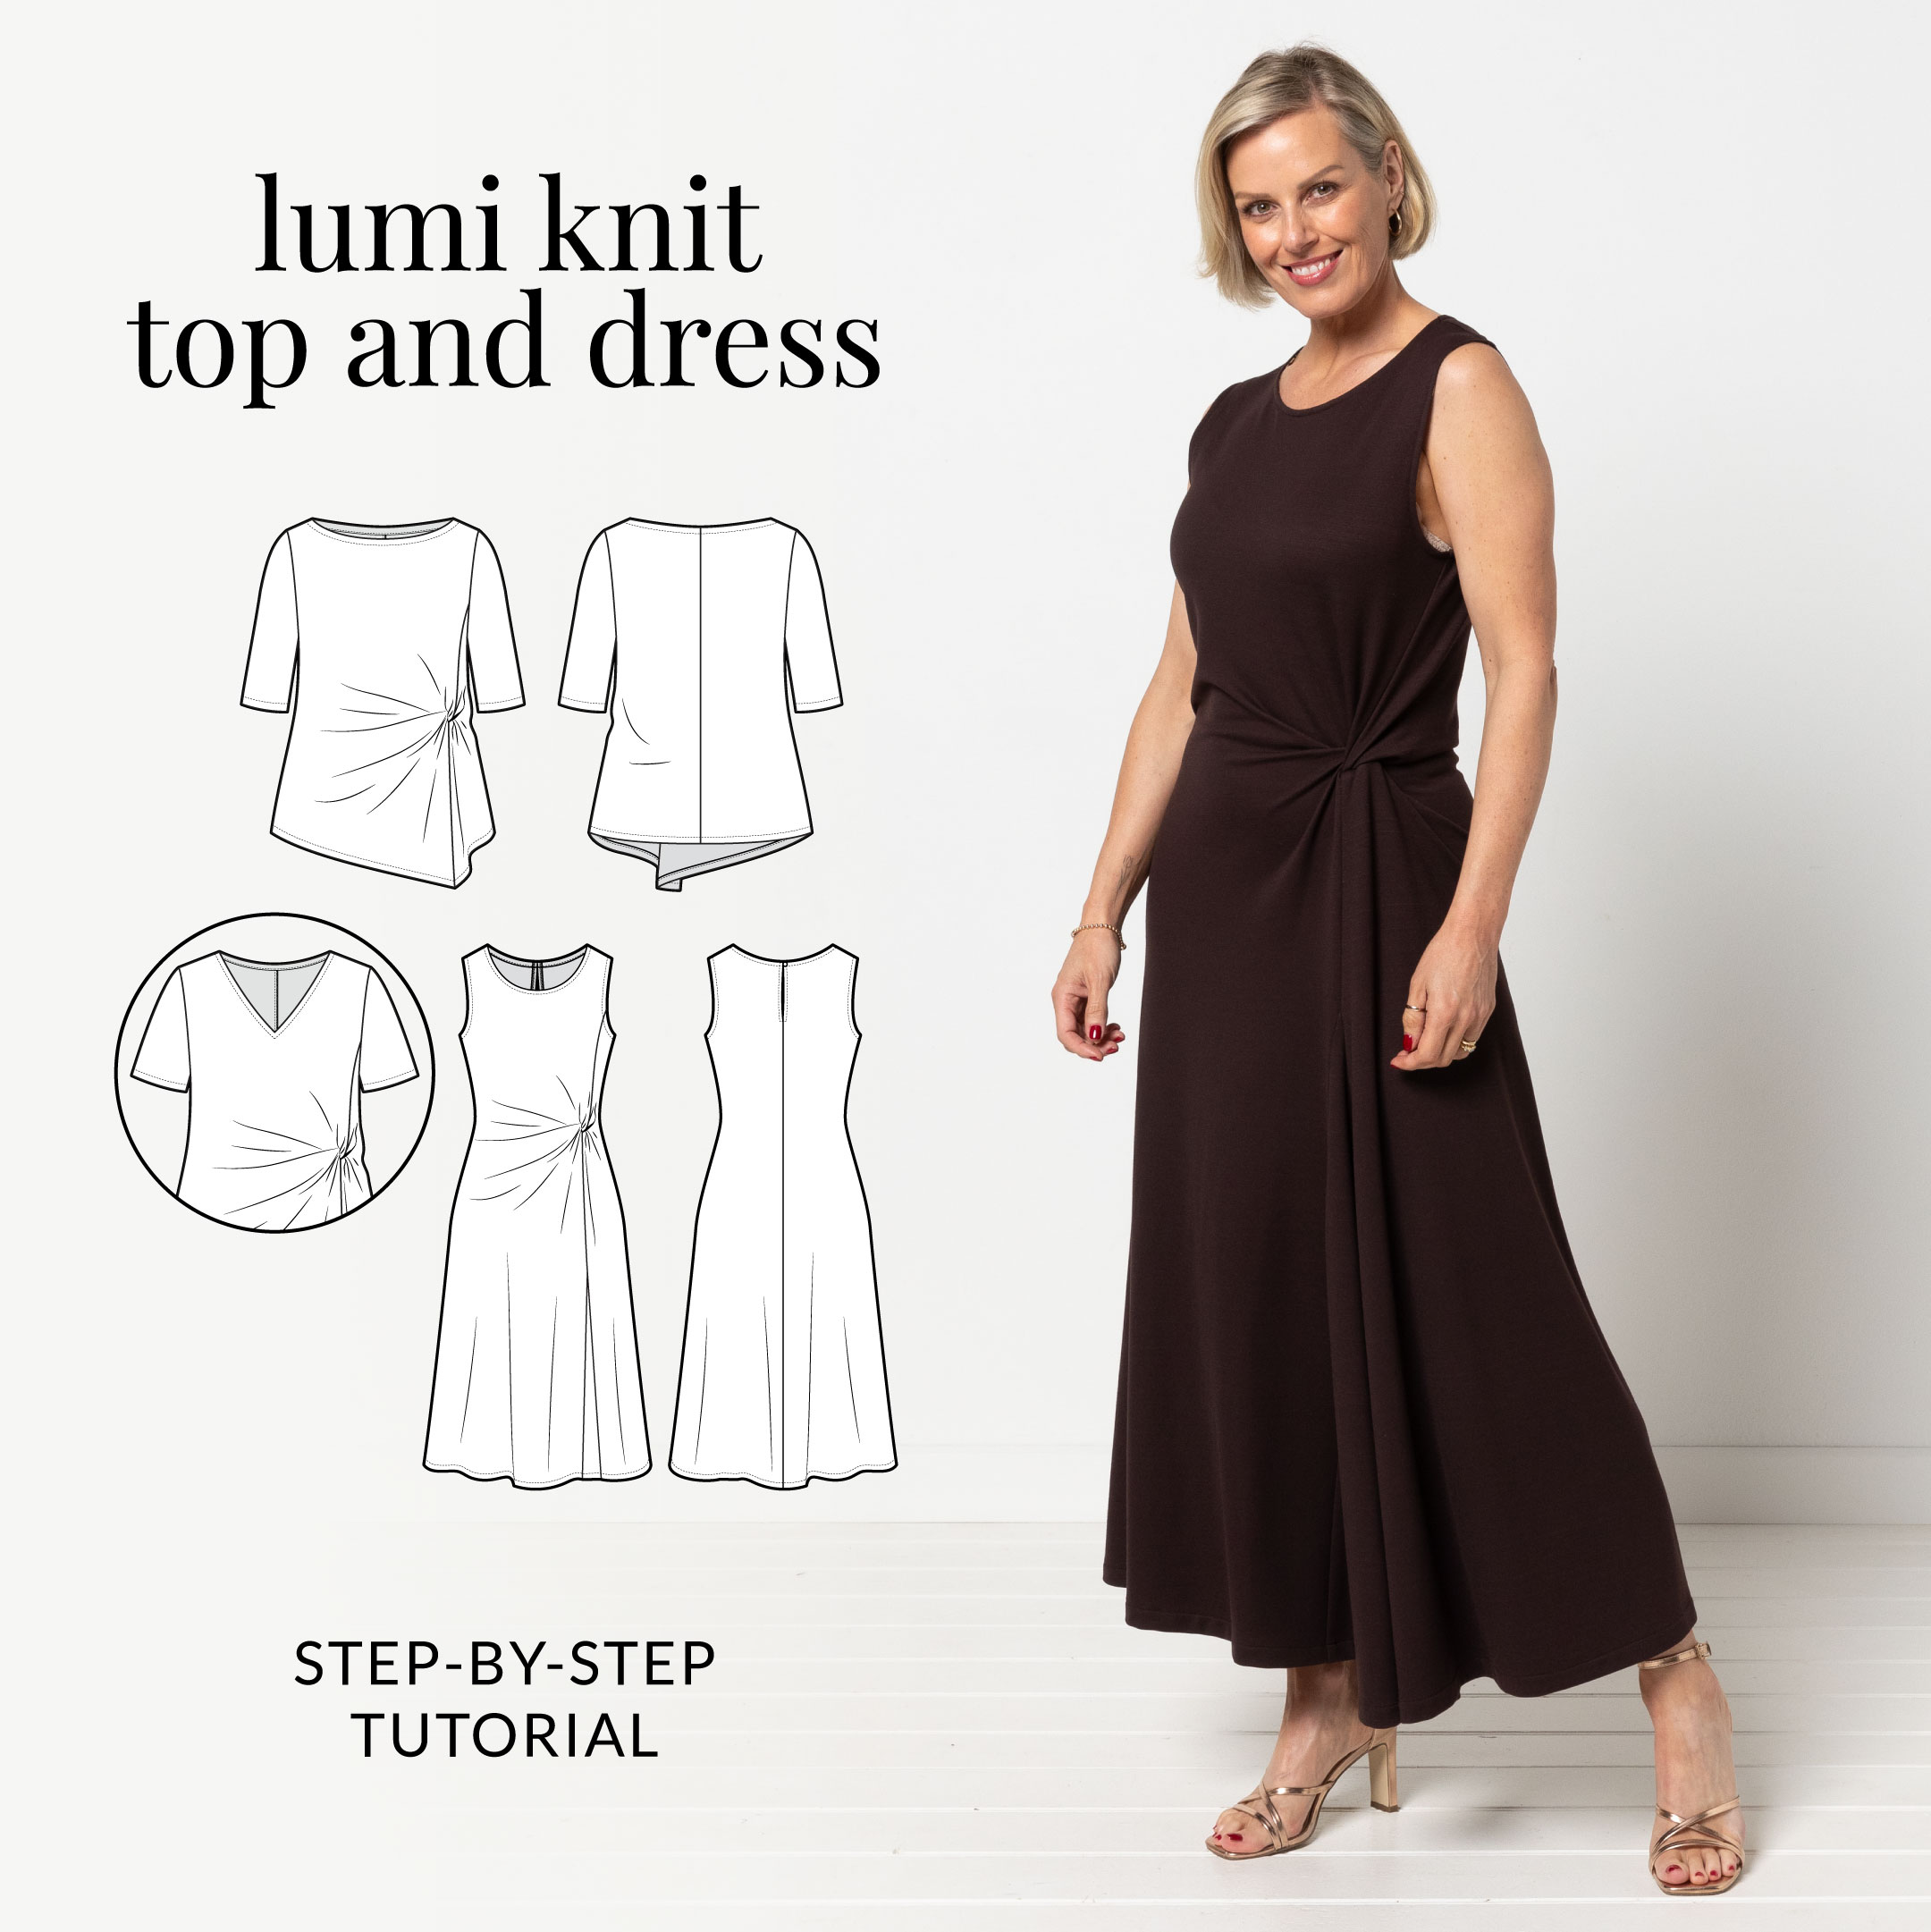
Shop the Lumi Knit Top and Dress
#SALumiKnitTopandDress
VIDEO TUTORIAL
Click here for the full sew along on our YouTube channel
PHOTO TUTORIAL
CONSTRUCTION
Please note: all seams are 1cm (3/8″) unless otherwise stated (seam allowances are marked on each pattern piece with a dashed line)
BOAT NECK OPTION:
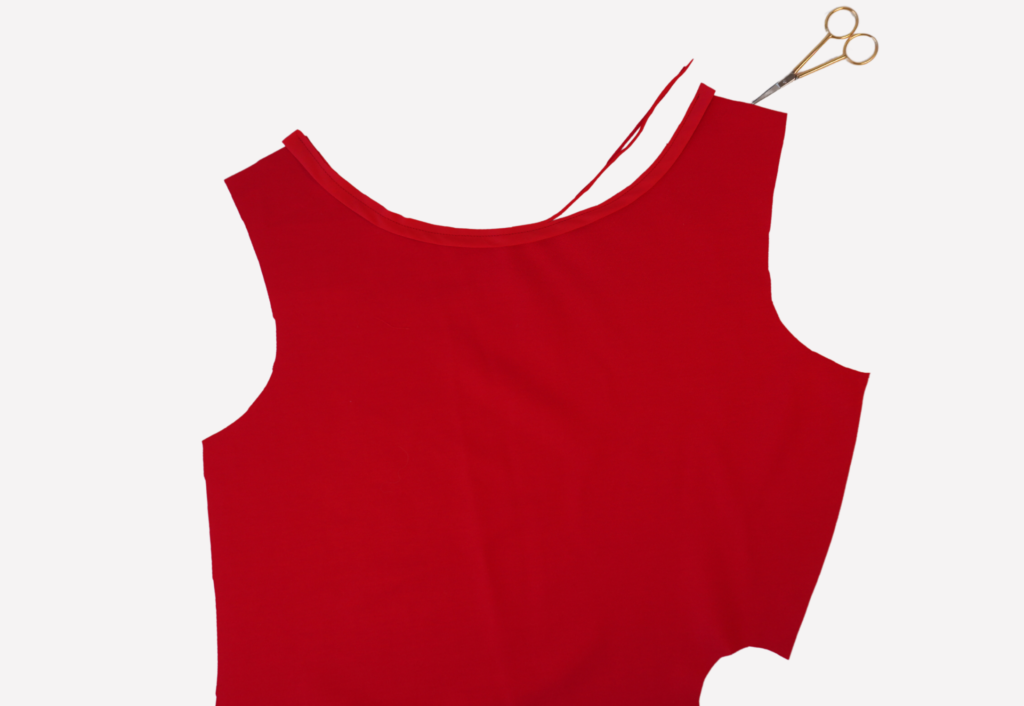
With RST, sew RHS back (1) and LHS back (2) together at the centre back seam. Neaten using an overlocker/serger and press to one side.
Press the Boat Neck Bind (7) in half lengthways with WST. Baste the raw edges together.
With RST, pin the binding to the Front (3) neckline and sew using using a 6mm (1/4”) seam.
Cut off the excess binding and pin it to the Back neckline. Sew using using a 6mm (1/4”) seam.
Trim the front and back neckline seams to eliminate unnecessary bulk, and press the seams and binding upward.
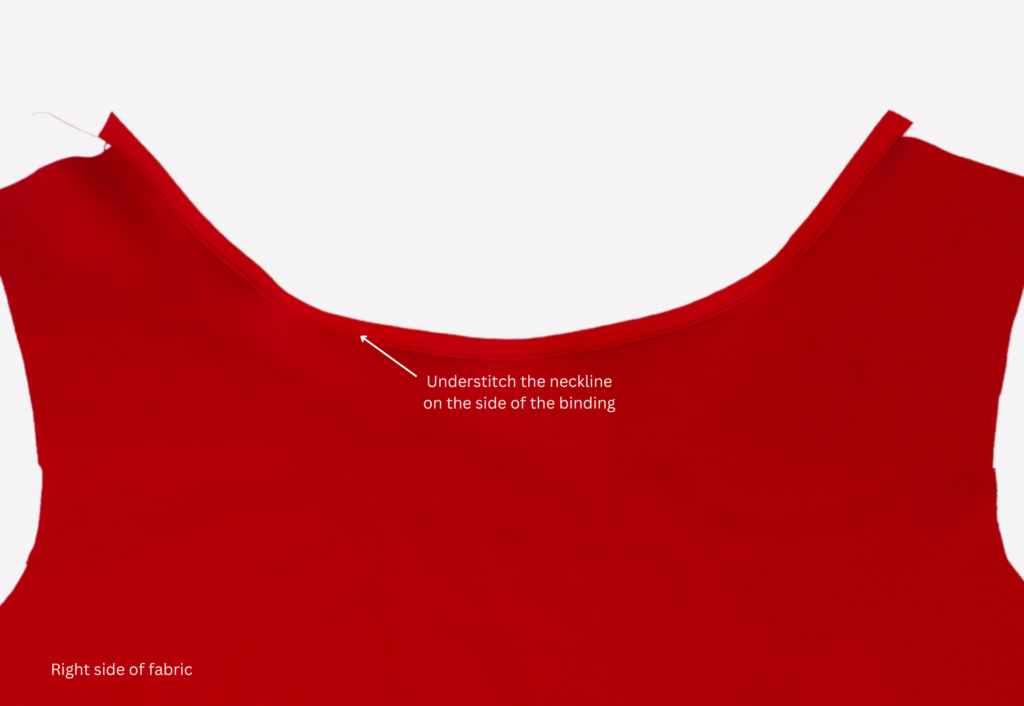
Sew an understitch to the neckline seams on the side of the binding.
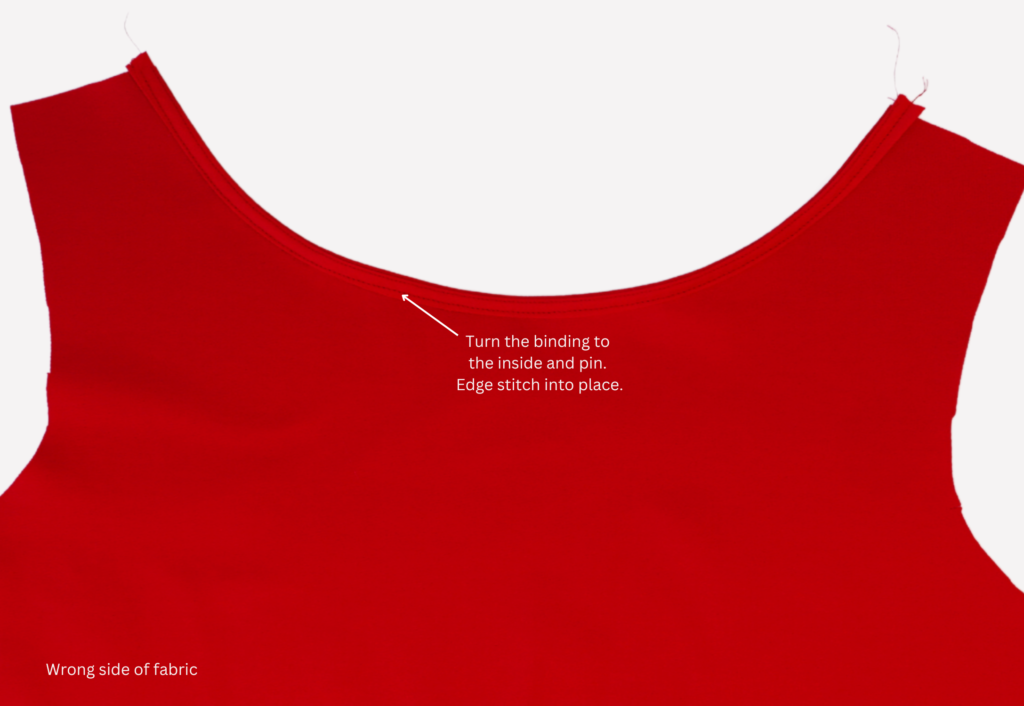
Turn the binding to the inside and pin. Edge stitch into place.
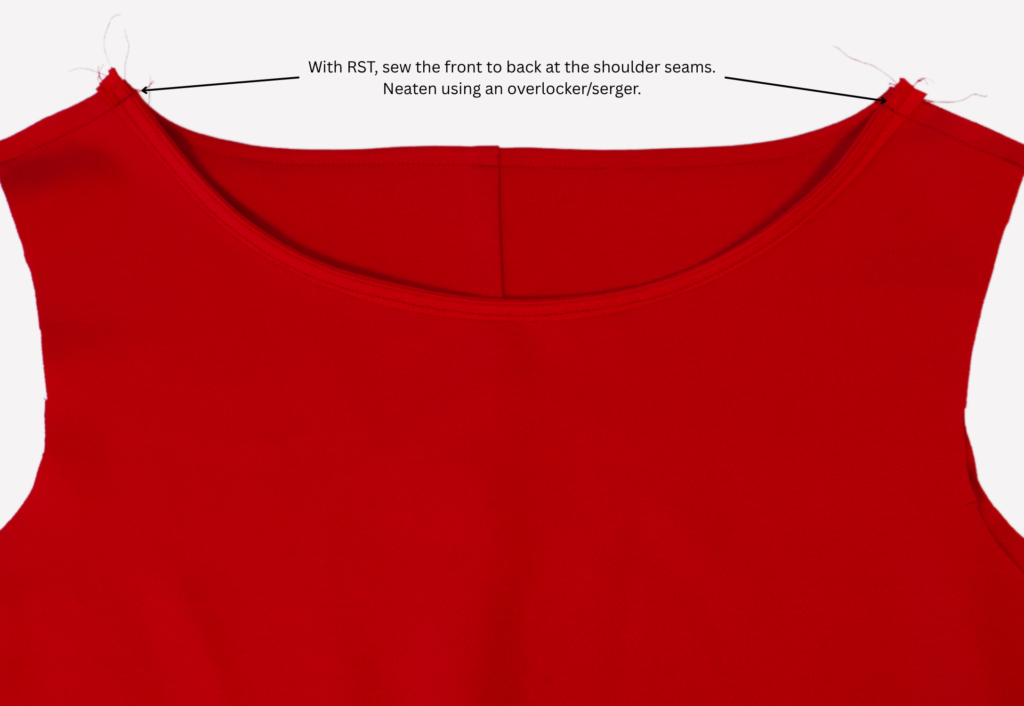
With RST, sew the front to back at the shoulder seams. Neaten using an overlocker/serger.
Take care at the neck seam – you may choose to stay stitch the neatened edge for a clean finish.
Proceed to step 34 for sleeves, or step 35 for a sleeveless option.
ROUND NECK OR V NECK WITH BACK SPLIT AND BUTTON OPTION:
With RST, fold the back neck Loop (10) in half lengthways. Sew using a 6mm (1/4”) seam. Turn out to the right side and press.
Create a loop by basting the two ends together. Pin the loop to the left back body as marked on the pattern, with the loop facing inward. Once the split is turned out, the loop will face outward.
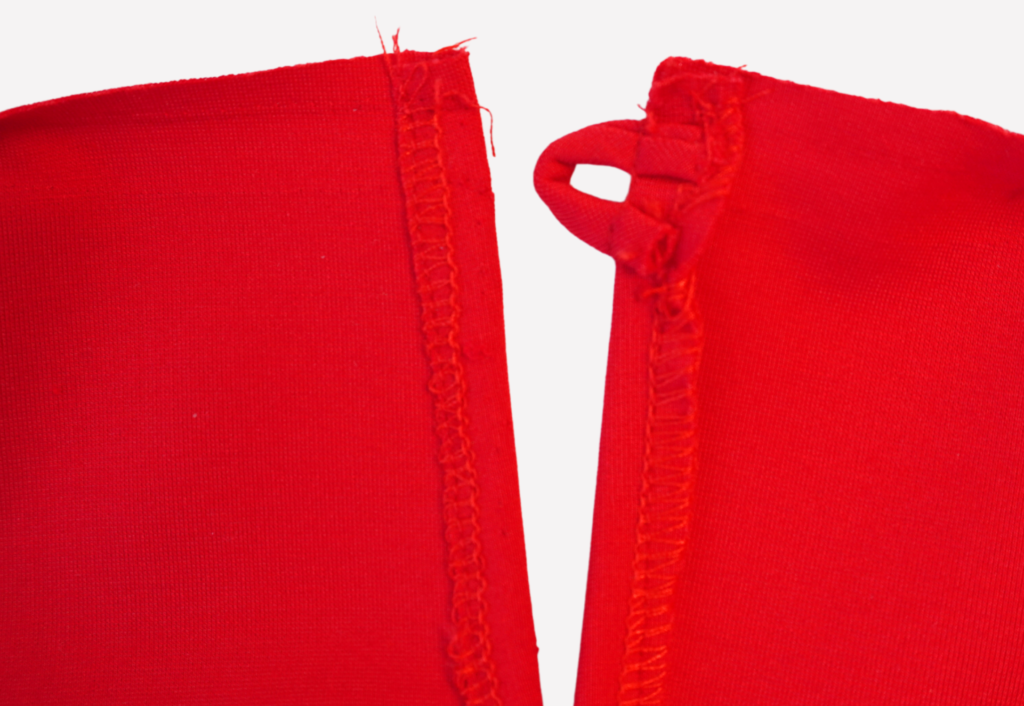
Neaten each edge of the RHS back (1) and LHS back (2) neck split separately. Using an overlocker/serger, start at the neck opening and finish approximately 2.5cm (1”) below the notch indicating the split.
With RST, sew the centre back seam. Start from the notch indicating the split and finish at the hem.
Neaten using an overlocker/serger as far as the previously neatened section. Press to one side.
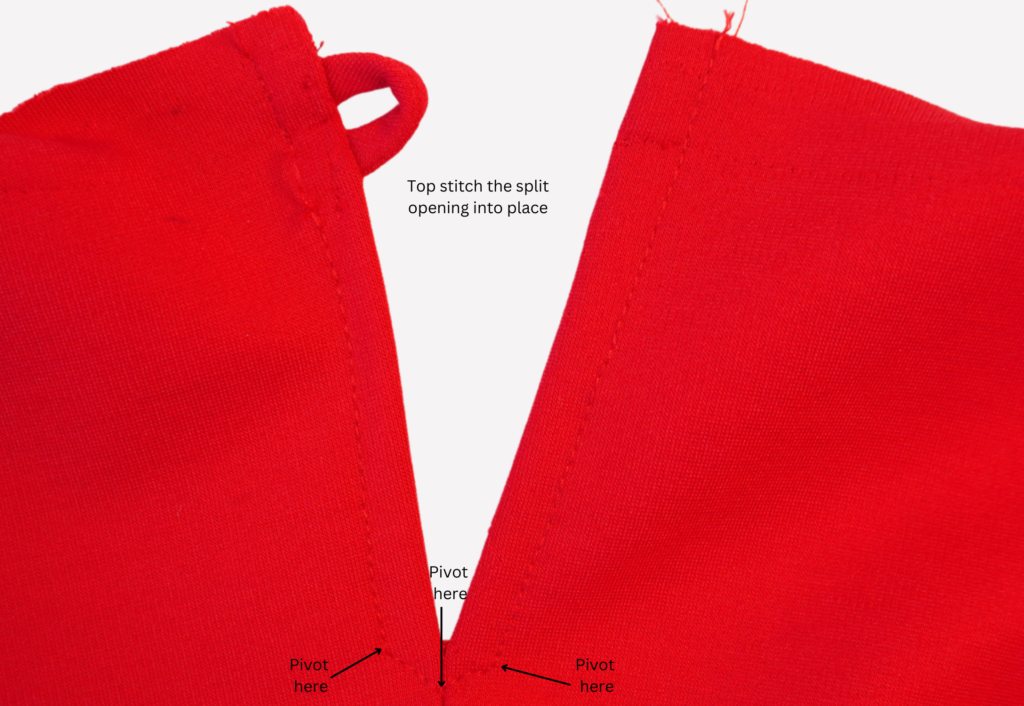
Press the seam allowance of each side of the back neck split opening toward the inside and sew into place using a top stitch. Start sewing at one neck edge, sew down to the base of the split and with the needle down, pivot to sew along the base of the split. Pivot again and sew up the other side of the split.
Press binding in half lengthways with WST and baste the raw edges together using a 6mm (1/4”) seam.
ROUND NECK OR V NECK WITHOUT BACK SPLIT AND BUTTON OPTION:
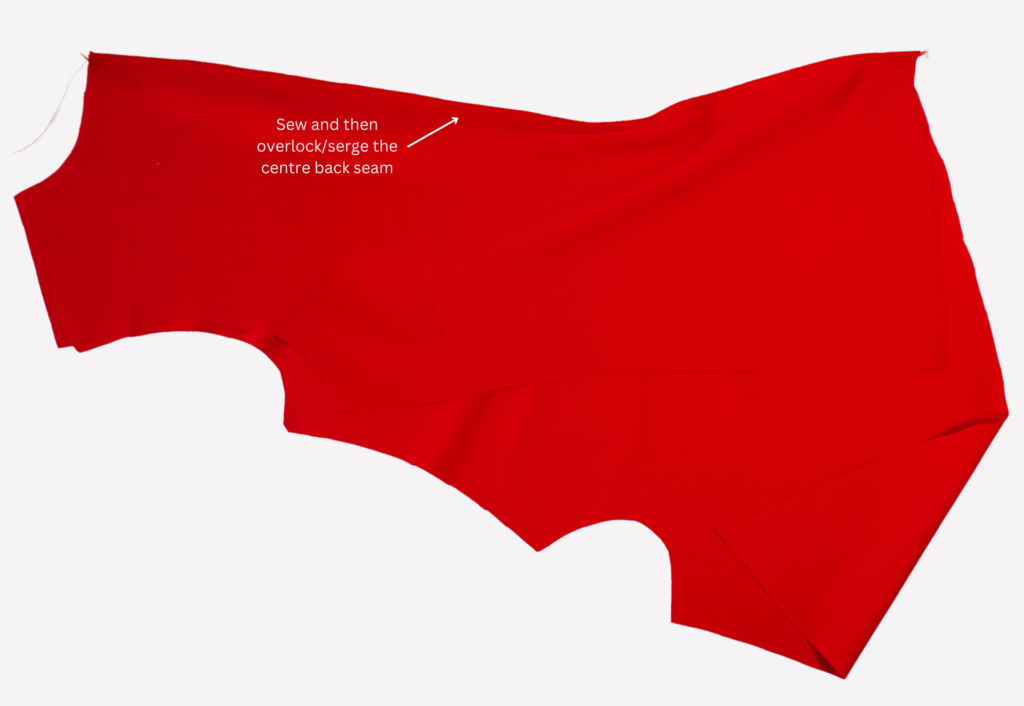
With RST, sew the RHS back (1) and LHS back (2) centre back seam. Neaten using an overlocker/serger and press to one side.
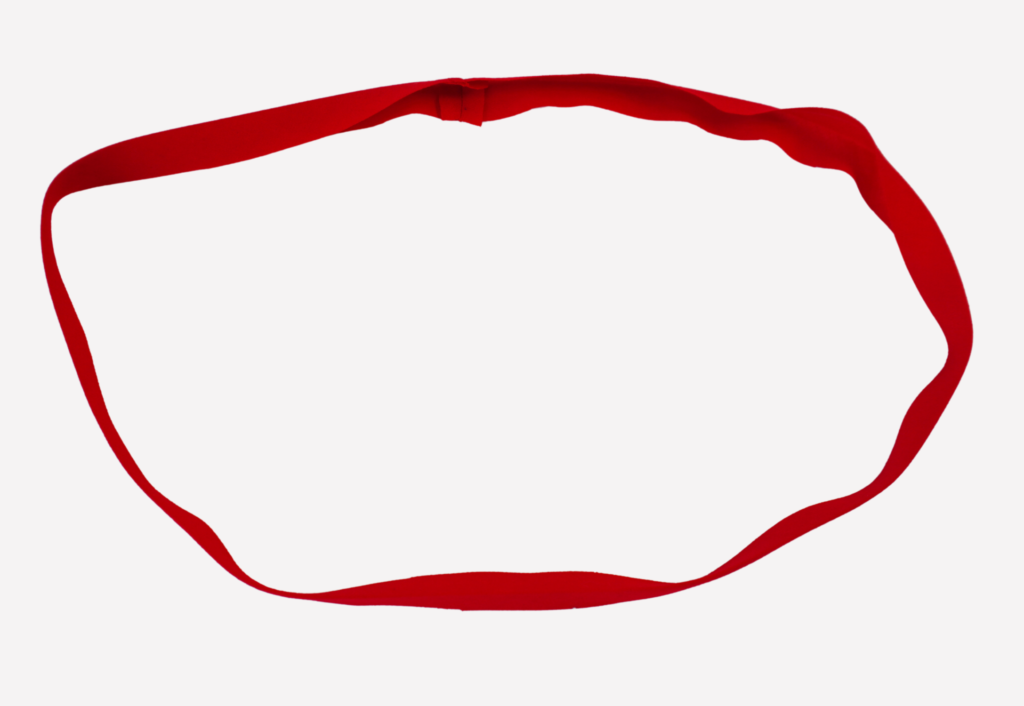
With RST, sew the Round Neck Bind (6) OR V Neck Bind (8) together at the short ends, creating a loop. Press the seam open and press the binding in half lengthways with WST. Baste the raw edges together.
MAIN BODY – ROUND AND V NECK OPTIONS – WITH OR WITHOUT BACK SPLIT:
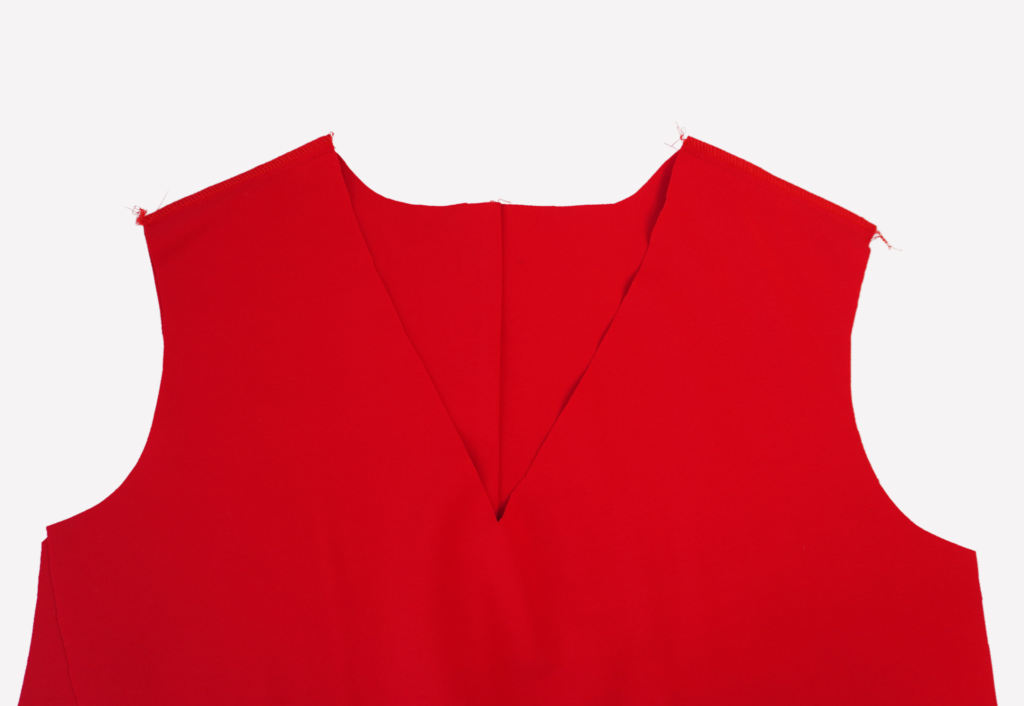
With RST, sew the front to back at the shoulder seams. Neaten using an overlocker/serger and press toward the back.
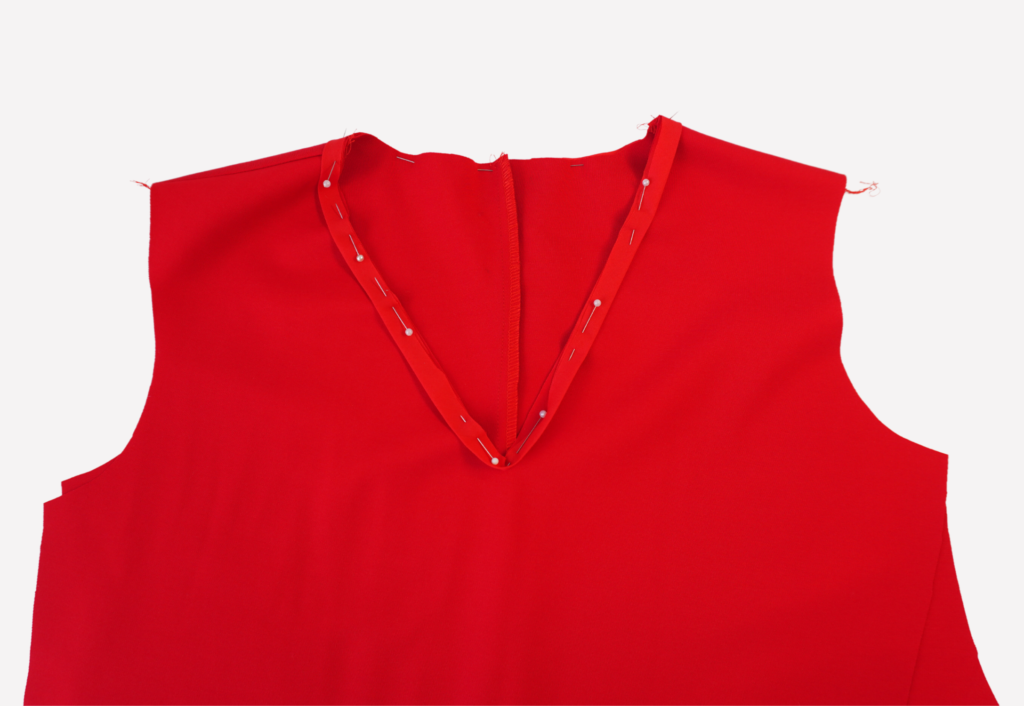
With RST, pin the Round Neck Bind (6) OR V Neck Bind (8) to the neck opening and sew using a 6mm (1/4”) seam.
If using the V-neck option, carefully clip into the seam at the centre front to create a nice V shape.

Trim the seam to eliminate unnecessary bulk, then press the seam and binding upward.
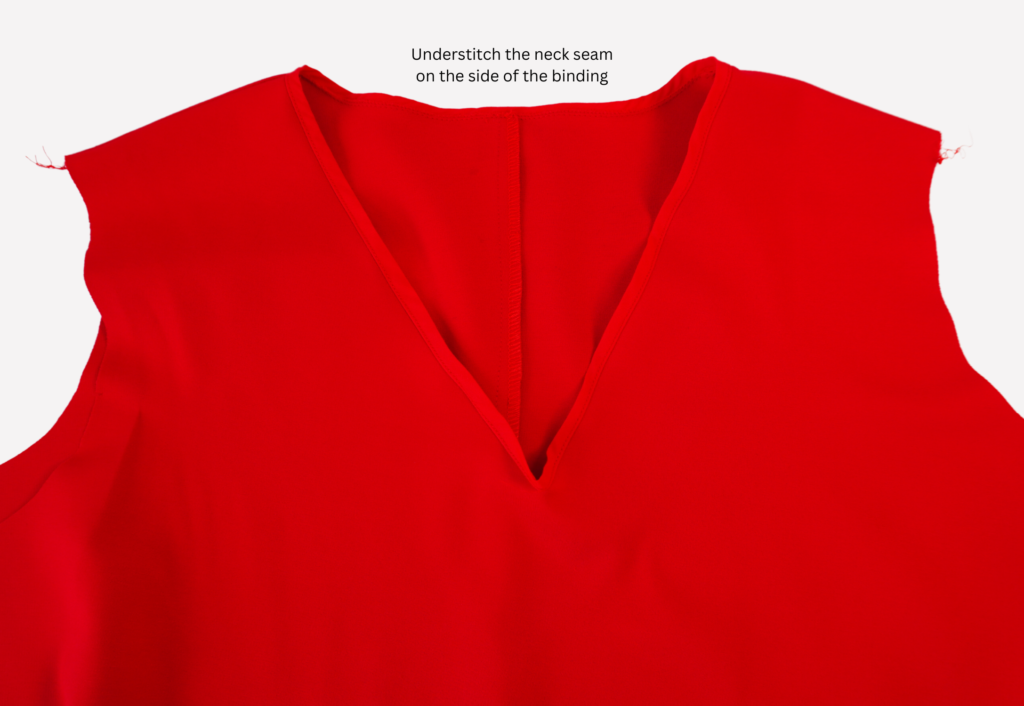
Sew an understitch to the seam on the side of the binding.
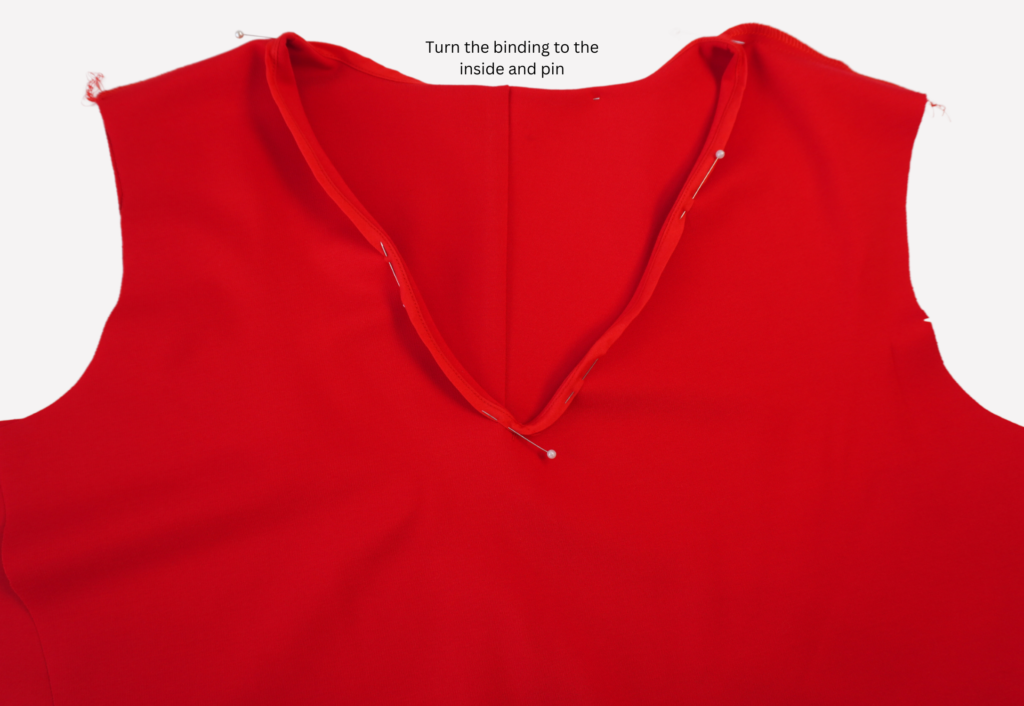
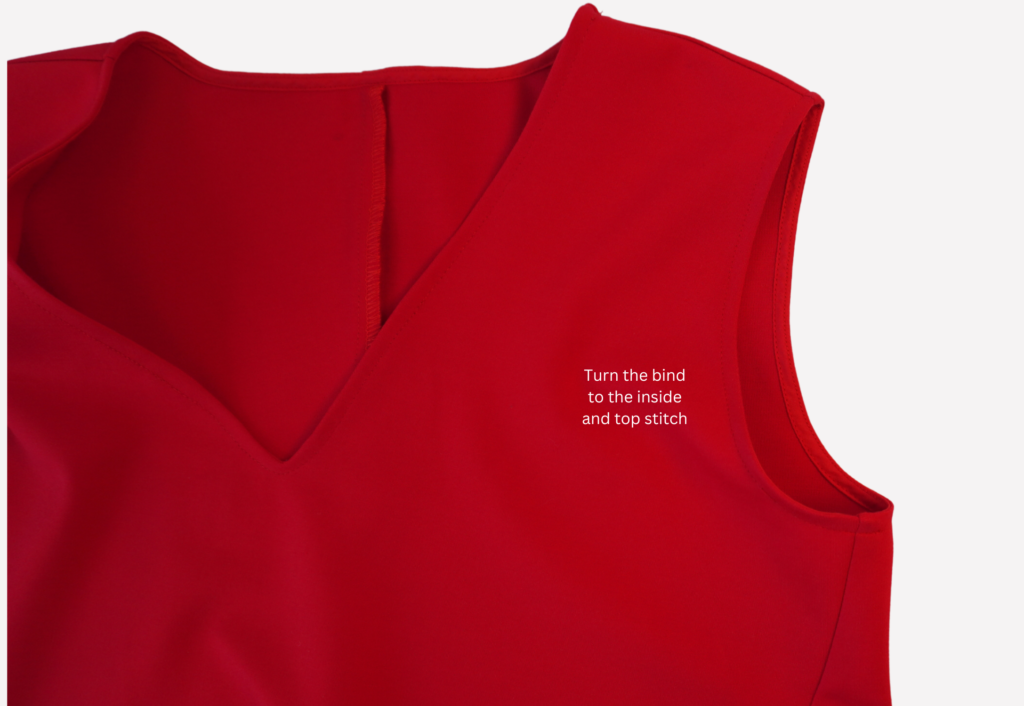
Turn the binding to the inside and pin.
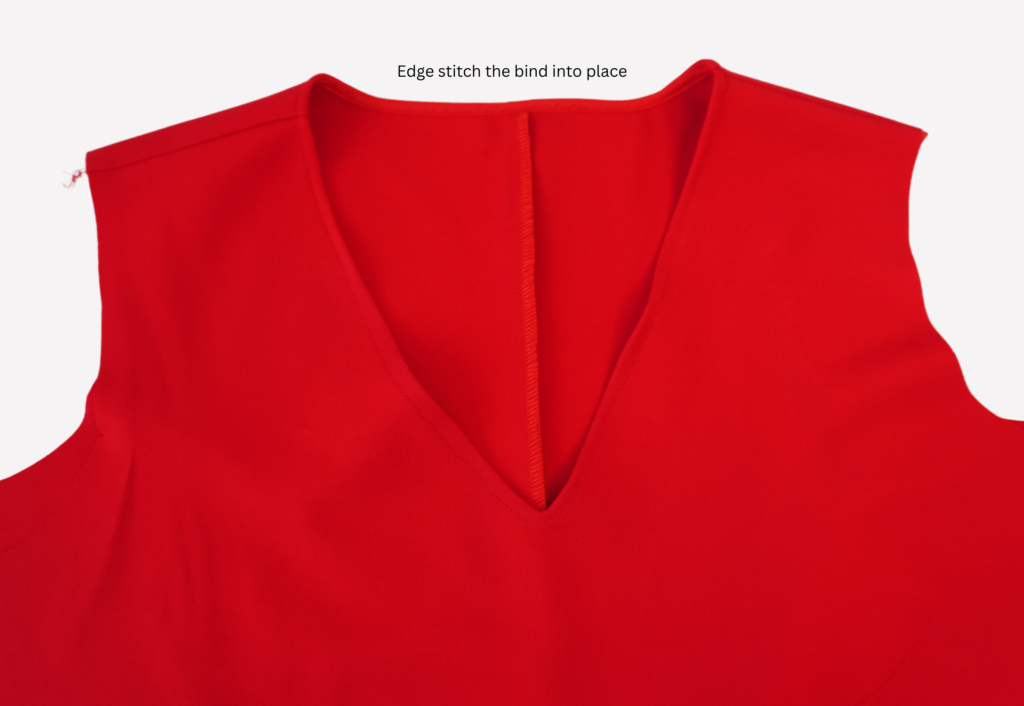
Edge stitch the binding into place, tucking the ends in neatly (for the back split option).
For a nice sharp V, you may choose to sew a small dart to the binding at the centre front (see diagram).
SLEEVED OPTION:

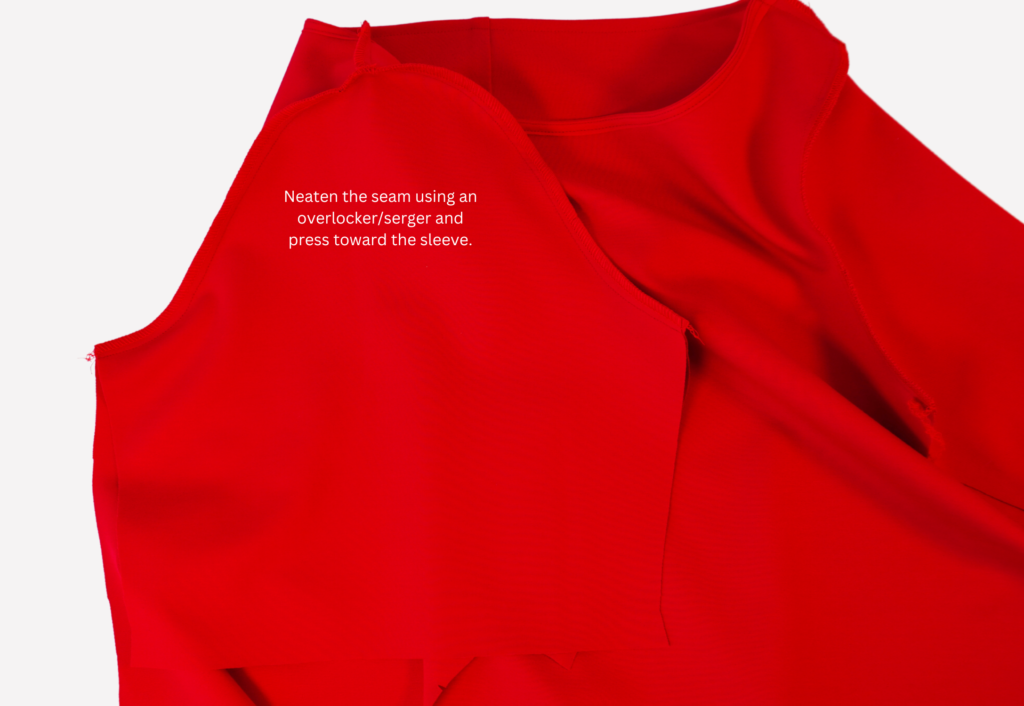
With RST and notches aligned, sew the Sleeve (4) to the armhole. Neaten using an overlocker/serger and press toward the sleeve.
SLEEVELESS OPTION:
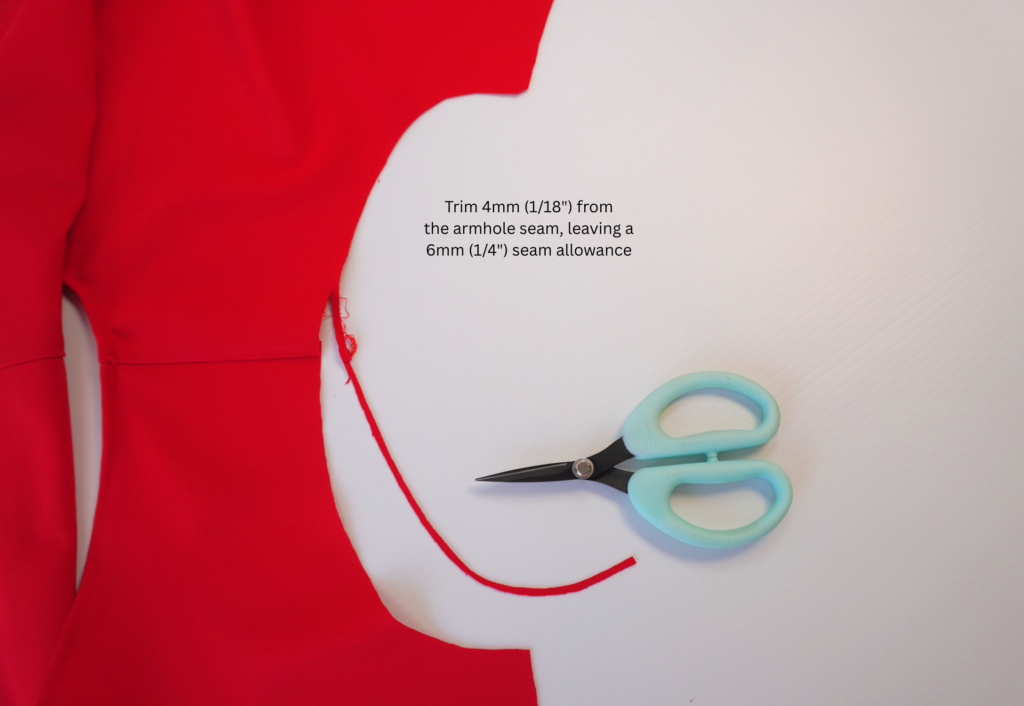
Carefully trim 4mm (1/16”) from the armhole so you have a 6mm (1/4”) seam.
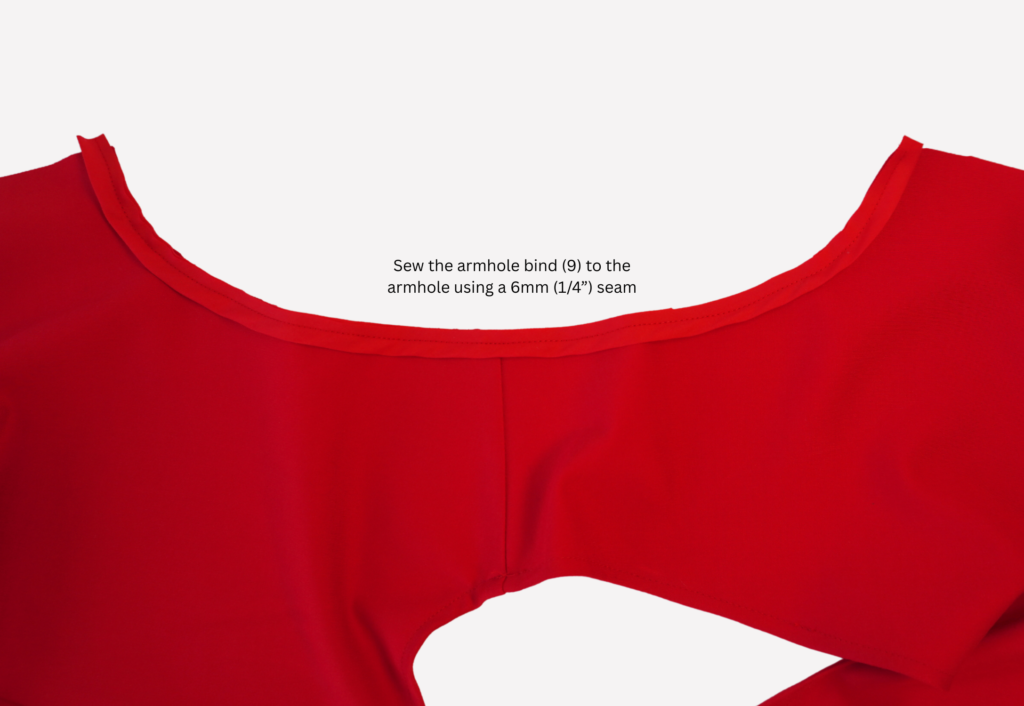
With RST, pin the Armhole Bind (9) to the armhole and sew using a 6mm (1/4”) seam.
Trim the seam to eliminate unnecessary bulk, then press the seam and binding outward.
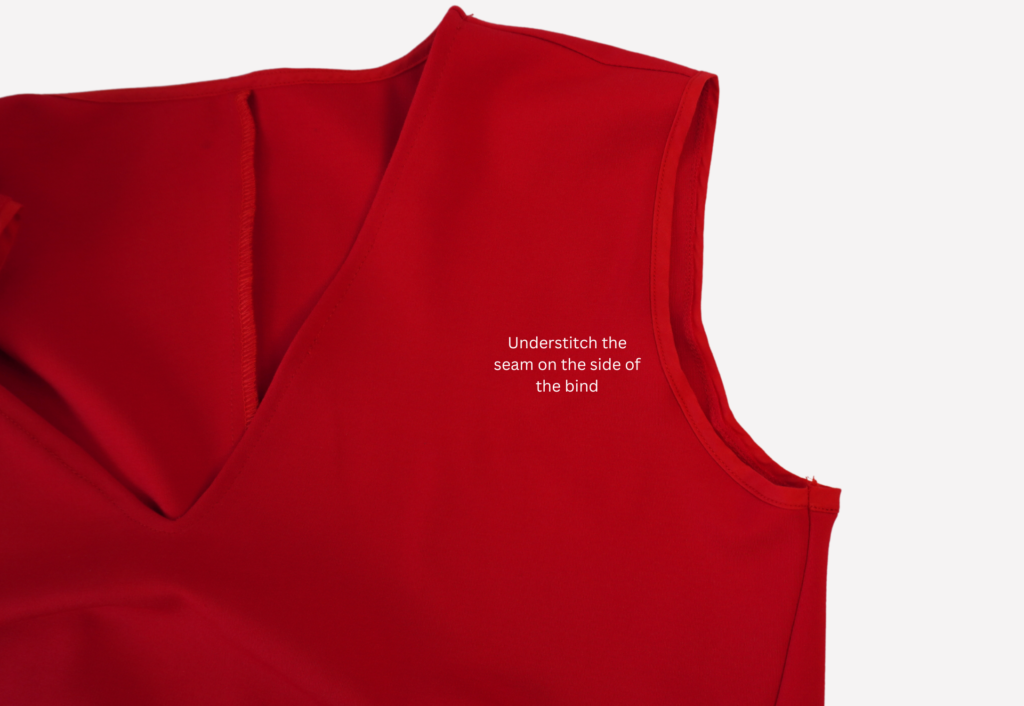
Sew an understitch to the seam on the side of the binding. The armhole binding will be completed once the side seams are sewn.
OPTIONAL GODET (DRESS ONLY):
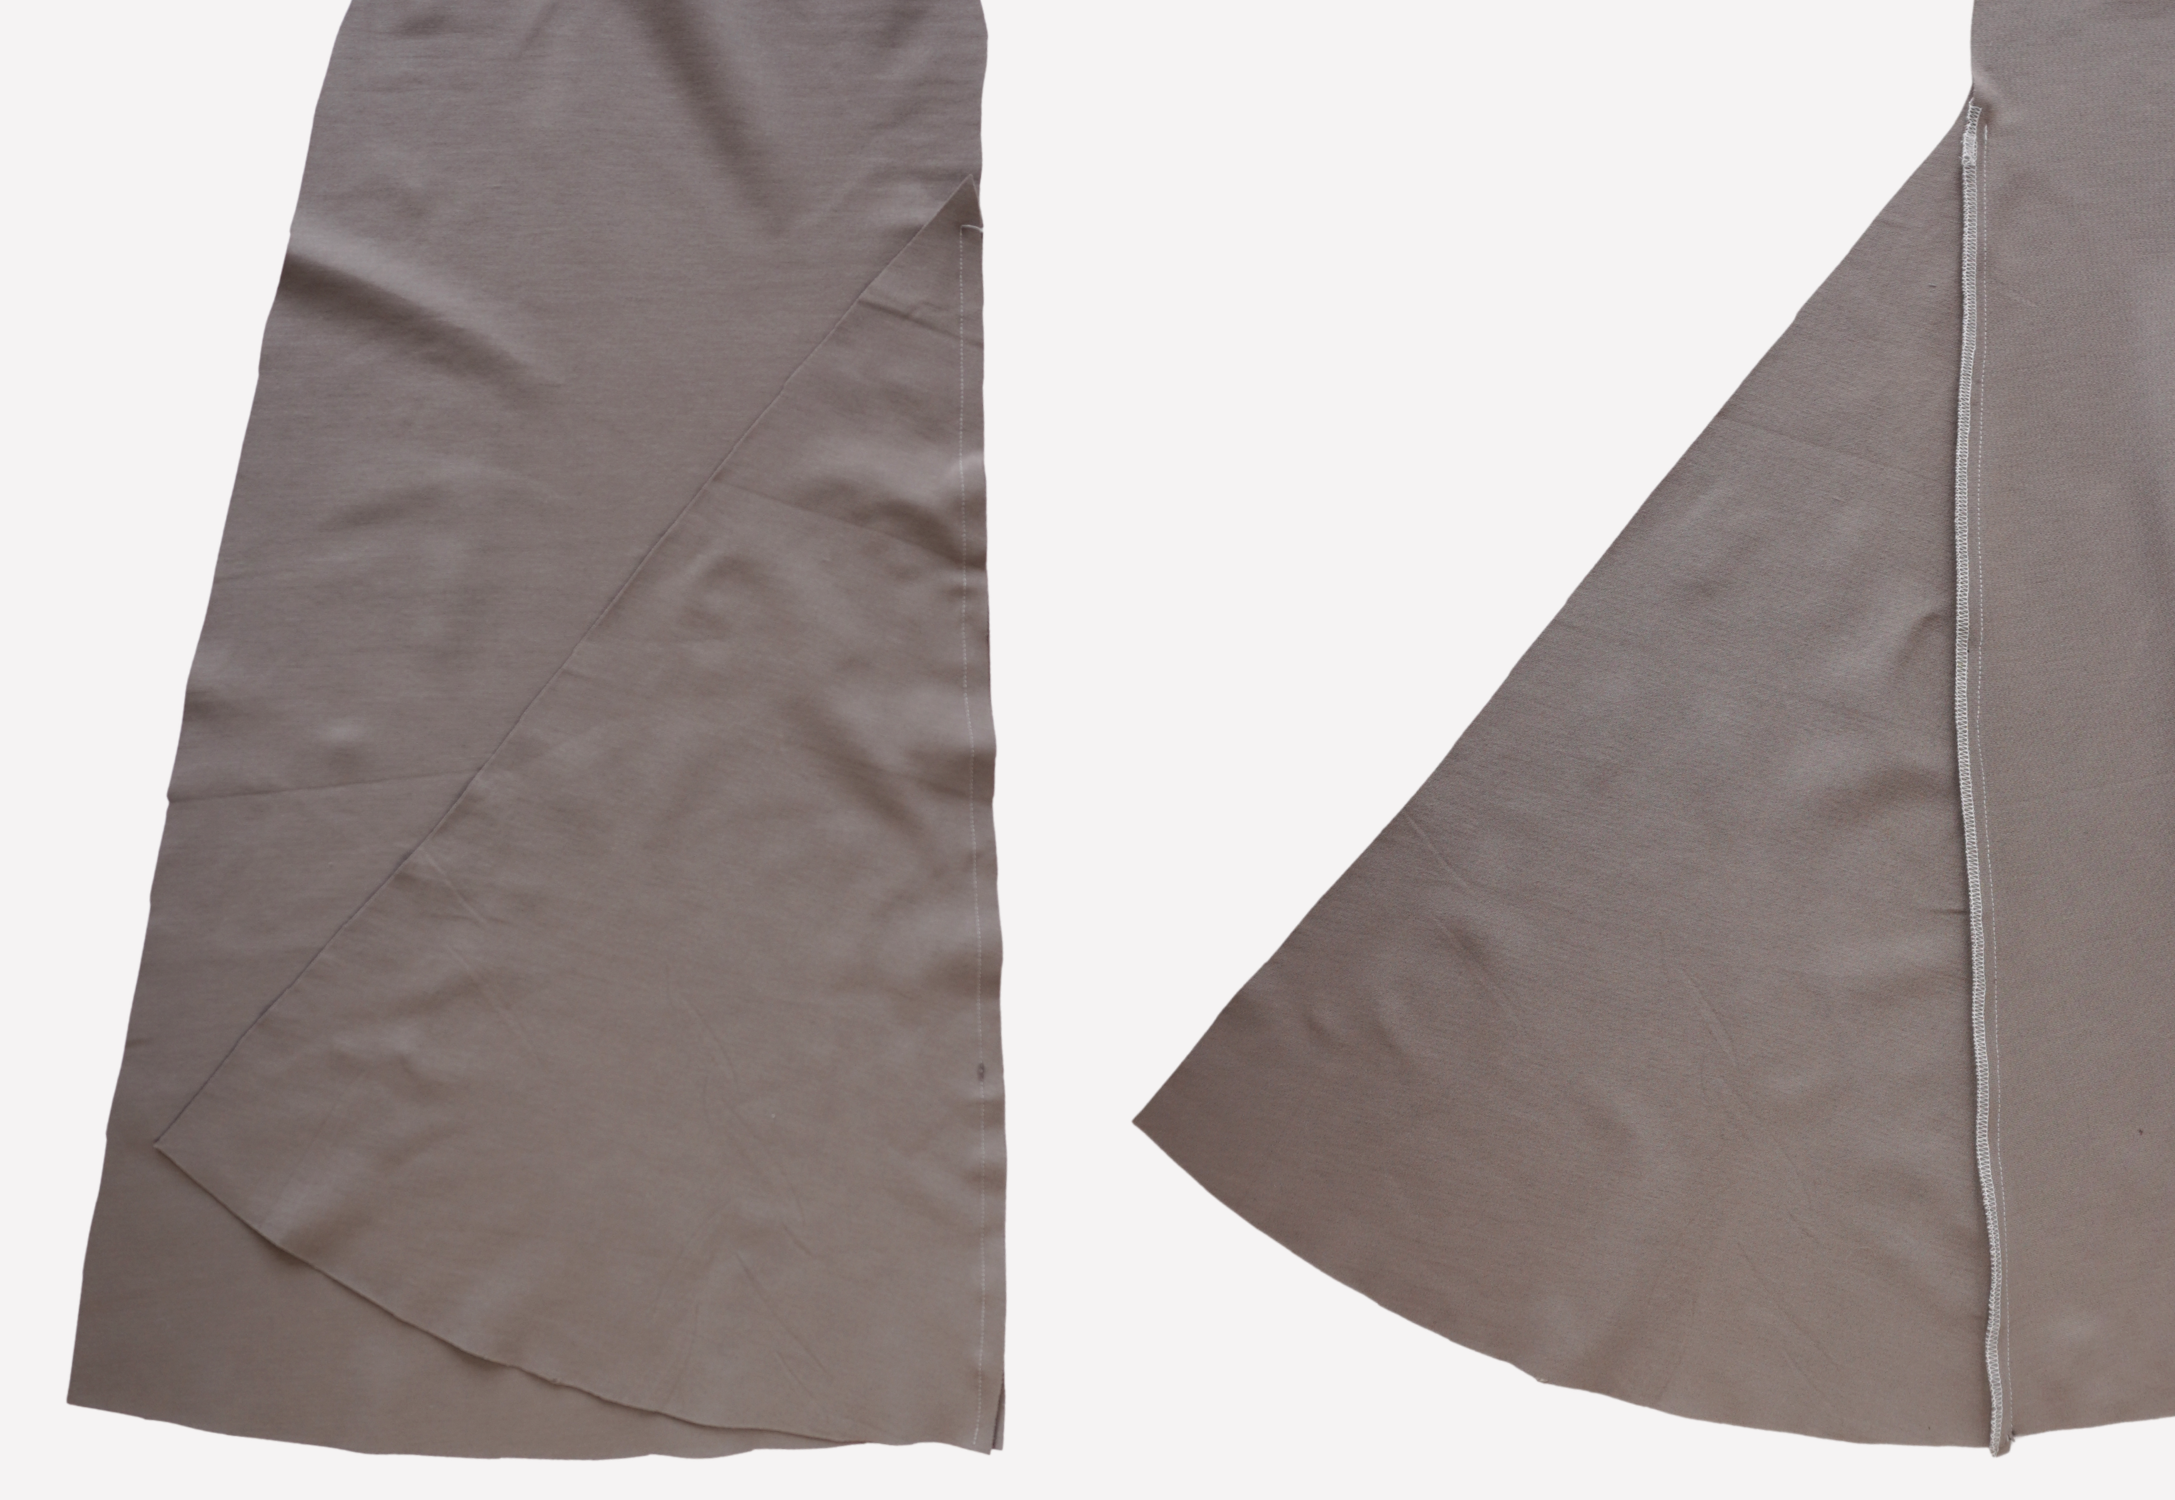
With RST pin the Godet (5) to the front on the wearer’s left.
Sew then neaten using an overlocker/serger. Press toward the godet.
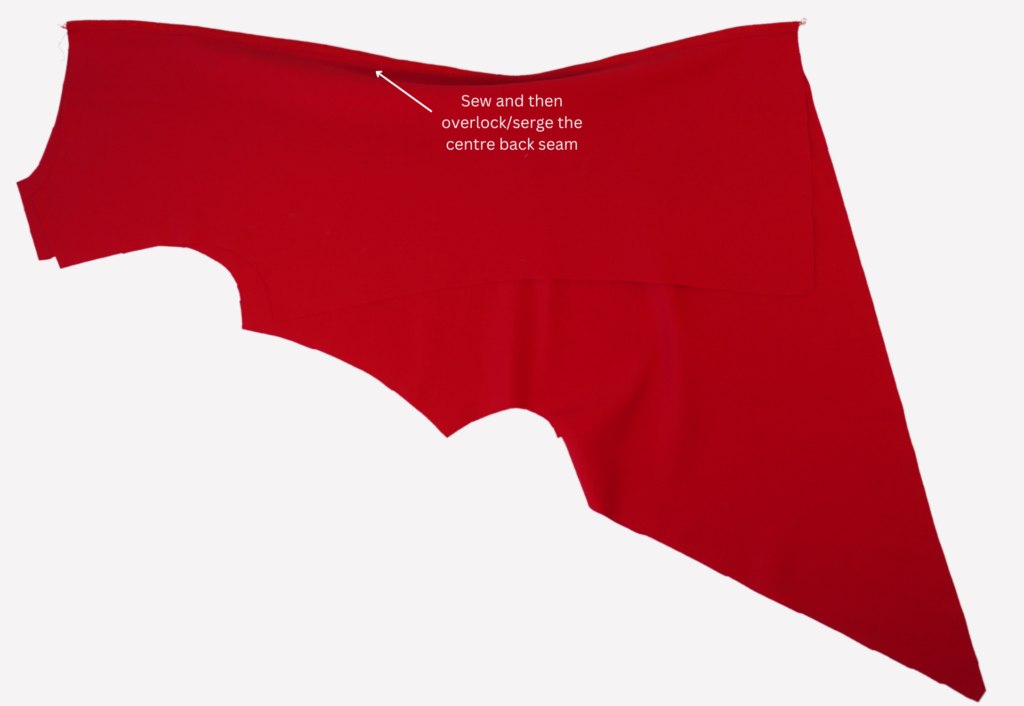
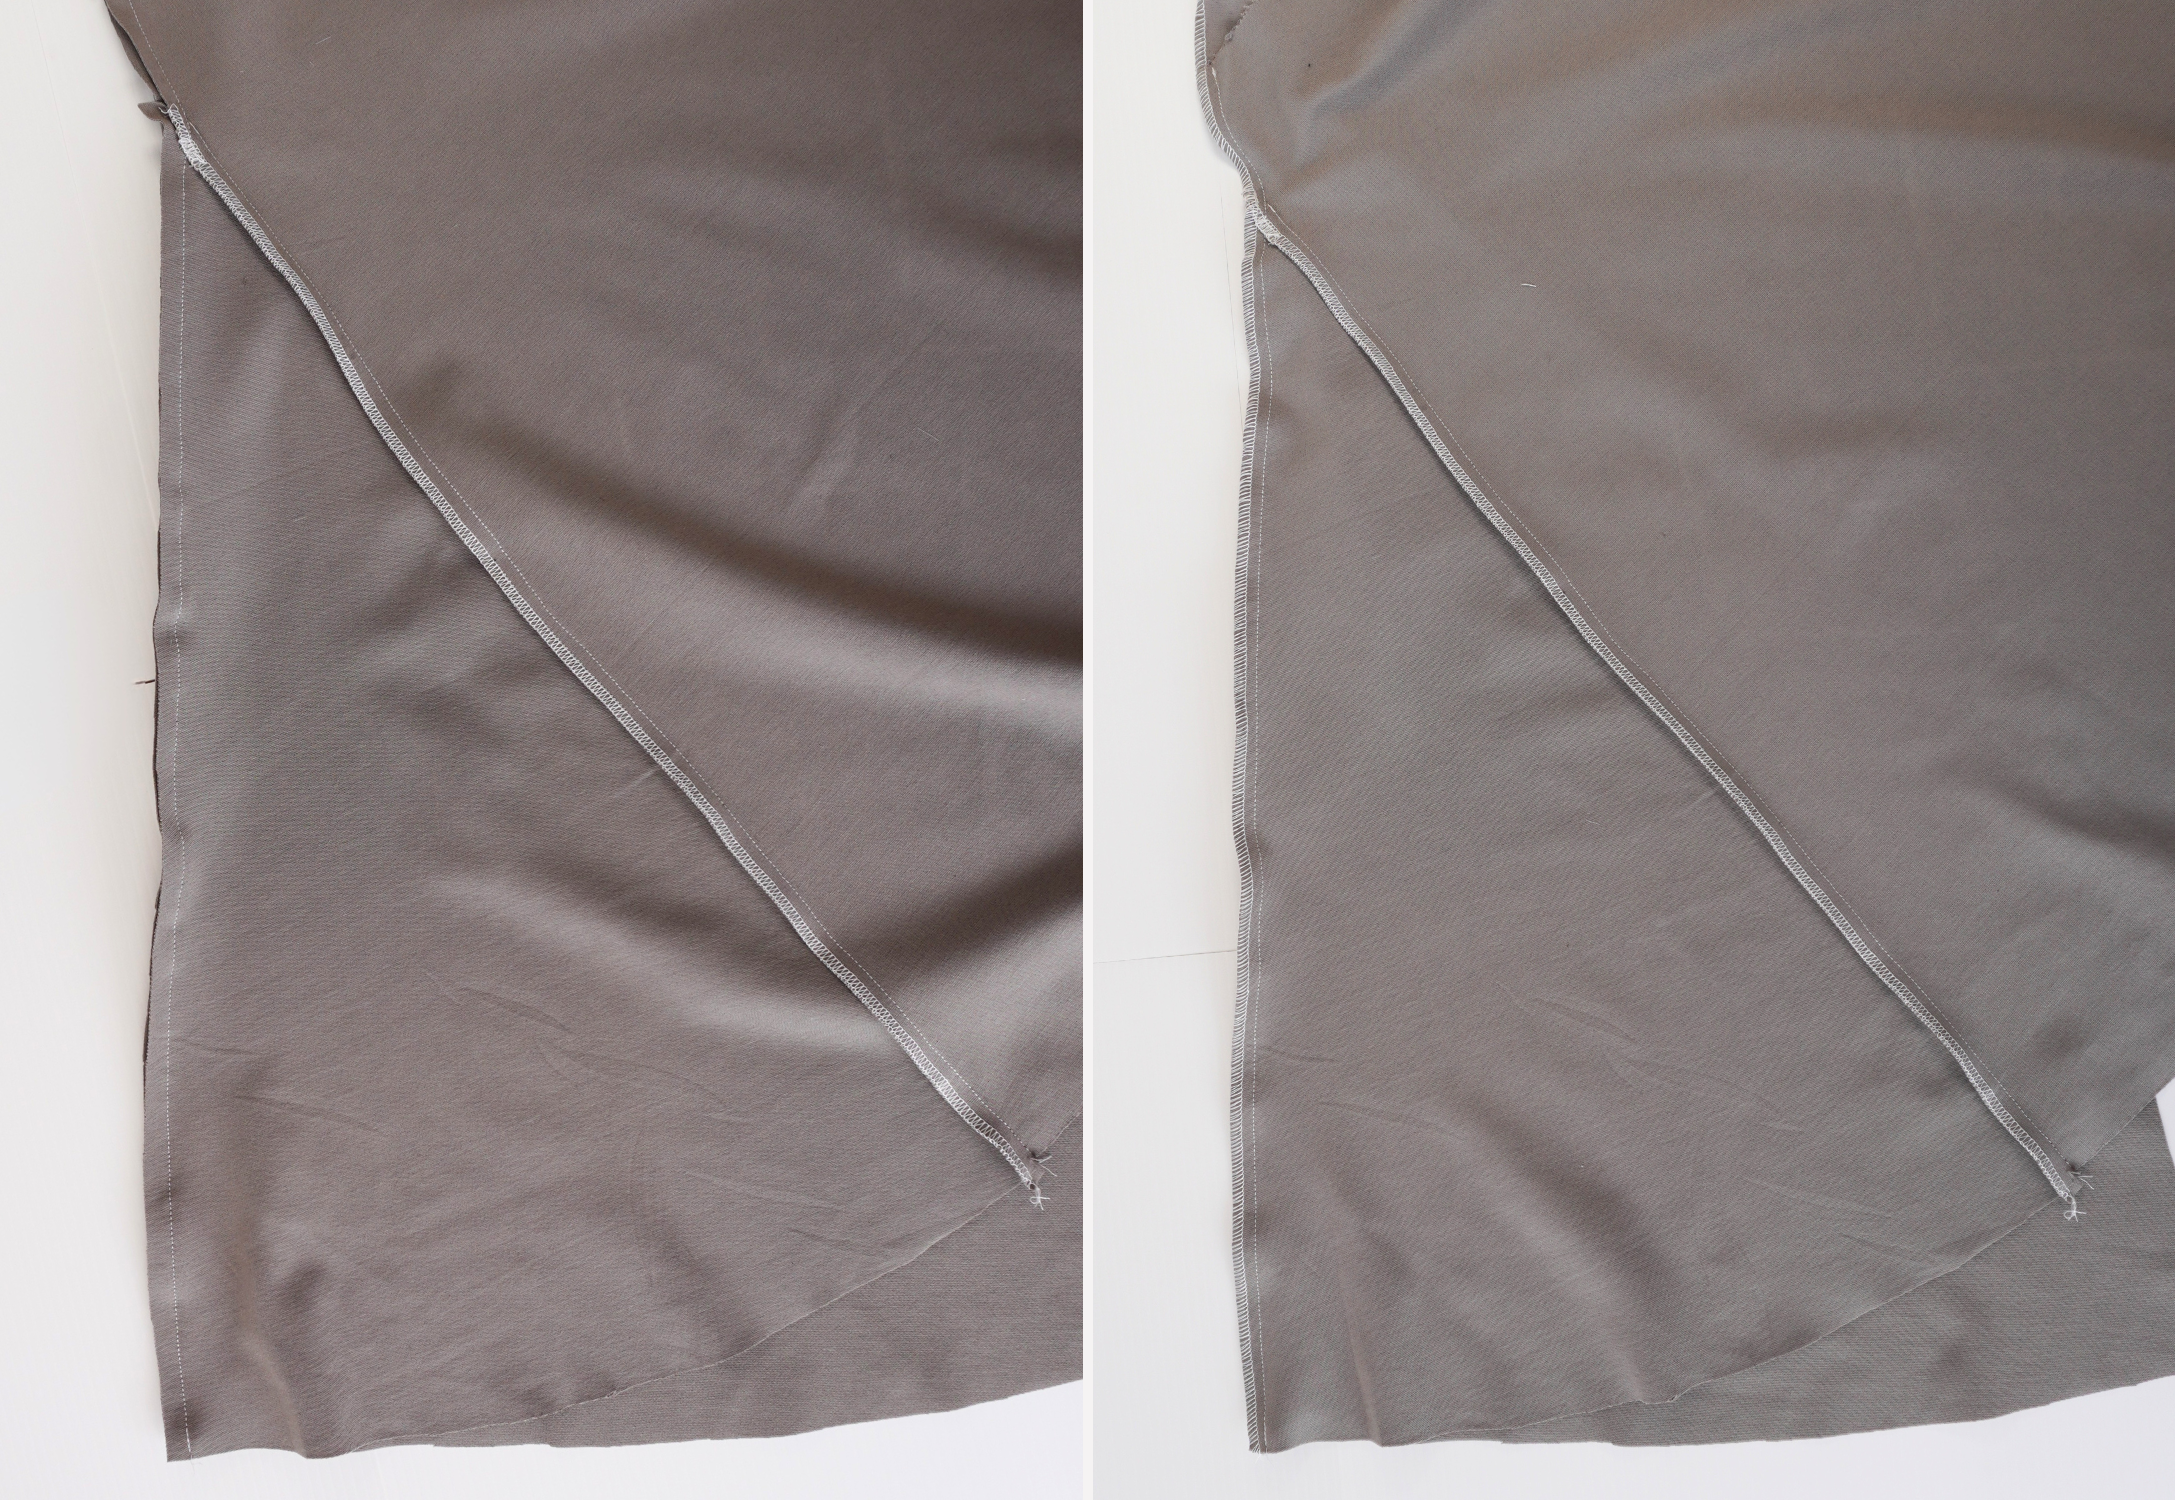
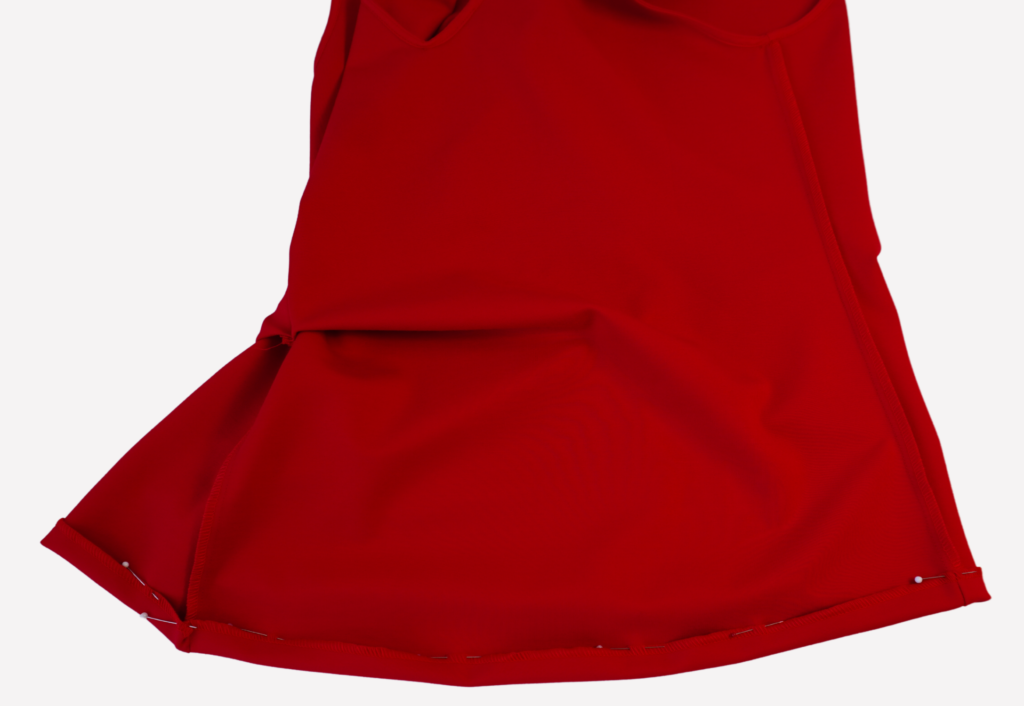
SIDE SEAMS AND TWIST:
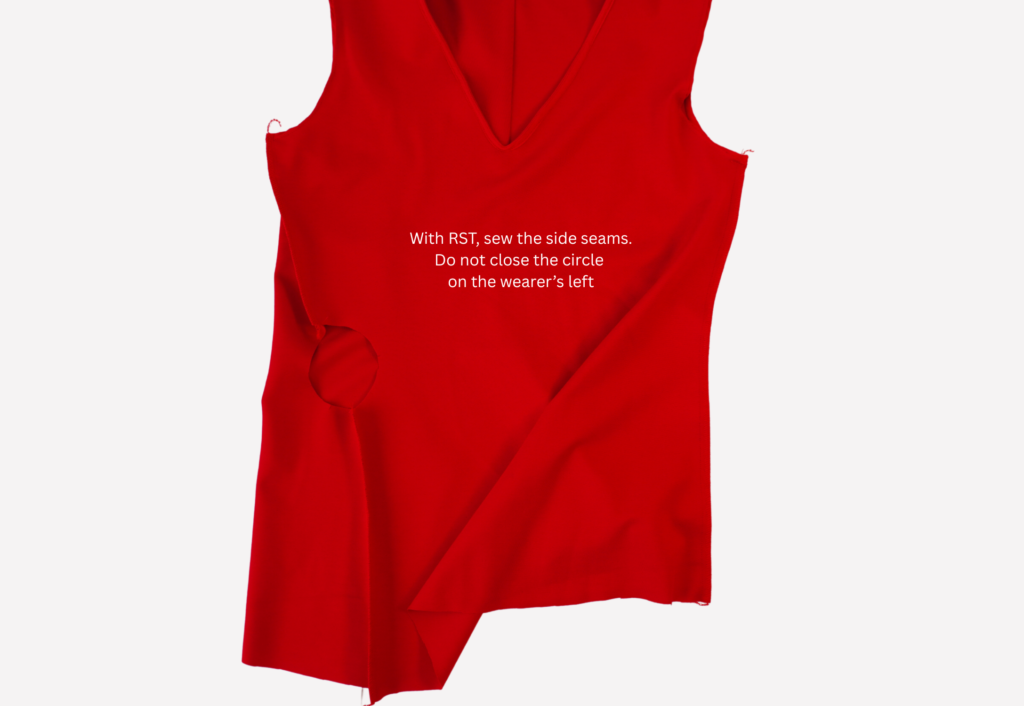
With RST and starting at the hem, sew the side seam, leaving a gap on the wearer’s left side for the twist. Continue sewing through the binding/sleeve.
Neaten using an overlocker/serger and press toward the back.
Turn the arm hole binding (if using) to the inside and pin. Top stitch into place.
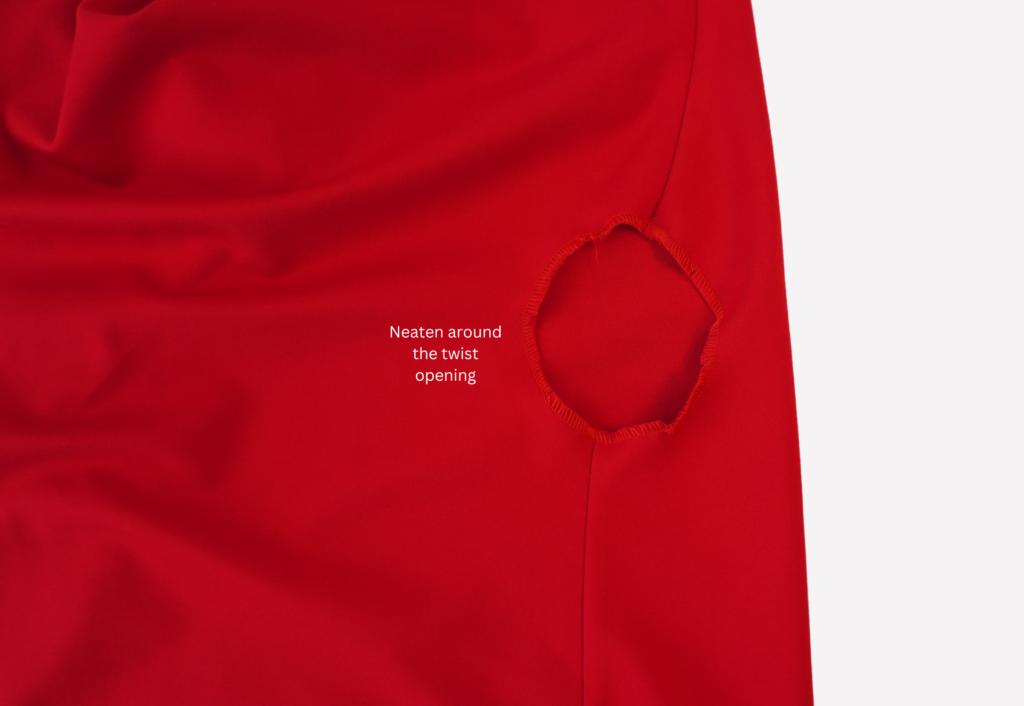
Neaten around the twist opening in the left side seam using an overlocker/serger, stretching the fabric slightly.
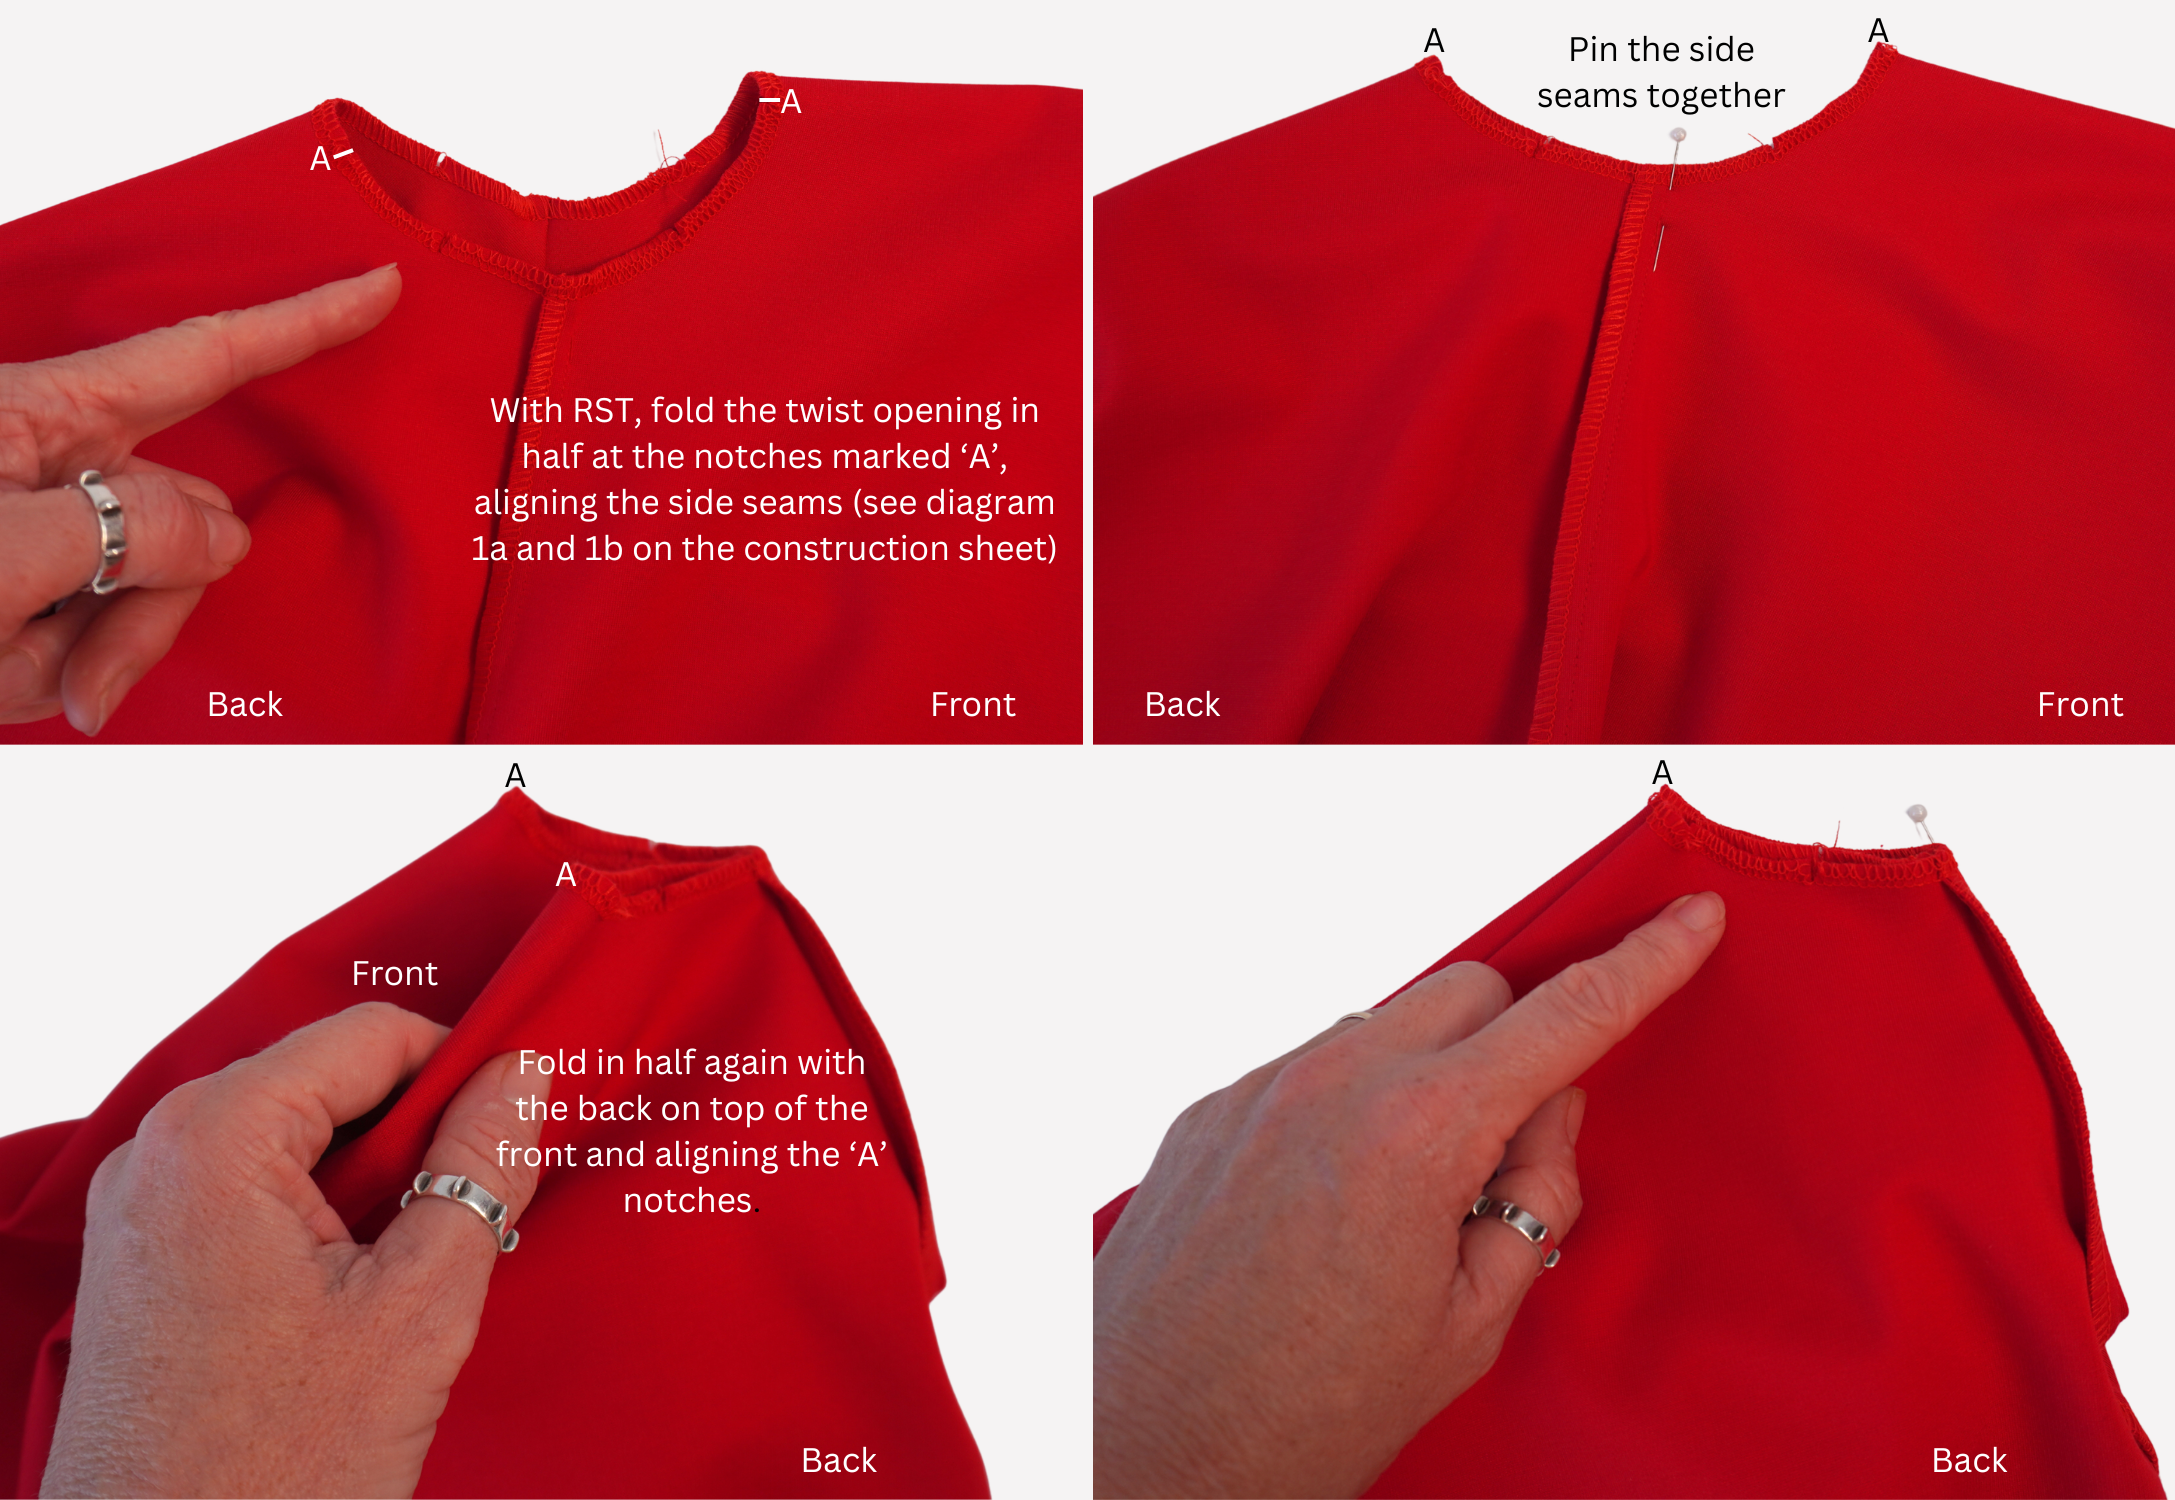
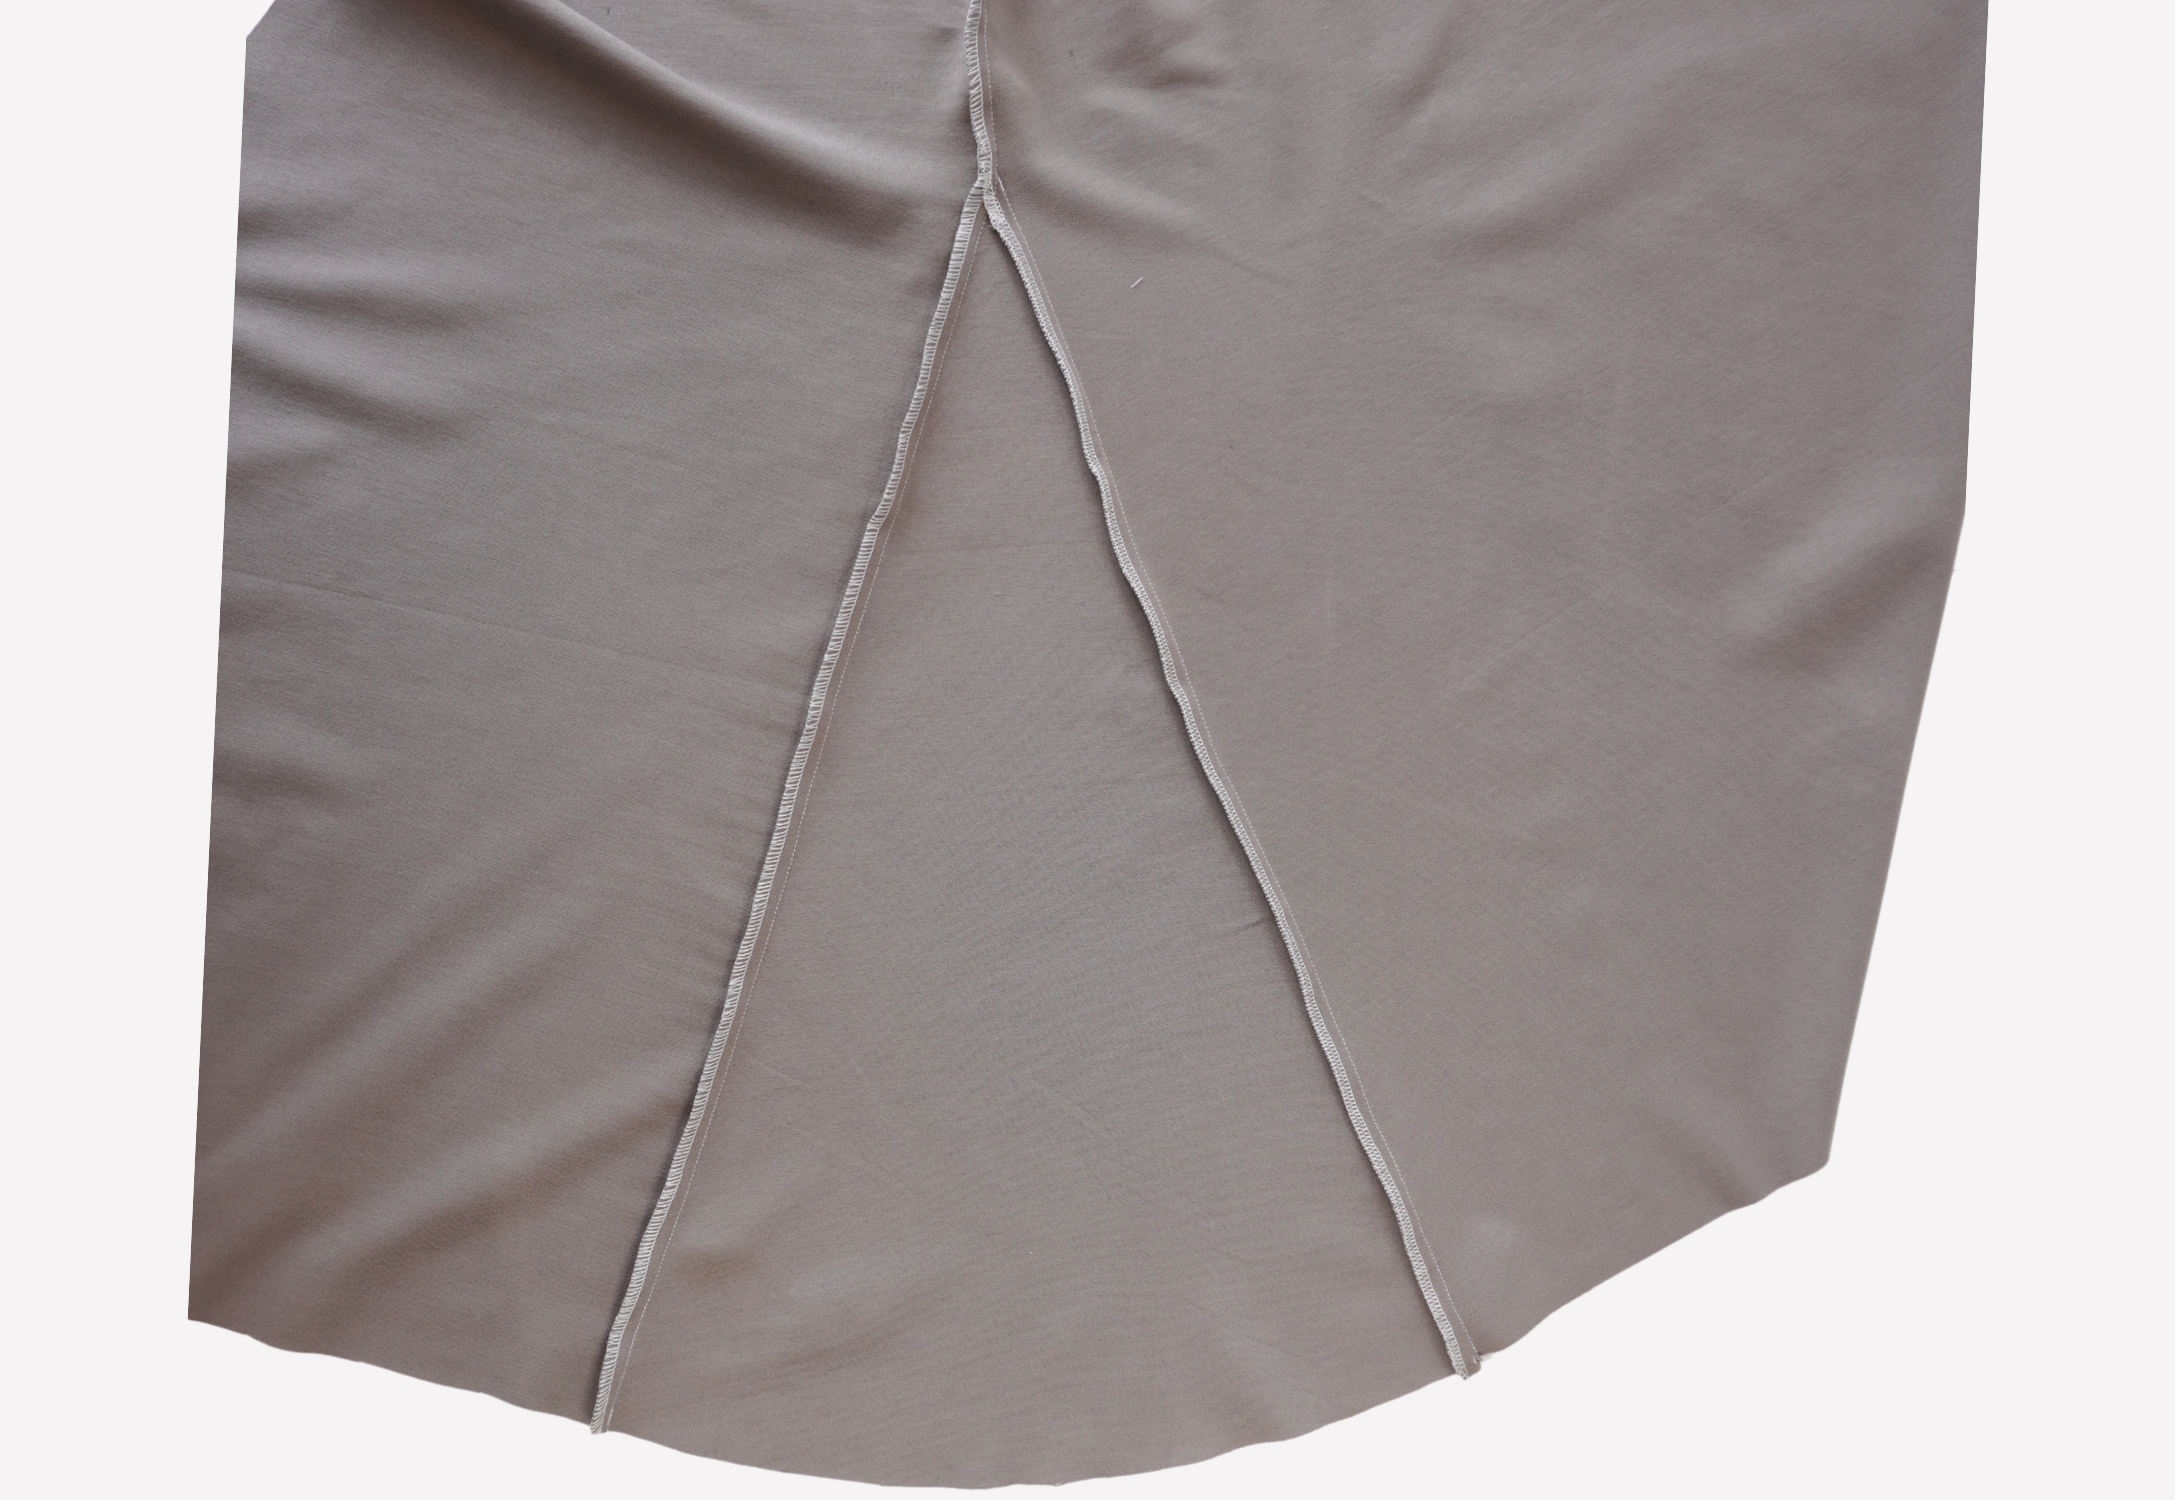
Place the body on your work surface with the wrong side of the fabric facing up and the Front on the right hand side.
Fold the twist opening in half with RST and aligning the side seams (see diagram 1a and 1b on the construction sheet).
Pin the side seams together using a pin placed vertically.
Fold in half again with the Back on top of the Front and aligning the “A” notches (see diagram 2 on the construction sheet).
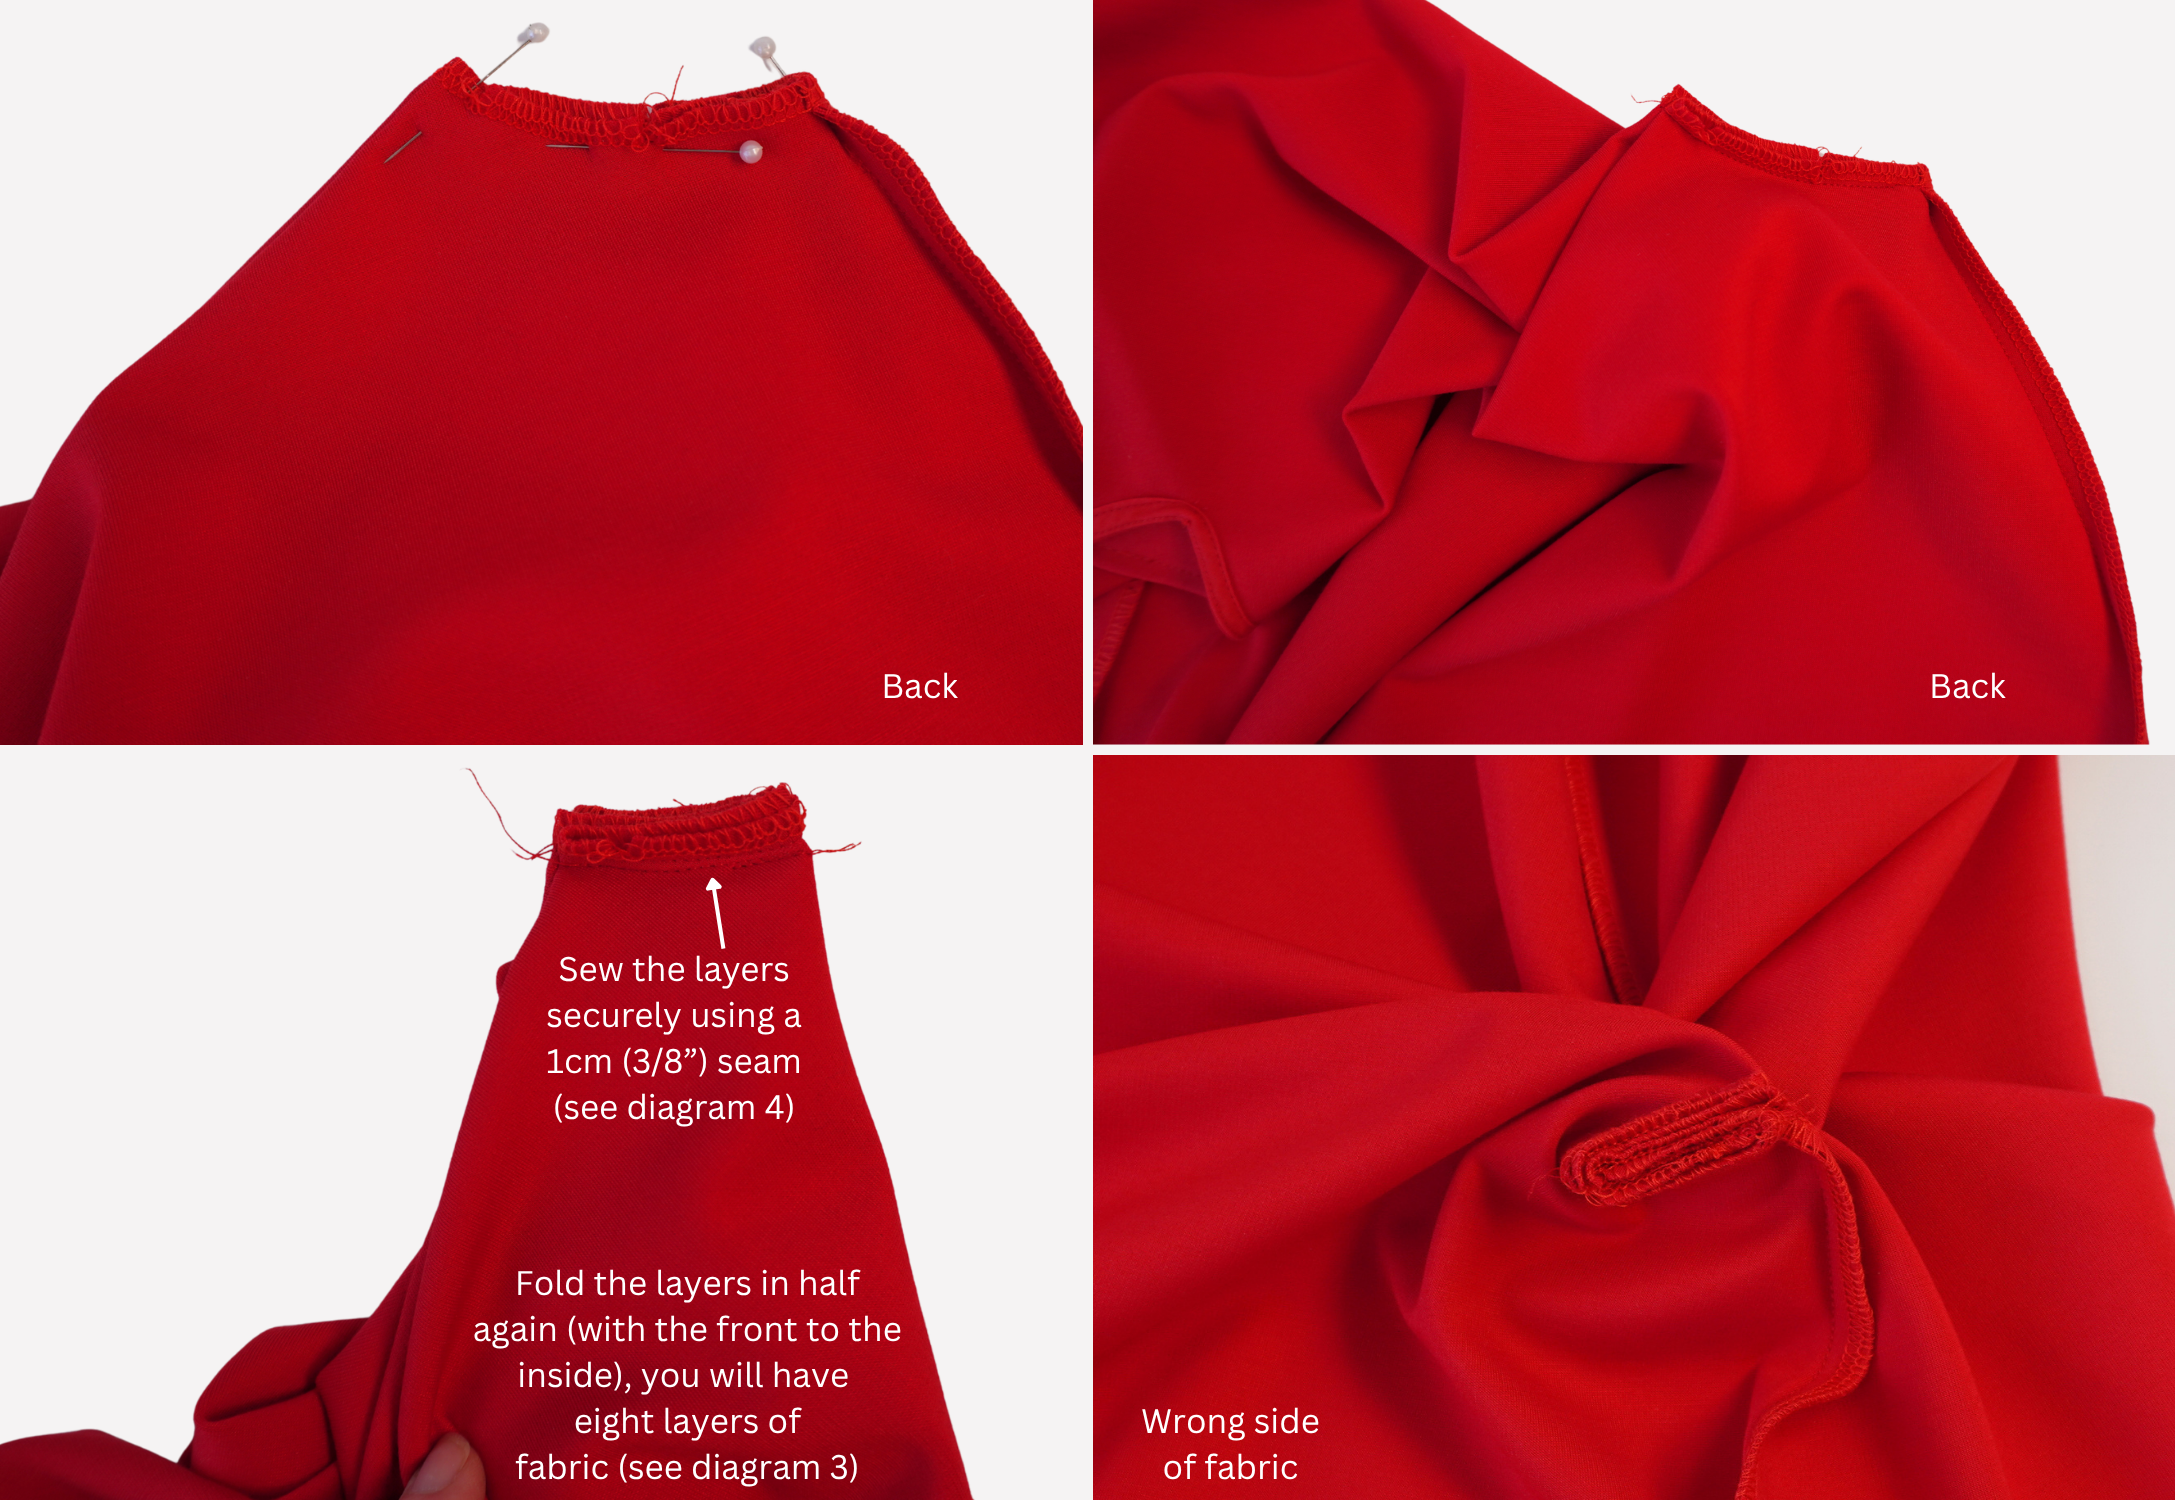
Fold in half again (with the front to the inside), you will now have eight layers of fabric (see diagram 3).
Sew the layers securely using a 1cm (3/8”) seam (see diagram 4).
HEM AND COMPLETION:
Neaten the hem and sleeve hems (if using) using an overlocker/serger.
Turn to the inside 2cm (3/4”) and top stitch. You may choose to use a twin needle.
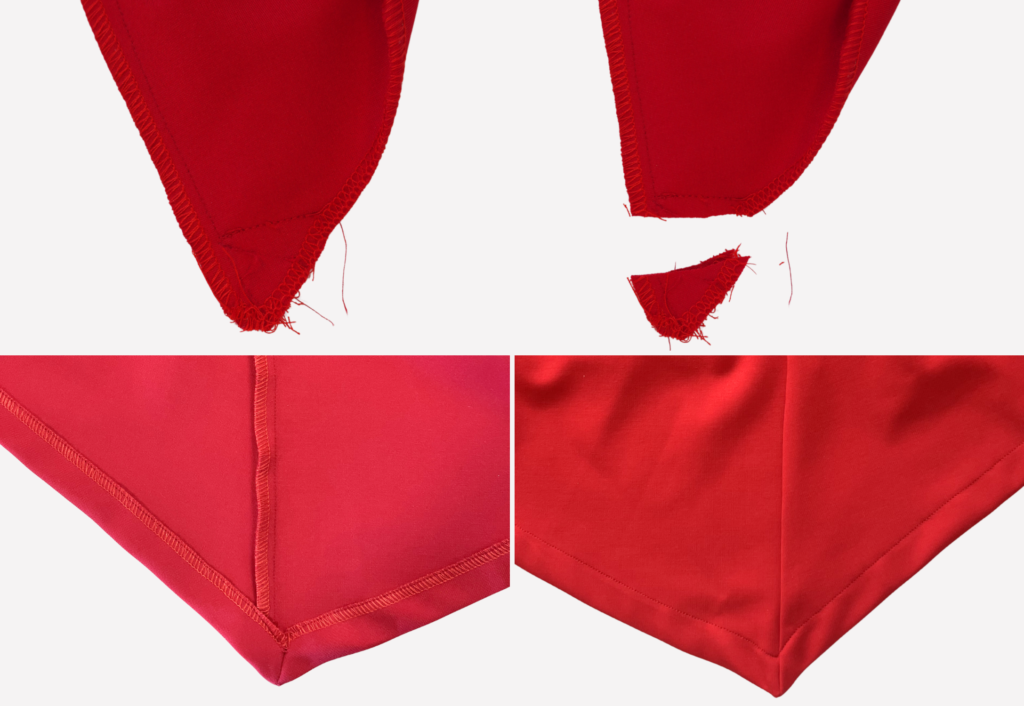
Note the top option has an interesting point at the left side. Trim the excess fabric from the corner. Turn to the inside 2cm (3/4”) and top stitch. You may choose to use a twin needle.
Sew the button into place at the back neckline (if using).
Trim any loose threads and carefully press your new top or dress!