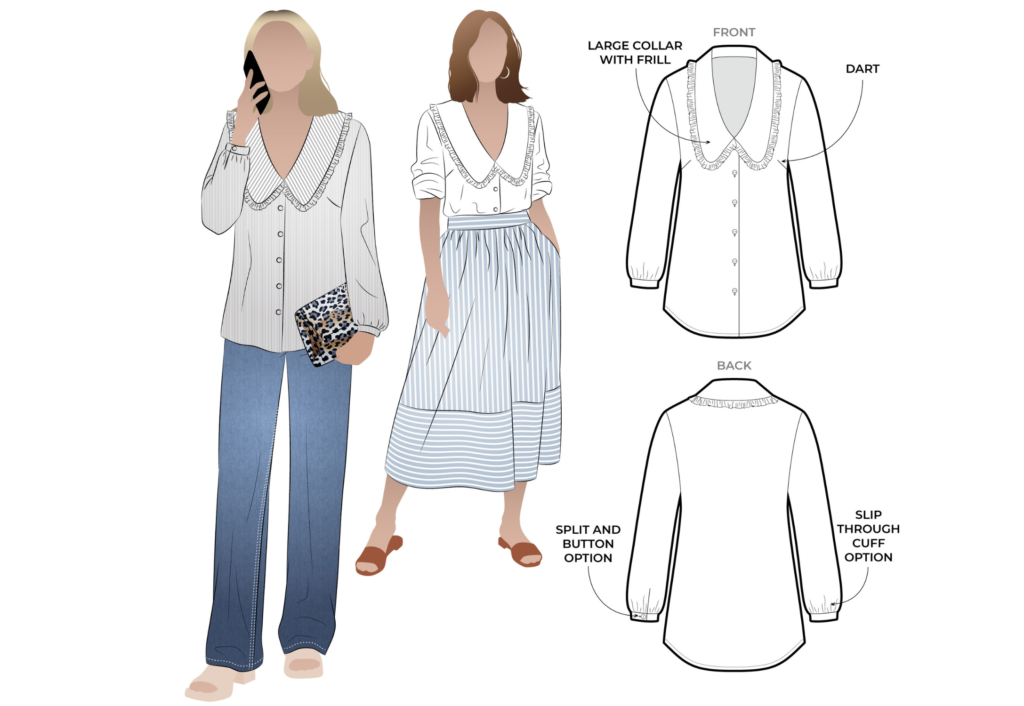
Shop the Kennie Woven Shirt
※ ※ ※
The Kennie Woven Shirt pattern now includes a split sleeve bind and cuff. See the photo tutorial below for step-by-step instructions.
For the remainder of the garment construction, click here to watch the YouTube video sew-along or click here for the step-by-step photo tutorial.
CONSTRUCTION
Cuff (5) with button and Sleeve Bind (8):
All seam allowances are 1cm (3/8″) unless otherwise stated
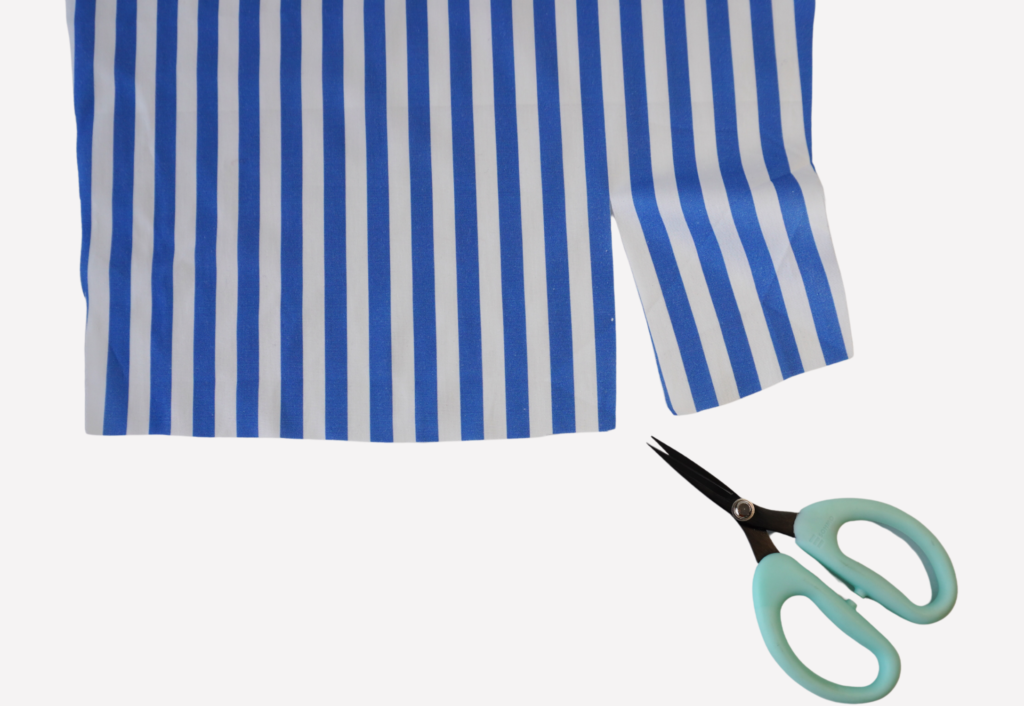
Carefully cut into the sleeve at the cut line shown on the pattern.
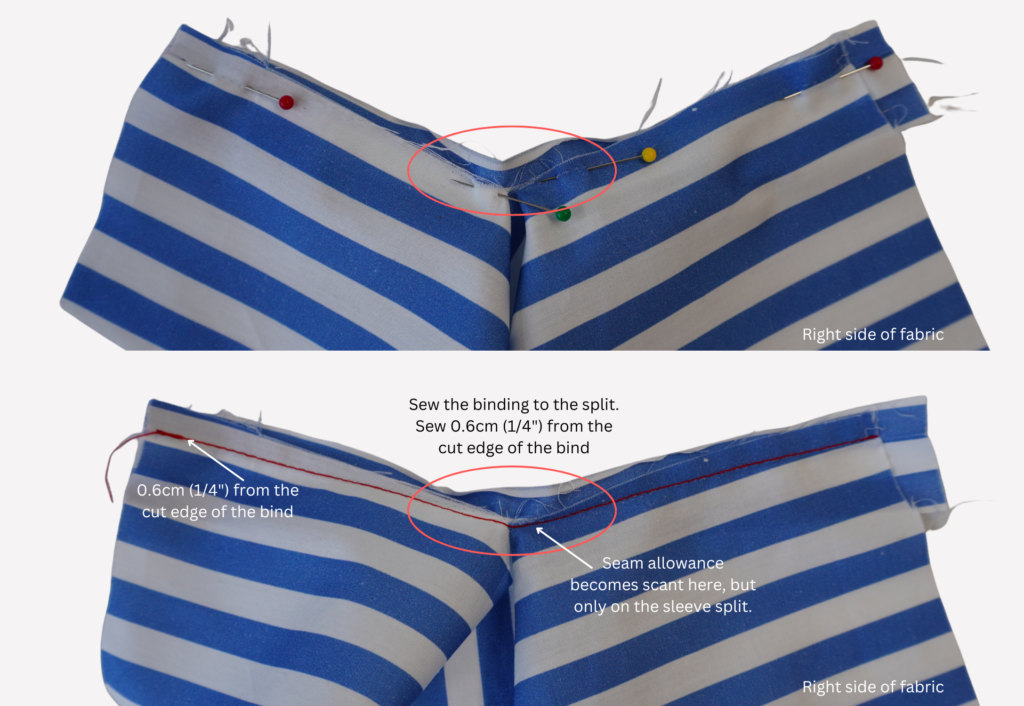
With the right side of the Sleeve Bind (8) facing the wrong side of the sleeve split, align the long cut edge of the binding to the split opening.
Sew using a 0.6cm (1/4″) seam allowance, following the binding cut edge as guidance for the seam allowance.
Note that towards the top of the split (marked ‘+’ on the pattern) it’s not possible to completely align the split to the binding as you sew (see circled area above).
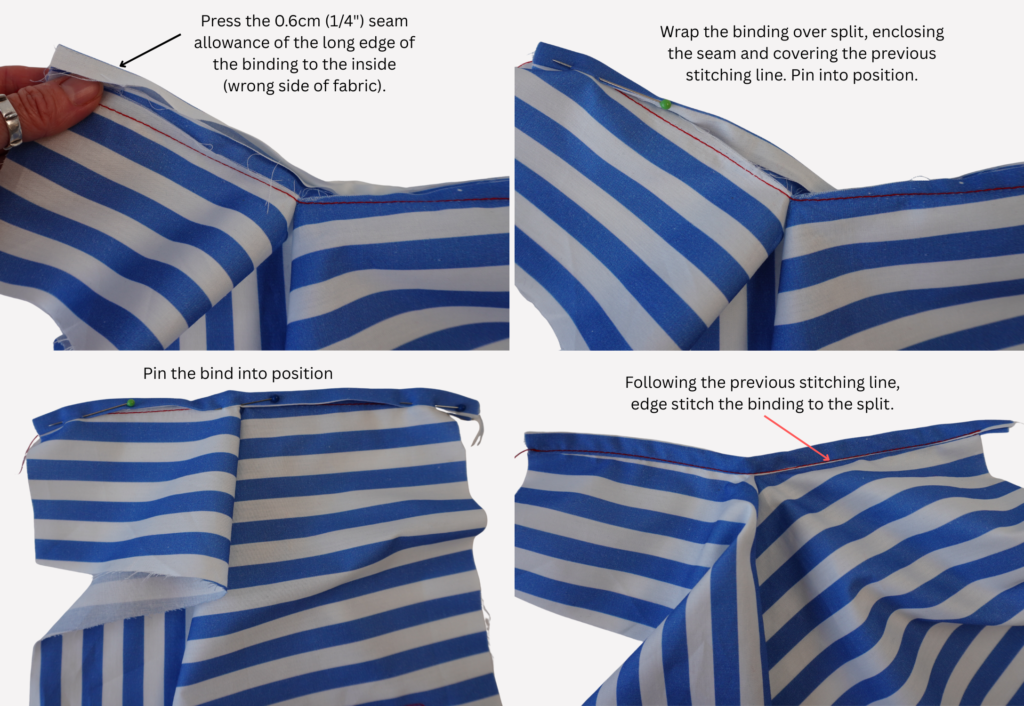
Press 0.6cm (1/4″) seam allowance of the opposite long edge of the binding to the inside (wrong side of fabric).
Turn the binding over to the right side of the sleeve, wrap the binding over the split and enclosing the seam. The bind should be positioned so that it just covers the previous stitching line. Pin into position.
Following the previous stitching line, sew the binding to the sleeve split with an edge stitch.
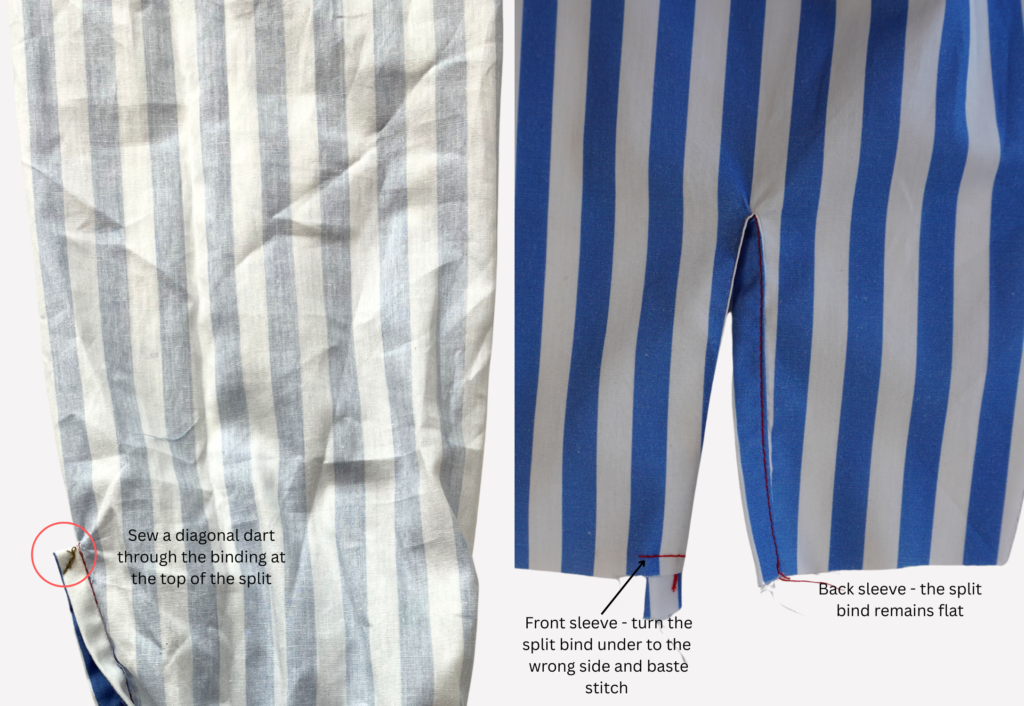
Pinch the top of the binding in half and sew a diagonal dart through the binding at the top of the split.
Take note of the front and back of the sleeve – the narrow side is the back sleeve. When the cuff is finished the back will sit under the front, and you will position the bind this way.
Turn the front sleeve binding under to the wrong side and press.
Baste the bind into position at the raw edge of the sleeve.

With RST, sew the underarm seams of the Sleeve (4) together. Neaten using an overlocker/serger and press toward the back.
Sew a gathering stitch to the sleeve opening and gather in to match the length of the cuff.
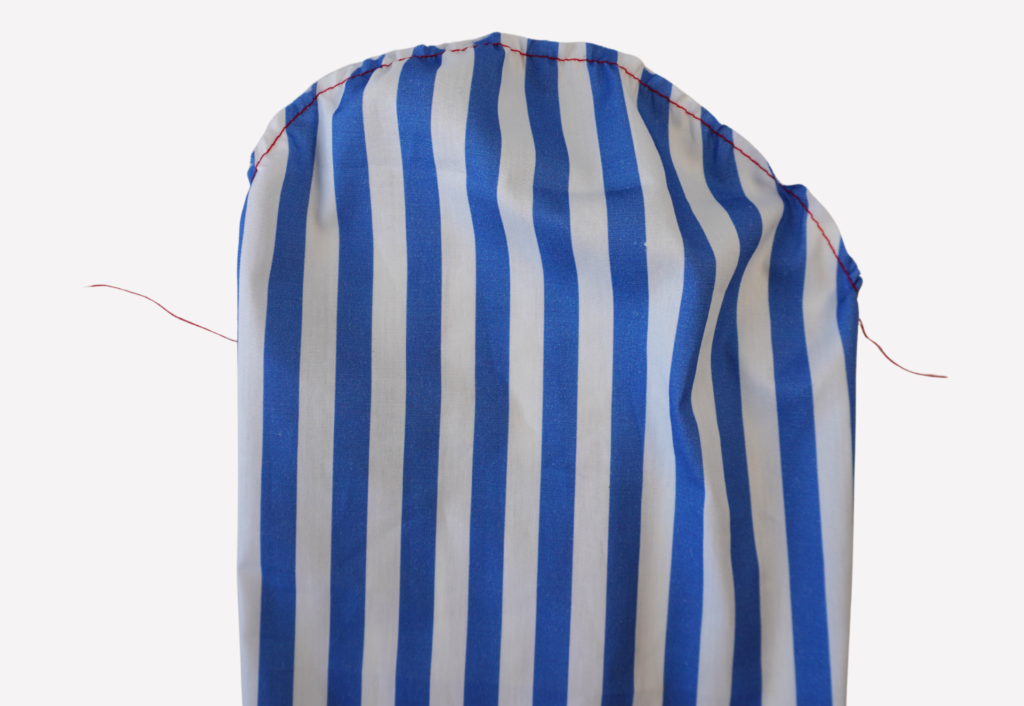
Sew a long ease stitch to the head of the sleeve. This will make it easier to sew the sleeve into the opening.
Draw in slightly and with RST and notches aligned, sew the sleeve into the armhole.
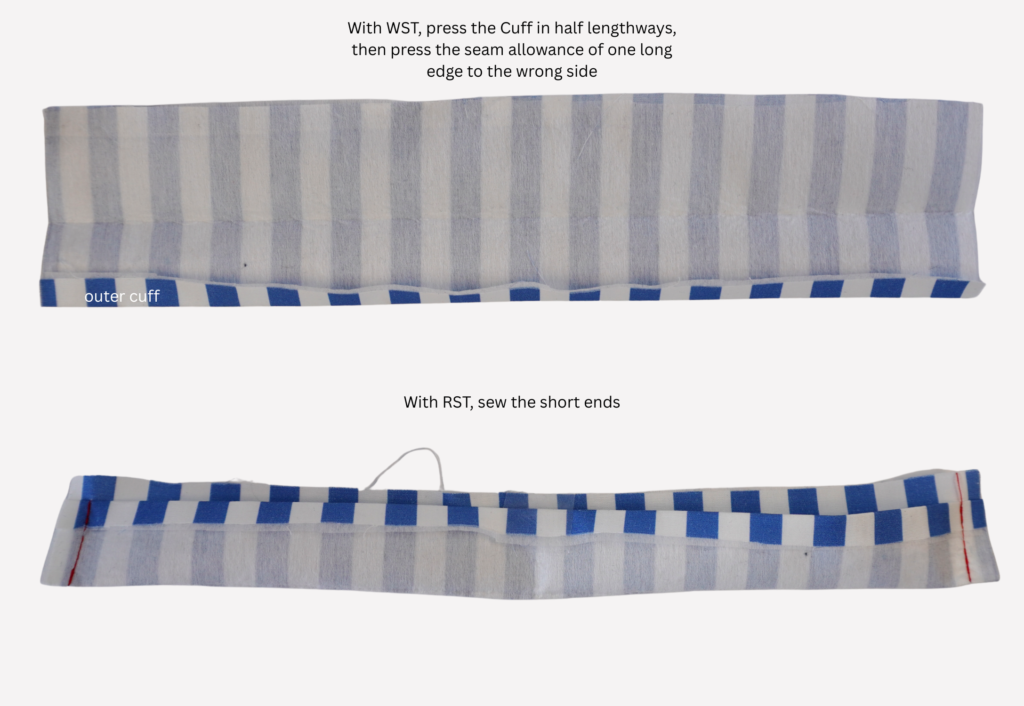
With WST, press the Cuff (5) in half lengthways, then press the seam allowance of one long edge to the wrong side – this is the outer cuff.
With RST, sew the short ends. Turn out to the right side and press.
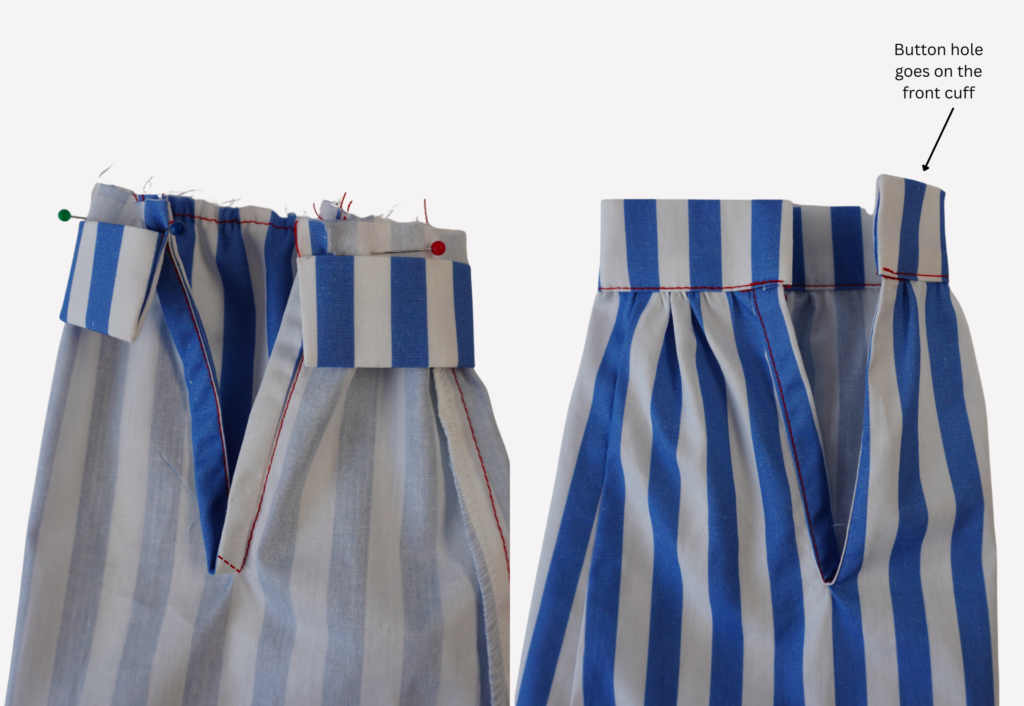
With RST, pin the raw edge of the inner cuff seam to the sleeve opening, once in place sew together.
Pin the pressed outer cuff to the sleeve. Once in place sew the cuff to the sleeve with an edge stitch on the side of the cuff.
Mark the button and buttonhole placement on the front body and cuffs as indicated on the pattern.
Completion:
Make the buttonholes on the wearer’s front right hand side and front cuffs using your preferred method and attach the buttons.
Trim any loose threads and carefully press your new shirt!